All 3D slicers offer settings to let users control how a 3D model should be converted into G-code and printed on their machine. While most slicers carry basic 3D printing settings (e.g. layer height, infill density, print speed), some advanced programs have more complex features to experiment with. UltiMaker Cura, a popular open-source 3D slicer program for fused deposition modeling (FDM) printers, is loaded with these special features, usually located in the “Experimental” category.
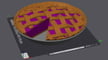
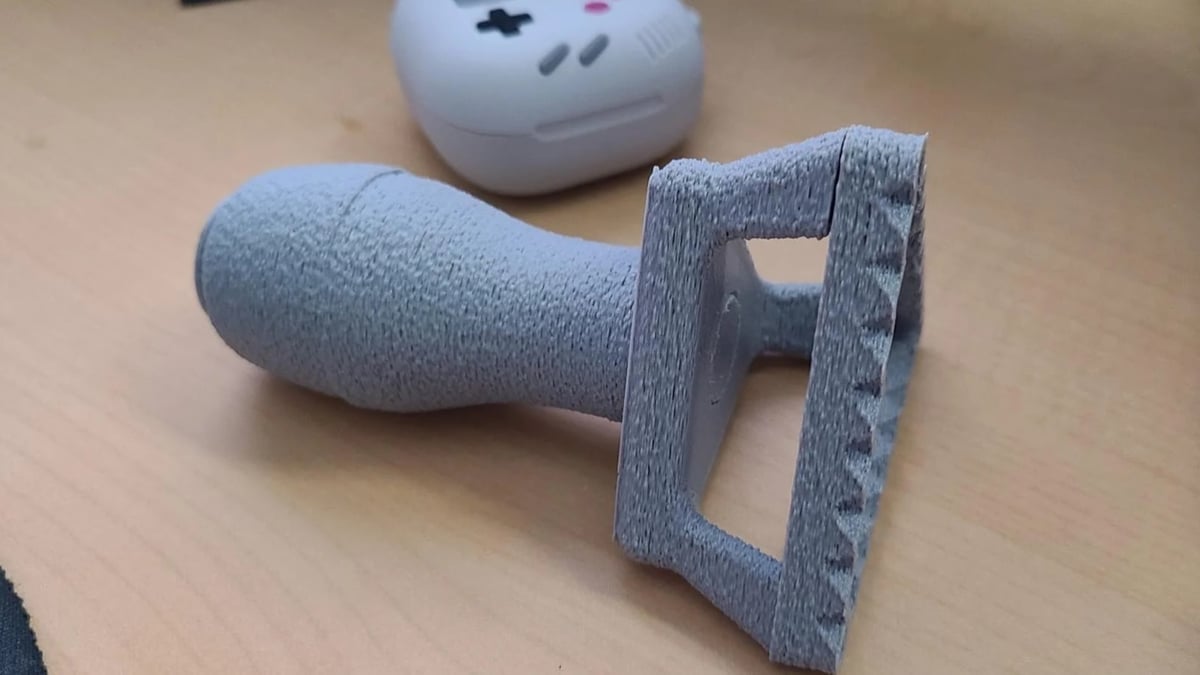
One of these special Cura settings is “Fuzzy Skin”, which generates a rough surface texture on the exterior surfaces of a part. This setting is often used for 3D printing structures that need to have a good grip on another surface and produce a lot of friction. Of course, many users also use this setting because it looks cool when replicating snow or Sonic’s skin, and some have even found that it’s great for hiding other imperfections. A talented maker recreated an impressively realistic cat!
In this article, we’ll go over Cura’s fuzzy skin setting, but most of this information also applies to other slicers with similar features. We’ll first discuss how this slicing feature works and then get into how you can use the different fuzzy skin settings in Cura.
How It Works
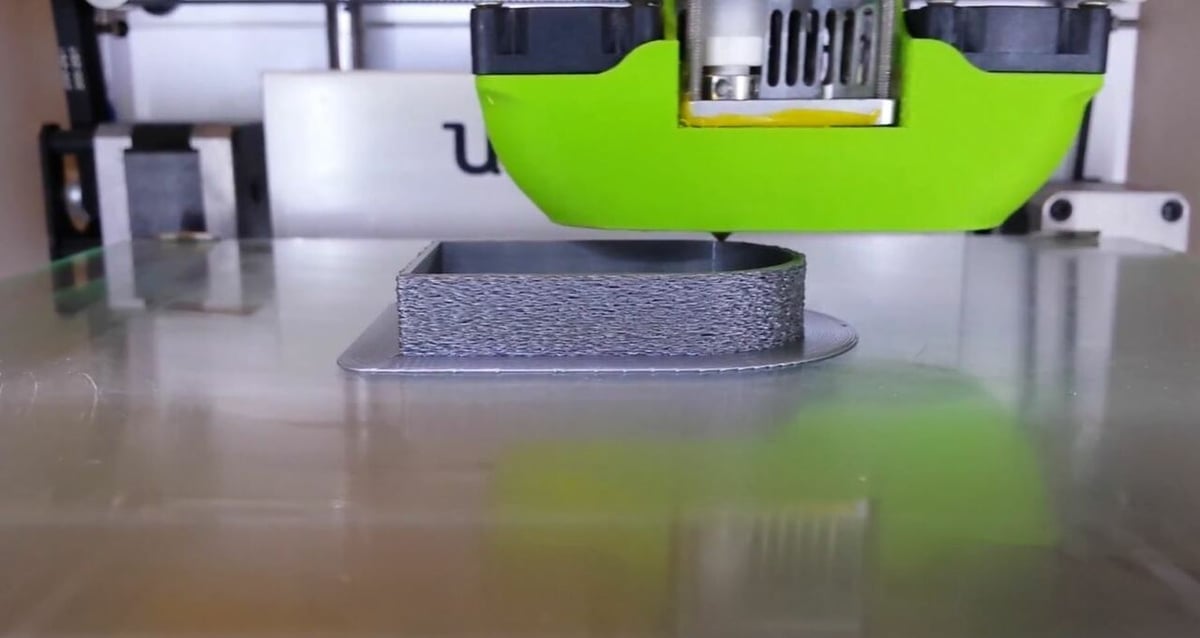
As pictured above, the fuzzy skin setting in Cura yields a rough surface texture on the exterior walls. The slicer achieves this by telling your printer to move the nozzle back and forth while printing outer walls.
The effect is an uneven texture, similar to what a print might look like if the nozzle was unintentionally vibrating. However, the printer’s wobbly motion is completely controlled. The reason the texture looks like a printing artifact is the seemingly random placement of the points where the nozzle jitters.
The fuzzy skin Cura setting only generates fuzzy skin on the sides of prints, not the top and bottom surfaces. Fuzzy skin also only appears on the outer walls because if the entire model were printed with a wobbling nozzle, the part would be extremely weak.
Although fuzzy skin involves more motion for your printer, the print time doesn’t change significantly, which is great. You also might expect the printer, specifically the motors, to make more noise went the machine is printing the fuzzy skin due to the quick changes in the printing direction. According to users, it’s not noticeably louder, but this may also depend on your machine’s stepper motor drivers.
How to Use It
Now that you know how this feature works, let’s get to how you can use all the different settings.
Before we get started, make sure that you’ve installed Cura, preferably the latest version, but any version after V2.1 should work. Also, ensure that you’ve set your visible Cura settings to “All”. If you’re having trouble locating these settings, they can all be found in the “Experimental” section in Cura, or with a search for “fuzzy”.
- Fuzzy Skin: This setting enables fuzzy skin for your slicing profile. After you check the box, other fuzzy skin settings should appear below with the Cura default values.
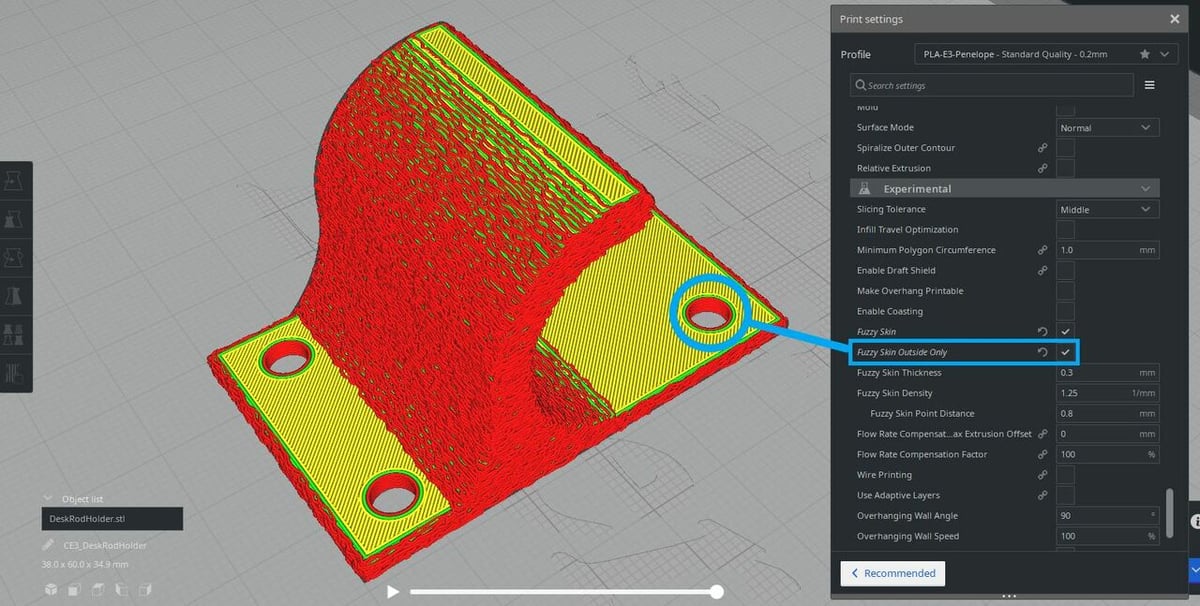
- Fuzzy Skin Outside Only: This setting tells Cura to only generate the fuzzy skin texture on the outermost walls of a model. As seen in the image below, internal features like screw holes won’t have fuzzy skin if you check this feature box.
- Fuzzy Skin Thickness: This setting controls the magnitude and depth of each nozzle wobble used to yield the fuzzy skin. This value is a distance in millimeters, and increasing it will make the surface more uneven and the fuzzy skin more noticeable.
- Fuzzy Skin Density: This setting controls the density of nozzle wobbles used to make the fuzzy skin. The higher this value (measured in 1/mm), the more jitters the nozzle will make in a given area, causing the surface to be rougher and more detailed.
- Fuzzy Skin Point Distance: Lastly, this setting is inversely affected by the “Fuzzy Skin Density” and is the distance value (in mm) for the wobble density. This setting determines the average distance between the points where the nozzle wobbles in each line segment.
And that’s all there is to it!
License: The text of "Cura Fuzzy Skin Setting: What It Is & How to Use It" by All3DP is licensed under a Creative Commons Attribution 4.0 International License.