Perfect Prints Every Time: The Ultimate Elegoo Resin Settings Guide

Stop the guesswork and start printing. From exposure times to lift speeds, we’ve got the Elegoo resin settings you need to eliminate failures and capture every crisp detail.
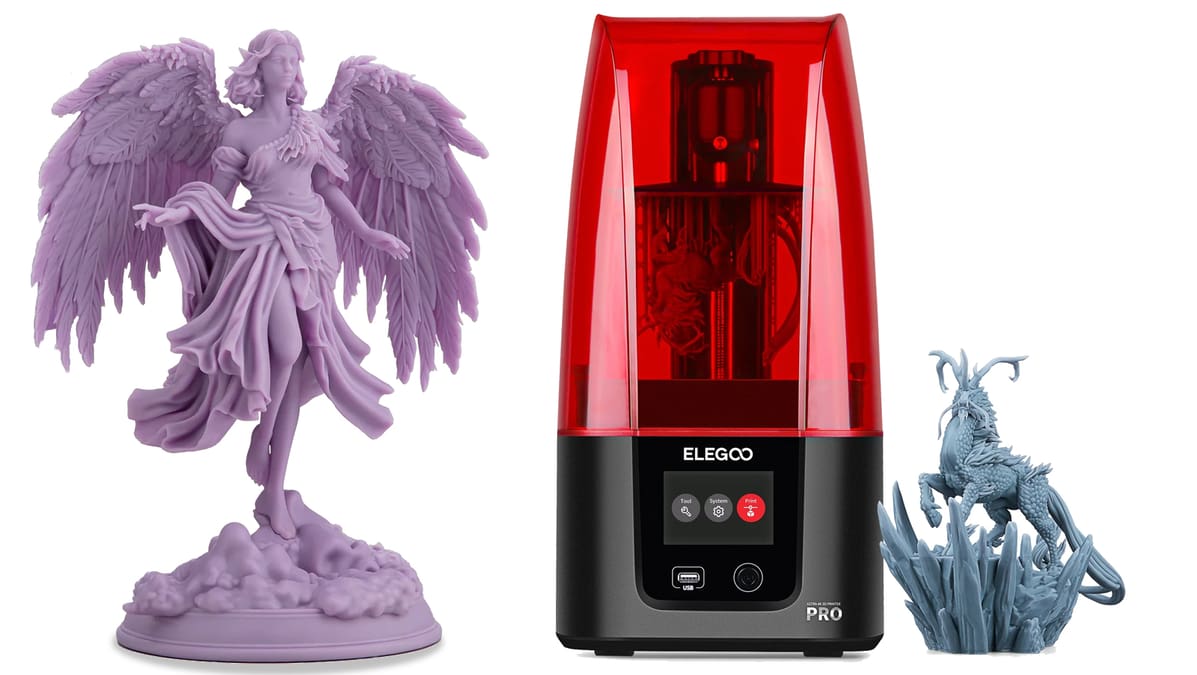
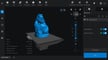
Resin printing is the gold standard for producing highly detailed and smooth surface prints – far more so than you would get from most filament printers! But as any maker knows, the default settings for any 3D printer rarely lead to a perfectly optimized print.
For those looking to jump into the world of resin printing, Elegoo’s printers and resins are a great place to begin: They’re some of the most popular, affordable, and easiest to get started with. Yet, the sheer variety of resins can make your first few builds feel like a guessing game.
Due to different printer models and types of resin all working in slightly different ways, there’s no one-size-fits-all profile for resin printing, which can make getting started quite overwhelming and maybe even frustrating.
To help break down the barriers and get you up and printing right away, we’ve done the testing for you. In this guide, we break down the exact settings you need to master Elegoo resin, optimize your ChiTuBox workflow, and ensure your next print comes out flawless the first time.
Elegoo's Resin
There’s quite an amazing range of resins available out there! Each has its pros and cons, and they’re each best suited to certain applications. But what is resin, anyway?
Resin for printing is a photosensitive liquid that hardens when exposed to UV light. In the case of Elegoo’s printers, each layer of a print is cured one at a time from the bottom up, until you have a complete model.
It’s worth noting that resins can be harmful, so it’s important to limit your exposure to them where possible and wear appropriate PPE when handling them. Gloves, a face mask, and a well/ventilated workspace are all strongly recommended.
Elegoo produces different types of resin. They all print quite similarly but are best suited for different applications. We’ve included a list here, but for more detailed information, check out our article specifically focused on Elegoo resins.
Standard Resin
This resin is a great all-rounder. It’ll work well for most applications and can produce highly accurate and detailed prints. It’s a great place to start if you’re new to resin printing, especially as it’s also Elegoo’s most affordable option. And as a next step, the company’s also released the Standard 2.0, which reportedly offers higher accuracy and sturdier results, as well as better scratch resistance.
Water-Washable Resin
Similar in performance to the standard option, the main difference with water-washable resin and water-washable resin 2.0, is that you’re able to wash your finished prints using plain old water, eliminating the need for isopropyl alcohol (IPA). Some users have reported finding water-washable resin a little more brittle than standard resin once fully cured, so this is worth considering, too.
The difference in version 2.0 is that it has a better print quality. Its advanced formulation ensures low shrinkage, maintaining dimensional accuracy and preventing distortion. The curing process is quick and without compromising quality, allowing you to produce well-detailed models in less time.
Just be aware that being “water-washable” doesn’t mean that you can simply rinse a print under the kitchen tap. Resin can be harmful to aquatic life and any contaminated water should be disposed of properly.
ABS-Like Resin
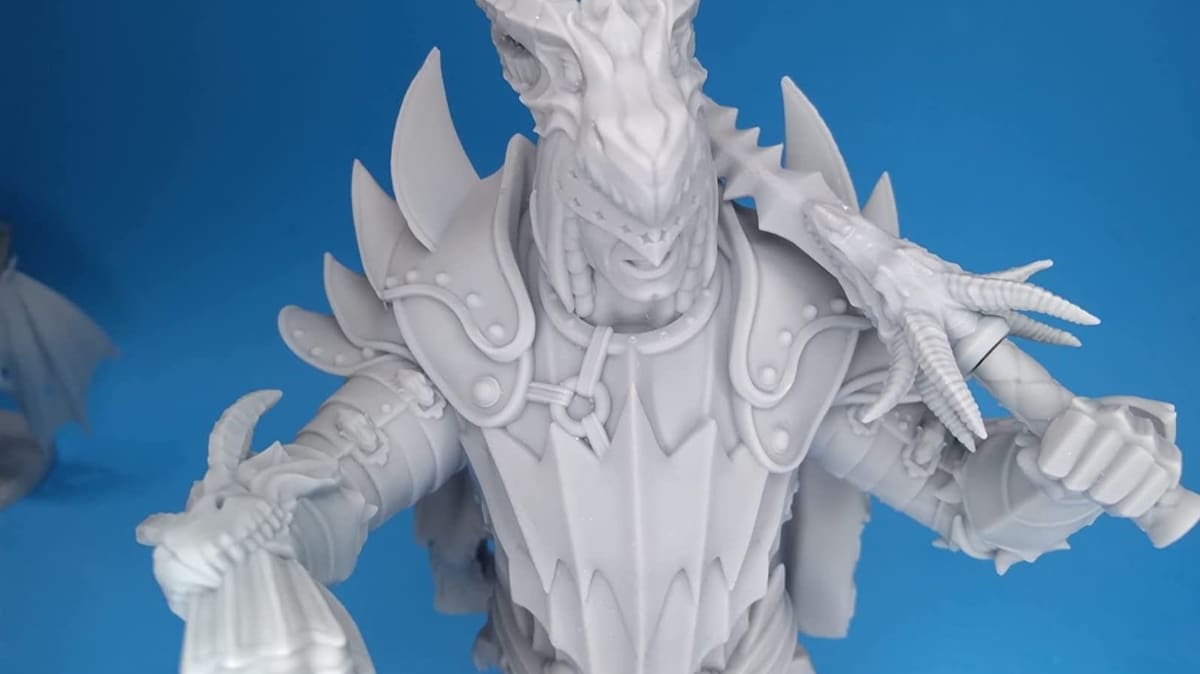
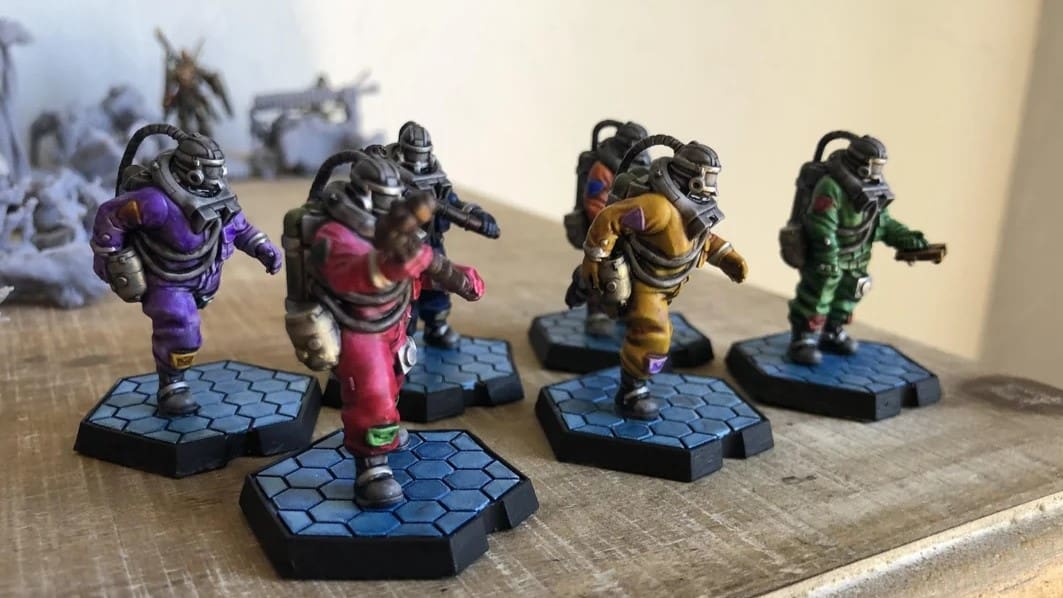
This option is less brittle than other resins, meaning your print will be tougher and less prone to shattering if dropped. This is ideal when printing practical models such as tools. It’s also popular with those who print miniatures for tabletop gaming, as small protrusions from the model, like arms or weapons, can be prone to breaking when printed in standard resin. The company has also released, per their explanation for added strength, higher accuracy, smoother surfaces, and lower shrinkage rates, the ABS-Like 2.0.
ABS-Like 3.0 is meant for high impact-resistance. So, ideal for functional prototypes, mechanical parts, industrial components, and objects intended for intensive use. Building on the success of 3.0, new and improved formulas by Elegoo have led to the development of ABS-like Resin V3.0+ – which features superior heat resistance – and ABS-like Resin V3.0 Pro, which is highly scratch-resistant. According to some reviews at Amazon, these resins are appreciated for greater durability and greater precision in the details of the printed models.
All in all, users mainly appreciate the toughness and details. That said, thorough post-processing is warranted, especially for the translucent option. In addition, a very intense odor is reported.
Plant-Based Resin
Elegoo’s eco-friendly addition is a plant-based resin that offers results that rival their standard resin, but which is made using a natural alternative that’s free of Bisphenol A (BPA). It’s a great choice for those who want to try and minimize their environmental impact while still enjoying the benefits of resin printing!
8K
With the latest developments with 8K and higher resin printers, Elegoo obviously rose to the occasion, not only with one, but with three options. The first is a standard 8K resin, the second is a water-washable option, and the third is an 8K abs-like V3.0. While these should be compatible with other printers, they are claimed to bring out the best when used on the Elegoo Saturn 8K, for example.
Thermocromic
And last but not least, Elegoo’s thermochromic resin will change from gray to purple when heated. Whether it’s especially relevant to your prints or not will be entirely up to you, but it’s nothing short of cool to look at. Unfortunately, however, the product has been phased out from many stores, so availability may be limited.
The Perfect Starting Point

There isn’t a single perfect resin profile that works for every printer and material, but slicing has become much easier over the past few years for a number of reasons.
If you’re using an older Elegoo printer, you’re probably using ChiTuBox to slice your models. While a lot of newbies find the Lychee Slicer more beginner-friendly, and for the Mars 4 and Saturn 3 Ultra printers, Elegoo includes a license to Voxeldance Tango as part of their bundle, ChiTuBox is the slicer Elegoo recommends. You can download ChiTuBox for free if you haven’t already. While there’s an Advance version for ∼$99 per year and a Pro version for ∼$169 per year, the free option still offers plenty to work with, especially if you’re getting started.
Slicers such as ChiTuBox are easy for new users to get the hang of, but they still offer users significant control through a wide range of settings. However, the many options can be overwhelming, especially if you’re new to resin printing.
We’ll walk you through getting started with ChiTuBox and offer a few recommendations for some of the most important settings available.
Slicing for Your Printer
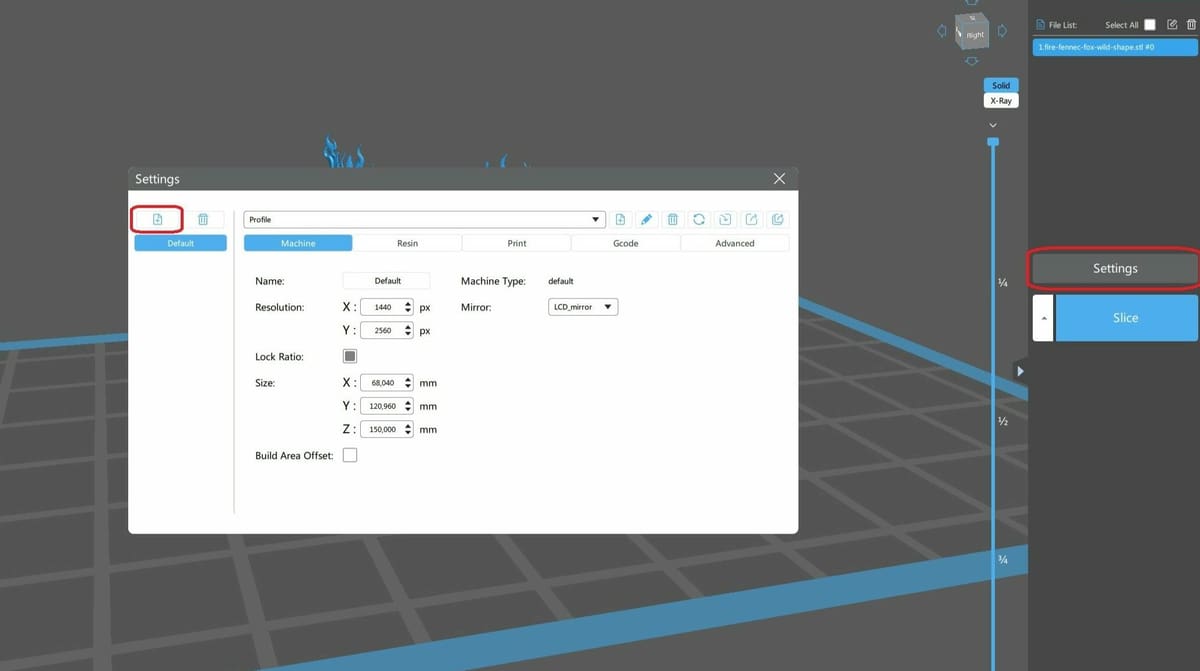
One of the most important steps towards high-quality prints is to make sure that you’re slicing for your specific model of printer. So, how do you tell your slicer which printer you’re using?
On starting ChiTuBox, you’ll first need to click on the Settings button on the right to open the corresponding menu. The “Add new printer” button can be hard to spot, but you’ll find it in the top left-hand corner of the Settings menu, as seen in the image above.
One of the benefits of using ChiTuBox, in this case, is the preset profiles for all Elegoo printers. By selecting your printer’s model in ChiTuBox, most of the settings will automatically be set for you. You’ll only need to make a few tweaks to optimize print quality, so let’s get to it!
Exposure Settings
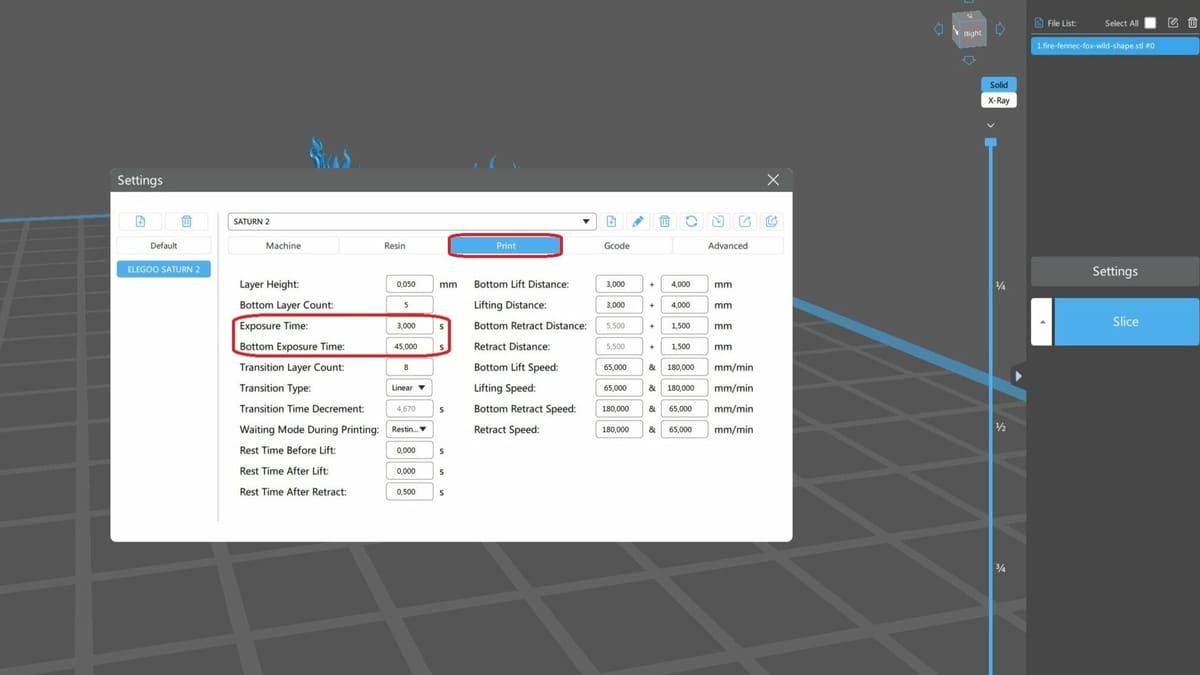
Now to get into the settings. Exposure times are probably the most important settings to get right as they do a lot to determine whether your print will be successful or not, and they can hugely affect the level of detail in your prints, as well.
To find and alter the exposure settings in ChiTuBox, you’ll again need to access the Settings menu. This time, though, you’ll need to navigate to the Print tab, which is where you’ll find both the bottom and normal exposure settings.
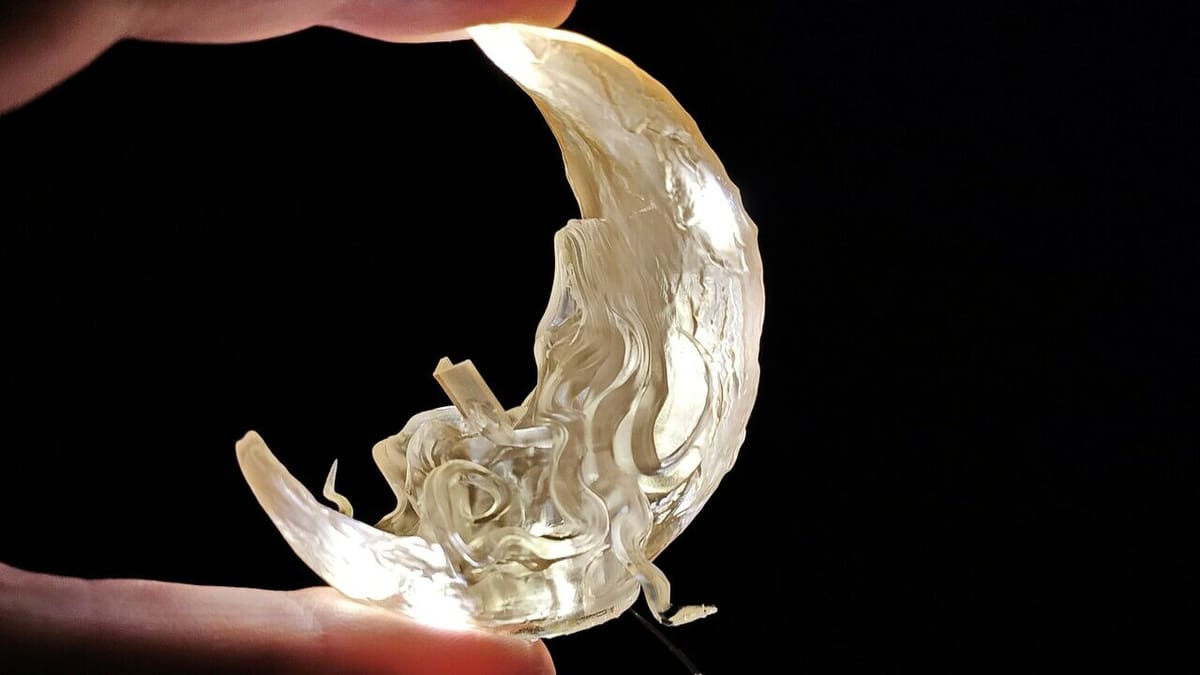
You may be surprised to find that optimum exposure times are affected not only by the resin and printer, but also by the resin’s color. For example, darker colors such as black or maroon typically need longer exposure times due to dark pigmentation that makes it harder for the UV light to penetrate. Elegoo also recommends longer than normal exposure times for translucent resins.
As mentioned, below we’ve recommended settings for several common Elegoo printers when using Elegoo’s Standard resin. If you have a different make or model of machine, or a different resin, use these as a guideline, but always defer to the manufacturer’s instructions.
While, in general, most settings won’t differ too much between the different types of resins (when using the same printer), there may be special considerations, like when you’re opting for 8K resin with the Saturn 8K. That’s why it’s always best to double-check depending on your setup and materials – no one wants a failed print!
Bottom Exposure
This is the slicer setting that determines how long the first few layers of your print are cured for. This needs to be significantly higher than your normal exposure time to ensure your print sticks to the bed. Set it too high, though, and you’ll find your prints difficult to remove and with a slightly flared base.
Recommended settings:
Normal Exposure
This is the slicer setting that determines how long all the other layers of your print are cured for – too low and your print will be weak and likely to fail, too high and you’ll lose details and dimensional accuracy.
Recommended settings are:
*The times given here assume a 0.05-mm layer height (except in the case of the Mars 4 Ultra and Saturn 3 Ultra which assumes a 0.1-mm layer height) as this is typically used to provide a good balance between print quality and print time.
For further recommendations, see Elegoo’s official settings tables. Here, you’ll find a thorough list that specifies the settings for the different resins and colors when used with select printers.
Layer Height
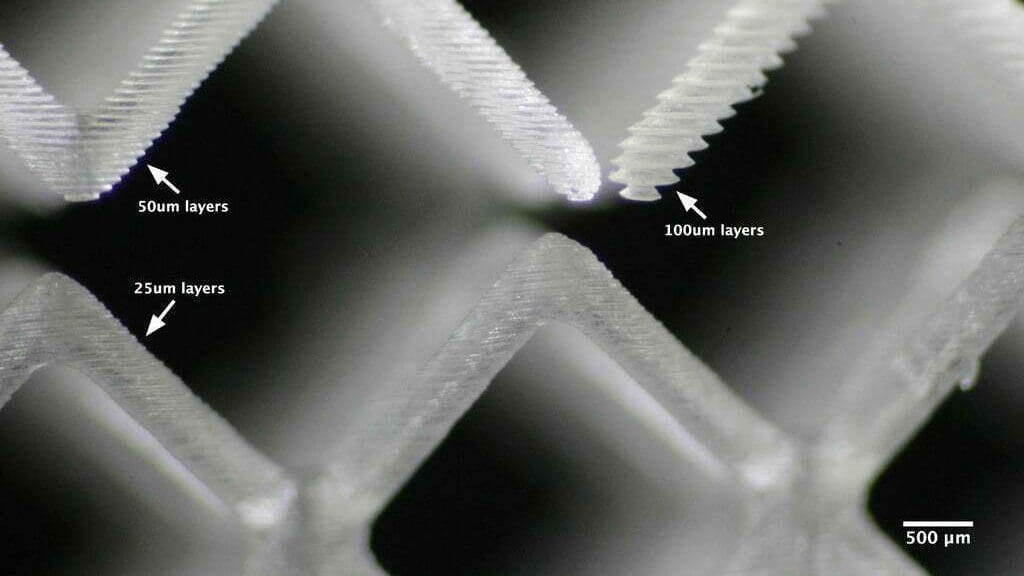
Layer height determines the height of each individual layer that your model is printed in and has a huge impact on almost every element of your print. A lower layer height will be less visible in the finished print, giving a smoother end result and cleaner details in the Z-axis. Additionally, while smaller layers require shorter exposure times, they will actually increase the overall print time as there are more layers to be processed.
You can change the layer height in the Print tab of the Settings menu in ChiTuBox. A good starting point for most use cases is 0.05 mm (50 μm), as it gives a good balance between print quality and print speed. However, most resin printers can work well with a layer height between 0.025 mm (25 μm) and 0.1 mm (100 μm).
To find the exact limits of your printer, check the user’s guide or consider contacting the manufacturer, and don’t forget that you’ll need to adjust your exposure times when changing layer height, too!

Lift Speeds
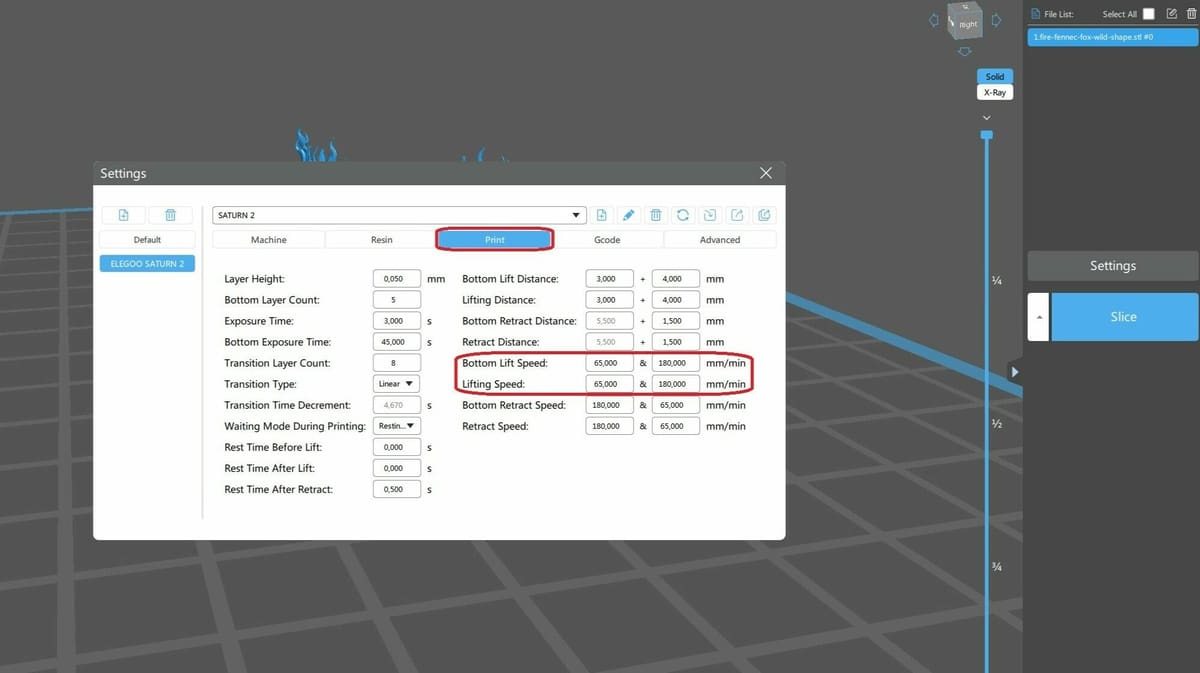
Lift speeds determine the speed at which the build plate is lifted out of the vat between layers. You can shave some time off your overall print by speeding this up, but there’s a definite balance to be found. Set this too high and your print may be pulled off the build plate or your FEP (the plastic sheet at the bottom of your resin vat) may be damaged; set this too slow, and your print time will be unnecessarily long.
You can adjust the lift speeds in the Print tab of the Settings menu in ChiTuBox. There are two lift speed settings within ChiTuBox: Bottom Lift Speed and Lift Speed.
Bottom Lift Speed
This setting dictates the speed at which the build plate is first pulled away from the vat of resin after each layer is cured. This stage of the lift is most prone to issues such as the print coming off the build plate or sticking to the FEP, so the safest option is to keep this fairly slow, around 60 mm/s.
Lift Speed
This setting dictates the speed at which the build plate is raised after the initial pull away, so it’s safe to set this a bit higher – around 80-100 mm/s should give you no issues.
Note that lift speeds are actually a little more complicated than they may first seem. Without digging too deeply into the physics behind it, there are ways to significantly increase your lift speeds without risking print failures! Quite popular within the printing community are what are known as “vroom” settings (explained by 3D printing YouTuber Uncle Jessy), where lift speeds are pushed up, sometimes as high as 300 mm/s.
Anti-Aliasing
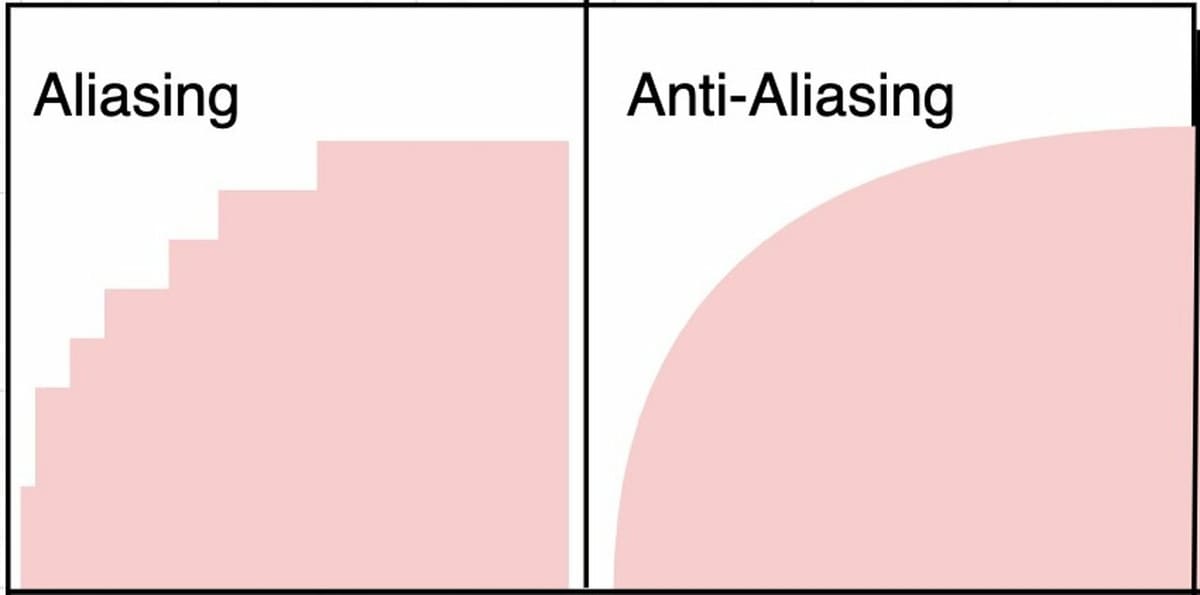
Anti-aliasing in resin printing is much the same as anti-aliasing in any other application. You may be familiar with the concept already if you play video games, but essentially, anti-aliasing is the smoothing out of diagonal or curved lines. Without anti-aliasing, these will appear angular and pixelated, and this can show in the end result of your print. But if that’s the case, why would you ever want to turn anti-aliasing off?
Well, anti-aliasing is great for smooth curves, but when you have a design with a lot of small, sharp details, it can actually cause those areas to become blurred and less defined. The level of anti-aliasing you should use will depend a lot on the model you’re printing.
Typically you want to keep it as low as is appropriate for your print so as to maintain accuracy and detail. If you’re printing something that needs to be very precise and where a smooth finish isn’t too important, we recommend leaving anti-aliasing switched off. If you’re printing something such as a bust or figure where smoothness of the print is very important, a setting of 2-4 would be a good starting point.
You’ll find the anti-aliasing options in the Advanced tab of ChiTuBox’s Settings menu.

Testing Your Settings
Now that we’ve gone over the different settings and the requirements for the kinds of resin, how do you know when you’ve got the settings just right?
We’ve given you some good starting points for the most important settings so far, but it’s worth noting that resin is a fickle beast and your prints can be affected by anything from your slicer settings to ambient temperature so, while the values given will serve as a great starting point, you may still need to do a little fine-tuning.
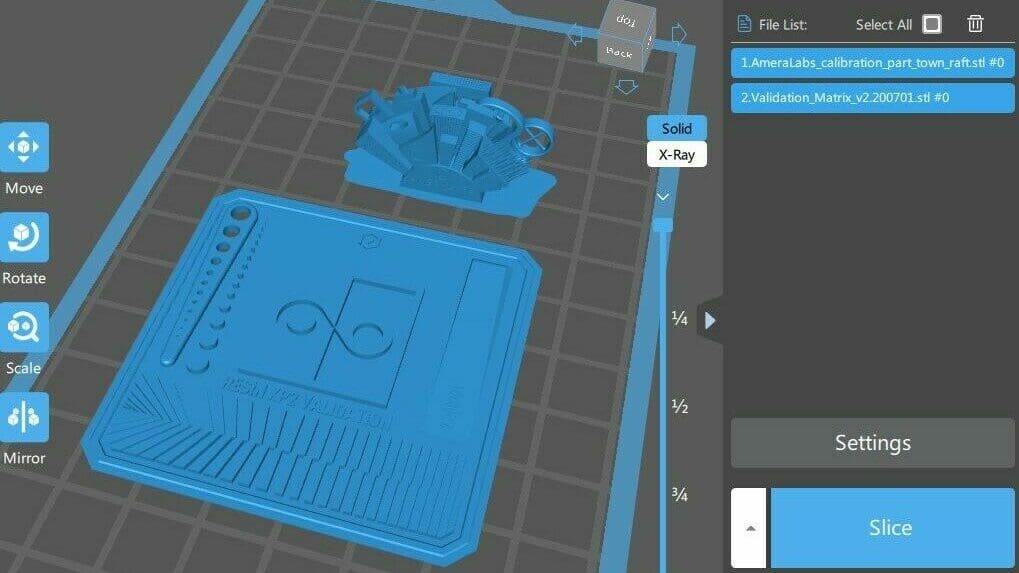
Ideally, you probably don’t want to test your new settings out on your next big print as that could be an awful lot of resin wasted if it turns out you have a bit more tuning to do. Fortunately, much like the famous Benchy of the filament printing world, there are benchmark tests for resin printers, too!
AmeraLabs have designed and made available their town calibration STL so you can ensure you’re getting the best performance out of your printer and resin possible. They’ve also created a fantastic guide detailing how to interpret the test and which settings you may need to change depending on how your print comes out.
Another incredibly popular and useful test is the Photonsters Validation Matrix v2. This is an extremely quick and easy test to use that will help you fine-tune exposure times for your resins. There’s a detailed guide on how to complete and interpret the test as well.

License: The text of "Perfect Prints Every Time: The Ultimate Elegoo Resin Settings Guide" by All3DP is licensed under a Creative Commons Attribution 4.0 International License.