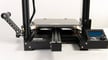
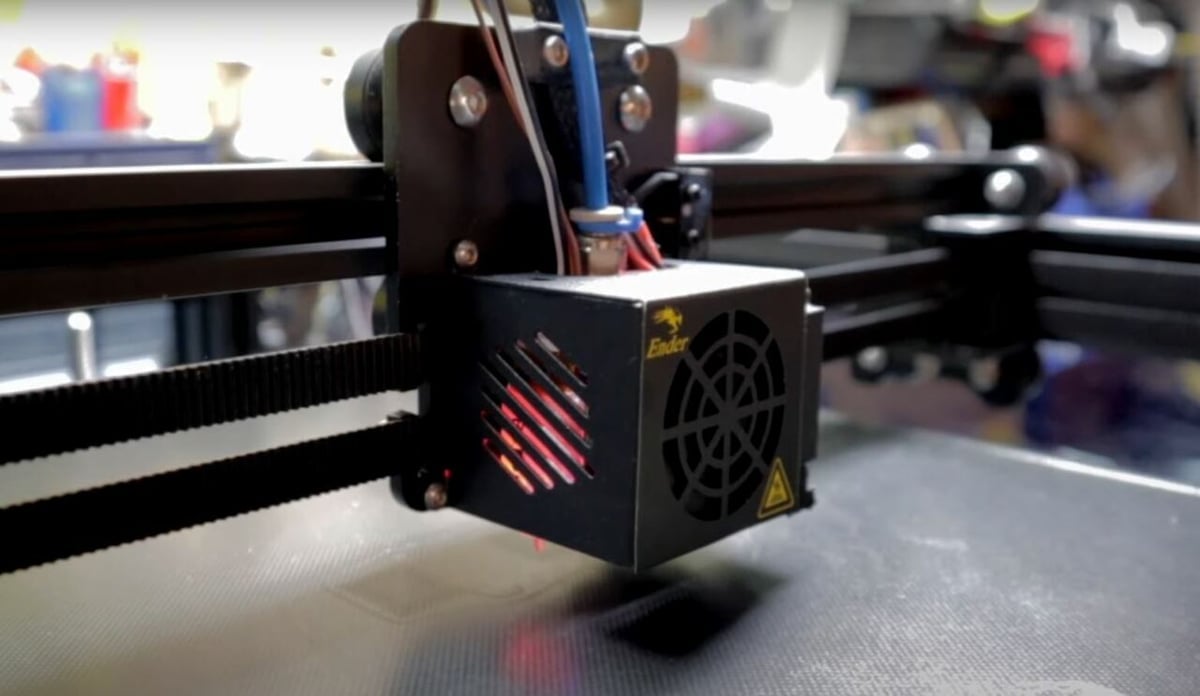
Creality, if you haven’t already heard their name at least a million times, is a popular manufacturer of budget 3D printers, typically geared towards hobbyists. The Ender 3 helped launch Creality’s popularity due to the printer’s low cost and high performance. Following that success, they’ve developed many new and improved printers, including the Ender 6.
The Ender 6 is no ordinary Creality printer; it’s fully enclosed, meaning you can print materials that are sensitive to temperature changes (like ABS and ASA). The Ender 6 also utilizes a CoreXY motion system, which is a junction of belts and pulleys that allow the printhead to move.
If you have one, you’ll know that your printer is equipped with many features that were typical upgrades on previous Creality machines. For instance, the Ender 6 comes with a filament runout sensor. While there are many things to be proud of, Creality seems to be most happy about the speed the Ender 6 can achieve, which is significantly faster than previous Creality printers.
Overall, the Ender 6 is a great machine with tons of capabilities. However, with any 3D printer, there’s always room for improvement, and the community has developed upgrades to enhance the machine’s usability and performance. In this article, we’ll go over some great upgrades for the Creality Ender 6.
To DIY
We’ll get started with the upgrades that you should be able to either print on the Ender 6 itself or for which you’ll only need a few accessible components. And if you’d rather leave the printing to the professionals, you could always try a service like Craftcloud by All3DP.
Z-Axis Stabilizer
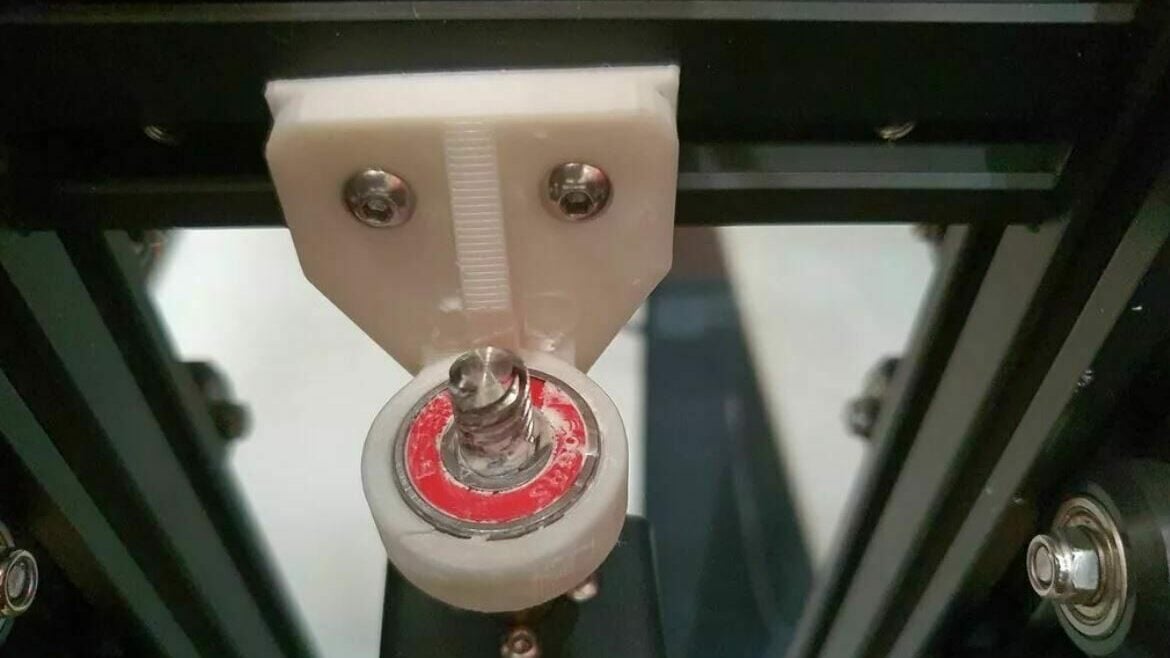
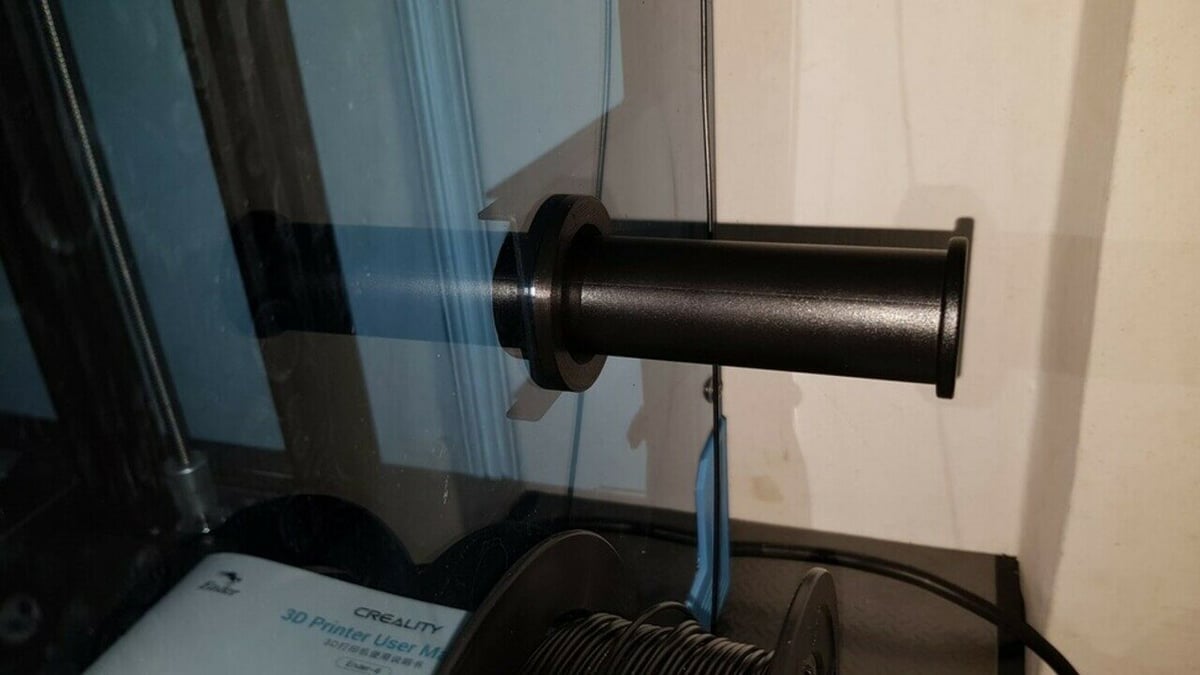
First up, this printable upgrade stabilizes the Z-axis lead screw on the Ender 6 to reduce the chances of print quality issues such as Z wobble. According to the project page, the design was remixed from a similar model and was made to fit the Ender 6.
As seen in the image above, you’ll need a standard skateboard bearing, which goes in the recessed hole to allow the lead screw to spin easily but in a controlled manner. You’ll also need some screws and two T-nuts to hold the fixture in place on the aluminum extrusion.
Tool Holder
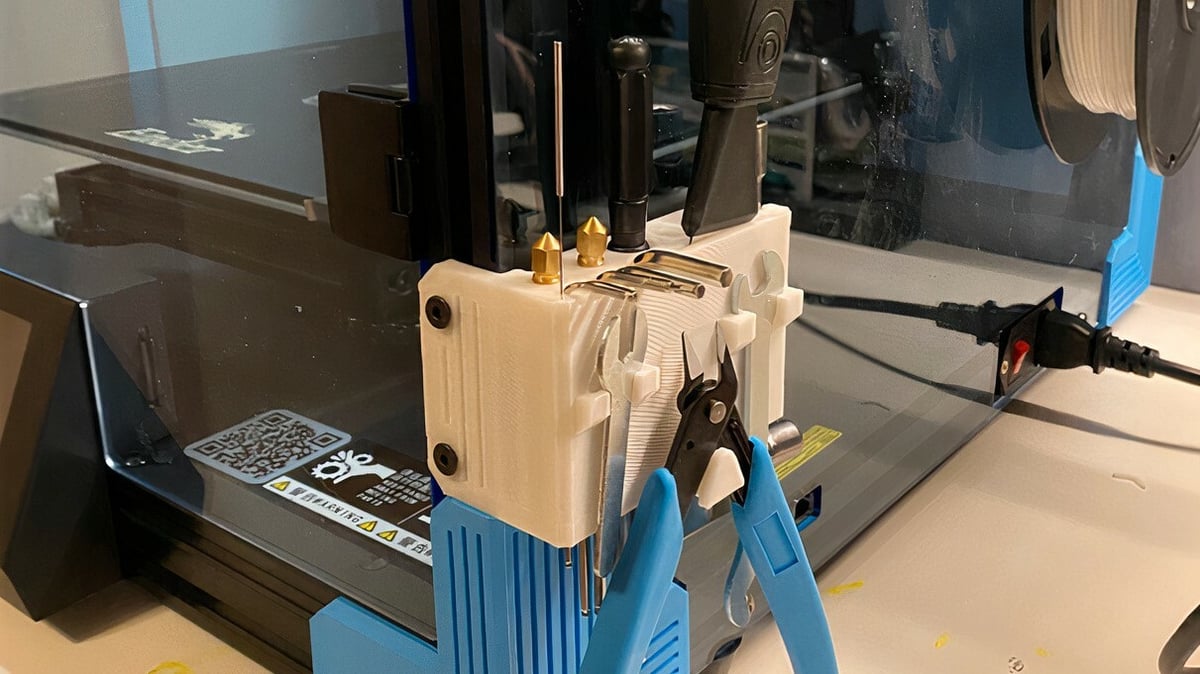
This is a remixed Ender 6 3D printed tool holder that holds filament pliers, a couple of Allen keys, a screwdriver, a scraper, replacement nozzles, and some other tools. You can place it anywhere on the sides of the printer, which is out of the way of anything important but accessible enough.
The designer printed the holder at a 0.2-mm layer height with 15% infill, so these settings should work for you too.
- Parts required: 3D printed part, screws and nuts
- Cost: Cost of filament
- Who designed it: Stuart800
- Where to find it: Thingiverse
Spool Holder Spacer
Some users have reported that while the Ender 6 is well-designed, the stock spool holder doesn’t provide space between the machine’s outer enclosure wall and the spool, leading to unnecessary friction between the two. Although this isn’t a big problem, it could cause slight under-extrusion in prints if the spool can’t rotate properly to provide the extruder with enough material. This upgrade is a small spacer that goes on the stock spool holder to give the spool and enclosure wall some clearance.
The designer listed that they used a 0.16-mm layer height with a 10% infill density. To attach the model, you should be able to remove the stock spool holder and slip on the spacer before reconnecting it.
If you want to completely overhaul the Ender 6’s spool holder, you can also find an upgrade to move it inside the enclosure.
- Parts required: 3D printed part
- Cost: Cost of filament
- Who designed it: Sdsyc
- Where to find it: Thingiverse
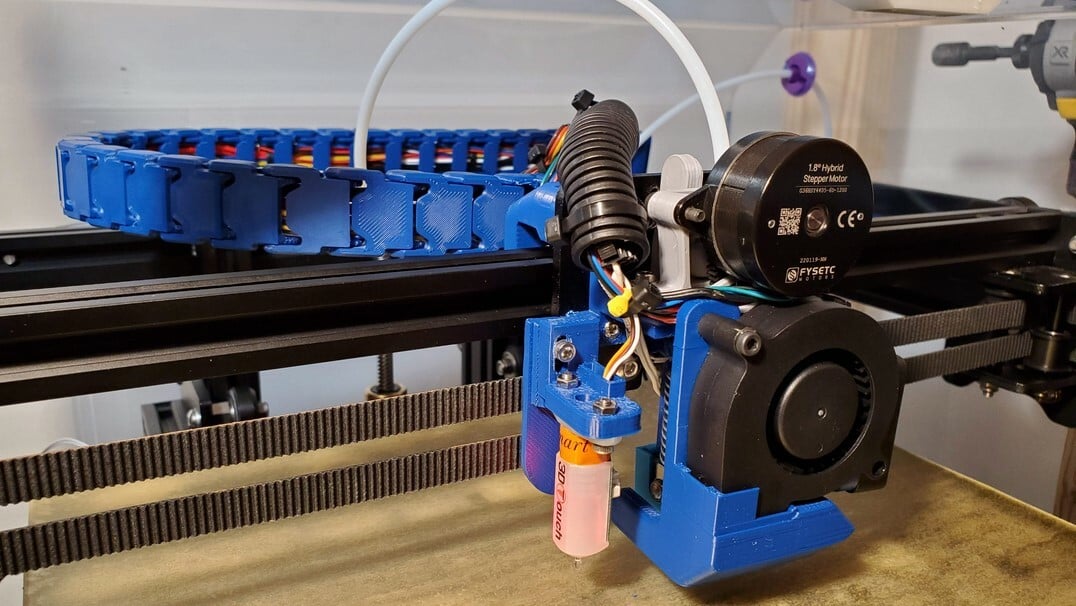
Relocated Top Extruder
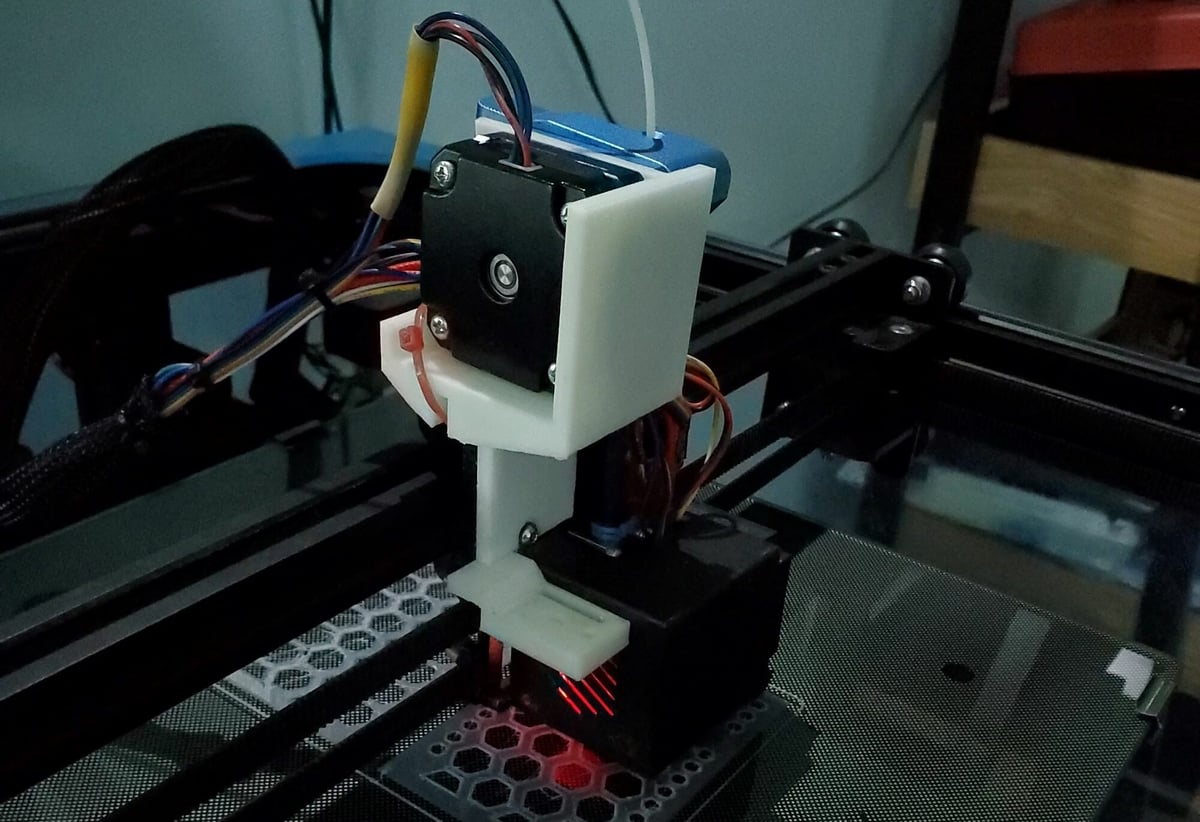
This next upgrade isn’t as popular as others, but it’s super useful for reducing the length of the Bowden tube and providing better extrusion. The Ender 6 comes with a side-mounted extruder motor, which, while functional, is quite a distance from the hot end, so a long Bowden tube is needed to connect the two entities. This long tube gives the filament more slack in the tube, so longer retractions are needed in order to be effective. As such, extrusion is less reliable than a system with a shorter distance between the extruder and hot end.
This upgrade involves moving the side-mounted extruder to the top of the frame so the tube length is significantly reduced and, as a bonus, the filament doesn’t have to make a sharp turn in the Bowden tube. Other than a few screws, nuts, and spacers, you shouldn’t need any extra components (besides the existing Ender 6 extruder and motor). Assembly is also pretty easy; all you have to do is remove the extruder and reposition it near the back left corner of the top of the frame.
Z-Axis Adjustment Knob
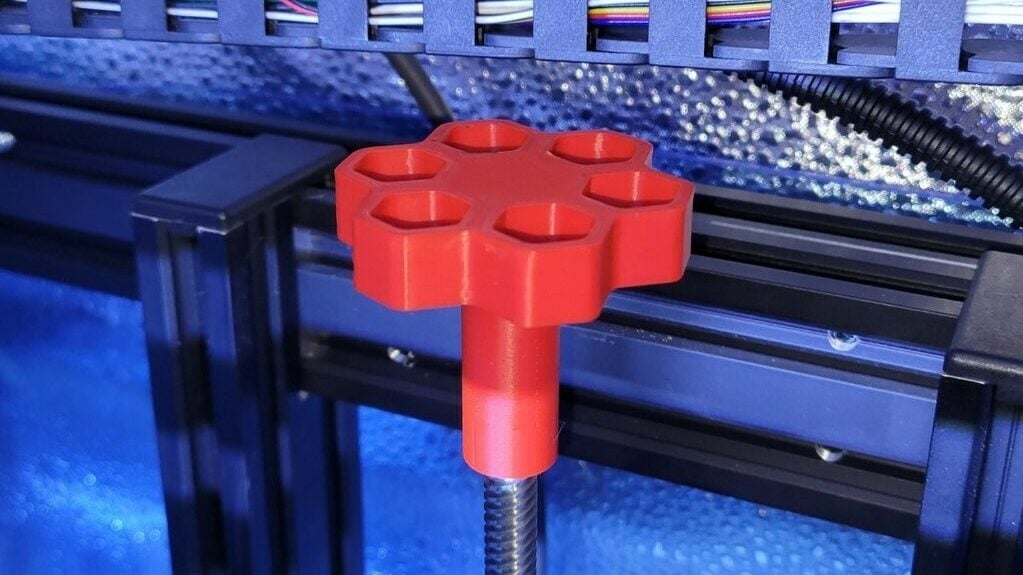
Manually moving your Ender 6’s different components across their axes is sometimes necessary. While moving components by hand isn’t a bad thing, pushing or pulling on the wrong parts can cause issues. That’s why this Z-axis adjustment knob is a great addition to your Ender 6 setup: it allows you to safely and easily rotate the Z-axis lead screw on your printer to bring the build plate up or down as you please.
The knob has a great design, with a hexagonal shape that provides a good grip for rotating the knob. The upgrade is also easy to install and you can fit it right over the lead screw. It’s worth noting, though, that this upgrade doesn’t work if you’ve installed a Z-axis extension to your Ender 6. As for printing this single part, the designer listed that they used a 0.2-mm layer height, a 15% infill density, and didn’t need supports or a raft.
- Parts required: 3D printed part
- Cost: Cost of filament
- Who designed it: vampyrex13
- Where to find it: Thingiverse
Wire Strain Relief
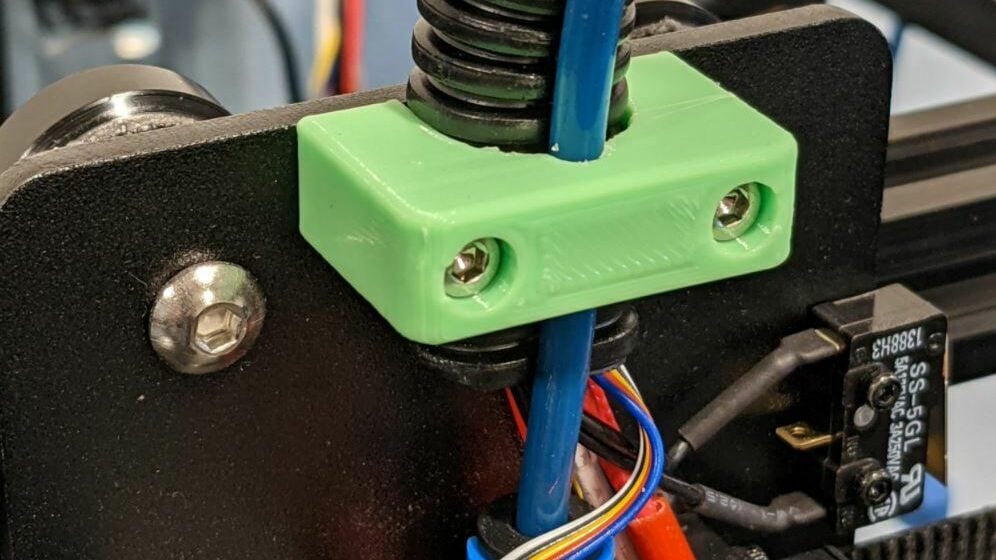
Cable management is one area where Creality has been improving a lot: For the Ender 6, they’ve added a wire strain relief feature on the printhead. This attempts to alleviate any tension on the internal cables caused by the movement of the printhead. While this feature is better than nothing, some users have found it ineffective as it doesn’t hold the Bowden tube.
This upgrade attaches to the top of the printhead using the two original mounting screws. Once attached, you should hold your hot end wires and Bowden tube together and then screw this component over them to avoid having to rewire everything. The maker listed that they printed this model with a 20% infill and a 0.2-mm layer height in PLA+ filament.
- Parts required: 3D printed part
- Cost: Cost of filament
- Who designed it: mnswamp
- Where to find it: Thingiverse
Cable Chain
3D printed drag chains have quite a few benefits, which make this a worthy upgrade. They make cable management tidier while increasing the cables’ life, reducing the chance of them getting caught in any moving parts.
Although the drag chain can be purchased and the adapters can be 3D printed, going the completely 3D printed drag chain route also works quite well. For this, the designer suggests printing the chain at a 0.2-mm layer height with 20% infill.
- Parts required: Drag chain, 3D printed chain adapters and mounts
- Cost: Cost of filament
- Who designed it: shawnseveras
- Where to find it: Thingiverse
Fan Duct
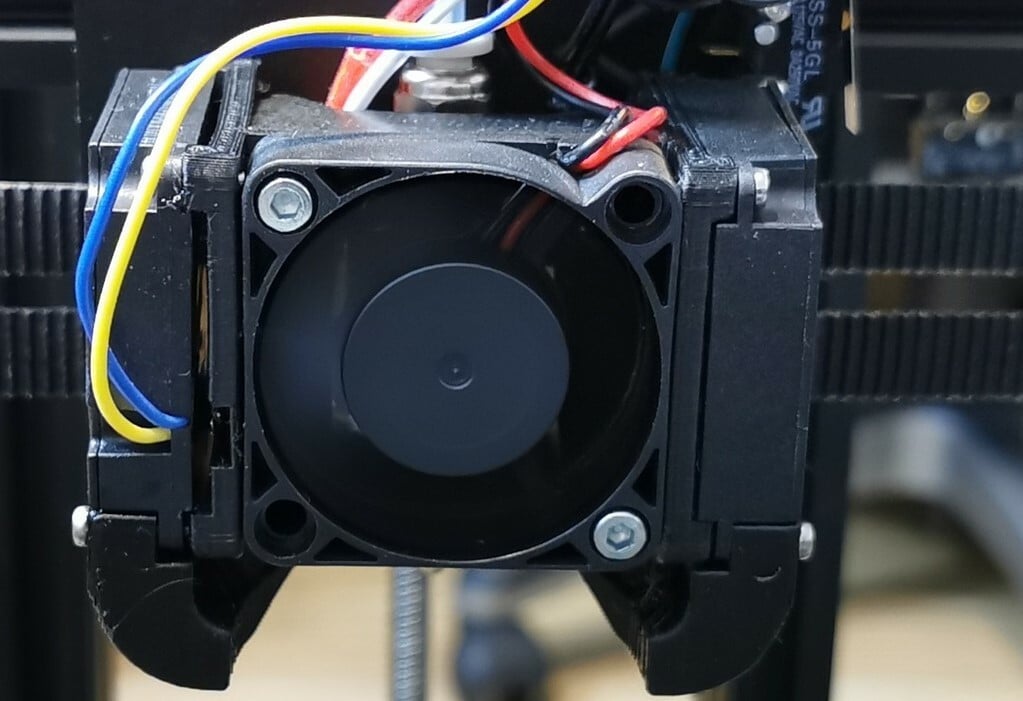
Cooling is a very important part of the 3D printing process. If the melted filament that flows out the hot end of your Ender 6 isn’t properly cooled, prints can turn out droopy and severely inaccurate. The stock Ender 6 printhead features a small part-cooling fan and a fan duct. However, if you want to add more cooling capacity and potentially improve the quality of prints, you can upgrade with this 3D printable fan duct.
This project includes three 3D printed parts and allows for adding two part-cooling fans to go on both the right and left of the nozzle and blow straight where filament will come out. The creator of this project listed that they printed the pieces with a 0.2-mm layer height, 25% infill density, and with supports activated.
- Parts required: 4010 blower fans, 3D printed parts, screws, pin connectors
- Cost: ~$30
- Who designed it: Rics_3D
- Where to find it: Thingiverse
Linear Rails
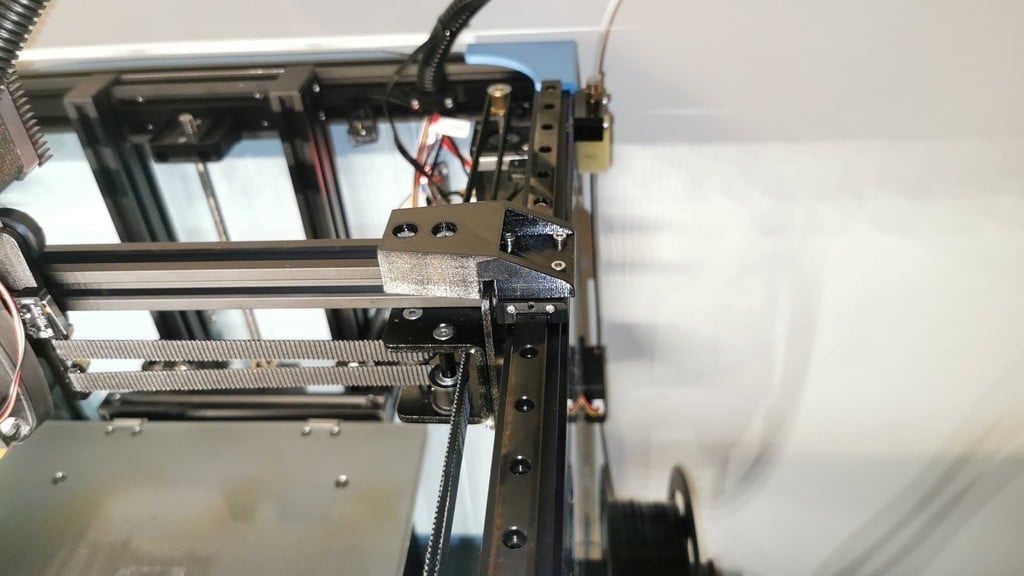
Linear rails are a rather intensive upgrade for any 3D printer, but they can significantly improve your printer’s performance by making your printhead’s movements smoother. This upgrade involves adding very rigid metal rails along the X- and Y-axes of your Ender 6 and then putting the moving gantries on carriages. These carriages contain many tiny balls that smoothly roll along the rigid tracks, for very smooth and almost-frictionless motion.
Smoother printhead motion can improve print quality because it will prevent or reduce the impact of certain printing issues like ringing. Unfortunately, adding linear rails to your Ender 6 requires a lot of different components, like a set of linear rails (which can get pretty pricey), some 3D printed mounts, screws, and other hardware. For more options, designer Tertullidan has shared 3D printable mounts online for adding linear rails to the different axes on your Ender 6.
- Parts required: Linear rails, 3D printed mounts, screws
- Cost: $20-$100 (depending on size and quality of linear rails)
- Who designed it: ErNeSt93
- Where to find it: Thingiverse
Lights
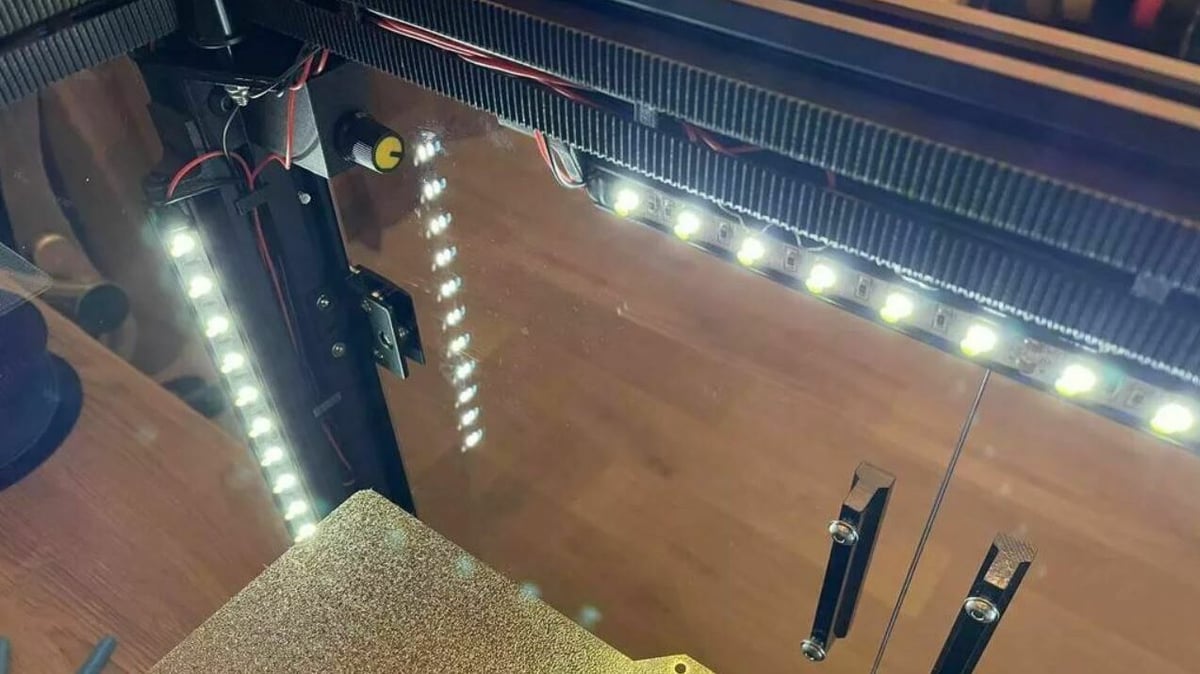
This upgrade is a set of partially 3D printable light fixtures that you can use to illuminate the enclosed space on your Ender 6. Lights are a great upgrade for any printer because they make it easier to fix and use your machine. Plus, they add an appealing visual effect.
This upgrade consists of three light holders located on the front and the two sides of the enclosure, with the mounts for LED strips facing inwards towards the print bed. With a few screws, washers, and nuts, you’ll be able to assemble everything.
Lastly, you’ll also need a way to control these lights. The designer states that they used a motor controller, but you can use alternative methods (like basic USB power).
- Parts required: LED strips, 3D printed parts, screws, washers, nuts
- Cost: ~$25
- Who designed it: AuverPrint
- Where to find it: Cults
Klipper
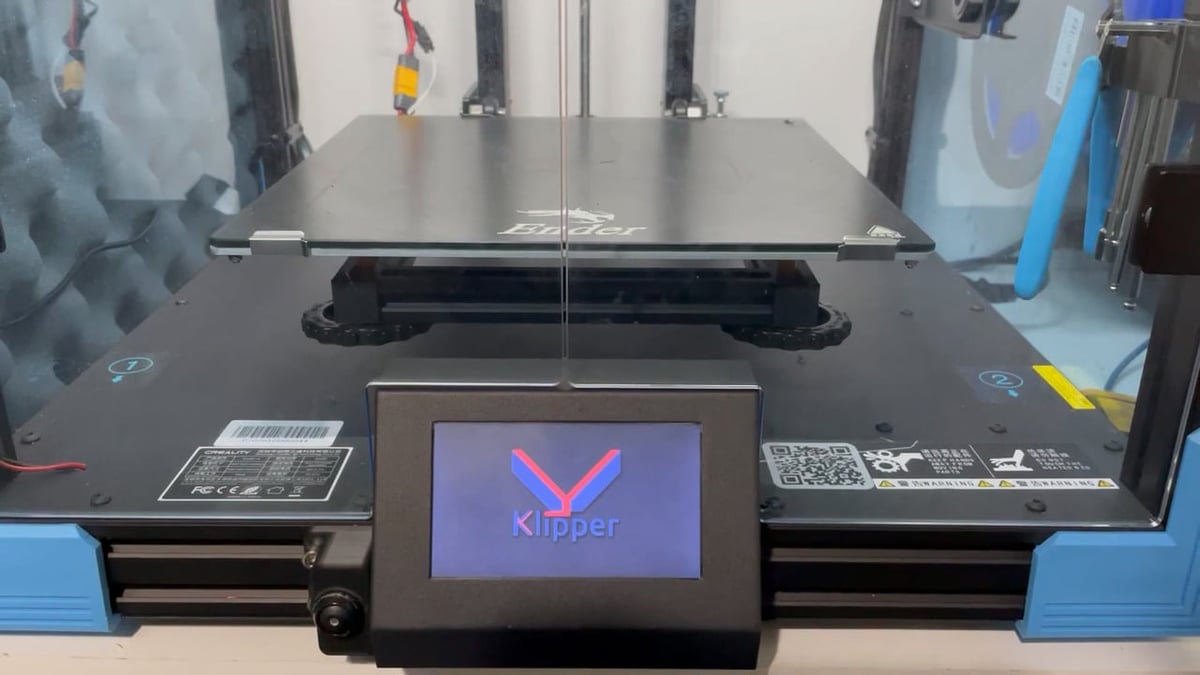
Klipper firmware with Raspberry Pi is one of the best combination upgrades for the Ender 6. It makes your printer run and perform faster without compromising on print quality and accuracy.
Along with all this, because the firmware is completely open source, it has some great compatibility features with sensors, extruders, and more. To complete its benefits, there’s plenty of great support, documentation, and forums online, which can help you get started and solve any issues you might face down the line.
- Parts required: Klipper firmware and Raspberry Pi
- Cost: Cost of a Raspberry Pi, if you don’t already have one
- Who designed it: KevinOConnor
- Where to find it: GitHub
To Buy
While some of these options may require DIY parts, the main component needs to be purchased, with prices ranging from $5 to $100.
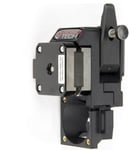
Creality Spider Hot End
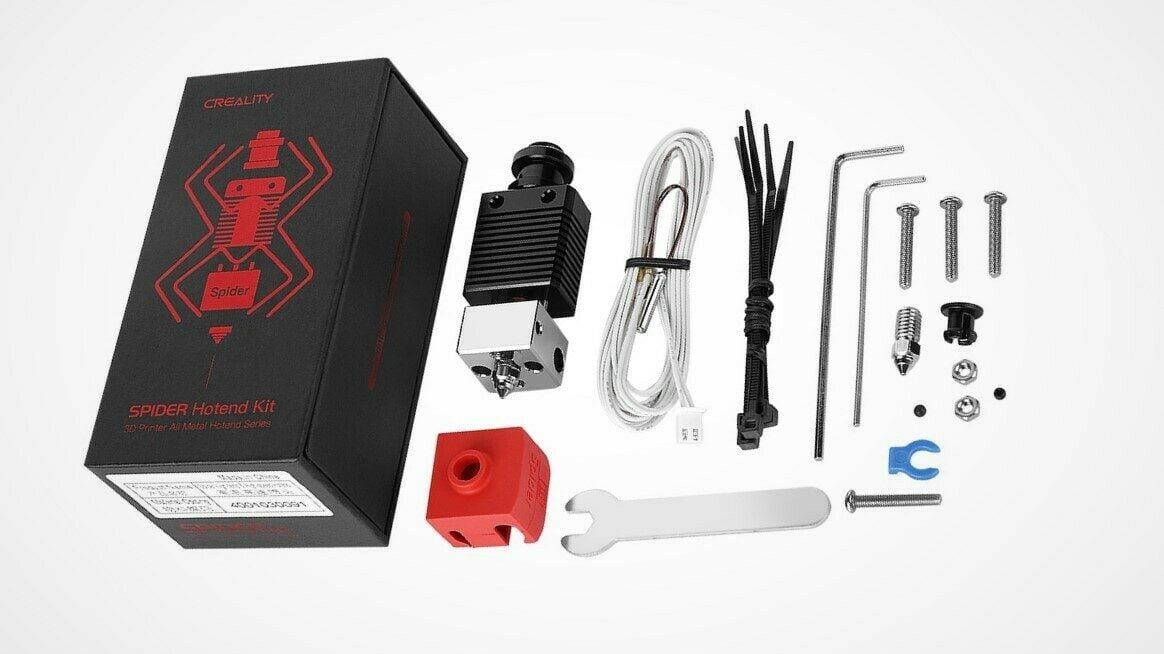
Creality has developed plenty of 3D printing products over the last few years and recently came out with the Creality Spider. The Spider is a high-temperature hot end that serves as a great upgrade to the Ender 6’s stock hot end, which can only reach a nozzle temperature of 260 °C.
However, the Spider isn’t just any “high-temp” hot end. Creality claims that it can reach nozzle temperatures as high as 500 °C, which is hotter than basically any other sub-$50 hot end on the market. With this much heating power, you’ll be able to print basically any filament material you want, from PLA to PEEK, just as long as the rest of your printer is capable.
Creality highlights the Spider’s ability to print faster with traditional materials. Being able to reach higher temperatures means that you can use faster speeds and filament will be able to melt quickly enough to leave the nozzle without issue. In fact, Creality mentions that this hot end will enable print speeds of 250 mm/s with materials like PLA.
- Parts required: Creality Spider hot! end kit
- Cost: ~$50
BuildTak FlexPlate
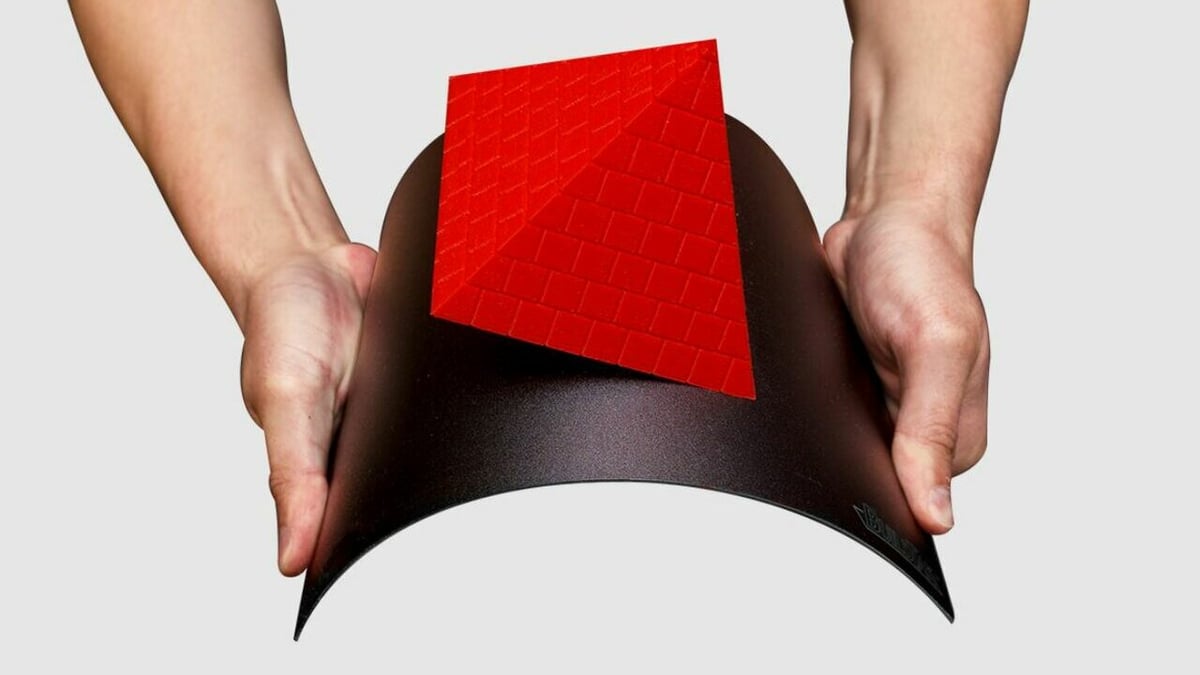
The Ender 6 comes with a glass build plate, a great choice for printing all sorts of materials from PLA and ABS to TPU and nylon. However, for some materials like PETG that really stick to the build plate, using a flexible platform is advantageous as it allows you to remove parts easily. While many flexible build plates are available, some users found that the BuildTak FlexPlate was a high-performance solution to this problem.
When choosing which size build plate to get, make sure to select the 300 x 300 mm option. Although the advertised printing dimensions might be smaller, the build plate’s actual size is around 295 x 295 mm, so 300 x 300 mm should suffice (295 x 295 mm isn’t a standard option). Once you attach and print on it, you can remove the FlexPlate and bend it to easily pop off your model.
- Parts required: BuildTak FlexPlate
- Cost: ~$100
Auto-Bed Leveling
The Ender 6 comes with many pre-installed upgrades that were once optional add-ons for other Creality printers. But, auto-bed leveling (ABL) didn’t make the cut so this still needs to be done manually, which can be a repetitive and annoying process. Luckily, installing a CR Touch or a BLTouch sensor on your Ender 6 is very easy.
While the BLTouch was the first sensor available, seeing its popularity, Creality brought its own design to the market. While the two sensors have their differences, in a nutshell, all you have to do is correctly wire either one to the Ender 6’s mainboard, upload the corresponding firmware, and run a leveling sequence. After running a multi-point, cross-bed leveling sequence, you can tune your Z offset, and you’ll be ready to print without having to relevel the bed after each model.
- Parts required: ABL sensor, mount
- Cost: $40-$50
Capricorn Tubing
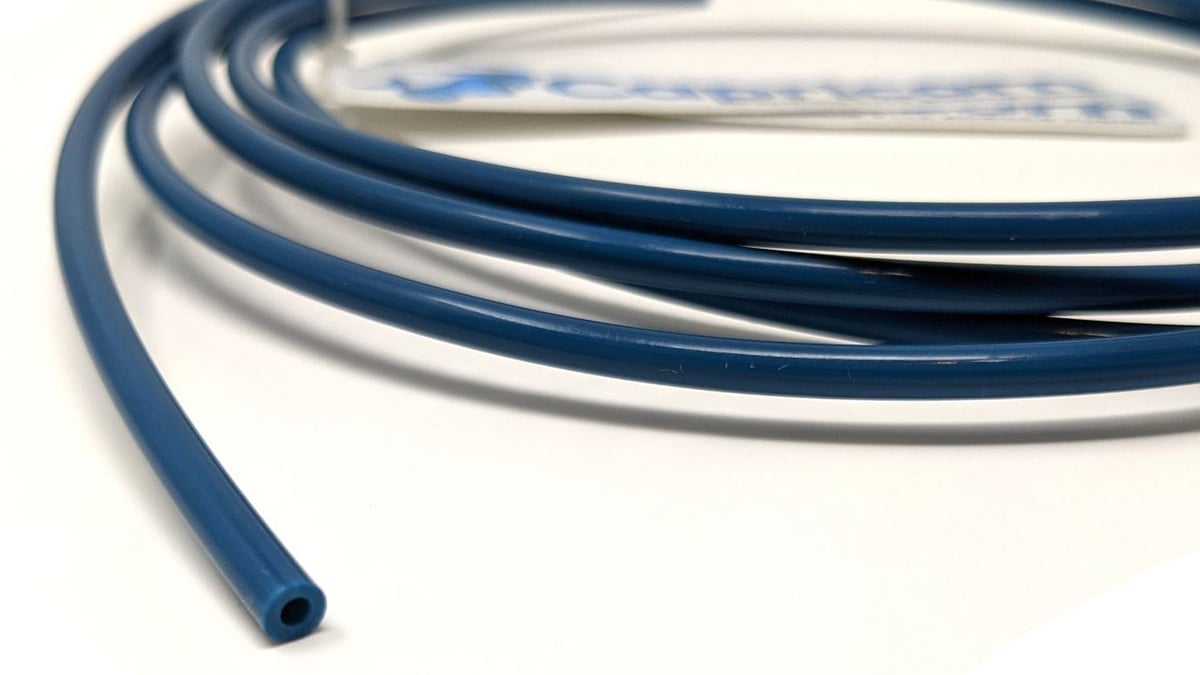
As mentioned, many Creality 3D printers, including the Ender 6, come configured with a Bowden extruder system. With any Bowden extrusion setup, the PTFE tube (a.k.a. Bowden tube) is important because it’s the filament’s transportation method from the extruder to the hot end. While Creality ships out their printers with their own PTFE tubing, it’s been known to be of pretty poor quality, so upgrading to premium tubing by Capricorn is a great option.
Capricorn, which makes PTFE tubing and some other 3D printing accessories, offers PTFE tubing in a 1.75-mm-filament version that works on the Ender 6. With this upgrade, you can expect to see issues like hot end clogs a lot less, and possibly even more consistent extrusion on prints.
- Parts required: Capricorn PTFE tubing (1.75 mm)
- Cost: $10-$15
Direct Extruder
Next, this upgrade converts the stock Bowden extruder system to a direct extruder setup on the Ender 6, so there’s no (or minimal) gap between the extruder and the hot end. One of the main advantages of direct extruders is that they’re usually better for printing flexible materials. Still, they can prevent you from printing at higher speeds because you could run into quality issues like ringing.
The easiest way to upgrade to direct extrusion is to replace the extruder with a new system, like the Bondtech DDX V3 extruder. Alternatively, you can print a mount that allows you to move the existing extruder components above the hot end to achieve a direct extrusion setup. While the Bondtech extruder is a great upgrade, it’s a lot pricier than the DIY approach.
- Parts required: BondTech DDX extruder or 3D printed parts, screws (to use the existing extruder)
- Cost: ~$140, or $5 (to use the existing extruder)
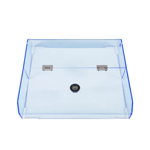
Top Cover
As its name suggests, the top cover sits on top of the Ender 6, and it’s crucial for maintaining temperature and avoiding potential drafts – plus, it can measure and display the temperature.
Apart from purchasing this top cover, it’s also possible to DIY it and use laser-cut acrylic as a top cover with 3D printed hinges. For this second option, you won’t get the temperature measurement like on the purchasable top cover, but it still gets the job done.
The purchasable top cover has hinges in the center of the cover, so only half the cover is open at a time. On the other hand, in the DIY cover, the entire top cover opens up to one side. Apart from this, the covers are quite similar.
- Parts required: Top cover or PMMA, screws, nuts, and 3D printed parts if going the DIY route
- Cost: ~$75, or cost of laser cut PMMA (or similar for a DIY cover)
Stronger Print Bed Springs
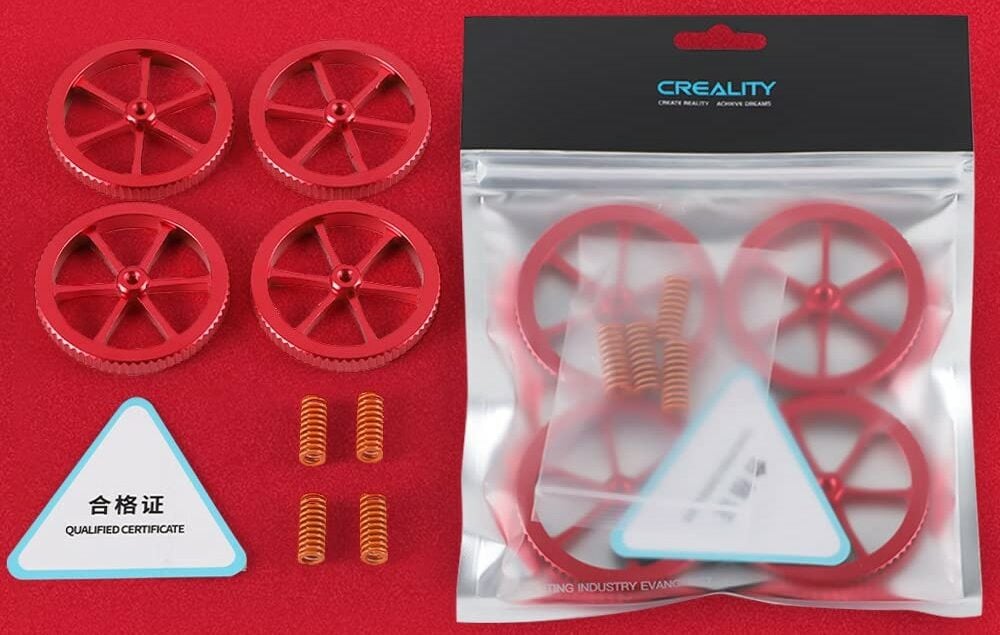
Another comment some users have made about the Ender 6 is that the bed springs (located between the leveling nuts and the build plate underframe) are too weak. This is a common issue on Creality printers, and it can cause the need to relevel the bed more often due to the build plate bouncing too easily and losing its current position. Luckily, the fix is super easy: Get new springs!
New bed springs are super cheap online, and you only need four of them, one for each corner of the bed. Installing this upgrade should take just a few minutes: remove the leveling nuts, change out the springs, screw the nuts back on, and then relevel your print bed.
Sadly, not many sets of springs are specifically meant for the Ender 6. But you can get away with using some upgraded bed springs for other printers, like the Ender 3 V2, and adding spacers or washers to make up any difference in length.
- Parts required: Bed springs
- Cost: ~$10
LCD Screen Replacement
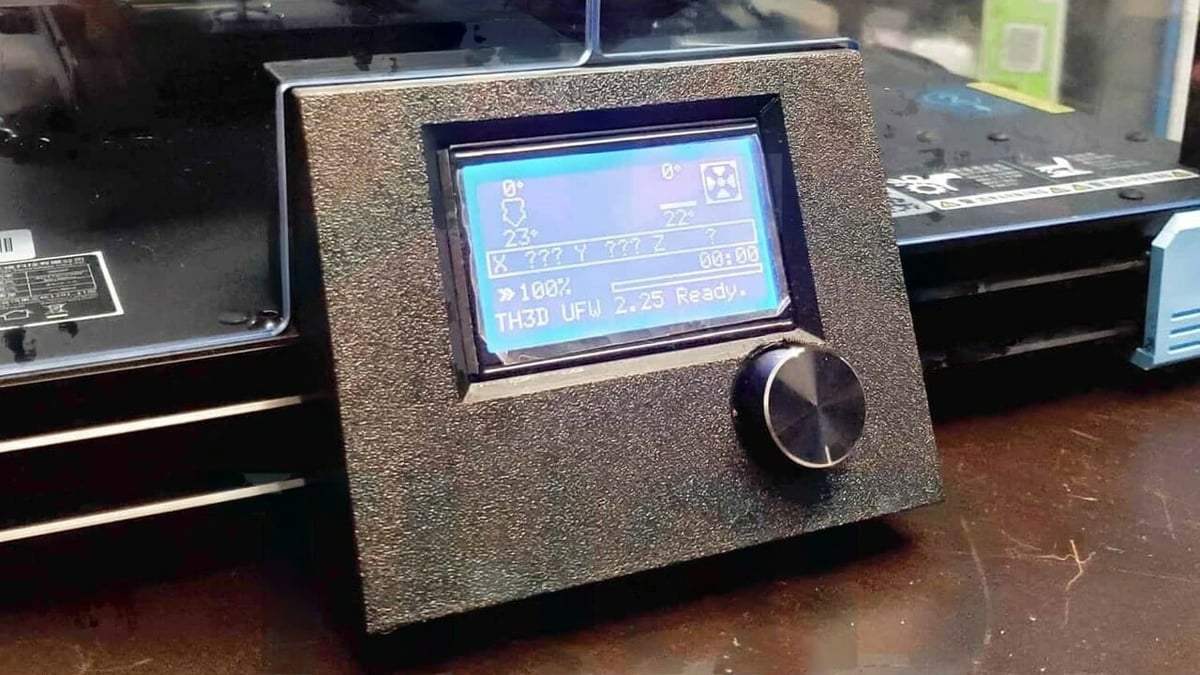
An LCD screen replacement is an upgrade kit by TH3D Studio, which gives more controls and functionalities over the stock LCD. You get direct access to various settings of the printer, such as temperature regulation and acceleration (this is just the tip of the iceberg!).
The kit includes the LCD housing, screen, cable, and some screws, and you get the option of printing the housing in PLA or ABS. TH3D also gives a detailed installation guide that lets you swap out the LCDs easily, making the entire installation process smooth.
- Parts required: LCD upgrade kit (LCD screen and housing, mounting screws)
- Cost: $35-$40
OctoPrint
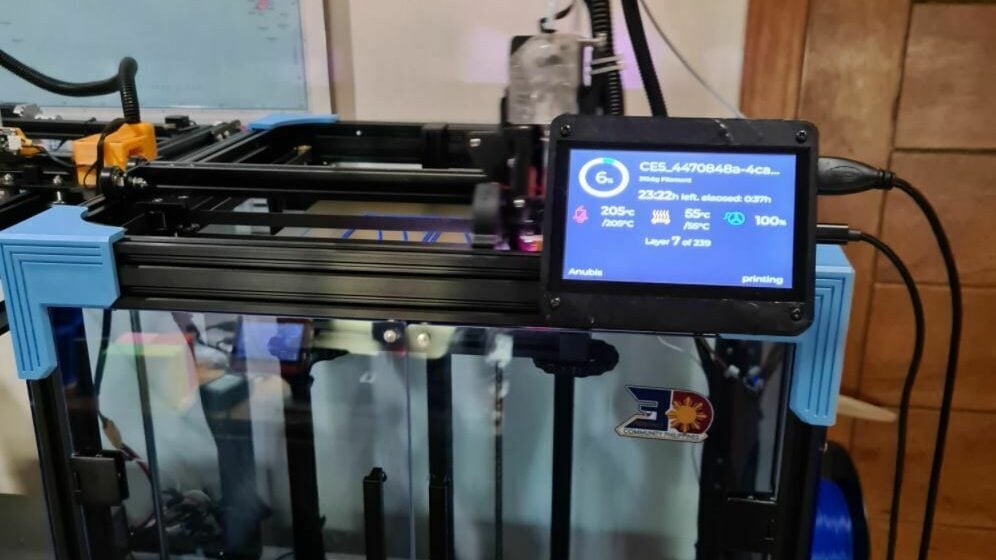
OctoPrint is a way to connect your 3D printer to a network and online interface to monitor and control your machine via a connected single-board computer (SBC), like a Raspberry Pi 4. OctoPrint is compatible with various machines, including Creality’s Ender 6. You can use the stock interface to control temperatures, upload models, start prints, move parts along their axis, send G-code, and monitor connected webcam streams. OctoPrint is a gateway to enhancing your machine, too, with plug-ins that, for example, use AI to ensure your print isn’t failing.
On this note, a camera is a very popular OctoPrint add-on and is a great upgrade for any printer, including the Ender 6. A camera connected to OctoPrint enables you to monitor your machine remotely, use failure-detection programs, create time-lapses, and so much more. Other OctoPrint upgrades include improved interfaces (like touchscreen tablets) and bed leveling visualizers.
For more information, one Reddit user has shared instructions to set up OctoPrint with the Ender 6, and there’s a universal set of directions for installation on the OctoPrint page.
- Parts required: Raspberry Pi (or another compatible SBC), Raspberry Pi case and/or mount, camera (optional), connection cable
- Cost: $45-$50 (or ∼$200 depending on SBC)
License: The text of "The Best Creality Ender 6 Upgrades & Mods of 2023" by All3DP is licensed under a Creative Commons Attribution 4.0 International License.
CERTAIN CONTENT THAT APPEARS ON THIS SITE COMES FROM AMAZON. THIS CONTENT IS PROVIDED ‘AS IS’ AND IS SUBJECT TO CHANGE OR REMOVAL AT ANY TIME.