The Best Anycubic Mega Zero (2.0) Upgrades & Mods

The Anycubic Mega Zero and Mega Zero 2.0 are easy printers to improve. Read on for some of the best Anycubic Mega Zero upgrades available!
Anycubic is a popular leader in the consumer 3D printing realm, producing many inexpensive FDM and resin 3D printers as well as accessories to go along with them. The Anycubic Mega Zero and its successor, the Zero 2.0, are excellent FDM printers with similar specs as the Creality Ender 3 but less expensive. Yet, while the Mega Zero printers are definitely a bargain, they’re not perfect, so there are many opportunities to improve them.
Luckily, the Mega Zero contains many parts, like the V-slot extrusions from the frame, that can easily be modified or augmented to further enhance the machine. And the popularity of the printers means the maker community has come up with many great additions and upgrades, both printable and purchasable.
In this article, we’ll go over a few great upgrade options for the Anycubic Mega Zero and Zero 2.0. These improvements will enhance the printers’ performance, their usability, and even their look. Let’s dive in!
Auto-Bed Leveling
Automatic bed leveling (ABL) has become increasingly popular with the development of newer and better consumer 3D printers. Auto-bed leveling allows users to run a leveling sequence to measure the distance from the nozzle to the build plate at different points on the bed, so you can get a great first layer (as long as your Z offset is set properly). Sadly, neither the Mega Zero nor the Zero 2.0 come with this feature installed, but you can always add this technology to your printer as an upgrade.
One Redditor posted that you can install the popular BLTouch ABL sensor onto the Mega Zero (2.0) and mount it using a 3D printable mounting plate that attaches to the printhead. On Thingiverse and Reddit pages, the maker provided details on the installation process, including pictures and a list of the necessary hardware.
- What it does: Allows you to use automatic bed leveling to consistently achieve a great first layer
- Compatibility: Mega Zero, Zero 2.0
- Parts needed: BLTouch, pin 27 board, screws, 3D printed parts
- Approximate cost: $50
- Where to get it: zatipnis via Thingiverse (more information on Reddit)
Belt Tensioners
Belt tensioners are another great modification that lets you quickly and easily tighten (or loosen) your printer’s belts. Tightening your machine’s belts can improve your prints’ dimensional accuracy and yield more “circular” circles (less oval-shaped).
This upgrade is intended to be used on the Y-axis belt. All that’s required for this modification is a few 3D printed parts, some screws, and a pulley, which you can take from the stock belt pulley on the Y-axis. The designer listed that they printed the parts with a 25% infill density, a 0.15-mm layer height, and supports activated.
- What it does: Allows you to easily tighten your belts
- Compatibility: Mega Zero, Zero 2.0
- Parts needed: Pulleys, 3D printed parts, screws
- Approximate cost: $10
- Where to get it: Calvin_MegaZero via Thingiverse
Filament Guide
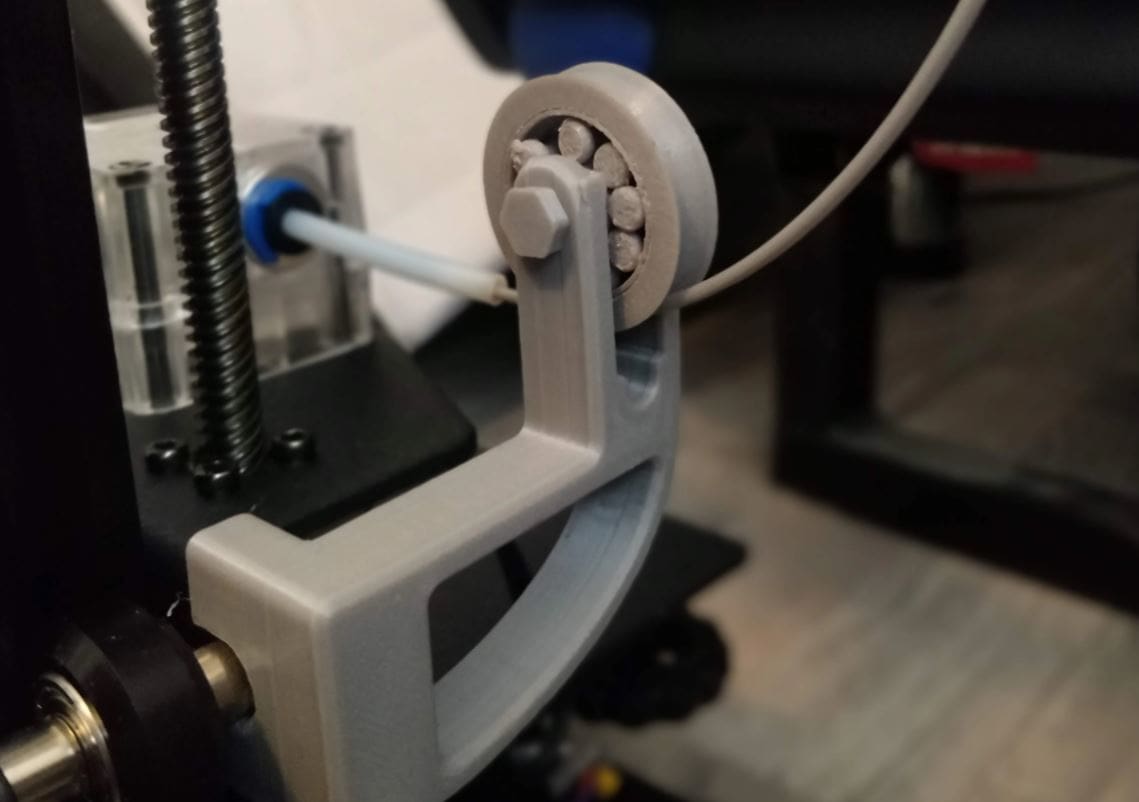
A filament guide is a useful upgrade for any 3D printer that assists filament to safely reach its destination as the filament travels from the filament spool. Filament guides usually include bearings that spin when the filament passes through the guide to provide smooth motion.
This upgrade actually contains a couple of different guides, including one for the Z-axis carriage and one for the top frame extrusion on the printer. This design uses bearings, but you don’t actually have to use metal ones! The maker posted pictures of the guide working with 3D printed bearings. Other than that, all you need are the rest of the printed parts and just a few nuts and bolts, which you can also print, as seen in the image above.
Installation should also be a breeze because the parts should slide onto the printer’s existing components (extrusions and carriage). The creator of this upgrade listed that they used a 20% infill density and a 0.1-mm layer height to make the printable components in PLA with supports activated.
- What it does: Guides your filament from the spool to your extruder safely
- Compatibility: Mega Zero, Zero 2.0
- Parts needed: Bearings, screws, 3D printed parts
- Approximate cost: $1-$5
- Where to get it: Calvin_MegaZero via Thingiverse
Filament Runout Sensor
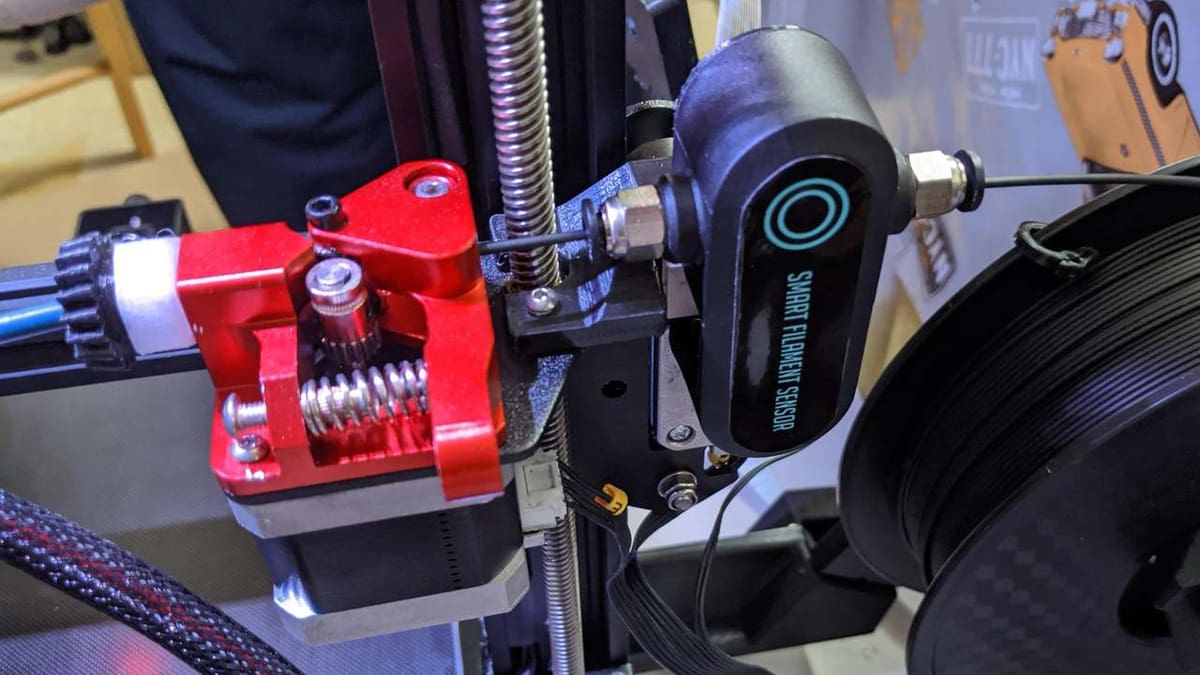
A filament runout sensor is a type of sensor that detects when you’ve run out of filament. This allows you to finish those almost-empty spools with peace of mind that your print won’t be ruined if the spool runs out!
The BigTreeTech (BTT) Smart Filament Sensor is a great option as it’s well-built, inexpensive, and compatible with many 3D printers, including the Mega Zero machines. You’ll need a 3D printed mounting plate and some screws to mount it to the printer. The designer recommends printing the mounting plate with a 20% infill density and a 0.16-mm layer height with no supports.
Installation is fairly simple for this sensor, and the model slides onto the metal X-axis carriage plate of the printer. Just don’t forget to activate the sensor in your printer’s firmware, as this needs to be adjusted and re-flashed to your printer for it to function.
- What it does: Prevents your machine from continuing a print without a filament (pauses print once no filament is detected)
- Compatibility: Mega Zero, Zero 2.0
- Parts needed: BTT Smart Filament Sensor, 3D printed parts
- Approximate cost: $20
- Where to get it:
- Sensor: Amazon
- Parts: Calvin_MegaZero via Thingiverse
Mainboard & Display
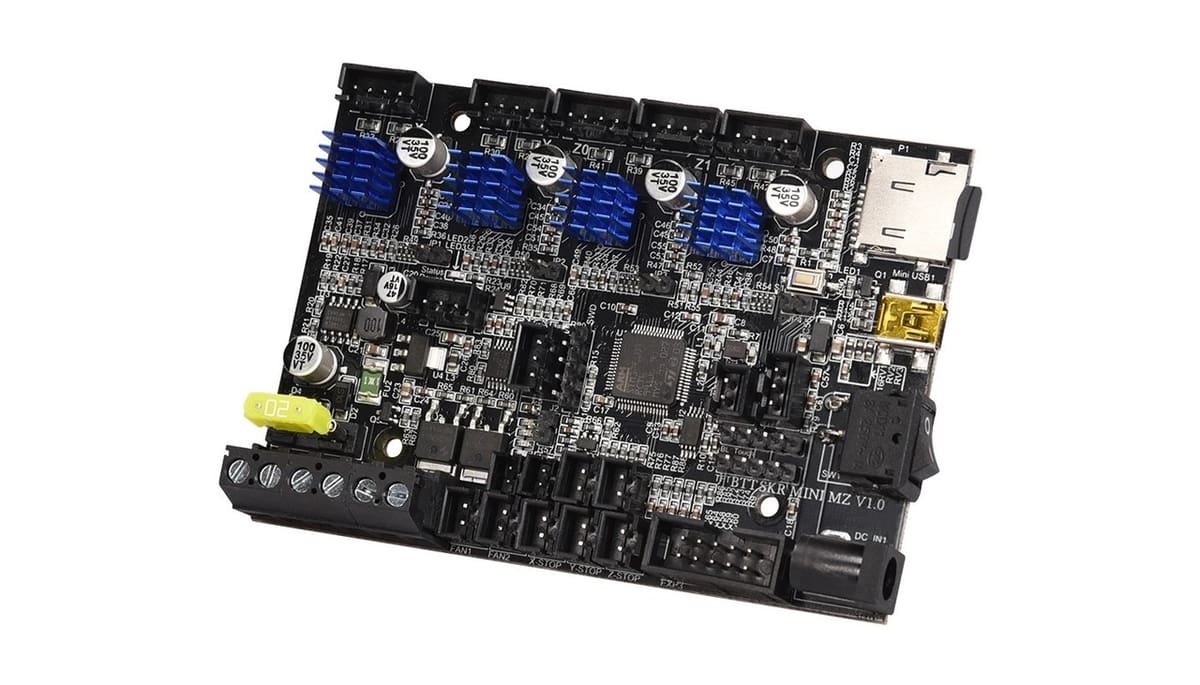
The Anycubic Mega Zero’s display and mainboard aren’t anything to complain about, but there’s always room for improvement. BigTreeTech makes their own BTT SKR Mini MZ (Mega Zero) mainboard and TFT (touchscreen) display that can serve as replacements or upgrades for the stock parts on your Mega Zero (2.0). Upgrading to these new parts will make the user interface easier and more fun to use. Plus, it can allow for larger firmware packages like Marlin 2.0 for 32-bit mainboards (the SKR Mini is 32-bit).
Installing this board shouldn’t be too difficult, but it may take a while, especially if you take the safe route and replace each wire one by one from the old to the new mainboards. Also, you may have to upload new firmware for the mainboard and provide new LCD firmware files.
- What it does: Allows you to use larger firmware packages such as Marlin 2.0
- Compatibility: Mega Zero, Zero 2.0
- Parts needed: BTT SKR Mini MZ mainboard, TFT35 MZ touchscreen, printed parts, firmware
- Approximate cost: $75
- Where to get it: Amazon
OctoPrint
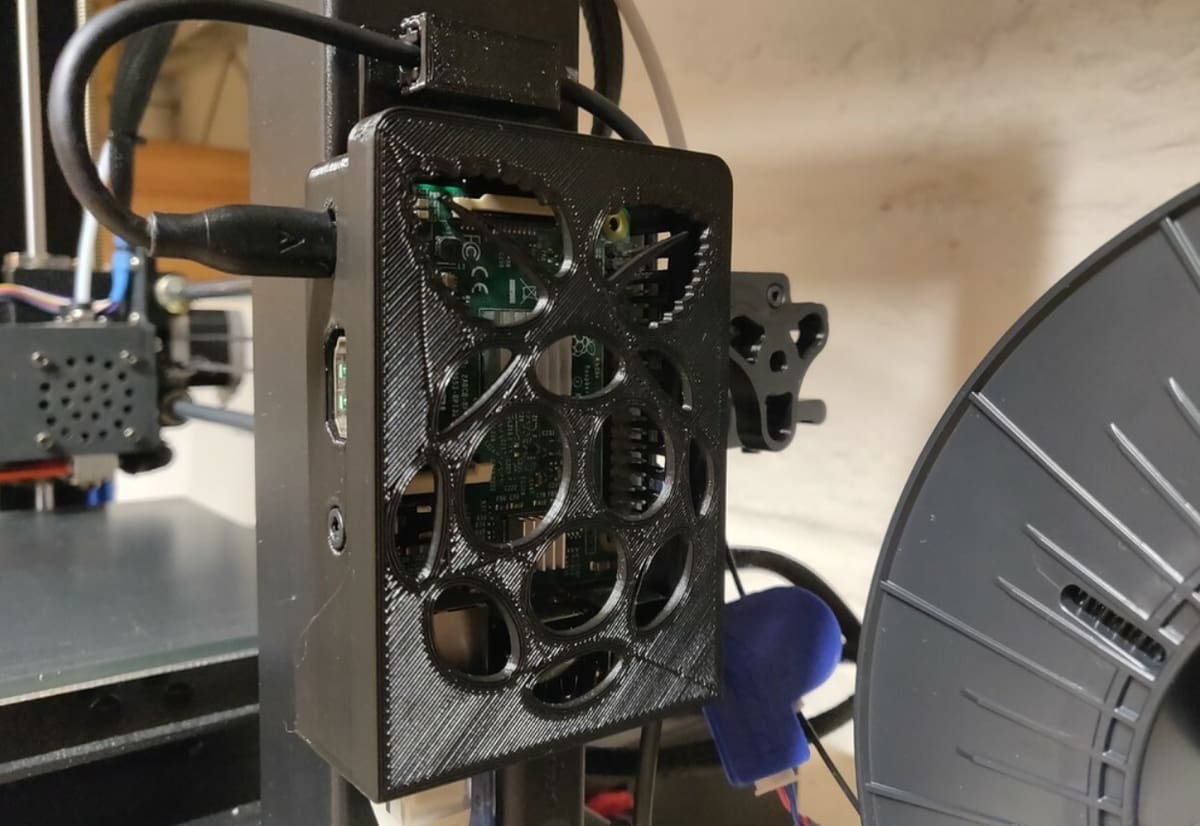
OctoPrint is one of the most popular 3D printer upgrades around. If you haven’t heard about it, it’s a remote printer control program that lets you start prints, set temperatures, and so much more, all from a custom web interface. OctoPrint runs on a computer, commonly a Raspberry Pi, which hosts the program and connects to the motherboard of your printer.
And, if the many capabilities of OctoPrint aren’t enough for you, you can take advantage of the hundreds of available plug-ins for OctoPrint, making the upgrade even more powerful and versatile. Additionally, you can connect a camera to your Pi board (host computer) to remotely monitor your printer.
To set it up, you can follow our guide to installing OctoPrint on a Raspberry Pi. You can also find and print a case for your board and a camera, if you choose to get one, on Thingiverse.
- What it does: Allows you to remotely control your printer as well as monitor prints
- Compatibility: Mega Zero, Zero 2.0
- Parts needed: Raspberry Pi models 3B, 3B+, or 4B; USB cable; Pi case (optional); camera (optional); camera mount (optional)
- Approximate cost: $30-$60
- Where to get it: Various sources
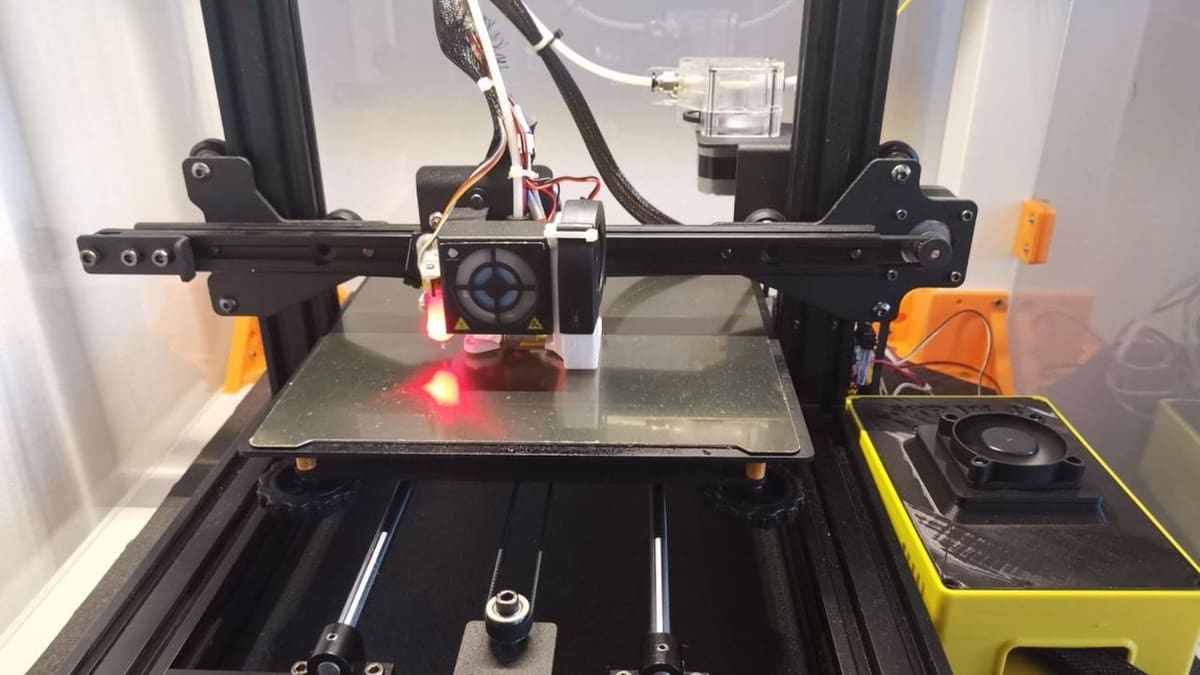
Fan Duct
Fan ducts are a key part of any printhead, as they direct the way air flows from the part-cooling fan to the melted plastic recently extruded from the nozzle. While the Mega Zero printers already have fan ducts and not just naked part-cooling fans, the fan duct only pushes air from one side of the nozzle. Using a more circular fan duct that surrounds the nozzle can improve parts’ quality, especially around overhangs where cooling is critical.
This semi-circular fan duct can screw onto the existing part-cooling fan’s attachments once you take off the old one. This model is the designer’s third revision of a fan duct for the Mega Zero after concluding that a fully-circular one was less effective. The designer listed that they used a 0.15-mm layer height and a 30% infill density to print the model in PETG with no supports activated.
- What it does: Cools printed parts more effectively as filament comes out of the nozzle
- Compatibility: Mega Zero, Zero 2.0
- Parts needed: 3D printed parts
- Approximate cost: $1
- Where to get it: Antoxyn via Thingiverse
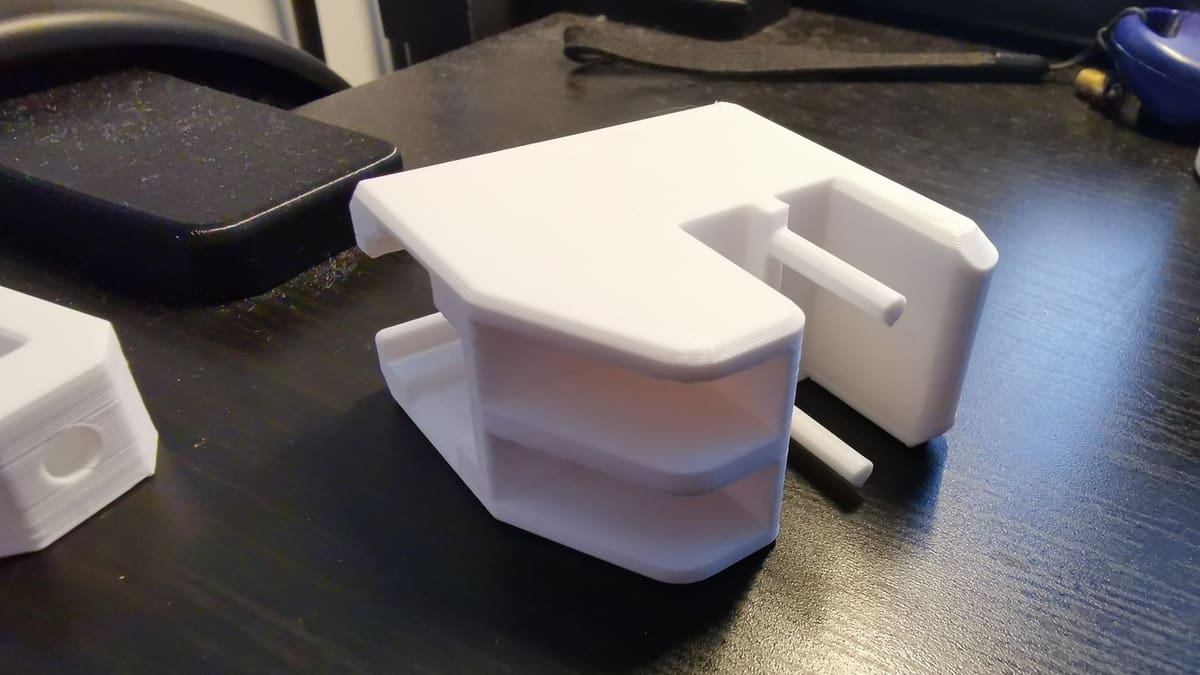
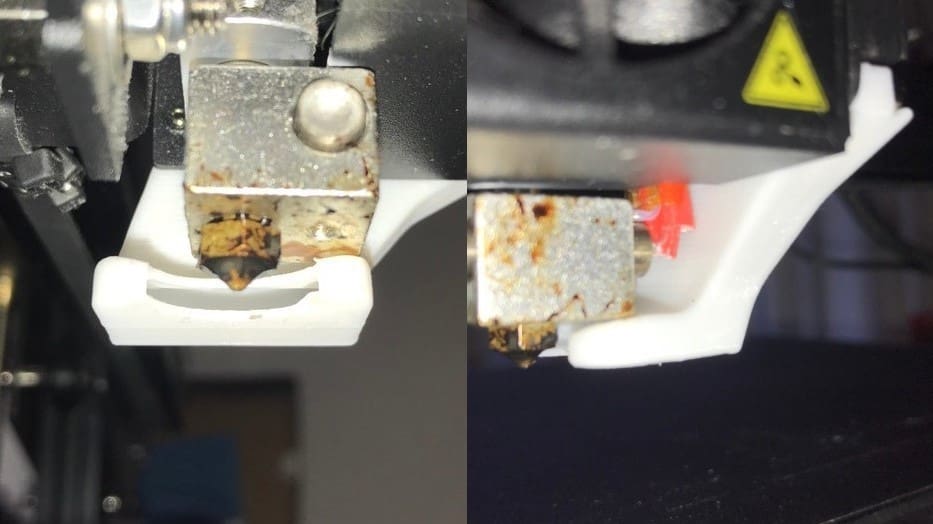
Hot End
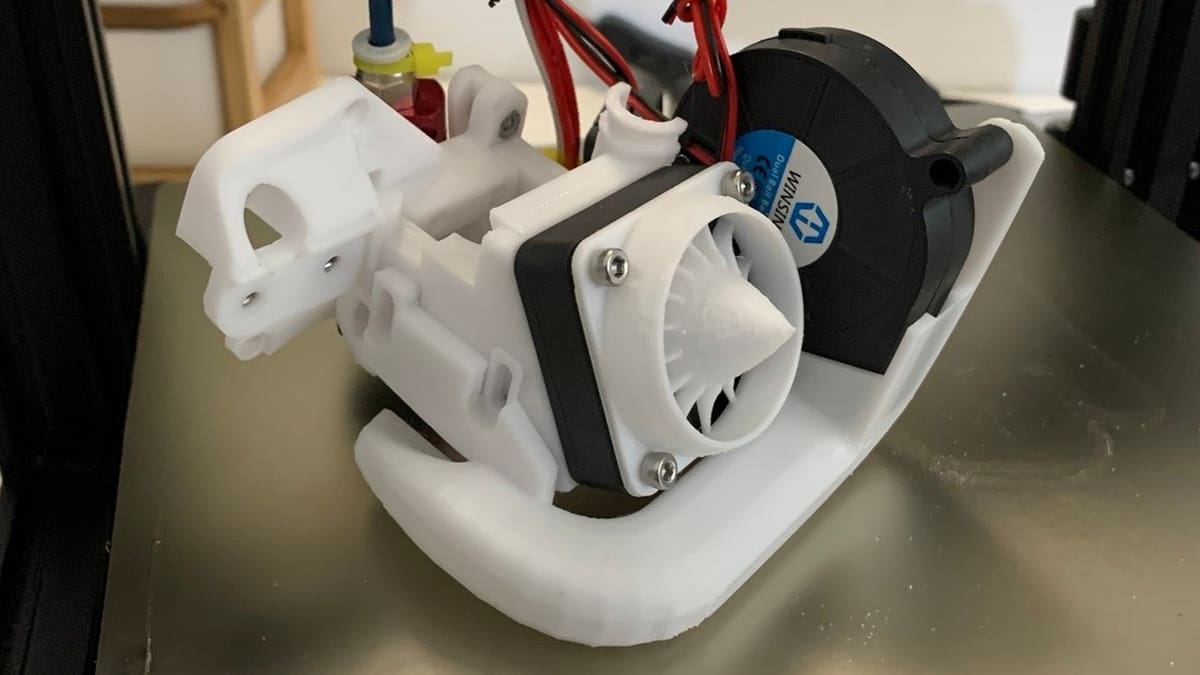
The hot end on the Mega Zero printers is pretty decent, but it’s limited to a 255 °C temperature, meaning you might not be able to print with certain filaments. If you want to increase your hot end’s temperature range, you can switch to the classic and popular E3D V6 hot end, capable of achieving temperatures around 285 °C. The V6 has become a new standard for 3D printer hot ends due to its reliability, open-source design, and compatible hardware.
While the E3D V6 hot end doesn’t fit right on the Mega Zero printers, you can print the well-known HeroMe Gen5 printhead as well as this Mega Zero adapter to fit the V6 hot end on your printer. The HeroMe printhead, as seen in the image above, is meant to work with a 5015 radial blower fan, which you might want to consider purchasing, as they provide great cooling when used on this printhead. For this print, the designer used a 0.1-mm layer height, 25% infill density, and supports to print the adapter plate in PETG.
- What it does: Allows for printing at higher temperatures, provides better cooling than the stock printhead, allows for other upgrades
- Compatibility: Mega Zero, Zero 2.0
- Parts needed: E3D V6 hot end, fan (optional), 3D printed parts, screws, nuts
- Approximate cost: $60-$75
- Where to get it:
- Printhead: mediaman via Thingiverse
- Adapter: Calvin_MegaZero via Thingiverse
- Hot end: Various retailers
Capricorn PTFE Tubing
The stock PTFE tube (also known as the Bowden tube) has been known to cause some issues with hot end jams and extrusion on the Anycubic Mega printers. You can replace the lower-quality stock PTFE tube with one from Capricorn, a company that specializes in making high-quality Bowden tubes.
Capricorn’s PTFE tube for 1.75-mm filament is known to provide a tighter fitting around the filament. This reduces the chance of incorrect extrusion or jams in the hot end. And the good news is that it’s compatible with both versions of the Anycubic Mega Zero.
To install the tubing, simply remove the old tube and insert both ends of your Capricorn tube into the existing fittings on your printer. You can also choose to purchase Capricorn’s own PTFE fittings and install those if you want.
- What it does: Reduces friction when filament moves from the extruder to the hot end
- Compatibility: Mega Zero, Zero 2.0
- Parts needed: Capricorn 1.75-mm PTFE tubing
- Approximate cost: $12
- Where to get it: Amazon
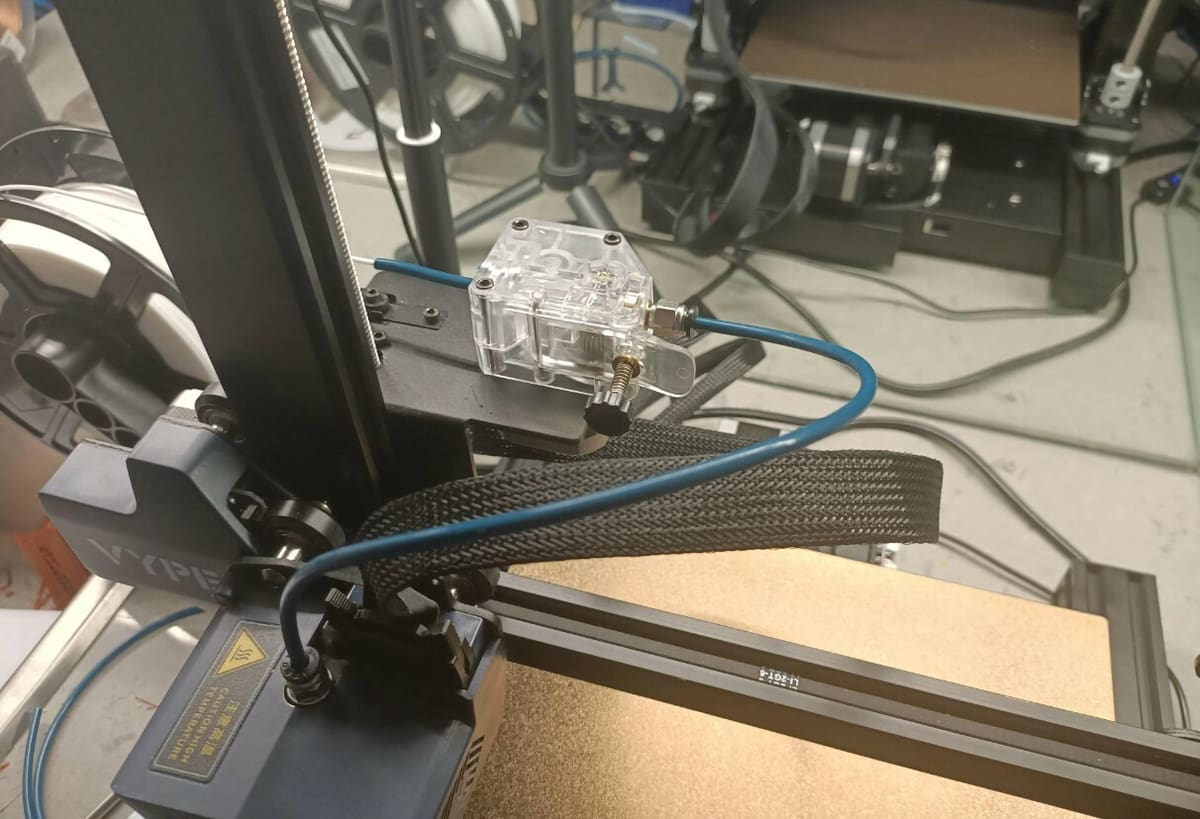
Direct Extruder
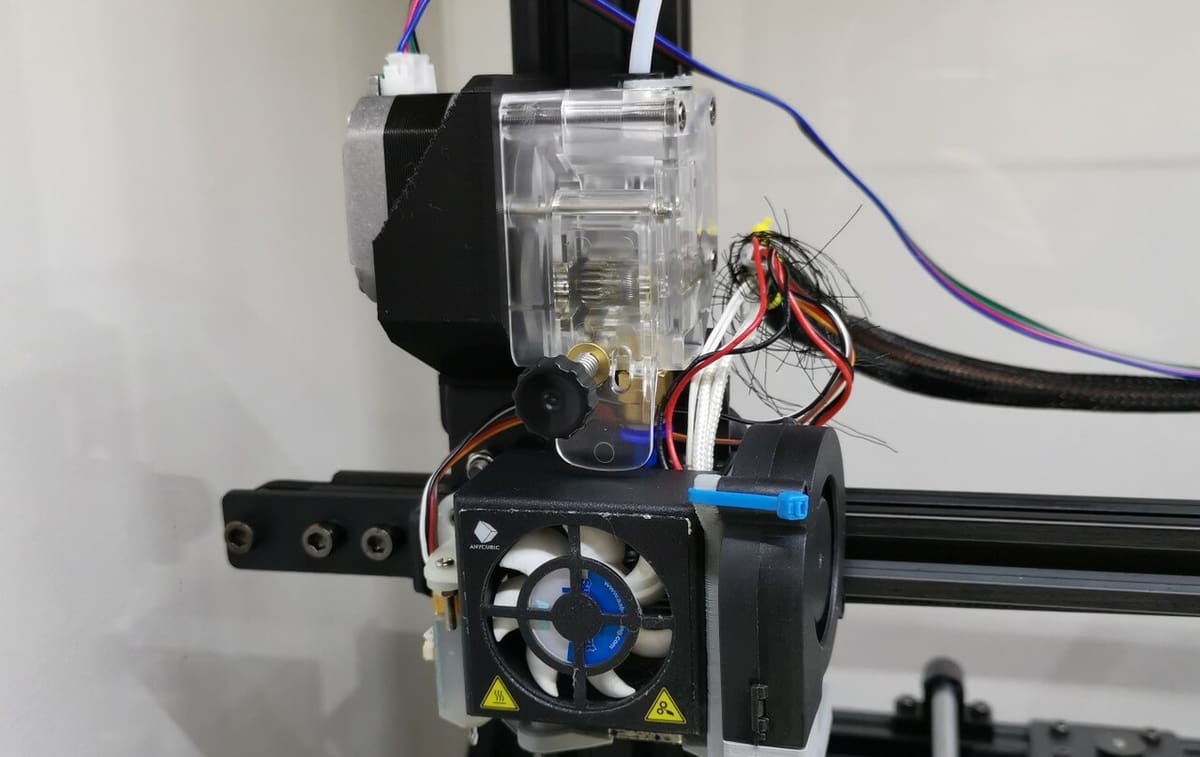
Both versions of the Anycubic Mega Zero have Bowden extruder setups, meaning that the extruder assembly is separated from the hot end by a PTFE tube. This setup is easy to work with and inexpensive, but if you want to print with flexible filaments, you’ll want a direct extruder configuration. Direct extruders are known for better retraction, which can help to reduce stringing on prints.
You can convert the extruder setup on your stock Mega Zero (2.0) printer by printing a few mounting pieces, designed by an avid Mega Zero user. On this project page, you’ll find the single 3D printable model you need to move the stock extruder to be directly over the stock hot end. Additionally, the designer provided an altered version of the mount to fit printers that have an E3D V6 hot end.
As for installing the mount, you can use the tools that came with your Anycubic printer. All you have to do is remove a few bolts, slide the mount on, and move the extruder motor and drive assembly.
- What it does: Moves the extruder directly over the hot end
- Compatibility: Mega Zero, Zero 2.0
- Parts needed: Stock extruder components (nothing else)
- Approximate cost: $1
- Where to get it: Calvin_MegaZero via Thingiverse
Lead Screw Stabilizer
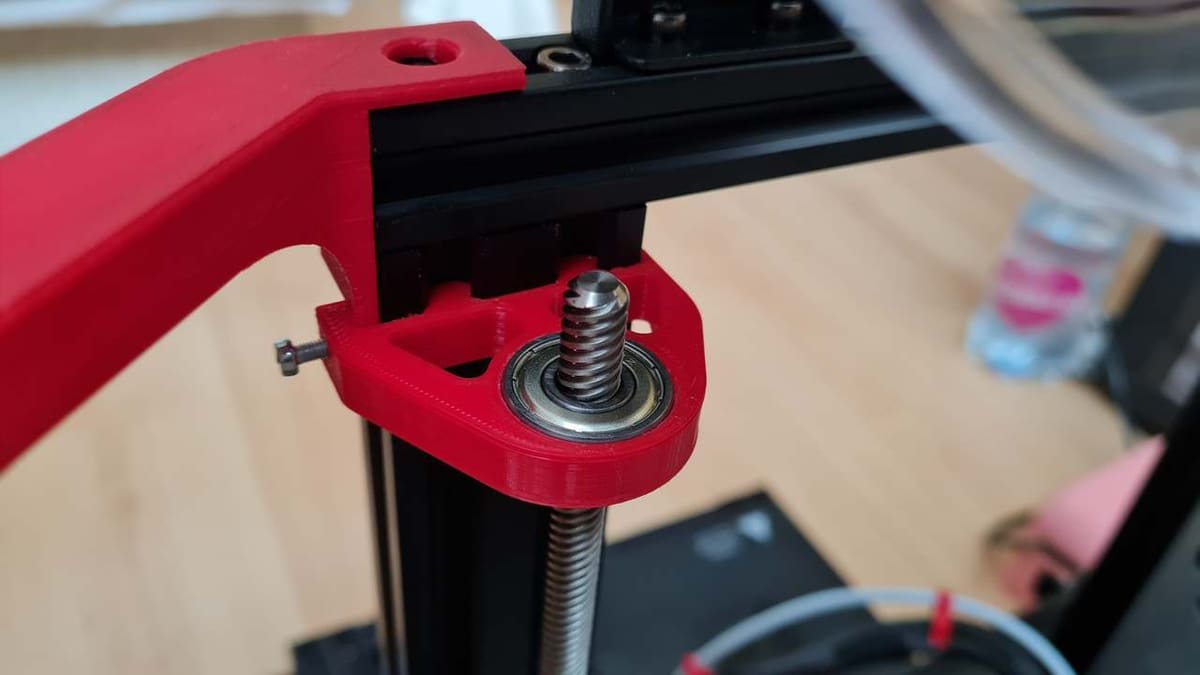
A lead screw stabilizer is a component that goes near the top of the Z-axis lead screw and holds it in place to make sure it doesn’t bend or shake. This can prevent Z banding and other Z-axis wobble-related problems, which can improve print quality.
This upgrade uses a 3D printed part and a skateboard bearing to hold the lead screw in place while allowing it to rotate easily. The stabilizer is also easily mountable, as it slides right into the V-slot extrusions on the printer’s frame. To secure the part, you’ll insert a screw into the model’s side (there’s a specific hole for this) and tighten its grip to the extrusion, as seen in the image above.
- What it does: Stabilizes the Z-axis lead screw to prevent Z banding and similar issues
- Compatibility: Mega Zero, Zero 2.0
- Parts needed: Bearing, 3D printed part, screw
- Approximate cost: $3-$5
- Where to get it: drogica via Thingiverse
Dual Z-Axis Lead Screws
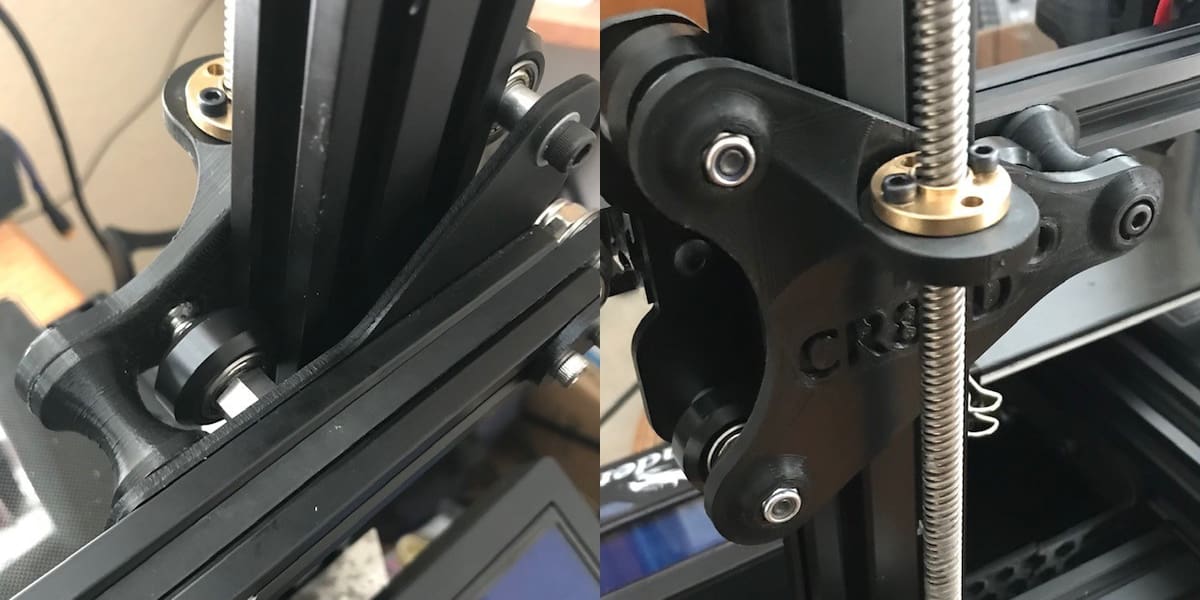
The Mega Zero printers have many features, but only one Z-axis lead screw and stepper motor, meaning that the X-axis gantry is only pushed on one side of the printer’s frame. While this system is less expensive (fewer parts are needed) and works adequately, having two Z-axis stepper motors further supports the X-axis gantry. Specifically, an additional motor prevents one side of the X-axis gantry from sagging or being uneven, which will vary the nozzle-to-bed distance across the bed.
Upgrading your Mega Zero (2.0) to have two Z-axis motors will require a fair amount of new parts, including a stepper motor, motor cable, lead screw, and more. This upgrade isn’t as popular as more simple options for other printers, but it can significantly improve the machine’s print quality. Based on one user’s experience, you can use the 3D printable Z-axis motion carriage below, even though it’s meant for the Ender 3.
- What it does: Keeps both ends of the X-axis gantry at the same height to prevent print quality issues
- Compatibility: Mega Zero, Zero 2.0
- Parts needed: Bearings, 3D printed parts, Z-axis lead screw, lead screw coupler, screws, and more
- Approximate cost: $50-$75
- Where to get it: CR83D via Cults (more information on Reddit)
Linear Rails

Most budget 3D printers, including both versions of the Anycubic Mega Zero, use aluminum extrusions and bearing rollers to facilitate the movement of the print bed and printhead. But a much smoother motion style is linear rails, which consist of a metal ball-bearing carriage that runs along sturdy metal rails. Switching to linear rails on the Mega Zero is a bit tricky (and expensive) compared to the other options, but it can reduce effects like ringing and improve the overall quality of prints.
We recommend using already-tested projects for the process, such as this one for the X-axis and this one for the Y-axis linear rail installation. You’ll need a fair amount of different parts for this upgrade, including linear rails, a few 3D printed mounts, screws, carriage blocks, and more.
- What it does: Provides smoother motion for the X- and Y-axis moving components on your printer (improves print quality)
- Compatibility: Mega Zero only
- Parts needed: Linear rails, 3D printed mounts, heated inserts, screws, T-nuts, carriage blocks, and more (see project pages for the full list)
- Approximate cost: $150
- Where to get it:
- X-Axis: djos_1475 via Thingiverse
- Y-Axis: foureight84 via Thingiverse
Heated Bed
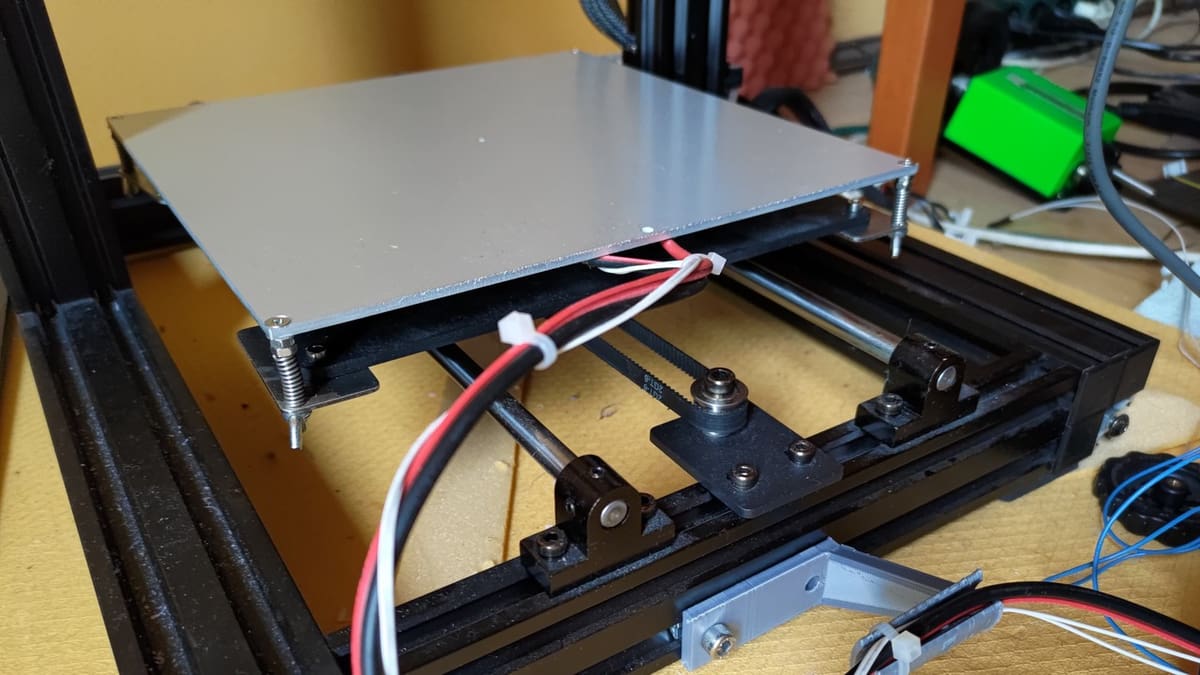
One of the biggest misses of the Mega Zero – something that Anycubic remedied with the Zero 2.0 – is a heated bed. Many consumer 3D printers have heated beds nowadays, and they provide sufficient first layer adhesion for all materials to reduce warping. Additionally, a heated build platform broadens the scope of materials you can print because some materials require a heated bed.
Many community members have added heated beds to their original Mega Zero to enhance the printer’s capabilities. This upgrade is definitely no walk in the park in terms of installation, but the designer has provided great instructions with images on the GitHub page.
This printer modification also costs more than some of the other ones on this list, as you’ll need some extra hardware (screws), 3D printed parts, a 12-V power supply, a 12-V heater pad, and more. You can check the bill of materials and tools list on the project’s GitHub page.
Another option for this upgrade can be found on Thingiverse, and it uses many of the same materials but has more instructions (YouTube videos). This project has also been updated and added to, which is a good assurance that it’s been tested.
- What it does: Adds a heated bed to your machine, allowing you to print with more materials
- Compatibility: Mega Zero only
- Parts needed: Bed heater pad, power supply, screws, printed parts, and more
- Approximate cost: $75-$100
- Where to get it:
- ztipnis via GitHub
- AdaptedMachining via Thingiverse
Enclosure
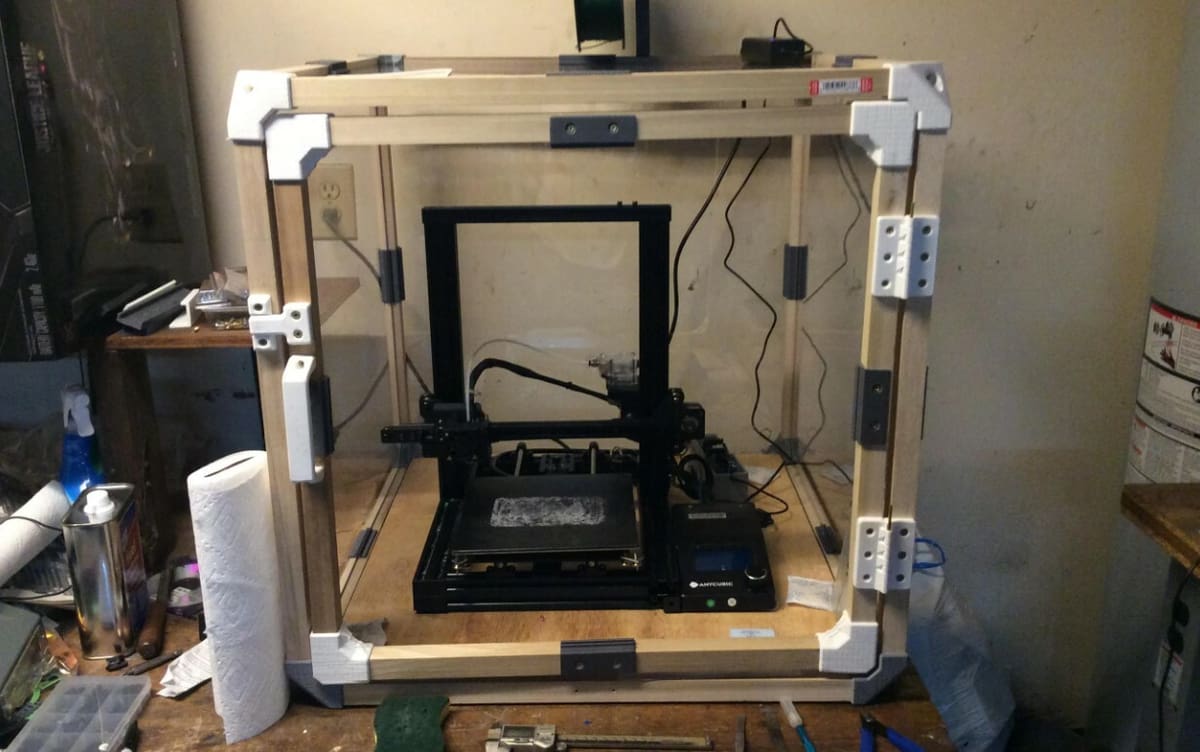
One of the biggest flaws people point out about the first version of Anycubic Mega Zero is that it can’t print ABS. But, even though the Mega Zero 2.0 has a heated bed, it also can’t print high-quality ABS models because it lacks an enclosure. As such, an enclosure is a great upgrade to your Mega Zero printer if you’re interested in printing ABS, ASA, or other high-temperature materials.
An enclosure will trap heat around your printer and keep air drafts out, which helps to prevent high-temperature materials from deforming mid-print. While enclosures are most useful if you’re printing materials like ABS, you can also use them to simply improve the print quality of regular materials like PLA.
You can either build or buy an enclosure, which costs anywhere from $50 to $150. If you want to skip the build process, a purchasable option such as Creality’s official enclosure (for the Ender 3) would be a good option to consider. The Mega Zero will fit either the medium or large size of the enclosure.
If you want to DIY your enclosure, you have a lot more options and can customize your setup completely. For low-budget options, you can use something as simple as a trash bag or a photography tent. For a more sturdy option, though, you can make an enclosure for your Anycubic printer out of wood or acrylic panels.
- What it does: Traps heat around your printer to improve the print quality, especially for high-temperature materials like ABS
- Compatibility: Zero 2.0
- Parts needed: Purchasable enclosure; panels (e.g. wood), a door hinge, screws, and more for DIY options
- Approximate cost: $50-$150
- Where to get it:
- Buy: Various retailers
- DIY: Various sources
License: The text of "The Best Anycubic Mega Zero (2.0) Upgrades & Mods" by All3DP is licensed under a Creative Commons Attribution 4.0 International License.