
Bambu Lab H2D/Laser Full Combo Review: It’s Big, and Just Getting Started
Rating

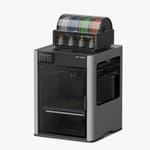
The long-anticipated next-gen Bambu Lab 3D printer is finally here, delivering on the demand for bigger, multiple extrusion capability, plus so much more with laser, cutting, and pen plotting. There's a lot to cover, so let's dive in!
Bambu Lab has made the unlikely very much a reality with the H2D, upgrading not only the 3D printing experience it set the benchmark for with its X1C, squeezing gains out of the system in every direction, but then adding more features, more functions, more possibilities for your making in the form of optional add-ons or the full Laser Edition package of the printer plus all tools.
Dual multi-extrusion is at the core of the base H2D 3D printer, offering a variety of ways it can impact your printing. Not only can it address some of the wastefulness of single-nozzle multicolor printing, but there are a handful of optional, native functions that are not 3D printing to add a little spice to your crafting.
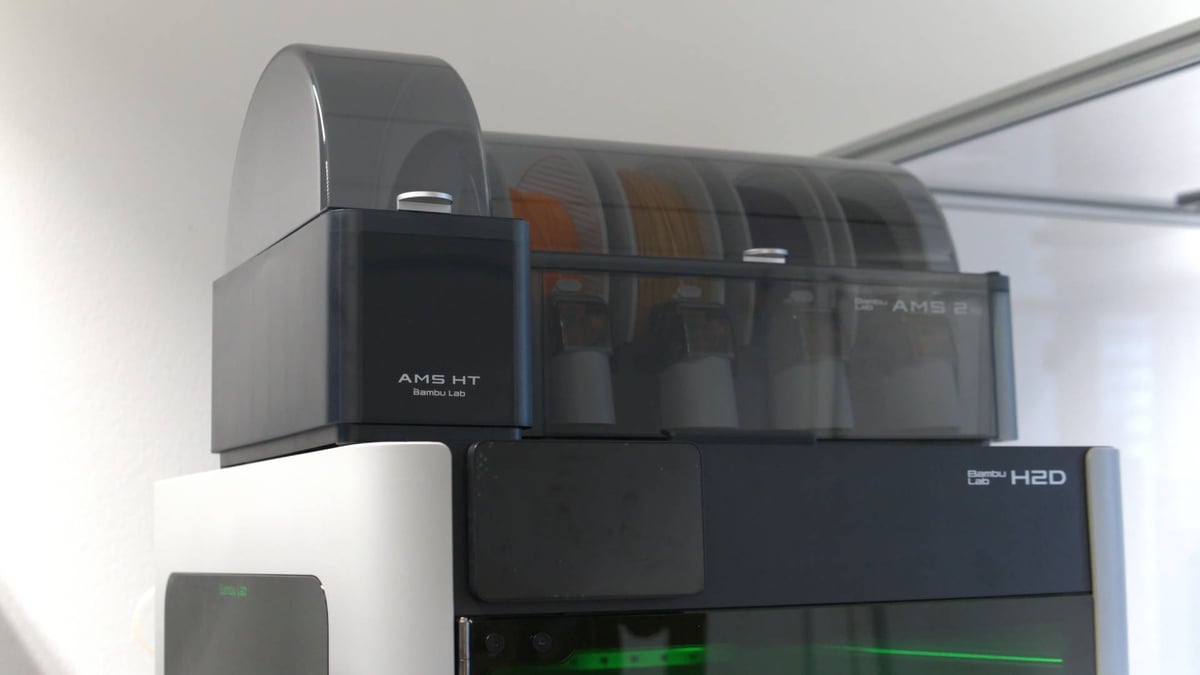
Where the company’s previous machines empowered a legion of flexi-dragon sellers, the fully kitted out H2D adds laser-cut wood trinkets and vinyl stickers to the mix, which could certainly be interpreted the wrong way to the 3D printing hardcore that simply wants more 3D printing–bigger, and faster. Hold your horses, though, cowboy, because the base H2D 3D printer does present a leap forward of sorts, with an updated AMS adding the much-requested filament drying functionality, and an addition in the single-spool AMS HT, which caters specifically to fussy high-temp materials.
Add to that onboard features like the intelligent venting system, fast heating components, cameras upon cameras upon cameras (there’s a nozzle camera!), and more, and you’re left with a sophisticated multimodal-making tool that’s unlike any desktop 3D printer going right now.
It’s not magic, though; much of it is familiar, and our early experience is that while the software side of wrangling its new abilities is quite polished and intuitive, the printing is good, but not as set-and-forget as we’ve experienced with its predecessors (some of our larger prints turned out weak or partial failures). There are, seemingly, some wrinkles for Bambu Lab to smooth out.
Available in fits and starts since its March launch, with prices fluctuating for U.S. customers due to tariffs between the U.S. and China, at the time of updating this article in June, the H2D is finally, fully available in four flavors:
- Standard H2D 3D printer ($1,999)
- H2D Combo including AMS 2 Pro ($2,299)
- H2D Laser Full Combo with 10W laser module, includes AMS 2 Pro ($2,899)
- H2D Laser Full Combo with 40W laser module, includes AMS 2 Pro ($3,649)
The Tech
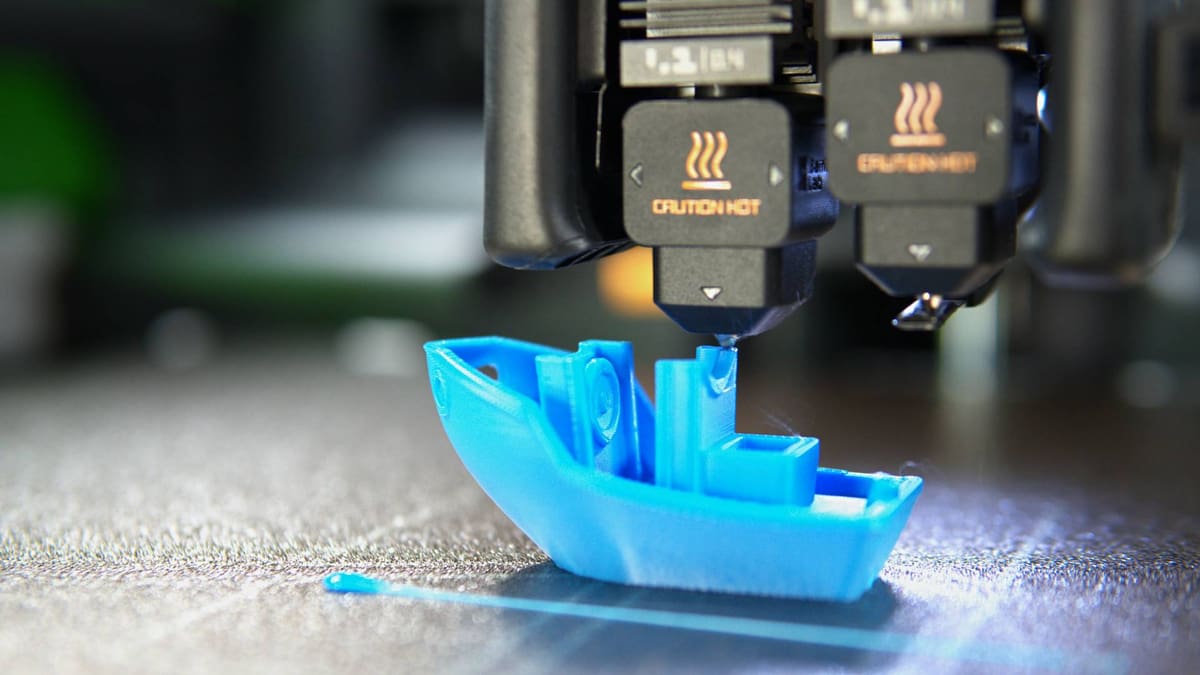
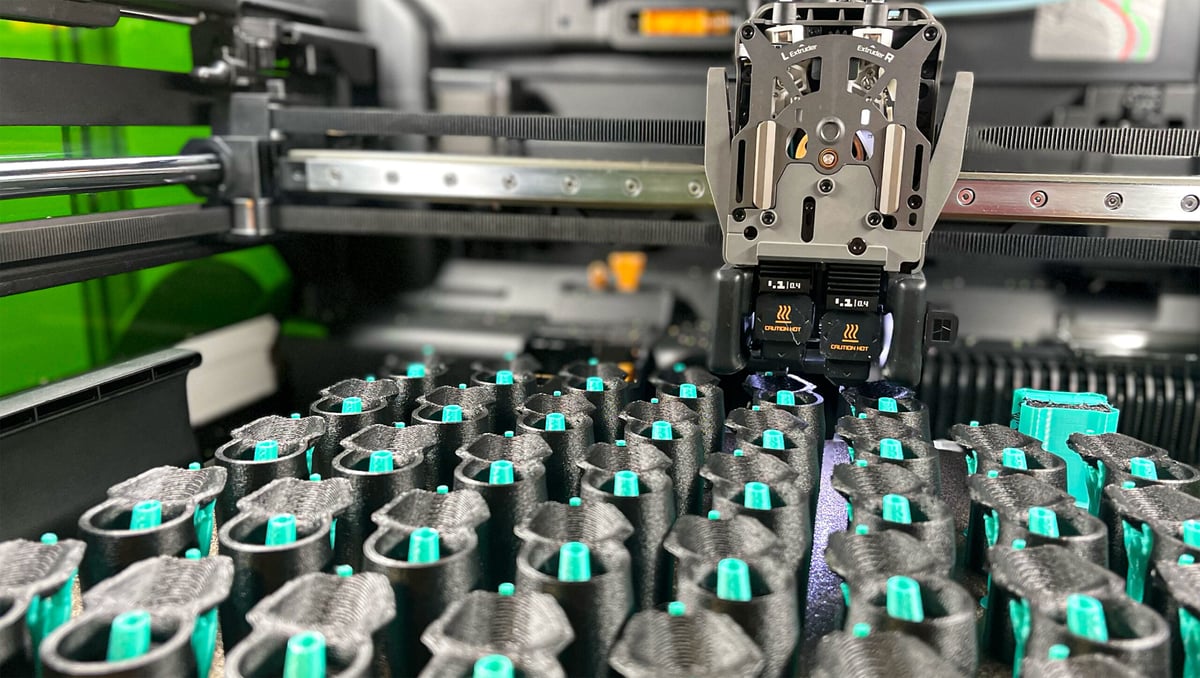
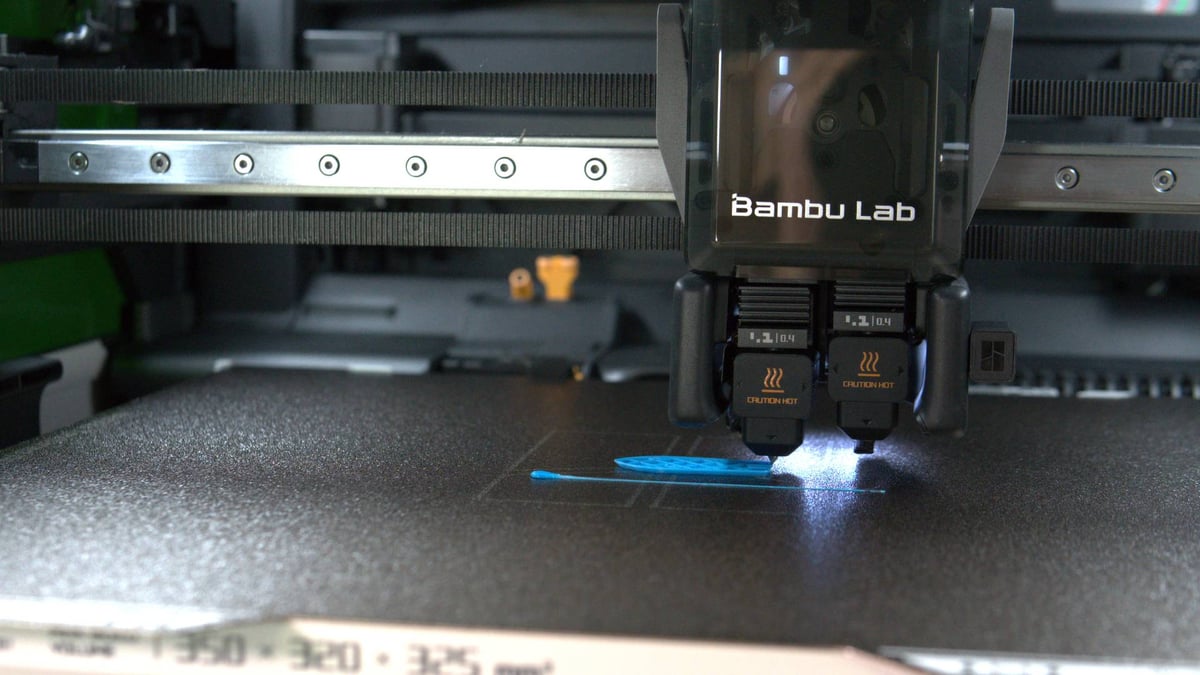
Under the hood, the H2D boasts 1,000 mm/s top print speed and 20,000 mm/s acceleration for the large, dependent dual-extrusion print head. That is to say, it’s throwing two hot ends side-by-side in one printhead. Each hot end can be hooked up to an AMS – the original, or the new AMS 2 Pro and AMS HT – and whizzes around the 350 x 320 mm build area at speed. Organizing the multitude of actions involved in a dependent dual-extrusion system here is the H2D’s clever all-in-one actuator that pulls triple duty in aligning the filament path, positioning the active nozzle, and swinging a nozzle blocker in place to prevent oozing from the idle nozzle.
As with any claims to speed, this depends on the material, its flow characteristics, and the nozzle it flows through. The company lists the H2D’s stock hot end at a high flow of 40 mm³ using ABS in lab conditions. That’s fast, but also not really reflective of regular usage. The H2D is as quick as you’ll be used to from the company’s past machines, sometimes faster, but it’s not a mind-blowing generational leap that some may have hoped for.
The “poop chute” remains in the H2D. Those hopeful for an ingenious solution to nozzle purge material will be found wanting. Using the H2D with a single AMS for multicolor prints is only marginally different from the X- and P- series machines. You still get a lot of “poop” purge material ejected from the rear of the machine (or purged into the print). So far, so familiar. Where the H2D stands apart in Bambu Lab’s lineup is with its dual hot ends.
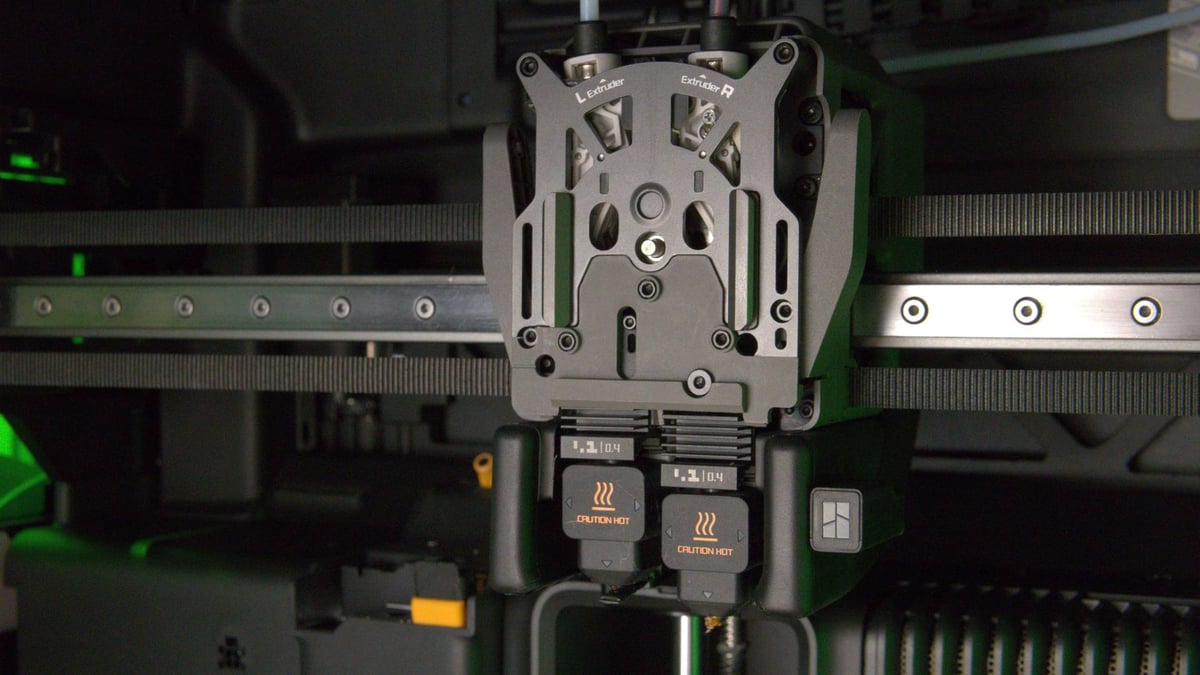
The system is similar in concept to how UltiMaker and Snapmaker approach dual extrusion, with easily removable hot ends sitting in parallel. They heat independently, can be swapped out for hot end assemblies with different nozzle sizes for creative strategies in your prints. These are held in place by a cage that can easily be opened by hand, just like the Bambu Lab A-series printers.
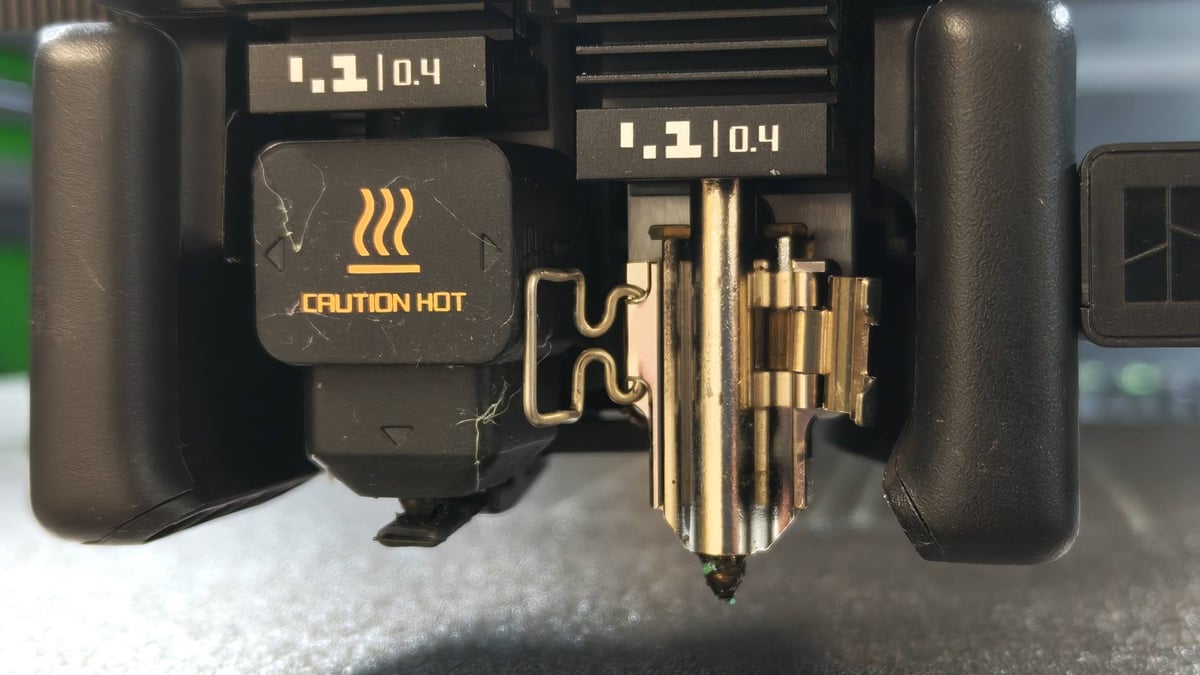
Each of the two hot ends can be fed filament in a couple of ways. There are two default filament paths via a permanent buffer integrated into the rear of the printer, feeding each hot end respectively. There is also a dedicated opening for you to feed flexible filament from the printer’s external spoolholder.
As best we can tell, Bambu Lab’s goal with this arrangement is flexibility. While it does not “fix” the waste of multicolor printing, improvements do come in an optimized purge tower and the ability to task one nozzle with dedicated support material duty, or assign the most purge-heavy material of a multicolor print to its own nozzle. Flexible materials have to be handled differently, though, feeding through a dedicated (and awkward to reach) port on the back of the printer, and requiring some creative AMS or filament dryer positioning to sort out the filament path. This is possibly the most frustrating aspect of printing with the H2D.
Flexibility is king here, in more ways than one, and the test prints provided by Bambu Lab push this message to the fore. The obvious machine to benchmark against for this kind of multi-material printing is the Prusa XL, which still handles jobs using three or more filaments faster and with less waste. When printing only two materials, though, the gap has closed significantly.
A-Series Ideas Carry Forward
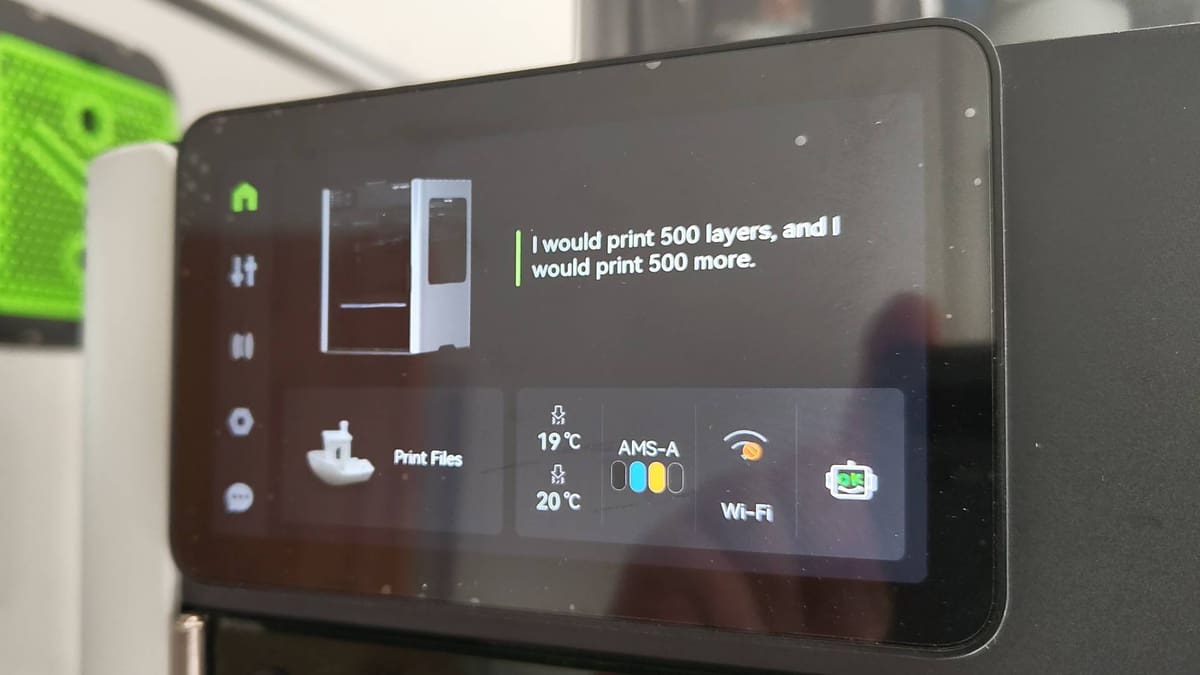
There are more than a few elements of the budget-conscious A-series visible beneath the surface of the H2D, from the UI and user-facing elements of the Health Monitoring System (HMS) to the slide-on external spool holder and, something we’re very happy about, the toolless quick-swap hotends. It goes a long way to explain Bambu Lab’s grand vision of a universal, no-barrier making appliance. Harking back to our review of the X1-Carbon, it’s more fresh thinking, and even less tinkerin’. The A1 Mini introduced a winking face to acknowledge systems as a-ok, and the H2D quips hackneyed pop culture lines at you on the printer’s dashboard between jobs.
What’s new goes much, much deeper. The H2D’s fully enclosed build smartly adapts to your job. Printing warp-happy engineering materials? The actively heated chamber kicks in and can warm it up to 65°C. Printing low-temp materials that don’t need a warm chamber? The H2D has flaps, and will open them automatically to let cooler air in so you don’t have to. It seems like an overengineered alternative to “just prop the door open”, but the reality is the filtered exhaust continues to eject scrubbed air out of the back of the printer while the optimal printing conditions can exist in the chamber. Such systems mean more moving parts, and moving parts can break, granted. The upshot is you don’t have to think about it, though.
If you use one of the H2D’s laser modules, the system adapts again, with inlets opening for air to be sucked in and everything vented out the back the printer through the provided ventilation duct. If you buy the optional smoke ventilation unit, it can sit at the end of the duct and scrub the smoke and particulates from the machine’s exhaust. It’s loud, but it makes it possible to operate the H2D in rooms with limited ventilation options. It’s all rather homogenous, and Bambu Lab has accomplished an impressive feat in getting all of the hardware systems and conditions to live harmoniously together as a natively enclosed product with no overhead on you to adapt.
Next Gen Upgrades
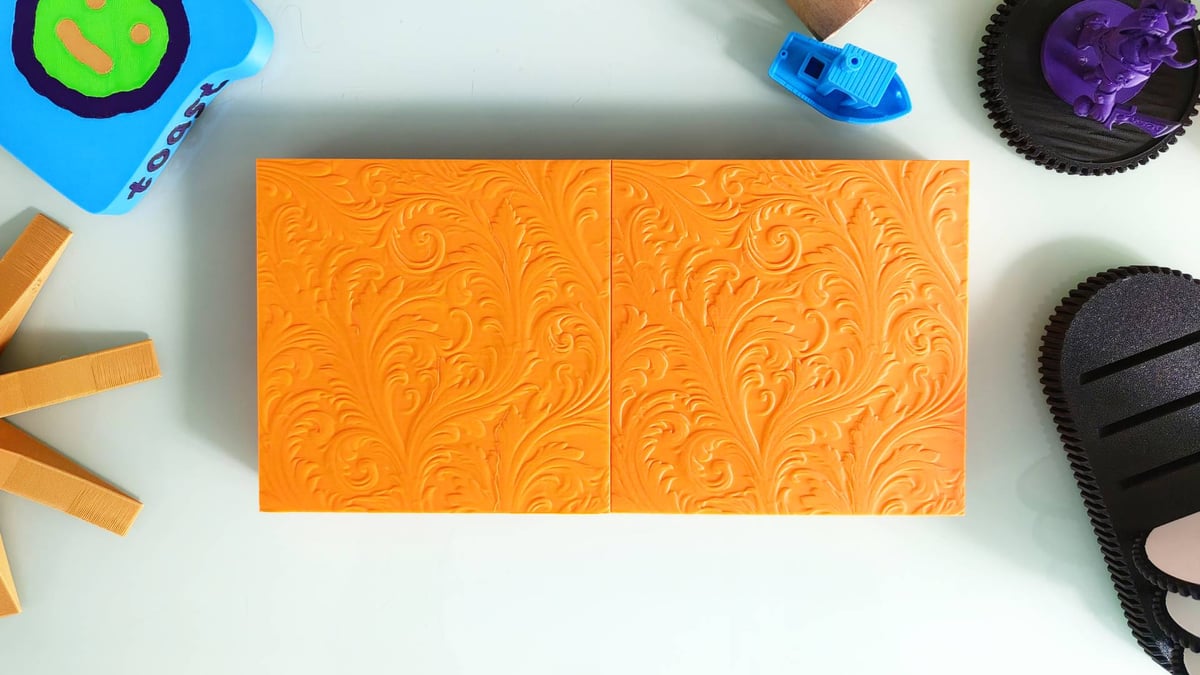
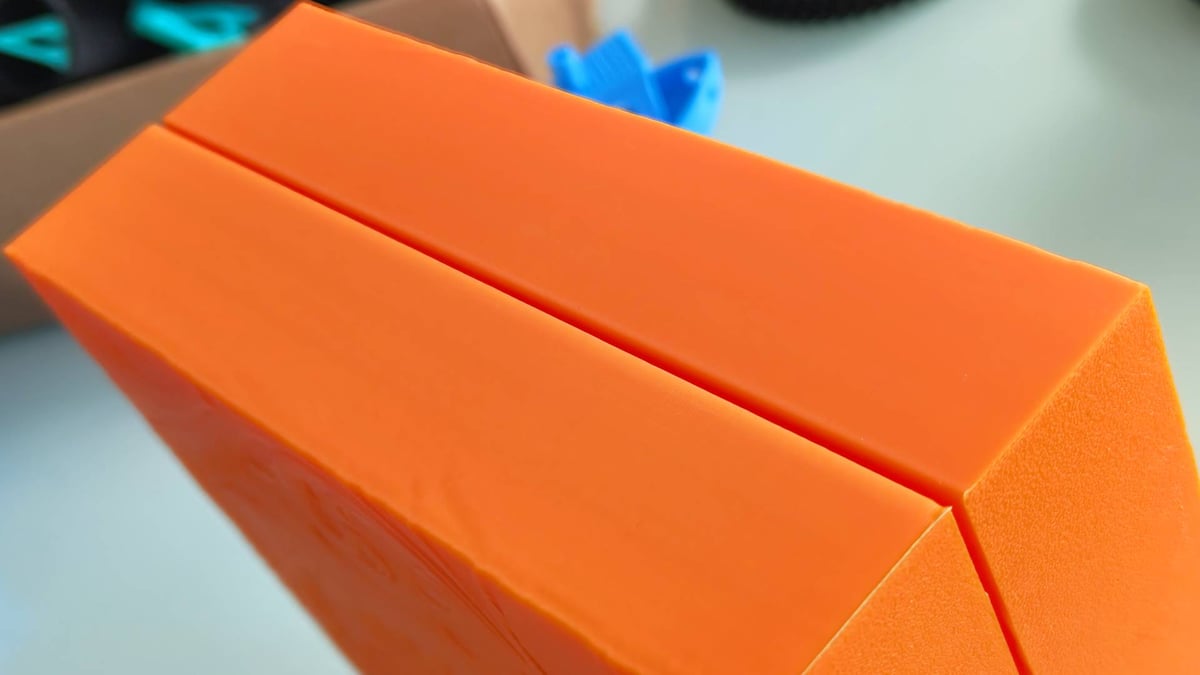
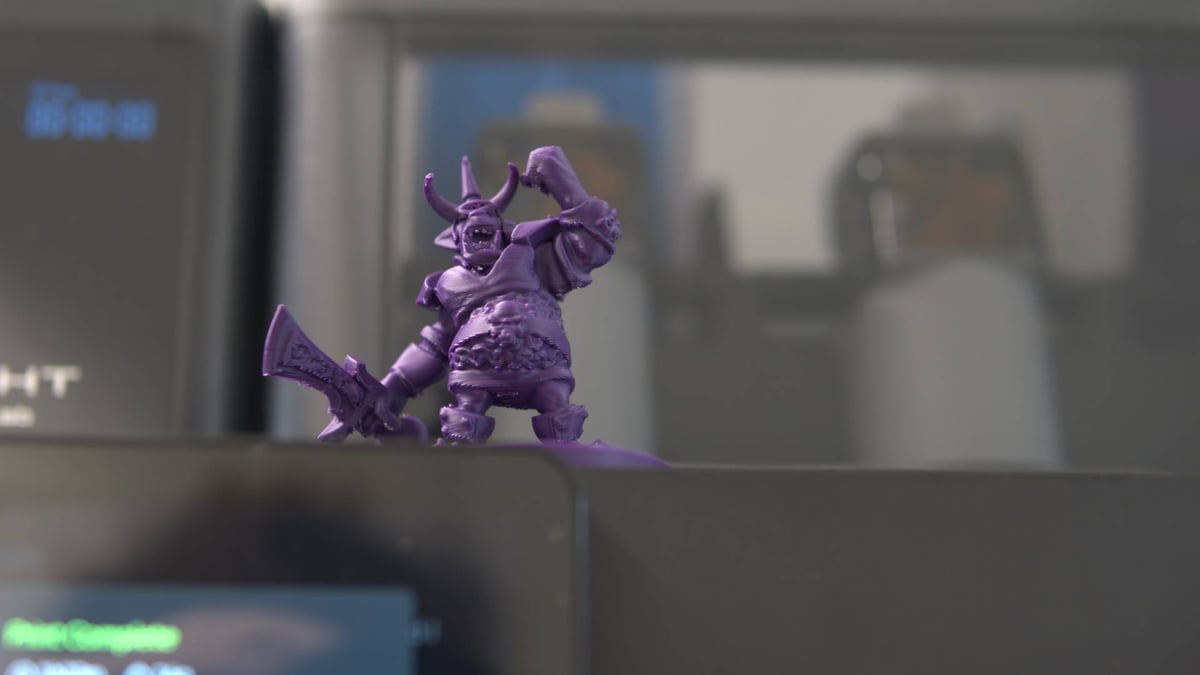
Pulling and pushing the filament is Bambu Lab’s all-new DynaSense extruder, which features a Bambu Lab-made servo motor, something the company intimates offers strong advantages over even closed-loop stepper motor analogs. Capable of knowing and controlling the torque, speed, and position of the motor, the DynaSense’s data presumably feeds into the H2D’s active adjustment of filament flow. The results speak for themself with the H2D producing, hands-down, the cleanest layer uniformity of any printer we’ve tested yet.
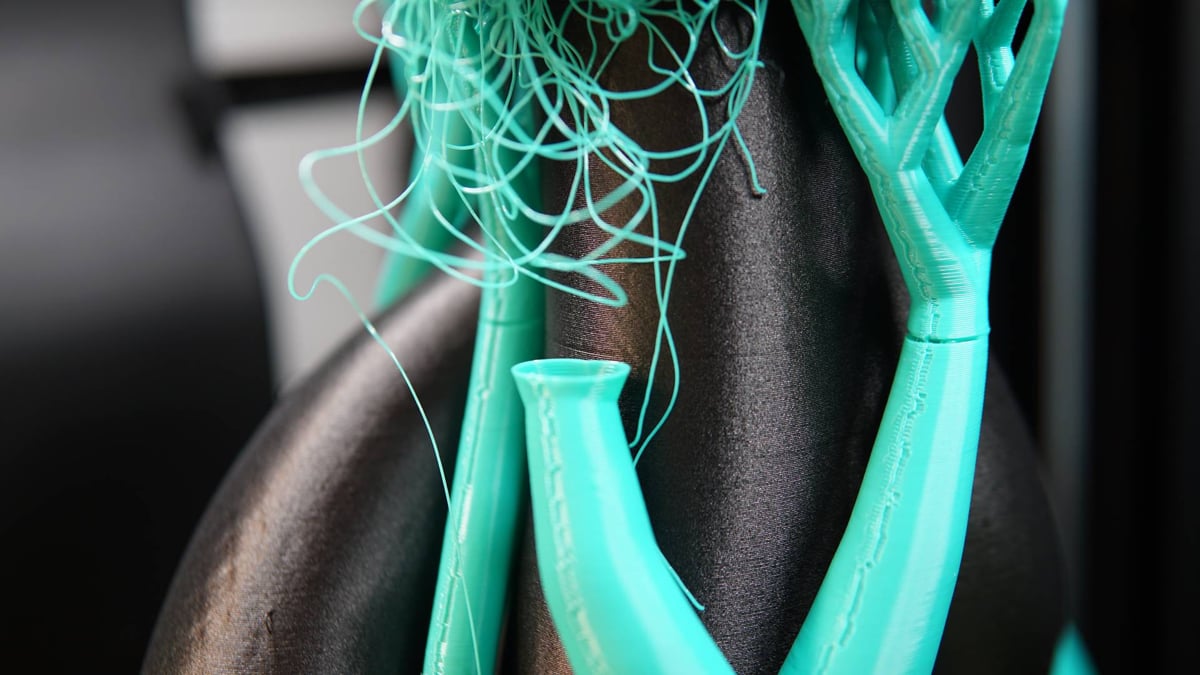
Don’t mistake this for us saying the H2D’s prints are always perfect – the design rules of 3D printing still apply, and the oh-so-smooth layer uniformity amplifies the rare occasion where some other type of defect presents itself. We found this case particularly when mixing materials and pulling flexibles from outside the machine.
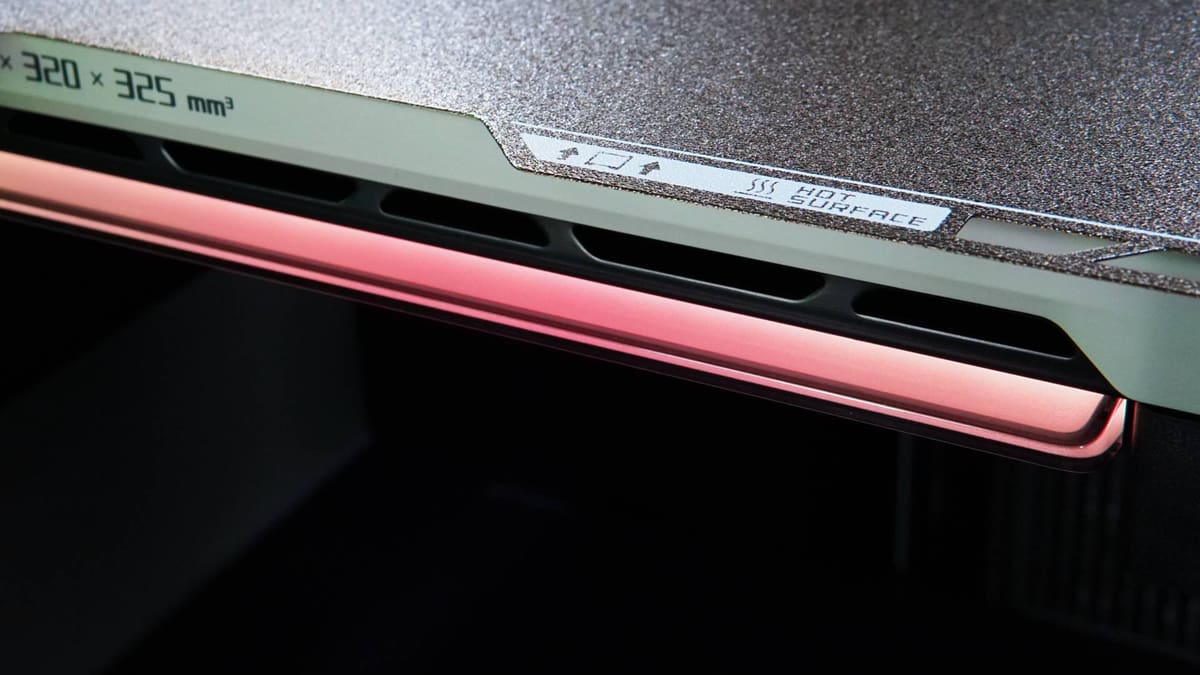
This is the biggest Bambu Lab printer to date. The H2D offers a 350 x 320 x 325 mm work envelope in total, though only 325 mm in the X-axis is printable when using a single nozzle. This reduces to 300 mm when using both nozzles. By our classification, this makes the H2D a medium-format desktop 3D printer. Larger than standard, but not large format.
The H2D loses the carbon fiber rods of its predecessors, opting for the torsional stability of a linear rail for the printer’s X-axis movement. The print bed heats quickly, too. (We understand it to be of similar power and heating speed as the $300 Elegoo Centauri Carbon, a printer we laud for its fast-heating abilities.)
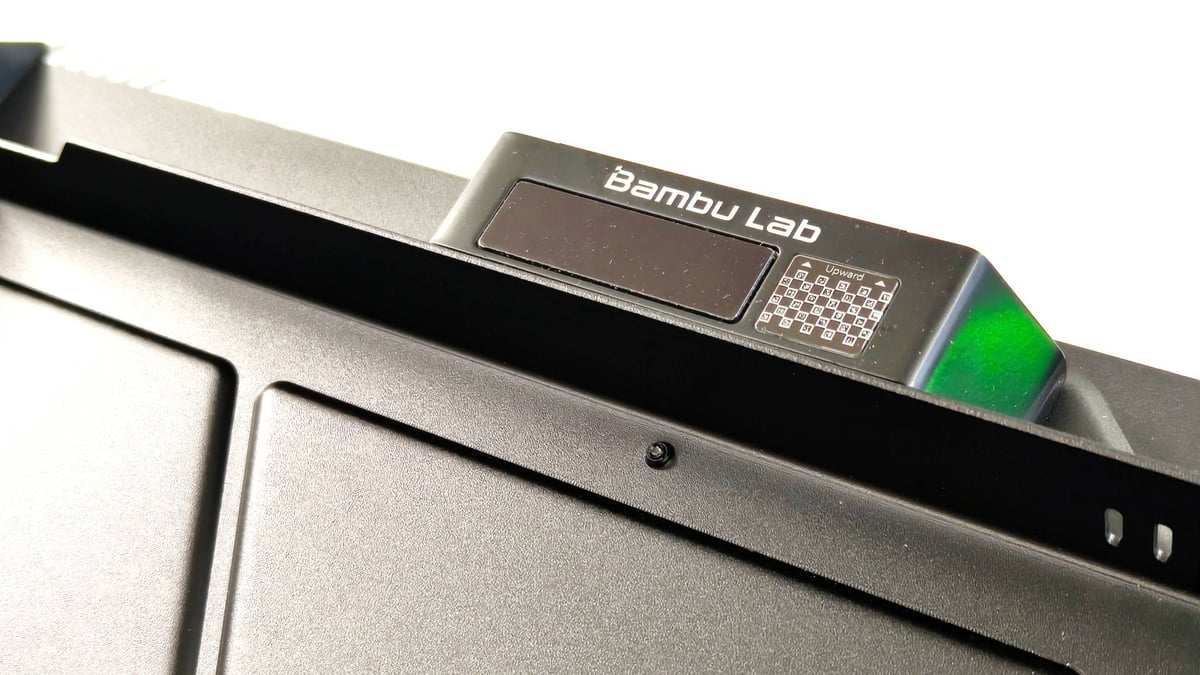
Bambu Lab leans into its software-based approach to tackling the variability in 3D printing hardware, with what it claims is “accuracy to a new level”. For non-dimensionally critical printing, you could use the H2D from the factory and be happy with the results.
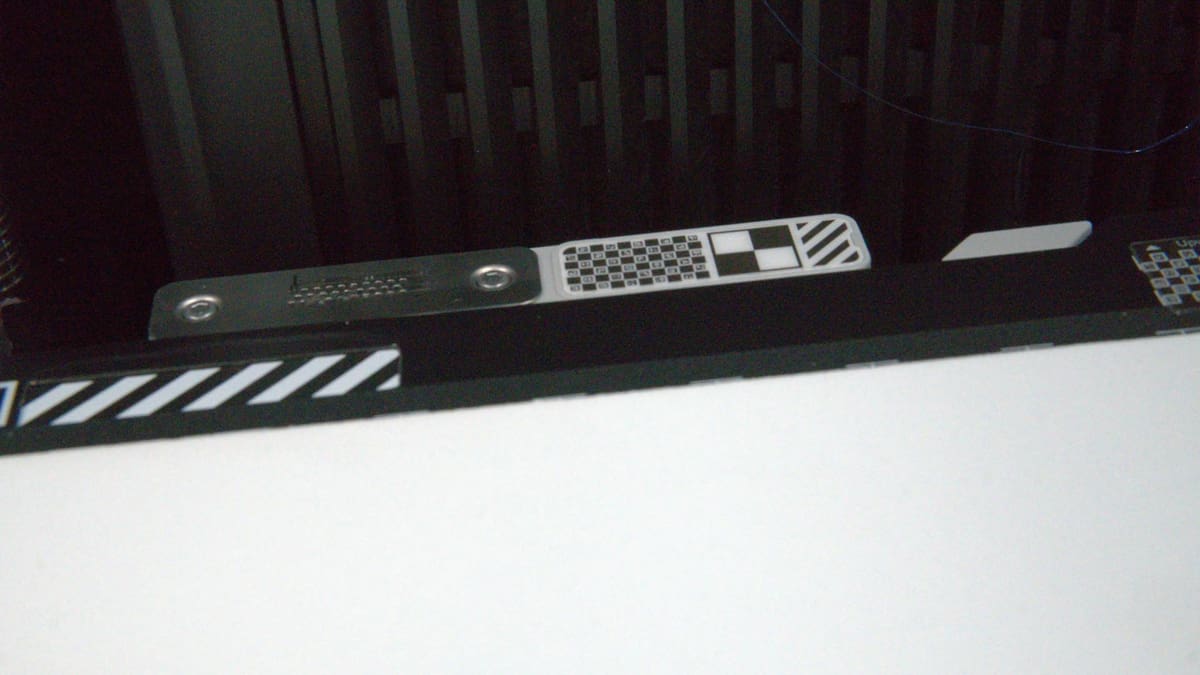
Or, you can squash virtually all dimensional deviation in your prints by running the motion accuracy calibration, which combines the optional encoder plate – a build-plate-shaped sheet covered in minuscule tracking marks, not unlike the tracking dots used in 3D scanning – with the H2D’s camera systems to feed the printer’s motion algorithms data.
This is said to result in more accurate movement. We haven’t tested it, so we can’t comment on any performance changes from using this special plate calibration tool.
The Printing
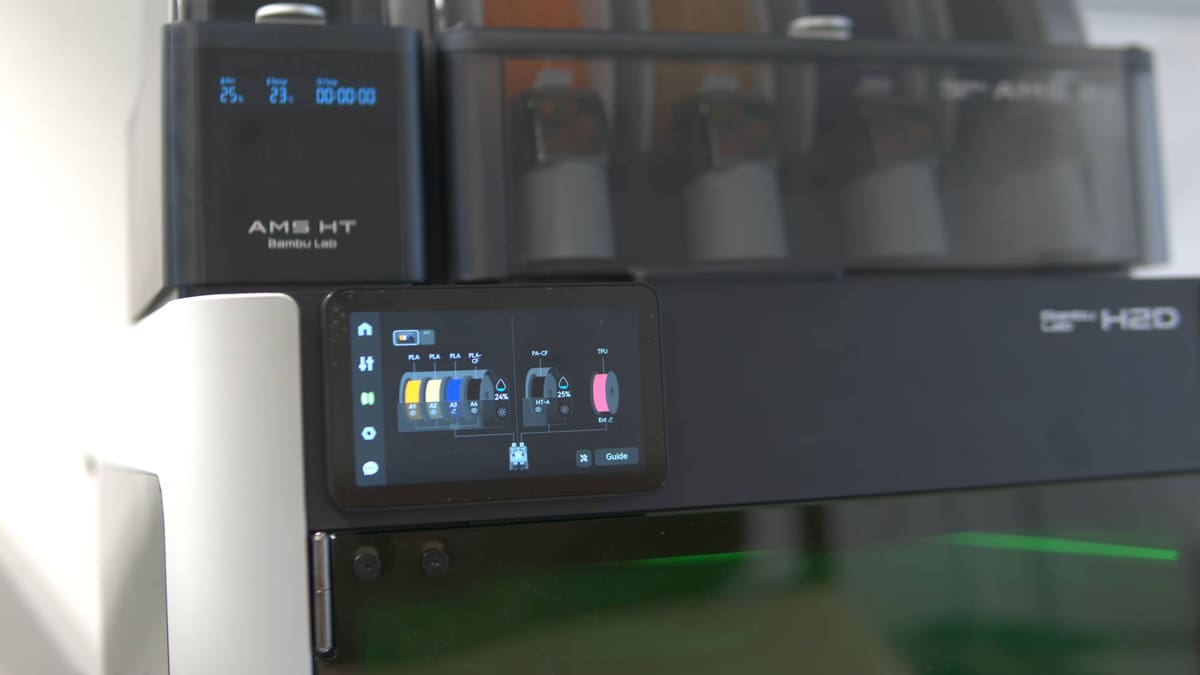
3D printing with the Bambu Lab H2D continues the ready-to-run simplicity that characterizes the brand. Within the H2D’s myriad configurations for filament – be it a bank of four in the AMS 2 Pro, alongside or replaced by a lone engineering-spec spool in the AMS HT, or perhaps some flexible material sitting on the printer’s external holder – one constant throughout is the software’s attempt to simplify going from the desired print as set on your build plate, and optimal usage of the filaments at your disposal.
To this end, the H2D introduces a filament grouping strategy wizard that unobtrusively sits behind the “print” button in the slicer. Go to slice your model, and one of three options is presented, which can be loosely classified as “reduce waste,” “reduce effort,” and “let me choose” outcomes of the slicing process.
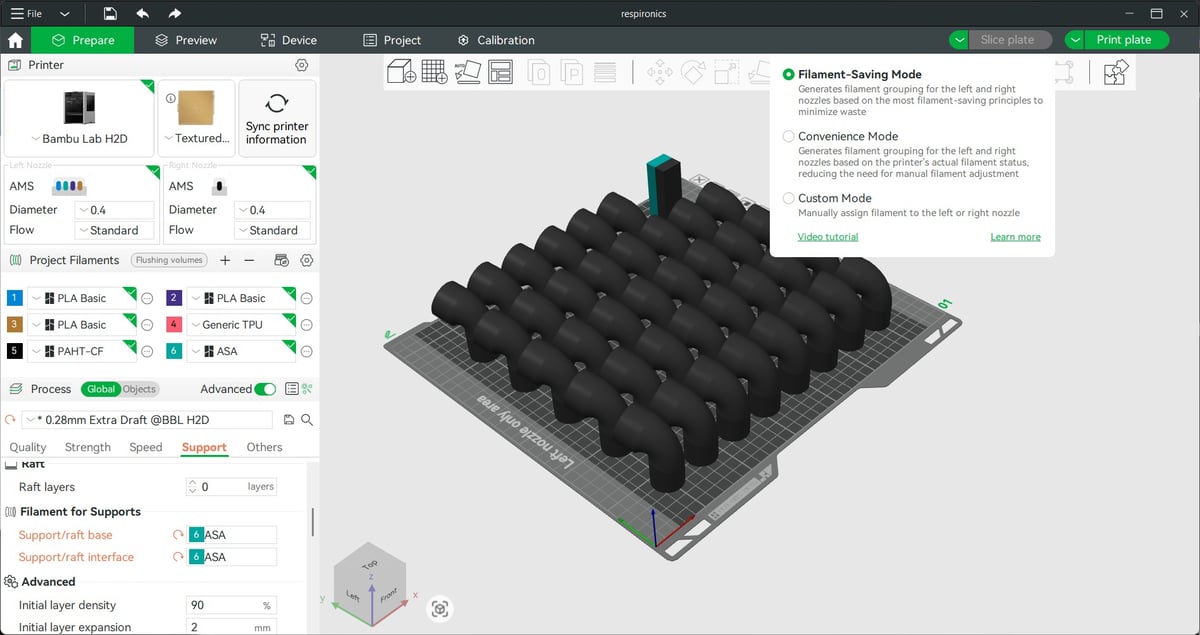
The filament-saving mode will assign your selected filaments for the print to the left or right nozzle, with the possibility of some action from you to move the filaments as prescribed. The result is that the print completes with as little waste as possible, be it from the primary material of a multicolor print getting a dedicated nozzle or a dedicated support nozzle, which will reduce much of the need to waste material on purging.
Alternatively, convenience mode matches filaments based on what is loaded where, when appropriate–no spool juggling required. Often, what you have loaded is already the most filament-efficient and convenient, since one prompt from the system then places the filament in optimal positions for future print jobs.
Lastly, you can simply override it all and manually assign materials as you wish.
We didn’t often have to mess with these options. The default behavior is usually spot on for what you intend to do, but having the gentle reminder that there may be alternatives, particularly if you change filaments frequently, is helpful.
Bambu Studio is more visual than it used to be, with pictures of the printers and bed plates helping to make a connection between what you’re doing and the hardware itself. Select your material (synchronize with the AMS if needed), choose the quality, tinker with fine advanced settings if desired, and hit print.
The printing results have mostly been excellent, with layer uniformity a standout feature. Trouble manifested itself when attempting a miniature using the 0.08 mm layer height, which requires more investigation before we can suggest solutions.
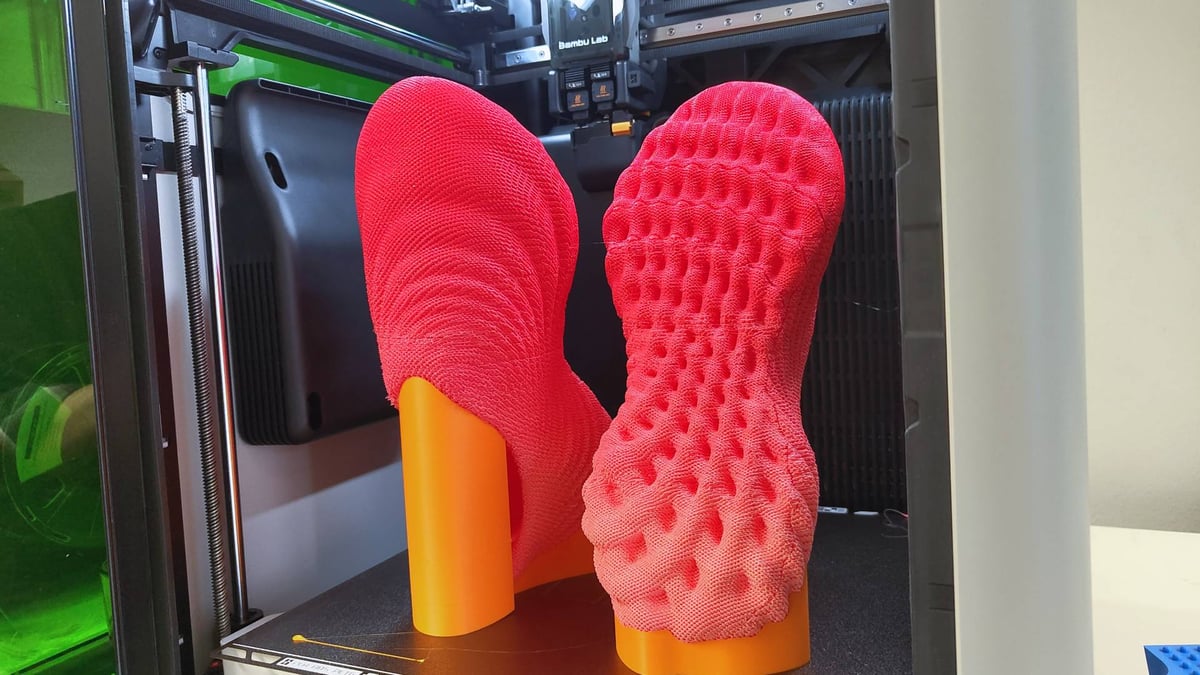
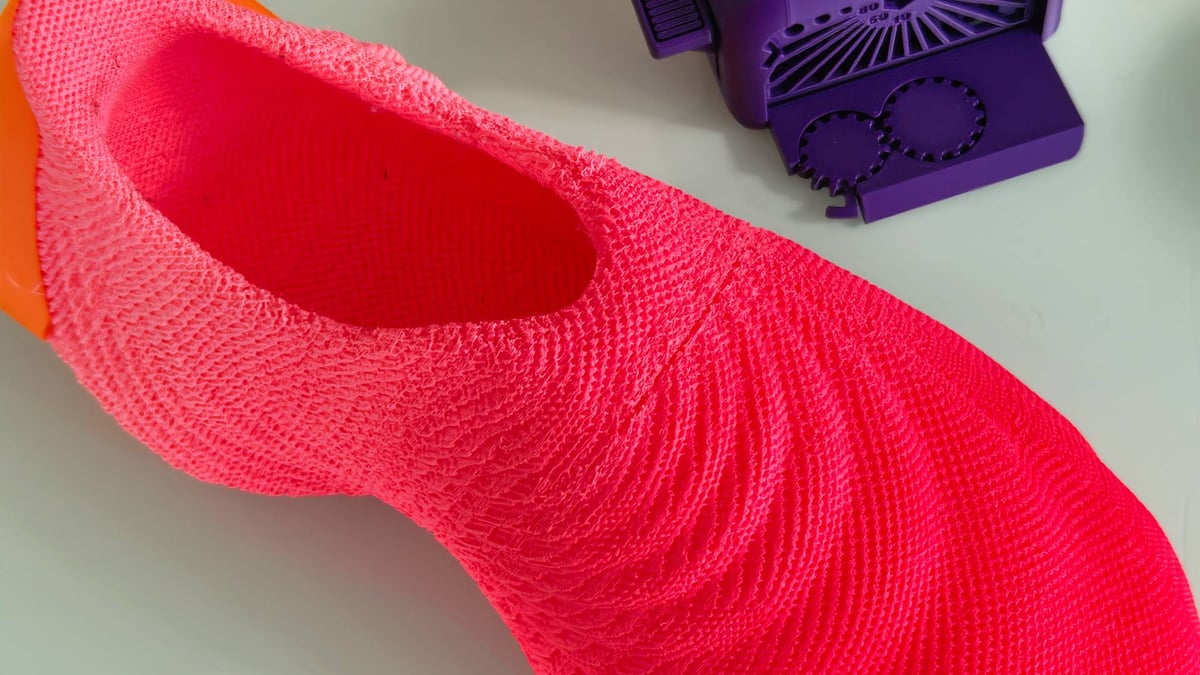
Printing one of the prestige test prints for flexible material provided with our review sample, a pair of Zellerfeld-like sneakers, while kind of radical when you think about it, is weak and delaminates in areas, falling short of our expectations for this printer. It was a five-day-plus print, which stings even more.
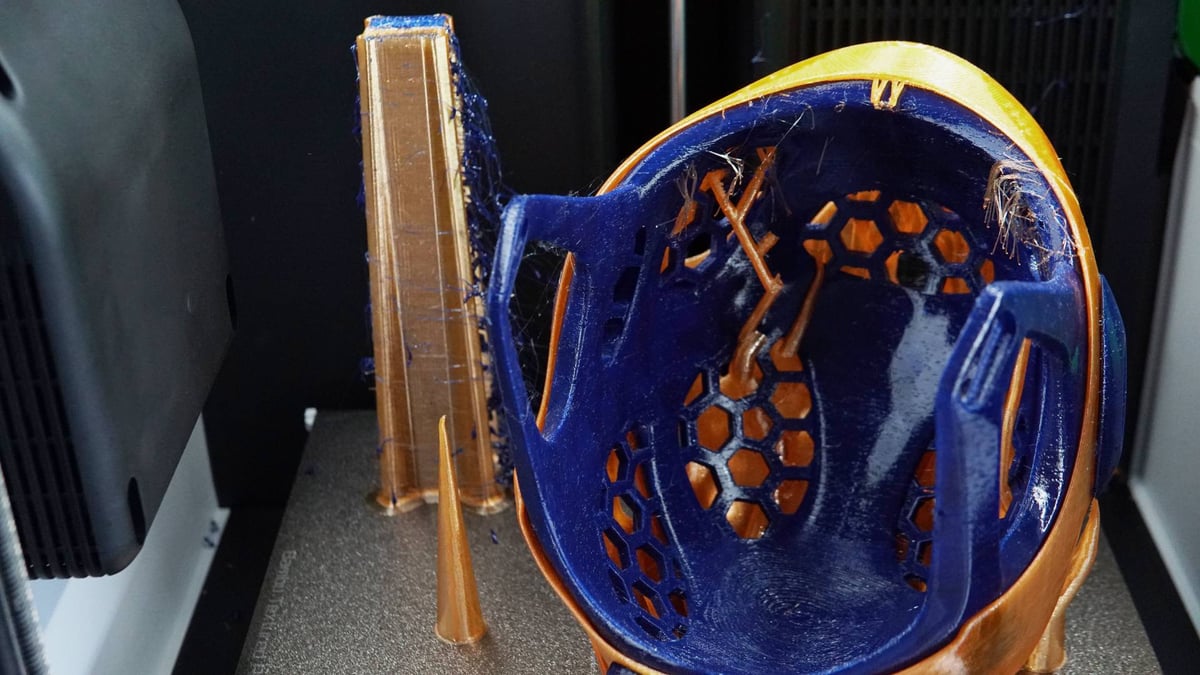
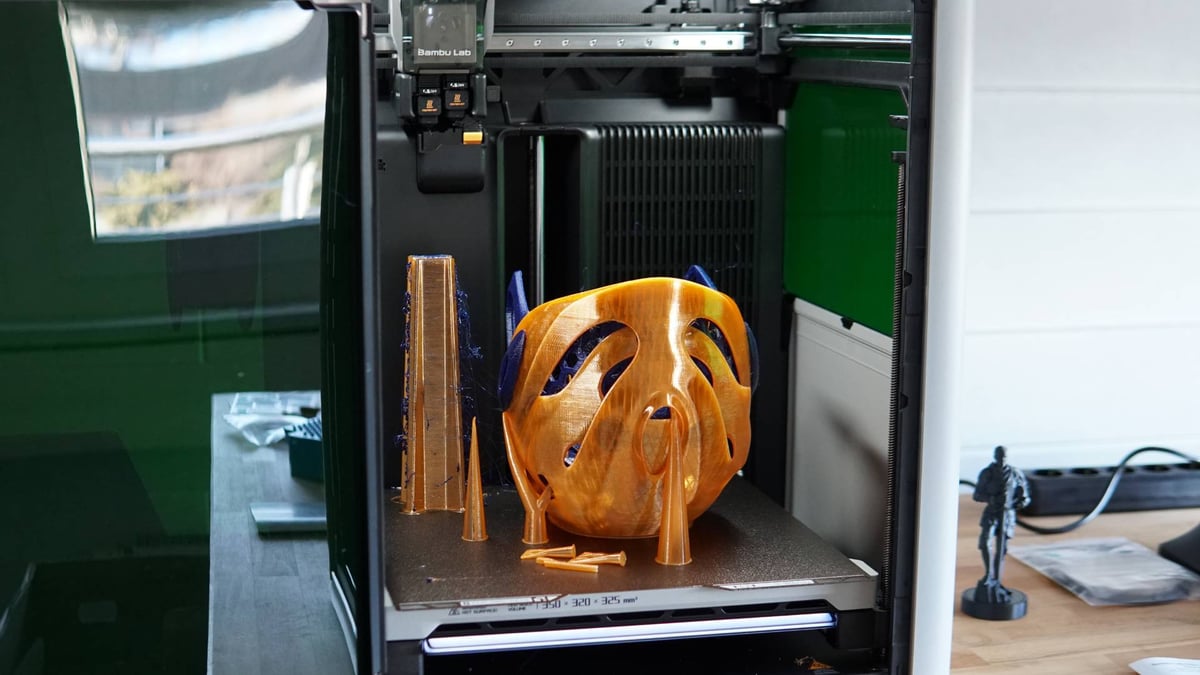
A bicycle helmet model was provided to demonstrate a mixed TPU and PETG print, again, impressive in scope and scale, but was undone by one inconsistent, under-extruded layer. Another multiple-day print wasted.
All of this is to say the Bambu Lab H2D is not a panacea for desktop 3D printing. It’s a bigger, better, and more capable Bambu Lab 3D printer, but is still, ultimately, just a 3D printer, with the occasional failure occasionally blotting an otherwise positive and productive run of prints.
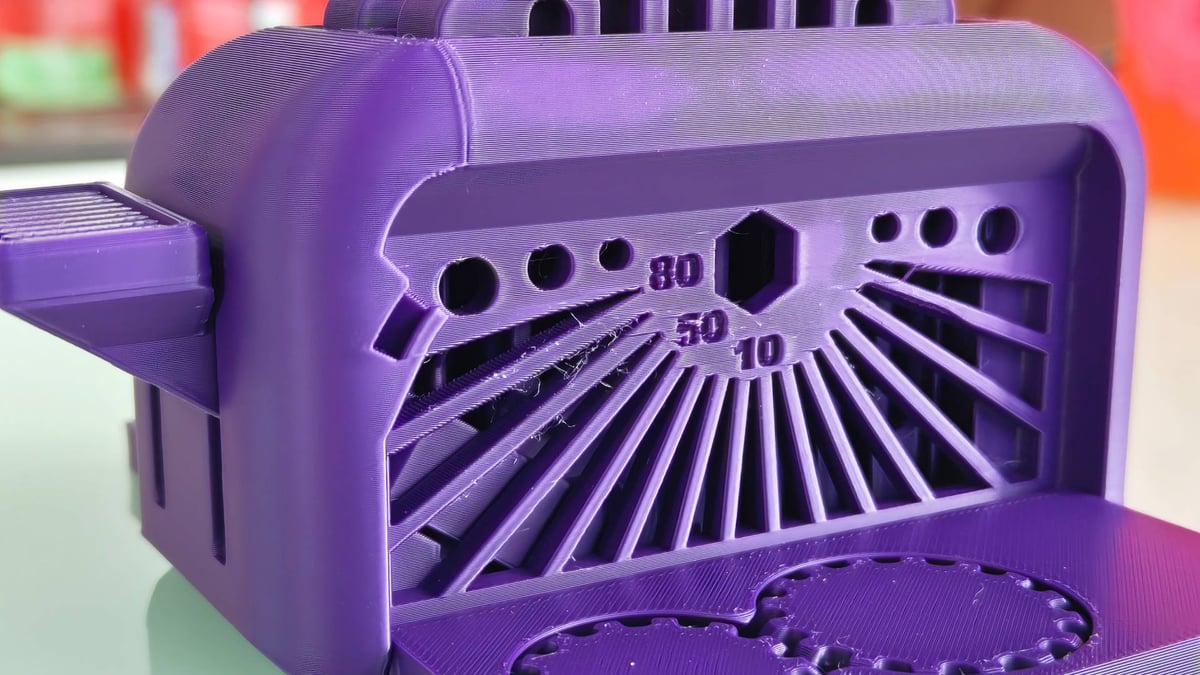
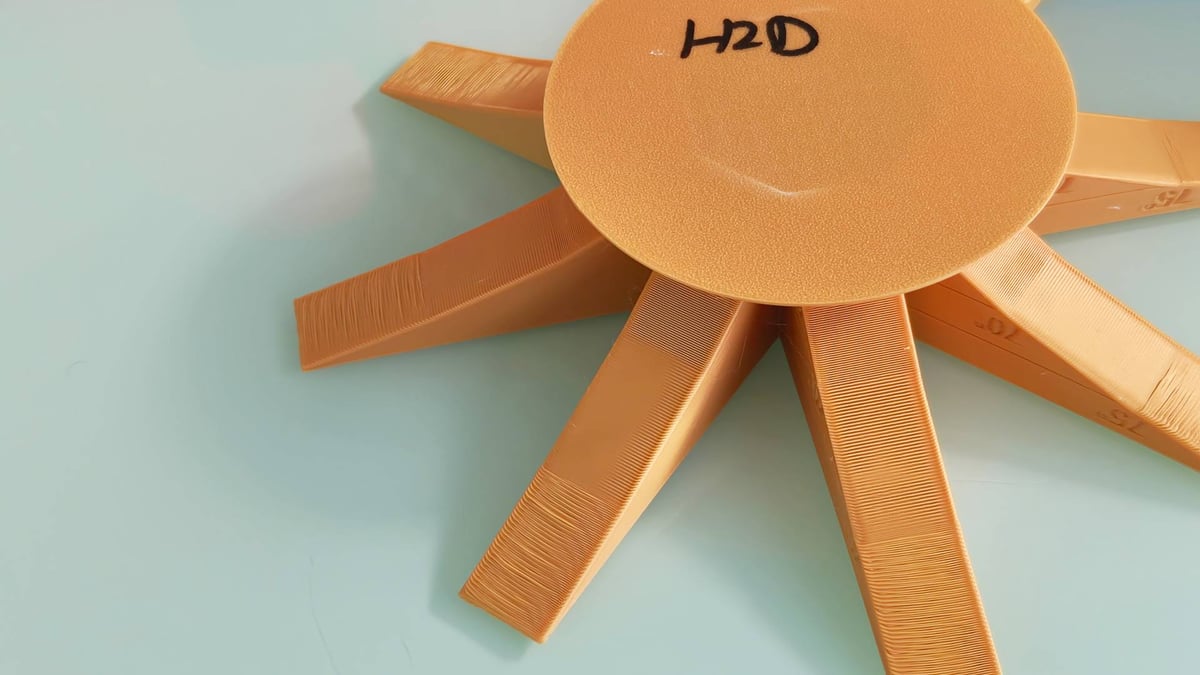
Judging by overhang torture tests, the H2D keeps pace with recent improvements from the likes of Prusa and its new Prusa Core One, a printer we also took for a spin recently, with door-shut performance seeing 75-degree overhangs printed at a decent quality without issue. Our experience from printing with the H2D is that Bambu Lab has managed to maintain the effortlessness of its printing, despite the many expanded variables the H2D presents. Early, unpredictable issues trip up the occasional print, though as time goes on, we see fewer and fewer of them.
More Making with Add-Ons
Bambu Lab’s “next generation” machine has been the subject of much speculation over the last year, including by us. We thought the company would debut a machine with multiple nozzles, each compatible with an AMS. We also thought it plausible, but unlikely, that it would be multi-functional.
The reality is it’s all of the above, with the H2D Laser Full Combo packing every tool available for the H2D. Alongside 3D printing, this bumper package gets you a cutting module with a pen holder attachment and a diode laser module rated at 10W. A more powerful 40W laser is available, too.
To those unfamiliar with the kinds of things you can do with such tools, think 2D. Flat stackable designs and cutouts, or components that can be applied to other objects to add effects and tactility. Decals, labels, frames, inlays … some of the things that you could wastefully apply multicolor 3D printing to do, but that’s a square peg for a round hole if you ask us.
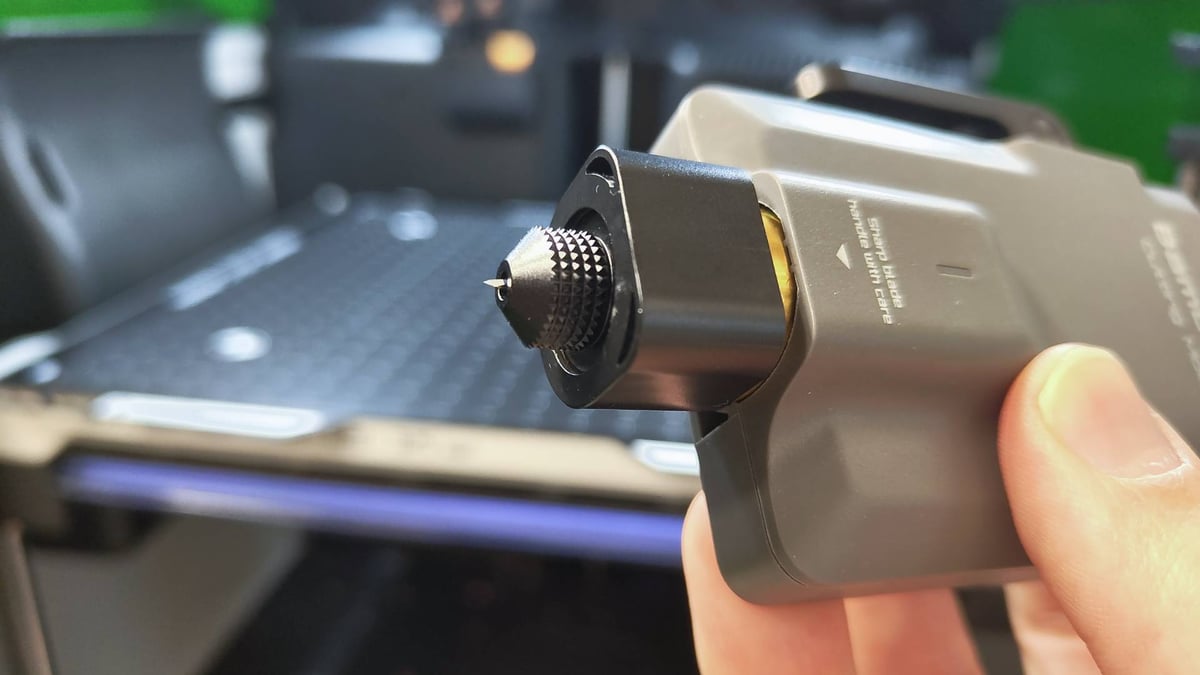
Your material choices for this will be determined by the tool you use. The cutting module is a shallow drag knife capable of cutting clean through thin material like paper, card, vinyl, and some fabrics. The laser modules are suited to cutting through more millimeters of wood, acrylic, and similar materials.
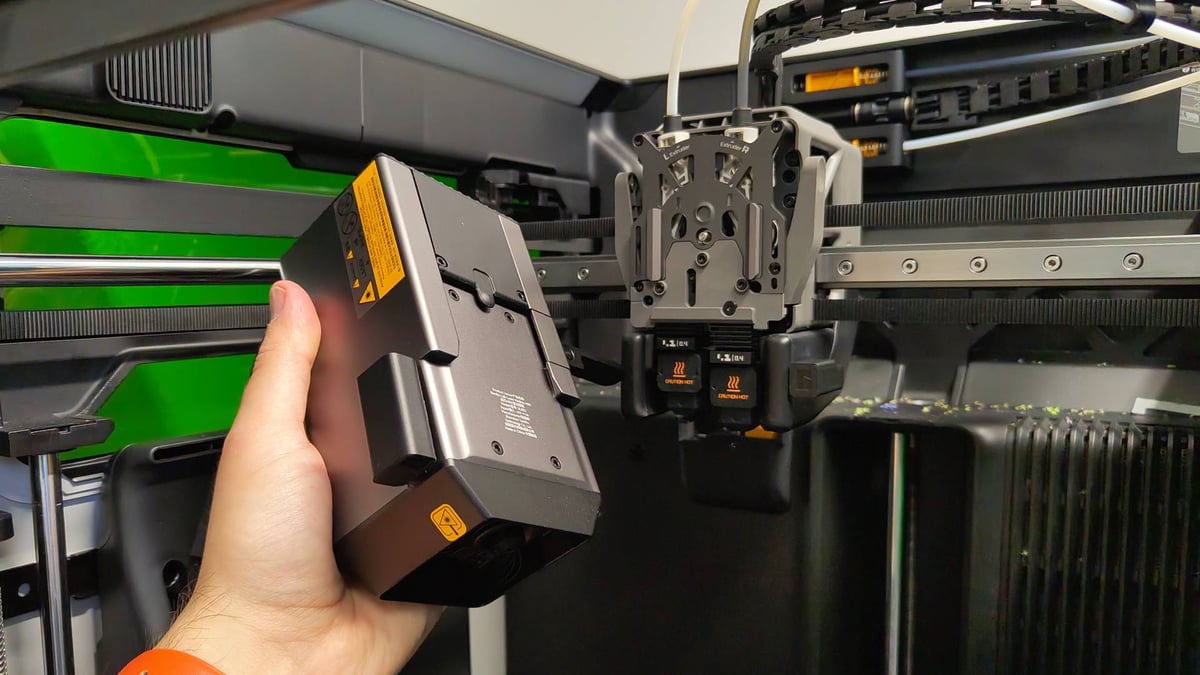
The new tools piggyback on the front of the H2D’s printhead, slotting into place and locking with a friction-based lever, meaning that the H2D one-ups similar multi-tool devices like those by Snapmaker or ZMorph by keeping the base toolhead (the 3D printing component) in place. Swapping function only ever means adding to the printhead, not removing it.
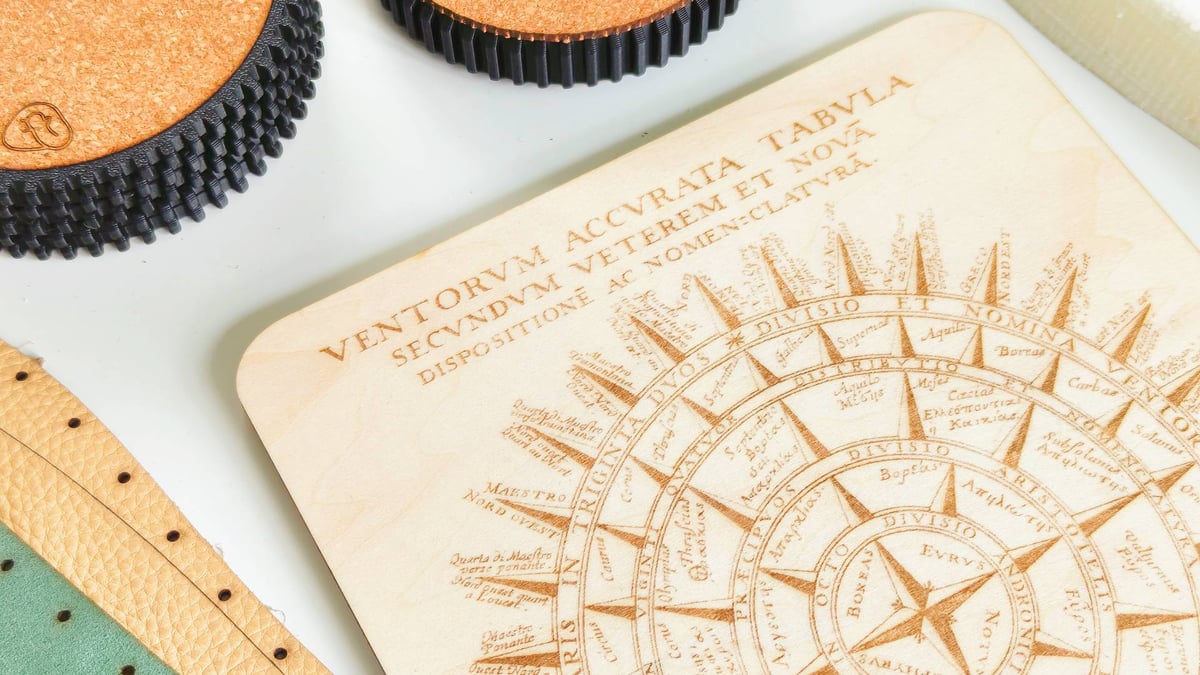
The cutting functions (laser or knife) use vector file types to cut outlines and shapes. If you design things for yourself in CAD software, getting vectors you can use to complement your printed models may be easier than you might expect. Messing around in Onshape, I discovered the sketch export function, which lets you extract pinpoint-perfect outlines that layer onto the 3D printed model. Designing around this, removing a shallow pocket for a fabric cutout to nestle into, results in coaster designs that feel 100% more premium than bare 3D printed plastic.

One Machine, One Repository, Two Softwares
Bambu Lab’s piecemeal rollout of the H2D in full no doubt frustrated some. Even when writing the update for this review, months after launch, the basic H2D printer was not yet available. It is now, but that point combined with the device’s apparent focus not on 3D printing, but other forms of crafting, probably felt like a lack of focus for folks wanting the next and best of 3D printing.
Putting to bed any illusions about the device before diving into laser stuff, the H2D very much is a 3D printer first. We see no compromises on the 3D printing functionality to accommodate the extra functions – only a higher ceiling for upkeep, keeping the machine clean for transitions between functions. That’s it.
The full H2D Laser Combo offers you a choice between a 10W and 40W laser. All3DP was provided with the 40W laser as part of its Laser Combo review unit, so I’ve been getting to grips with this brave new laser-powered world with a variety of projects and *bits,* to contrast with my extensive time spent printing with the machine.
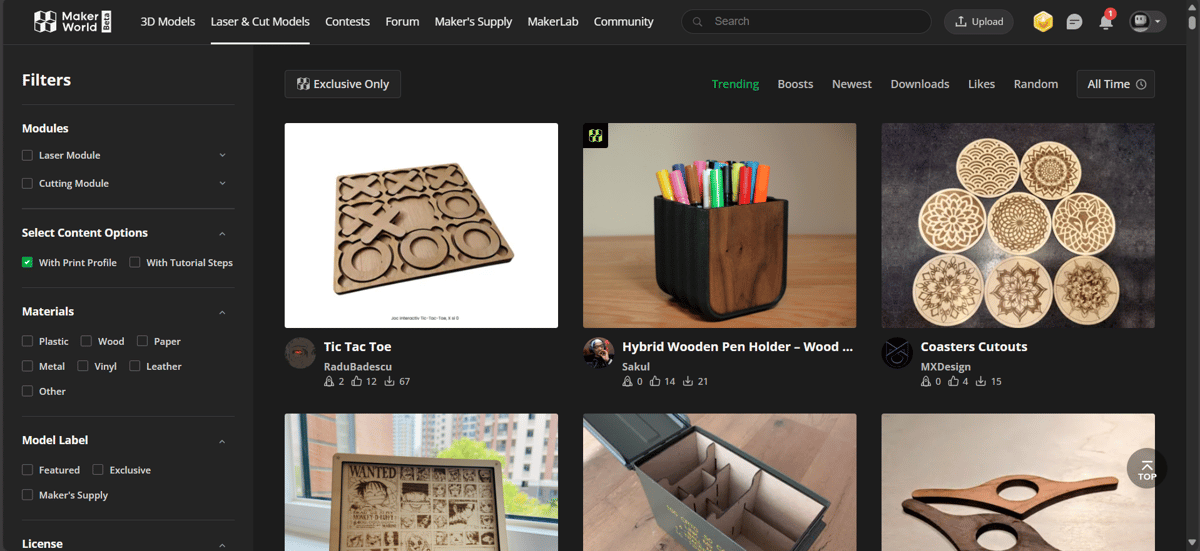
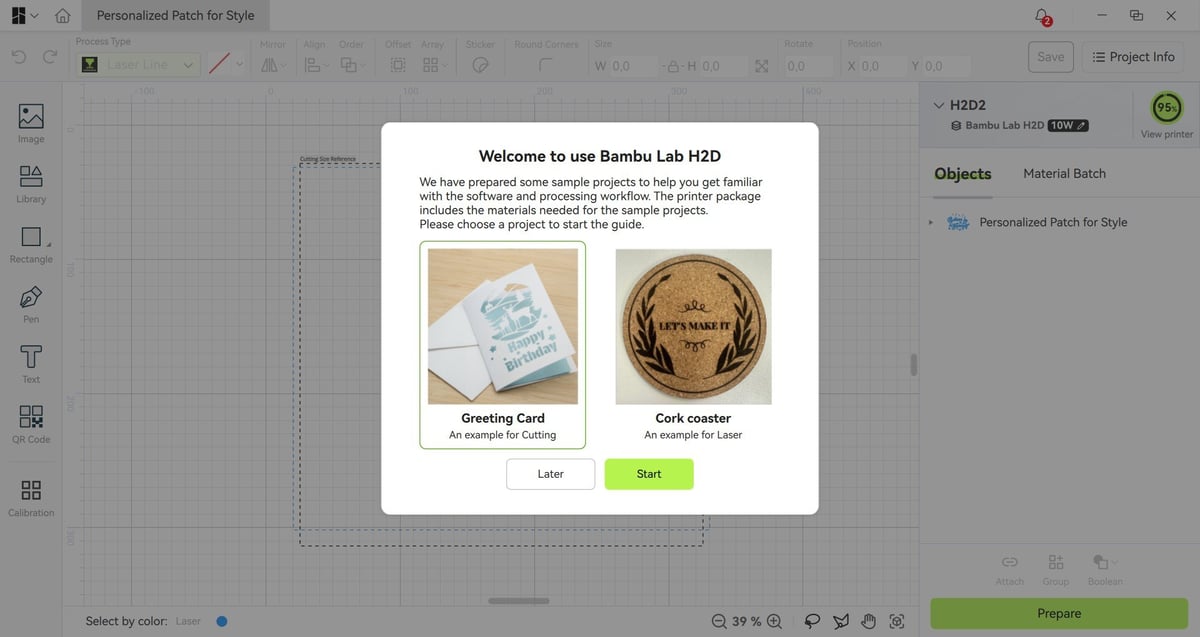
While a recent update to MakerWorld, Bambu Lab’s model repository, added an area for community-created laser and blade cutting projects, actually handling the projects and configuring them to your setup requires Bambu Suite. Distinct from the company’s 3D printing software, Bambu Suite is where all jobs using the non-3D printing functions of the H2D, including laser marking, cutting, blade marking and cutting, and pen plotting, can be created and managed. You can combine these functions in single jobs, and even rope in your regular 2D printer for a print-then-cut feature.
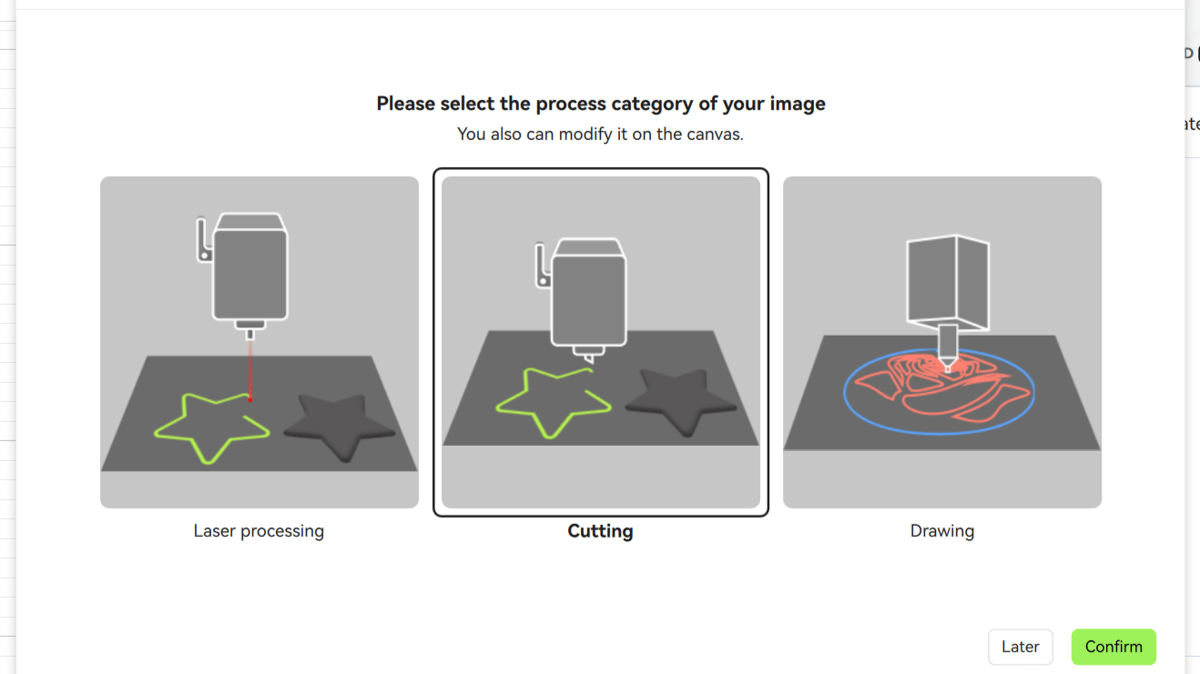
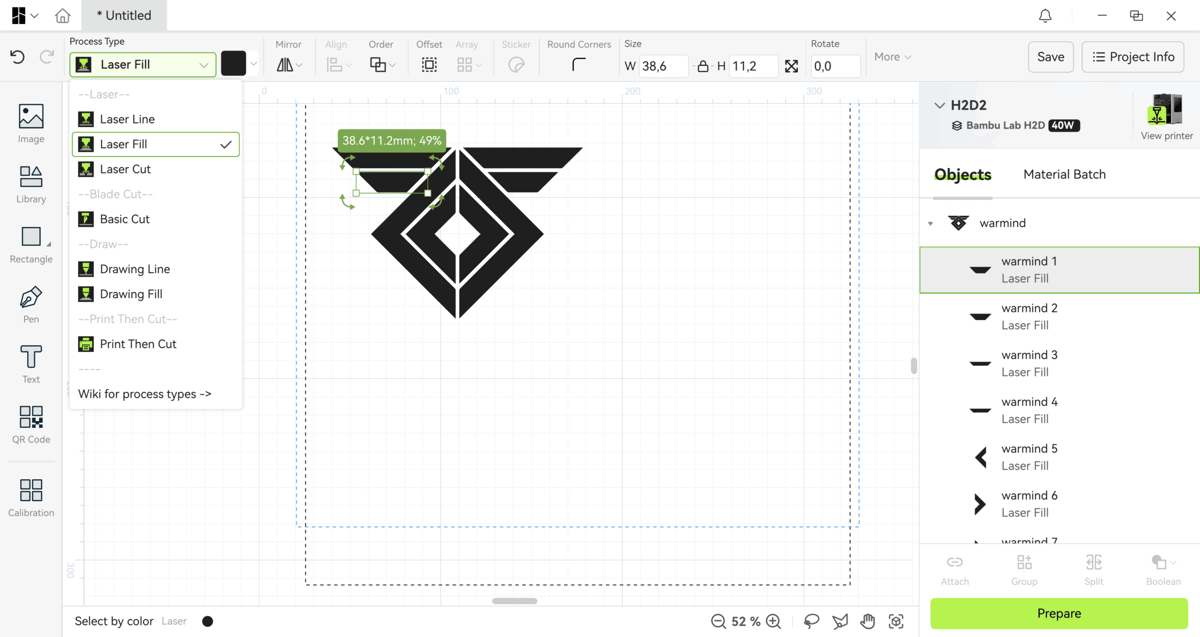
The workflow takes some getting used to. Unlike 3D printing, where you load a model and then configure the settings before slicing (effectively a prep, preview, then print flow) Suite instead starts you off in a creation space, with tools to craft designs from scratch. These include basic primitive shapes, text (including a deep font library), an image library with emojis and other generic icons, and a pen tool for point-to-point drawing and arcs. There’s also a QR Code generation tool, and the ability to add a sticker-like offset border to your work.
Of likely greater importance is that you can import images and graphics directly into Bambu Suite to work with, including SVGs, which is incredibly helpful for setting up complex, multi-stage work.
When working with the laser, sequencing and operation type matter, so get used to checking the specific assigned operation for each element of a job.
Zooming out and viewing the functions as a whole, it’s impossible not to see the similarities between Bambu Suite and rival software tools like xTool’s xTool Creative Space (XCS). A quick primer: xTool historically makes laser cutters and engravers, but recently branched out into multifunctional devices such as the
M1 Ultra. Its design and control software covers the same territory as Bambu Lab’s here, with the benefit of maturity (you can create more, with baked-in AI tools and a vast, mature model repository).
On the flip side, Bambu Studio has the advantage of a fresh approach to the same processes, and the resulting experience is, on balance, a more straightforward presentation for some tasks.
After the creation stage, you work in a preparation area. Here’s where you can access Bambu Suite’s smarter functions like batch processing and auto-alignment. Theoretically, the H2D’s array of cameras means you get an accurate view of the work area to confidently place designs on your materials. In testing, we found if individual objects were too close together, the device would struggle to distinguish them from one another, making the batch processing a little ineffective. In other situations, the shapes automatically detected were not quite accurate representations of the objects loaded, and the fisheye effect of the camera distorted captured previews, making it hard to be confident of accurate design placement.
Disappointingly, Bambu Lab advertises one potentially very useful feature in 3D mesh-adjusted lasering, which is not yet present on the machine. This could let you, theoretically, engrave or cut on curved surfaces (not cylindrical stuff, which would need a rotary module – an addon Bambu Lab plans to release for the H2D eventually).
Not 3D Printing with the H2D
Equipped with the 40W laser, the H2D is capable of powering through millimeters of material in a single pass. It’s essential to attach the air assist tubing for this, helping the H2D blast debris away as it goes. The air pump hose attaches to a coupler between the H2D’s two filament guide couplers at the back of the chamber, and requires you to remove a safety screw before the pump will function.
In practice, we’ve found the air pump can work a little too well, moving so much air that materials can shift mid-job and ruins the alignment. For all its cameras and sensors, the H2D doesn’t catch any of this and flag the job as compromised, like it would a detached print when 3D printing.
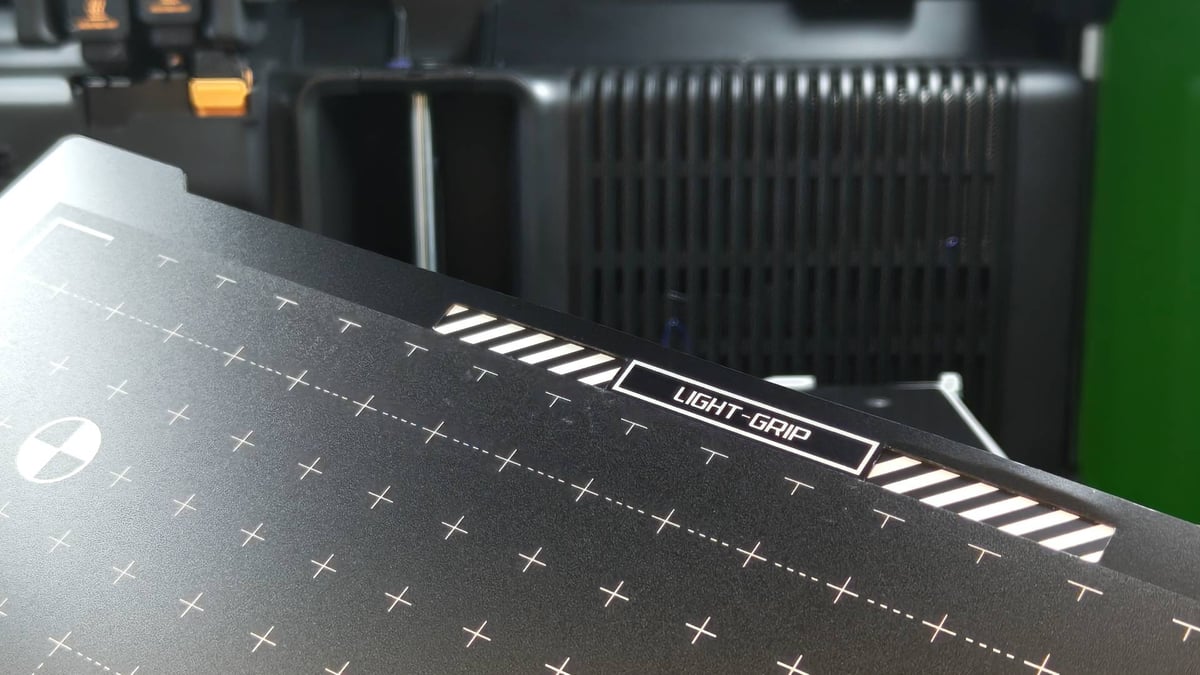
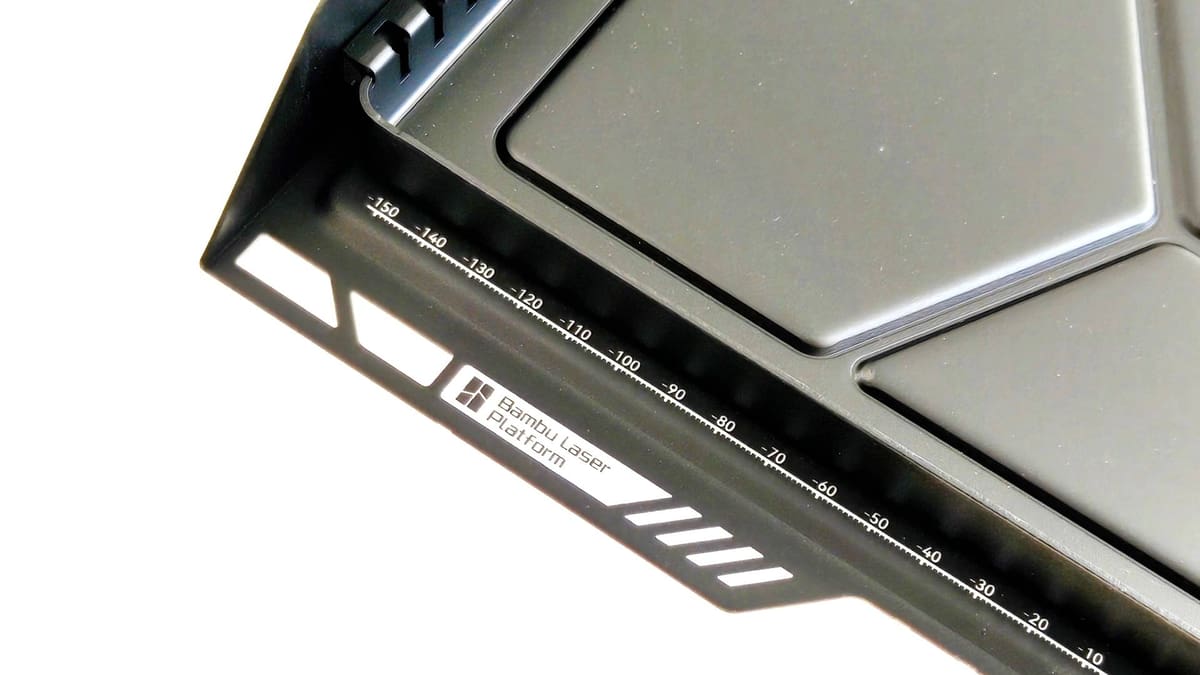
The provided laser build plate supports materials for laser cutting, with sparse slats for hard materials that require few contact points, plus full grid-style plates to support flexible materials that’d otherwise fall between the gaps.
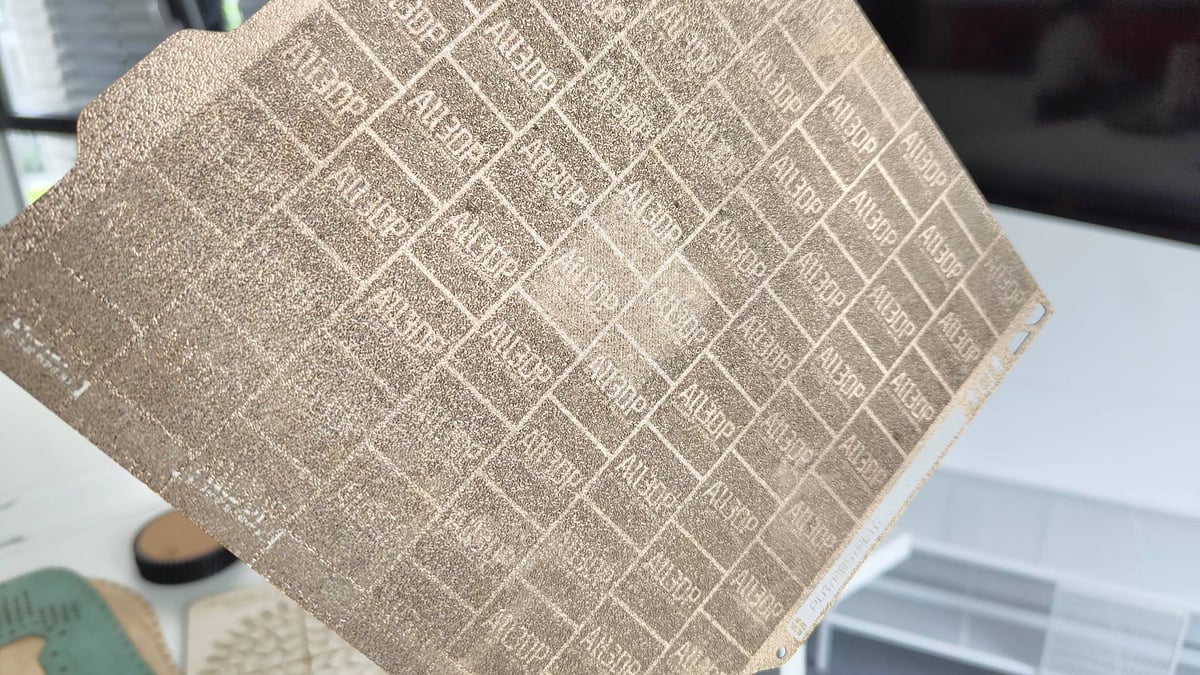
As we’d expect of a high-tier Bambu Lab system, there’s a lot of automation and self-checking going on. The H2D’s multiple cameras read machine codes on the build plates (and material, if you buy Bambu Lab materials) to ensure that the software knows what’s there and is compatible with what you’re trying to achieve.
There’s room to experiment, though, with user-defined materials and the ability to save custom operation profiles so you can recall settings that worked well before. The H2D can auto-detect the thickness of a material, which is helpful for non-standard, non-Bambu Lab materials from the library.
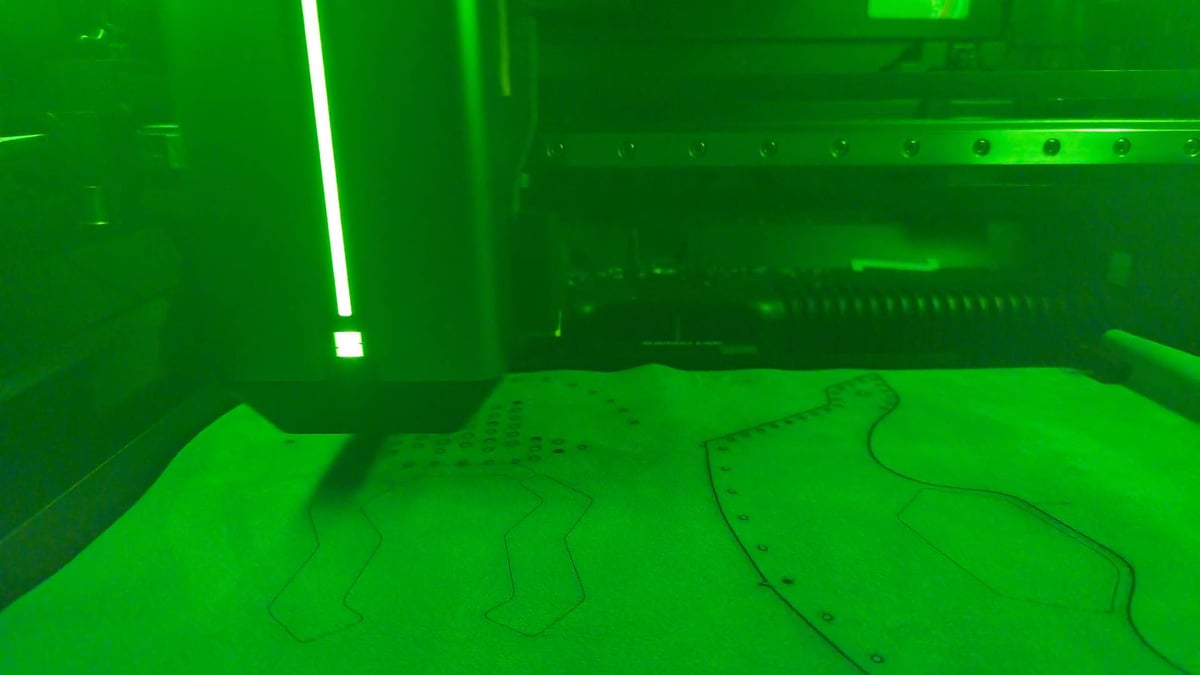
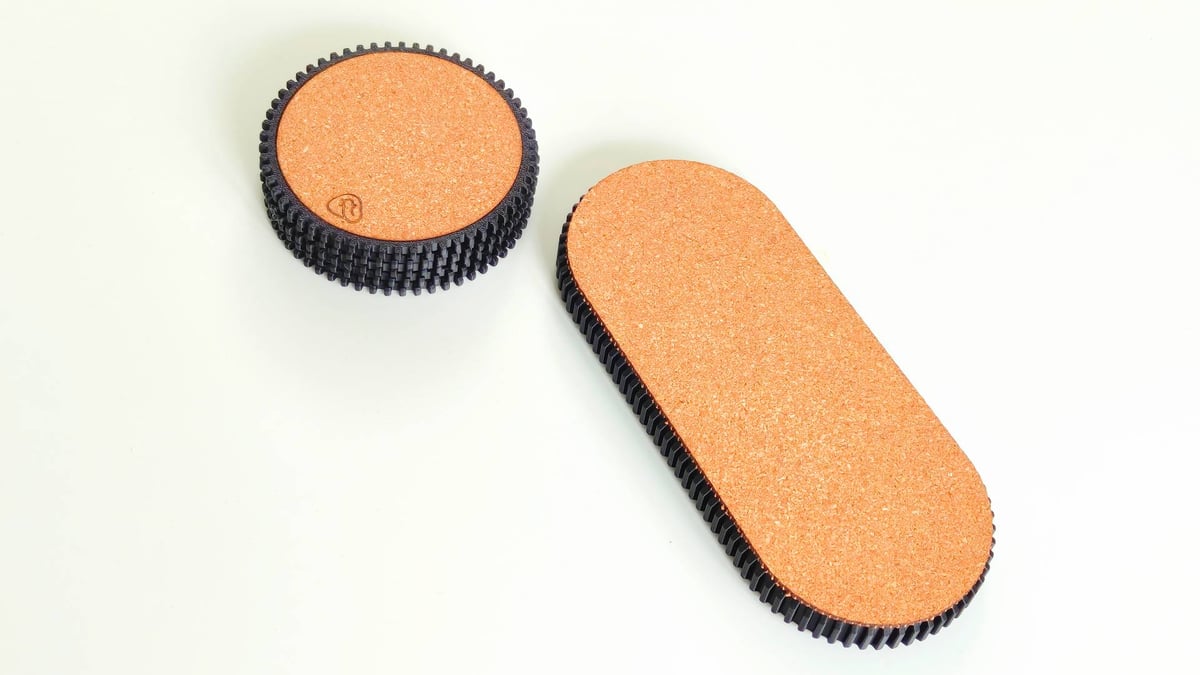
In practice, we were able to knock out a wide variety of laser and blade-cut projects in short order with no notable hurdles. Cutting through leather, cork, wood, paper, all obviously achievable – it’d be concerning if it couldn’t. The air assist laser seems to create a vortex pattern of residue on the underside of cuts, which looks ugly, but can be post-processed off some materials.
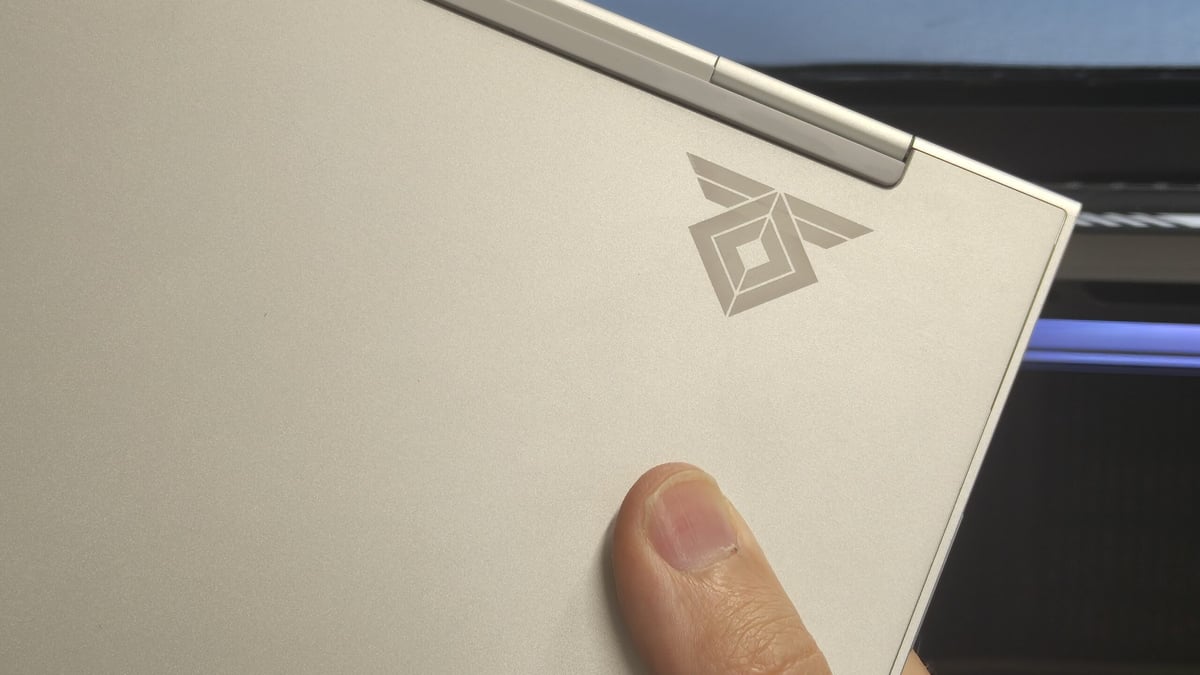
The 40W laser can make its mark on some metals, too, which we used to great effect, customizing personal tech.
Both of Bambu Lab’s laser modules are blue diode type lasers, meaning that while they’re compatible to engrave and cut a larger variety of materials, they’ll struggle with white or semi-clear acrylic.
While we’ve tried to throw a variety of tasks at the H2D, we’re sure there’s more we can test, so further updates will no doubt evolve our impressions of it over time.
Safety First?
It’d be negligent to cover the H2D’s laser abilities without talking about the stinky elephant in the room: ventilation and safety. Bambu Lab goes to great efforts to reassure the user with an array of fire sensors spread throughout the fully enclosed device, plus a powerful built-in exhaust system that can quickly evacuate the chamber of smoke and fumes.
Since we’ve been using the H2D in an office environment with fussy coworkers who’ll complain at the first whiff of a fume, we’ve also been using the smoke ventilation system– an optional $649 accessory.
Together, this setup powerfully vents air from the H2D’s chamber through a three-layer filter before exhausting the scrubbed air through an exhaust duct, channeled to an open window for good measure.
The necessary hoses and soldier clips to attach them come with the hardware. Each provides some meters worth of ducting, from H2D to smoke ventilator to window, giving you a little flexibility in how you position things.
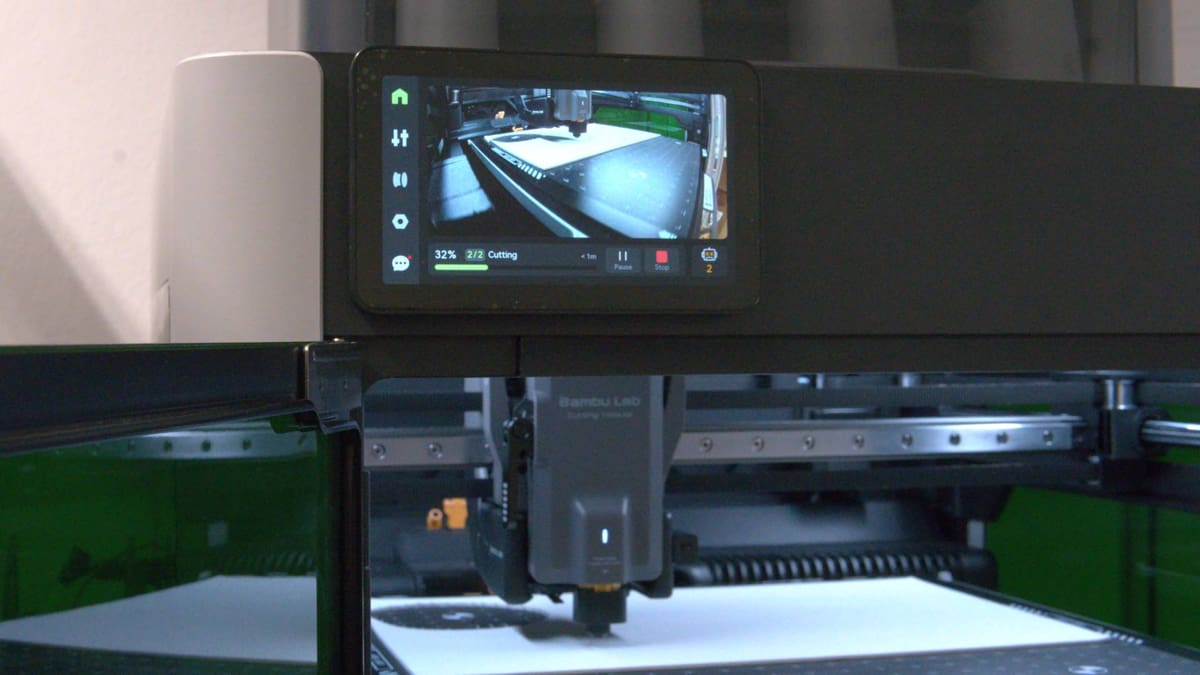
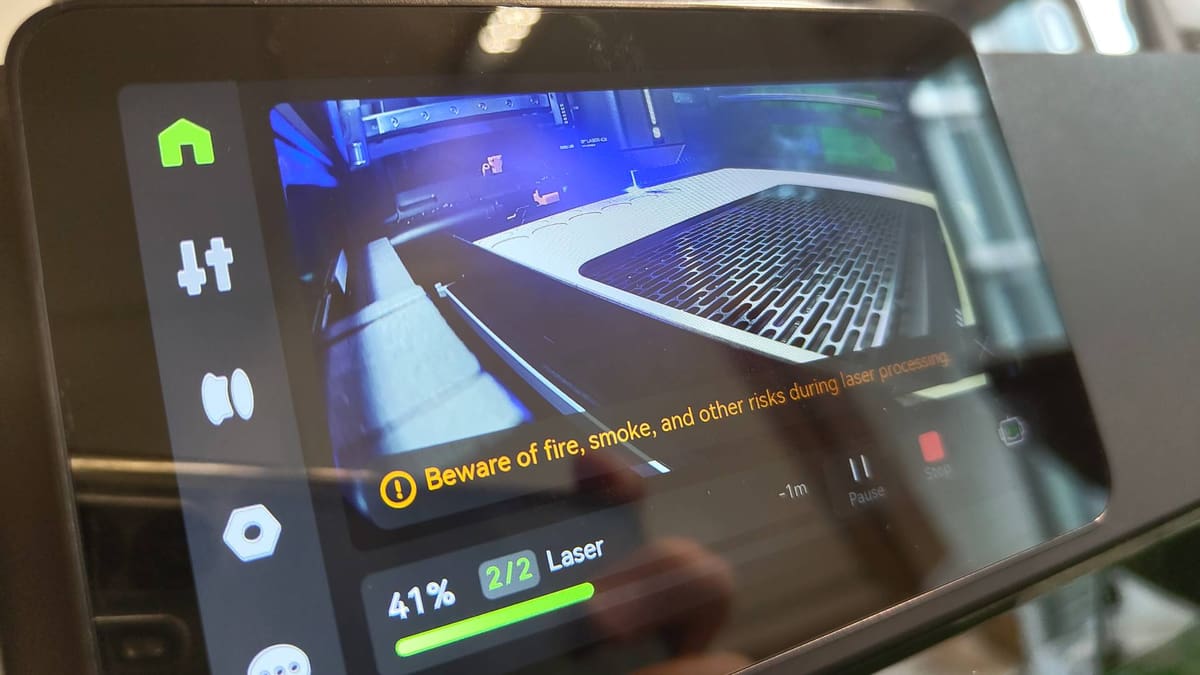
Another break from the 3D printing workflow with the H2D is that all cutting jobs require you to be physically present at the machine. You have to push a button to confirm the job, and both the machine and software remind you not to leave the machine unattended. The big red slappable emergency stop button comes as standard equipment with the Full Laser Edition of the H2D. With it, you can stop the machine dead in its tracks should anything go wrong.
Stand blindfolded in front of this setup for the H2D running a laser job, and you wouldn’t know it. No smell escapes the chamber. Once a job is complete, provided the H2D knows which material has been engraved or cut, a countdown timer appears requesting you wait before removing the material to allow sufficient time for all smoke to vent properly.
In practice, it is a very tidy experience. We’ve seen the pictures of how the H2D can look, though: a nightmarish smoke-residue-caked chamber that requires deep cleaning. We’re not even remotely close to this situation yet, and the machine has a maintenance tracker that ticks up with every job. Eventually, the printer will say when it is time to clean.
Out of pure curiosity to see the fire alarm system in action, I set a fire inside the H2D to see what would happen. Mistake number one. The H2D’s fire alert system is only actually monitoring for fire when a job is active. From the fire alert page on the printer’s UI, you can see the different sensors turn red when they detect something. According to Bambu Lab’s Wiki, unless a job is running, the alarm won’t trip, which seems an oversight. We asked the company about the logic behind this, but have yet to hear back.
On the plus side, the smoke ventilation system worked so well you wouldn’t know there’d been a small paper fire inside the machine. Silver linings.
Knowing that the fire system only “watches” when the machine is active, we also ran an irresponsibly configured job lasering a cork sheet–a material Bambu Suite prominently flags as a flammable hazard to attend to closely when working. Cranked to full power, with air assist off and the processing speed dialled back, we saw licks of flame at the contact point of the laser and material, but nothing caught and, despite toolhead flame sensor picking up a positive, the machine deemed it fine to continue.
Is It Worth It as an All-in-One?
It’s a resounding “maybe!”
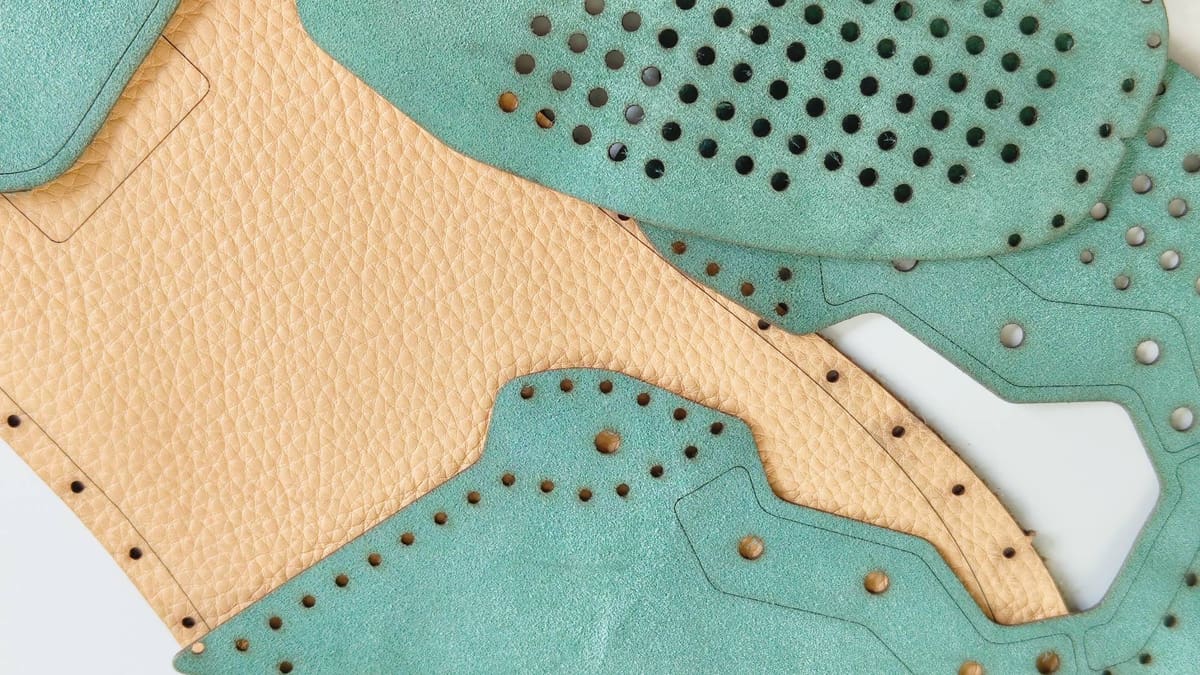
The longer you’re in contact with a machine like this, the more you start to see complementary materials and processes emerge in your thinking. I’ve designed objects to 3D print, but nowadays those designs are influenced by the possibilities a machine like the H2D offers for material tactility. Cork padding, foam base pads, and felt liners are all simple cut operations that dramatically improve how a 3D print feels, so in that regard, the H2D is a wickedly helpful machine.
It is also early days still. While the MakerWorld model repository now hosts laser and blade cutting projects, it’s pretty thin with samey-looking makes that all blur into one wooden-slat-box-type amalgam. While viewable in the Bambu Handy app, these jobs can’t be sent remotely to the machine. You can open projects directly in Bambu Suite from the MakerWorld website, though.
I’d love to see more effort made to marry the 3D printing with the cutting and marking functions. As it stands, there’s a hard wall between 3D printing and everything else.
Is It Worth It as a 3D Printer?
This has been a tricky review to write, not only because the H2D is massive in scope, but also because of what we imagine is the massive expectation placed upon the H2D. To get a better grasp of things, we’ve been using two Bambu Lab H2D’s for this review, with an H2D Combo set up exclusively for 3D printing, and our original H2D Laser Full Combo tasked with non-3D printing operations. We’ll keep this simple.
The Bambu Lab H2D ticks multiple in-demand boxes well. It is a larger Bambu Lab, meaning high-speed, quality prints at a larger size. Check. It also packs two hot ends, each of which can be connected to peripherals that empower them to print multiple materials. Check check.
It can cut back on the wastage of Bambu Lab’s single-nozzle multicolor printing, too, giving you the chance to feel less guilty about the mountains of purged “poop” you hoard or throw away.
If the appeal of the H2D for you is in its multi-material capabilities, and you balk at the cost of a fully kitted-out Prusa XL, then the H2D is the logical choice. Its base configuration is the optimal form of dual extrusion (dependent dual extrusion), leveraging two nozzles for efficient and quick multicolor and multi-material. This can then, of course, be taken to extremes with the addition of multiple Bambu Lab AMS devices, expanding the number of filaments you can use in a job. While some of its qualities are found in other systems, there is nothing else like the H2D right now.
For a view on the H2D’s prospects for professional use, check out All3DP Pro section editor Carolyn Schwaar’s take on how this new printer compares to the Bambu Lab X1E, the company’s last, enterprise-friendly release.
License: The text of "Bambu Lab H2D/Laser Full Combo Review: It’s Big, and Just Getting Started" by All3DP is licensed under a Creative Commons Attribution 4.0 International License.
CERTAIN CONTENT THAT APPEARS ON THIS SITE COMES FROM AMAZON. THIS CONTENT IS PROVIDED ‘AS IS’ AND IS SUBJECT TO CHANGE OR REMOVAL AT ANY TIME.