
How to Convert SVG to G-code: The Best Options

Convert SVG files to G-code, turning your images into beautiful physical objects. Learn a few easy ways to do it!
Why just look at a graphic drawing or artwork when you can convert it into a real-life, physical object? This process is pretty straightforward: You take a sketch or drawing in an SVG file format and convert it to G-code, which is understood by 3D printers, laser and vinyl cutters, as well as CNC routers.
SVG files, also known as scalable vector graphics, store 2D images in a way that retains their resolution no matter how large or small they’re scaled. Rather than rows of information about individual pixels, they contain XML data that describe coordinates, lines, and curves. SVG images are widely available in online libraries. Alternatively, you can create your own easily using tools such as Adobe Illustrator or Inkscape.
G-code is used by computers to control manufacturing machines with instructions that tell motors and tools where to move, how fast to move, and what path to follow. Although the underlying command lines are common, G-code files come in many different “flavors”, each unique to the type, make, and configuration of a particular machine. As a result, G-code created for one machine may be completely incomprehensible to another and could even cause damage.
In this article, we walk you through a couple of options for converting an SVG image to G-code. Before we do so, however, there are a few things to consider, not least of which is deciding whether the physical output you want will be created on a 2D-oriented machine (e.g. a laser cutter or simple CNC router) or 3D machine (e.g. a 3D printer). Depending on the required output, you may have to go through more than one step to complete your SVG to G-code conversion.
2D or 3D?
Let’s start with the SVG image itself. These range from very simple black-and-white graphics to complex multicolor illustrations. In the next section, we’ll see that not all are suitable for conversion to G-code and that your chosen image may need to be changed or edited in some way.
The main decision point, however, revolves around the machine that will produce a physical representation of the SVG file. Remember that G-code is tailored to a particular machine and material. SVG images are, primarily, 2D and are therefore a natural fit for machines that cut, engrave, or carve 2D shapes. There are many programs that convert SVG files to G-code for this type of use, and we’ll look at the main options below.
Output on 3D printers requires an additional step. The 2D information in the SVG file must include details about the third dimension before the final conversion to G-code. We’ll look at the options for both of these steps below, from the simple to the more ambitious.
Preparing Your SVG File

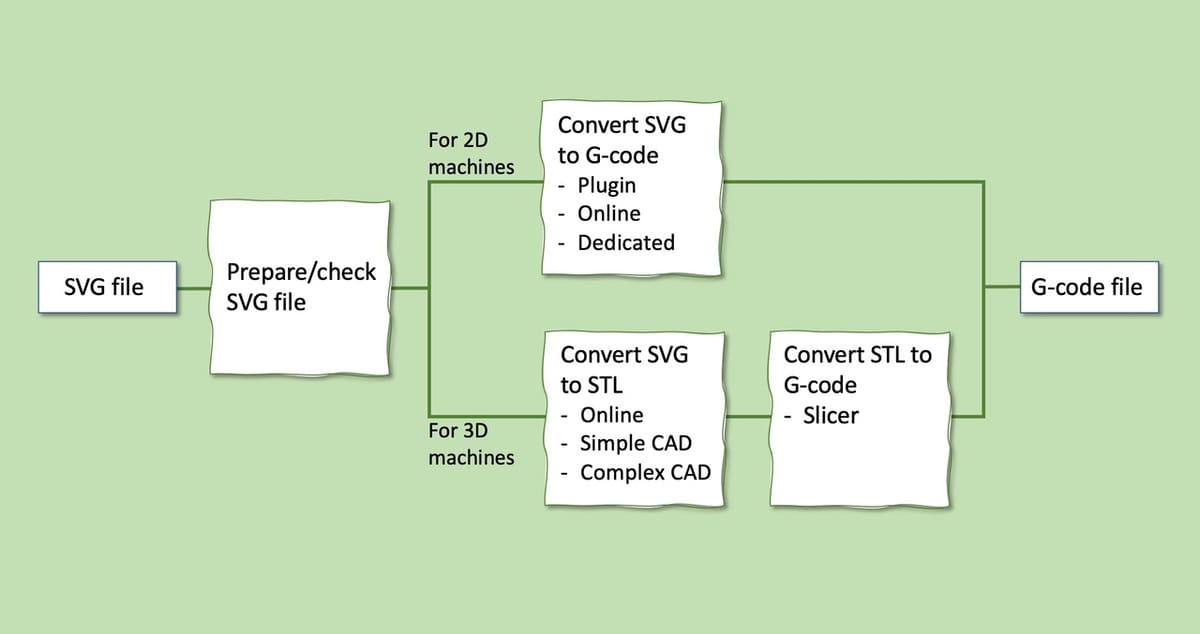
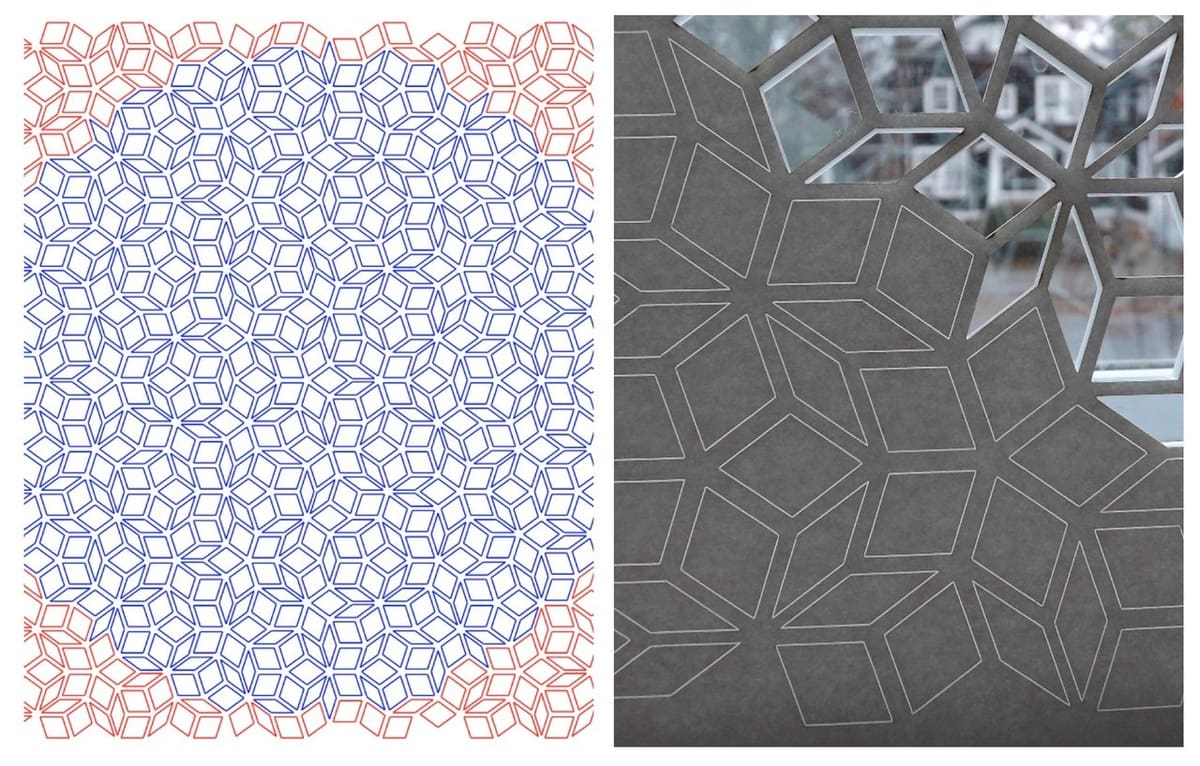
The first step in converting an SVG file to G-code is to look closely at your image, as not all are suitable for every application. For example, a sophisticated illustration (see above) with multiple layers of detail, color, and shading might not be the best starting point if your aim is simply to scribe an outline using a CNC router.
If the original SVG has detail you’d like to omit, this can be removed or changed using one of many SVG editors such as Adode Illustrator or free and open-source tools like Inkscape, Method, Vectr, or SVG-edit.
You may also need to make other changes depending on the type of G-code you want to generate. In some cases (laser cutting, for example), different line colors signal different actions: Black or blue lines may signify a cut all the way through, while red might indicate only etching.
Other common problems include text and shapes not showing up properly when you try to convert them. This can often be fixed by selecting those items in your SVG editor and using the “object-to-path” functionality. It can also help in some cases if the SVG image is stored in the dimensions you plan to use, double-checking whether these are in inches or millimeters.
Finally, although SVG is an international standard, it has evolved and continues to do so; it can be interpreted and implemented in different ways. Most of the time, this isn’t an issue, but incompatibilities arise occasionally. If any of the following steps don’t work as expected, that can often be fixed simply by opening and resaving the SVG in any of the tools above or by using an SVG optimization tool.
After you’re happy with your SVG file, it’s time to consider how best to convert it.
2D G-code
If you plan to make something that’s two-dimensional (pen plotting, laser cutting, simple CNC routing, among others), the conversion from SVG to G-code is normally quite straightforward and typically involves only a single conversion step.
There’s a wide choice of software tools available for this conversion, and these are usually designed with a specific family of machines (and hence a particular flavor of G-code) in mind. The learning curve is not high, so trying out more than one is a great way to experiment and learn.
Conversion Options
Tools for 2D SVG to G-code conversion fall into three broad categories, and the steps to use each tool are also similar. So, let’s first look at possible tools, then we’ll look at the steps in detail.
SVG Editor Extensions
The most obvious approach is to use software extensions embedded in your SVG editor (mainly Inkscape in this case). Inkscape has a built-in extension “Gcodetools” that – with the addition of machine details – can quickly generate G-code for plotters and CNC routers and mills. There are also third-party extensions, including GcodePlot for pen plotters.
Dedicated Online Tools
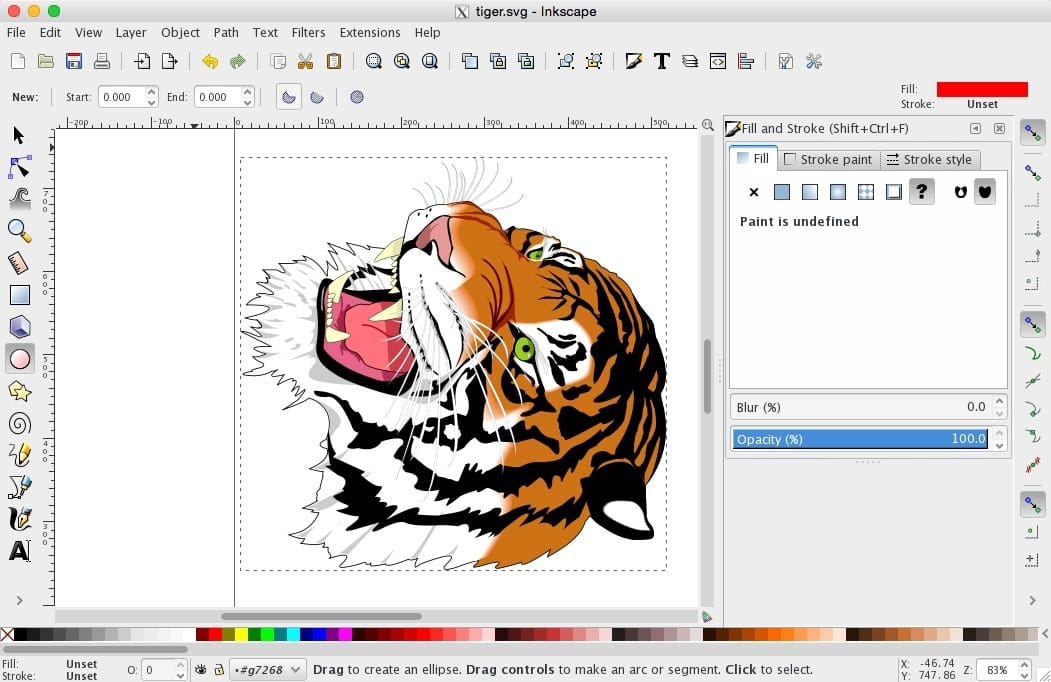
A very popular and flexible online choice, especially for CNC routers, is Jscut (which also has an offline version). Jscut has an active forum and good online tutorials. As a bonus, its built-in simulator visualizes how the G-code will work before committing to it in the real world.
Dedicated Offline Desktop Tools
For those that prefer desktop tools, Carbide Create runs on both Windows and MacOS. It supports CNC carving, cutting, and engraving. The software also has a built-in simulation in order to test out G-code virtually in advance.
For laser cutting, there are many other tools available including LightBurn, LaserGRBL, and LaserWeb (which also has a CNC mill option), among many others. These packages often use the colors of the lines in the SVG to control the power and speed of laser cuts – another good reason to learn one or more SVG editing tools!
A final source of software tools to convert SVG to G-code are those dedicated to particular manufacturer’s products. For well-known brands, these are often the best options to take.
Basic Conversion Steps
Having settled on the software tool you plan to use, we’re ready to convert. Remember that G-code is specific to the machine and material you intend to work with, so you’ll need all of the relevant information to complete this step. Although the exact workflow may differ slightly from tool to tool, the basic process is as follows:
- Open the software and check that the relevant details of your machine (workspace size and power or size characteristics of the tools to be used, for example) and materials are all specified.
- Upload or open your SVG file and check that it’s scaled as you want and fits the machine’s workspace.
- If your chosen software tool supports it, run a simulation to check that you have the desired output (i.e. that the tool cuts or shapes what you want) before committing to physically using the G-code. This step is optional but highly recommended.
- Export the G-code. You have two options here: You can save it as a file to upload later to your chosen machine, or you can send it directly to the machine if it’s connected. The latter option only works if your conversion software supports this, which is typically the case with the dedicated, offline software.
- Finally, power up your machine, and watch as your SVG image is transformed into a physical reality!
For those of you who are interested in how things work “under the hood”, you might also like to inspect the actual G-code itself. For 2D machines, you can find out more about this in our G-code Tutorial for CNC Programming: 6 Simple Steps.
3D G-code
If your plan is to 3D print an object based on your SVG file, you need to go through a two-part process to create the G-code. The first part applies various transformations to the flat SVG image in order to convert it into a 3D object and save it in the near-ubiquitous 3D format STL. In the second part, this STL file is “sliced” into the G-code that makes the 3D printer magic happen.
We’ll look more closely at each part in the following sections.
Part 1: SVG to STL
There are various ways to convert a flat 2D SVG image to 3D. The basic method is to “extrude” a 2D shape upwards. Think of stacking many thin copies of that shape one above the other. For many applications, this is more than enough (i.e. turning a flat company logo into a raised shape to print and stick on a wall).
Other options include extruding only the edges of that shape to create a cookie cutter-like object, and if extruded at an angle, or perhaps using different heights for different parts of the image, we can generate still richer possibilities.
In each case, the process is much the same: The conversion tools allow all or parts of an SVG image to be extruded in one or more directions, resulting in a 3D shape that’s then saved as an STL file.
In the sections below, we’ll take a closer look at three different options: SVG 2 STL, Tinkecad, and Fusion 360.
Option #1: SVG 2 STL
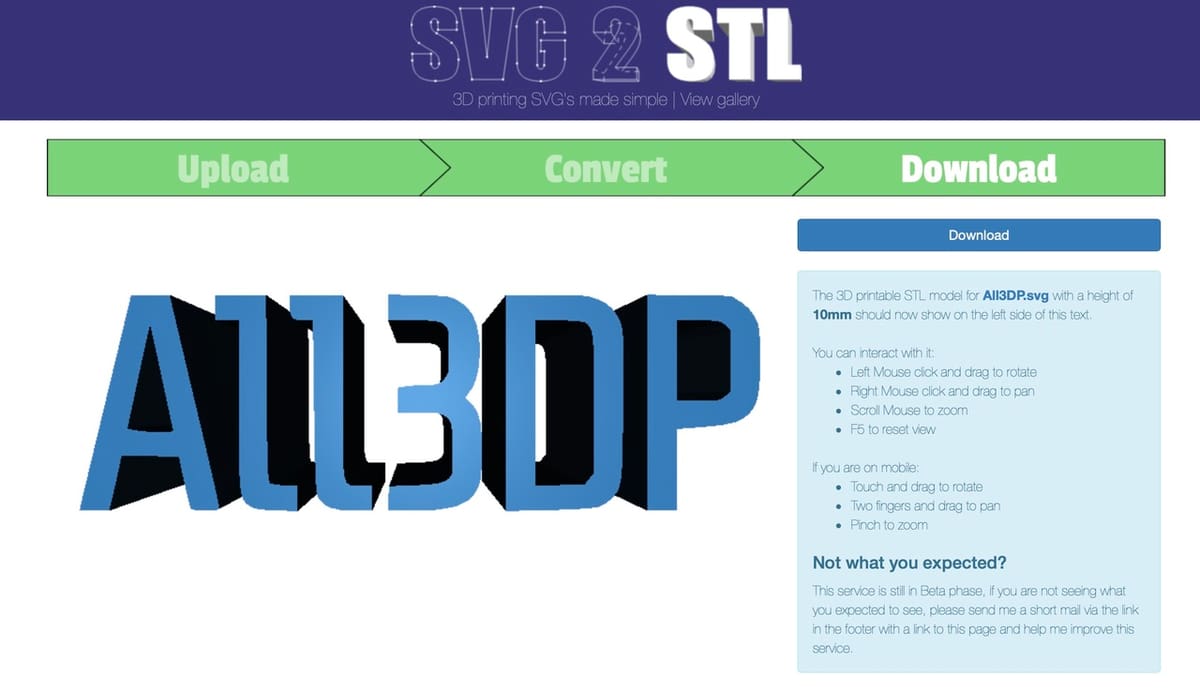
SVG 2 STL is a popular example of a simple online conversion tool. Others include AnyConv, which can convert more complex SVGs (as well as other 2D file formats) but is less flexible in terms of defining how the resulting 3D shape is extruded.
Using SVG 2 STL could hardly be more simple:
- Select the SVG you want from your PC.
- Click “Upload”.
- Choose how many mm (between 1 and 300) you want to extrude upwards.
- Click “Convert”. You’ll be shown a simple 3D representation of the uploaded SVG image.
- Click “Download” if you’re happy with the model generated.
That’s it! The whole process takes seconds for simple SVG files. There’s also a gallery of other recent conversions made using the tool – often a great source of inspiration.
Very complex SVG files or some that construct their shapes in certain incompatible ways may cause the conversion to fail. If that happens, you might want to try one of the options in the following sections.
Option #2: Tinkercad
Using simple online CAD tools gives you much more control over the 2D-to-3D conversion process. We’ll look at Tinkercad in this example, but many other options are available.
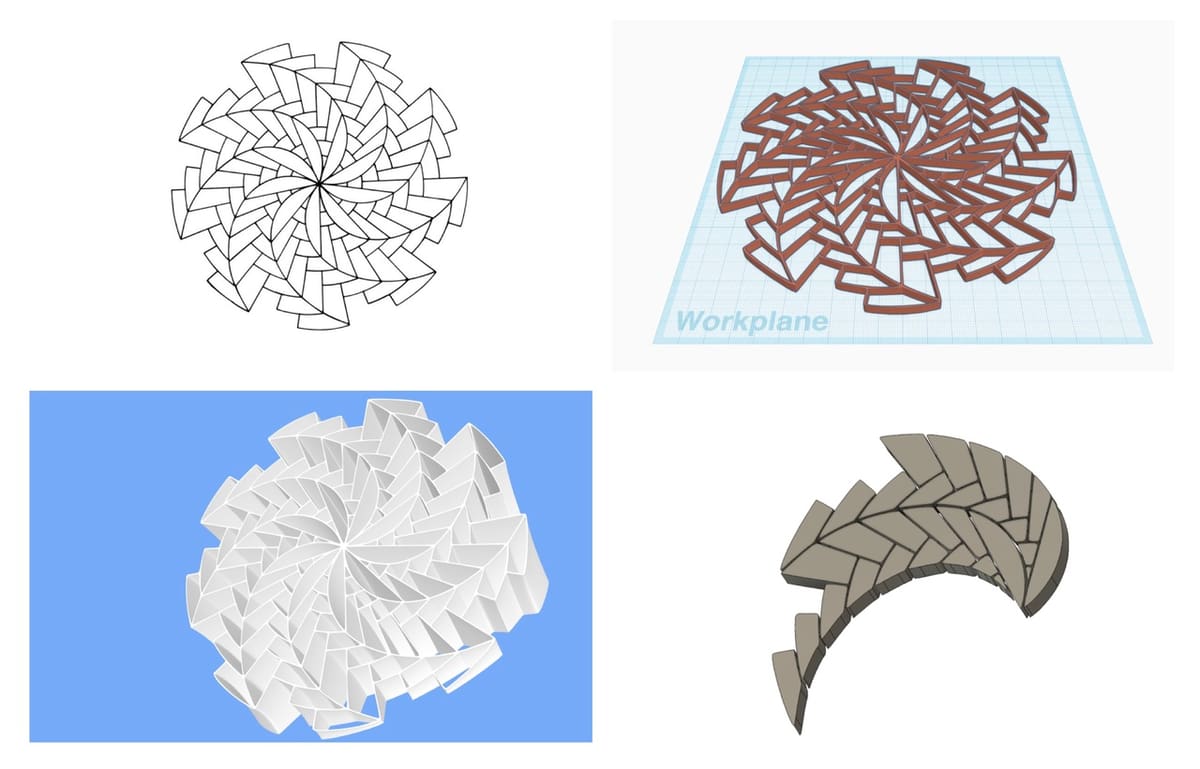
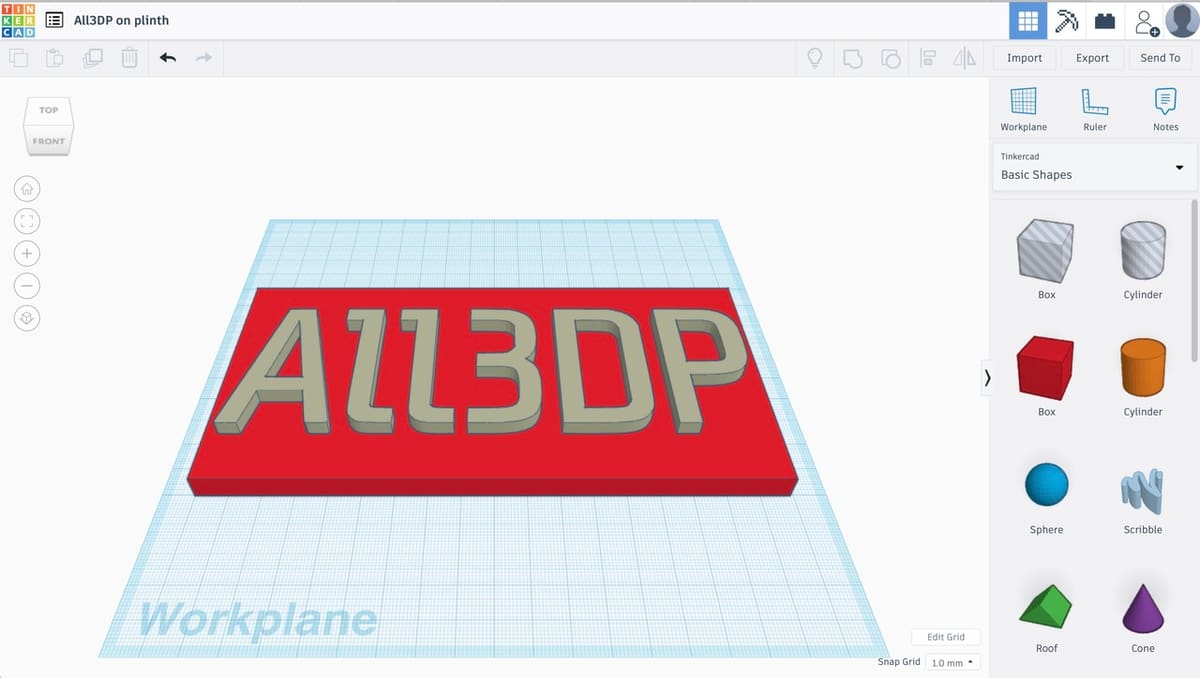
The main difference between the previous conversion method and converting with Tinkercad is that after applying a simple upwards extrusion, you can then modify and add to the resulting 3D model. For example, you can add an eyelet to create a hanging model or a base or plinth for your SVG shape (as shown in the image above).
Before you start, you’ll need to register for a Tinkercad account or log on using Facebook or Google credentials. After you’ve logged in, the steps are as follows:
- Click the “Import” button on the right-hand side of the window, then choose or drag the SVG file you want to extrude. At this stage, you’ll have an opportunity to scale the image to the size you want, but you can also do this after it’s been imported.
- Tinkercad will apply a default extrusion, but this can also be changed afterward by selecting the “handle” in the center of the image and dragging it up or down.
- If you want, use the CAD tools to add to or modify the extruded shape.
- Click the “Export” button, then choose STL as the output format. Your STL file will download automatically.
Option #3: Fusion 360
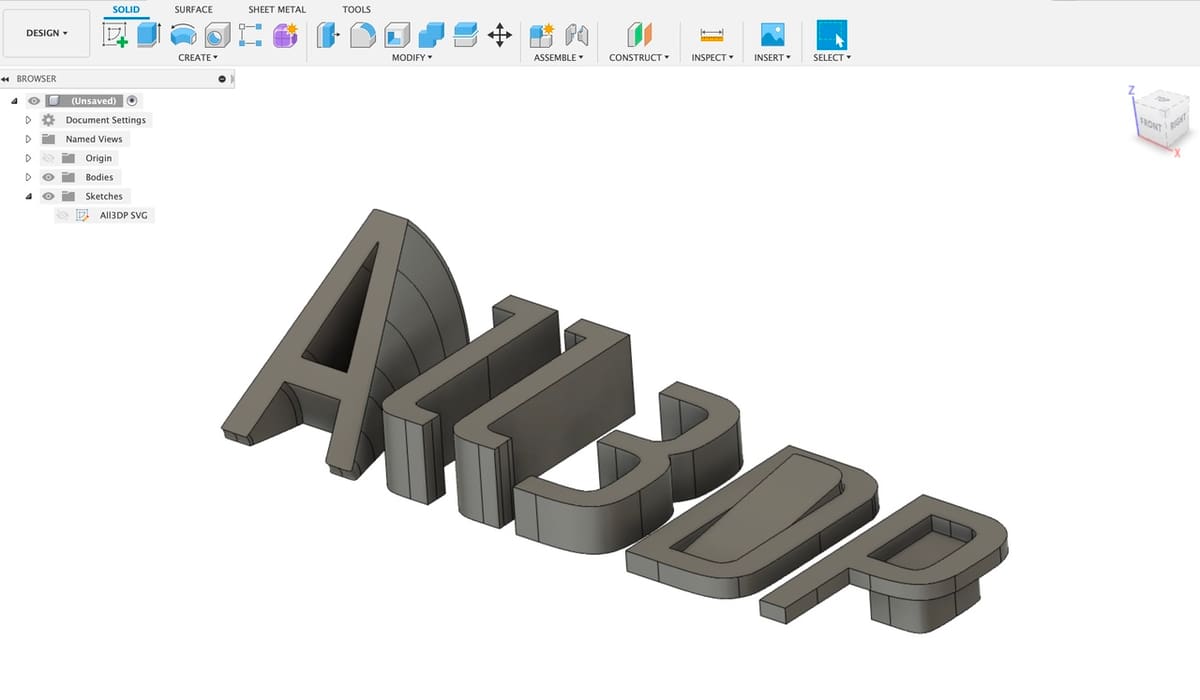
A more sophisticated CAD tool, such as Fusion 360 or one of many alternatives, ups the game enormously in terms of creative possibilities. Compared with Tinkercad, Fusion 360 gives you better access to all of your imported SVG file’s internal geometry. This allows you to apply various transformations to all or just part of the SVG image.
Of course, to be able to do this, you need to understand how to use the tool, and there’s a significantly larger learning curve than for the options above. Check out our great article about using Fusion 360 for 3D printing if you’re interested in exploring more.
In the meantime, the conversion steps are as follows:
- Open Fusion 360, log in, and select a new project.
- Make sure you’re in the Design workspace. Click the “Solid” tab and use the Import option to add an SVG file to a sketch. This will give you access to all of the SVG file’s internal geometry. Typically, this will resolve the SVG file into its component parts, allowing you then to select individual planes or edges for further modification.
- Use the Extrude tool, or any of the other solid modeling tools, to create the 3D shape you want. Add or remove other features of the object as necessary.
- When you’ve created the 3D object you want, select the “Tools” tab, followed by “Make”, then choose “3D Print”.
- Uncheck the option to send direct to a slicer (if it’s there), and click “OK” to save the shape as an STL file.
You’re all done!
Part 2: STL to G-code
Regardless of which of the above options you used, you should now have a 3D model of your original SVG stored as an STL file. Now, you’re ready for the second and final step: converting the STL to machine-specific G-code. To do this, we’ll use what is known as slicer software. This step should be familiar to anyone who has used a 3D printer, but if you’re not, check out our introduction to slicers.
From standalone tools (such as Cura, PrusaSlicer, Simplify3D, Slic3r, among others) or slicing functionality embedded in control software (such as OctoPrint), there’s a wide variety of slicing software out there. In each case, the process to follow is pretty much the same.
G-code for 3D printers is not only specific to the machine, but it also depends on the type of filament used and a host of other settings that control speed, quality, and more. Thankfully, slicer software uses pre-defined profiles that can pre-populate this in advance, making life easier. Another plus is that STL files converted from SVGs are usually simple, so there typically isn’t a need to consider adding supports.
Equipped with your slicer tool and information about your printer and materials, you’re ready for the final steps:
- In the slicer, check that the relevant details of your 3D printer and materials are all specified, or that the appropriate printer, material, and quality profiles are loaded.
- Open the STL file from the previous step and check that it’s scaled appropriately on the print bed, adjusting if necessary.
- Select the “Slice” option to generate the G-code.
- Save the G-code as a local file, or send it directly to your printer (if it’s connected, and this feature is supported).
- Fire up that 3D printer!!
For simple SVG files, that really is all that’s required.
Feeling Ambitious?
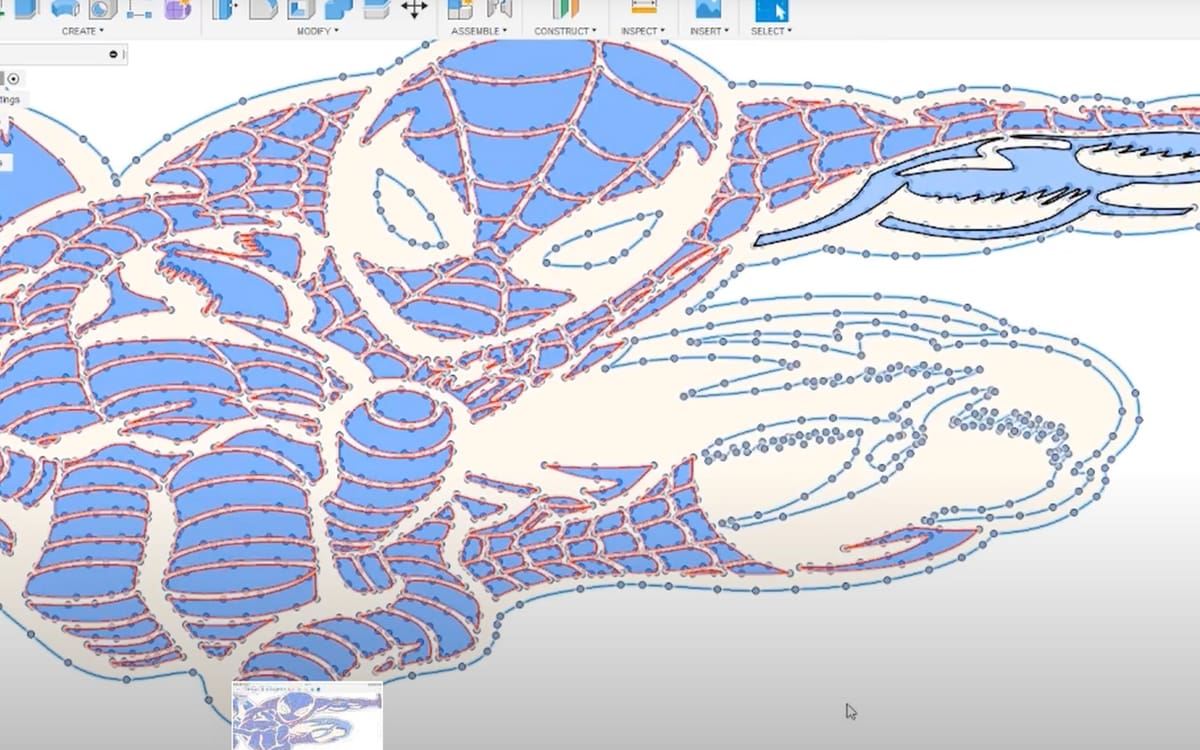
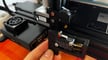
If you’re feeling ambitious, one of the appeals of 3D printing is that there’s always an option to try something a bit more advanced. The image above is a multicolor SVG image that will be converted to an STL file (using Fusion 360) with each color extruded to a different height.
In the slicer, instructions are added to the G-code to request a change of filament color when each of these heights is reached. The result will be a multicolor 3D print that matches the original SVG file.
Converting SVG to G-code opens many exciting possibilities, offering new sources of designs as well as the flexibility to realize those designs in a variety of different physical media. So happy making!
License: The text of "How to Convert SVG to G-code: The Best Options" by All3DP is licensed under a Creative Commons Attribution 4.0 International License.