Stereolithography: SLA 3D Printing Simply Explained

Stereolithography is the oldest form of 3D printing. Read on to learn all about how the technology works and how it compares!
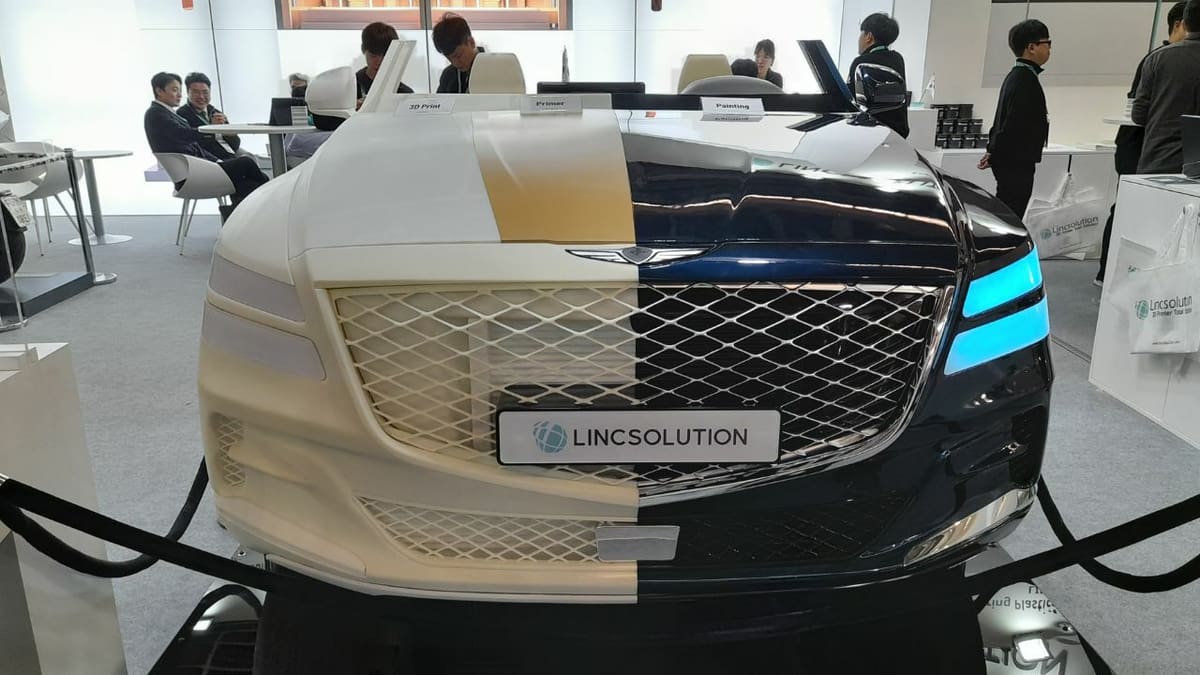
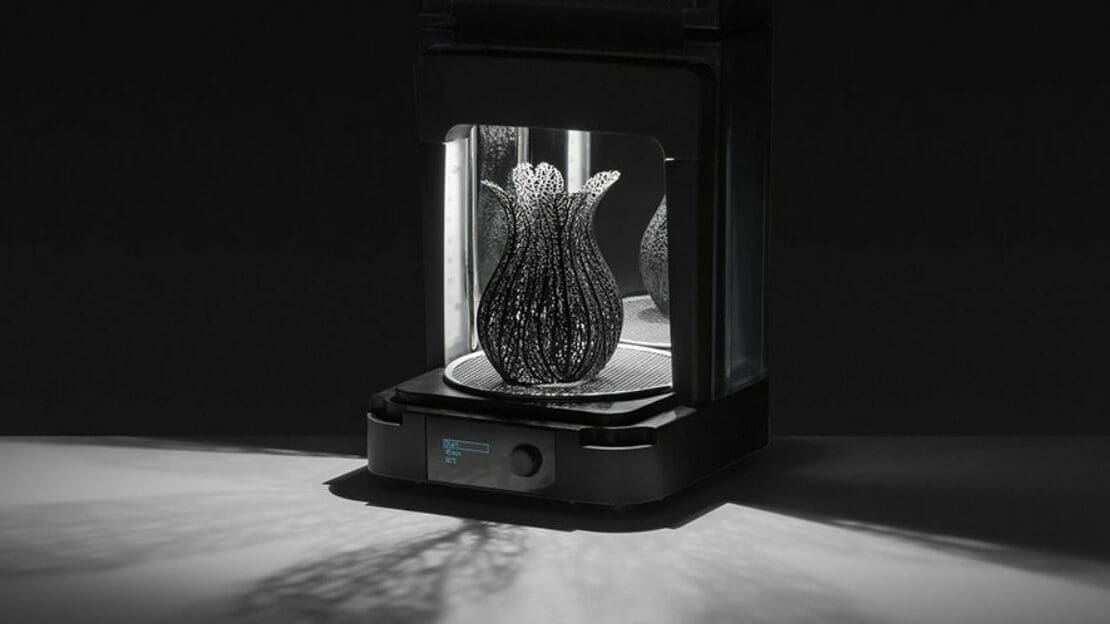
Stereolithography, or SLA 3D printing, is one of the most popular and widespread printing methods in the world of additive manufacturing. It works by using a low-powered laser to harden a liquid resin that is contained in a reservoir, commonly called a “vat”, to create the desired 3D shape. Essentially, this process converts photosensitive liquid plastic into solid plastic in a layer-by-layer fashion in a process known as photopolymerization.
SLA is one of the main 3D printing technologies, along with fused deposition modeling (FDM) and selective laser sintering (SLS). It belongs to the vat polymerization category, which is also known as resin 3D printing and includes newer technologies such as digital light processing (DLP) and liquid crystal display based (LCD) resin 3D printing. In this article, we’ll discuss the basics of SLA 3D printing as well as compare it with other popular technologies.
Let’s dive in!

History
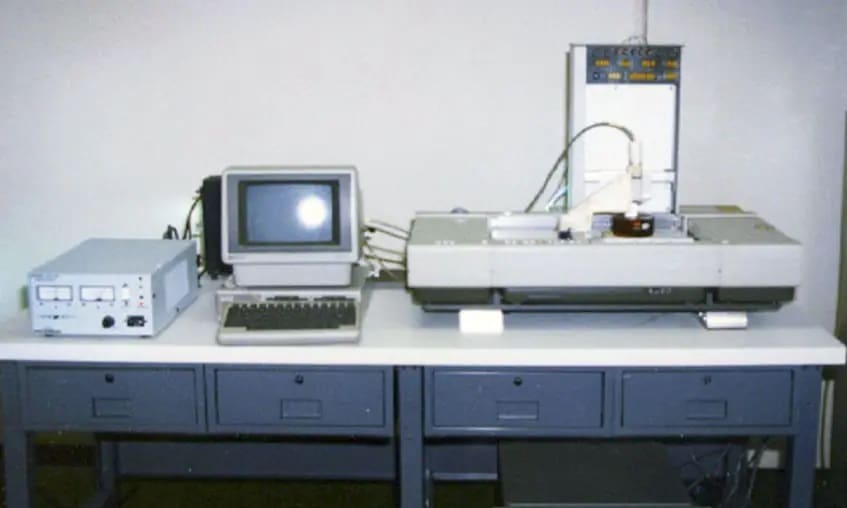
Despite being less popular than FDM technology in hobby circles, SLA is actually the oldest additive manufacturing technique and one of the most popular in industrial settings. The technology and the term were created in 1986 by Chuck Hull, founder of 3D printing company 3D Systems. According to him, SLA is a method of creating 3D objects by successively “printing” layers, by which he meant curing a photosensitive material layer by layer.
SLA was the first entry into the rapid prototyping field during the 1980s and has continued to advance itself into a widely used technology. In 1992, 3D Systems created the world’s first SLA apparatus, which made it possible to fabricate complex parts in a fraction of the time it would normally take. Despite being the first additive process on the market, SLA remains the process that produces the most detailed parts and smoothest surface finish.
Components
Every standard SLA 3D printer is generally composed of four primary sections:
- Vat: This serves as the reservoir for the liquid photopolymer, which is usually a clear and liquid plastic called “resin“.
- Build platform: The platform is lowered into the vat and can move up and down according to the printing process.
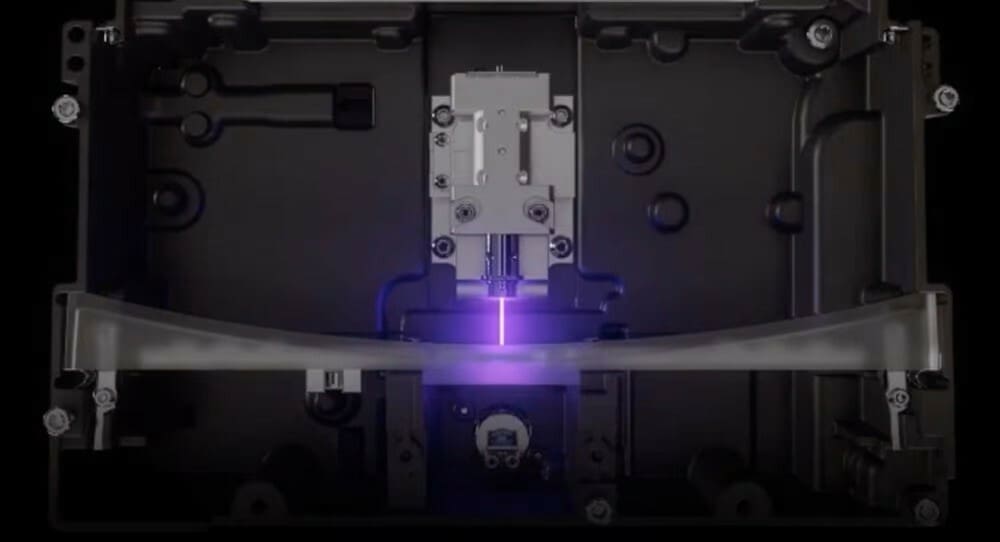
- Ultraviolet laser: The laser cures the layers.
- Computer interface: An interface accessible on the printer itself manages both the platform and the laser movements.
At this point, it’s worth mentioning that most desktop SLA printers work upside-down. That is, the laser is pointed up to the build platform, which starts low and is incrementally raised. This is referred to as “bottom-up” rather than “top-down”.
How Does It Work
Software
As is the case for many additive manufacturing processes, the first step consists of designing a 3D model through CAD or modeling software. The resulting CAD files are digital representations of the desired object.
The CAD files must then be converted into STL files. Standard tessellation language (STL), or “standard triangle language”, is a file format created for stereolithographic printing. The origin of the STL file was in a software suite created by the Abert Consulting Group specifically for 3D Systems back in 1987. STL files describe the surface geometry of the 3D object, neglecting other common CAD model attributes, such as color and texture.
The pre-printing step is to load an STL file into 3D slicer software, which is normally provided by the manufacturer. This software then generates a set of motion commands that can be understood by the 3D printer.
Printing
When the process starts, the laser is directed into a pattern called a “layer” within the vat. Wherever the laser hits, the liquid solidifies. The laser and liquid plastic are the two components required for this photopolymerization, with the laser providing the photon aspect. The laser is usually directed to the appropriate coordinates by a computer-controlled mirror system called a “galvanometer” or “galvo” for short.
After the first layer, the platform is raised according to the layer thickness (which is typically about 0.1 mm), then additional resin is allowed to flow below the already-printed portion. In reality, the bed usually moved much more to allow the viscous resin an easier flow path. The laser then solidifies the next cross-section, and the process is repeated until the whole part is complete. The resin that isn’t touched by the laser remains in the vat and can be reused.
Post-Processing
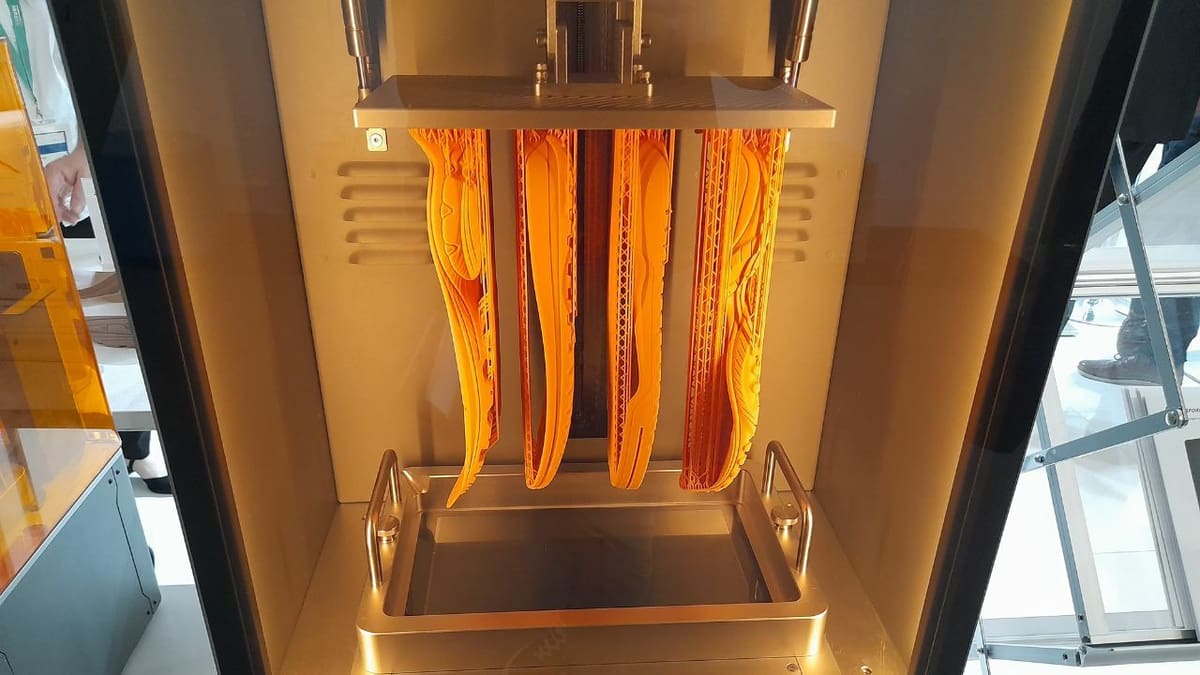
After finishing the entire 3D print, the platform raises out of the tank. At the end of the process, the model is removed from the platform, washed of excess resin with alcohol, then placed in a UV curing chamber. Post-print curing enables objects to reach the highest possible strength and become more stable. This post-curing allows the actual layer curing to happen at a minimum power requirement, which speeds up the overall process.
Alternative Processes
Over the past few years, new resin 3D printing technologies have emerged, namely DLP and LCD printing. Unlike SLA, DLP uses a digital projector to flash a single image of each layer across the entire platform. As the projector is a digital micro-mirror device, each layer will be composed of pixels with some distance between them. Thus, the resolution of a DLP printer corresponds to pixel size and pitch, whereas with SLA, it’s the laser spot size.
LCD resin 3D printing is similar to DLP, but instead of a projector, an LCD screen is used as the light source. It displays a photomask of each layer and is also composed of square pixels. The technology is also known as masked stereolithography (mSLA), and thanks to the low cost of LCD units, these resin 3D printers have proliferated in recent years – with printer models serving everyone from hobbyists to industrial manufacturers.

Pros & Cons
Pros
- SLA is one of the most precise 3D printing techniques on the market.
- Prototypes can be created with extremely high quality, with finely detailed features. You can print thin walls, sharp corners, and complex geometrical shapes with a smooth surface finish. Layer thicknesses can be made as low as 10 μm, with minimum feature sizes typically between 50 and 250 μm. Although these values depend mostly on the viscosity and pigmentation of the material, low viscosities and large amounts of pigmentation typically provide the best results.
- SLA provides one of the tightest dimensional tolerances of any rapid prototyping or additive manufacturing technology, usually something like +/- 0.127 mm.
- Build volumes can be very large.
Cons
- Printing tends to take a long time.
- Steep slopes and overhangs require support structures during the building process.
- Most standard resins will yield prints that are relatively fragile. However, there are tough and engineering-grade resins that are great for printing parts that require strength or other enhanced properties.
- Resins are oftentimes proprietary and therefore cannot be easily exchanged between printers from different brands.
SLA vs. FDM
In fused deposition modeling (FDM), filament is fed through a hot extruder and deposited layer-by-layer. The materials used are typically thermoplastics, but they can be mixed with other elements, including wood, metal, and carbon fiber for a variety of results. This is one advantage over SLA, which has a relatively limited choice of materials. When it comes to hobby usage, the cost of materials is relatively similar for FDM and SLA.
FDM typically doesn’t have the same detail as SLA. The tolerance of the printed part is usually in the hundreds of microns. SLA can produce smaller holes and sharper corners in almost all instances.
An object printed using an FDM 3D printer also requires removing supports (if present) and smoothening surfaces, although some FDM printers can print dissolvable supports – which isn’t available in SLA printing. In SLA, prints are submerged in isopropyl alcohol to remove excess resin before being exposed to passive UV light for extra strengthening. Nevertheless, the final result is typically not as strong as a product made with FDM, but this is material dependent.
Typically, if high precision and a smooth finish are priorities, SLA will be your best bet. If cost and (to a lesser extent) durability play a role, use an FDM printer.
SLA vs. SLS
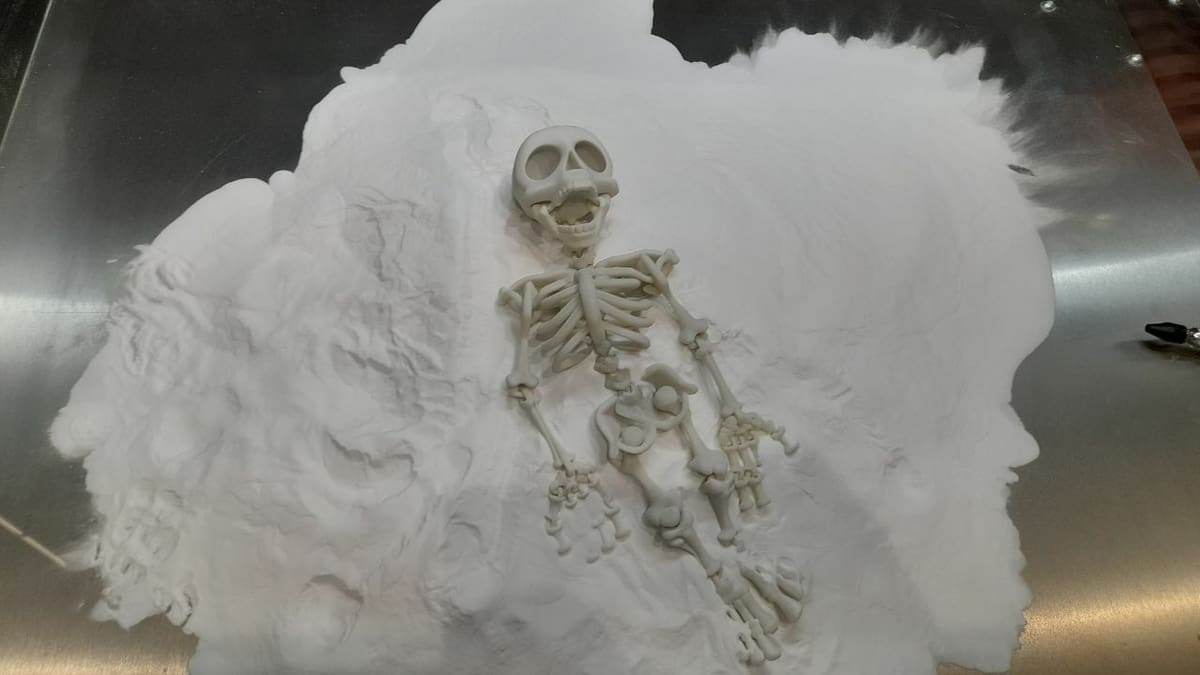
Selective laser sintering (SLS) involves an entirely different approach, although it also involves the use of a laser to draw out the layer. In SLS, the laser is typically more powerful. That’s because, instead of curing a substance, the beam heats a powder to the point of fusing its particles together. Often grouped with SLS are direct metal laser sintering (DMLS) and selective laser melting (SLM), which are specifically adapted to metals. Standard SLS works with polymers like nylon.
Compared to objects made with other technologies, SLS prints can be quite strong and durable, although they may be porous. Since supports aren’t necessary for SLS, prints can be of complex geometries, and parts can be stacked for efficiency. Detailing can be good with SLS, but it generally can’t compare to the precision of SLA. Lastly, the surfaces of SLS printed objects are usually quite rough before post-processing or coating.
Due to their high-powered lasers, SLS machines incorporate more advanced technology, including special shielding against harmful UV radiation. This results in more expensive printers, with few desktop or benchtop options available. Another factor limiting its usage in hobby circles is the danger associated with working with fine powders. Significantly more safety precautions must be used with this process for it to be safe, although companies like Formlabs are making the process more accessible.
Furthermore, SLS powders are more expensive than liquid photopolymers. This is mainly due to the complexity of making such fine particles, so this is unlikely to change much over time.
Basically, if high mechanical strength and printing many parts at once are your priority, and the cost is of minor importance, use an SLS printer. Otherwise, SLA is probably your best bet.

Final Thoughts
Although stereolithography is the oldest among the main 3D printing methods, it still remains an attractive solution for creating prototypes with high accuracy and durability. No process can match its detail and surface finish. Additionally, the range of materials has grown steadily since its inception.
Many industries use this process to build prototypes as well as final products. Though newer forms of vat polymerization, such as LCD-based resin 3D printing, tend to be less expensive and are thus more pervasive in the hobbyist market, SLA printers continue to become more affordable and accessible. Professionals and DIY prosumers are increasingly likely to invest in SLA technology and benefit from its advantages.

License: The text of "Stereolithography: SLA 3D Printing Simply Explained" by All3DP is licensed under a Creative Commons Attribution 4.0 International License.