Simplify3D vs Cura: The Differences

Among the most popular slicers, Simplify3D and Cura split opinions and hearts in the 3D printing community. Find out which is best for you!
A slicing software tool (or slicer) converts a 3D model and some parameters into a set of printing instructions for a 3D printer, usually outputting a machine language known as G-code. It’s not only essential within the workflow of 3D printing, but it’s also one of the most important steps to ensure the success of a project.
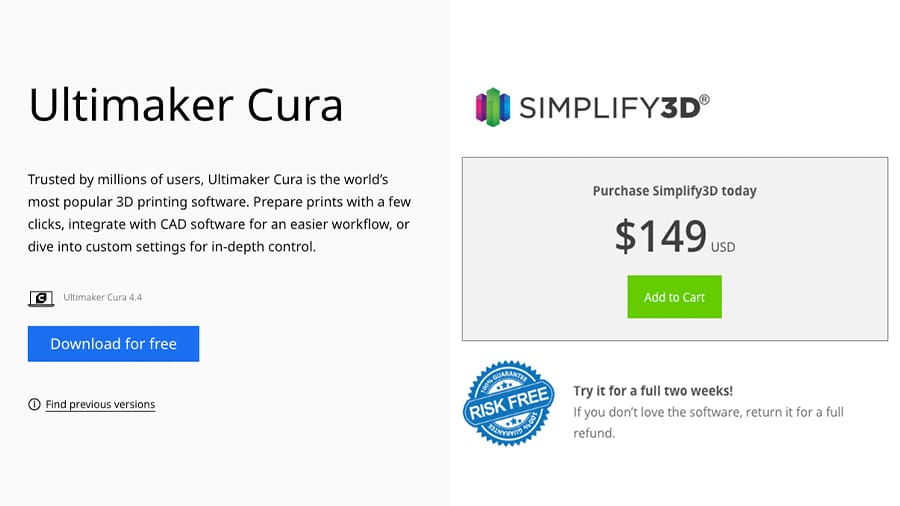
Costing around $150, Simplify3D is considered one of the few premium slicers on the market. Available for Windows, MacOS, and Linux, it’s an ultra-fast slicer, loaded with features specially designed for the best quality 3D printing.
Costing absolutely nothing, Cura is the official slicer of Ultimaker 3D printers and an all-time favorite of makers and open-source fans. It’s known as an easy-to-use slicer that can be enhanced with plug-ins made by members of the community.
In this article, we present the main differences between Simplify3D and Cura. Which slicer will come out on top? Keep reading to find out!

Cost & Updates
The cost is likely the most important difference for the majority of users.
Simplify3D
Simplify3D is probably the most expensive slicer software out there, despite being marketed to beginners and amateurs. Each license costs around $150 and can be purchased directly from their website.
That said, there’s a 25% discount for students and educators, and a 14-day refund policy in case “you don’t love it.”
Simplify3D was last updated in 2019 (4.1.2), mostly for bug fixes and minor improvements. Older versions of the software are not available for download.
At the end of 2018, Simplify3D announced its plans for 2019, which included a major update said to be the “biggest in our company’s history.” To the surprise of all users, they declared that this would be the first paid software upgrade. However, this new version 5.0 has yet to be released (as of 2021).
Cura
While Cura is currently owned by Ultimaker, it’s an open-source platform available under the LGPLv3 license. This means that the program and any future updates are completely free.
Speaking of updates, since its inception, Cura has boasted constant updates, with at least three major releases (4.9, 4.11, and 4.11) in 2021 alone. All of these versions are kept on GitHub.
User Interface & Experience
The software’s user interface (UI) is crucial for good user experience. A UI that’s confusing or overwhelming can inhibit the user’s ability to fully appreciate its features. In this section, we’ll cover some aspects of both slicers in regards to user interface and experience.
Overall Layout
A good layout should be clean, with recognizable icons and buttons, which in turn make the platform as intuitive as possible.
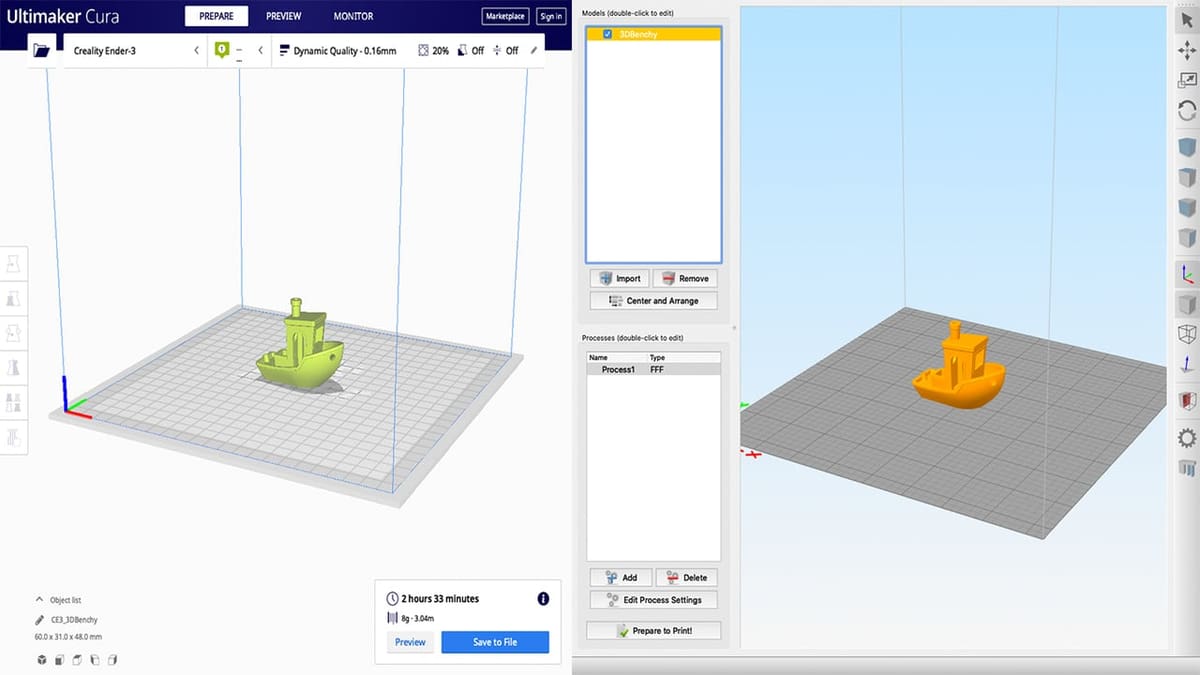
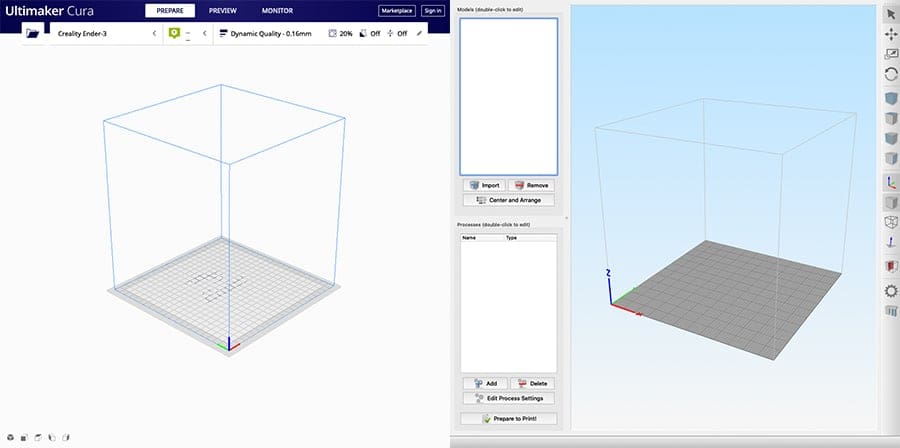
At first, both slicers display nice clean layouts with similar tools for importing models. While Cura has bigger icons and smaller toolbars, Simplify3D’s left panel allows the instant management of all imported models and printing processes.
The buttons for positioning and scaling models are fixed on the right in Simplify3D, while in Cura, they only show up when a model is imported.
Printing Settings Panel
As for process settings, Simplify3D displays a big overlaid window for adjusting the printing parameters. All customizable settings and processes options are divided into tabs, for a total of 12 tabs.
These tabs are organized by specific 3D printing parameters, such as layers, infill, supports, and temperature, enabling a streamlined workflow. Each printing parameter displays a small description when hovering with the mouse.
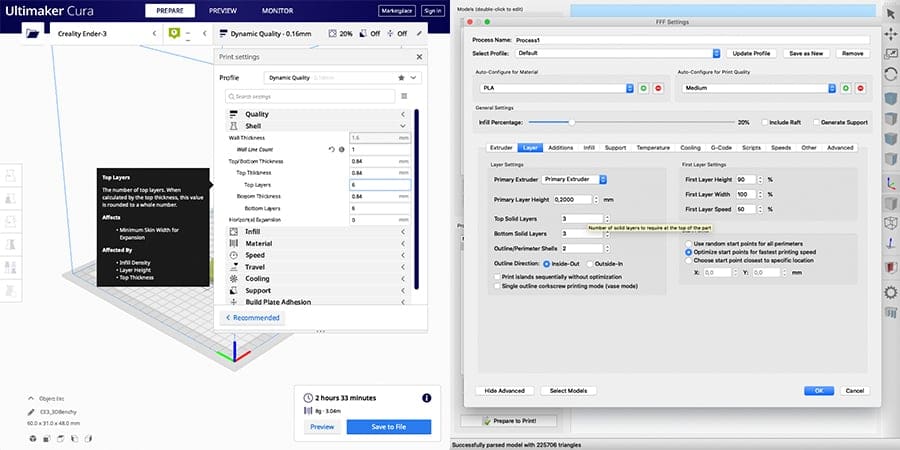
Cura has a somewhat different approach, as the print settings panel is presented in a side window that occupies only part of the interface. The parameters are presented in a sort of drop-down list and are customizable, so you can choose to keep only the most-used settings or those that are most relevant to your 3D printers.
Cura also displays settings descriptions when hovering, but these are a bit lengthier than Simplify3D’s. The range of process settings available for tweaking in Cura is also more in-depth than in Simplify3D.
Print Preview

Both slicers have preview environments, where the printing process can be simulated, analyzed, and checked for errors and inconsistencies. If anything needs changing, the printing parameters and model positioning can be altered within the preview environment in Cura, but this isn’t possible in Simplify3D.
For Simplify3D, if any improvement or error is spotted during simulation, you’re required to exit the preview mode to enter the changes. This back-and-forth can be tiresome since the model must be reprocessed and sliced whenever entering the preview mode. Depending on the size and complexity of the model, the slicing process might take some time (and CPU), even with the fast processing capabilities of Simplify3D.
With that said, both platforms present similar tools for analysis, with different visualization modes like color schemes for different line types (e.g. outlines, infill), feed rate, speeds, and so on.
Printing Information
Regardless of the type of user, from service providers to hobbyists, printing information like time and filament usage is very important.
Simplify3D displays these statistics on the left panel in the preview mode environment (see above). If you want to see the impact of a printing parameter on these statistics (like layer height vs. printing duration), you’ll bump into the same issue raised in the last section – the back-and-forth between working and preview modes.
For Cura, once the model has been sliced, the printing information is displayed in a small window in the lower right of the preview environment. It’s necessary to hover on the little “information” icon to see all the stats, though.
If the printing settings are changed in preview mode, the model can be quickly re-sliced by just pressing a button on the lower right, and will then be replaced by the updated printing information.
Features
The set of features is the backbone of every slicer. These determine what can be adjusted in terms of the 3D printing process and they play a central role in calibration and print quality. In fact, some people use both slicers, depending on the project, to benefit from these different features.
In this section, we’ll be discussing the main feature differences between Simplify3D and Cura.
Printer Setup
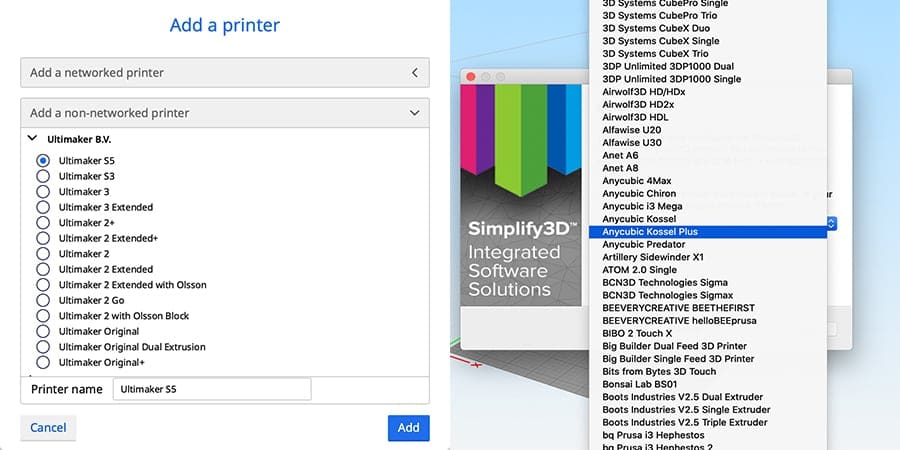
Your slicer needs to know your 3D printer’s properties to be able to create G-code files for it. Rather than inputting all the technical details and dimensions of each printer into the slicer, both Cura and Simplify3D provide ready-to-use profiles for many common printers and brands.
While Cura started by supporting only Ultimaker printers, it now has a comprehensive list of many different brands and models. Simplify3D, on the other hand, has always supported a huge number of 3D printers, including some smaller brands local to specific countries.
Plug-ins
Being open-source software has its advantages. Cura has an online marketplace for plug-ins developed by the user community. Plug-ins can add extra functionality, like new tools and features, they can enable the change of the user interface, or even allow for the import of preset profiles for specific brands of filament.
The platform is accessed within Cura, and it enables the installation and management of all plug-ins. Unfortunately, Simplify3D has nothing of the sort.
Customizable Supports
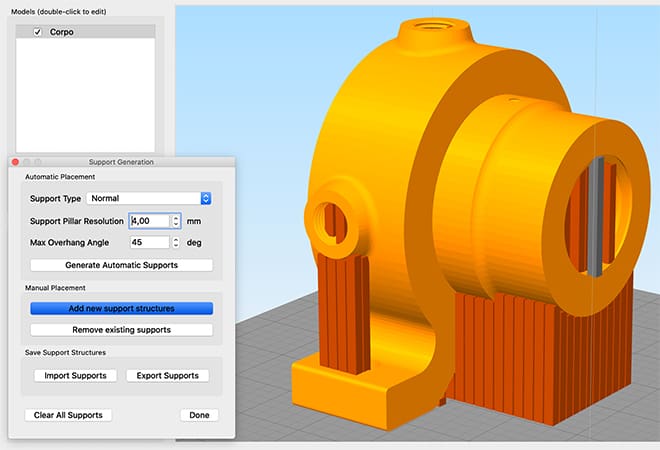
As with any slicer worth its salt, Cura and Simplify3D both create support structures for overhangs. This automatic feature allows the user to set parameters like the maximum overhang angle, density, or pattern before determining support placement.
While this can be considered a sort of customization at first, Simplify3D goes a little further to give the user complete control of support allocation. The “Manual Placement” tools make the process of manually removing and adding support structures very visual and intuitive.
Cura has also implemented some manual customization with the “Support Blocker” tool, but it’s still very constrained when compared to Simplify3D’s functionality. Cura users must rely on third-party plug-ins for real manual support editing.

Processes
Last but not least, one major difference between these two slicers is the ability to create different printing processes within a single G-code file.
By definition, a process in Simplify3D is a set of printing parameters that can be assigned to different models within the same print job, or even in the same model but at different layer heights.
This means that you can have four different models being printed in the same job with different printing settings applied to each, or you can apply different settings to different parts of one model. In addition, depending on the total height of the parts, it’s entirely possible to have each part printed sequentially, one after another.
Although Cura has features that allow different settings to be applied to different models, they’re not quite as intuitive and easy to use as Simplify3D’s processes arrangement. For applying different settings to a single model, external plug-ins are required.
Final Thoughts
Both of these slicers have strengths and weaknesses that can benefit different users. In terms of print quality, there are a number of YouTube videos that try to compare these slicers, but the truth is that both of them are very solid if properly used.
Being very popular slicers, both user communities are huge, with Cura slightly ahead for being open-source and supporting community plug-ins. On the other hand, Simplify3D’s premium features, like manual support customization and processes, are hard to top.
In the end, it’s up to you to decide which slicer better suits your needs. As Cura is free, it could be better to start there and upgrade to Simplify3D if you feel its unique features will enhance your setup. You may also want to get to know them both and switch between them depending on the specific project.
Lead image source: Lucas Carolo via All3DP
License: The text of "Simplify3D vs Cura: The Differences" by All3DP is licensed under a Creative Commons Attribution 4.0 International License.