Simplify3D: Beginner’s Guide to This Premium Slicer

Simplify3D is a controversial 3D printing software: Some say it's overpriced, others can't live without it. Let's explore its most important aspects!
Simplify3D is a very popular 3D printing software tool. The creators claim that it’s an “integrated software solution” for 3D printing, and it is in fact a powerful slicer.
Slicing software converts 3D digital models and their printing process parameters into instructions for the 3D printer to perform. Using such software is, therefore, an essential step for any 3D printing procedure.
In this article, we’ll provide a general overview of Simplify3D, talk about its strengths and weakness, and finally guide you through the first steps of slicing a model and getting it ready for printing. Let’s get started!
Overview & Pricing
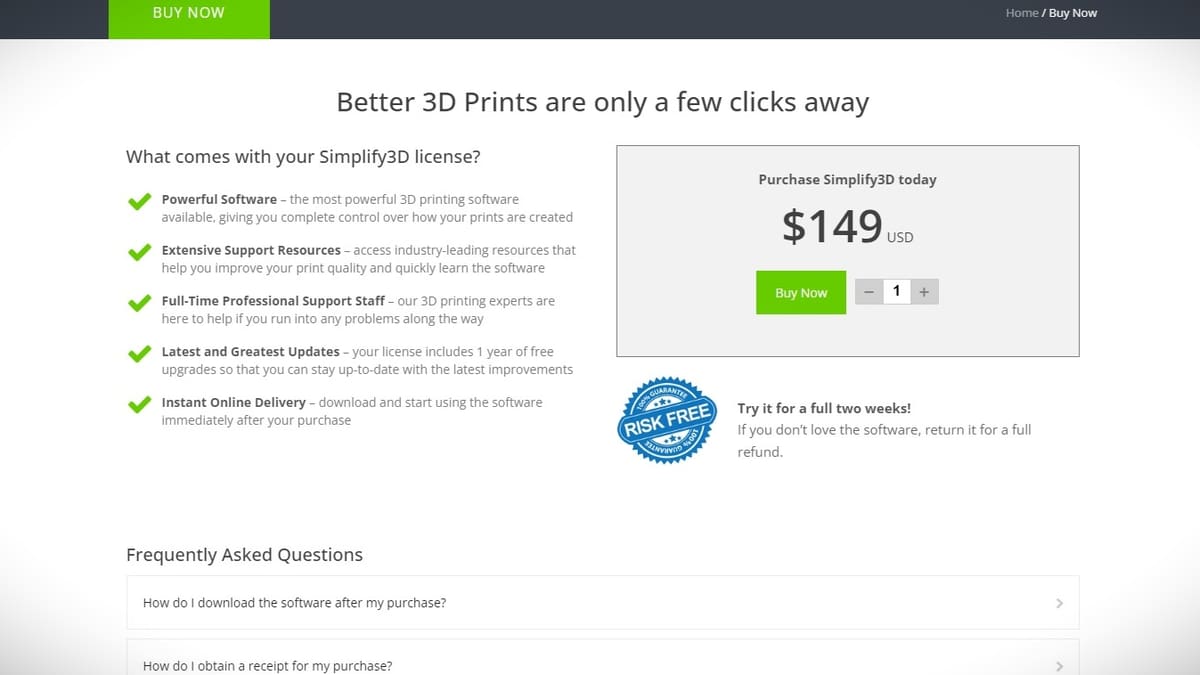
Simplify3D is among one of the best-known slicers in FDM 3D printing. In fact, alongside Cura, it’s generally considered to be the best, with Slic3r following close behind. That said, the main aspect separating these three slicers is the cost. While Cura and Slic3r are entirely free (and open-source), a Simplify3D license will set you back $149.
Often considered overpriced, the fact is that many people are willing to pay for the one-time license. Up to now, all software upgrades were free of charge, being updated twice (4.1.1 and 4.1.2) in 2019.
We say “up to now” because Simplify3D announced in 2018 the development of version 5.0, said to be “the biggest update in company’s history”. This will be the first paid software upgrade, although the company still hasn’t given a release date.
In terms of print quality, all three of the slicers perform about the same, if properly used. They all possess the same basic tools that allow for decent slicing. Yet, the devil is in the details, as the organization and usability of these tools can make a real difference in any 3D printing workflow.
Why Use (and Pay For) Simplify3D?
For any software, the user interface (UI) needs to be clean and as intuitive as possible, and Simplify3D delivers on both. The design is simple, with only a few toolbars on the main screen, which makes for great user experience.
Don’t let that simplicity fool you, though. Simplify3D has one of the most powerful toolsets for customization and settings configuration on the market. The advanced process settings, perhaps its core feature, are logically divided into tabs that can expedite your workflow.
After the printing settings have been defined, the preview mode provides an interactive simulation of the 3D printing. With this, the user can check every step of the process, checking for errors and potential improvements before actually sending it to the printer. Simplify3D has a special interface that can control the 3D printer via USB cable, and live track all its movements.
To better understand all of these features, besides the official support from the company, Simplify3D has a great user community. You can find great unofficial guides and tutorials on YouTube and GitHub.
Let’s get familiarized with some of Simplify3D’s unique features.
Features
Simplify3D has some key features that many people feel are worth paying for.
3D Printer Configuration Assistant
A slicer must know the physical details of the 3D printer if it is to provide it with instructions for printing. And while these can be set manually, where the user inputs all the not-so-simple technical details, Simplify3D has a comprehensive list of configurable 3D printers with ready-to-use presets, requiring little to no extra input.
The company claims to support 95% of all desktop 3D printers on the market, and these profiles even contain suggested printing parameters, which is a nice starting point for beginners.
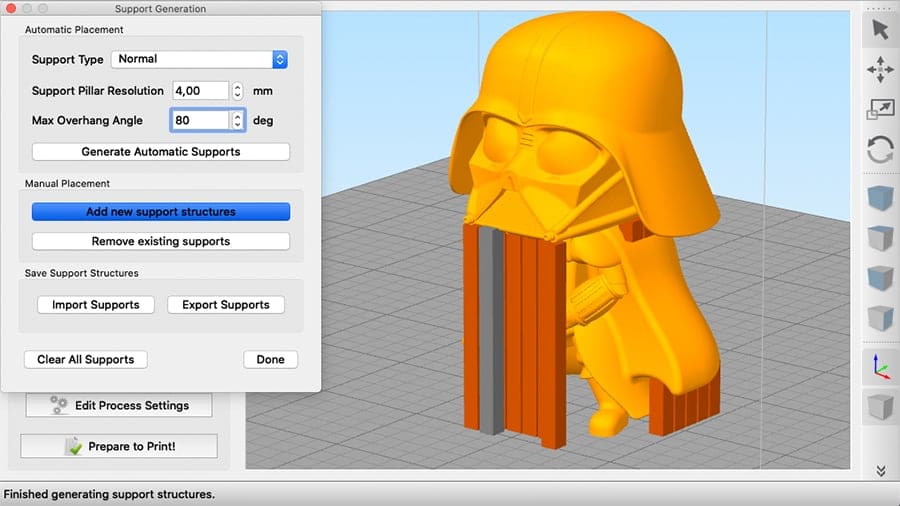
Custom Supports
Although most common slicers perform automatic support creation for overhangs, Simplify3D is somewhat unique in that it allows the user to manually customize them.
Rather than only controlling a few support settings, like density, overhang angle, and pattern, Simplify3D hands over full control of the support structures. The “Manual Placement” tool is probably the easiest, most intuitive way to provide finer control of support allocation within any slicer, and there are even more powerful tools just waiting to be utilized.
Printing Processes
Another handy feature is the printing process arrangement. A process is a set of 3D printing parameters like layer height, temperature, and speeds. Simplify3D allows the creation of many different processes within the same print job.
Multi-process printing enables the simultaneous build of multiple objects with different settings. Depending on the printer and the models, “sequential printing” can be performed, which is when each object on the plate is printed one at a time, rather than simultaneously.
One single model can have multiple processes too. Each process can be assigned to a specific height range. This means that different parameters like infill, temperature, and cooling can vary multiple times at different heights on the model.
Tutorial: First Steps
If you decided to go with Simplify3D and haven’t tried it yet, now’s the time.
Configuring Your 3D Printer
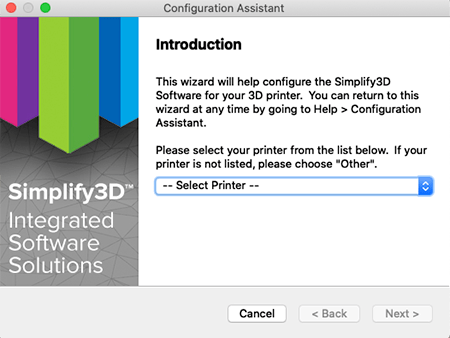
When you open Simplify3D for the first time, the Configuration Assistant will immediately pop up. If it’s not your first time using this slicer, access this tool at “Help > Configuration Assistant”.
For setting up your 3D printer, simply select it from the dropdown menu and Simplify3D will automatically do all the work. If your machine isn’t available, don’t worry – you can configure it manually. To do this, select “Other” and then “Next”.
Unless it’s a homemade printer, you can contact your printer’s manufacturer or check its advertised specifications. This can provide you with the settings for manual configuration.
Setting the FFF Profile
Once configured, Simplify3D will not only know how to communicate with your 3D printer, but also provide the printing settings for it. This knowledge package is called “FFF Profile”.
Although some settings are related to physical properties, like nozzle diameter, most of them are suggested values that constitute a great starting point. To achieve good quality printing, though, you’ll need to adjust them according to material and the 3D model that will be printed.
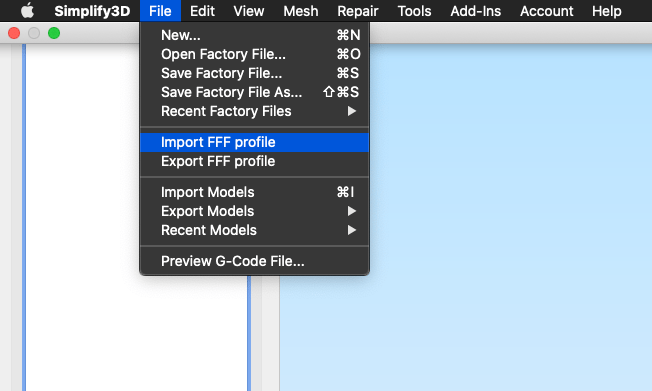
Adjusting these settings requires time and testing. Just know that you can import, save, and export profiles, meaning that they can be shared within the user community. If you already have a profile, go to “File > Import FFF profile”, and select the desired .fff file.
In case you want to share yours, or even save it for any reason, go to “File > Export FFF profile”.
Learning the Interface
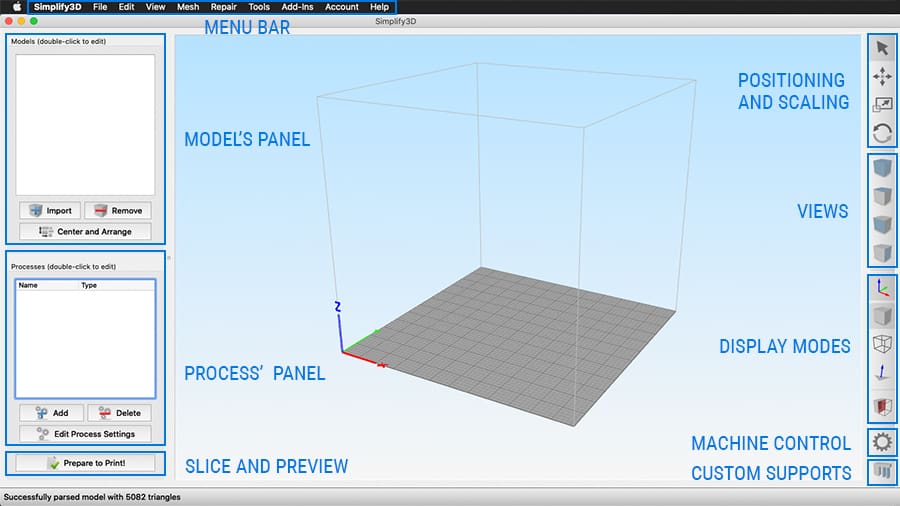
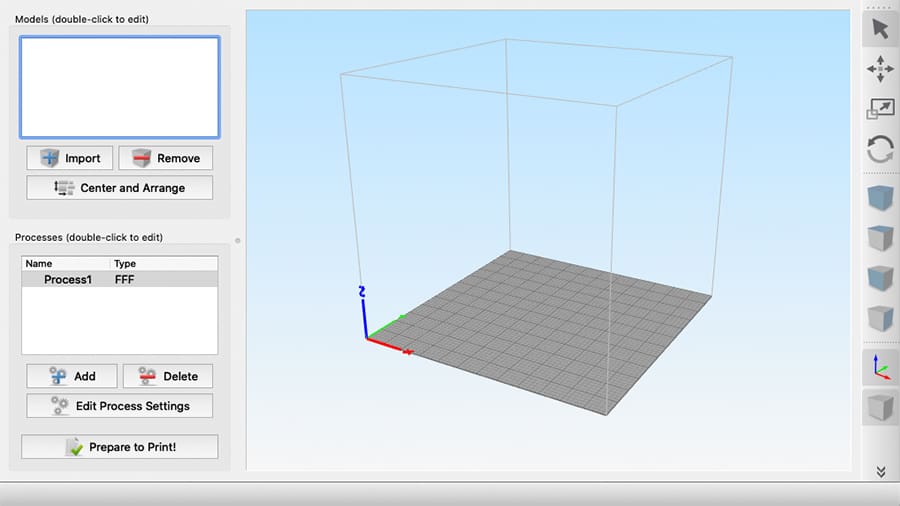
Now that your 3D printer is configured, let’s check out the interface. Once again, it might seem simple and clean, but it displays all the tools required to set up your model for printing.
At the center is the build plate, also known as the print bed. You can zoom in and out with the mouse scroll wheel, rotate around with the left button, and pan with the right.
The top menu bar contains virtually all the tools seen on the main screen and more. It has more advanced tools like mesh repair and firmware configuration. You can also logout from the software and check for updates in “Help”.
With the model panel, you can import and manage 3D models. All imported models are displayed in a list, and selecting a model here will highlight it on the build plate for easy identification.
Once imported, every model can then be positioned, scaled, and displayed in different views and modes using the icons on the vertical toolbar on the right. There’s a “machine control” tool icon for controlling the 3D printer via USB and to access the much-celebrated custom supports feature.
The process panel contains all of you printing processes. You can edit them individually by selecting the process and clicking on “Edit Process Settings” or by simply double-clicking it.
When ready, the “Prepare to Print!” button in the lower left will slice the model and take you to the preview mode, which we’ll cover in a later section.
Yes, it all seems a bit confusing at first, but stick around as we cover all the steps from importing to preparing a file for printing.
Importing & Positioning 3D Models

The most common file type for 3D printing is STL, but Simplify3D also supports OBJ and 3MF files.
To import a 3D model, click on “Import” in the model’s panel on the left, or drag-and-drop the file directly to the build plate. Next, we’ll have to position it on the build plate accordingly.
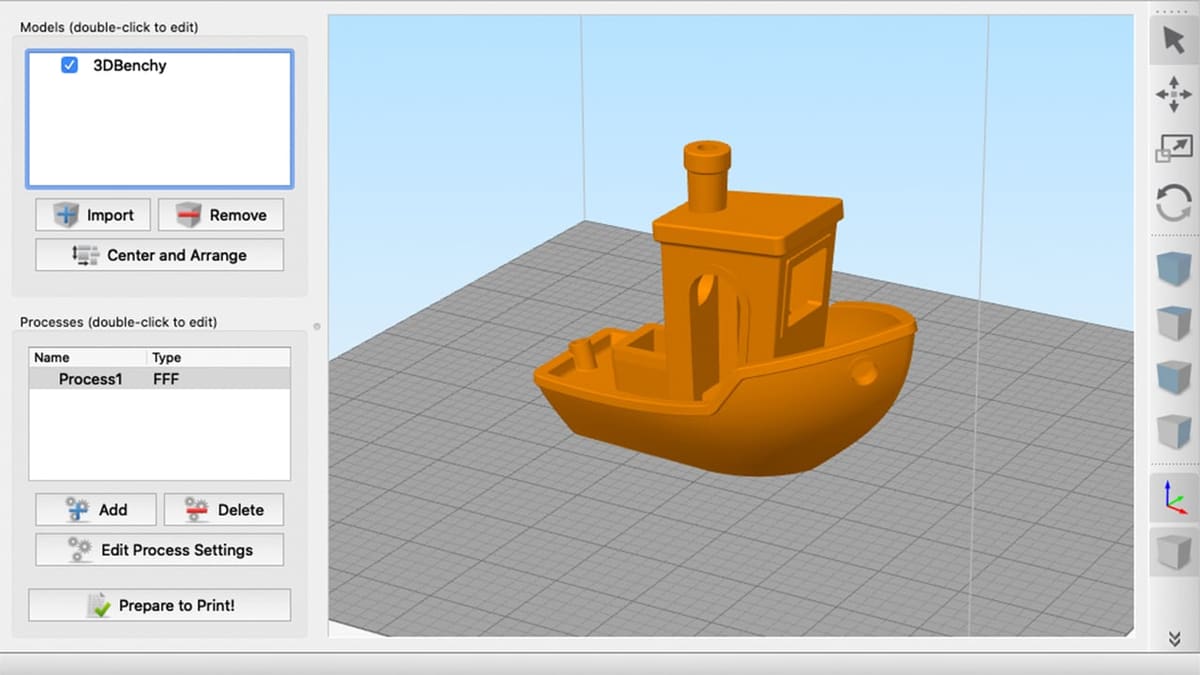
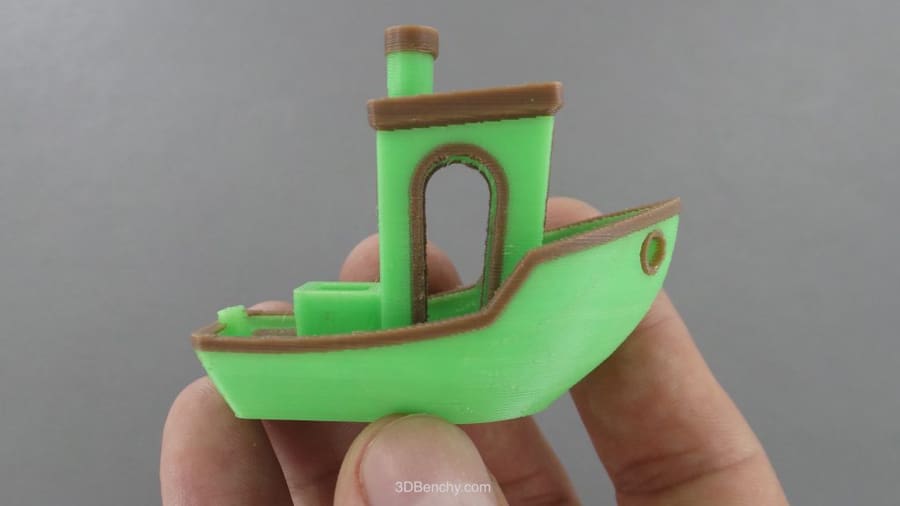
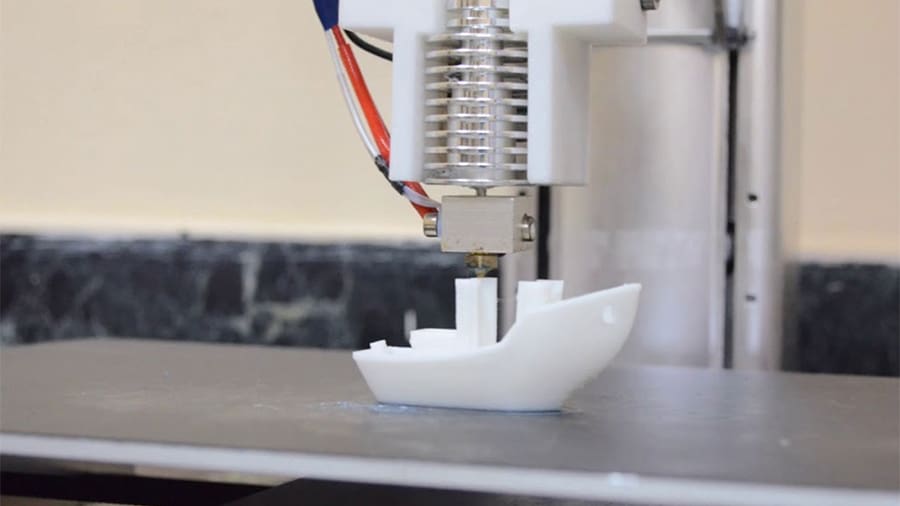
Usually, you’ll want to lay a flat surface directly on the plate, but that’s not always possible. Experience will teach you about part orientation in 3D printing, but for this guide, let’s say we’re printing the famous 3DBenchy.
We want to place its bottom surface on the bed and there’s a couple of ways to do it. For starters, double-clicking the model on the build plate will open a right-side panel, where you can enter a numerical value to spin the model around an axis.
The simplest way, though, is by going to “Edit > Place Surface on Bed”, or using the shortcut CTRL + L (CMD + L on Mac). Then, click on the surface you want to have flat on the build plate. The model will automatically be positioned.
The “Center and Arrange” button centers the model or arranges multiple models around the build plate center. (It automatically keeps some space between each model.) If you want to manually position your models, use the “Translate Models” tool in the toolbar on the right.
Adjusting Process Settings
Perhaps the core feature of any slicer, the right process settings are the difference between failing and succeeding with a print job. These printing parameters will specify exactly how the 3D printer will build the object.
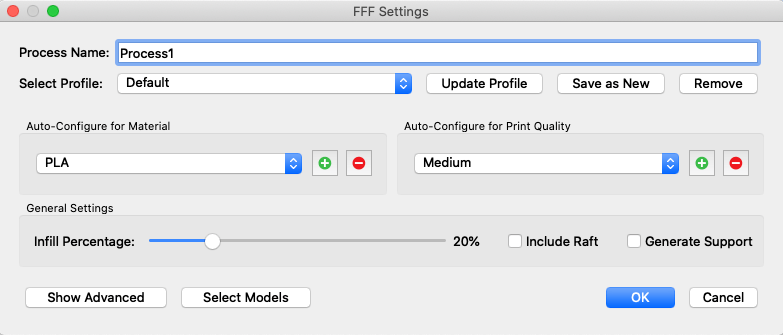
Usually, a default process is already set on the lower-left panel,. To fine-tune it, double-click the process in the panel, or select it and click “Edit Process Settings”.
Initially, a small “FFF Settings” window will pop up. Here, you can select different printer profiles (and load the corresponding settings) or select the intended material (PLA, ABS, PETG, etc.) and print quality (fast, medium, or high). There’s also the possibility to set the infill percentage and allow automatic support generation. So far, so good.
Now, the real value of Simplify3D is in the advanced settings. Click on “Show Advanced” in the lower-left corner, and the window will more than double in size. You’ll see 12 categorized tabs filled with custom settings. Let’s briefly go over them.
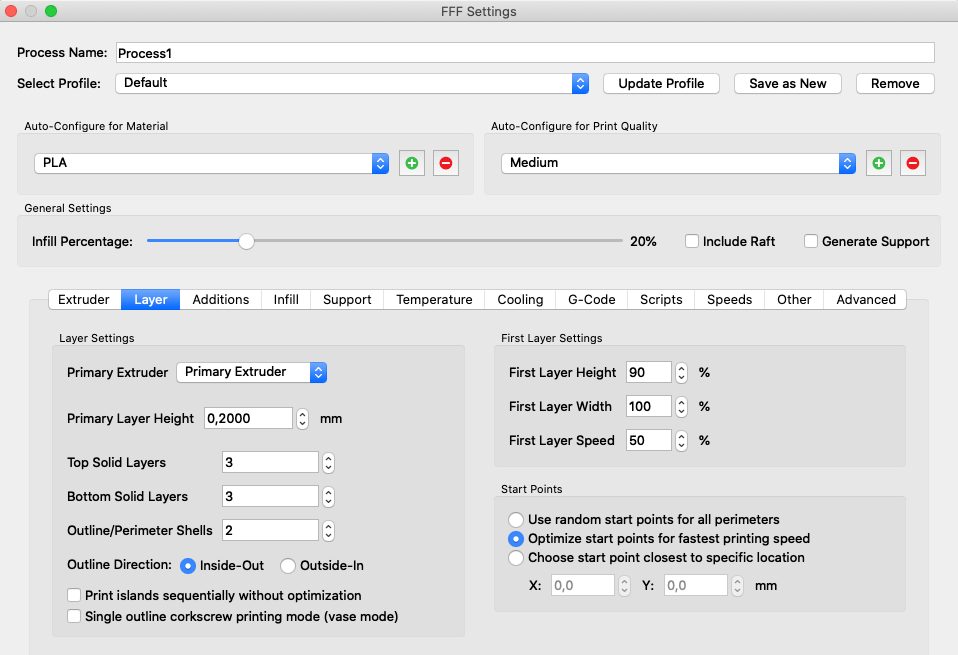
Advanced Settings
- Extruder: Contains all parameters related to the extruder, such as nozzle diameter, extrusion width, and multiplier (material feedrate). The “Ooze Control” section, with features like retraction, helps to prevent unwanted strings that might appear on your prints.
- Layer: Probably one of the most important ones. Here, you can choose the final object layer height, the number of perimeters, and more. The first layer, crucial for good adhesion to the build plate, can be adjusted independently here.
- Additions: Includes extra features, like skirts and rafts. These help ensure a good print by improving the part’s adhesion to the bed (skirts and rafts) or aiding in multicolor printing (prime pillar and ooze shield).
- Infill: Contains all infill-related settings. These can be highly customized, from choosing a specific fill pattern to even setting angle offsets between the lines.
- Support: Includes all parameters that control and define support structures. Be sure to enable the automatic generation by clicking on the checkbox “Generate Support Material”.
- Temperature: One of the most crucial parameters for 3D printing. In the temperature tab, you can set both the heated bed and extruder temperatures. It’s also possible to set different temperature values for different layer ranges.
- Cooling: Similar to the temperature, specifies how quickly the cooling fan will run and when to turn it on or off. Here, you can also set different speed values for different layers.
- G-Code: More advanced settings, related to the printer’s firmware and other definitions, like build volume. Usually, these are automatically defined by the Configuration Assistant.
- Scripts: Yet another feature for more advanced users. Here, you can have your own G-code incorporated into the final process file.
- Speeds: Controls all the printing speeds. (Yes, there are more than one.) You might want to slow down the outline speed for better surface quality while speeding up the infill to reduce the overall print duration. These values are represented as a percentage of the “Default Printing Speed”.
- Other: Contains settings that are unrelated to other tabs but are still very relevant, like “Bridging” and “Filament Properties”, where you can fine-tune the material diameter, set the density for different materials and even assign prices (to use in the calculation of print cost estimates).
- Advanced: More like miscellaneous settings that wouldn’t fit under any other tab. You’ll find more parameters tied to ooze (stringing) control and a couple of sections for adjusting the extrusion for small details and thin walls.
Again, it might feel a bit overwhelming at first, considering all these different settings and parameters. The truth is that even for more experienced users, some of these parameters are kept unchanged. With time and experience, you’ll be able to understand them better and learn a bit more every time.
Prepare to Print
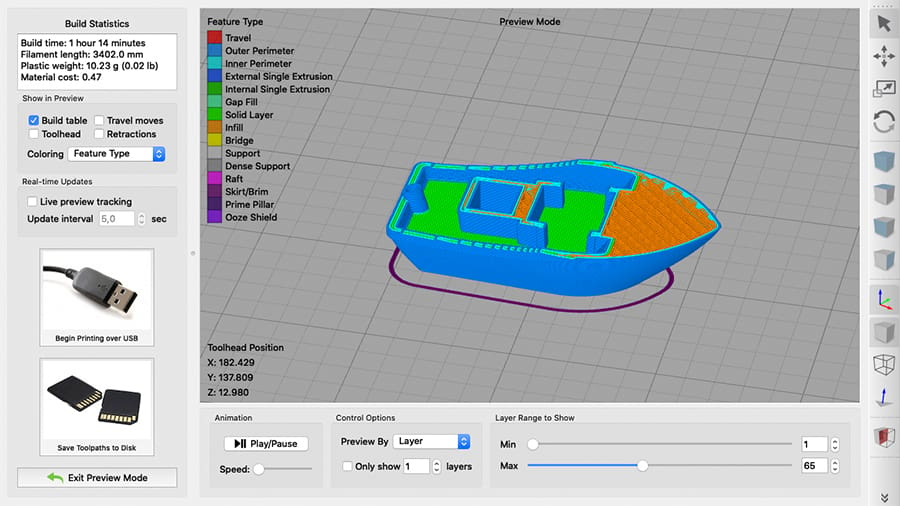
With the model well-positioned and the process parameters all set, it’s time to get ready for printing. On Simplify3D’s main screen, click on “Prepare to Print!” for your model (or models) to be processed and sliced. Note that it might take some time depending on the model size and complexity.
Next, you’ll be taken to the preview mode. In this environment, the build process is simulated. In the top-left corner, the “Build Statistics” panel displays information like build time and material quantities used.
Just below, the “Show in Preview” buttons customize the way the simulation is viewed. You can toggle the build plate, travel moves, and retractions views between on and off. The color scheme displayed for the model can also be changed in the drop-down menu.
The simulation is controlled in the panel on the bottom. The “Play/Pause” button will start the preview, while the playback speed can be adjusted below.
In “Layer Range to Show”, the leveler labeled “Max” allows manual control of the preview. Drag the button from left to right to check the printing process from the first layer to the last. This is where you can check for potential errors, like unsupported areas, before moving to the last step of the workflow.
Printing
Congratulations! You just prepared and sliced your first model! The very last step is to boot up your 3D printer and transfer your G-code file.
The easiest way is to print from an SD card. To do that, click on “Save Toolpaths to Disk” and Simplify3D will export the G-code file to a location you choose. The output is the file you’ll put on the SD card for your printer.
Your model can also be printed by connecting your printer to the computer via USB. In this case, the 3D printing is controlled through Simplify3D, so it’s necessary to keep the printer connected at all times, which can be inconvenient. To start, click on “Begin Printing over USB”.
And there you have it! There’s still much to learn, so be sure to check out some of our other tutorial articles like our guide to Simplify3D troubleshooting. Happy printing!
(Lead image source: Lucas Carolo via All3DP)
License: The text of "Simplify3D: Beginner’s Guide to This Premium Slicer" by All3DP is licensed under a Creative Commons Attribution 4.0 International License.