These days, 3D printing technologies are used by everyone from hobbyists to high-level industries, but the rise of 3D printing into an accessible manufacturing method didn’t happen overnight. Even after FDM technology became more widely available, the software part was yet to be figured out. Enter Repetier Host.
In 2011, finding no suitable software for their Reprap Mendel, Marcus and Roland Littwin began to develop their own. What started as an individual project later grew to become Repetier Host, a leading slicer in the 3D printing industry. Now, the Repetier ecosystem incorporates Repetier firmware and even the Repetier Server.
Repetier Host is a 3D printer host and slicing program that converts STL files into G-code using one of three prominent slicing engines: Cura, Slic3r, or PrusaSlicer. It also has tons of features that are aimed at improving your 3D printing setup. In this article, we’ll be discussing everything you need to know about Repetier Host: its features, functionality, settings, and a whole lot more.
Full of Features
Repetier Host has a comprehensive suite of features to aid your 3D printing workflow.
- Slicing engines: As stated earlier, Repetier Host provides you the benefit of a choice of three powerful slicers for your 3D model.
- Velocity painting: This feature allows you to imprint images onto a surface to make it look like a pattern has been carved.
- Manual control: Repetier Host primarily started as a host software for 3D printers, so manual control is an important and leading feature of the software.
- Multi-extruder support: Repetier Host allows you to configure up to 16 extruders for your 3D printers, adding easy multi-material capabilities.
- Repetier Informer app: This app works alongside Repetier Host to keep you informed via your phone about your ongoing 3D prints.
- Custom Repetier: If you’re a 3D printing professional or running a printer farm, Repetier offers a customized version of the software that’s optimized for your setup.
Starting Out
Installing Repetier Host software is as easy as it gets. The software is available for Windows, MacOS, and Linux, and the installation files can be downloaded for free on the Repetier website, though donations are encouraged.
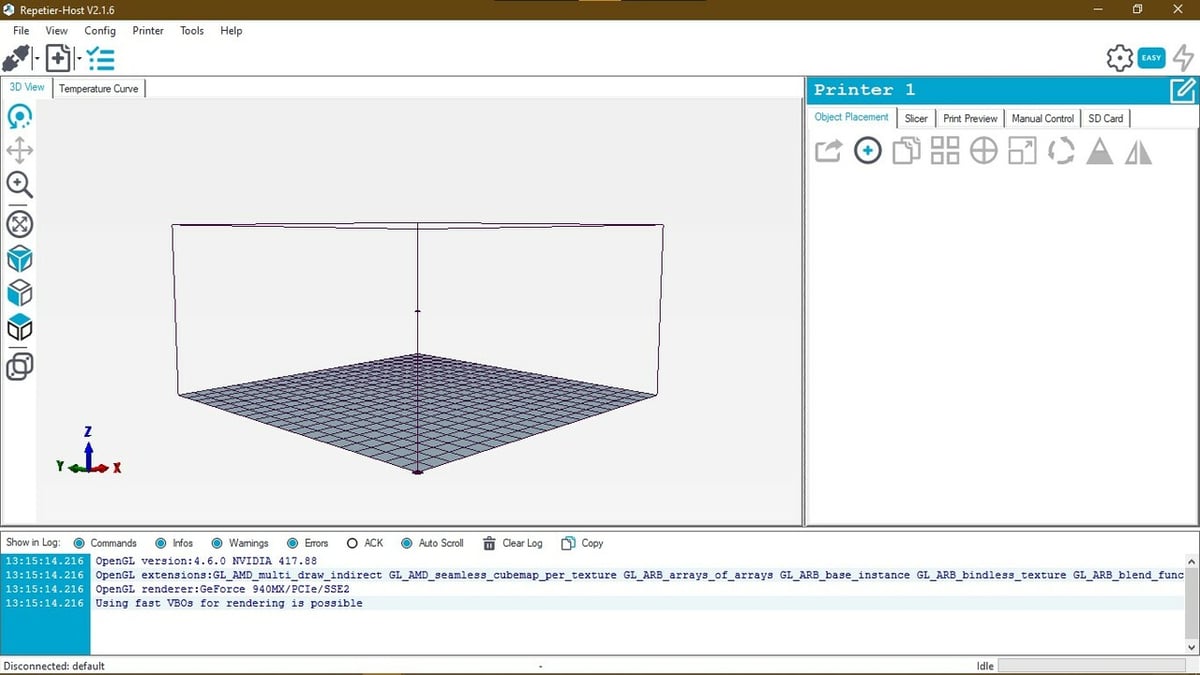
After installation, once you open the software, you’re greeted with a clean white-and-blue user interface (UI). The window is divided into two columns: one for a preview of the print space (including controls on the left) and the other for the printing settings and other configurations. At the top of the window is a menu bar that contains most settings for the slicer.
Once you’ve configured your printer in the “Printer settings” tab, the rest of the process is pretty straightforward. The basic workflow is very intuitive and similar to that of all slicing software
When it comes time for slicing, you can choose from different slicing engines. Whenever you toggle between the slicers, you’re presented with a different set of settings that are particular to each slicing engine. Then, the export section provides you with two options, either to send the G-code file directly to a connected printer or to save it to an SD card.
Slicer Basics
Here are a few of the essential functionalities that you can expect from any slicer. We can evaluate a slicer on how well it performs the basic tasks and how it differs from the competition.
3D View
This is the space where you can preview a model on your printer’s build plate, and make adjustments to the scale, placement, and so on. In Repetier Host, there are clear buttons for loading 3D models into the slicer and orienting them on the print surface. On the right-hand side, in the “Object Placement” tab, you can perform more actions to prepare a model for some slicing.
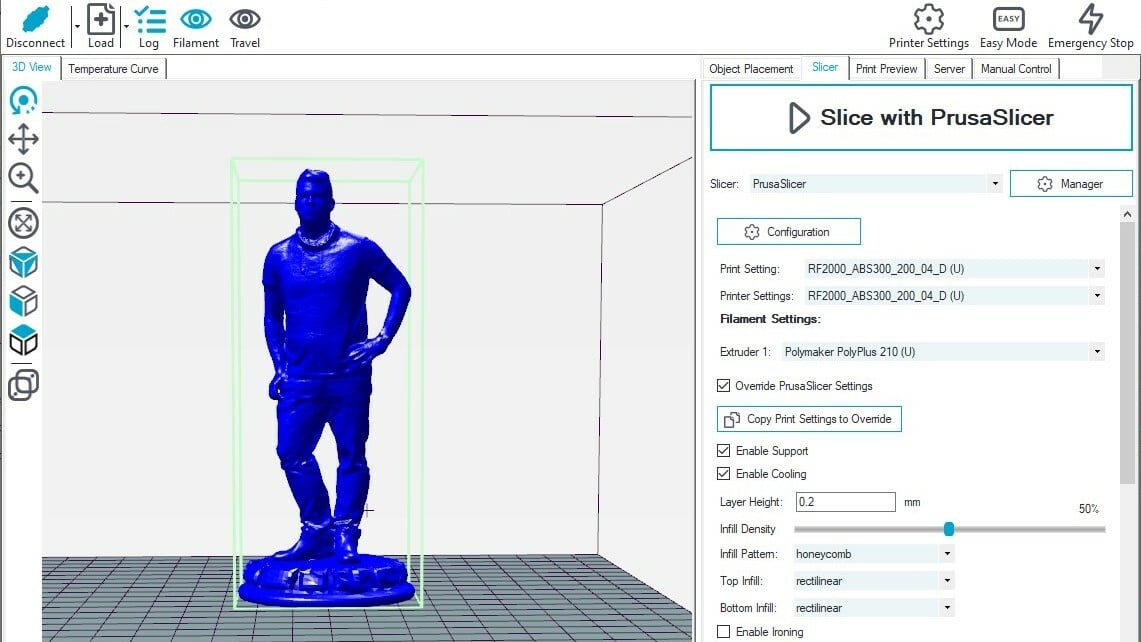
Slicer
Out of all the slicers available out there, this feature of the Repetier Host makes it stand out the most among the competition. Under the slicer tab on the right-hand side of the window is a set of very intuitive controls. As we’ve mentioned, you can choose from three slicing engines, each with its own unique set of features. You can configure settings at a micro-level in each slicer and save the configurations so that you can re-use a setup to get a quick print without having to dabble with the settings again and again. Once you’ve prepared everything, you use the huge rectangular button at the top to slice the model.
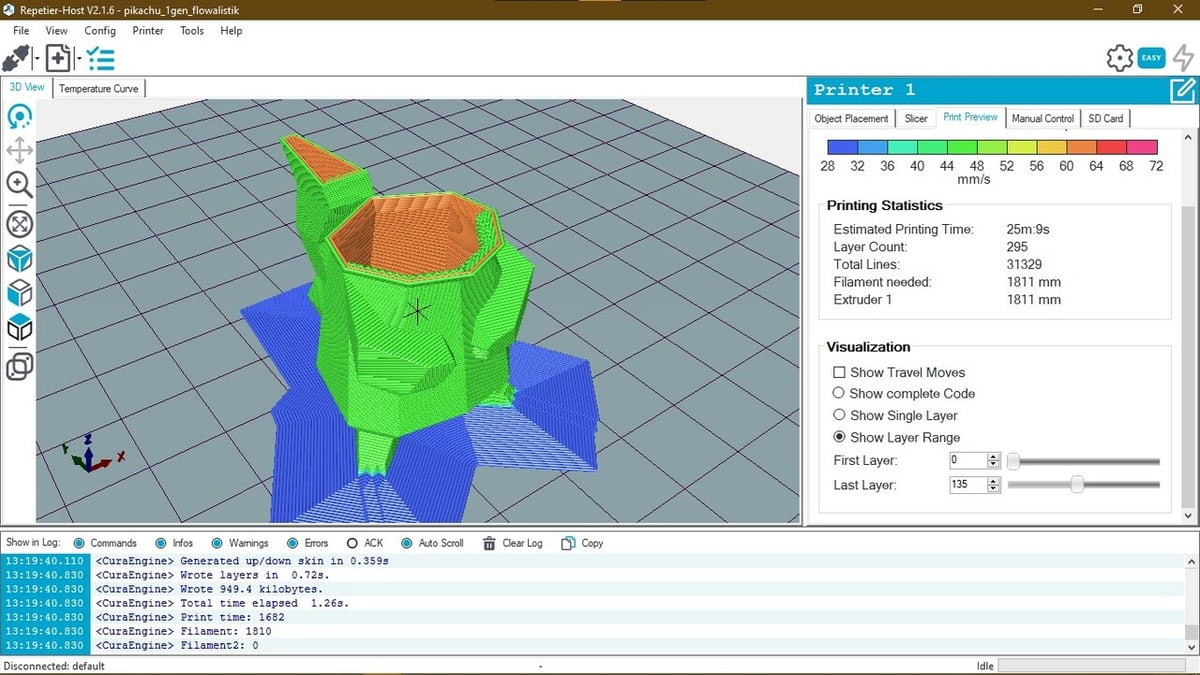
Print Preview
You’ve placed the model, and you’ve sliced it according to your needs. Now comes the time to view the result. In the preview window, you can visualize how the model is going to be 3D printed. The speed of the printer, the nozzle movements, the treatment of overhangs (if any), and so much more. If the preview shows any issues, they can be corrected immediately.
SD Card Viewer
While this functionality might sound standard now, it was a later addition to Repetier Host, allowing users to set a 3D print and forget about it. It enables the user to store G-code on an SD card and not have a computer connected to the 3D printer 24-7. In Repetier Host’s SD card viewer, you can view a good deal of information, including visualizing any G-code files stored on the card in the 3D viewer, and editing and deleting files.
Manual Control
Repetier Host started as a 3D printing host software, designed from the ground up for manual 3D printing control. Manual control of a connected 3D printer allows you to interact with the printer in real-time, without having to go to the printer and change settings. In Repetier Host, you can send G-code during printing, and monitor and control the temperature of the extruder(s) and heated bed.
Repetier Specifics
Next, we’ll look at some of the specific settings and features that make Repetier Host unique.
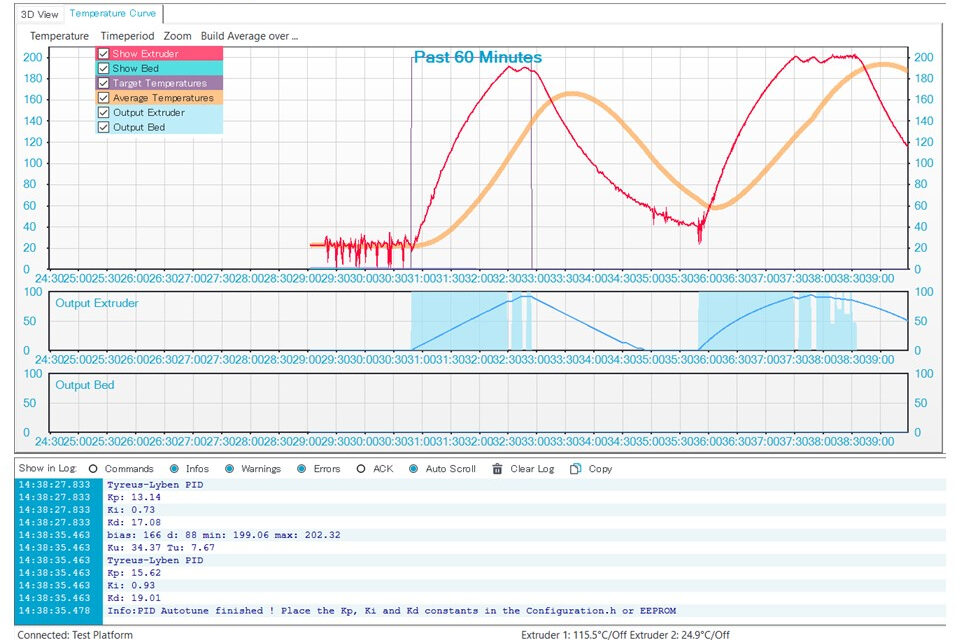
Temperature Curve
Repetier Host becomes a standout tool when it’s connected to a 3D printer. It informs the user of the various parameters of the 3D print and visualizes the process in real time. You can monitor your 3D printer’s temperature over time in a helpful graph that allows you to view the data for the past hour and keep an eye on the values. If the 3D print fails, this can be a vital tool in troubleshooting what went wrong.
Logger
The logger is another unique feature of Repetier Host, which maintains a record of all the actions in the software. Any action that either you perform or the slicer executes is logged and can be viewed. You can choose to highlight any errors or just the commands in the logger. Like the temperature curve, this function is particularly useful in case of any unexpected errors. As Repetier Host is continuously under development, logging your actions also provides the developer with valuable insights for future development.
Repetier Informer
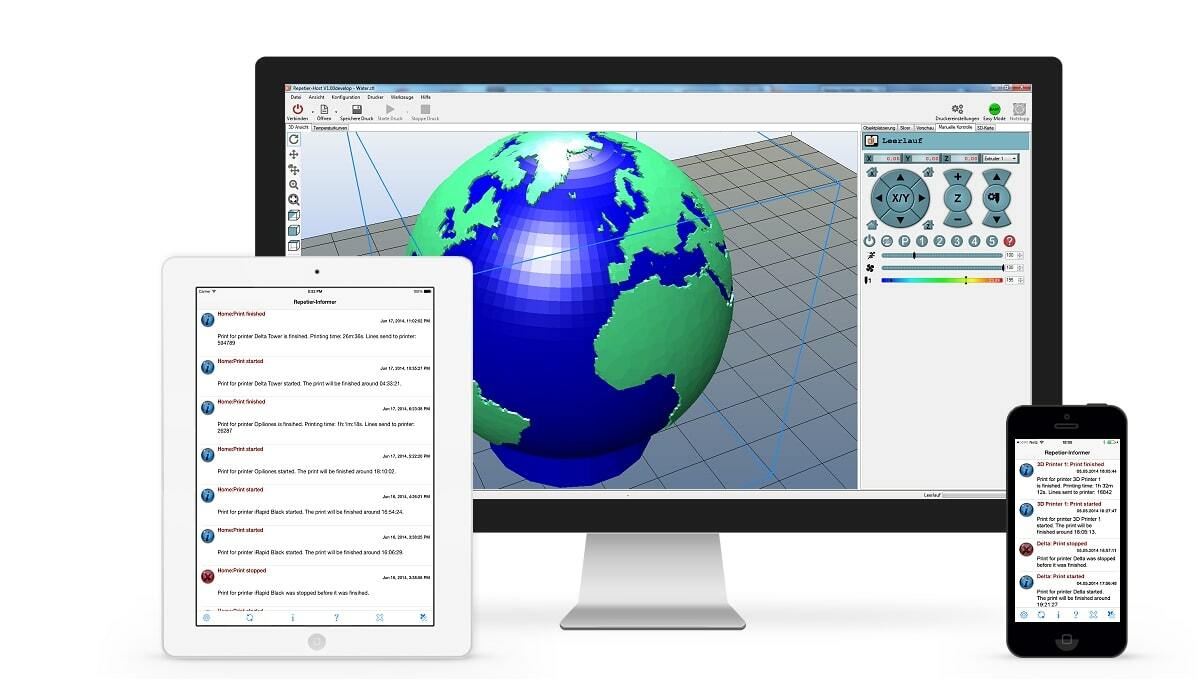
While we all like to see how our 3D print is progressing, nobody likes to be glued to the computer to monitor its progress. This is where the Repetier Informer mobile app steps in. It sends push notifications to your mobile device about the progress of your 3D print. This way you get quickly notified of the status of your prints, including if a print has failed. This app really enhances the user experience of Repetier Host and gives you peace of mind, knowing that you’re always informed about your printing status.
3D Visualization
Under the “Config” menu, there’s a selection of preferences in which you can customize the Repetier Host UI. Among those options is “3D Visualization”, which presents you with a plethora of choices in how you want to customize the look of the UI. You can set the colors of the UI and change how a model preview appears. The same settings can apply to filament visualizing, and (the cherry on the cake) you can light the model as per your liking. It’s amazing how much time can pass while you’re playing with the colors and lighting to make a model appear just right!
Advancing Ahead
Repetier’s advanced features enable you to do some pretty amazing things that may not be possible with other slicers. Some of these next features have a significant learning curve and might only be useful in some scenarios, but it’s still good to know what’s possible!
Velocity Painting
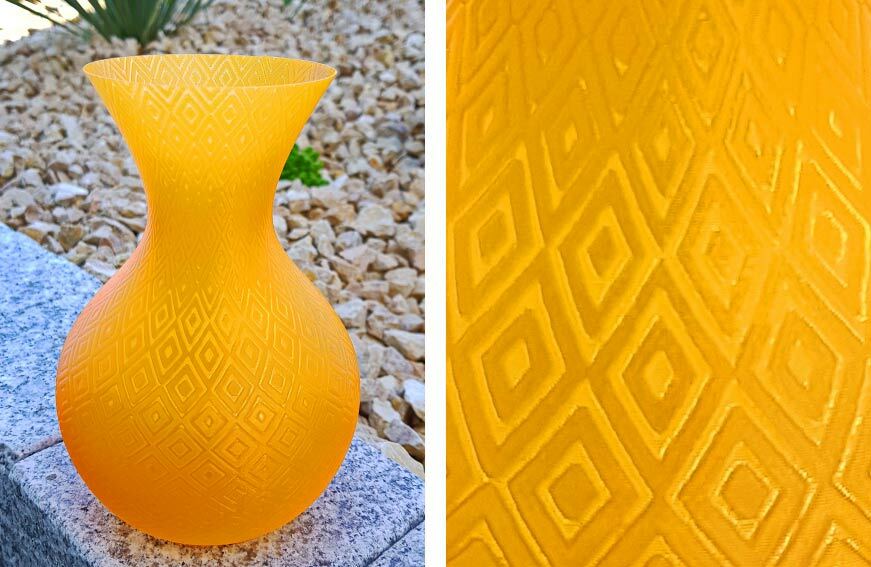
Velocity painting is a novel feature that’s included in Repetier Host. This tool is developed by Mark Wheadon, and he’s also made it available as a separate application. The velocity painting tool creates a textured 3D object based on an image.
In short, you get an imprint of the image on your 3D model. It prints the darker areas in the image at lower speeds, and the lighter areas are printed at a slightly higher speed. This works best with objects printed in vase mode. Once you have the tool configured, you’ll likely want to use it on everything you print!
Object Grouping
Object grouping is another neat feature in Repetier Host that is useful for multicolor printing. In multicolor printing, you normally have a separate STL file for each color, which can get complicated to position as a single model on the print bed. With this feature, you can group elements of the same color and assign a separate extruder to them. You can find the detailed workings of this object grouping feature in the Repetier Host documentation.
G-code Editor
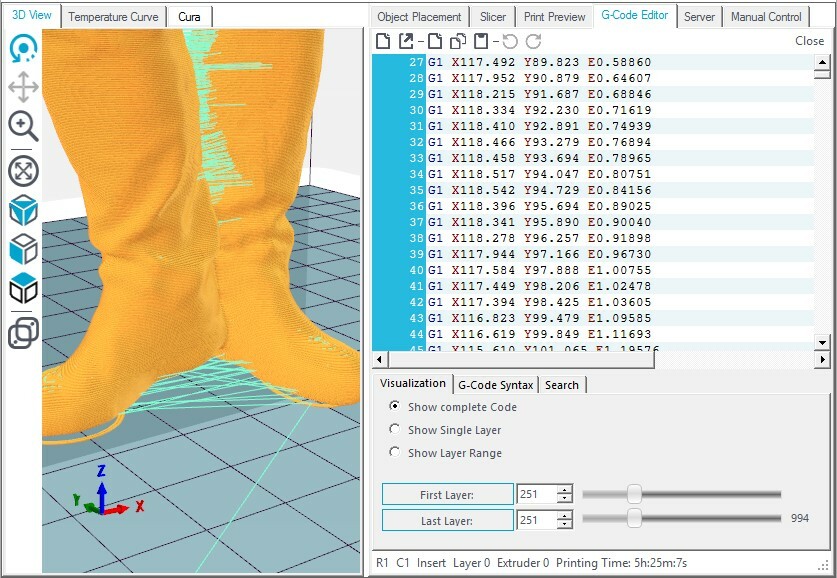
3D printing beginners may not ever need to use this feature, but if the need ever arises to manually edit a certain section of the G-code, Repetier Host has got you covered. The G-code editor allows you to view the entire G-code file line by line and edit it in the software itself. You can even visualize the altered G-code file immediately.
As an informational feature, the G-code editor even includes explanations of the different commands. In another tab, you can search for and replace any lines of code. While mostly targeted at advanced users, the visualization of edited G-code and explanation of commands make it useful for every 3D slicer user out there.
Bed-Height Mapping
This feature is available only when you use the Repetier firmware and a Z probe with your 3D printer. Generally, what seems like a flat 3D printing surface, in reality, is not a perfectly flat build plate. There are minor irregularities or indentations on the surface of the build plate that may cause errors while laying down the first layer of the 3D print.
The bed-height mapping tool maps the entire bed using the Z probe, and the resulting height map shows the unevenness in the surface and calibrates the first layer accordingly. This ensures that the first layer is always parallel to the print surface, thus giving the 3D print a strong foundation. It’s a handy feature to use if you’re facing continuous problems with the first layer of your 3D prints.
Support
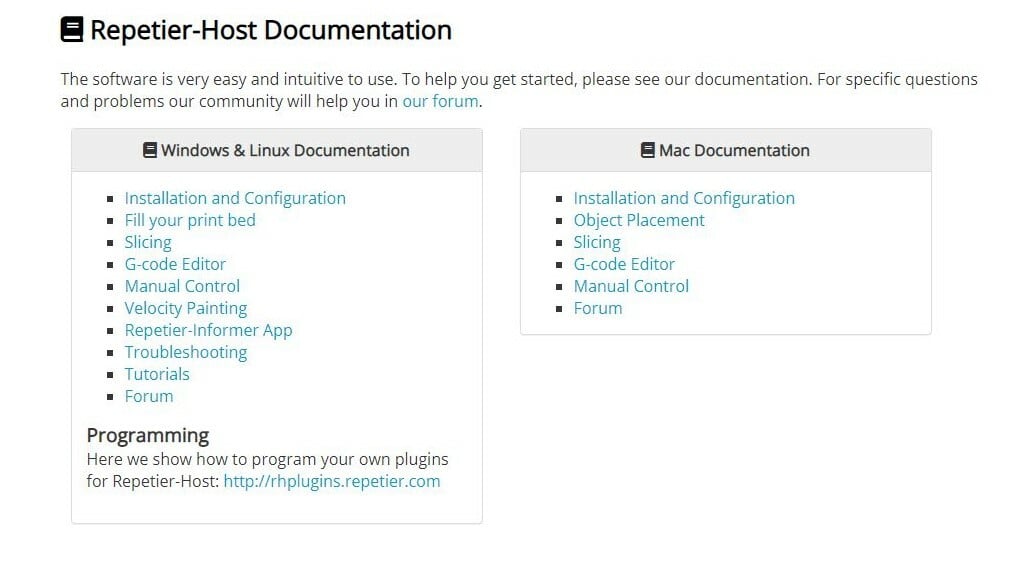
Repetier Host started as a free and open-source project, but later on in 2014, the developers closed the source code. However, this doesn’t mean that the support for Repetier Host has closed down, too. In fact, as a free and longstanding option, there’s a strong online community, as well as lots of information on Repetier’s own website.
The developers have continued to offer more and more features throughout the years. Should you run into any issues, there are forums and guides. Over the years, many people have also contributed to the support of Repetier Host by uploading guides and tutorials, and Repetier has also provided troubleshooting guides on their website.
Alternatives
Repetier Host is a great 3D slicer that combines the functionalities of three slicers into one. It has some great features for advanced users but is still user-friendly for beginners. When Repetier Host is combined with its other utilities such as the Repetier Informer app, Repetier firmware, and the Repetier server, you benefit from the cohesive Repetier ecosystem.
But even though Repetier Host is a great slicer, it’s not the only one out there. Competition ensures that development continues apace, and there are other alternatives that provide their own unique sets of features.
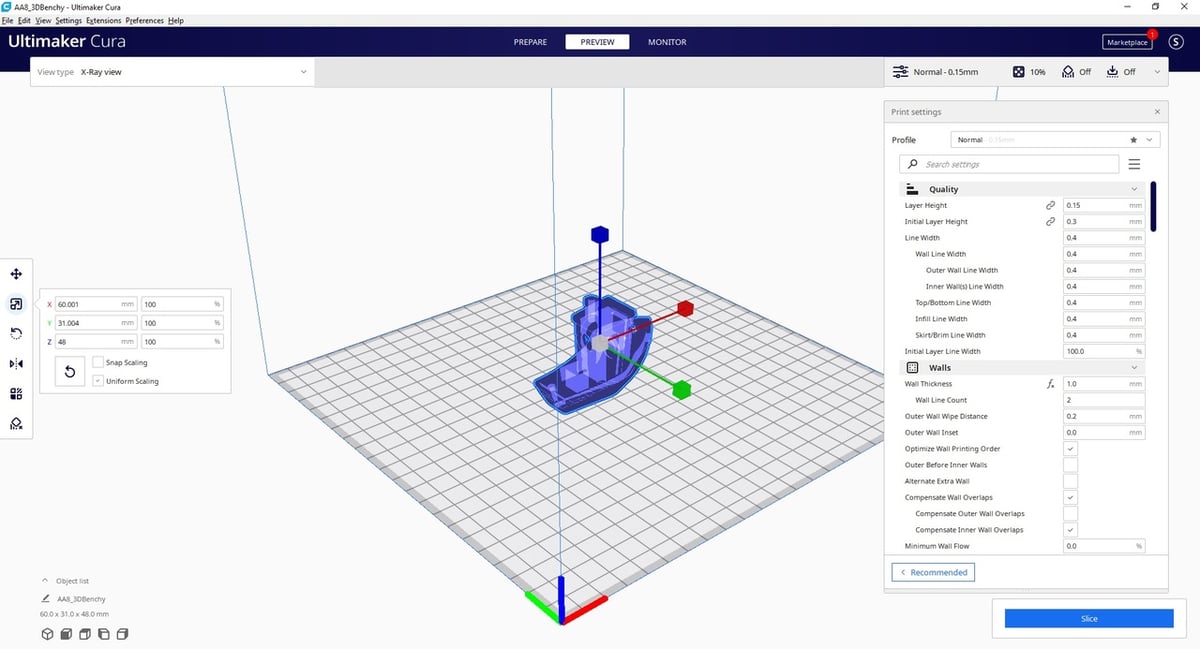
Cura
Cura is the popular 3D slicer software provided by Ultimaker. Repetier uses Cura’s slicing engines as one of the options in its own software. One key advantage of using Cura over Repetier is its open-source nature. Cura also provides a library of ready-to-use plug-ins, which enhance the functionality of the slicer. There’s also a whole set of experimental features in Cura that are not available in the Repetier software, or often in any other slicer at all. These enable the user to go a step further in achieving the optimal slicing setup.
PrusaSlicer
PrusaSlicer is another great 3D slicer developed and maintained by Prusa Research. Just like Ultimaker’s Cura, this slicer is open source and free to use. A main advantage of PrusaSlicer over both Cura and Repetier Host is that it provides slicing support for resin printing, though this is mostly limited to Prusa’s own resin printer at the moment. Community support for PrusaSlicer is also very strong.
License: The text of "Repetier Host: All You Need to Know to Get Started" by All3DP is licensed under a Creative Commons Attribution 4.0 International License.