The Best Raspberry Pi Camera Cases to 3D Print or Buy

Take your beloved micro-computer to a whole new level! Check out some of the best Raspberry Pi camera cases you can 3D print or purchase.
If you’re looking to add a camera module to your Raspberry Pi, there are a variety of different makes and models available. Raspberry Pi has updated the original camera to version 2.0, which offers better resolution and high-quality output.
Once you’ve got the camera, you’ll need a case or mount to put it in! If you have access to a 3D printer, things suddenly get more interesting. There are a lot of 3D printable Raspberry Pi camera cases around. You can use them with the popular OctoPrint and monitor your prints and their progress remotely. There are mounts designed for specific 3D printers as well as ones compatible with any 3D printer.
Aside from that, you can mount the camera on a telescope or microscope or use it as a selfie camera, an intercom, or a fancy DIY hoover monitor. There are too many use cases to mention, but feel free to get creative. With this in mind, we’ve put together a list of camera cases you can 3D print or purchase to provide the best protection (and style) for your Raspberry Pi camera. Let’s take a look!
Printable
Printable camera cases let you customize to your heart’s content. You can also design 3D printed mounts and attachments to secure these cases in place.
Simple
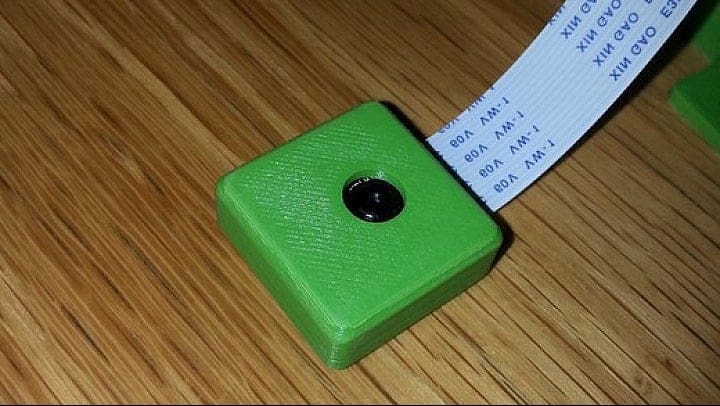
This is the first Raspberry Pi camera case you should print. It only has two 3D printed parts: a front and a back cover. It safely protects your camera’s electronics and can be attached by tape to any surface or, like a community make shows, you can use zip ties to secure it on a platform.
This minimalist case has had a few design upgrades over the years, and the latest update eliminates interference with interior front case radii. Many makers have successfully printed the updated case. One of them kept the print settings at a layer height of 0.25 mm and 30% infill. Following this, you should also be able to create a great 3D printed camera case.
- Who designed it? VGer
- How printable/popular is it? This case proves simple is best with over 32,000 downloads, 32 makes, and 42 remixes.
- Where to find it? Thingiverse
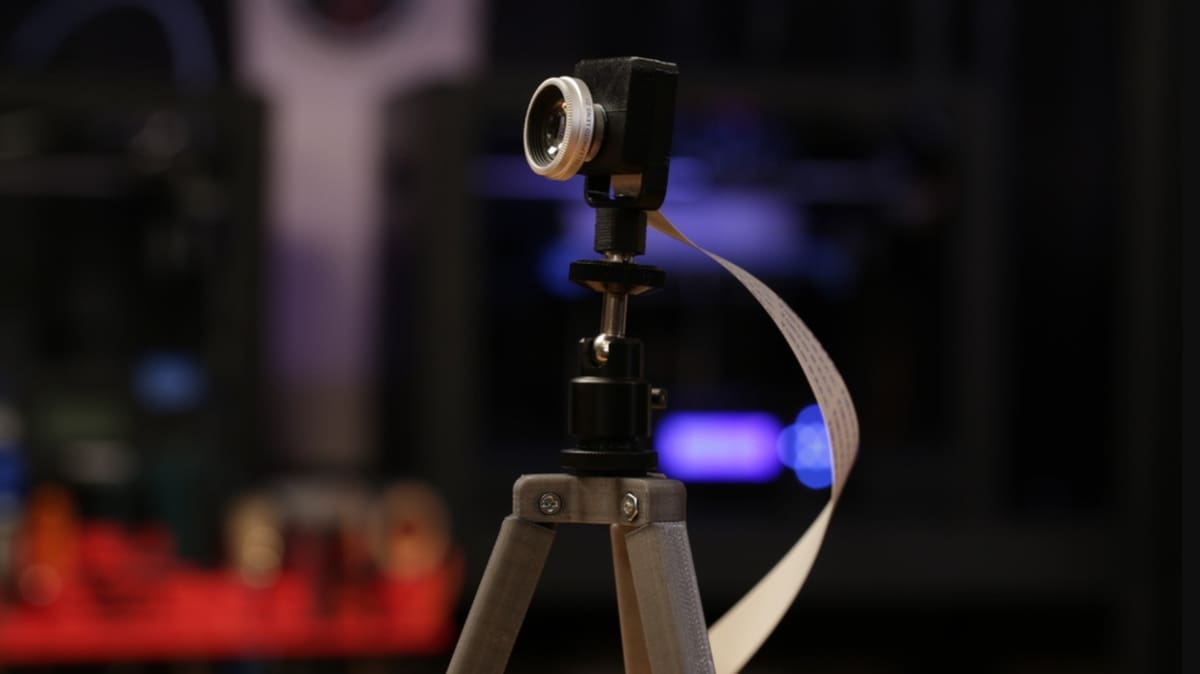
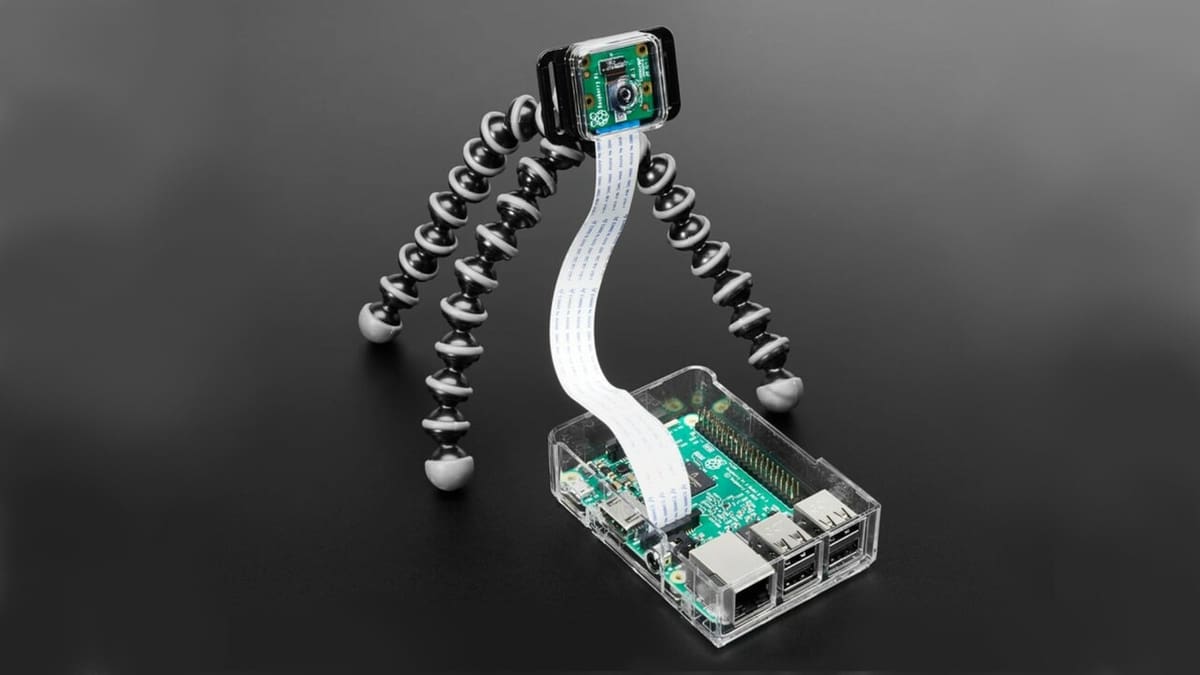
Case & Tripod
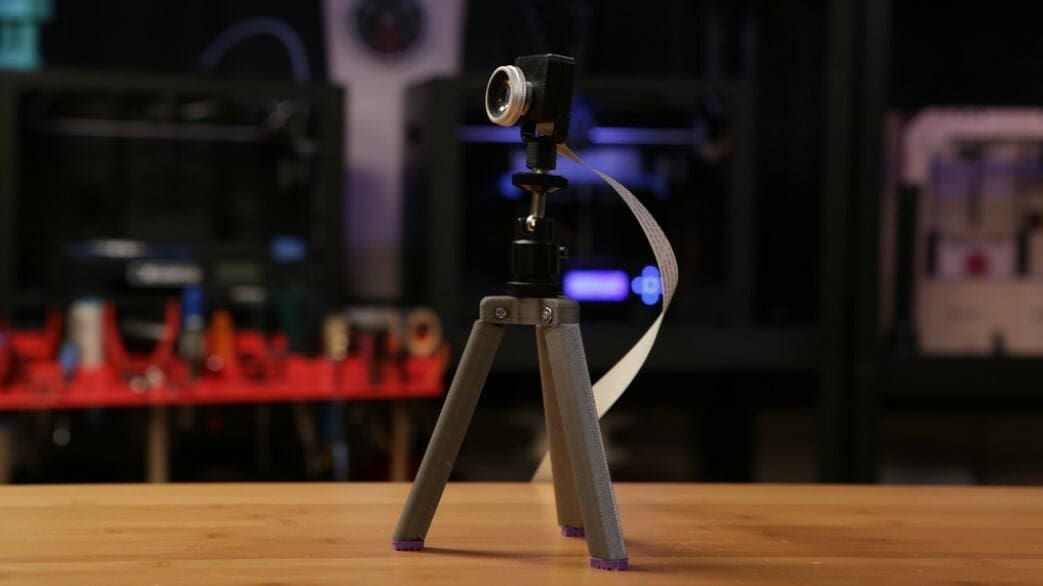
For this 3D printed case by Adafruit, a camera fits inside the case and mounts to a 3D printed tripod with a swivel-head adapter that secures in place with a side screw. You can use this to modify the camera’s position.
After printing and gathering all of the necessary components, you can assemble this camera case and tripod in no time. To help, Adafruit provides a complete step-by-step guide with video assembly tutorials.
- Who designed it? adafruit
- How printable/popular is it? This camera case and mount by Adafruit has over 8,400 downloads, 4 makes, and 4 remixes.
- Where to find it? Thingiverse
Tom's Camera Mount V4
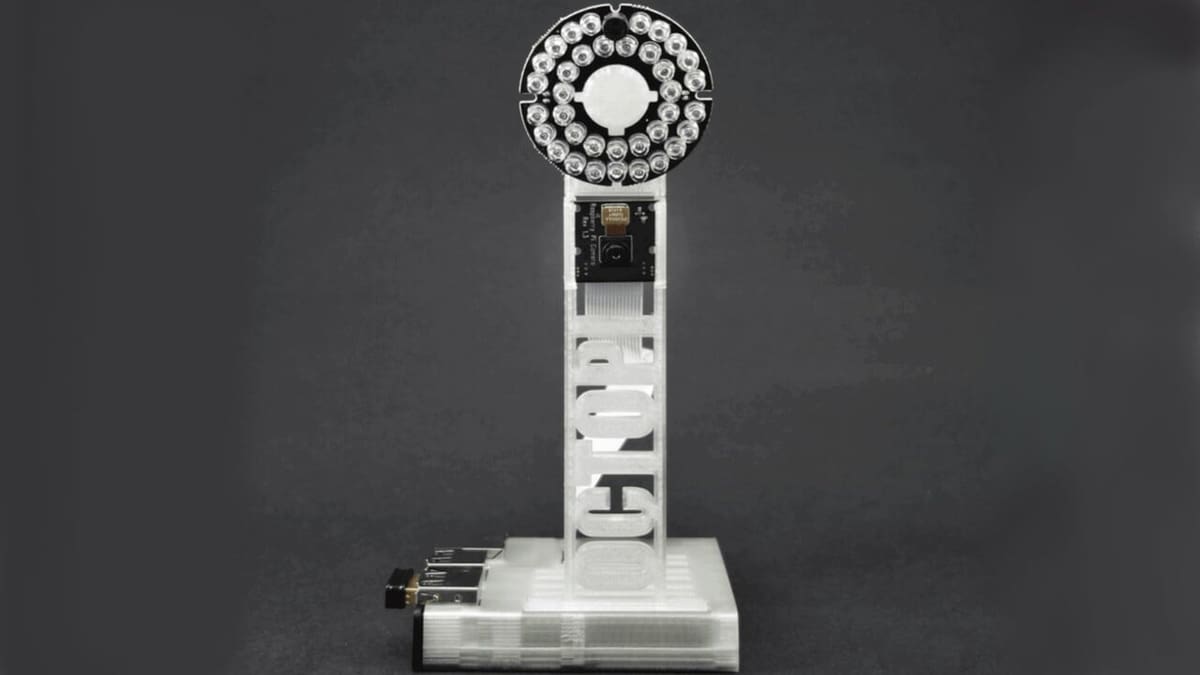
It’s a 3D printed “mini rig” for a Raspberry Pi case of your liking. You print the parts, attach the rig to the Raspberry Pi case, slide the cam in – you’re done. If you want, you can also add a LED ring for better lighting.
The designer has provided two different mounts, giving you a total of three different viewing angles to capture your subject. They recommend printing this mount at 0.2-mm layer height without any supports.
- Who designed it? tomulinek
- How printable/popular is it? This mount has over 3,500 downloads, 150 likes, and 6 makes.
- Where to find it? Thingiverse
InMoov Raspicam Modification
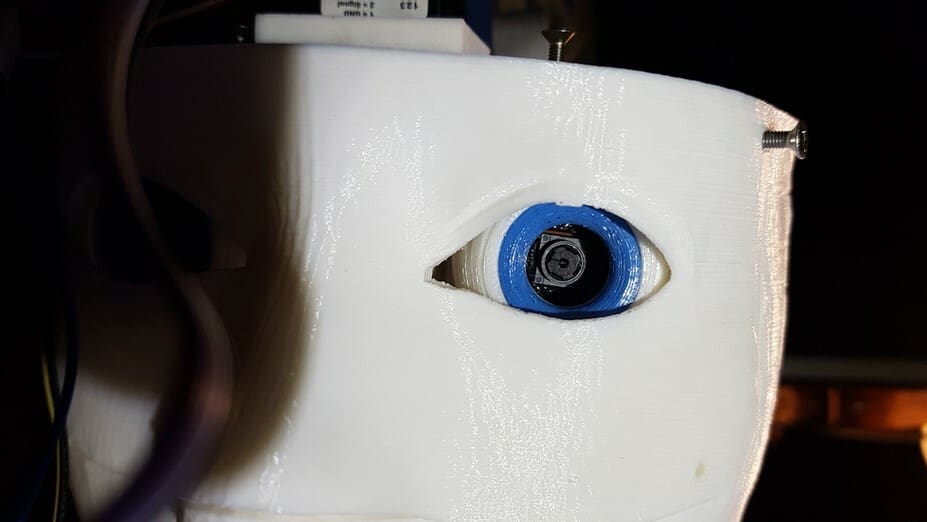
InMoov is an open-source 3D printed life-size robot project in constant development, with people from all over the world working on it.
To begin this modification, print and assemble InMoov’s eye mechanism. You will mount the Raspberry Pi camera case on the robot itself, giving the impression of a real eye. Then, swap out the original eyeball parts for the Raspicam parts, bestowing it with eyesight!
- Who designed it? RideFly3D
- How printable/popular is it? On Thingiverse this mod has over 1,200 downloads and 1 reported make.
- Where to find it? Thingiverse
Customizable Fixed Angle Stand
This stand is made to hold a simple camera case steady and at a fixed angle. Depending on the viewing angle you want to capture, you can select any of the five stands provided by the designer. The stand will hold the case at any angle when the camera is pointing up, down, or straight ahead.
The maker doesn’t recommend any specific print settings, but printing this stand is quite simple and shouldn’t be a challenge.
- Who designed it? cdmacy
- How printable/popular is it? This camera stand has close to 5,000 downloads, 5 makes, and 9 remixes.
- Where to find it? Thingiverse
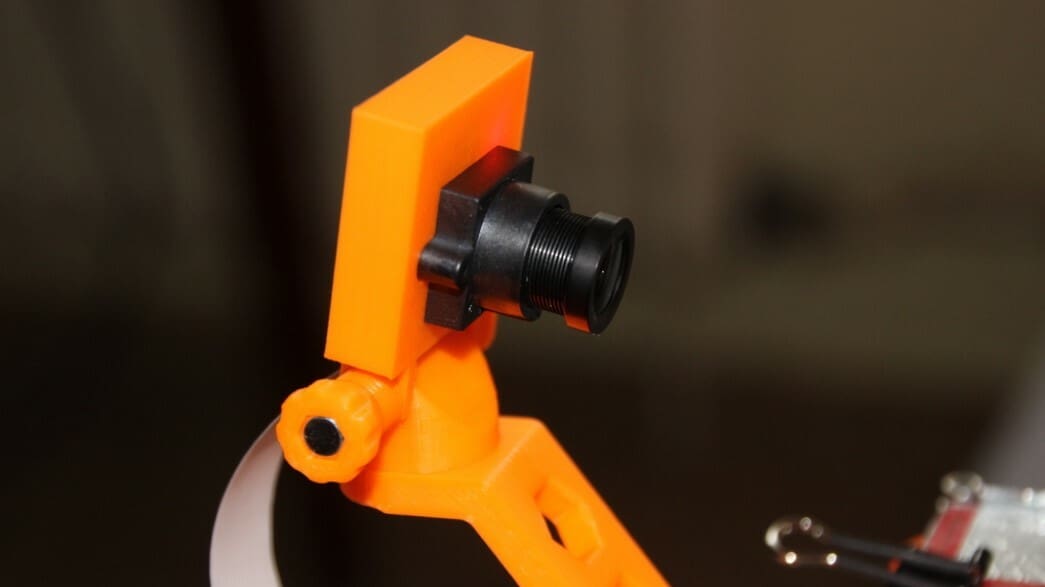
Ball Joint Mount

This case is ideal for mounting to your 3D printer and streaming your feed from a specific viewpoint. This is achievable with the ball joint mount, which is extremely flexible and can be twisted to any position.
According to the placement, you can select the appropriate camera housing to print so that the camera’s cable attaches without straining. Once you’ve printed all the parts, you can proceed to the assembly. This part will require a few screws and nuts, so keep these handy!
- Who designed it? 3dkarma
- How printable/popular is it? This mount is quite popular on Thingiverse, with more than 22,000 downloads, 760 likes, 17 makes, and 31 remixes.
- Where to find it? Thingiverse
Prusa i3 Mount
The Prusa i3 is one of the most popular 3D printers in the world. It’s open source, well-designed, and versatile.
This Raspberry Pi camera case and mount is the perfect mod for your printer, allowing you to monitor your prints from afar. Unfortunately, it is only compatible with the Raspberry Pi camera V1. The maker recommends printing this case at a layer height of 0.2 mm and 22% infill, and to show how easy it is to print, no rafts or supports are needed.
- Who designed it? parkis
- How printable/popular is it? Even though there are no posted makes yet, this case and mount have over 10,500 downloads and 9 remixes.
- Where to find it? Thingiverse
Microscope Adapter
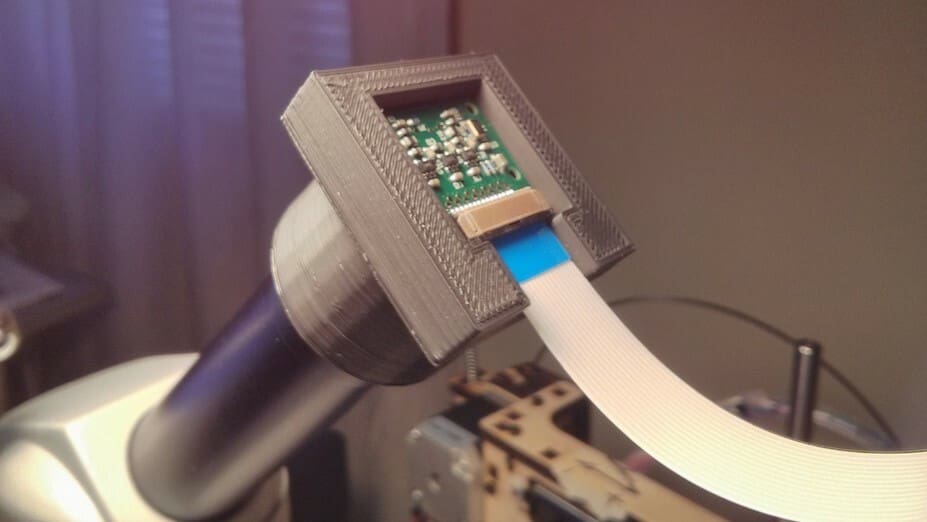
The maker of this Raspberry Pi camera case designed the parts to fit onto a Celestron biological microscope. By using a Raspberry Pi camera on this microscope, you can capture, clearly view, and analyze the images captured.
The first piece is designed to fit the Raspberry Pi camera, while the second (a cylindrical tube) fits on top of the microscope and snaps together.
- Who designed it? luisibanez
- How printable/popular is it? Thingiverse reports over 5,700 downloads, 3 makes, and 3 remixes.
- Where to find it? Thingiverse
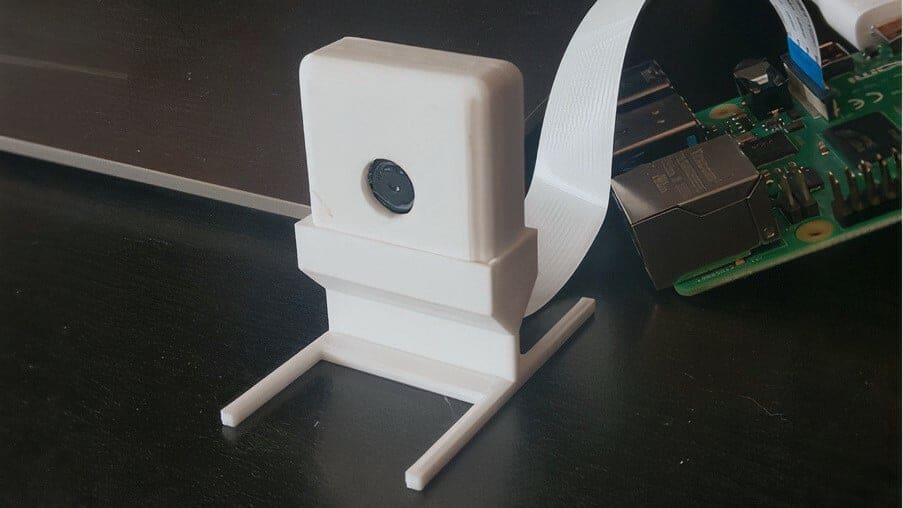
Desktop Stand

This 3D printed stand houses the camera in a case that protects it from dust and keeps the lens clean. You can tilt the case to point the camera at a variety of different angles.
The flat base of the stand makes it perfect for desks and other platforms. All you need for this is your Raspberry Pi, camera module, screws, nuts, and the 3D printed parts. Per the designer’s suggestion, print these at a 0.25-mm layer height with 15% infill.
- Who designed it? Greg_The_Maker
- How printable/popular is it? There are almost 1,370 views, 150 downloads, 15 likes, and 1 make of the design.
- Where to find it? Printables
Purchasable
From camera cases ideal for the great outdoors to ones capable of capturing pictures from different angles, this list includes a variety of purchasable options fit for your needs. These cases vary in shape, size, and application, with some requiring DIY parts.
Arducam Housing
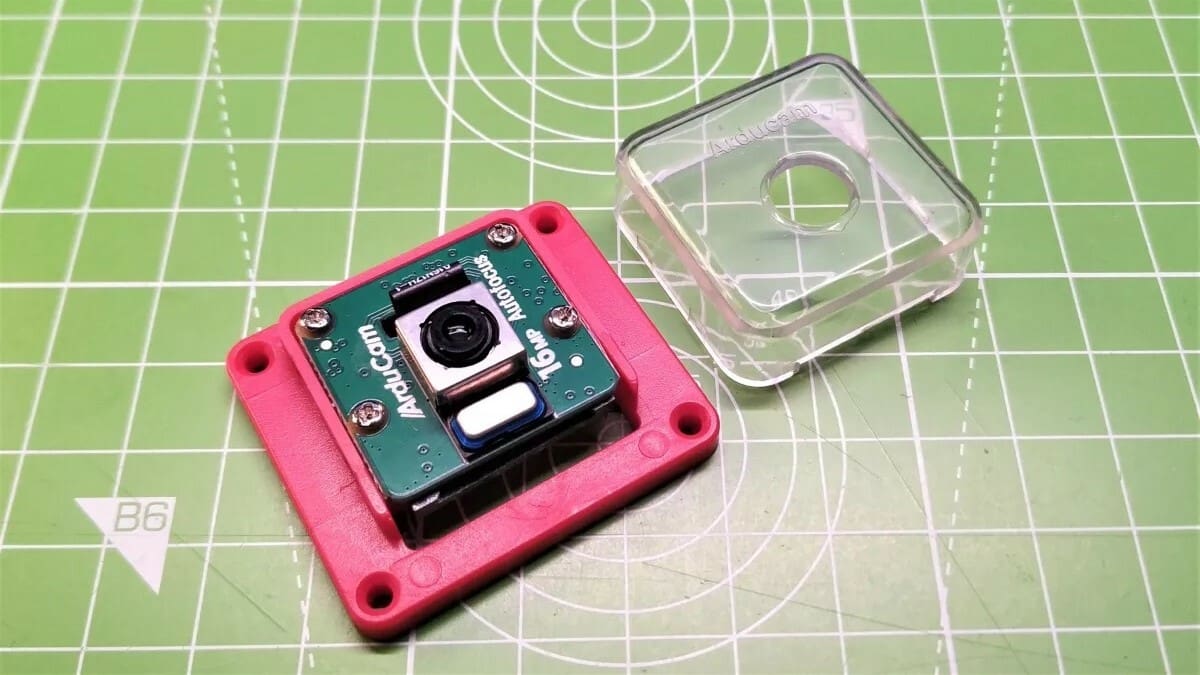
Arducam Camera Housing is a durable and functional camera case for your Raspberry Pi. Arducam uses ABS plastic for the housing to make the case tough and keep the camera secure.
The case has mounting holes at the corners so you can fix it on any surface. Alternatively, you can purchase a bundle that includes a mini tripod stand with a camera cable to hold your case securely in place.
Transparent
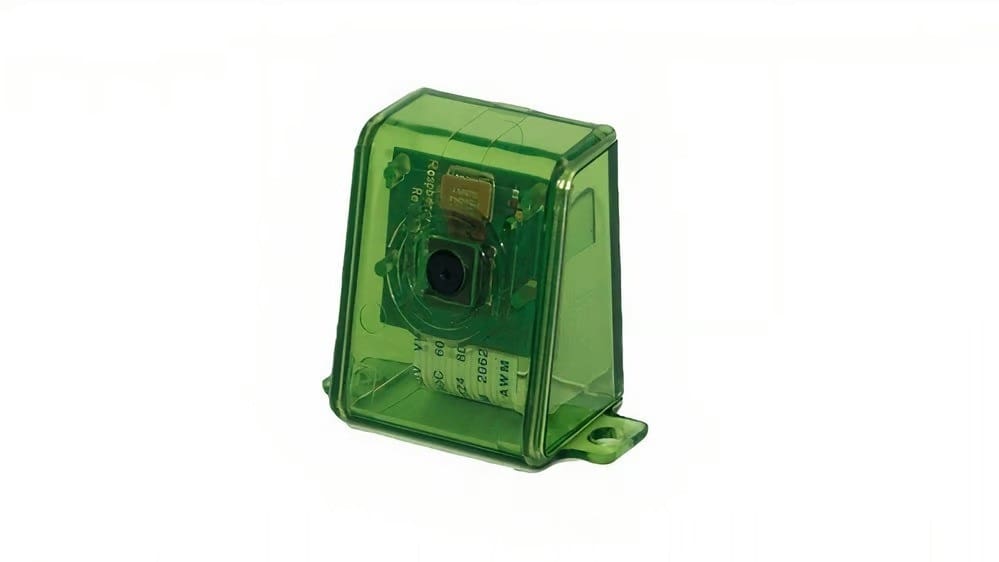
This tough transparent case comes in two halves, which you can press together and mount on the wall using screws and double-sided tape. If you wish, you can also purchase this case in other colors, including clear, blue, and black.
A few buyers had issues closing the case. One fix for this is to clip off the tabs on the back side of the case so that it closes completely. Another common issue involves the camera lens not lining up exactly with the case’s camera hole. However, none of the user images were obstructed by the case, so it’s not a major concern.
- Who designed it? SB Components
- How much does it cost? ~$6
- Where to find it? Amazon
Makeronics Holder
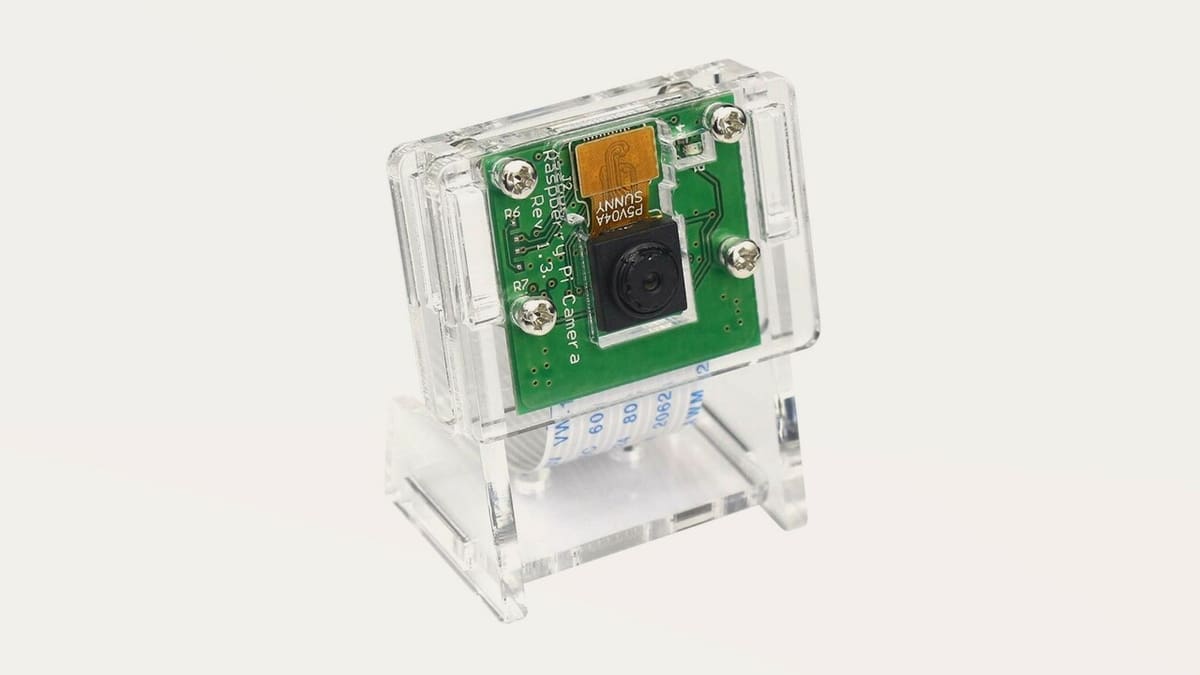
This Makeronics camera case is made completely of acrylic parts, giving it a clean and simple look. The case acts as a holder and a stand with parts that may require some minor assembly.
The model comes with a manual for assembly and a screwdriver, so you can get it ready as soon as you unpack. Once assembled, use any of the mounting holes on the back or stand to mount the case to the platform.
- Who designed it? Makeronics
- How much does it cost? ~$10
- Where to find it? Amazon
Cookie Wheel
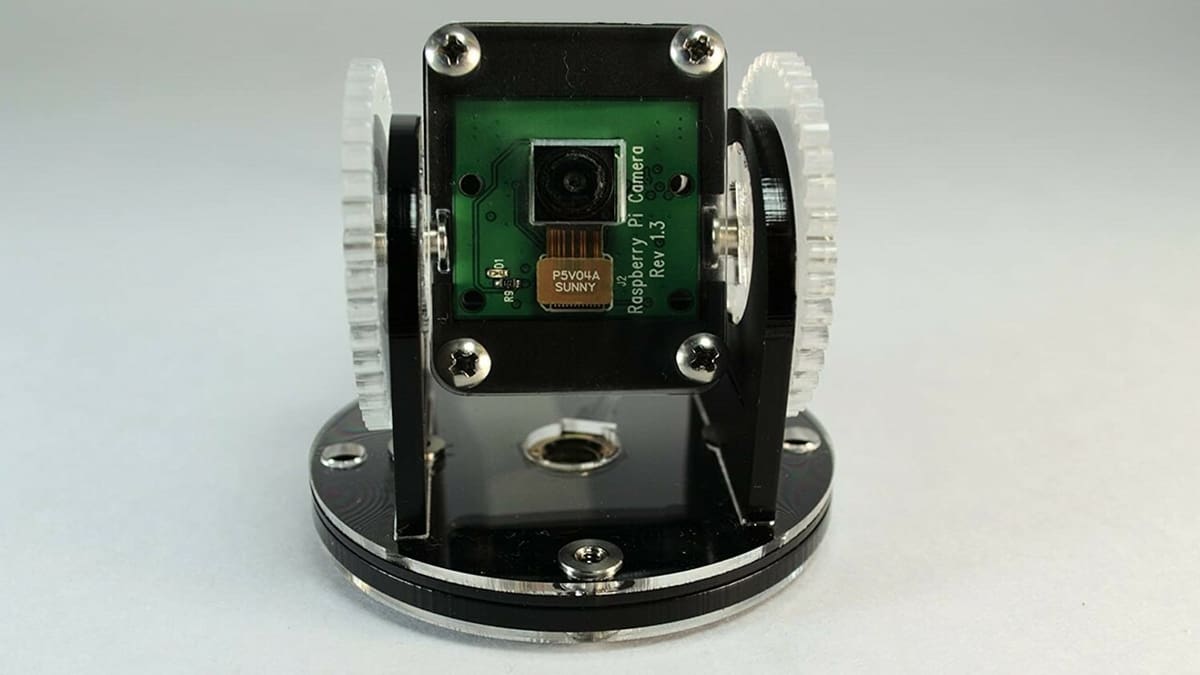
The Cookie Wheel case gives you the option to use the camera at different viewing angles. Its comes from the wheels on both sides of the case that look like cookies. Yum!
The camera locks securely into place with the help of internal gears, so you can be confident that your shots are steady. Since this is a DIY case, you’ll need to assemble the parts with the included instruction manual. The base of the camera case has a mounting hole for a tripod so you can elevate the height of your camera to take the perfect shot.
Adafruit Enclosure
This minimal camera case from Adafruit features two parts, including a clear case on the front and a black cover on the back. Both are manufactured using polycarbonate, giving them a glossy look.
You can secure this case using tape or zip ties using the two slots on the side or mount it on a tripod. There isn’t much to this simple case, but it’ll get the job done efficiently.
Naturebytes Wildlife
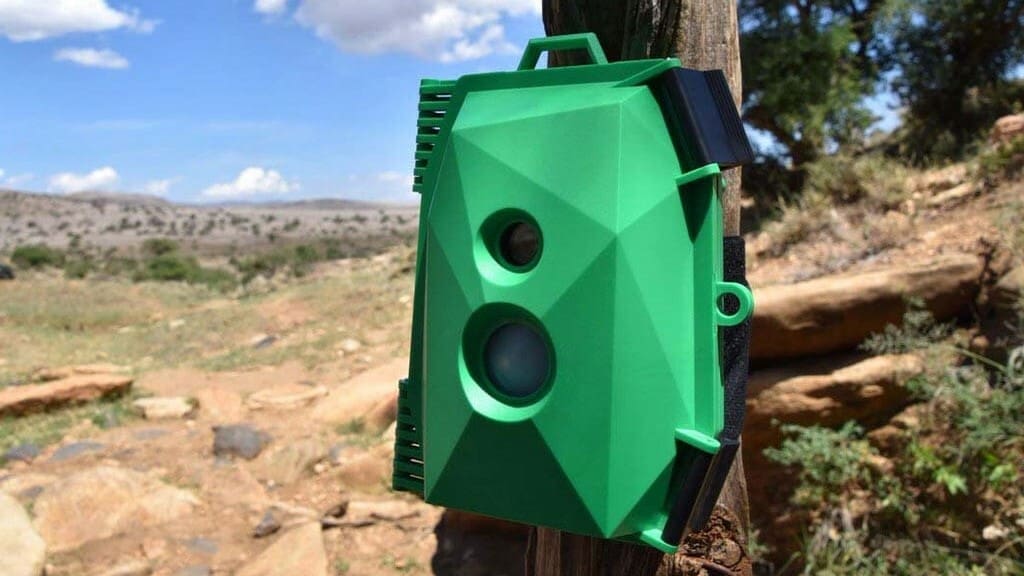
This camera case is designed to camouflage with nature so you can capture wildlife without attracting too much attention. The case is rugged, durable, and weatherproof, which keeps the internal components safe in all conditions.
The case can house a Raspberry Pi, camera module, passive infrared (PIR) sensor, and battery. Whenever the PIR sensor picks up movement, the camera takes a snapshot. If you already have the internal components, you can purchase the camera case by itself. Alternatively, you can get the entire kit with all the essentials.
- Who designed it? naturebytes
- How much does it cost? ~$40
- Where to find it? The PiHut
License: The text of "The Best Raspberry Pi Camera Cases to 3D Print or Buy" by All3DP is licensed under a Creative Commons Attribution 4.0 International License.