How to Use a Temperature Tower in PrusaSlicer

By creating PrusaSlicer temperature towers, you can elevate print quality and filament efficiency in one go. Read on to learn more!
A temperature tower is a simple method for fine-tuning the 3D printing temperature for different filaments. Each section is printed at a different temperature, allowing the user to directly compare the effects of a given temperature on layer adhesion, stringing, and overall quality in a single print job.
With temperature towers, you start the print at either the highest or lowest temperature in the range and then decrease or increase the temperature at specific layer heights. Generally, you’ll want to start with the highest temperature, and decrease by 5 °C with each step. The aim is to identify the optimal temperature for a given material on a specific 3D printer.
PrusaSlicer, a popular slicer from Prusa Research, facilitates the creation of temperature towers by allowing users to include custom temperature changes at specified layers. This flexibility makes PrusaSlicer an excellent tool for those looking to experiment with new filaments or perfect their print settings.
In this article, we’ll take a look at how to set up a temperature tower in PrusaSlicer and how to interpret the results. Let’s get started!

Examples

Temperature towers can be found on various 3D model repositories, including Thingiverse and Printables. Here are some examples worth checking out to get started.
Smart Compact
With 10 steps, or levels, this first example is one of the best towers out there for getting the right temperature range for your filament. You can use it to narrow your test temperatures down to a very precise value for an almost perfect print, and it also tests overhangs, bridging, and curvy shapes. It’s currently the most popular temperature tower on Thingiverse, and there are STL files available for PLA, PLA+, ABS, and PETG filament.
All-in-One
This next tower is the most popular model on Printables. The complete temperature tower tests fine details, stringing, and bridging. There is G-code available for both PLA and PETG, as well as an STL file with no numbers for testing other filaments. The creator has also included a STEP file for users to edit and customize as required.
Of the many remixes available, some are specifically for Prusa printers, with the corresponding G-code also included.
Bambu Studio
If you’re a Bambu Lab printer owner, you may want to check out this next model, which is specifically designed for the Bambu Studio slicer. The tower was created to explore high-speed PETG printing, although it can also test for PLA and PA-CF. In addition to the standard file, the creator has also included an STL file without the temperature change, as well as extra towers, including one with a temperature range of 220-260 °C and one for 260-300 °C.
Setting Up Your Temperature Tower
Now that we’ve looked at some popular examples, we’ll get into the process of setting up a temperature tower in PrusaSlicer. Here are the steps to follow:
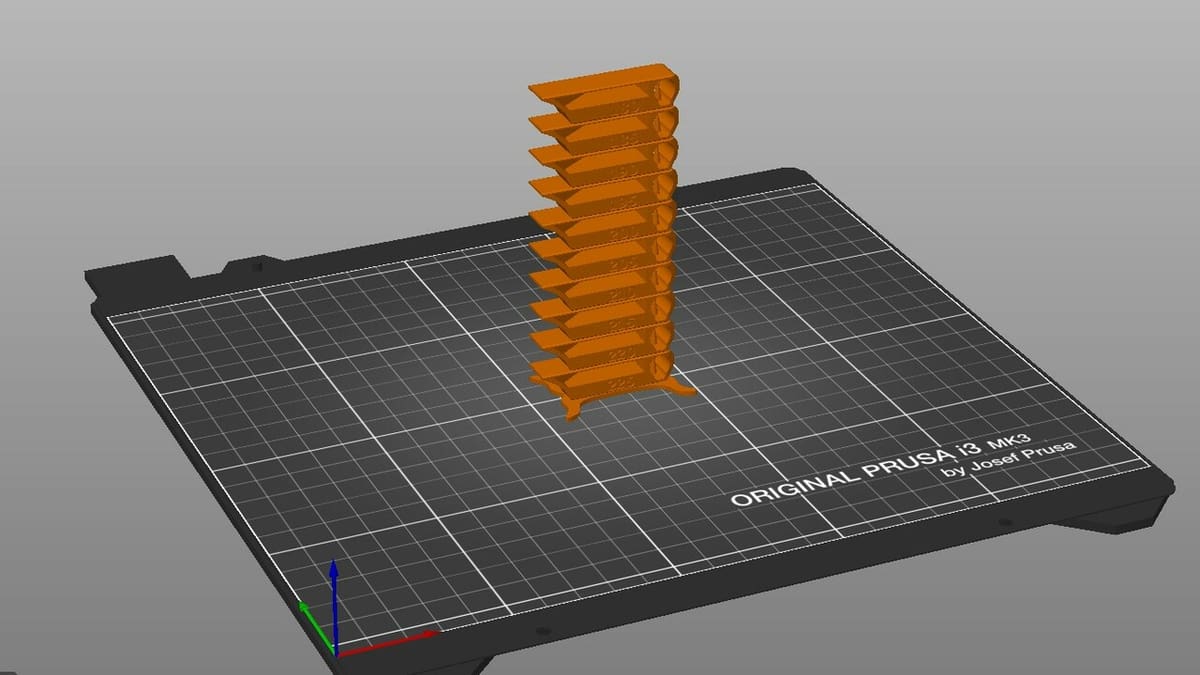
- The first thing you’ll want to to do is import the model. We’ll use the first model from the examples above. Click the cube with an ‘+’ icon in the top left corner of the PrusaSlicer build screen to open the list of files. From here, you can select the file you intend to use and import it. You can also use “Ctrl + I” as a shortcut or go to “File > Import” and select the file type.
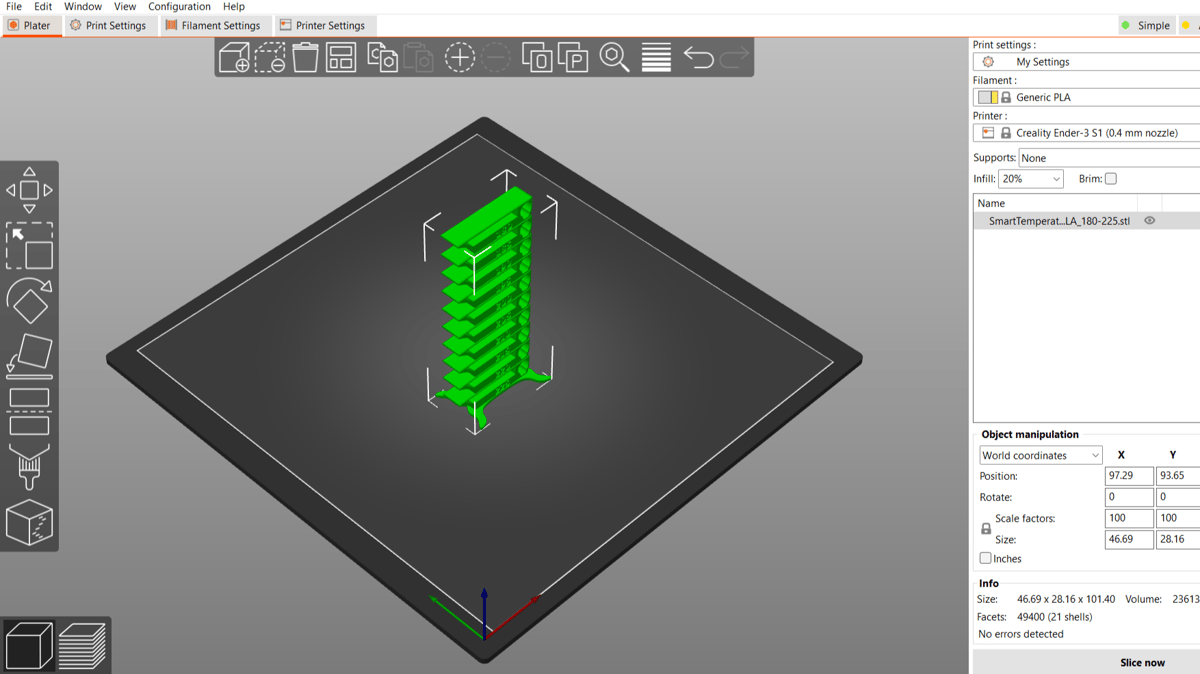
- Next, you’ll want to set up the print settings for your model in PrusaSlicer. To ensure that you can see them all, make sure to be in the “Expert” tab (top right, above the printing settings summary). Here are some important settings to adjust for your temperature tower:
- Layer height: Found under “Print Settings > Layers and perimeters”, the recommended layer height is 0.2 mm, as it ensures the temperature change takes place where the user wants it to. Raising the layer height could give inaccurate results, as the total number of layers would be reduced and lead to poor detail.
- Infill: Found under “Print Settings > Infill”, it’s best to keep your infill density around 15-20%. This ensures that the tower is not too weak and won’t fail due to a lack of adhesion between layers.
- Print speed: Located under “Print Settings > Speed”, the print speed should be set to a comfortable value for your printer. For example, an optimal print speed for the Prusa i3 MKS would be 50 mm/s when printing PLA.
- Temperature settings: Found under “Filament Settings > Filament”, the temperature needs to be set to the temperature of the first level in your tower, as this ensures the printer’s hot end will start at the correct temperature. You can also adjust the temperature of your build plate to help with adhesion, depending on which material you’re using.
- Since different materials have different melting and transition points, every filament has a different temperature range within which it provides decent-quality prints. The precise temperature for a perfect print could vary with colors and brands of filaments as well. For example, eSun’s black PETG may print well at 240 °C, whereas the white PETG may do best at 235 °C.
- After your settings are adjusted, you can go ahead and slice the model by selecting the “Slice now” button at the bottom right corner of the slicer from the “Plater” tab.
- Now we get to the fun part, adding the specific temperatures to your tower. After slicing the model, you’ll be able to see a toggle bar on the right. Use this bar to go to the desired layer, right-click on the ‘+’ sign, and then select “Add custom G-code.” A window will appear in the center of the screen, where you can type “M104 S___”. The blank section is where you’ll add the specific temperature for that layer. You’ll want to repeat this step for as many temperatures as you want to test.
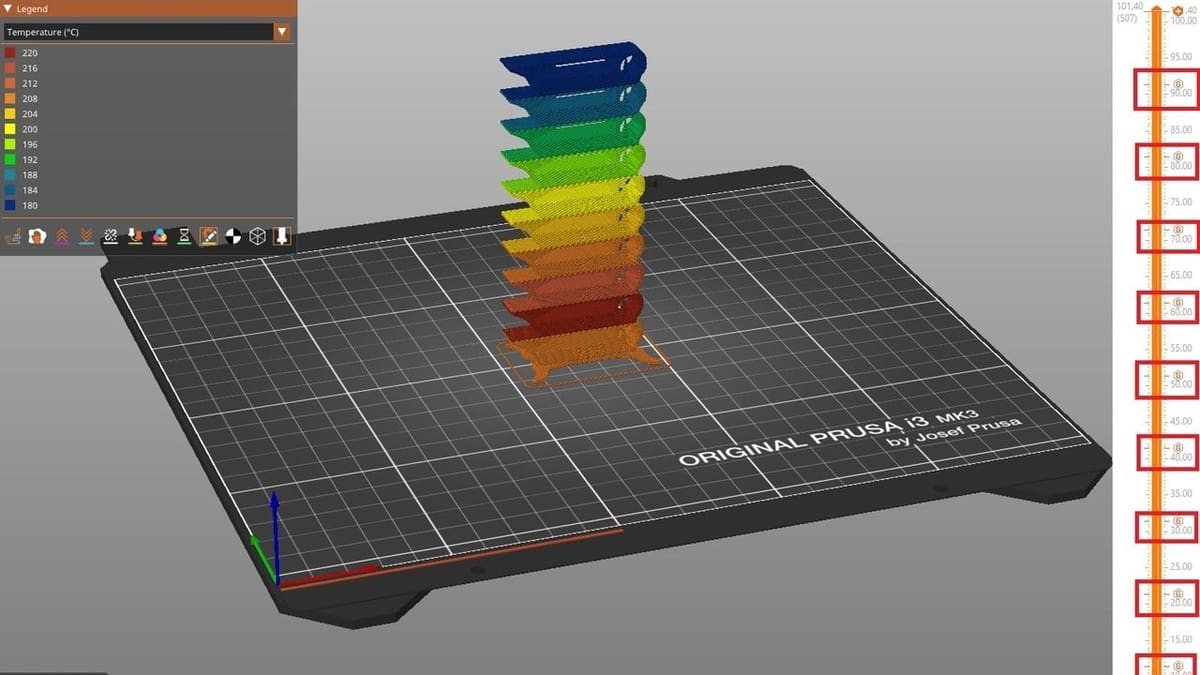
- After you’ve entered the temperatures for each layer, you’ll then slice the model and send it to your printer. If you want to verify that the G-code will work, you can open it in Prusa’s G-code Viewer and select “Temperature (°C)” from the drop-down menu, instead of “Feature type”. As you can see above, the different temperatures will appear in different colors.
If you feel more comfortable working directly on the G-code, you can replace Step 4 by going to “Printer Settings > Custom G-code”, scrolling down to the section that says “Before layer change G-code”, and changing the temperatures here by adding custom G-code.
Evaluating the Results
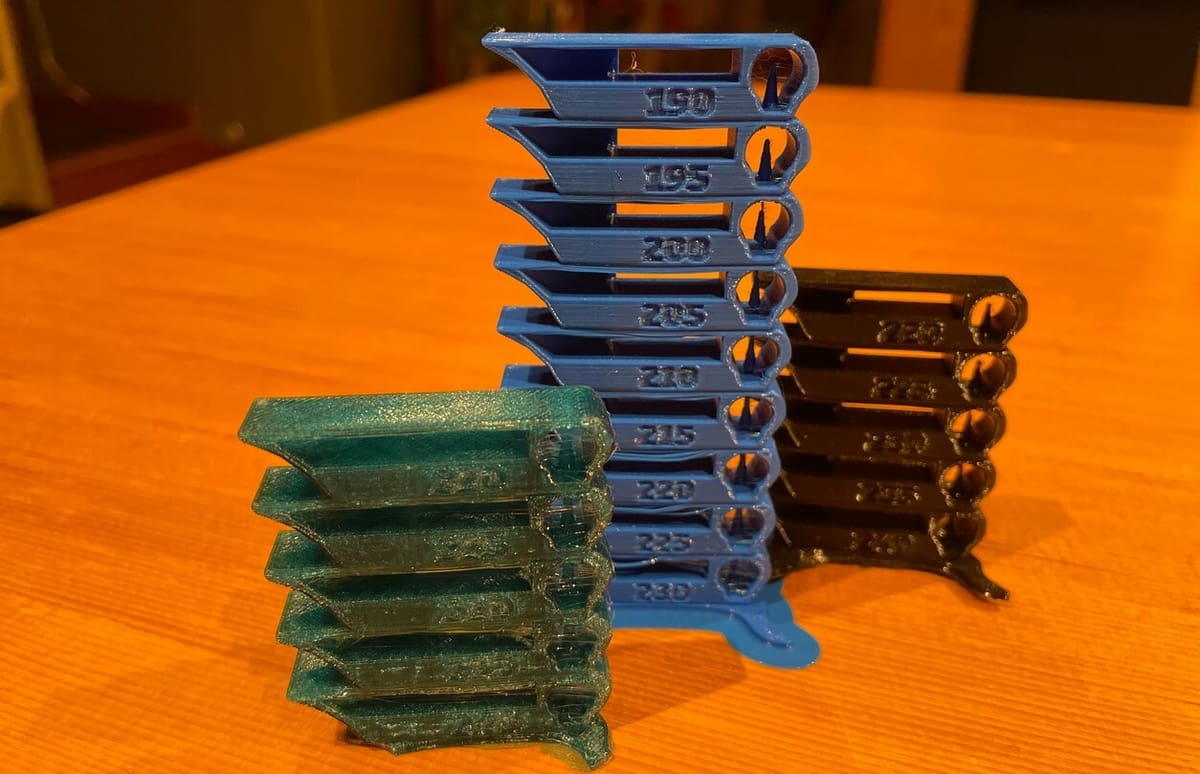
Successfully printing the temperature tower is only half the battle, particularly when you’re working with new filament types or brands. You’ll also need to look at how it turned out and interpret the results to figure out the best temperature.
The goal is to visually inspect and identify which temperature range produces the best overall quality with the least amount of imperfections. Here’s what to look for in your tower after it’s been printed:
Strength Test
For some applications, the mechanical strength of the printed object is crucial. You can perform a basic strength test by trying to break the tower with your hands. The temperature setting that offers the best layer adhesion without being brittle is often ideal. Poor layer adhesion is characterized by layers that easily separate or appear flimsy and not well fused together. To assess this, look for parts of the tower where the layers don’t blend seamlessly or where you can easily peel layers apart with minimal force.
Detail Resolution
Check the details and small features of the tower. Higher temperatures can sometimes result in better layer bonding and smoother surfaces but may also lead to sagging or blurring of small details. Conversely, lower temperatures might preserve details better but could lead to weak layer bonding.
Overhang Performance
Overhangs and bridges are challenging to print and can greatly benefit from optimal temperature settings. Evaluate how well each section of the tower handles overhangs. An optimal temperature setting for overhangs would produce sections where the underside of an overhang is as smooth and well-defined as the top surfaces, indicating that the printer managed to bridge the gap without the material sagging.
Stringing & Oozing
You’ll also want to look for stringing and oozing between the sections of the tower. Stringing and oozing often appear as thin, hair-like strands of plastic that stretch between parts of the print, often occurring when the nozzle moves across open spaces. The best temperature setting minimizes these artifacts, producing a clean print without unwanted strands.
Dimensional Accuracy
To verify dimensional accuracy, measure the width, depth, and height of the tower at different temperature levels and compare them to the intended dimensions. Variations may occur due to the material expanding or contracting as it cools. Dimensional accuracy is maintained when the measurements of the printed object closely match the original design specifications, indicating that the selected temperature settings correctly compensate for material behavior.
Surface Quality
Common issues with surface quality include roughness, waviness, or the presence of small bumps and zits. A high-quality surface should be smooth to the touch and visually appealing, without obvious defects. To improve surface quality, adjustments to the temperature can help; higher temperatures may result in a glossier finish, but watch for signs of overheating, such as sagging or blobs, while lower temperatures can help achieve a matte finish but may need careful monitoring to avoid poor layer adhesion.
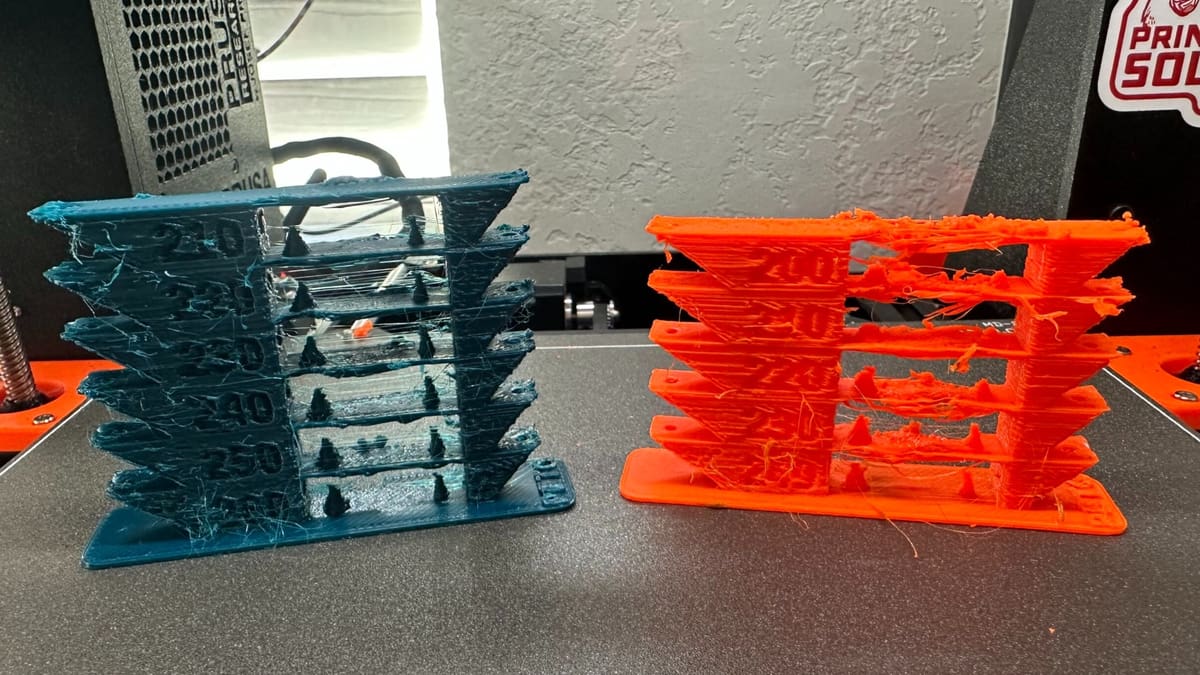
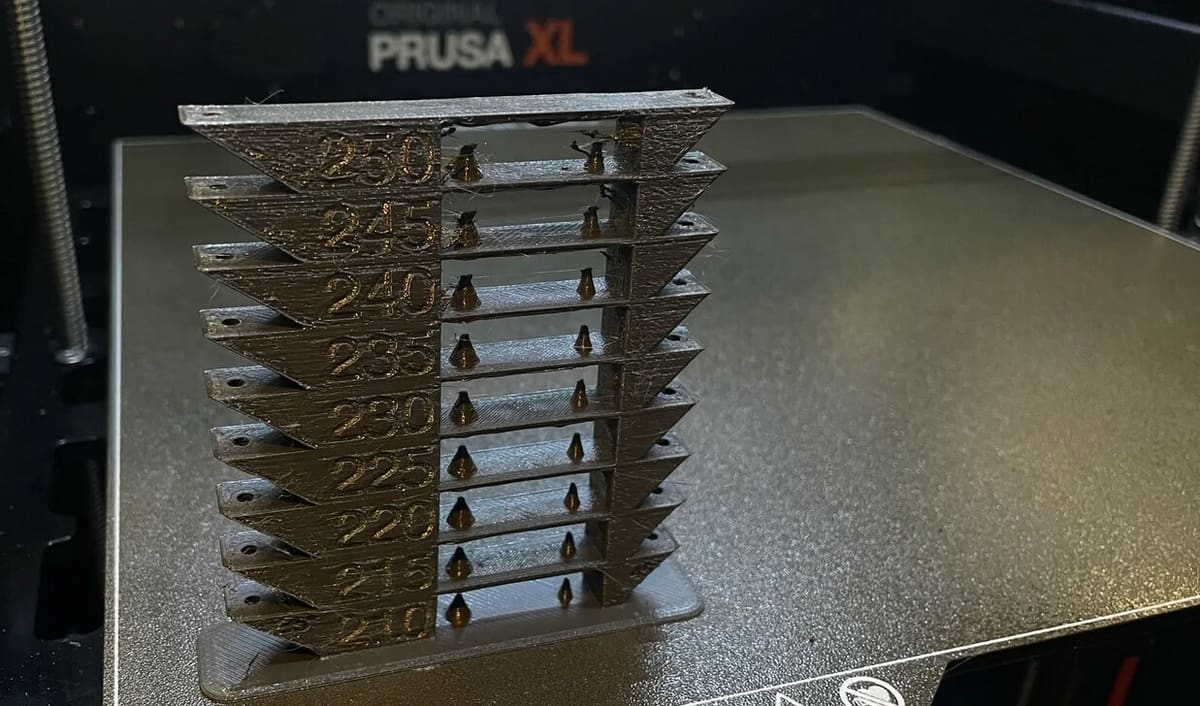
You can also refer to this make from Der_Gute on Reddit. He printed a temp tower with PETG on the MK3S+ and posted pictures showing stringing, detail fails, and poor bridging. In this temperature tower, the part printed at 220 °C looks the best with regard to bridging, stringing, oozing, and overall surface quality. However, it’s unlikely for PETG to print well at such a low temperature. In this case, the user could try printing another tower in PLA and see if it also looks the best at low temperatures. According to one Redditor, this may suggest that temp sensor may be malfunctioning on the printer. Another option would be to try tweaking retraction and see if it reduces the stringing.
Improving the Results
Printing a temperature tower provides a baseline for print quality. If you encounter any of the issues above, adjusting the printing temperature range is a good first step. For layer adhesion problems, increasing the temperature slightly can help layers bond more effectively.
Remember, however, that each filament type may react differently, so incremental adjustments and repeat testing are key. In some cases, users often find the best detail, layer adhesion, and surface finish occur at a particular temperature but face a lot of stringing at that same setting. To remedy this, you can consider doing a retraction test at that particular temperature.
When evaluating the results of a temperature tower, the primary goal is to find a balance between appearance and performance that suits your specific needs. This often involves a trade-off; for instance, a higher temperature might improve layer adhesion and surface finish but could also increase stringing and oozing. Therefore, it’s essential to identify which aspects are most critical for your application and select a temperature that optimizes those qualities.
The ideal temperature setting produces a print with good mechanical properties, excellent detail resolution, minimal defects, and high accuracy, striking the right balance for your project’s requirements. Happy printing!
License: The text of "How to Use a Temperature Tower in PrusaSlicer" by All3DP is licensed under a Creative Commons Attribution 4.0 International License.