Prusa MK3S(+)/MK4 Enclosure: 10 Great Solutions

The Prusa i3 MK3S(+) and MK4 are great 3D printers but not very protected. Read on for the best options to build or buy a Prusa enclosure.
The Prusa i3 MK3S, MK3S+, and MK4 are reliable, capable, and open-source 3D printers with a good range of features for any maker. Although these printers consistently produce great prints in a variety of materials, they do have their limits, especially when faced with ABS, ASA, or similar materials.
One of the features of many Prusa printers is the minimalistic, non-boxy design. However, this means no enclosure, so printing ABS is tough on a stock MK3S, MK3S+, or MK4. ABS is a temperature-sensitive material, and any air drafts or cold temperatures can deform (crack and warp) parts mid-print. An enclosure helps prevent any environmental interference during a 3D print.
In this article, we’ve included a few enclosures that you can build yourself, followed by some that are ready to use right away. But first, we’ve covered some of the advantages of an enclosure, and some aspects to think about when you’re deciding what will work best for your setup.

What to Think About
Before we get into the options to build at home or purchase, let’s look at some of the things to keep in mind as you decide on an enclosure for your Prusa.
The benefits an enclosure can bring are the protection of your printer from dust and debris as well as air currents that cause temperature fluctuations while printing. Enclosures can also help reduce noise and fumes during the printing process.
When looking for an enclosure, you should consider a few different factors: the visibility it offers, the ease of accessing your printer, the difficulty of assembly, the parts needed, and then weigh all of those against the price. The insulative capabilities of an enclosure matter a lot, too, as a less insulative enclosure won’t be as effective for temperature-sensitive materials like ABS and ASA.
The options we’ve outlined below all have different strengths and weaknesses, especially in terms of visibility, accessibility, and insulation, and they give a good overview of the range of possibilities. Let’s dive in!
To Build
To start, we have some DIY enclosures for those who like to customize. The advantage of a self-built option is that you can prioritize features that are important to you, and you can often keep costs down by sourcing materials yourself. The downside, of course, is the time and effort involved.
Here, we have options ranging from upcycling Ikea furniture to building a metal frame from scratch. There’s something for everyone!
Ikea Lack Table
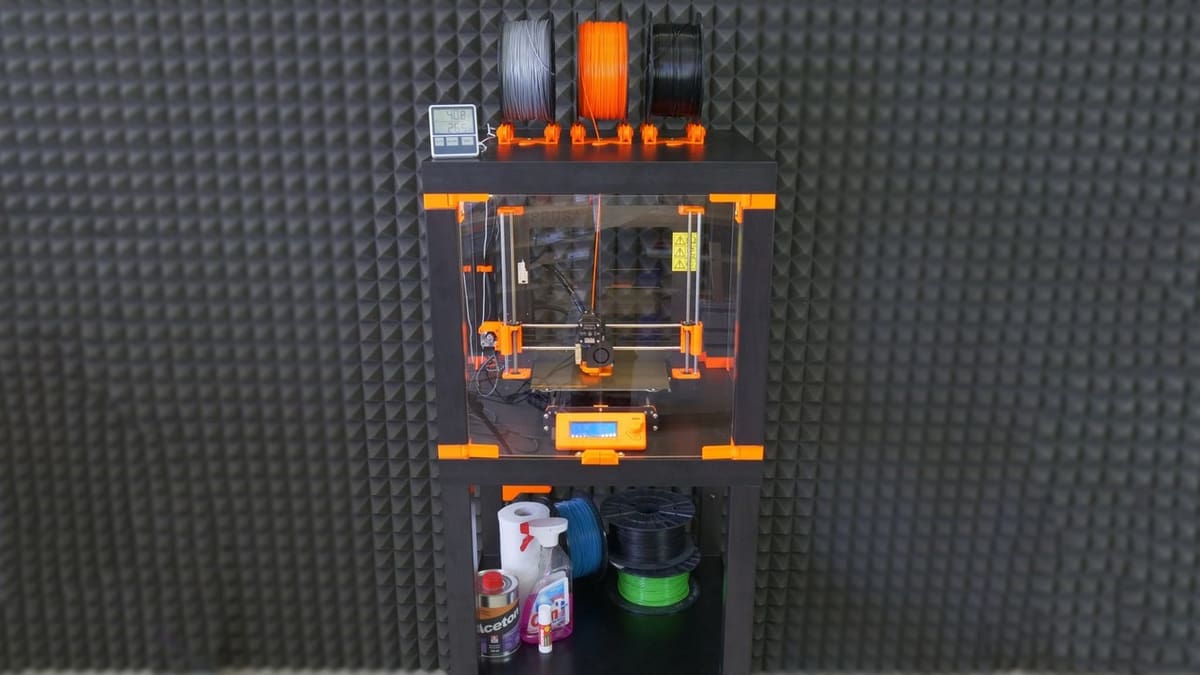
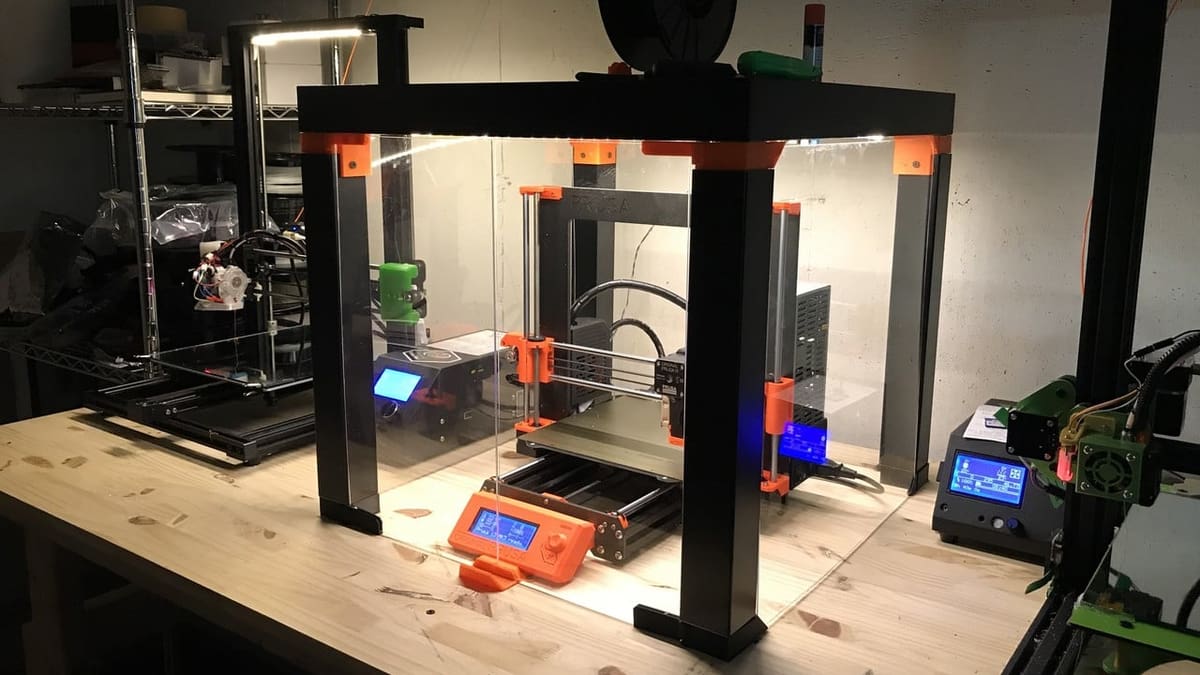
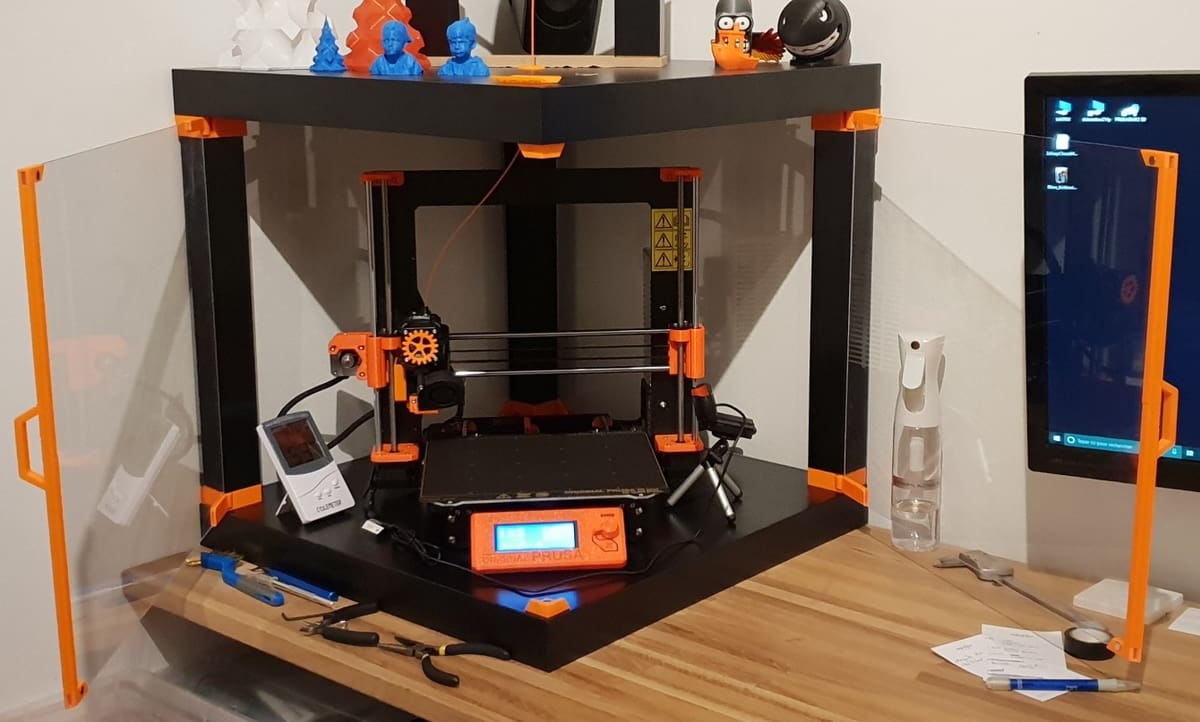
First up, you can make an upcycled table enclosure for your Prusa i3 MK3S, MK3S+, or MK4 using an Ikea Lack table for the structure. This is a well-known DIY enclosure for 3D printers, not just Prusas. It uses one or more Lack tables, but the more you stack, the more storage you add! If you don’t have a nearby Ikea store, you might be able to shop online or build a similar wooden structure yourself.
You’ll also need a few 3D printed parts, some acrylic sheets, and some other hardware. The acrylic sheets allow for visible sides so you can look at your printer from afar. Acrylic isn’t the best insulator on this list, but it’s still quite effective. You might want to add a layer of insulative material such as cotton or glass wool for increased insulation, but this isn’t necessary to print materials like ABS.
You can access your printer by adding hinges to make a door, or removing one of the sides using handles, depending on which project you choose to follow.
Building this enclosure usually costs around $70, depending on what specific features you choose to incorporate. The Ikea Lack table enclosure isn’t too difficult to make, but it does require assembly, and you’ll need to 3D print a few parts yourself (or order them online).
- Visibility: Four sides
- Insulation: Medium
- Price: ~$70
- Parts needed: Ikea Lack table, acrylic sheets, 3D printed parts, screws
- Accessibility: Hinged or removable door
- Difficulty: Medium
Plastic Sheet
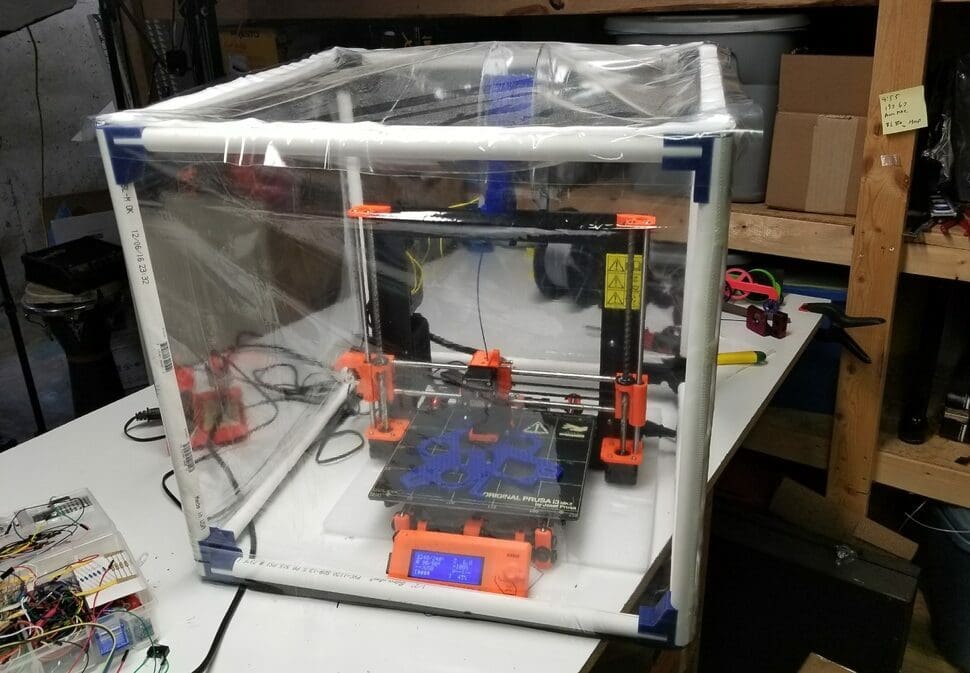
This next enclosure is the most basic on this list, as it’s simply a sheet of plastic to trap heat and block air drafts. There are two main ways to make this enclosure: either just laying a plastic sheet over the printer, or first building a structure for the sheet to go over.
The former option is a lot less work because all you need is a plastic sheet – just place the sheet over the printer, lock its sides down with weights (it could even be the bottom of the printer), and you’re done!
The second option involves making a frame to support the sheet so it doesn’t get snagged by the printer’s moving parts. MatterHackers suggests using PVC pipes to make a frame; for this method, you’ll need some PVC pipes, a staple gun, and tape. You can also 3D print parts of the frame and, with some 1/2″ PVC pipes, surround your Prusa. Printing in ABS would be ideal, but PLA should work, too. Just in case, though, consider re-printing the parts in ABS once your enclosure is finished, because PLA is subject to deformation under heat.
No matter what style of this type of enclosure you use, most likely, it won’t have the best insulative properties. That’s because a sheet of plastic isn’t very solid and might let in some air drafts or cold air if there are any gaps.
If you use a completely clear plastic sheet, you’ll have the best visibility, but make sure it’s capable of withstanding temperatures of around 150 °C so that the plastic won’t deform when you’re printing at high temperatures. This type of enclosure is definitely the cheapest, though, and it’s super easy to build.
- Visibility: Depends on transparency of plastic
- Insulation: Low
- Price: ~$30
- Parts needed: Plastic sheet, PVC pipes, frame
- Accessibility: Removable plastic sheet
- Difficulty: Easy
Exercise Mats
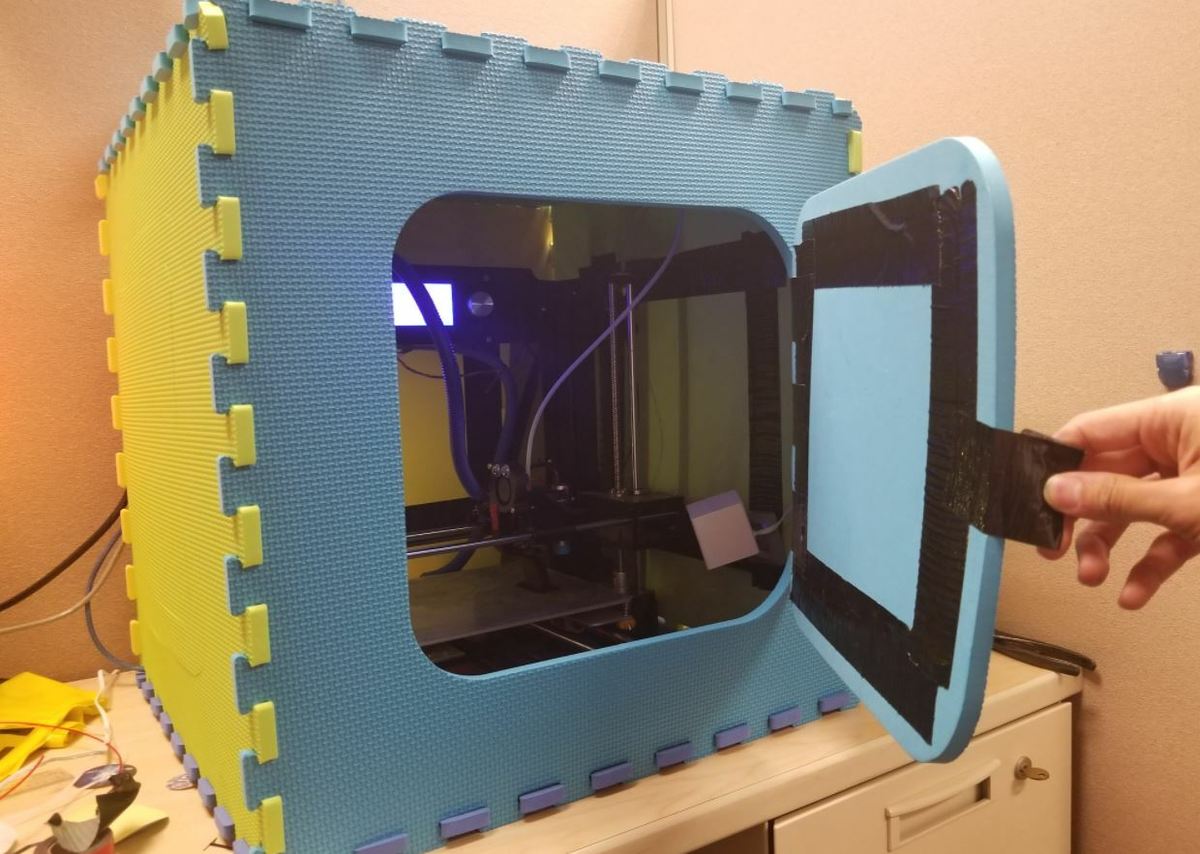
Exercise mats may not sound like the perfect enclosure for your Prusa printer, but they offer decent insulation at a very reasonable price. For this type of enclosure, all you’ll need is a set of interlocking foam exercise mats like the ones seen in the image above. Assembly can be done in under a minute as you just have to connect the panels together.
As we said, this type of enclosure is pretty decent when it comes to insulation, as foam is good at keeping heat in. Of course, foam also is opaque, so you won’t really be able to see your printer through this enclosure. You can make your own door or access hatch by cutting out a portion of one of the mats and using tape to re-connect it to the other panels.
While an enclosure made of exercise mats isn’t most makers’ first choice, it’s worth noting that this enclosure costs only around $30, and some users might already have some mats lying around.
- Visibility: None
- Insulation: Medium
- Price: ~$30
- Parts needed: Exercise mats
- Accessibility: Removable mat
- Difficulty: Easy
Temperature-Controlled
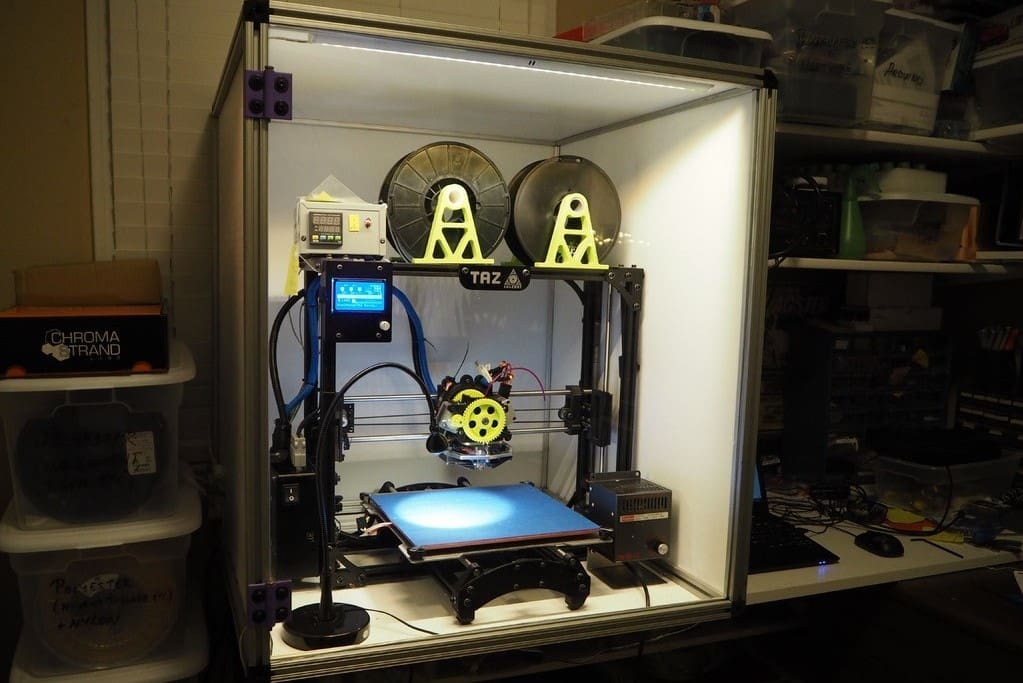
A heated and temperature-controlled enclosure is perhaps the most effective enclosure for any 3D printer. Unfortunately, there aren’t many guides for how to make your own climate-controlled enclosure as it can be a more complicated process.
But it is possible: For example, Thingiverse user KillaCycle’s guide goes over how to make your own heated enclosure using some printed parts, aluminum extrusions, CoroPlast panels, and an acrylic sheet. For this type of enclosure, you’ll also need a heating system and a thermostat.
Although heated enclosures are extremely effective, the level of insulation is something of an overkill. Most everyday filaments aren’t temperature-sensitive enough to require a heated enclosure, but having one is definitely a bonus. These enclosures don’t offer that much visibility, often with only one side that’s see-through.
As you might think, temperature-controlled enclosures are more expensive than other options, but if you stick to a budget, it’s possible to make one for around $200.
- Visibility: One side
- Insulation: High
- Price: ~$200
- Parts needed: Aluminum extrusions, insulative panels, acrylic panel, heater, thermostat, and more
- Accessibility: Hinged door
- Difficulty: Hard
Wood
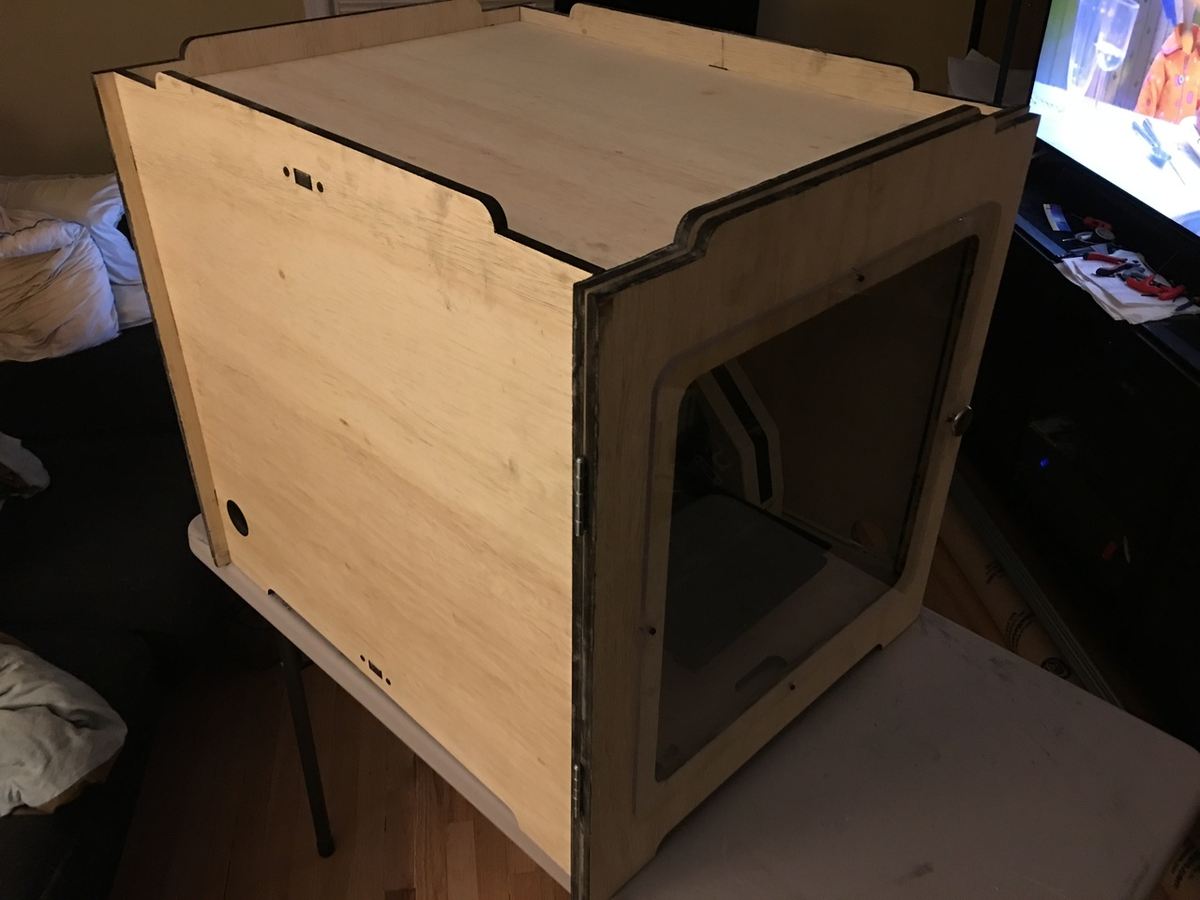
We’ve already talked about the Ikea Lack enclosure, but a generic wood enclosure is another option for your Prusa MK3S, MK3S+, or MK4. Wood is easy to work with as it can be cut, drilled, and sanded without cracking like plastics. Of course, building a wood enclosure is still more challenging than buying a pre-built option, but if you’re a DIY-ist, it may be right up your alley.
Wooden panels are the main component of wood enclosures. The thicker the panels are, the more insulative the enclosure will be, but wood is a naturally fine material for keeping heat in. For this type of enclosure, you’ll also need some basic hardware, like deck screws and a hinge for the door.
To access your printer, it’s best to use one or two acrylic panels in your enclosure to make a transparent front door that you can see your printer through. Given how easy it is to mount something to wood, you can also add other features, like an external spool holder or enclosure heater.
The price of a wooden enclosure will vary a lot depending on how thick your wooden panels are and the other features you include, but they typically are around $100. Many users also already have some spare wood or other pieces of hardware that lower the cost. If you want help building your own wood enclosure, you can follow one of the numerous guides available online.
- Visibility: One side
- Insulation: Medium
- Price: ~$100
- Parts needed: Wood panels, hinges, screws
- Accessibility: Removable plastic sheet
- Difficulty: Medium
To Buy
Are DIY solutions not your style? There are plenty of enclosures that are ready to install with minimal assembly required. Prices vary based on features and range, from an affordable photography tent to purpose-built cube enclosures.
Creality Enclosure
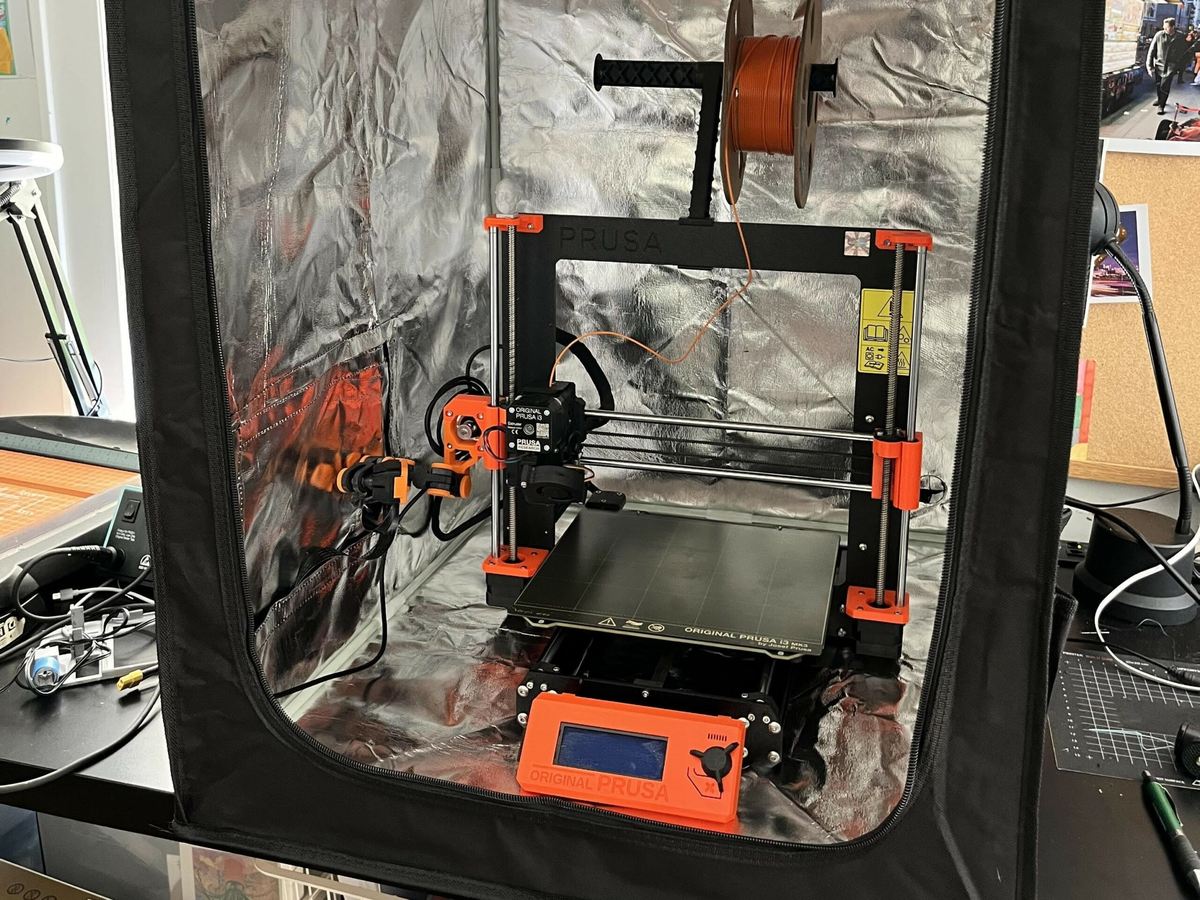
The perfect budget- and time-friendly enclosure option for a Prusa is the Creality tent enclosure. The large size will fit the MK3S, MK3S+, or MK4 with plenty of room to spare.
Assembly of this enclosure is a breeze, all you need to do is connect the metal frame rods together and then attach the foil-lined covering. This also makes disassembly and storage easy. Unlike other pop-up tent options, the cover material is made with 3D printing safety in mind, so it’s flame-retardant and insulating.
Visibility into the enclosure is possible through a front window panel, but the front side can also be nearly completely unzipped to gain access inside. There are also zipped access ports on the top and to one side of the enclosure that makes for easy access to rear cables and ports. A handy side pocket is great for storing your essential printing tools.
- Visibility: One side
- Insulation: Medium
- Price: ~$100
- Parts needed: None (all-in-one enclosure)
- Accessibility: Zipper doors on the top, front, and one side
- Difficulty: Easy

Wham Bam HotBox
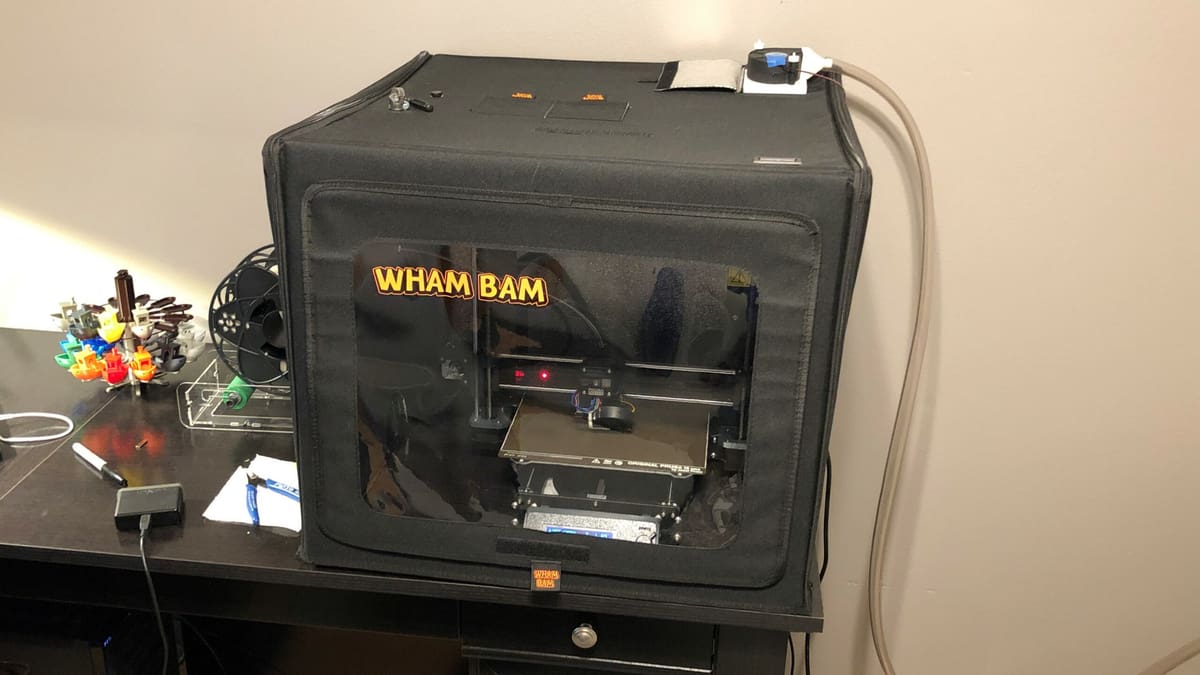
Wham Bam Systems offers its own enclosure, known as the HotBox, which you can buy for a little over $100. This enclosure has a few different features, such as a built-in thermometer and some loops for holding a light.
Their HotBox enclosure uses an insulative fabric to keep heat inside. Specifically, the HotBox’s nylon 600D material covers the panels of the surprisingly sturdy frame. While the fabric isn’t the ideal insulator for an enclosure, it works well enough.
This enclosure fits a wide range of printers besides the MK3S, MK3S+, and MK4, and it has an opening on the top for filament to pass through, making changing filament easy. Despite being made of fabric, the enclosure is sturdy enough to hold a filament roll on top.
The enclosure is easily accessible with a zipper on the top and front. The HotBox also has three openings for cable organization. Sadly, this enclosure doesn’t offer a lot of visibility, as it only has one small sheet of transparent plastic in the front.
Setting up the Wham Bam Systems HotBox is super easy, and all you have to do is unzip and unfold the enclosure. The HotBox can be folded down for easy transportation, too!
- Visibility: One side
- Insulation: Medium
- Price: ~$140
- Parts needed: None (all-in-one enclosure)
- Accessibility: Zipper doors on the top and front
- Difficulty: Easy
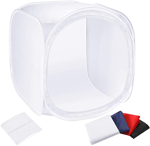
Photo Studio Tent
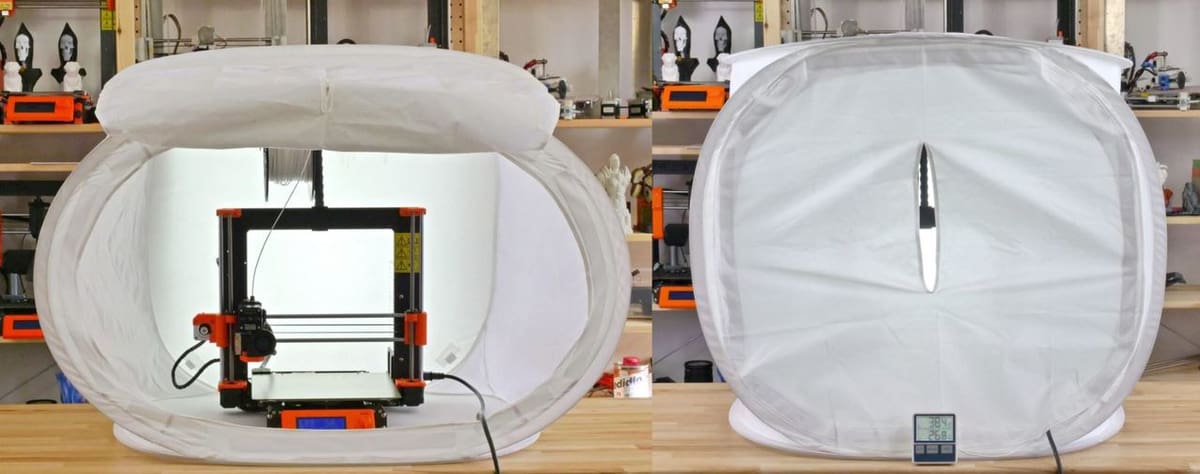
Another option is to use a photographer’s studio tent to surround your Prusa. This method isn’t the best enclosure from an insulation perspective, as the tents are usually made out of a somewhat porous material. This means that some air may be able to pass through the enclosure, but you’ll probably be able to print ABS and ASA just fine.
Visibility will be limited as photo studio tents are usually made from a white opaque material. However, it’s a simple solution; you’ll only need to buy a tent and maybe a light if you want one.
Definitely make sure that the plastic or other material used for the photo tent isn’t too temperature-sensitive. Otherwise, it could possibly melt during a long, high-temperature print. To check, just look at the tag for the type of plastic and look up its average temperature resistance.
These tents are easy to set up and take down, if portability is a concern. You can find photo tents to fit the MK3S, MK3S+, or MK4 for around $40. Just check the dimensions to make sure you’re getting the right size.
- Visibility: One side, when open
- Insulation: Low
- Price: ~$40
- Parts needed: None (all-in-one enclosure)
- Accessibility: Zipper or removable door
- Difficulty: Easy
Printed Solid
Printed Solid offers a line of next-gen 3D printer enclosures with attachable temperature sensors. You can also modify these enclosures with optional accessories such as air filtration systems, humidity sensors, and more.
This enclosure is built from CNC-routed panels, with the door made from laser-cut acrylic for visibility. You can also print a filament spool holder to attach to the top or side of the enclosure.
Printed Solid’s enclosure has pretty good insulation properties, as the panels fit tightly against each other, and there are almost no gaps at all. It fits the Prusa MK3S and MK4 stock versions and modified versions with the Prusa Bear or MMU2S.
This enclosure isn’t too expensive, sitting at just over $200, which is decent for the features and customizability offered. Assembly is also a breeze, as all you need to do is screw the panels together.
- Visibility: One side
- Insulation: High
- Price: ~$210
- Parts needed: None (all-in-one enclosure with optional printable spool holder)
- Accessibility: Hinged door
- Difficulty: Easy
Acrylic
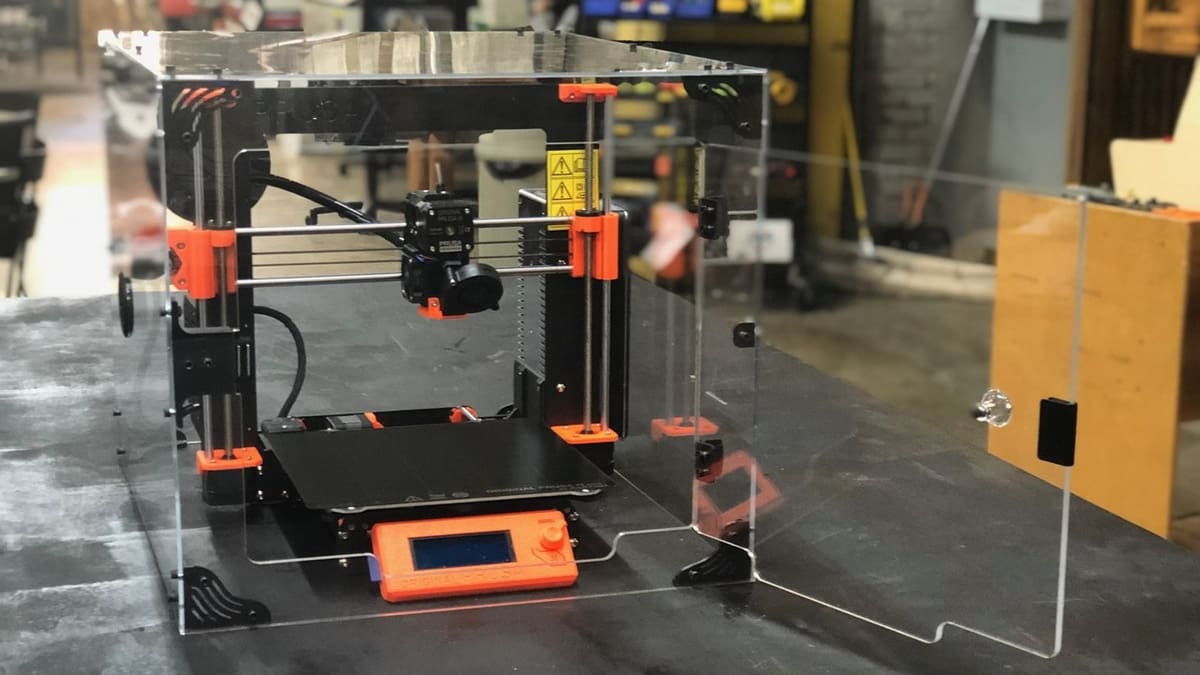
Finally, fully-acrylic enclosures are a popular option as they offer all-around visibility for not too much money. You can buy an acrylic enclosure for your Prusa i3 MK3S from 3DUpFitters for a starting price of $275. On top of that, you can buy add-ons like an air filter, temperature gauge, lighting system, and more.
Acrylic enclosures are generally pretty insulative, but this does depend on how tightly the panels fit together and the acrylic’s temperature resistance. Obviously, an acrylic enclosure is transparent, so visibility is excellent.
Alternatively, if you want a cheaper option, you can build one! You’ll need some acrylic panels, screws, brackets, and other hardware to tightly connect the panels. You’ll also need a hinge if you plan to access the printer via a door.
Building your own acrylic enclosure generally costs around $80. This type of enclosure is definitely harder to build and assemble than other options on this list. For one, cutting into acrylic isn’t as easy as cutting into wood or even aluminum because acrylic tends to break into shards when improperly cut. Check out Instructables for some good resources.
- Visibility: Four sides
- Insulation: Medium
- Price: ~$275 (or DIY for ~$80)
- Accessibility: Hinged door
- Difficulty: Easy (DIY is more involved)
License: The text of "Prusa MK3S(+)/MK4 Enclosure: 10 Great Solutions" by All3DP is licensed under a Creative Commons Attribution 4.0 International License.
CERTAIN CONTENT THAT APPEARS ON THIS SITE COMES FROM AMAZON. THIS CONTENT IS PROVIDED ‘AS IS’ AND IS SUBJECT TO CHANGE OR REMOVAL AT ANY TIME.