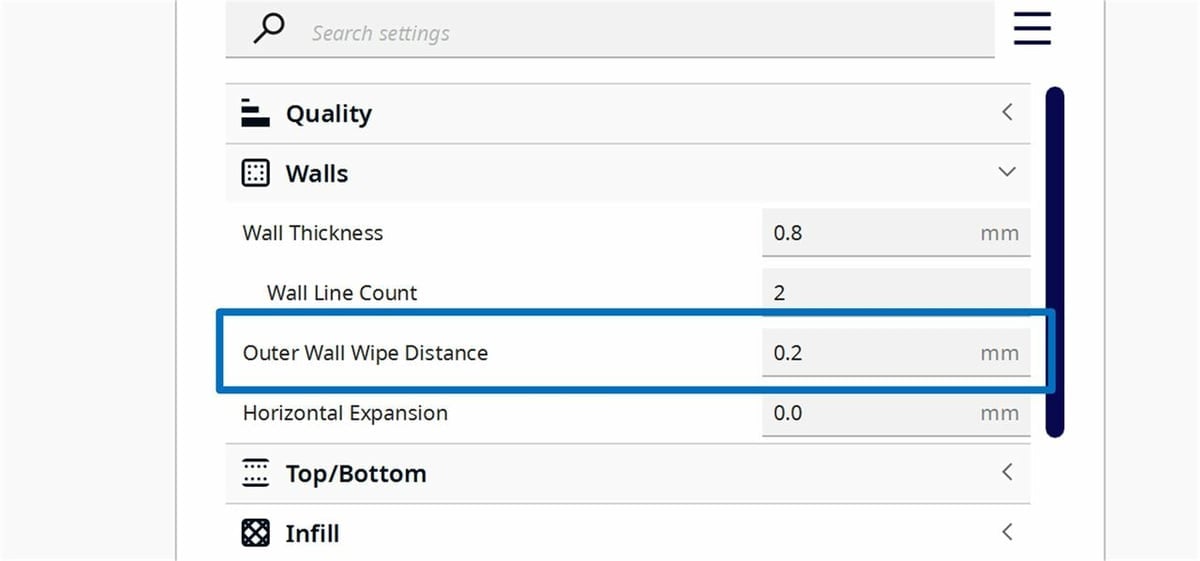
Print surface quality is one of the most important aspects of 3D printer tuning. The smoothness of the print surface determines the crispness of the print, the tightness of print tolerances, and even the overall strength of the print.
All sorts of issues can diminish the surface quality of prints. One major issue that can be difficult to eliminate is something called “Z seam”. Fortunately, many slicers, including UltiMaker’s Cura, have dedicated slicer settings that minimize the presence of Z seam on 3D prints. In this article, we’ll take a look at Cura’s “Outer Wall Wipe Distance” setting, which is fairly straightforward to use.
The Problem
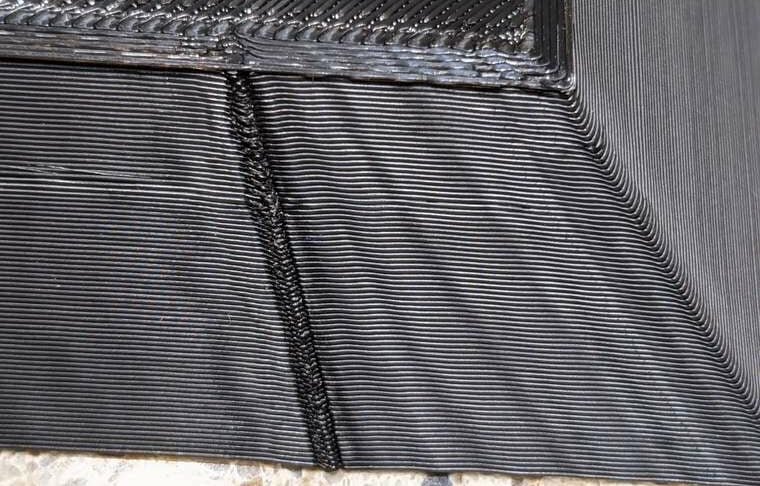
Z seam is a deformation that results from the buildup of filament each time the printer changes layers. It’s a consequence of extruders being unable to instantaneously stop and start the flow of filament. For this reason, this is really only a problem with FDM printers.
During a layer change, the 3D printer pauses extrusion. But the backpressure from having just extruded an entire layer of filament will continue to push out the hot filament while the extruder stands still on the XY-plane (even if it’s just for a moment). Thus, the result is over-extrusion in that area of the layer.
One solution to this is to retract the filament before a layer change, but this isn’t feasible with certain filaments or even certain extruders.
Solutions
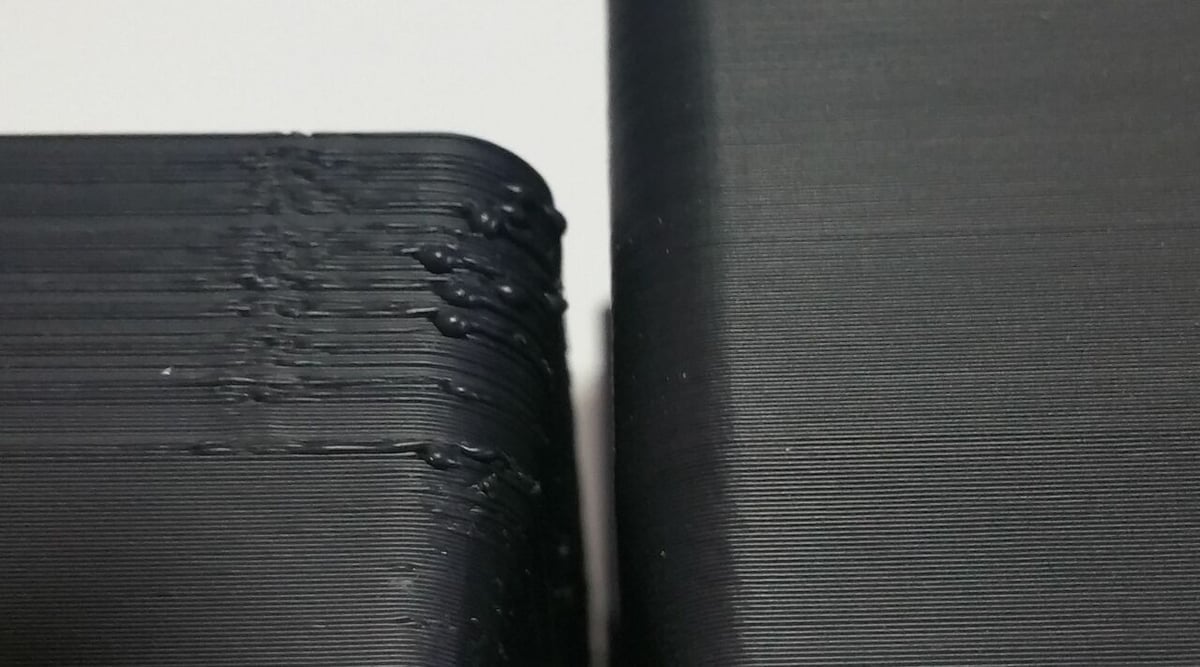
There are many ways to reduce the presence of Z seam on a 3D print. If you only need to reduce the noticeability of the Z seam, one option in Cura is to choose where the slicer changes layers. Depending on where you choose, this could make it so that the Z seam is harder to notice, but it won’t be eliminated.
Alternatively, Cura has another feature called “Coasting” that retracts filament before a layer change, reducing the pressure in the extruder that causes the blob at the Z seam.
However, there may be reasons for not using these adjustments. Changing Z seam alignment doesn’t improve tolerances, and coasting requires finely tuned retraction settings. In cases where tight tolerance is important or retraction is inhibited, changing the Outer Wall Wipe Distance of the print might be the right solution for you.
Outer Wall Wipe Distance is the distance that the 3D printer moves without extruding filament at the end of each layer before moving on to the next one. This extra travel essentially “wipes” the extra filament onto the wall, instead of leaving a the blob at the seam.
Why Use Outer Wall Wipe Distance
Changing the Outer Wall Wipe Distance does several good things for the 3D print surface finish. By smoothing out the extra filament into the print perimeter, it reduces the visibility of the Z seam, increases the smoothness, and tightens the tolerance of the wall.
A significant drawback to increasing the Outer Wall Wipe Distance is that it increases the total print time. After all, it adds an extra motion for every loop of every surface of every layer. In a print with several hundred layers, this additional time can become quite substantial. Additionally, if the Outer Wall Wipe Distance is increased too much, it will overheat the wall, which could melt part of the print at the Z seam. For this reason, it’s best to not exceed a wipe distance of ~0.5 mm.
How to Use It
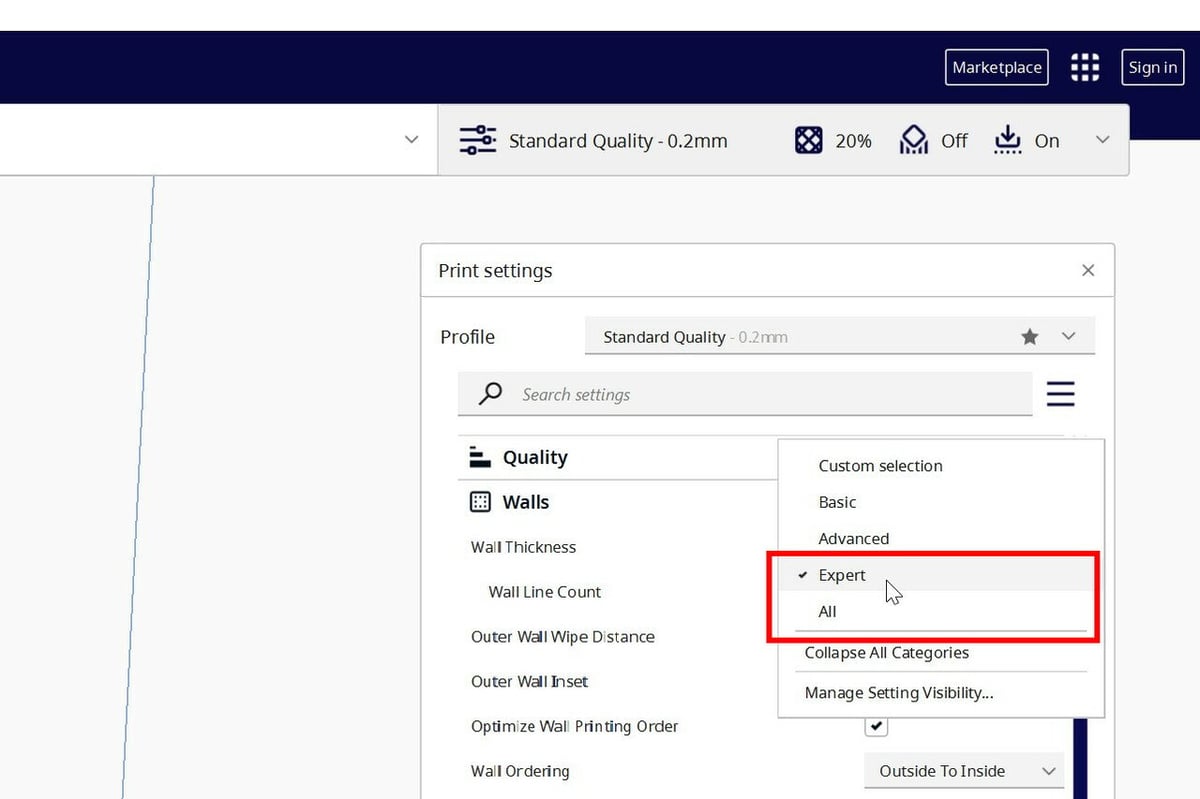
In Cura, Outer Wall Wipe Distance is by default a hidden setting. Before changing it, you first need to make it visible. Luckily, this can easily be done in the default view of UltiMaker Cura.
To enable this setting, go to the floating “Print settings” pane, click the hamburger-style menu button, and Select “Expert” or “All” on the resulting drop-down menu.
Then, navigate down to “Walls” and change the Outer Wall Wipe Distance value. If your current prints have noticeable Z seams, increase this value slightly. Typical values are 0.5 mm and below. If you increase this value too much, the printer will run out of filament to smooth, which will overheat the current layer and under-extrude the beginning of the next layer.
Try these new settings with test prints that have easily visible Z seams, such as a vertical cylinder. When the Z seam is decreased to the desired level, congratulations, you’ve done it! If not, try again with a greater Outer Wall Wipe Distance value.
Remember, it’s best practice to stay below a 0.5-mm wipe distance.
Slicers & Services

Z seam isn’t the only issue that can cause disappointing prints. All sorts of issues, from ghosting to bridge failure, can lower print quality and ruin prints. Fortunately, many of these issues can be solved by intelligently altering slicer settings. If you’re experiencing other issues in addition to Z seam, check out our guide to 3D slicer settings.
Fine-tuning slicer settings is a process that can take a while, though. If you need a part in a pinch, try Craftcloud by All3DP where you can find a printing service that will 3D print and deliver a part straight to your doorstep, no matter how small! Simply upload a model; select the printer technology, material, and surface finish; then choose a service. The model will be printed on a finely tuned 3D printer and shipped directly to your delivery address.
Community & Support
A great thing about UltiMaker Cura is that so many people use it. Have a question? Need more information? There are plenty of places to turn to on the internet for answers.
- UltiMaker Support: UltiMaker, the company behind Cura, has an online support website with a page specifically about Outer Wall Wipe Distance. In addition to being able to view prior activity on the site, they have dedicated staff that tracks the site and answers questions.
- r/FixMyPrint on Reddit: A moderated subreddit that has all sorts of information about how to improve print quality and avoid failed prints. Among other things, it includes posts about Z seam and Cura’s outer wall wipe distance setting.
License: The text of "Cura: Outer Wall Wipe Distance – How to Use This Setting" by All3DP is licensed under a Creative Commons Attribution 4.0 International License.

