How to Convert G-code to STL – Simply Explained

Converting an STL to G-code is easy, but to convert G-code to STL requires a dedicated tool. Learn how to tackle this challenging conversion!
A stereolithography file, more commonly known as an STL, is a very common 3D file type. It defines a 3D object using a number of triangular shapes, collectively known as tessellation. This file type is exported from a range of programs and downloadable from a range of online repositories.
On the other hand, G-code refers to the commands that tell a 3D printer how to print a 3D object. G-code typically describes printer parameters, such as speed and temperature, as well as the geometry of the 3D object. STL or other 3D file types are converted to G-code files using a slicer like Cura. However, reversing that process, going from G-code to STL, is much less common.
The main reason to do this is if you have a G-code file without the original 3D STL file. Converting in this direction is a somewhat error-prone and experimental process, and it’s common to experience errors in conversion. Thus, tweaking conversion parameters is often needed to obtain ideal results.
For instance, G-code files often contain non-part-related information, such as supports. When using converters from G-code to STL, these features will remain in the resulting STL and will need to be manually removed in 3D editing software like Fusion 360 to fully recover the original STL file.
While there’s a limited number of programs for this task, there’s a new player in this domain that might just make the conversion process a lot simpler and user-friendly: Gcode2l. In this article, we’ll take a look at this browser-based tool and see if recovering the 3D model from an STL file is really possible. Let’s get started!
About Gcode2l
Gcode2l is a versatile, online tool purpose-built for converting G-code back into STL files. Its unique value proposition is its cost-free operation, user-friendly accessibility, and efficient performance in deciphering G-code files. The clean interface and straightforward operations don’t necessitate a deep understanding of G-code or STL files, making it a versatile tool for both novice and seasoned users.
However, Gcode2l isn’t without its limitations. The creators state that the tool has been primarily tested with files produced by PrusaSlicer, Slic3r, and Cura. While it can process files from other slicers, you may end up with more artifacts. We tested a file sliced using Simplify3D and it yielded satisfactory results, but your mileage may vary, especially depending on the model.
Furthermore, Gcode2l doesn’t support the conversion of multiple models within a single file. In such instances, it can convert the file, but only the largest model from the group will be represented in the resulting STL file.
With all that said, the results from Gcode2l may surprise you. Up next, we’ll run through an example conversion to help you understand how to utilize Gcode2l effectively and give you a sense of the outcomes you can anticipate.
Reviving the STL
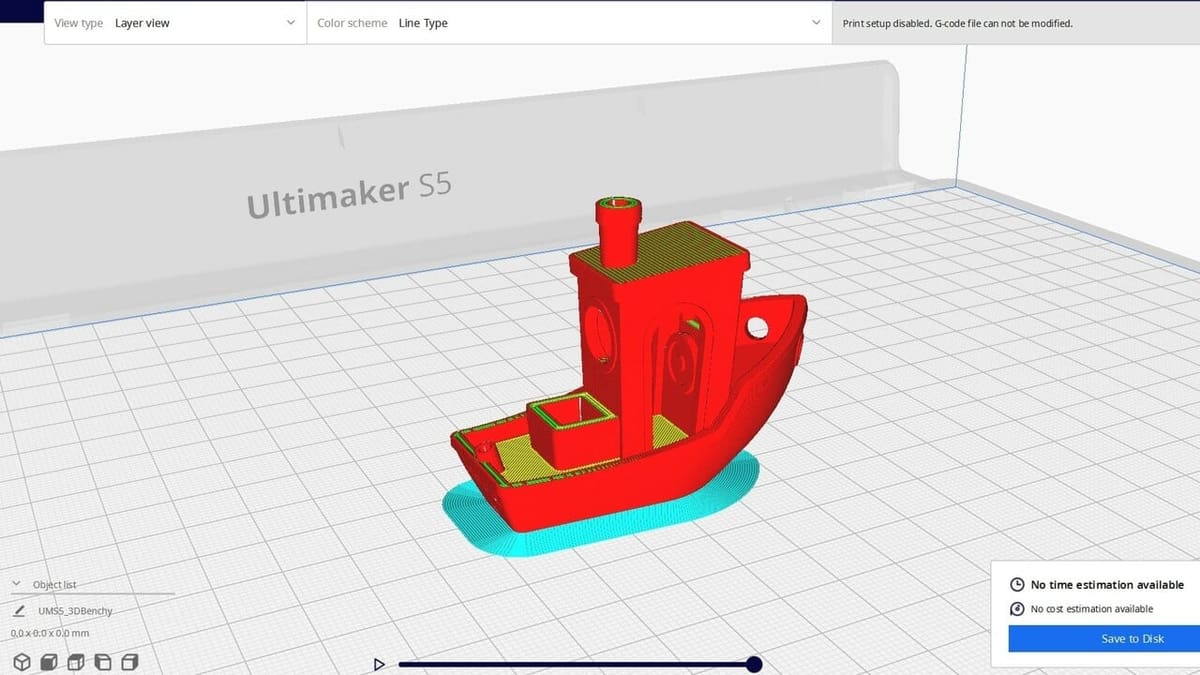
For our case study, we’ve selected the widely recognized 3D Benchy to be our example model. Given its popularity among 3D printing enthusiasts, it serves as an excellent candidate to showcase both the capabilities and limitations of the Gcode2l tool. Now, let’s dive into the step-by-step guide.
Gcode2l Workflow
Begin your process by navigating to the Gcode2l website. An optional sign-in is available, which serves solely to connect files to your account for easy management, but it’s not mandatory. You’ll also be greeted by an introductory splash screen that provides a brief overview of the tool, outlines its current limitations, and offers a help section. Once you’ve navigated past this, you’ll be able to proceed with uploading your G-code files.
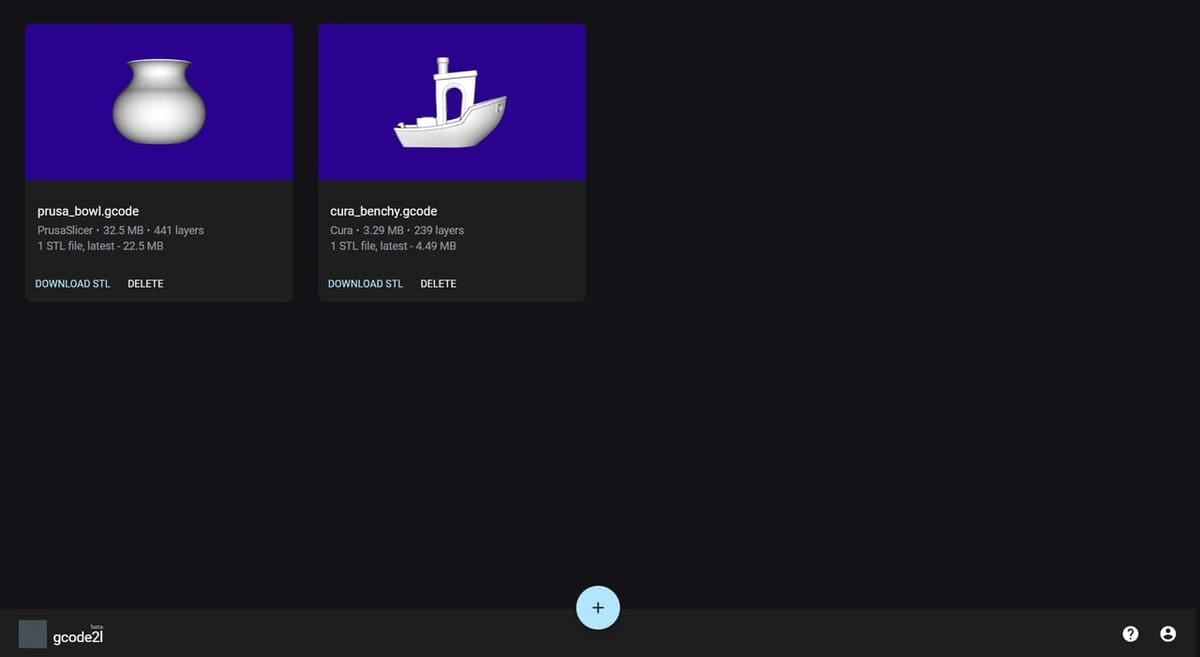
- Upload your own G-code file by clicking on the blue “+” symbol at the bottom of the page or click “Import Test Files Set” to explore the sample files.
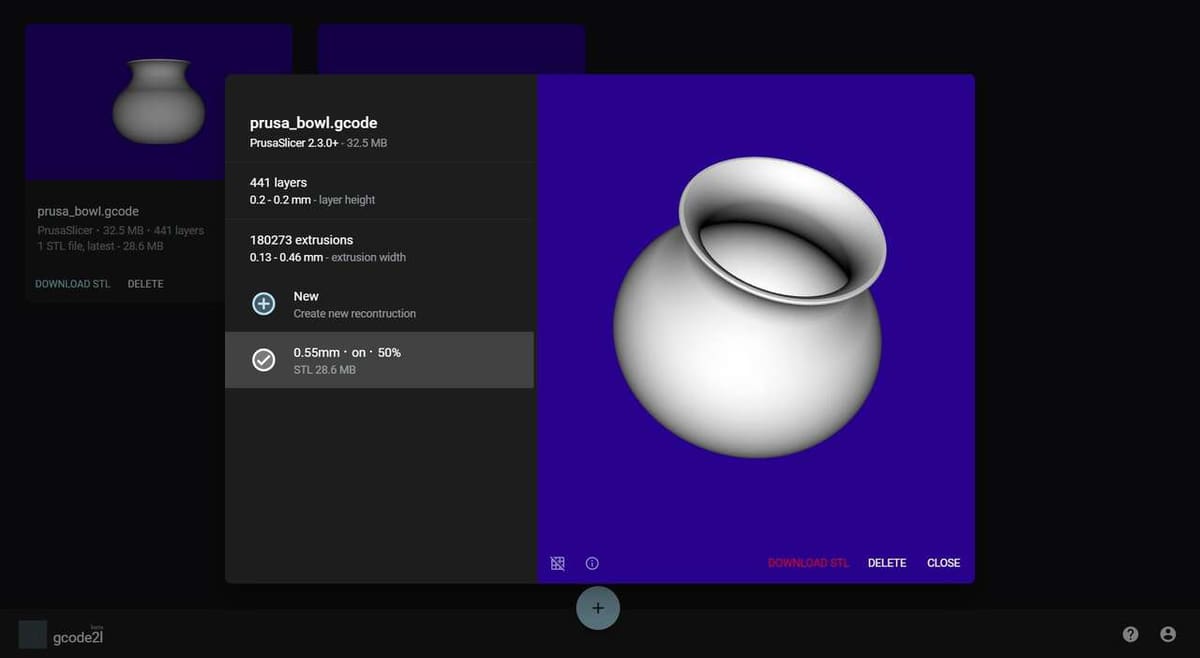
- You’ll have to hang tight while the file is processed to obtain the metadata such as the slicer used, file size, layer thickness, layer count, and extrusion width. Once complete, it’s normal for the file to show “No Preview”.
- Click on the uploaded file to open the Reconstruction menu where you’ll have access to several adjustable parameters (we’ll go over these in a bit).
- When you’re satisfied with your chosen settings, hit “Reconstruct” and let Gcode2l work its magic.
- The completed reconstruction will appear in a preview where you can drag to rotate and inspect the result.
- Hit “Download STL” if you’re satisfied with the result or start a new reconstruction and tweak the parameters to your liking. Simple as that!
Reconstruction Parameters
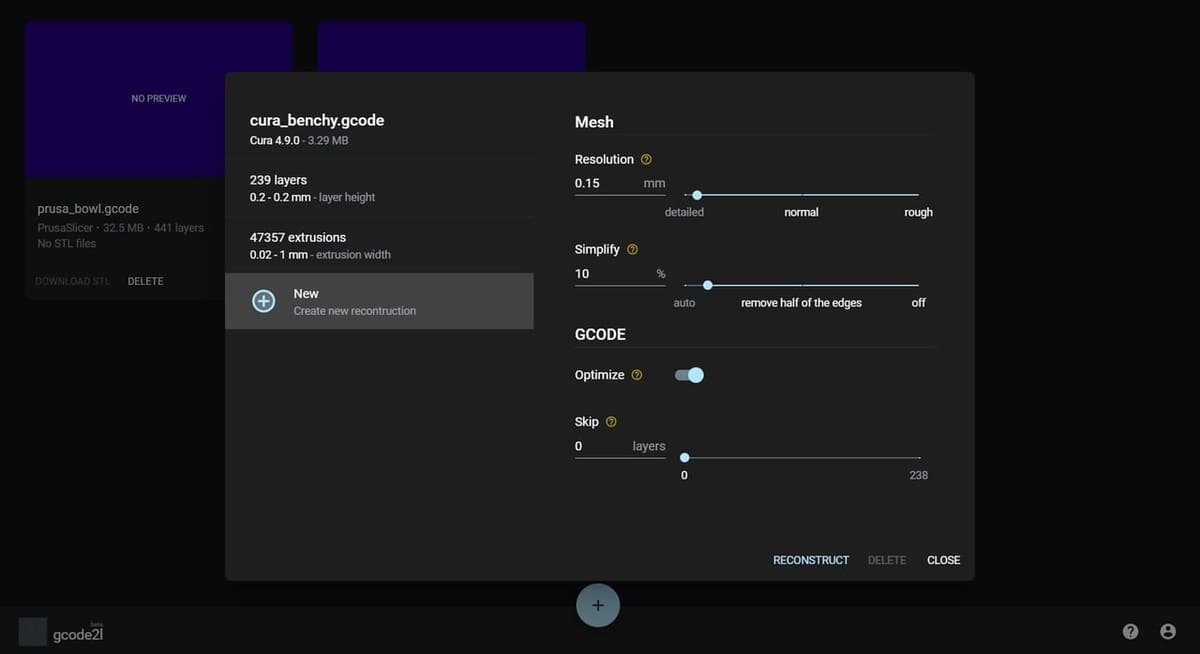
There is no single settings profile that will work in every case of STL file reconstruction. The right settings will depend on the size of your model, the amount of detail, and other included extrusion instructions. Here is a rundown of the four parameters you can experiment with in Gcode2l:
- Resolution: The resolution of the reconstructed STL can be adjusted with a slider on a scale from “detailed” to “rough” or by entering a specific numerical value in millimeters. If you know your model is on the smaller side, shoot for a resolution closer to “detailed” whereas the resolution for larger models should be increased to avoid excessively long reconstruction time.
- Simplify: The second slider can be used to decrease model complexity and file size by removing excess edges. The input percentage reflects how many triangle edges will be retained. You can set this anywhere between “auto” or “off”, depending on how (and if) you plan to use the reconstructed STL for printing.
- Optimize: This experimental toggle tells the reconstruction to preprocess each layer and remove interior extrusions. This can help save computer resources and speed up the reconstruction although it increases the chance of unwanted artifacts.
- Skip: To bypass initial layers, like a brim or raft, you can choose to define the number of initial layers to skip in the reconstruction. Note this only appears if an extrusion code for such features has not been identified for you.
Don’t hesitate to experiment with all of these settings to optimize the reconstruction. For example, try starting with a resolution close to the initial layer size as huge disparities between these two could result in voids in the reconstructed model. While the “Simplify” toggle is an essential feature for most models, it becomes particularly crucial to avoid a resource-intense reconstruction when dealing with anything beyond the most basic of models.
Evaluating Results
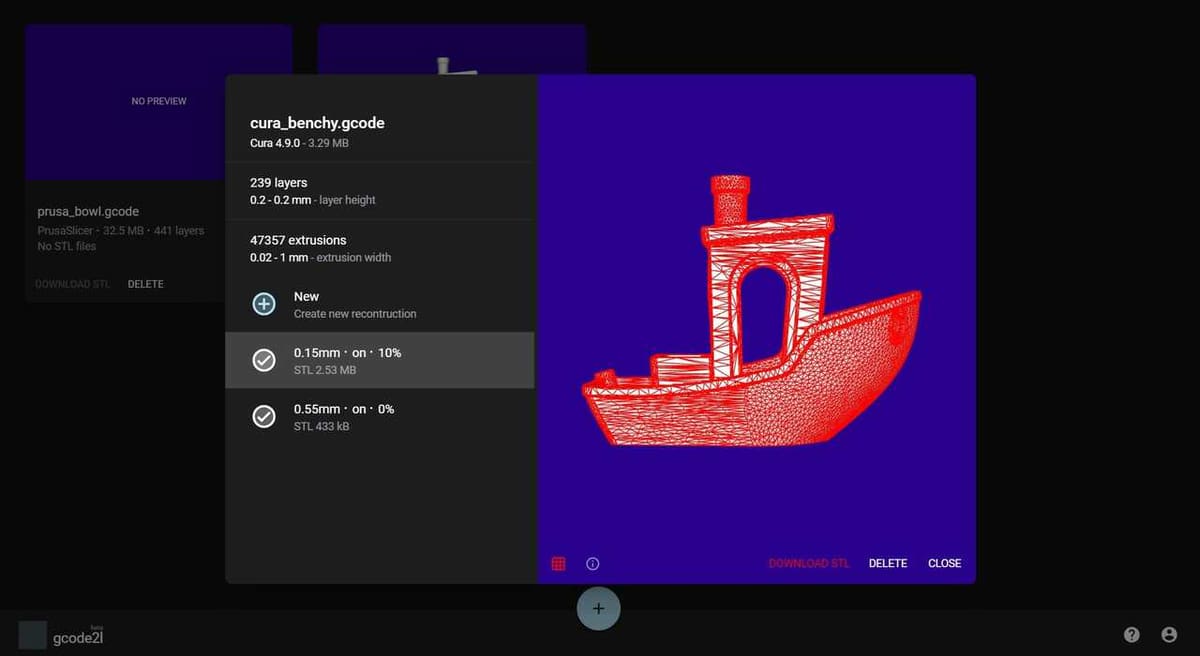
Keep in mind that Gcode2l carries out all processing on your device. To avoid overutilizing resources, it uses built-in safeguards to monitor usage and halt reconstruction if consumption exceeds set limits. Specifically, if an instance uses over 8 GB of memory or surpasses nine minutes, the process will be terminated, keeping your system’s performance in check. If you run into a processing limit, try reducing the resolution or increasing the “Simplify” parameters.
After the reconstruction is complete, you can use the built-in 3D viewer to inspect the resulting STL file. The viewer even allows you to toggle the visibility of the mesh edges on and off, assisting you in assessing the reconstruction’s details. You can also access important information such as the parameters used for the reconstruction, like layer height and extrusion width, as well as the resources consumed in the process.
Final Thoughts
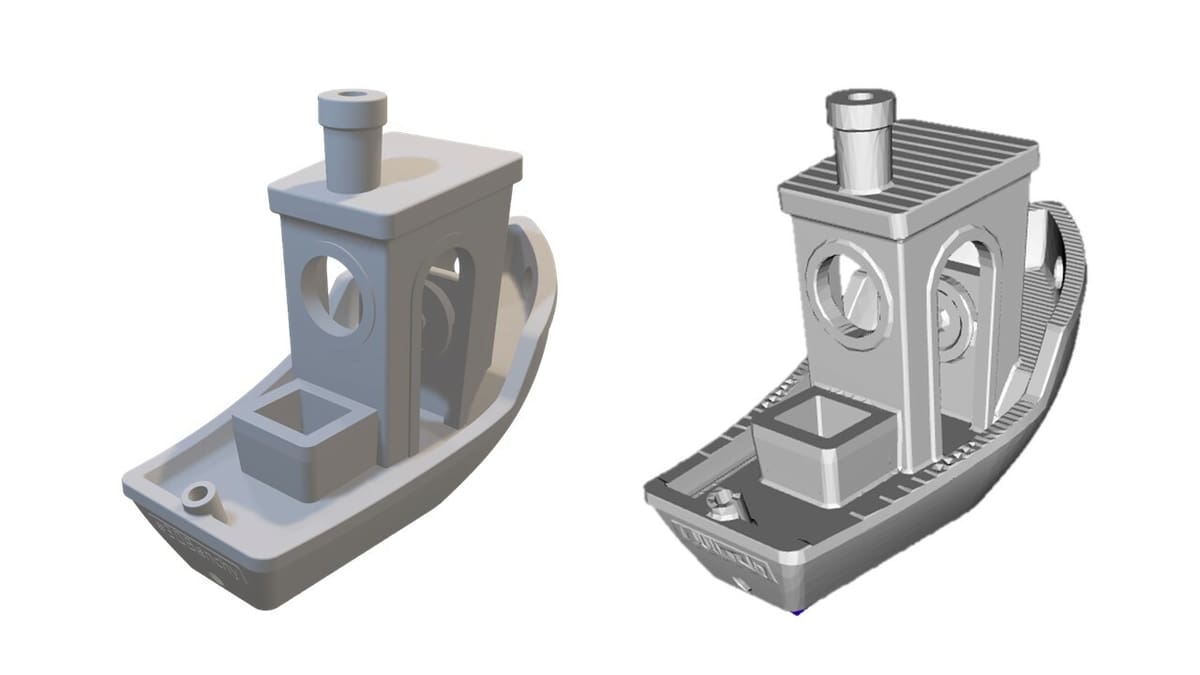
The quality of the resulting STL file is largely contingent upon your original slicer settings, such as the layer height and nozzle size. These settings determine the smallest detail that can be printed, and the reconstructed STL will carry the same levels of detail. For example, you will likely notice a stair-stepping effect on any sloping surface due to the layering process of 3D printing. Moreover, intricate details like text and small features might be impossible to recover fully.
Any supports generated during the slicing process will be incorporated into the model, creating a single unified mesh. This often requires a significant cleanup effort using mesh editing software such as MeshMixer. Note that the internal walls separating the supports from the model do not always translate to the STL.
Once all is said and done, Gcode2l is a great tool for converting G-code files back to STL and the reconstructed Benchy would print great if it were to be printed at lower quality. However, small details such as text are highly dependent on the resolution set before reconstruction. Most importantly, while this tool brings undeniable value in recovering lost STL files, it can’t replace missing data.
License: The text of "How to Convert G-code to STL – Simply Explained" by All3DP is licensed under a Creative Commons Attribution 4.0 International License.