
The Best Ender 3 S1 (Pro) Upgrades & Mods

The Ender 3 S1 and S1 Pro have plenty of features pre-installed. However, there's still room to grow. Read on for Ender 3 S1 upgrades!
The Ender 3 S1 and the S1 Pro are two of Creality’s latest versions of their popular Ender 3 3D printer. The original Ender 3 came out in 2018 and gained massive success in the consumer 3D printing world for its low price and easy upgradability.
Since its initial release, Creality has released other versions of the Ender 3, including the Ender 3 Pro and Ender 3 V2. With each new version come more pre-installed features, usually inspired by the popular community upgrades for the previous version. As some of the most recent printers in the series, the Ender 3 S1 and the S1 Pro are packed with small additional features, like a filament runout sensor, a direct extruder, an automatic bed leveling sensor, belt tensioners, and more.
While the Ender 3 S1 and S1 Pro are around double the price of the previous version, the Ender 3 V2, the upgrades improve the printers a lot. Nonetheless, there are never enough upgrades for a 3D printer, and there’s always more room to improve. In this article, we’ll go over some great upgrades for the Ender 3 S1 and the S1 Pro that further enhance the machines’ performance and usability. Since there are some differences between them, though, we’ll note when an upgrade is only compatible with the 3 S1.
Upgraded Hot End
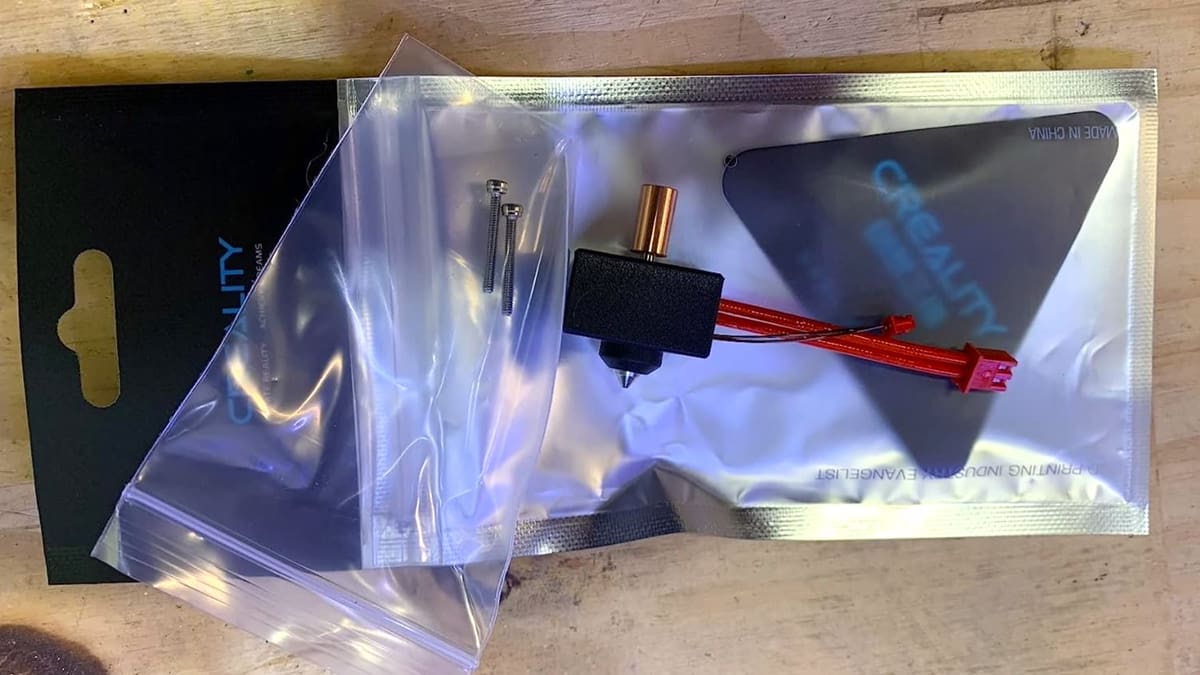
The Ender 3 S1 features many upgrades compared to previous versions of the Ender 3, but one area Creality failed to improve was the hot end. The Ender 3 S1’s nozzle temperature is capped at 260 °C due to the PTFE liner inside the hot end. Going above this limit will melt the PTFE liner, which could destroy the hot end. So, if you’re interested in printing higher-temperature filament materials (e.g. polycarbonate), you should upgrade the hot end.
While you could go with a third-party option, like an E3D Revo CR, opting for the official Creality hot end upgrade (option B) will lead to fewer compatibility issues (firmware and hardware). This high-temperature hot end, which comes stock on the Ender 3 S1 Pro, has an all-metal throat (no PTFE liner) and can handle nozzle temperatures as high as 300 °C, which is more than enough to print filaments from PLA and ABS to nylon and PC.
Replacing the hot end on your Creality Ender 3 S1 won’t be a super easy process as the Spider printhead assembly is very compact. However, if you follow Creality’s official instructions for this upgrade, you should get through the process without issues.
- What it improves: Increases the maximum nozzle temperature to enable printing higher-temperature materials (e.g. nylon, PC)
- Parts used: Creality Upgraded Hot End kit
- Manufacturer: Creality
- Compatible with S1 Pro? No (included)
- Price: $25-$30
Glass Bed
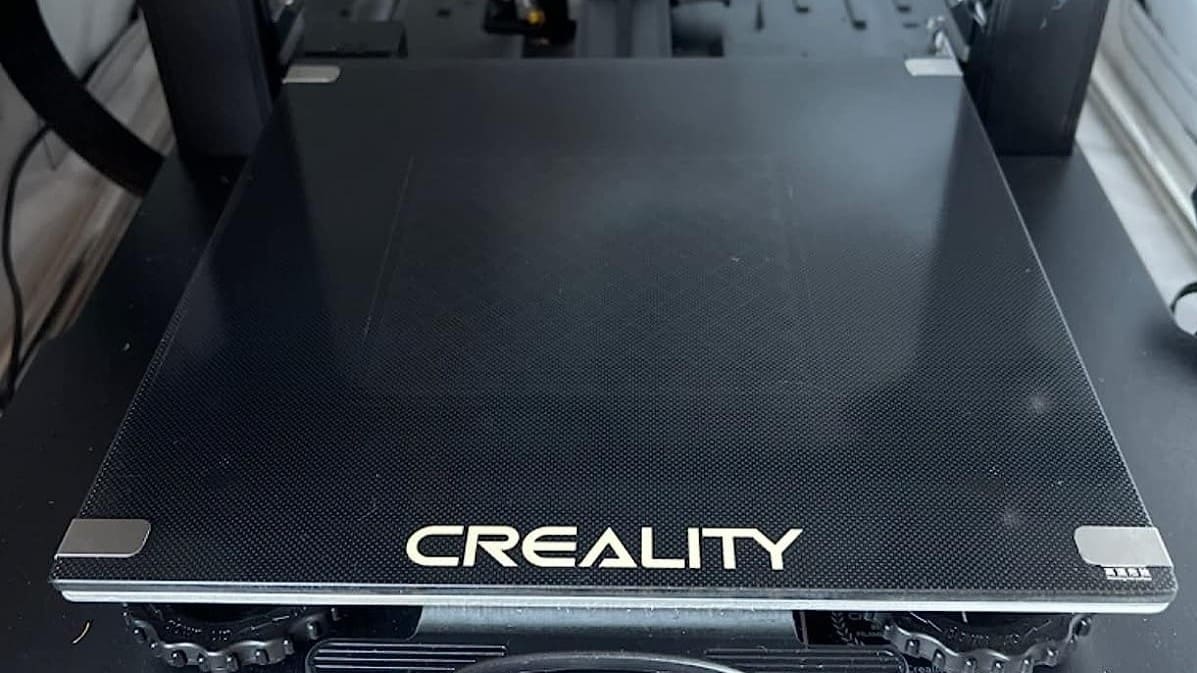
The Ender 3 S1 comes with a terrific spring steel build plate that users have raved about for its impressive first-layer adhesion and easy part removal. But, one downside of this build plate is that it doesn’t yield a very smooth texture on the bottom of 3D prints. Because of this, some people prefer to use a glass bed on the Ender 3 S1, such as Creality’s official Ender 3 glass bed or any other 3D printer glass bed that measures 235 x 235 mm.
On top of producing a smooth and glossy bottom surface on prints, a glass bed also offers decent first-layer adhesion. However, if you make this upgrade, it’s important that you relevel the bed (at printing temperatures) as the glass is a different thickness from the stock build plate.
On this note, some users have mentioned that you’ll need to use larger bed clips to secure a glass bed on the Ender 3 S1. Don’t worry, though, as standard binder clips should work perfectly!
- What it improves: Provides a smooth bed surface for printing, yielding smoother first-layers
- Parts used: Glass build plate
- Manufacturers: Creality, various others
- Compatible with S1 Pro? Yes
- Price: $15-$20
Fan Duct
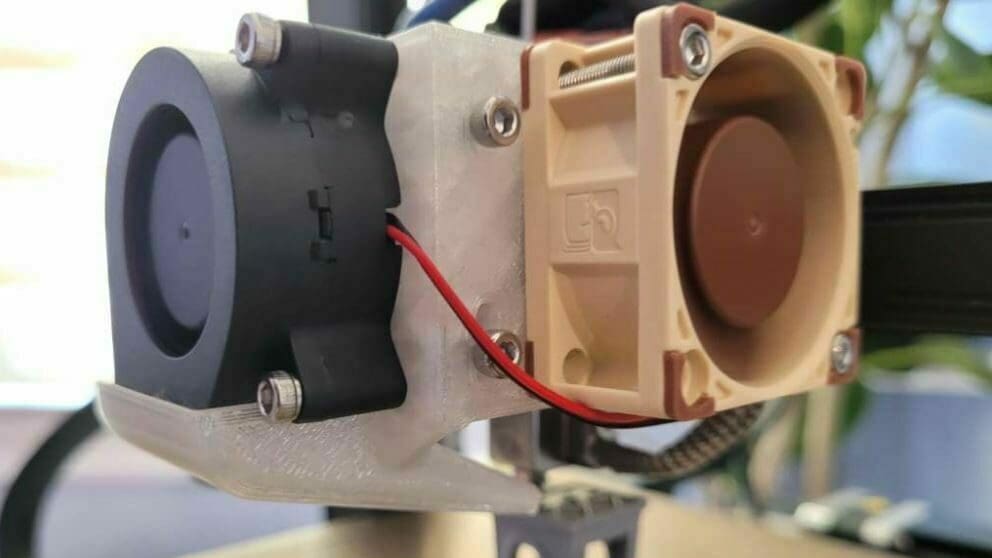
At first glance, a fan duct may not seem very important on a printer, but airflow to the material flowing out of the nozzle is very important. Without proper cooling, the extruded filament will stay melted longer, leading to a drop in print quality (e.g. curled corners). This custom fan duct is compatible with the Ender 3 S1’s Sprite printhead.
According to the project page, the fan duct can be attached to the printhead using some screws and requires no other modifications to the extruder or hot end. To install the fan duct on your Ender 3 S1, the designer recommends watching their instructional upgrade video.
- What it improves: Provides better part cooling for the hot end
- Parts used: 3D printed part, screws
- Designer: NathanBuildsRobots
- Compatible with S1 Pro? Yes
- Price: $1-$2
Filament Sensor Holder
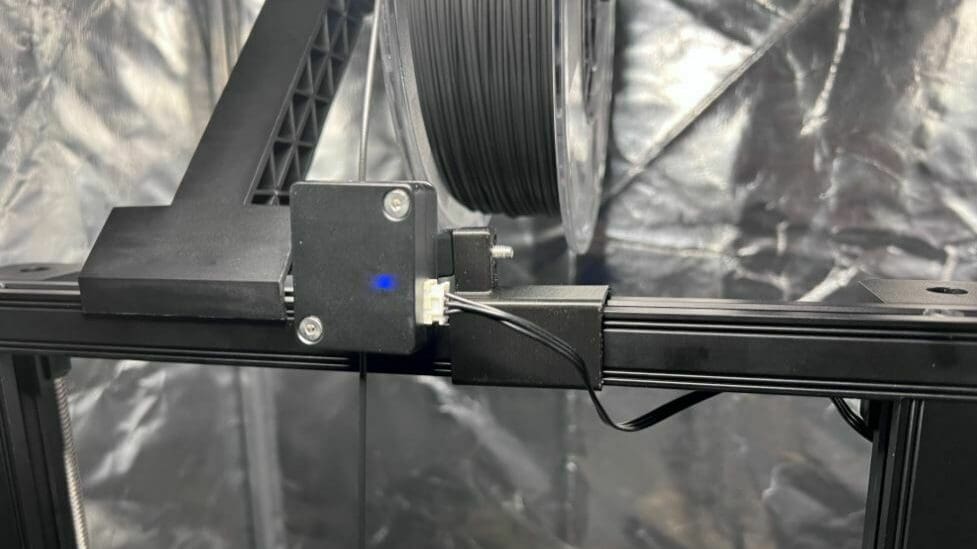
The Ender 3 S1 comes with a pre-installed filament runout sensor located on the printer’s stock spool holder on the top of the machine. However, this placement isn’t super ideal as the sensor prevents you from using your own filament spool holder or extra-large spools on the stock holder. This filament sensor holder allows you to move the sensor and attach it to the top gantry on the 3D printer, so it’s less in the way.
The model comes in three versions with varying tolerances for sliding into the gantry and holding the sensor. On this note, the sensor attaches to the mount with a single screw. One maker listed that they used a 0.2-mm layer height with a 15% infill density to print the model with no supports in PLA filament.
- What it improves: Moves the filament runout sensor so it’s out of the way of the spool holder
- Parts used: 3D printed mount, screw
- Designer: pakkko
- Compatible with S1 Pro? Yes
- Price: Cost of filament
Linear Rails
If your Ender 3 S1 is struggling with rough movements, ringing on prints, or poor dimensional accuracy, you might be interested in upgrading your machine with linear rails. Linear rails are a high-end motion system where a carriage, full of small bearing balls, glides over rigid metal tracks. Linear rails provide much smoother motion for the printhead and bed compared to the bearing roller motion system seen on the Ender 3 S1 (Pro), which helps reduce ringing, improve dimensional accuracy, and even make your machine quieter.
Linear rails are undoubtedly one of the most intensive upgrades for a 3D printer, usually requiring a mix of purchasable components (e.g. rails, carriage) as well as special 3D printable parts (e.g. mounts). As such, we suggest using a kit or build guide when making this upgrade. A few great options specific to the Ender 3 S1 (Pro) are the linear rail kits from Gulfcoast Robotics, the Enomaker Y-axis linear rail kit, and DIY brackets.
- What it improves: Provides super smooth motion over the X and Y axes to reduce print quality issues such as stringing
- Parts used: Linear rails, carriage, 3D printed mounts, screws, and more
- Manufacturers: Enomaker, Gulfcoast Robotics
- Compatible with S1 Pro? Yes
- Price: $50-$150 (depending on how many axes you change)
Squash Ball Feet
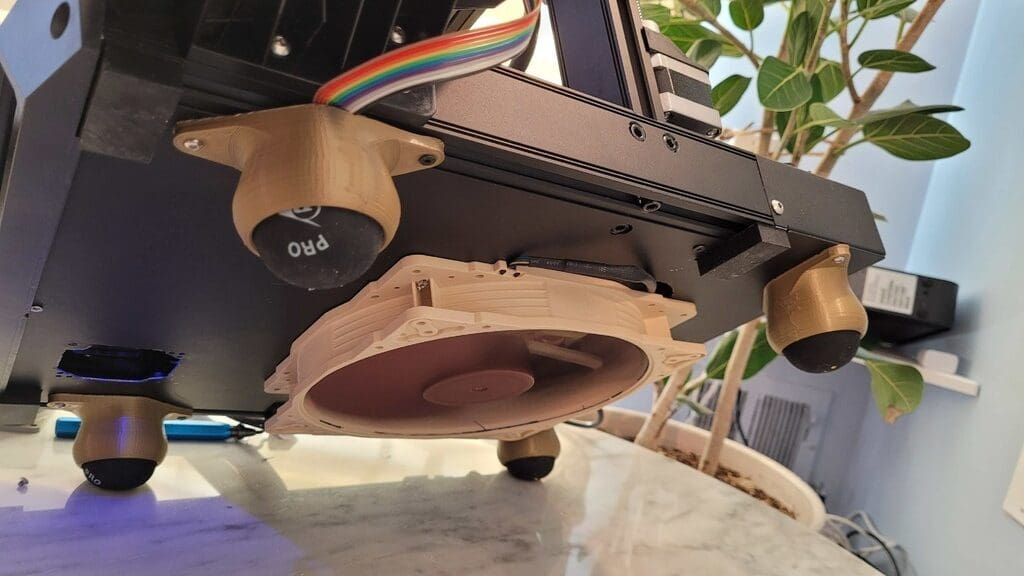
Squash ball feet are another popular upgrade for Ender 3 printers, as they can reduce the noise output of your printer. Squash balls are rubber spheres with a hollow core, and when used as feet for a 3D printer, they can suppress the vibrations produced by the machine.
You can add them to your Ender 3 S1 by purchasing some squash balls online and placing each in a 3D printable mount (compatible with the Ender 3 S1) that screws to the bottom corners of your printer.
- What it improves: Reduces the noise output of your printer
- Parts used: Squash balls, 3D printed mount, screws
- Designer: NathanBuildsRobots (mount)
- Compatible with S1 Pro? Yes
- Price: $10-$15
Enclosure
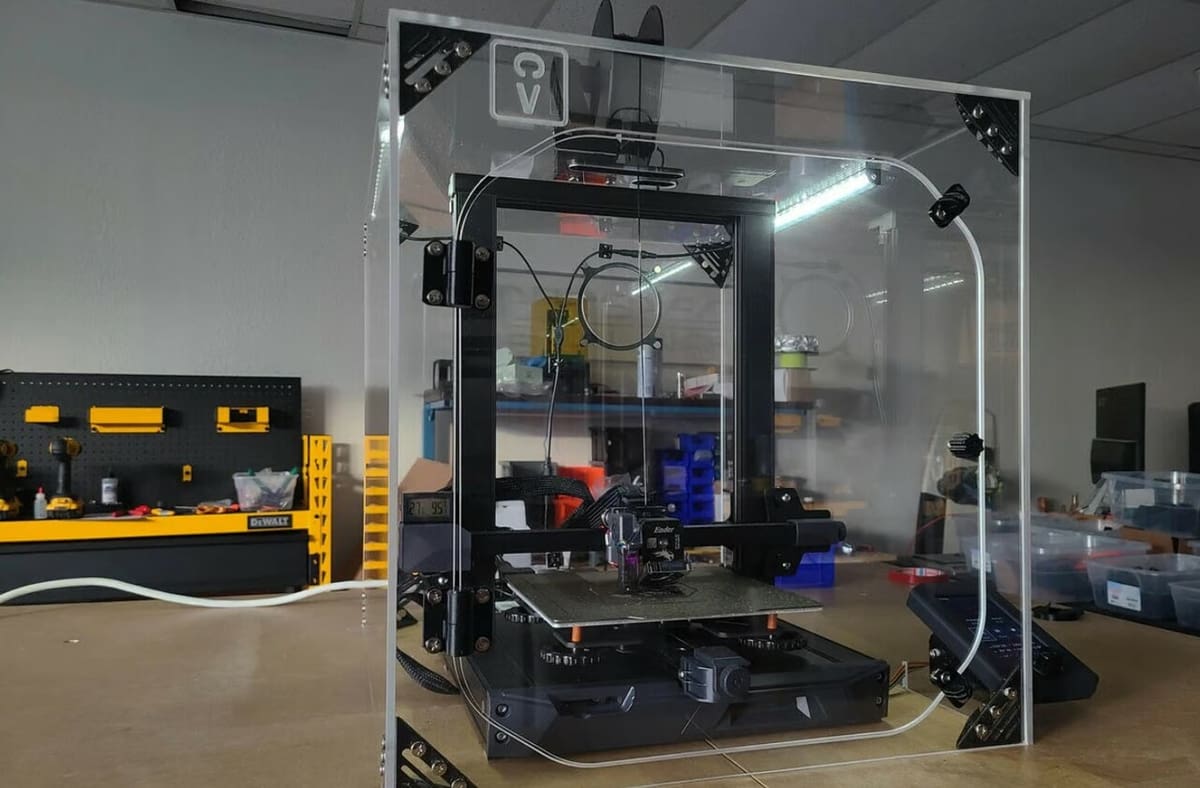
Creality states that the Ender 3 S1 can successfully print ABS and other high-temperature materials, but this isn’t technically true. While the Ender 3 S1 meets the temperature capabilities for printing ABS and similar filaments, the machine isn’t enclosed, so it’s likely that prints in these materials will warp, crack, or fail. Luckily, you can build or buy an enclosure for the Ender 3 S1, so you can start printing ABS, nylon, and other options where an enclosure is near necessary for high-quality prints.
Building an enclosure is usually the less expensive option compared to buying one, and it gives you the ability to customize it, adding in any features that you want (e.g. air filter, lights, etc.). There are many different types of enclosures you can build (e.g. wood, metal, acrylic).
No matter which one you choose, make sure to properly measure the printer first. This includes measuring the machine’s footprint, additional movement space, filament spool, and any peripherals you have (e.g. webcam, Raspberry Pi board). You may even want to move your filament spool holder to make your enclosure more compact. If so, this 3D printable side spool holder is a great option. You can also check out our listicle about the best Ender 3 S1 (Pro) enclosures, which include both DIY and purchasable options.
On this note, if you’d rather skip the build process and just buy an enclosure, there are many great options that are compatible with the Ender 3 S1. Creality’s larger enclosure is listed as the right one for the Ender 3 S1 (Pro), but you can also use other options, such as a photo light box. Clearview Plastics also makes a purchasable acrylic enclosure that fits the Ender 3 S1 and S1 Pro, though it’s on the pricier side.
- What it improves: Traps heat around the printer and enables printing high-temperature materials such as ABS, ASA, and PC
- Parts used: Enclosure kit or various DIY enclosure parts (e.g. plastic panels, screws, etc.)
- Manufacturers: Creality, Clearview Plastics
- Compatible with S1 Pro? Yes
- Price: $30-$320

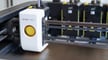
OctoPrint
OctoPrint is one of the most popular upgrades for the Ender 3 and other open-source budget 3D printers, as it’s a remote printer control hub. OctoPrint typically runs on a single-board computer like a Raspberry Pi board and connects to your printer via a USB cable.
Once installed, you can use the server’s online interface to remotely control your printer, such as setting temperatures, starting prints, and moving its components. You can also download additional OctoPrint plug-ins from the plug-in library to enable other features, such as BLTouch control, AI-based print monitoring, and more.
While a bit goes into it, the process is fairly straightforward. If you don’t want to spend the money on a Raspberry Pi board, the Creality Wi-Fi Box is a great alternative.
- What it improves: Enables remote printer control, monitoring, and other applications
- Parts used: Raspberry Pi board (or other SBC), 3D printed case, USB cable
- Designer: Gina Häußge (OctoPrint), dubs49 (integration for printer)
- Compatible with S1 Pro? Yes
- Price: $40-$120
Webcam
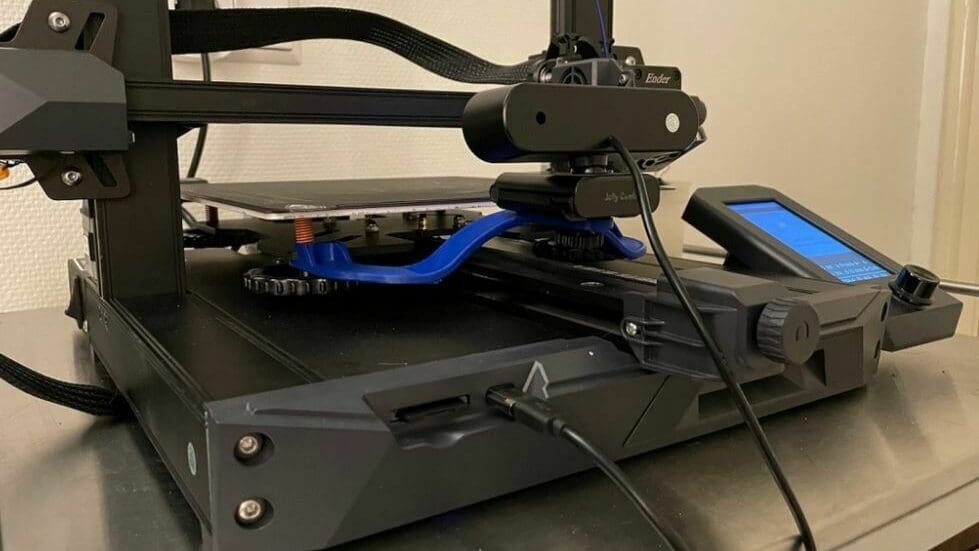
One of the best features of OctoPrint as well as similar systems (e.g. Creality Wi-Fi Box, AstroPrint), is that you connect a web camera to enable remote monitoring of your machine. This is especially useful for long prints that run while you’re out of the house because you can check to make sure your printer is running smoothly. Even if you don’t have a remote printing server like OctoPrint that connects to your camera, you can still use a camera (with some other hardware) to record your prints.
There are many options for webcams, and most work using a USB connection that you can plug into your host computer running OctoPrint. Cameras differ in their frames-per-second and video quality, and some popular options for the Ender 3 S1 include the Raspberry Pi camera module, Logitech C920, and Logitech C270. You’ll also want a good camera position, and there are a few 3D printable camera mounts for the Ender 3 S1 that you can use, such as this bed-mounted option.
- What it improves: Allows you to watch your 3D printer at work remotely and record prints
- Parts used: Web camera, 3D printed mount
- Designer: TSDano (mount)
- Compatible with S1 Pro? Yes
- Price: $15-$40
Touchscreen LCD
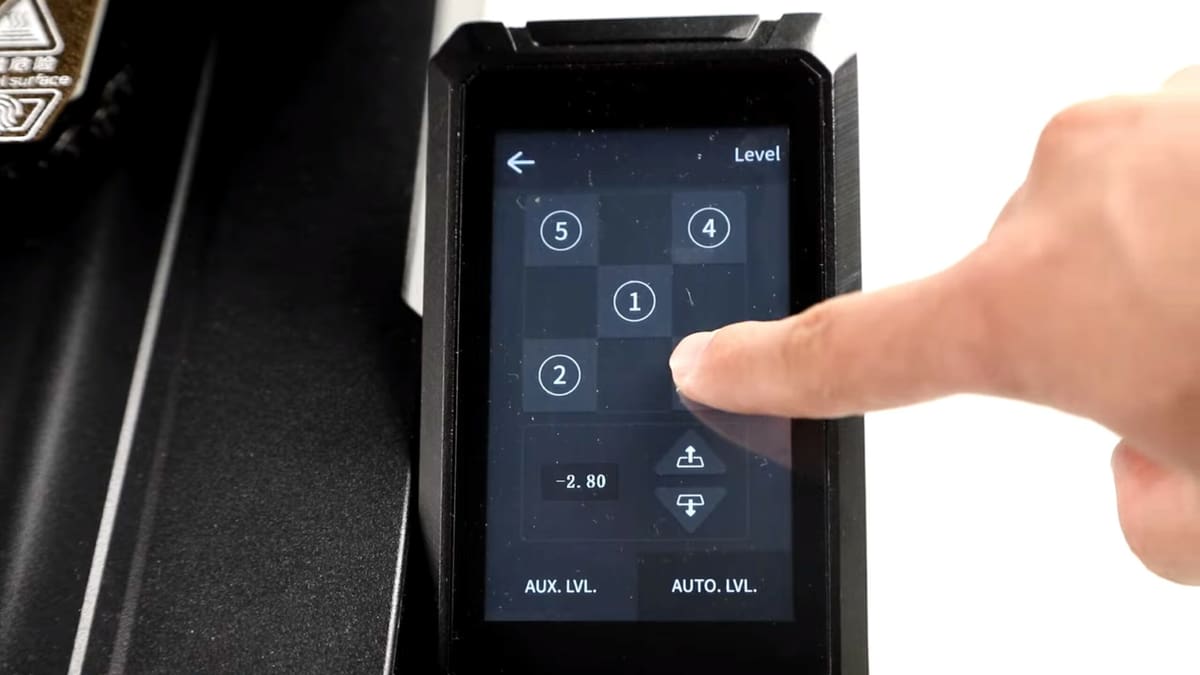
The Ender 3 S1 comes equipped with Creality’s full-color LCD, which is a big step up from the ancient, dual-color LCD seen on the original Ender 3. But there’s still room for improvement here, and you can upgrade the control LCD on your Ender 3 S1 to Creality’s touchscreen LCD, which comes stock on the Ender 3 S1 Pro.
While this upgrade is purely aesthetic and won’t affect printing performance, a touchscreen LCD doesn’t just make using your 3D printer easier, but also more fun. And what’s the point of a 3D printing hobby if the serotonin isn’t flowing? Plus, the Creality-developed user interface for the touchscreen LCD looks way cleaner than the UI for the Ender 3 S1’s stock LCD.
This upgrade will set you back just over $50, and installing it is fairly simple. All you have to do is move the LCD cables to your touchscreen device and mount the screen to the printer’s frame. You should also update both your motherboard’s and LCD board’s firmware to the latest official Creality version to ensure that the LCD is compatible and runs the correct interface; you can find the proper files on Creality’s download page.
- What it improves: Enables touchscreen control of the LCD and provides a higher-definition UI
- Parts used: Touchscreen LCD kit
- Manufacturer: Creality
- Compatible with S1 Pro? No (included)
- Price: $50

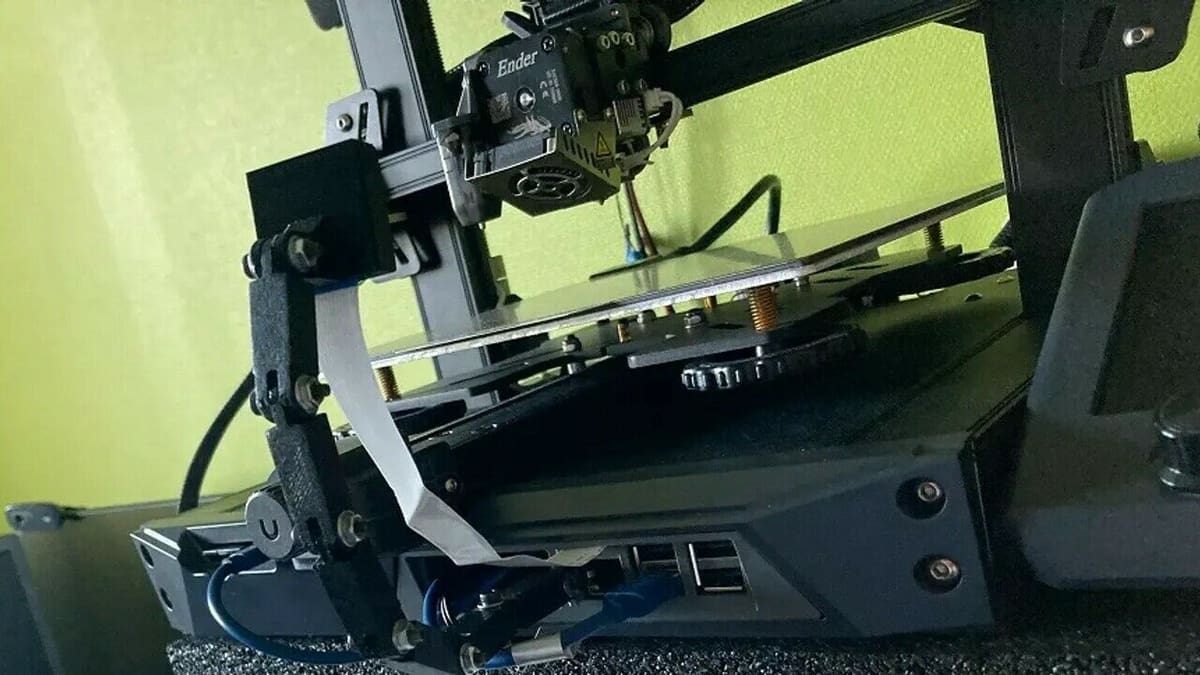
Ribbon Cable Holder
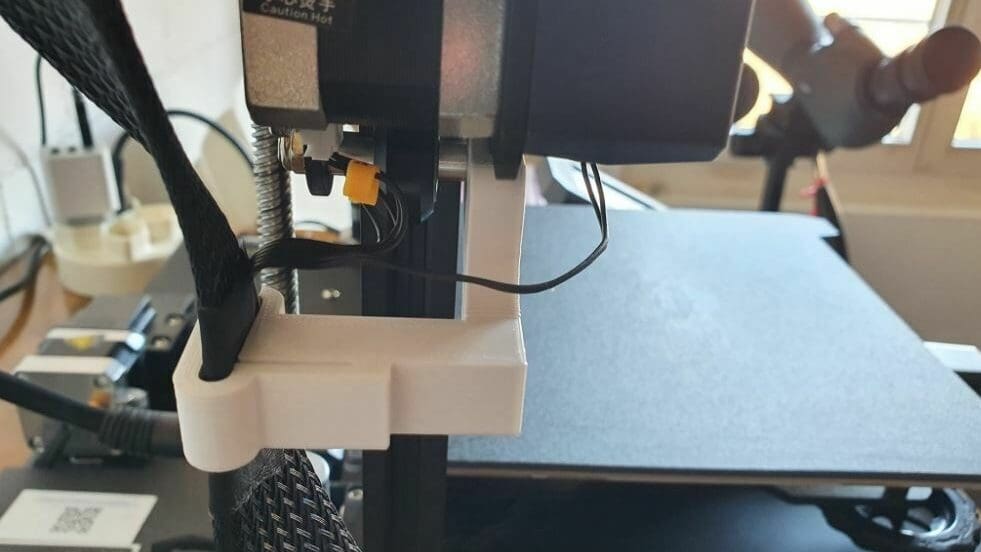
The Ender 3 S1 comes with some improvements to its cable organization, thanks to the use of a ribbon cable for the printhead wiring. Still, this ribbon cable is susceptible to getting snagged by the printer’s frame when the Z-axis carriage moves up and down. You can print this ribbon cable holder to help keep the printhead’s ribbon cable out of the way, as well as the X-axis endstop and stepper motor cables.
The upgrade attaches to the area beneath the X-axis stepper motor and requires no additional screws. The designer listed using a 0.2-mm layer height and a 20% infill density to print the part. They also mentioned that they activated supports for the print job and used PLA filament.
- What it improves: Keeps the ribbon cable and other wires out of the way so they don’t get caught on the frame
- Parts used: 3D printed ribbon cable holder
- Designer: alei100 (ribbon cable mount)
- Compatible with S1 Pro? Yes
- Price: Cost of filament
Printhead Cable Holder
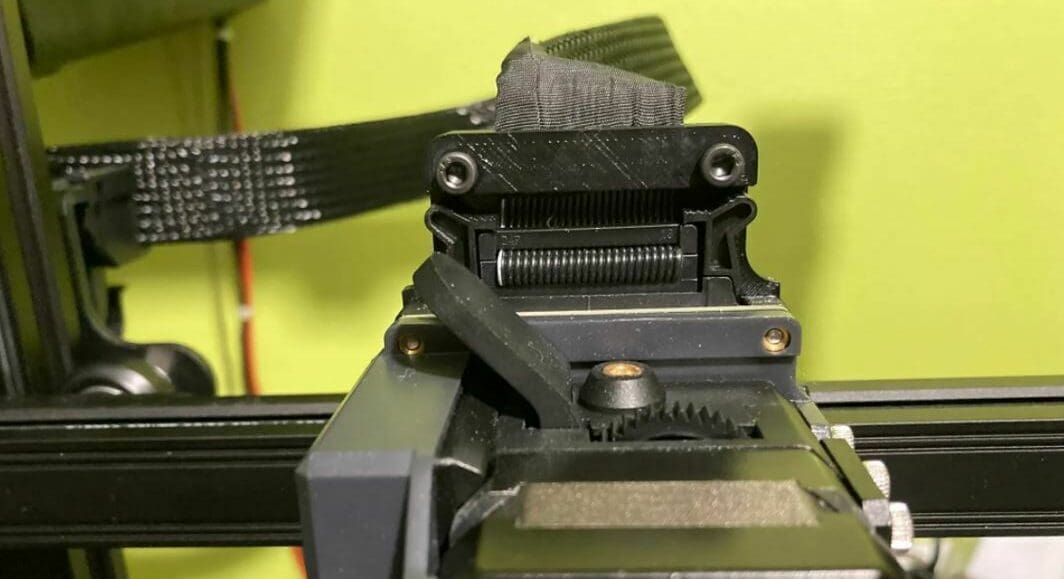
As we mentioned, the printhead on the Ender 3 S1 now uses a ribbon cable to power its components. While this is seen as an upgrade, if the ribbon cable comes loose, every electronic component of the printhead turns off at the same time. This would obviously cause a print failure, so to prevent this from ever happening, you can print this mounted cable holder.
The model bolts behind the printhead cartridge and the ribbon cable is supposed to go through the small slot at the front of the model. This should ensure that the ribbon cable isn’t able to be removed easily from the printhead. Not much other information was provided by the designer, but you should only need a few threaded inserts, screws, and the printed plate to make the upgrade.
- What it improves: Keeps the printhead ribbon cable connected to the printhead
- Parts used: 3D printed part, threaded inserts, screws
- Designer: dubs49
- Compatible with S1 Pro? Yes
- Price: $1-$5
Cable Chains
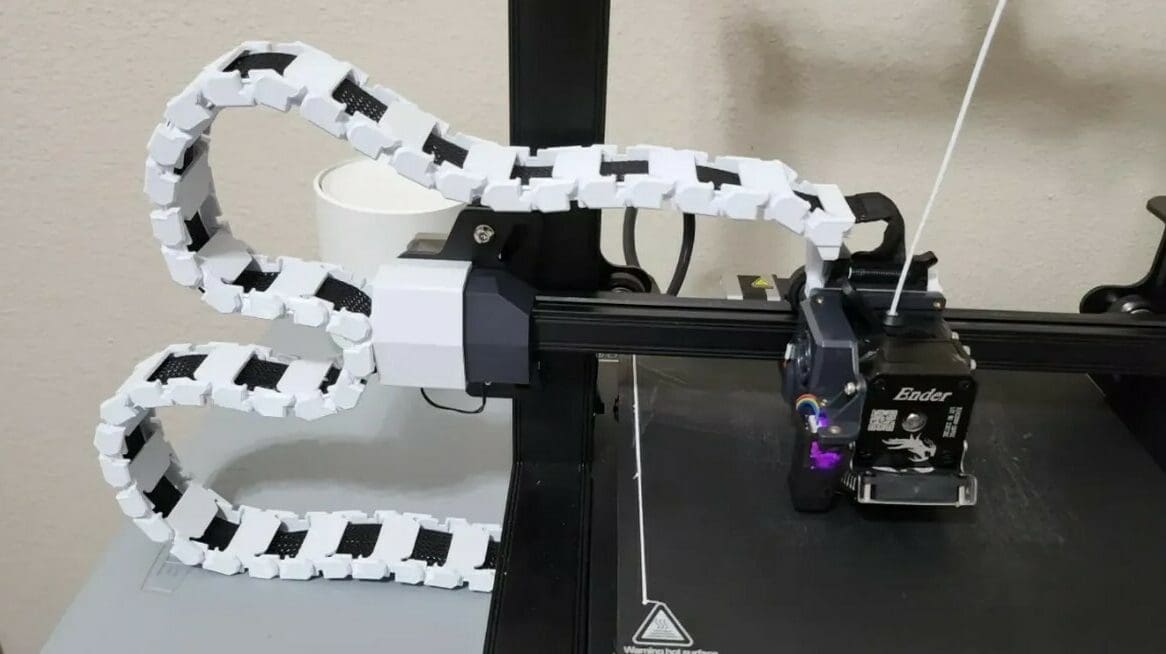
Cable chains are a great upgrade for any 3D printer, including the Ender 3 S1. Cable chains help contain and organize your printer’s wires, both preventing cables from getting caught by a moving part (e.g. print bed) and making your machine look cleaner. And the best part about this upgrade is that you can 3D print the cable chains, so the cost is practically $0.
Although you could use any set of 3D printable cable chains, we recommend this project that’s specific to the Ender 3 S1. It contains mounts designed specifically for the Ender 3 S1, allowing you to attach the cable chains so that they aren’t just dangling in the air. It’s worth noting that, according to comments for this project, one of the mounting clips doesn’t fit the Ender 3 S1 Pro, but you can still use the other 3D printable components.
As for printing the models, the designer suggests using a 100% infill density to ensure the cable chains are strong. They also noted that they used a 0.16-0.2-mm layer height for the prints.
- What it improves: Contains the cables on the printer so they don’t get caught on a moving part; improves the machine’s appearance
- Parts used: 3D printed cable chains
- Designer: FizzyChickens
- Compatible with S1 Pro? Yes
- Price: Cost of filament
Lights
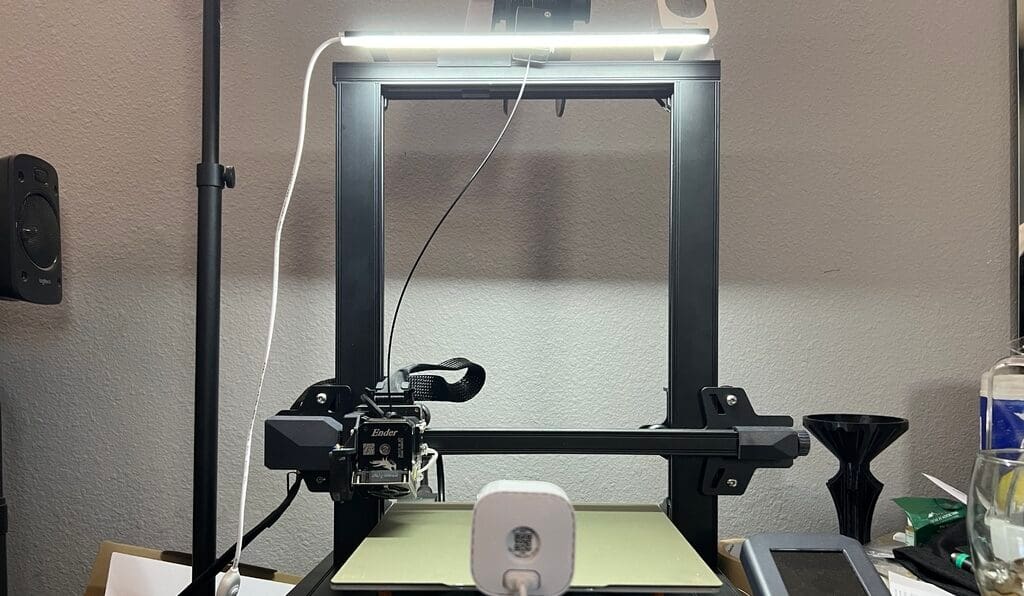
Working without proper lighting, especially in the small and tight spaces on a 3D printer (e.g. the extruder) can be a pain. Adding an external lighting system to your printer is not only a great way to make working on the machine easier, but you’ll also be able to see how your machine is printing from further away.
There are many lighting options for a 3D printer, but the easiest is to use a USB-powered light bar or LED strips, which are pretty inexpensive online. As for attaching the lights, it’s best to mount them from the top of your printer, pointing down. Many LED strips come with adhesive that you can use to attach the lights to the top extrusion of your printer, but you can also use a 3D printed light mount for your Ender 3 S1.
- What it improves: Illuminates your printer’s build space so you can better watch prints and adjust your machine
- Parts used: Lights, 3D printed holder
- Designer: Surnds0und (mount)
- Compatible with S1 Pro? No (included)
- Price: $15-$25
Drawer Inserts
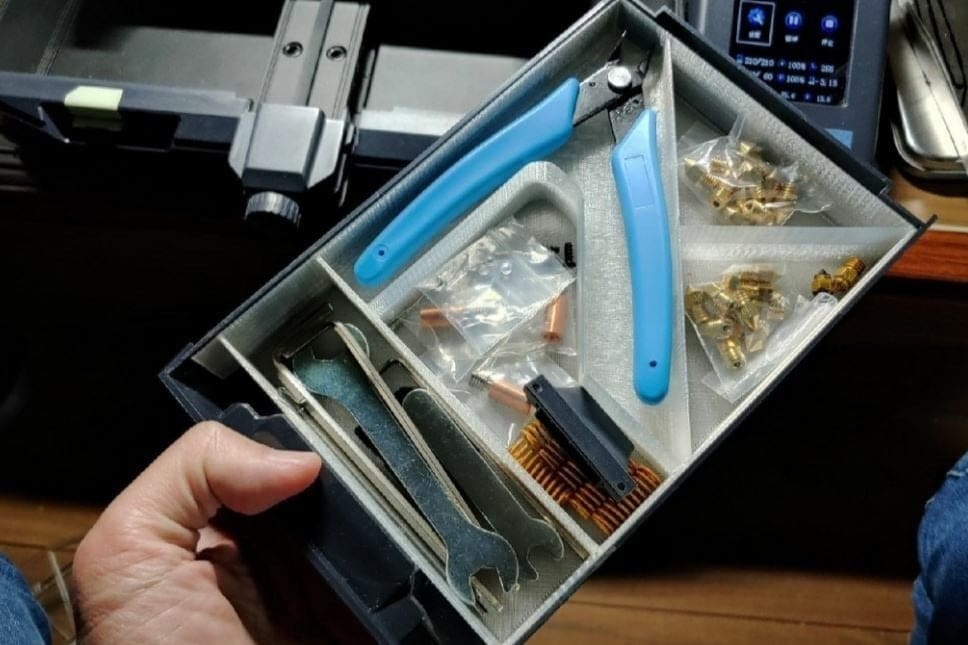
When it was first released, one of the most popular upgrades for the original Ender 3 was a 3D printable drawer to store tools and replacement parts (e.g. nozzles) for the printer. Creality integrated a tool drawer into their Ender 3 V2 and kept the feature for the Ender 3 S1. Taking it a step further, you can 3D print this tool drawer insert to organize your printer’s tools and pieces.
The model fits inside the space for the pre-installed drawer and splits the area into a total of five uniquely-shaped sections. As seen in the image above, the sections are great for fitting some of the included tools like pliers, wrenches, Allen keys, and some extra nozzles without all the pieces overlapping.
- What it improves: Keeps your tools and spare parts organized
- Parts used: 3D printed part
- Designer: gumo_design
- Compatible with S1 Pro? Yes
- Price: Cost of filament
License: The text of "The Best Ender 3 S1 (Pro) Upgrades & Mods" by All3DP is licensed under a Creative Commons Attribution 4.0 International License.
CERTAIN CONTENT THAT APPEARS ON THIS SITE COMES FROM AMAZON. THIS CONTENT IS PROVIDED ‘AS IS’ AND IS SUBJECT TO CHANGE OR REMOVAL AT ANY TIME.