The Best Creality Ender 3 Max Upgrades & Mods

The Ender 3 Max is a 3D printer with great features, but there's always room for more. Read on for the best Ender 3 Max upgrades and mods!
The Ender 3 Max is Creality’s large-format version of their incredibly popular Ender 3 3D printer. The Max adds a few new features to the original, many of which were previously after-market upgrades for the Ender 3. While larger in size, the Ender 3 Max isn’t too different from the other versions of the Ender 3 (like the Pro and V2 models), as it follows the same motion system and uses most of the same electronics.
However, just as the Ender 3 Max offers a lot of room to print, it also has a lot of room to grow. Luckily, the Max is a very upgradable machine due to the machine’s open-use parts (e.g. aluminum extrusions) and Creality’s large following, which makes getting help easy. Also, many of the upgrades designed for other Creality 3D printers are compatible with the Ender 3 Max.
In this article, we’ll go over the best upgrades and modifications that you can 3D print, DIY, or purchase. These enhancements all offer improvements to the Ender 3 Max’s usability and performance. For each upgrade, we’ll go over its purpose, the parts needed, the price, and where you can find out more.

To DIY or Print
To get started, we’ll look into the upgrades that you can print or make at home. You may need to buy a few screws for the full setup, but these improvements can mostly be accomplished with things you have lying around.
Filament Guide
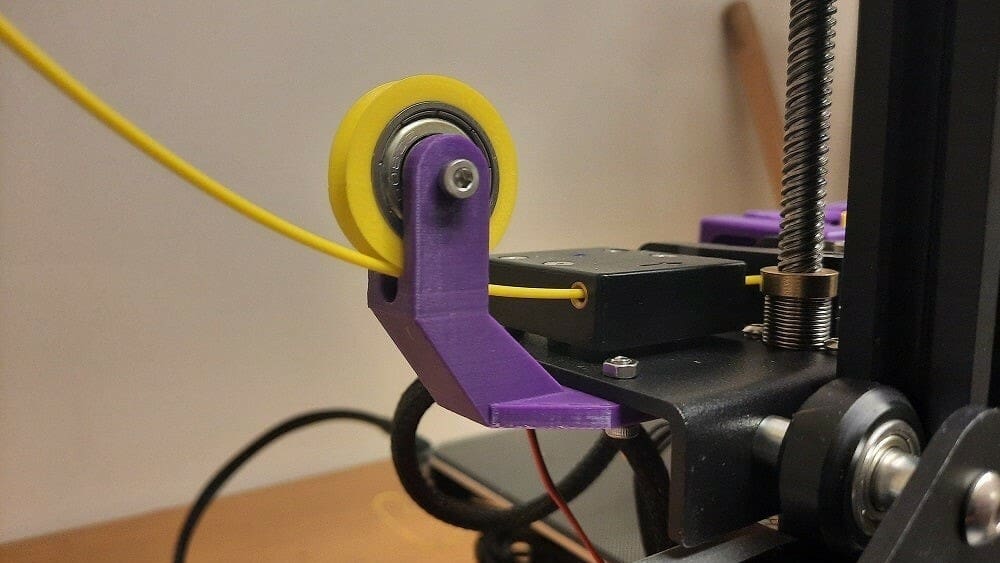
Although Creality has moved the filament spool on the Ender 3 Max to the bottom, the filament’s journey from the spool to the extruder (or really the runout sensor) is still uncontained. Also, especially when the printhead and extruder are positioned higher on the printer, the filament meets the extruder at an odd orientation. This may make extrusion more difficult because the extruder has to pull the filament at a 90-degree angle.
A filament guide is a structure or assembly that helps your extruder by smoothing out the filament’s path and making it flow better. Many different 3D printable filament guides are available, and most require a ball bearing or a screw to serve as the rotating axis for a guide wheel. We’ve linked two filament guide options below, including one for when your spool is lower down on the printer (the stock setup) and one for when it’s above (if you’ve moved the spool holder to the top of the frame).
- Purpose: Makes the filament path smooth, helps prevent the filament from bending too much in one place
- Parts required: Bearing (or screw), 3D printed parts
- Approximate cost: $3-$5
- Where to find it:
- Cubed_3D via Thingiverse (stock setup)
- 0patience via Thingiverse (above the printer)
Frame Braces
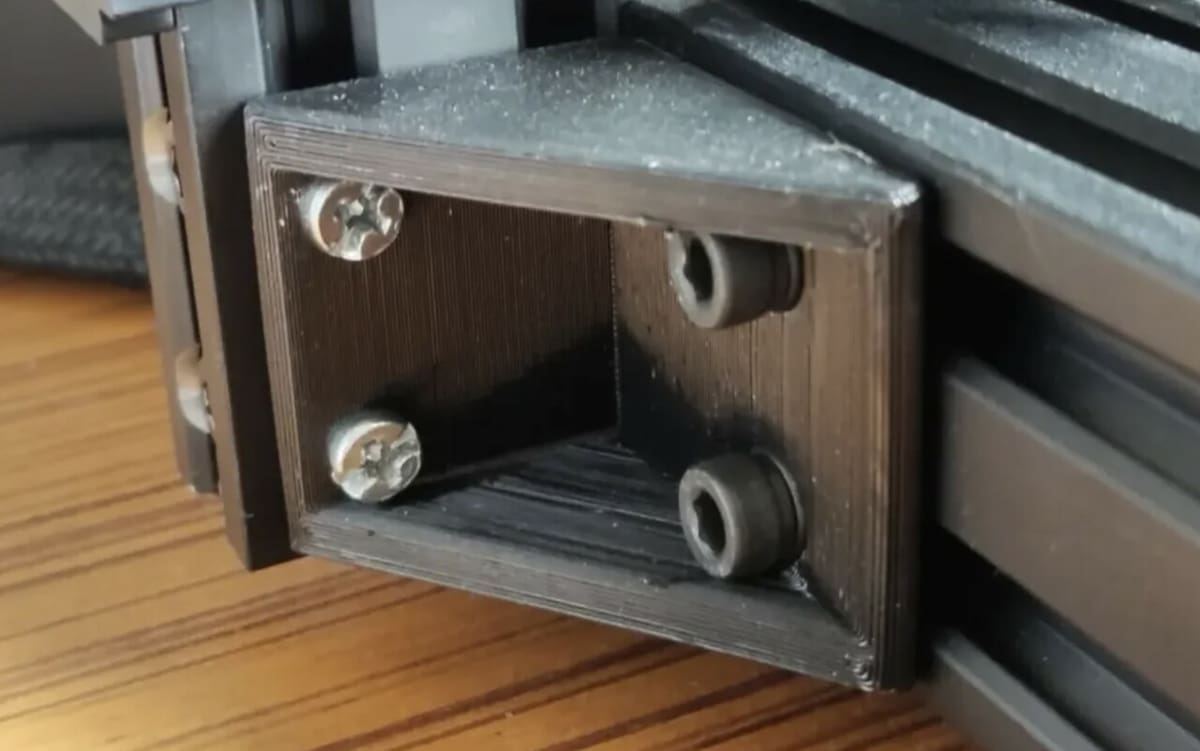
A sturdy frame is essential for any high-quality printer, but even more so for a large-format machine such as the Ender 3 Max. If you want to improve the Ender 3 Max’s stability and prevent any unwanted printing deformations, adding 3D printed braces to the machine’s frame is a great idea.
One user, VertX, has posted two different types of 3D printable frame braces for the Ender 3 Max, including one for the Z-axis section and one for the bottom frame section. In addition to the 3D printed parts, you’ll need a few M3, M4, and M5 screws, which are specified on the project pages. Installation should be fairly simple, especially if you use the reference photos provided by the maker.
- Purpose: Further stabilizes the printer’s frame to prevent print quality issues like ringing and ghosting
- Parts required: 3D printed components, T-nuts, screws
- Approximate cost: $3-$5
- Where to find it: VertX via Printables
Bed Handle
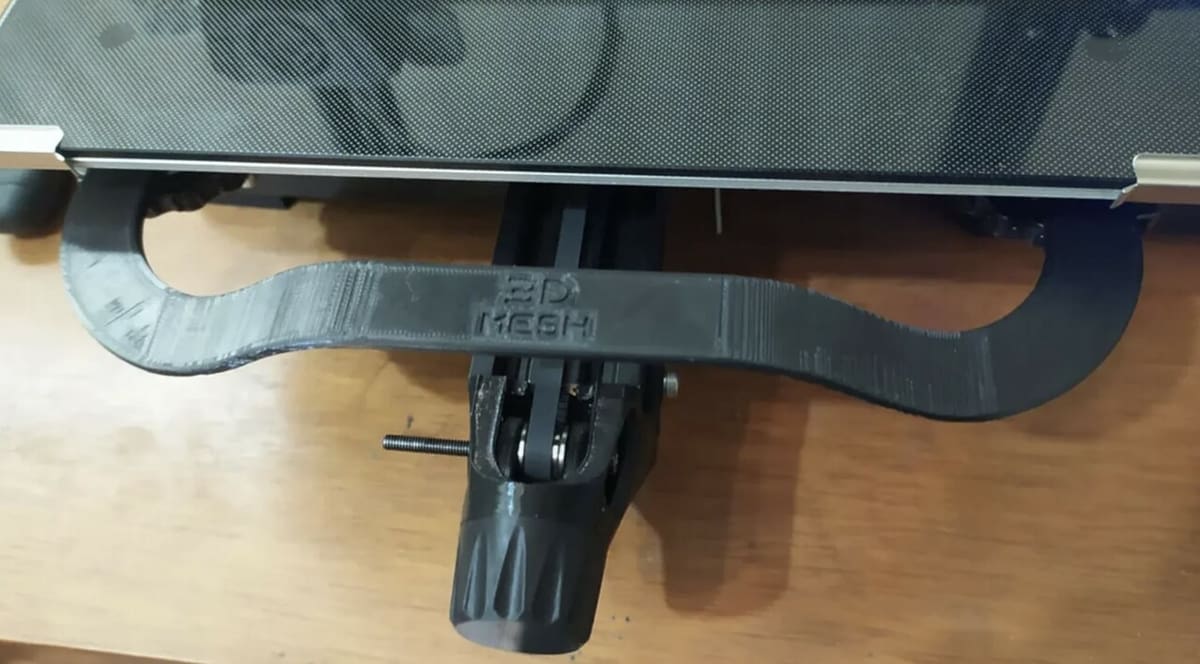
The bed of any FDM 3D printer, like the Ender 3 Max, is a very sensitive surface, and it’s best to avoid touching it with your hands directly, both for safety and performance (leveling) reasons. This 3D printable bed handle fits on the Ender 3 Max’s bed leveling nuts and makes moving the print surface back and forth much easier and safer.
The designer of the bed handle suggests printing the model in ABS for the material’s heat resistance, but they also noted that PLA will suffice. They also listed that they used supports when printing the model and used a 0.2-mm layer height with a 20% infill density.
- Purpose: Makes removing prints from the bed easier and safer, and improves the visual appeal of the printer
- Parts required: 3D printed component
- Approximate cost: $1
- Where to find it: 3D Mesh via Printables
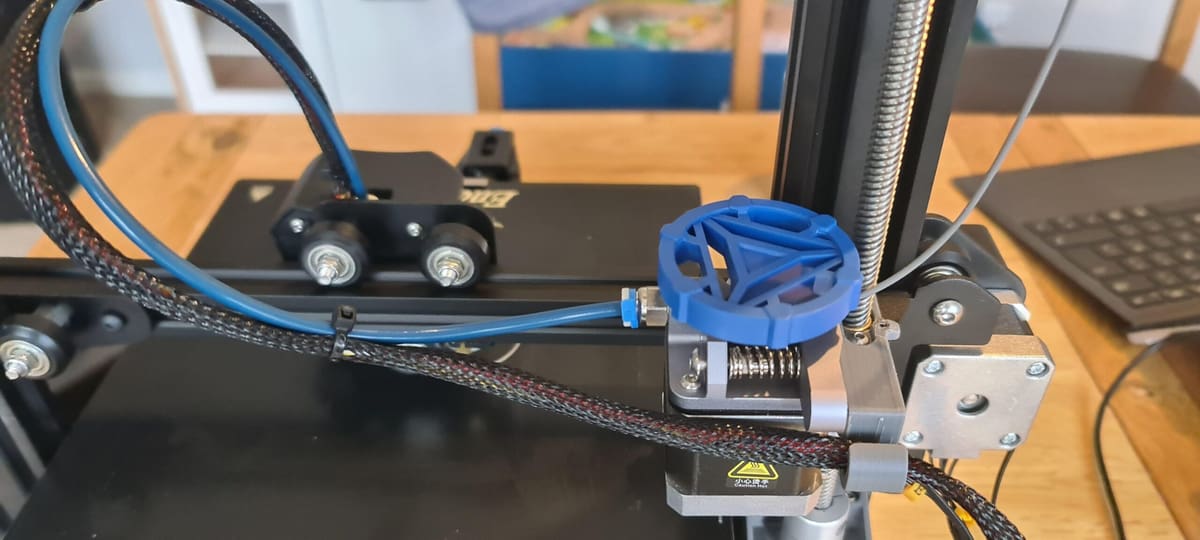
Z-Axis Stabilizer
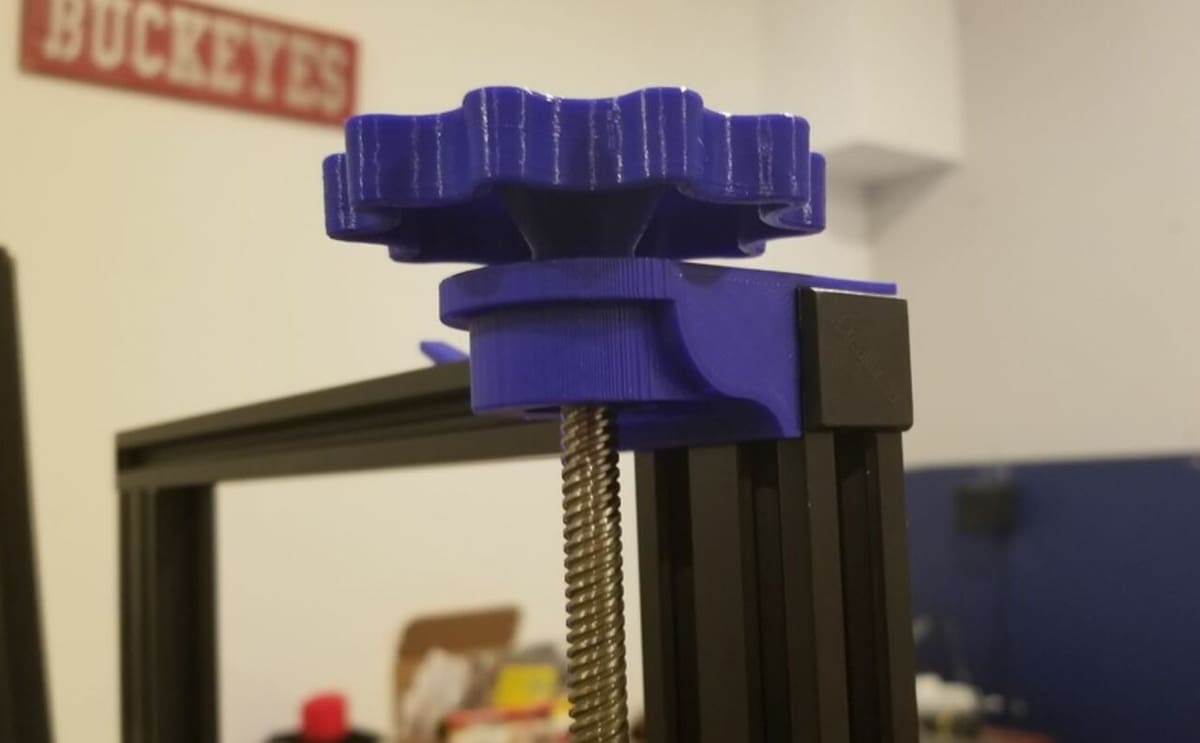
With the larger build volume on the Ender 3 Max comes reduced stability for the printer. Moreover, there’s an increased likelihood of issues like ringing and layer shift, which can negatively affect print quality. A Z-axis stabilizer secures the extremely tall lead screw on the Ender 3 Max and ensures that it’s aligned from top to bottom.
This 3D printable Z-axis stabilizer can be attached to the top gantry on the Ender 3 Max with two screws and T-nuts. The model has a hole where you can put a standard skateboard wheel bearing (22 x 8 mm), which will allow for super-smooth rotations for the lead screw. While the upgrade blocks off the top of the lead screw, preventing you from manually rotating it by hand, you can print an adjustment knob that makes manually spinning the screw much easier.
- Purpose: Aligns and stabilizes the Z-axis lead screw on the printer to prevent print quality issues like layer shifting
- Parts required: 3D printed component, two screws, two T-nuts, 3D printed adjustment knob (optional)
- Approximate cost: $1
- Where to find it: baschz via Thingiverse
Belt Tensioners
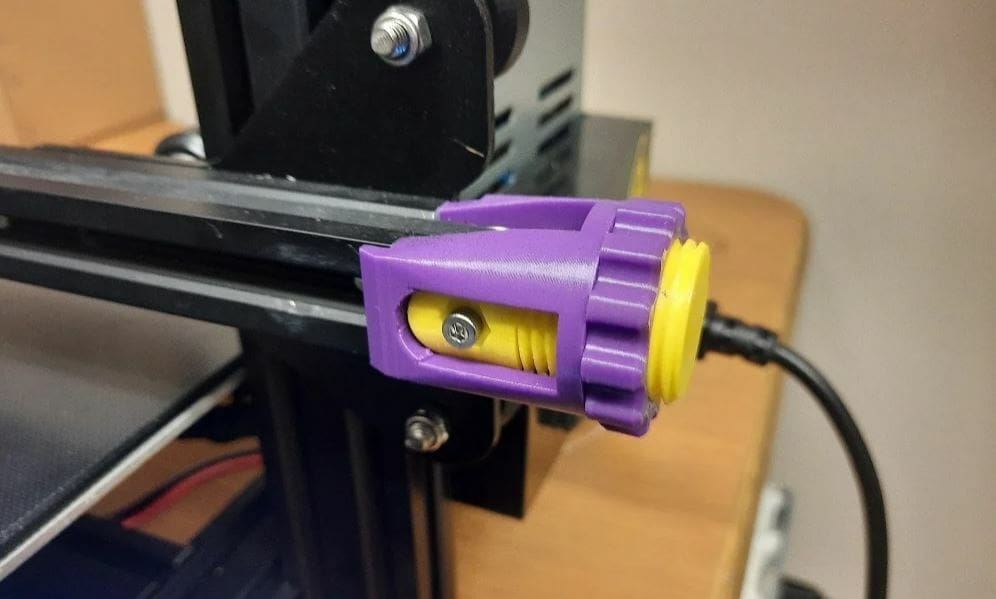
The Ender 3 Max uses belts and pulleys around an aluminum extrusion to provide stable and smooth motion to the printhead and print bed. This is a great movement method, but you may experience layer shifting or other print quality issues if the belts aren’t tight enough.
Although Creality added adjustable belt tensioners to the Ender 3 V2, the Max has traditional belt pulleys that can only be adjusted by unscrewing and sliding them, which can be difficult and fiddly. To make tightening the belts easier on your Ender 3 Max, you can 3D print and install adjustable belt tensioners that use printed thumb screws to move the pulley back and forth.
While these tensioners may look similar to the ones compatible with other models of the Ender 3, the makers of these tensioners have noted that the other versions didn’t properly fit the Max. This upgrade shouldn’t require any external hardware besides the screws on the stock tensioners.
- Purpose: Allows you to adjust the printer’s belt tension
- Parts required: 3D printed parts, stock belt pulley screws
- Approximate cost: $2-$5
- Where to find it:
- OpenDorrPolicy via Thingiverse (X- and Y-axes)
- thething84 via Thingiverse (Y-axis)
Tool Drawer
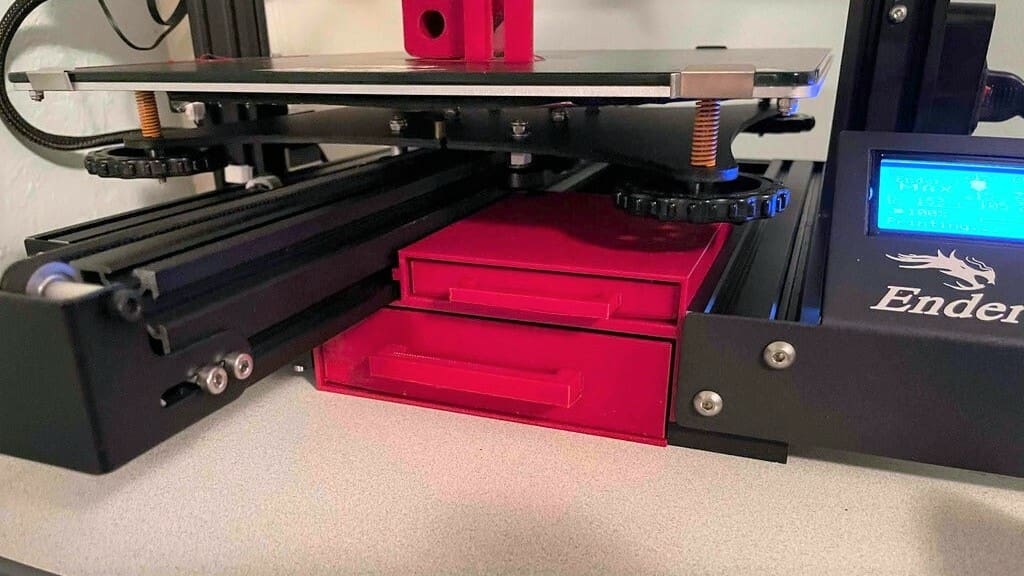
As with any budget 3D printer, the Ender 3 Max may need to have some parts replaced or repaired every once in a while. When this time comes, you can use Creality’s provided toolset (and your own tools) to get the work done.
As each tool serves a unique purpose, it’s important to keep them organized, and you can neatly store your tools with a 3D printed drawer or organizer. We’ve found two good options, both of which require no extra parts. The first option is a drawer that goes underneath the printer next to the LCD display, and the second is an organizer that can be mounted to the Ender 3 Max’s top gantry.
- Purpose: Organizes and stores your tools
- Parts required: 3D printed parts
- Approximate cost: $2-$5
- Where to find it:
- jjpeters10 via Thingiverse (drawer)
- DantRush via Thingiverse (top gantry organizer)
Cable Management
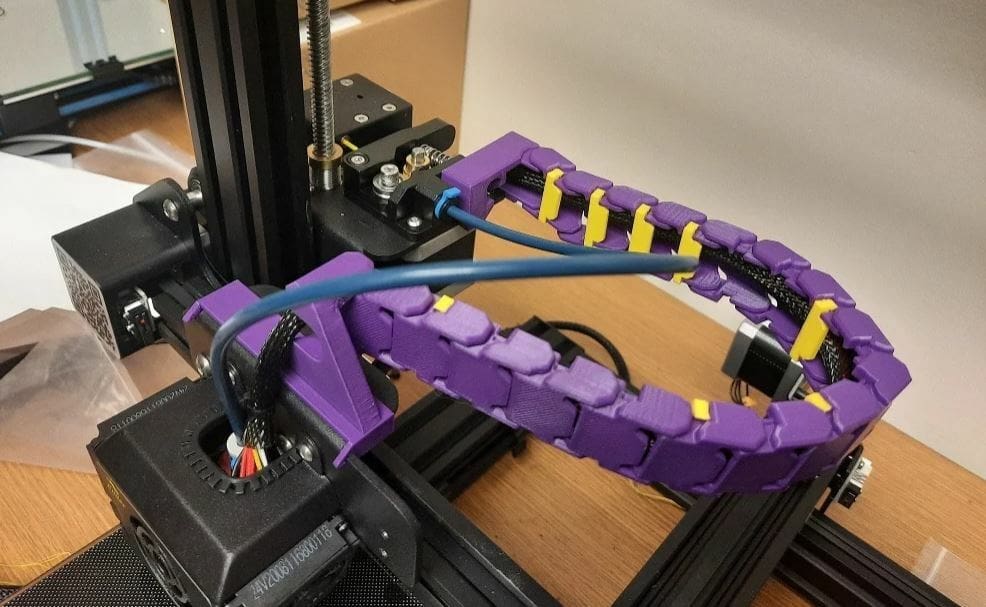
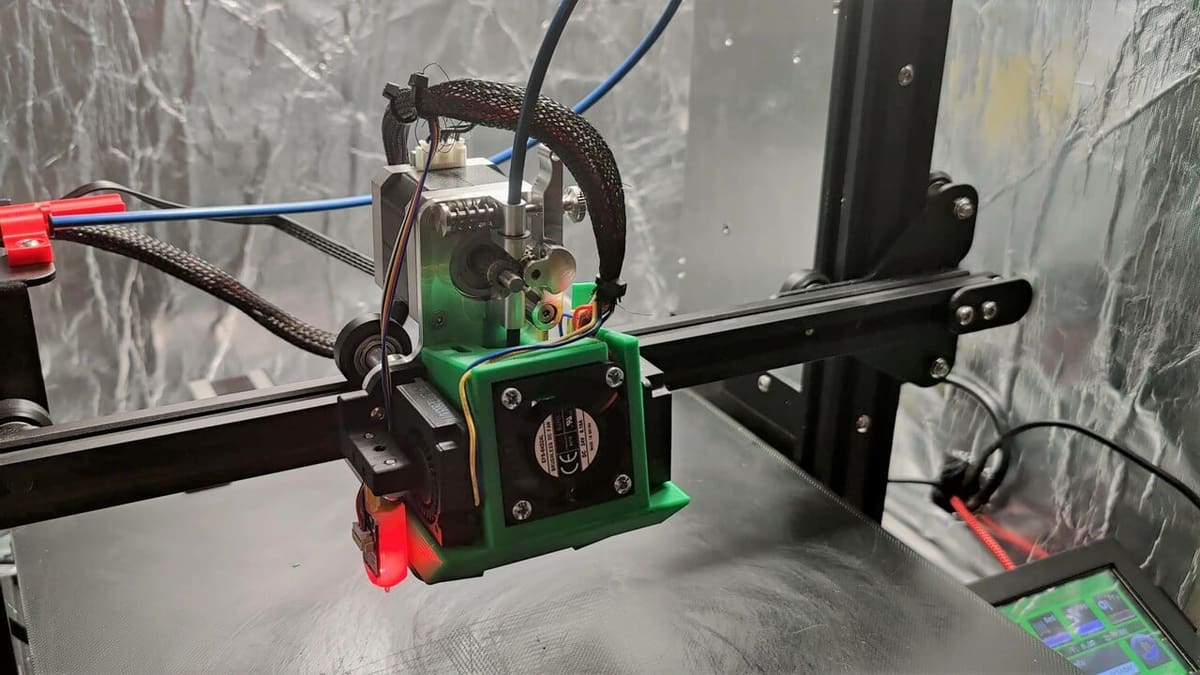
Creality has consistently improved the cable management on their machines in each new generation, but the Ender 3 Max still has a few issues concerning its wire organization. Most problems stem from the hot end wires zip-tied to the Bowden tube to prevent them from catching on other moving components. This method presents some problems because the Bowden tube can bend under pressure from the wires. You may also need to access the tube at some point, but this would require cutting the zip ties.
You can 3D print cable chains to contain the hot end wires (in wire mesh), and the plastic links will be more sturdy than just the provided wire mesh alone. The links also won’t interfere with the Bowden tube. This 3D printable cable chain is designed for the Ender 3 Max and includes a mounting plate for both ends of the chain, which will keep the chains from dipping beneath the hot end.
- Purpose: Prevents the hot end wires from dipping and catching on moving objects, makes the Bowden tube easily accessible
- Parts required: Printed parts
- Approximate cost: $2-$5
- Where to find it: OpenDorrPolicy via Thingiverse
Lighting
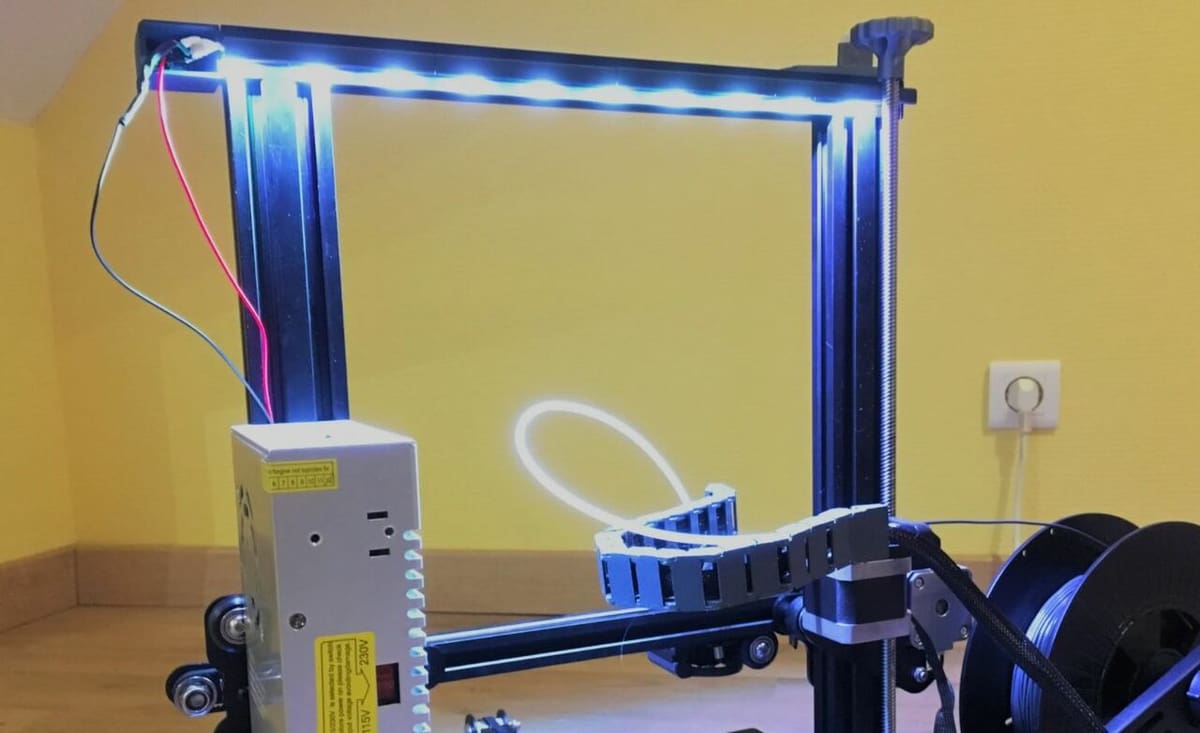
The most obvious advantage of the Ender 3 Max is that it offers a larger build volume, but with this comes more areas on the machine that need to be illuminated. Especially if you’re planning other upgrades or repairs, having proper lighting is key to working with, modifying, and fixing the machine.
While there aren’t many light options meant specifically for the Ender 3 Max, you can really use any type of lighting. You can check out some lighting solutions for 3D printers or mount a light you already have to your Ender 3 Max with a 3D printed bracket. If you’re looking for a more in-depth guide, there’s a full tutorial on Instructables to add LEDs to the Ender 3 that will work just as well for the Max.
- Purpose: Illuminates the printer’s build space
- Parts required: Lights, mounting bracket
- Approximate cost: $5-$20
- Where to find it:
- someguywitha3dprinter via Instructables (tutorial)
- Smokyjoe via Thingiverse (files)
To Buy
The next upgrades range from the BLTouch to enclosures, with some options also including a DIY alternative. Check them out!
Creality LCD Pad
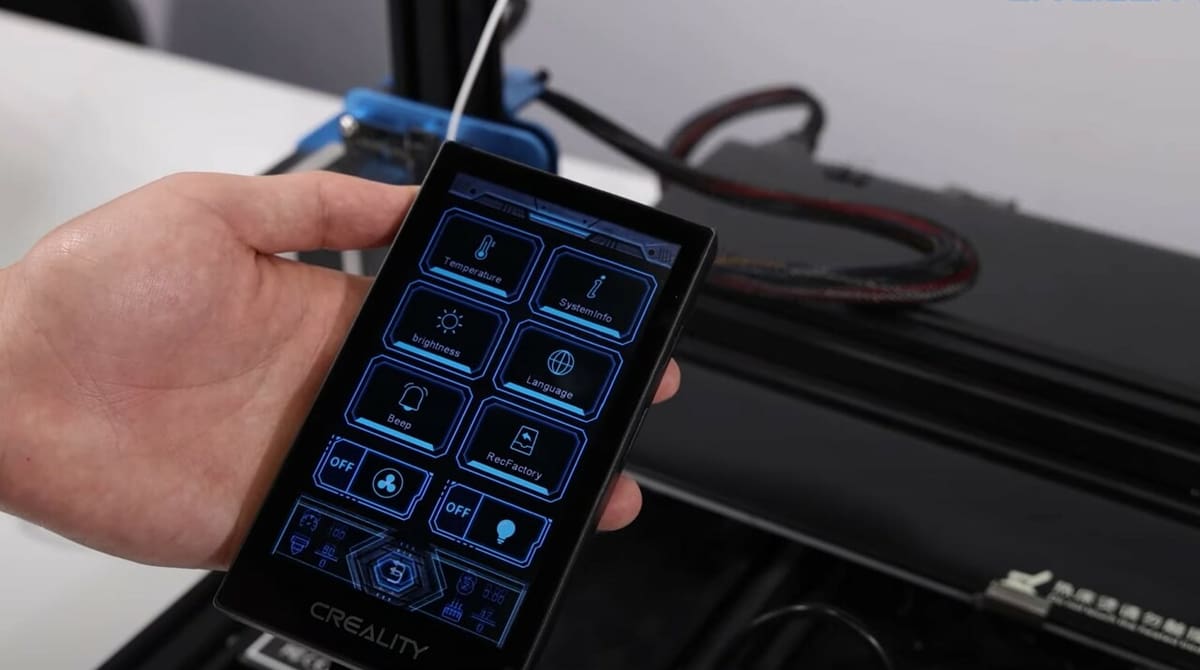
Another purchasable upgrade for the Ender 3 Max is the Creality LCD Pad, a mini touchscreen tablet that you can use to control your connected printer. Creality specifically mentions on the product page that the LCD Pad is compatible with the Ender 3 Max, among other versions of the Ender 3. This LCD Pad is not just more advanced than the Ender 3 Max’s stock LCD, but it also is meant to run a more developed graphical interface to make using the printer a more enjoyable experience.
The Creality LCD Pad is currently very affordable. It’s a great deal for users who want an improved user experience but aren’t ready to make the jump to Creality’s Sonic Pad. You can find all of the installation and assembly instructions for this tablet device in the “Download” section of the product page on the Creality website.
- Purpose: Provides a touchscreen display with an easy-to-use interface to simplify controlling the 3D printer
- Parts required: Creality 3D Pad, 3D printed mount (optional)
- Approximate cost: $20
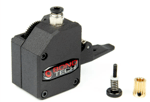
Micro Swiss Bowden Extruder
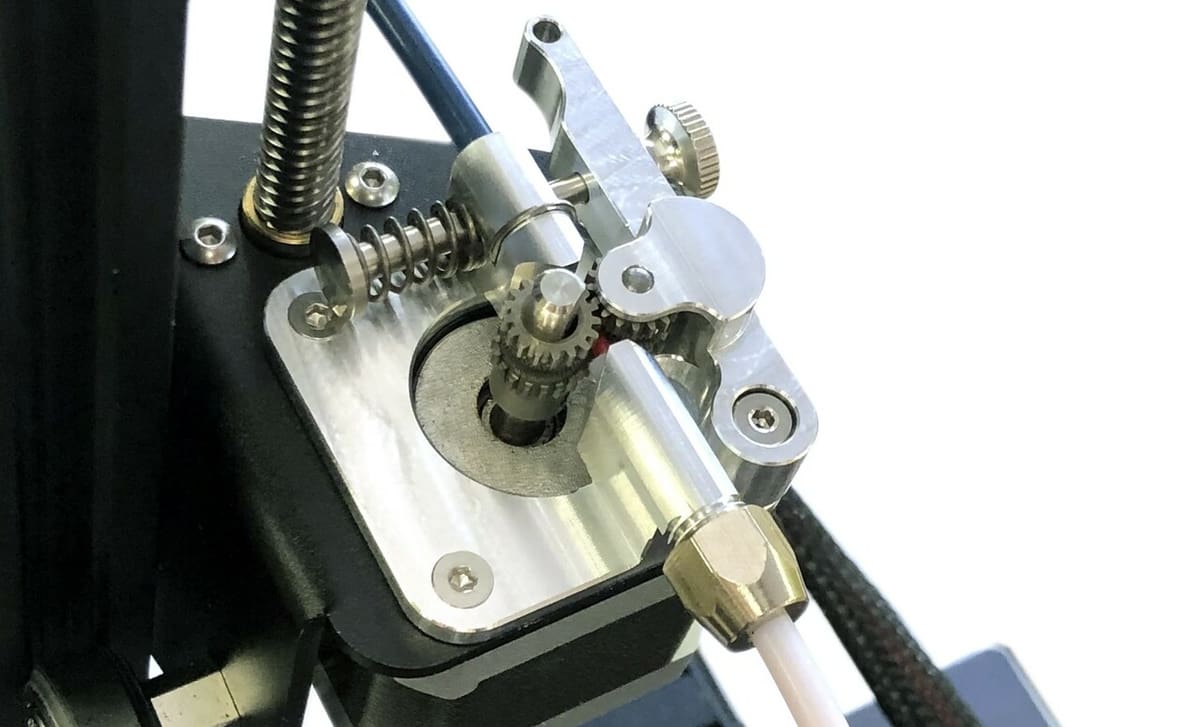
If you’re not interested in switching your Ender 3 Max to a direct extruder configuration, the Micro Swiss All-Metal Bowden Extruder is an excellent option. The Micro Swiss Bowden Extruder is a drop-in replacement for the Ender 3 Max’s stock extruder, and it’s known to be a lot more durable due to the all-metal construction.
Additionally, the extruder uses two drive gears, meaning the inserted filament strand is pushed from two directions. According to Micro Swiss, this dual-drive feature produces better extrusion results, especially with flexible filament materials. Like the original Creality extruder, this option also features an adjustable tension knob, which is helpful for preventing filament grinding and under-extrusion.
- Purpose: Provides more reliable and powerful filament extrusion to prevent issues such as under-extrusion
- Parts required: Micro Swiss Bowden Dual Gear Extruder Kit
- Approximate cost: $50
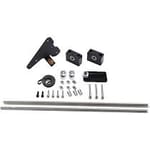
Linear Rails
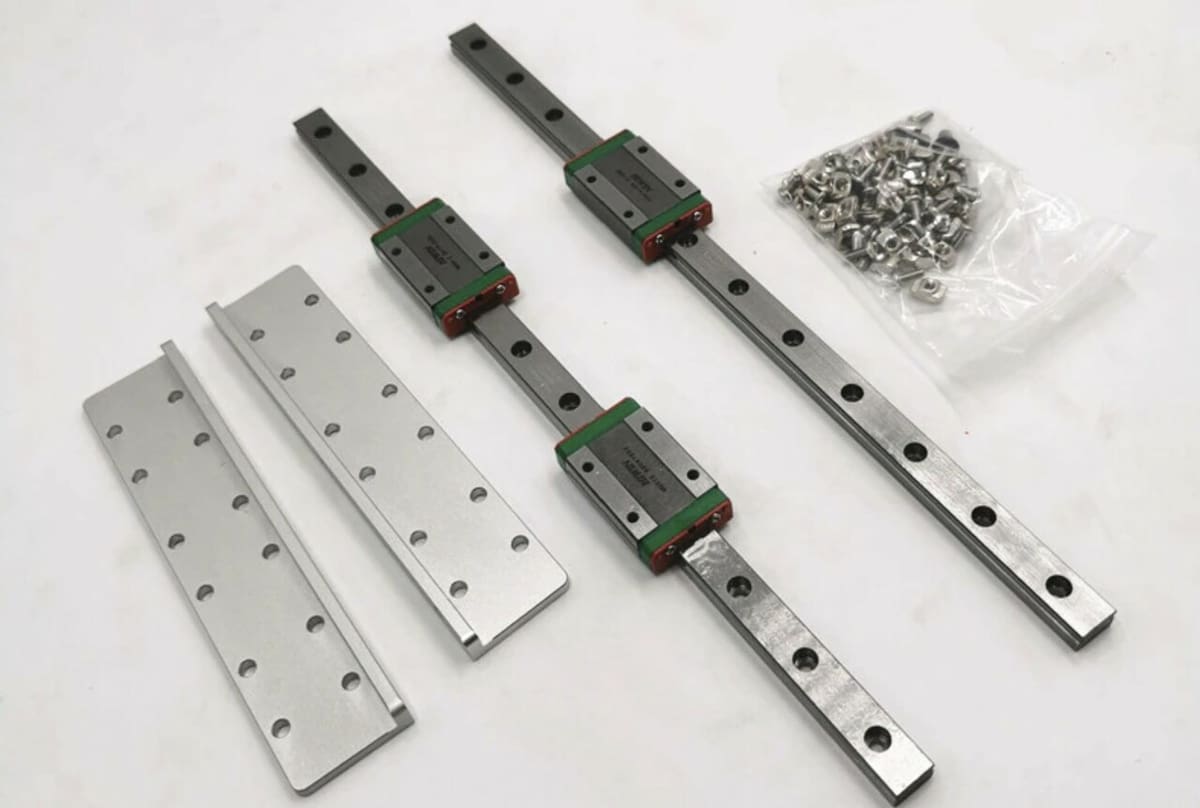
Linear rails are one of the most intensive upgrades you can make to a 3D printer, but you might be interested in adding them if your Ender 3 Max is struggling with smooth movements. On this note, smooth motion is critical for high-quality prints because any vibrations that occur when the printhead or bed is moving will result in ringing and other deformations on your prints.
Linear rails are a motion system technology involving the use of bearing-lined carriages that glide across stiff metal tracks, and they offer much smoother motion than the bearing roller motion system found on the Ender 3 Max. While adding linear rails to your Ender 3 Max is a rather challenging upgrade to do by yourself, following a tutorial or using a kit can simplify the process. One example of a great linear rail upgrade kit that’s specific to the Ender 3 Max is available at 3DFused.
- Purpose: Provides more stable and smooth motion for the printhead along the respective axes and prevents print quality issues like ringing
- Parts required: Linear rails, carriage, screws, other kit components, 3D printed mount (for non-stock printheads)
- Approximate cost: $100-$300
BLTouch
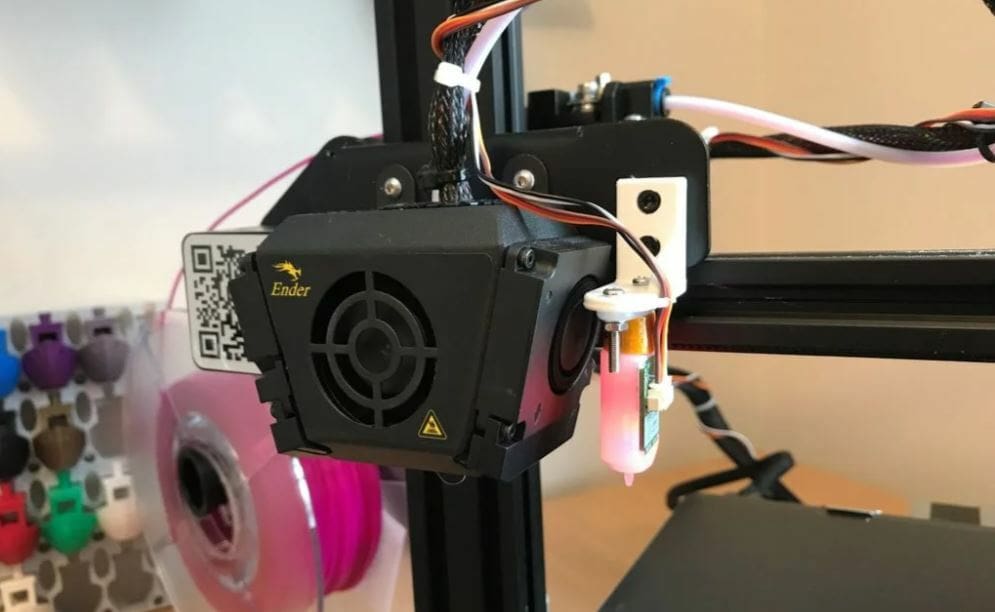
One of the biggest downsides of the Ender 3 Max is that you have to manually level the bed to achieve a quality first layer because the machine lacks an automatic bed leveling (ABL) sensor. Luckily, the printer has pre-drilled holes and available mainboard ports, so you can easily mount and install a BLTouch device, a popular type of ABL sensor.
A BLTouch measures the distance from itself to the build plate at different points, then tells your printer to adjust the Z-axis as it prints to make this distance as consistent as possible. This allows you to skip leveling your printer’s bed by hand because your machine will use the measurements to self-compensate for levelness imperfections.
Similarly, you can consider the CR Touch, Creality’s sensor. There are a few differences in addition to price that may be worth considering before you make the call either way.
Most BLTouch upgrade kits come with a bracket that you can attach to the Ender 3 Max’s printhead, or you can print one yourself. You can download the BLTouch-compatible firmware on Creality’s website, and check out one of the many online tutorials, like Smith3D’s guide, for further guidance on the firmware. You can also check out our article for installation instructions.
- Purpose: Adds automatic bed leveling
- Parts required: BLTouch sensor, mounting bracket
- Approximate cost: $40-$50
Capricorn Tubing
On 3D printers with Bowden drive setups, like the Ender 3 Max, a tube is needed to guide the filament from the extruder to the hot end. The stock Bowden (PTFE) tube on the Ender 3 Max has been known to burn up inside the hot end, causing jams and clogs. Capricorn is a company dedicated to making high-quality PTFE tubing for 3D printers, and their 1.75-mm filament tubing is a great option.
Capricorn tubing offers a tighter diameter around the filament compared to Creality’s generic tubing. This gives the filament less room to move around inside the tube, thus reducing the chances of print failures. The tube is super easy to install, and most Capricorn tube kits come with fittings that work on the Ender 3 Max.
- Purpose: Provides a smoother extrusion path for the filament
- Parts required: Capricorn tubing, PTFE couplers (included with printer)
- Approximate cost: $10-$18
Capricorn Bowden PTFE Tubing is designed with an extremely precise internal diameter, making it easier for you to print with flexible filaments.
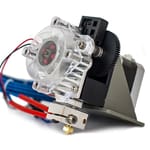
Direct Drive Extruder
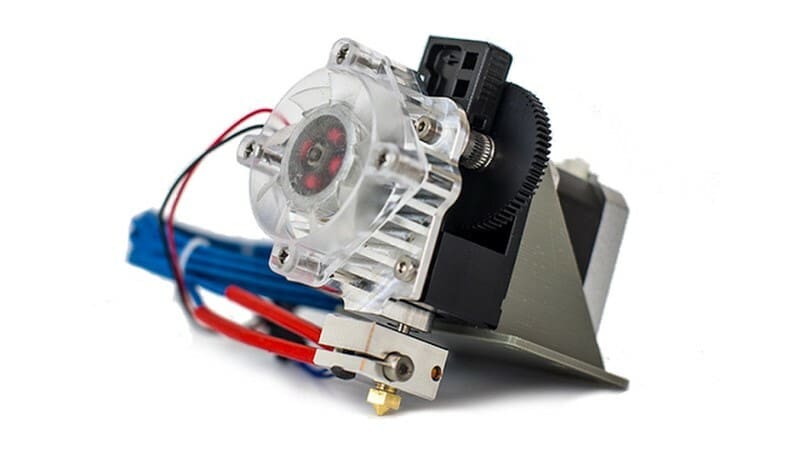
Although Creality took a step forward by switching to a metal extruder on the Ender 3 Max, the extruder is still in a Bowden configuration. Bowden setups have the extruder separate from the hot end, connected by a PTFE tube. While this extruder setup makes fixing extruder and hot end issues easier, it’s not ideal for printing flexible materials like TPU.
A direct drive extruder, with the extruder assembly located directly over the hot end, is the superior configuration for certain purposes. There are many ways you can upgrade the Ender 3 Max to have this type of extruder, generally involving installing a new extruder and 3D printing a mounting bracket.
The Bondtech BMG and E3D Titan Aero (an extruder and hot end combo) are two options that users have already designed Ender 3 Max mounts for: riazshaikgp for the Bondtech and stablestud for the E3D. For an overview of the process, see our article Ender 3 (V2/Pro) Direct Drive: Step-by-Step Guide.
- Purpose: Moves extruder to above the hot end, makes printing flexible filaments easier
- Parts required: Extruder, 3D printed mounting bracket
- Approximate cost: $50-$150 (depending on the extruder)
Dual Z-axis
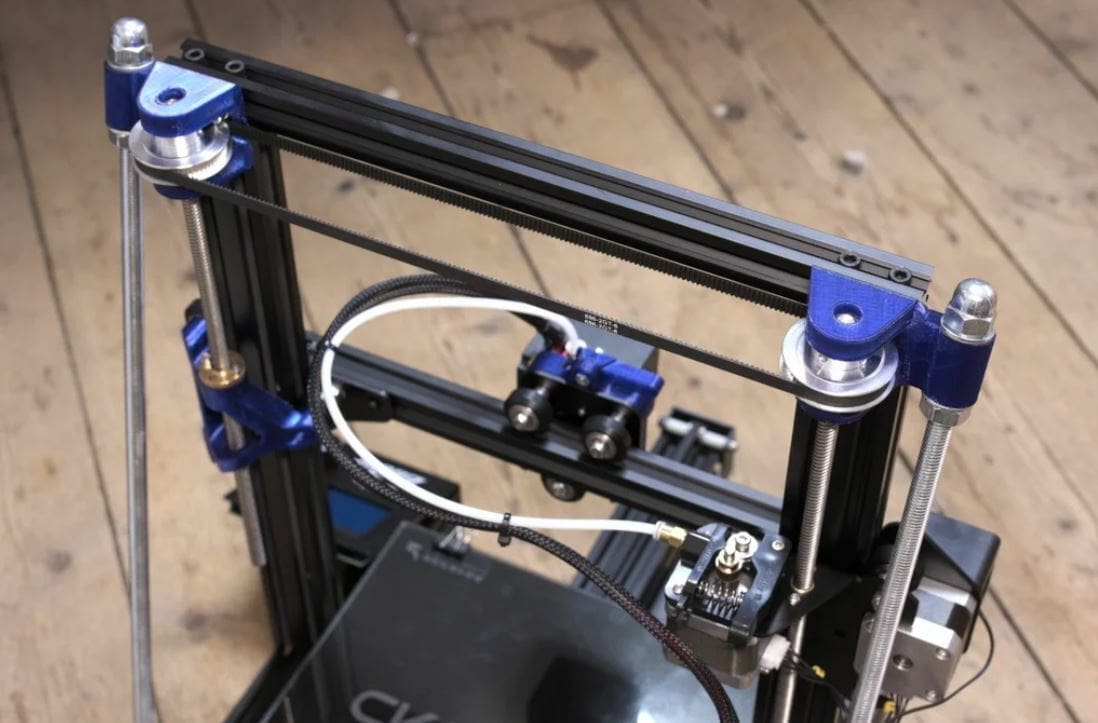
Although the Ender 3 Max’s motion system is pretty reliable, the increased size and weight of the X-axis gantry make the extrusion more likely to sag. This can make the printhead’s path slanted and also make the bed leveling process difficult. This problem has already been identified in the other versions of the Ender 3, but the size of the Ender 3 Max exacerbates the problem, so it’s a prime candidate for an upgrade.
The root of this problem is the lack of a second Z-axis lead screw to hold up the other side of the X-axis gantry. The solution is to install a second Z-axis lead screw, and there are a few different kits for this upgrade available; however, most of them are meant for the original Ender 3 (or Pro/V2). Luckily, as pointed out by one user, you can easily make these other kits work with the Max by simply purchasing a longer (500-mm) lead screw. For more information, Walt’s Reviews has covered this upgrade for the Ender 3 Max specifically.
- Purpose: Stabilizes the X-axis gantry, prevents gantry sagging
- Parts required: Ender 3 dual Z-axis kit, 500-mm Z-axis lead screw
- Approximate cost: $60-$80
Spring Steel PEI Build Plate
The glass build plate that comes on the Ender 3 Max provides excellent bed adhesion for many, but some still have issues getting their first layers to stick and stay down or can’t remove parts easily. A spring steel PEI build plate is a special type of print surface that has a Polyetherimide (PEI) coating. Most 3D printing filament materials, like PLA, ABS, and PETG, stick very well to this material.
However, the top coating of PEI for excellent bed adhesion isn’t the only great part about spring steel PEI build plates, and they’re also flexible and magnetic. This makes for super easy part removal because you can simply detach the bed, bend it, and your prints will jump off. Additionally, because it’s magnetic, no bed clips are needed.
Sadly, due to the large print area of the Ender 3 Max, not many build plates fit the printer. Fulament’s 310 x 310-mm Fula-Flex 2.0 bed and Enomaker’s generic spring steel PEI build plate are both great options you can choose from.
- Purpose: Provides an adhesive surface for the first layer to stick to and makes it easier to remove prints from the bed
- Parts required: Spring steel PEI build plate
- Approximate cost: $30-$55
Silent Motherboard
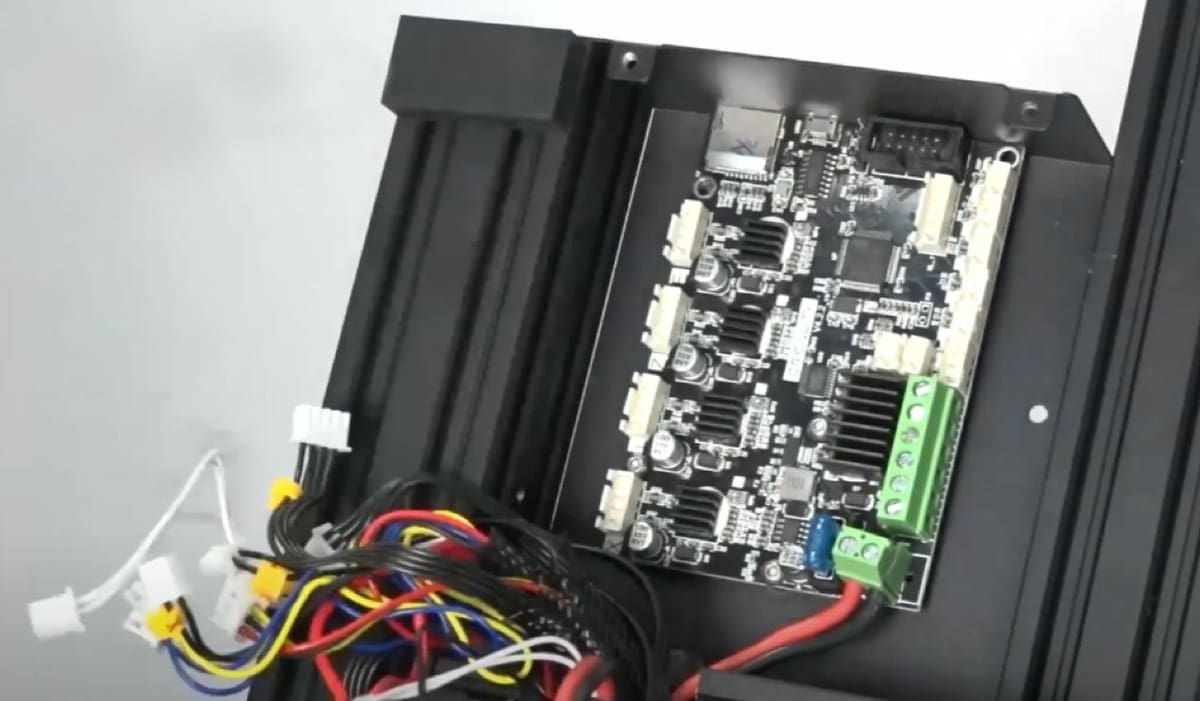
One of the best features of the Ender 3 Max is its 32-bit motherboard, known as the Creality V4.2.2. The board’s TMC2208 stepper motor drivers provide a significantly quieter printing experience compared to the original Ender 8-bit boards. However, you can take “quiet” to another level by upgrading to the Creality V4.2.7 board.
The V4.2.7 is Creality’s newest “silent” 32-bit board, and it sure is quiet. The board’s TMC2225 stepper motor drivers are more powerful than the stock board’s drivers and help the printer achieve a noise level under 50 decibels during printing.
While installing this board may look complicated, it’s actually pretty easy, as the boards are the same size and have the same ports. The easiest way to make the installation is to move each wire from the old board to the new board one by one so you don’t confuse any of them.
- Purpose: Lowers the noise output from the printer’s stepper motors
- Parts required: Creality V4.2.7 board
- Approximate cost: $50
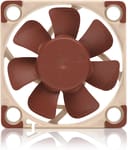
Noctua Silent Fans
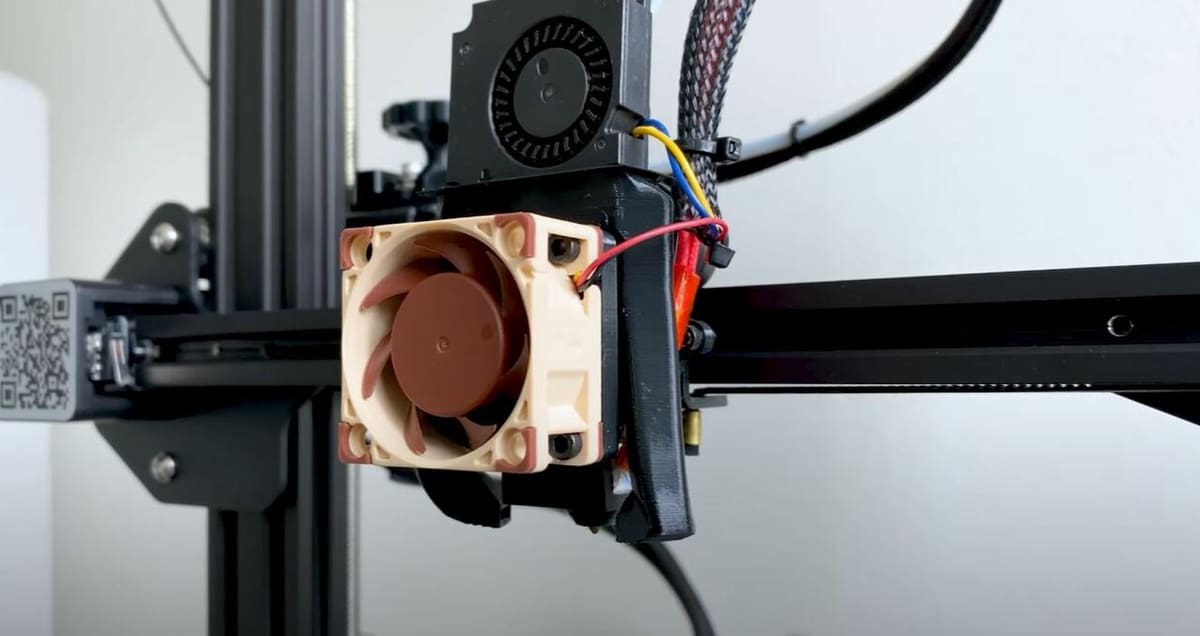
On the Ender 3 Max, Creality’s V4.2.2 mainboard and the TMC2208 stepper motor drivers do a good job of keeping the printer quiet. In fact, these parts are so effective that the loudest component is usually a fan. If you want to make your Ender 3 Max as silent as possible, you can upgrade to Noctua fans.
Noctua fans are known for their low-noise production, perfect for making a 3D printer incognito. They are popular upgrades for 3D printers, but, unfortunately, they’re usually only available for 12-V power sources. As the Ender 3 Max is a 24-V printer, 12-V Noctua fans won’t work straight out of the box, but you can use a step-down buck converter to install them properly.
For each fan replacement, you’ll need a Noctua fan, a buck converter, and some wire (for the extension). While you can use Noctua fans for all your printer’s cooling, they’re only the same size as the hot end and mainboards fans (not the 5010 blower fan). To install a Noctua fan on an Ender 3 Max, the available guides for other versions of the Ender 3 are applicable as the process is almost the same. There’s a good video guide from CHEP on YouTube, or an in-depth tutorial on Instructables.
- Purpose: Adds ultra-quiet fans, reduces the printer’s noise levels
- Parts required: Noctua fan, step-down buck converter, wires
- Approximate cost: $15-$30
Enclosure
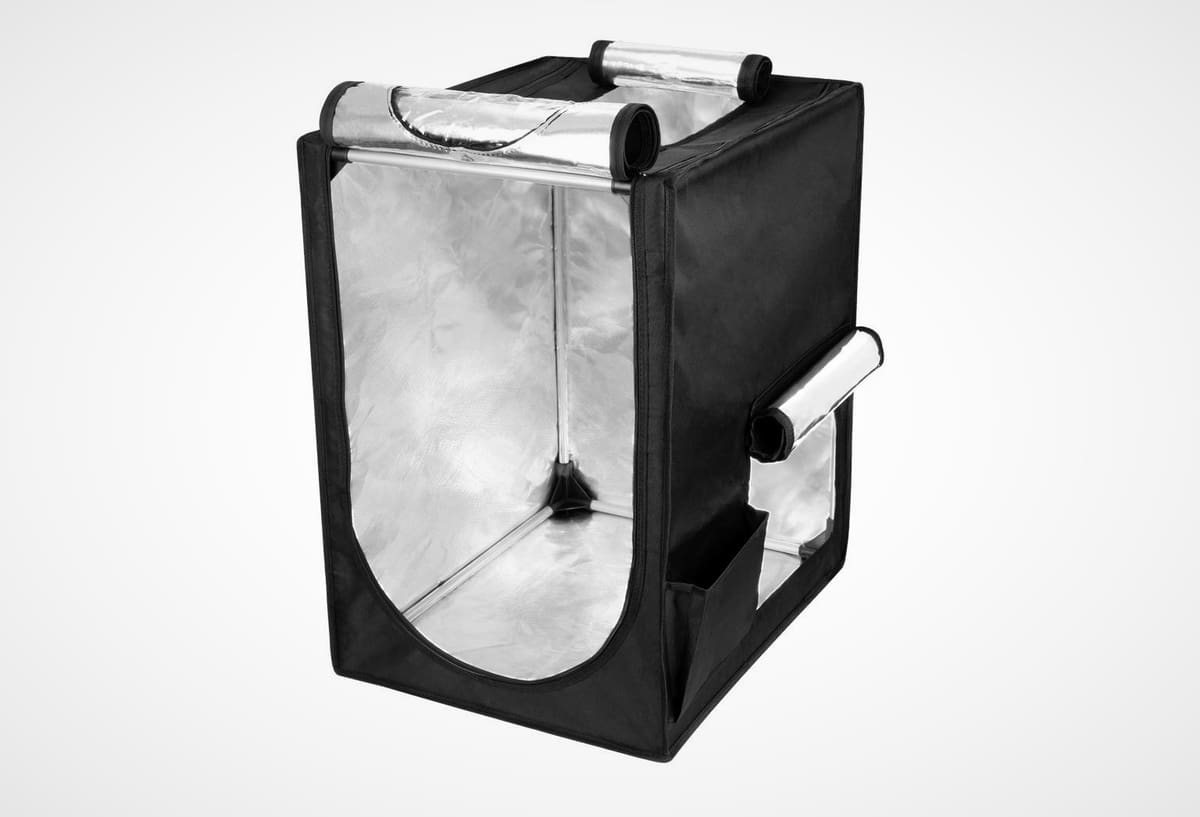
Although Creality states that you can print ABS on the Ender 3 Max, this isn’t exactly true. If you want to print temperature-sensitive materials like ABS and polycarbonate, you’ll want an enclosure as it helps achieve a decent print quality.
Due to the large machine volume of the Ender 3 Max, not many enclosures fit the printer. However, Creality sells a reliable option – just make sure to select the correct size.
For a different (if more costly) option, 3DUpFitters sells a compatible enclosure kit for the Ender 3 Max that works as long as you use an external spool holder. 3DUpFitters’ Ender 3 Max enclosure is made of acrylic panels, and the company offers many optional upgrades for the enclosure, such as a temperature sensor, air filter, and more.
If neither of those options does it for you, you might be interested in building your own enclosure. There are many different ways you can build a DIY enclosure, such as with a wooden table, plastic panels, and more. You can check out our article all about DIY enclosure solutions for some more ideas!
- Purpose: Traps heat near the printer for higher-quality prints in ABS and other temperature-sensitive materials
- Parts required: Enclosure kit or DIY materials (e.g. panels, screws, hinge)
- Approximate cost: $70-$265

OctoPrint
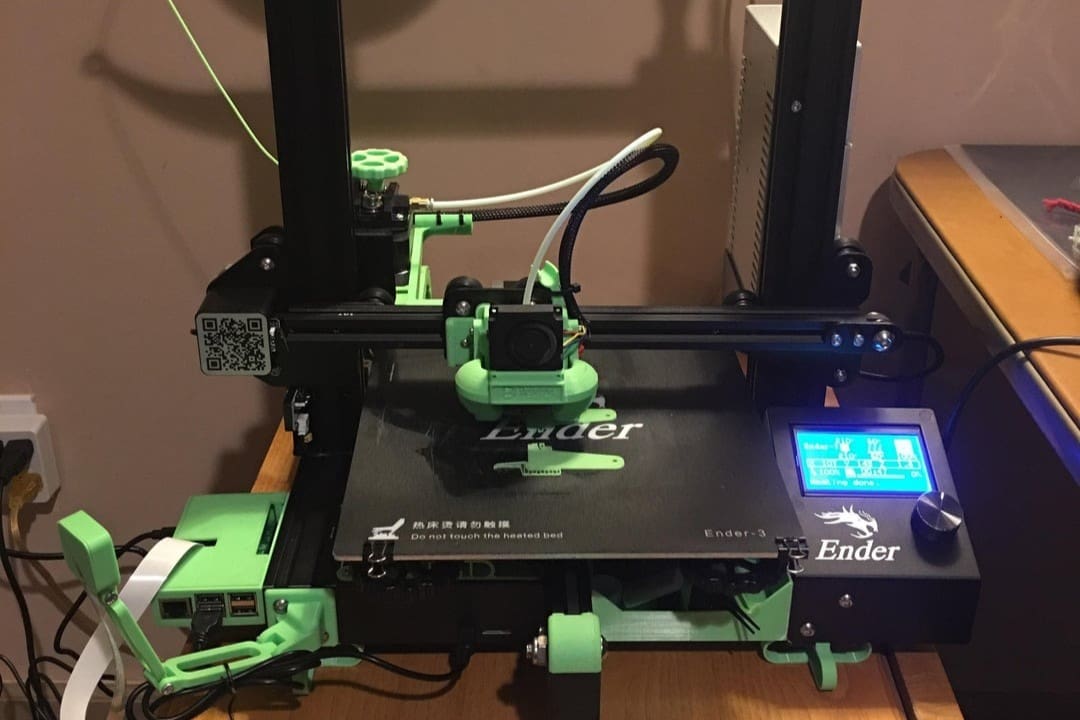
OctoPrint is a super popular upgrade for all types of 3D printers because it allows for remote printing and is compatible with most budget 3D printers. OctoPrint is open-source and runs on a single-board computer, like a Raspberry Pi, connected to the mainboard of your 3D printer.
With OctoPrint, you have access to a host of different features, including camera monitoring, movement control, sending G-code commands, and starting prints. You can also install community-developed OctoPrint plug-ins that improve OctoPrint’s abilities, like The Spaghetti Detective, which uses AI and a webcam to ensure your print is going well.
Installing OctoPrint isn’t any different for the Ender 3 Max than for other printers. You’ll need a computer, microSD card, Micro-USB cable (for the mainboard connection), and a power supply for the SBC.
You also can 3D print a housing to keep the components out of the way. This OctoPi station is a great option if you’re using a Raspberry Pi 4. Check out our guide to setting up OctoPrint on the Ender 3 to learn more about the process.
- Purpose: Allows you to control your printer remotely, adds new features via optional plug-ins
- Parts required: Single-board computer, microSD card, Micro-USB cable, power supply
- Approximate cost: $40-$50
- Where to find it: OctoPrint
License: The text of "The Best Creality Ender 3 Max Upgrades & Mods" by All3DP is licensed under a Creative Commons Attribution 4.0 International License.
CERTAIN CONTENT THAT APPEARS ON THIS SITE COMES FROM AMAZON. THIS CONTENT IS PROVIDED ‘AS IS’ AND IS SUBJECT TO CHANGE OR REMOVAL AT ANY TIME.