Creality Print vs Creality Slicer: The Main Differences

Slicing software is essential for any 3D maker. Creality now has two options, so read on to see how Creality Print vs. Slicer stacks up!
For the uninitiated, probably the best-known and most widely used slicer program to prepare a 3D model for printing is UltiMaker’s Cura. Given that this is an open-source program, developers have used it as a basis for their own bespoke slicers, which are known as “forks”.
This is where Creality, another widely known printer manufacturer, stepped in and used Cura as their base program for the Creality Slicer. Best known for their affordable line of Ender 3 FDM printers and peripherals, Creality released Creality Slicer as a companion slicer program tailored specifically to its own printers.
However, further development and expansion of Creality’s printer range has also led to the January 2022 release of another slicer program, Creality Print.
Naturally, the next question is, what’s the difference between Creality Print and Slicer? Well, that’s what we’re here to cover today. In this guide, we’re going to use LeoDDC‘s Batman model and Patrickart‘s Eevee to give you a close look into both of these programs.
Let’s get to the bottom of it!

User Interface
The first thing that you’ll notice when you open up any software of this type is the user interface (UI). This is basically the layout of the program and how you interact with it to slice your projects. The UI for both Creality Print and Slicer are similar in performance, but there are some noteworthy differences.
Creality Slicer
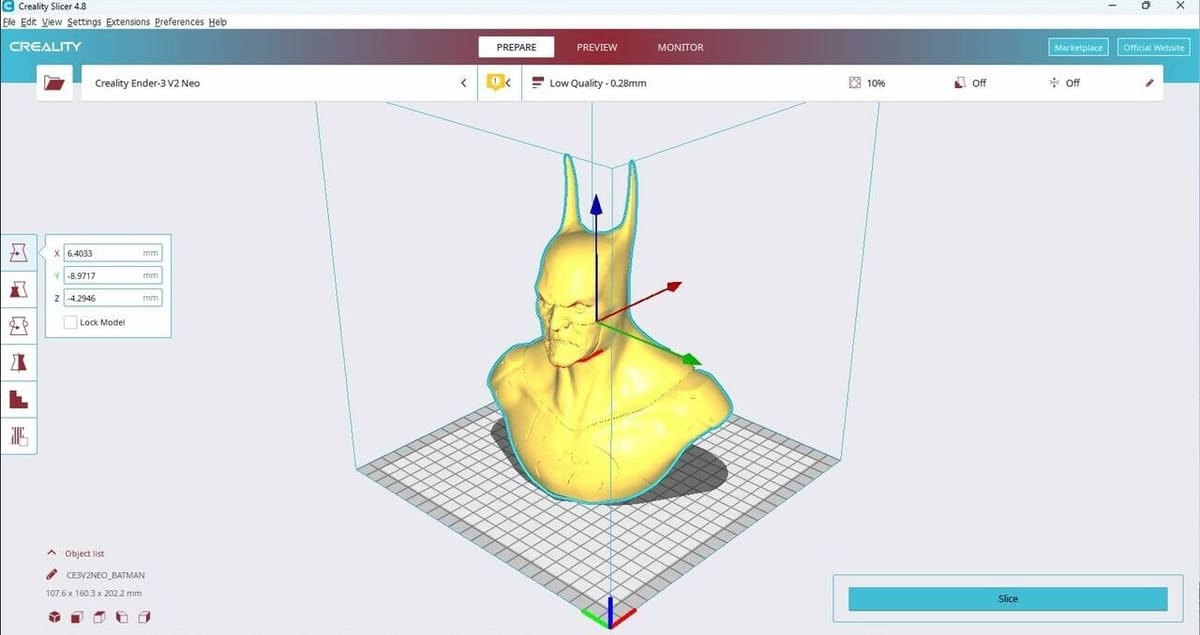
If you’re familiar with Cura, you’ll notice straight away how Creality Silcer still resembles its predecessor. The model sits front and center in the virtual build space of your selected printer. (We’ll be looking at printer profiles later on.)
The top banner controls the workspace you’re in and includes Prepare where you’ll do most of the slicing, Preview to proof your slicing job, and Monitor for keeping tabs on your print in progress if you have such setup.
The basic toolbar consists of drop-down menus across the top left, which gives you access to relevant aspects of the software such as Settings. The Print settings can be accessed by clicking on the bar to the top right of the screen that, by default, displays Standard Quality settings. Opening this menu presents you with a multitude of slicing parameters including infill, print speed, and supports.
Creality Print
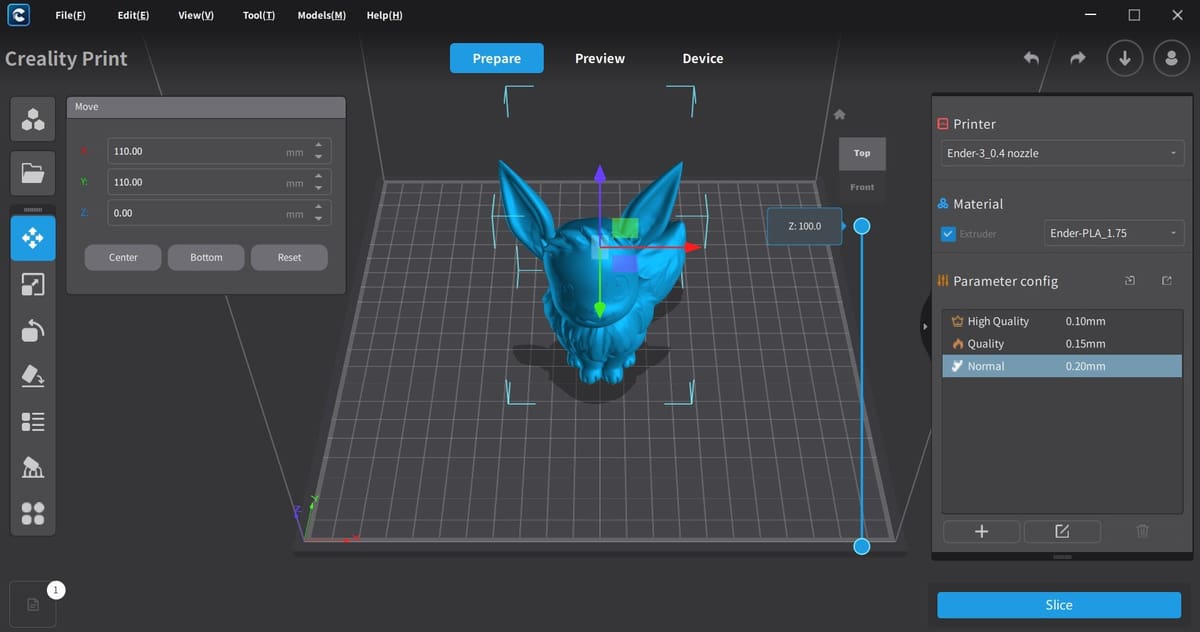
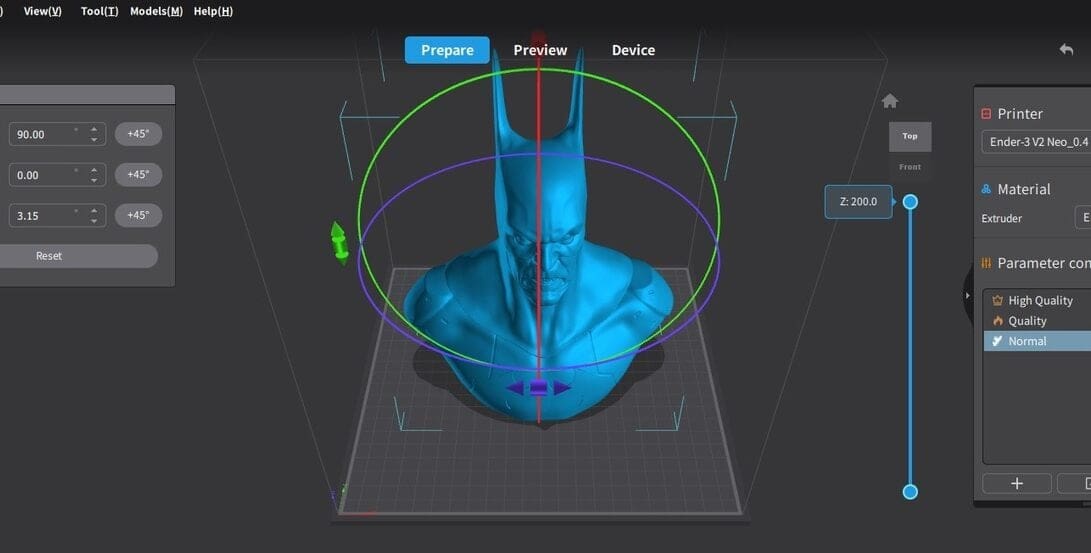
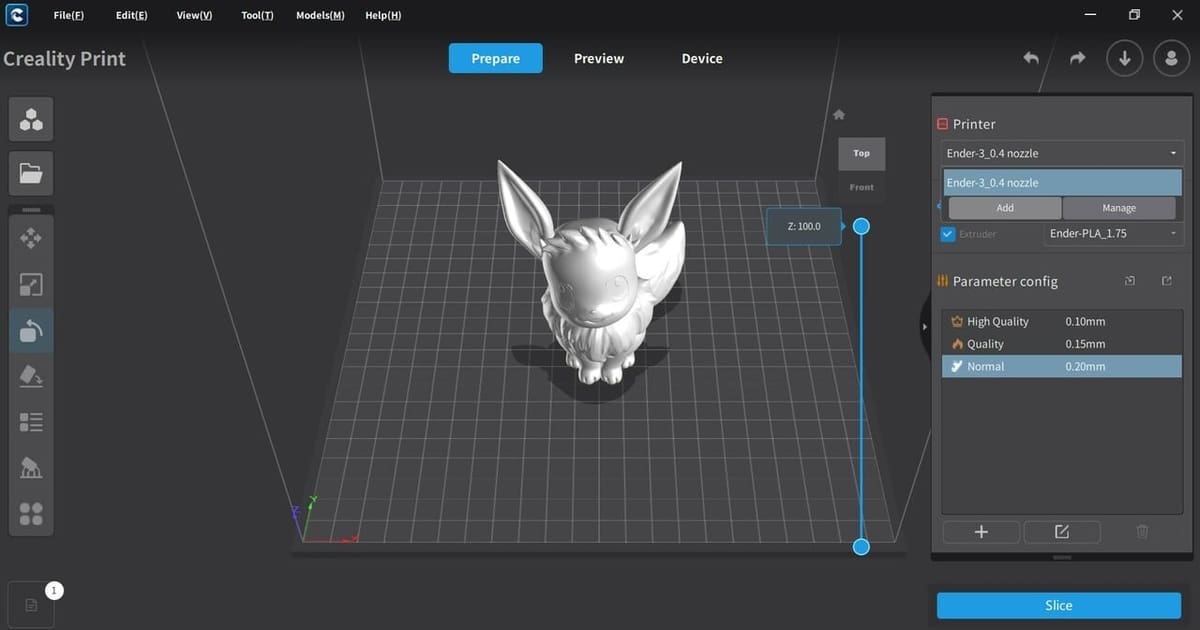
Taking a look now at Creality Print, the UI is less reminiscent of Cura and seems to establish Creality’s own software identity. Like Creality Slicer, the virtual build plate is center screen, and a right-hand sidebar houses printing parameters.
Settings are profile based, so instead of directly having a list of adjustable parameters, you select the printer and material you plan to use, as well as the level of print quality. To make adjustments to the profile settings, double-click the quality profile to open the full configuration menu.
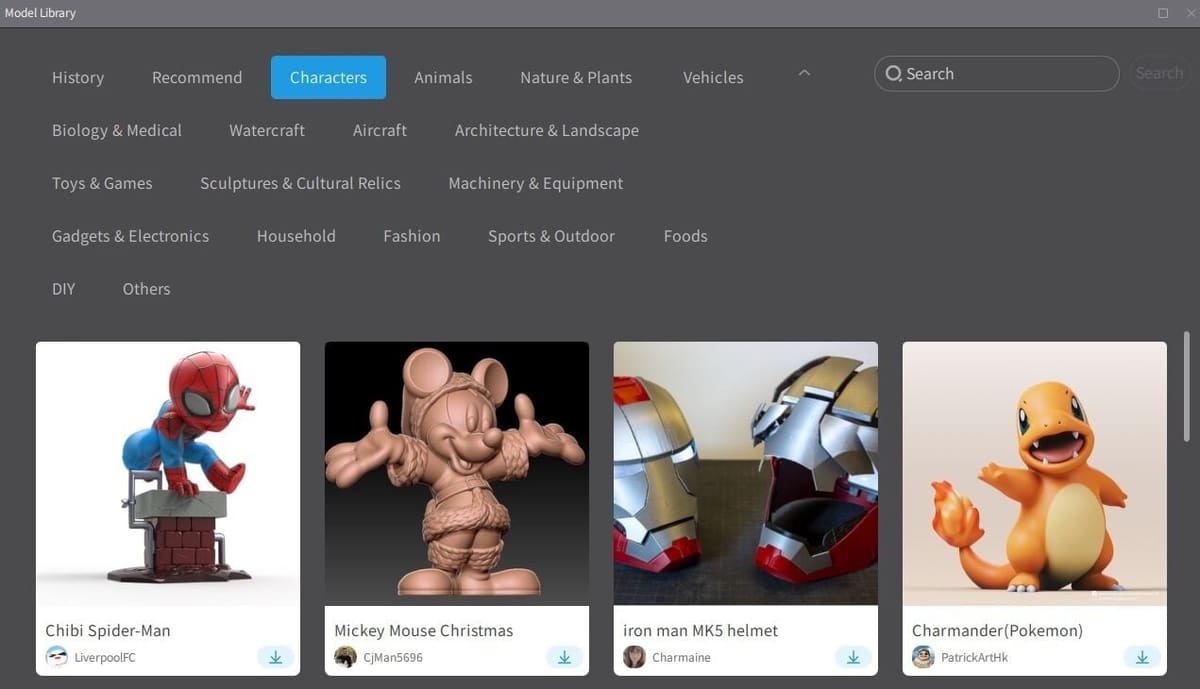
On the left-hand side of Creality Print, you’ll notice a Models button among the vertical bar of basic tools. This opens Creality’s vast model library of free or low-cost user-uploaded models.
Another noticeable difference is the Device tab across the top banner instead of Monitor as we saw in Creality Slicer. This tab can be used to configure Creality Cloud and directly upload your sliced file to your printer – more on that in a bit.
Now that we’ve had a quick look at how the UIs differ in each program, let’s take a look at the main features of each.
Main Features
The main considerations you’re looking for in a slicer program are convenient import and export options, its compatibility with your printer models, available settings, as well as remote printing options. Let’s see how Creality Print and Slicer stack up.
Import/Export File Compatibility
Both slicers obviously have the ability to import and export all the most commonly used file formats, including OBJ, 3MF, DAE, and 3DS. That said, you’ll be mainly working with STL and G-code files, which are on that list too.
Creality Print will only save files as STLs or project files, which may be enough for some. However, if you’re often sharing your files, Creality Slicer offers the ability to export to OBJ and 3MF file formats as well as STL.
Printer Compatibility & Profiles
As both of these programs are produced by Creality, it makes sense that they have prioritized their own printers for preset profiles. However, slightly disappointingly, there are no preset profiles in either program for printers from other manufacturers. The only exception to this is in Creality Slicer where some UltiMaker printer profiles are available, but this is likely a nod to its Cura heritage.
However, both programs have the option to add a custom printer profile, but this naturally comes with your effort to tune. A strange quirk of Creality Slicer is that it doesn’t seem to have all of Creality’s printer profiles available, especially more recently released printers like the K1 series. This is gradually being rectified, though, as further updates of Creality Print are released.
Presets
In addition to the printer profiles, default presets tweak your print settings according to the quality, or perhaps more accurately the resolution, of the printed piece. The higher quality the profile, the smaller the layer height. This is handy if you’re a beginner or just looking for a starting point to customize further.
In Creality Slicer, there are four options for quality levels: Super, Dynamic, Standard, and Low. With Creality Print, you have only three options: High Quality, Quality, and Normal. Nevertheless, both programs allow you to customize and save your own profiles.
Slicer Settings
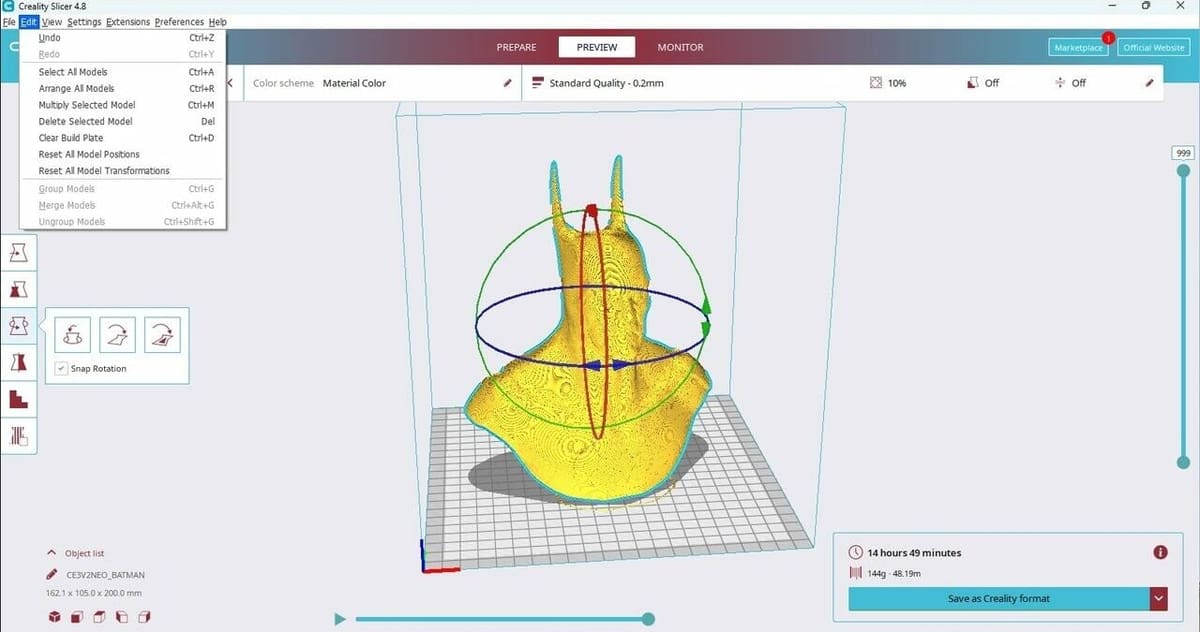
Now, we get to the bones of the two slicers: the settings. At first glance, Creality Slicer may appear to have much more limited slicing parameters accessible, however, this may only be because setting visibility is toggled off. Under Print settings, click the hamburger menu button that’s to the right of the search bar. Then, select “Manage Settings Visibility” to open the full list of available printing parameters.
Similarly for Creality Print, toggle full settings visibility by activating the “Advanced” switch that can be found in the Edit window for a printer profile. Further options may become visible once enabling certain parameters.
Both the slicers are quite comparable in terms of the settings they offer. Aside from the basics, which are naturally well-covered by these slicers, even experimental and advanced settings are available in both slicers, including tree supports, fuzzy skin, retraction wipe, and coasting.
This means that when it comes to choosing between these two slicers, it’s really up to your own personal preference and whether you’re looking for remote access options.

Remote & Cloud Printing
Creality has been a pioneer in built-in remote control of your 3D printer with their Creality Cloud platform. It allows for Wi-Fi and Bluetooth remote printing directly from your computer. With Creality Print, you can upload your sliced model directly to the Cloud from the slicer. If you have your printer set up with the Creality Wi-Fi Box, you can directly send your sliced file and control your printer without leaving your desktop.
As long as your mobile device is also connected to the same Wi-Fi network, you’d also have access to remote monitoring and printer control on your mobile device through the Creality Cloud app.
This feature is what sets Creality Print apart. With Creality Slicer, you don’t have any special remote printing options. If you were looking for mobile control and print monitoring, you’d have to look into a third-party program, like OctoPrint or others.

Company and Community Support
Creality has produced both of these slicers, so it would be good to know how they’re supporting the software and the users going forward. Both slicers are updated on a somewhat regular basis, but it’s unclear if this will continue in the long term.
There’s some speculation that the advent of Creality Print may signal an attempt to establish this original software as the go-to slicer for its new printers and customers, phasing out Creality Slicer. However, there are still a lot of users who are familiar with Creality Slicer and aren’t necessarily interested in changing their usage. In this case, support is still there, but it primarily comes from users and associated forums.
Community support is the main source of information and assistance for users of both slicers anyway, but this isn’t necessarily a bad thing. Users of the software are the first ones to notice if an issue arises or if they can offer tips and tricks to other users. The Creality Cloud forum is a great place where users can share their issues and ask for assistance.
Other sources of support come in the form of social media groups, although Cura is clearly a crowd favorite on most of the larger forums on Facebook and Reddit.
Alternatives
If you’re looking to branch out from Creality altogether, there are plenty of options for you that can cover everything these slicers can do, and possibly more.
As we’ve already established, Creality Slicer is a fork of Cura, the original open-source software. Therefore, Cura will be a seamless transition if you’re already familiar with Creality Slicer, but it’s also a clear upgrade from Creality Print as well. Cura is updated very regularly and has an incredibly active user base that’s constantly reporting issues and solutions that pop up.
However, Cura isn’t the only slicing solution for makers out there:
- PrusaSlicer: Another widely popular slicer from Prusa Research, PrusaSlicer was also originally a fork of the RepRap open-source Slic3r. Also constantly under improvement with active user-based support, it has great compatibility and profile options for most third-party brands. It does have a bit of a different look, so it might be a good deviation away from Cura and its forks.
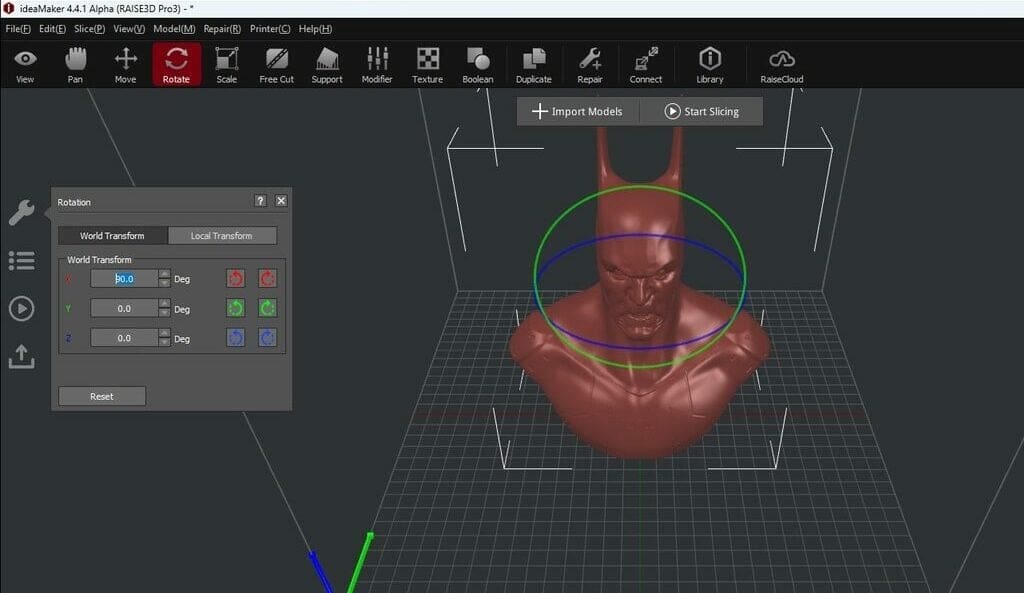
- IdeaMaker: As Raise3D‘s own slicer software, IdeaMaker is a super user-friendly slicer with profiles for many commercial FDM printers. This slicer also has a built-in printer management system that allows you to manage several printer profiles and includes remote monitoring capabilities.
- OctoPrint: If you’re set on remote monitoring but don’t vibe with the UI of Creality Print, OctoPrint is a great alternative. Although the setup is a bit complicated, requiring configuration with a Raspberry Pi, you can gain totally remote print monitoring and control (even when not on the same Wi-Fi network). While not innately a slicer, you can choose any slicer program you’d like to prepare your files.
License: The text of "Creality Print vs Creality Slicer: The Main Differences" by All3DP is licensed under a Creative Commons Attribution 4.0 International License.