Creality Print: All You Need to Know About the FDM Slicer

Creality Print is the company's latest entry into the field of 3D slicers for its FDM printers. Read all about it to get started slicing!
Creality Print is FDM slicing software produced and developed by Creality themselves.
For anyone not familiar, Creality is a China-based company founded in 2014 with the goal to progress 3D printing into the home user market. Since then, they’ve become one of the leaders in manufacturing high-quality but affordable 3D printers, with the Ender series being their best-known and best-selling range.
As the company has grown, creating proprietary software was a natural step. First, there was Creality Slicer (which is still available), and now it’s Creality Print’s time to shine. With a profile similar to other programs of its ilk, Creality Print could be seen as an essential tool for anyone who owns a Creality printer.
Creality Print is a fairly new slicer dedicated to fused deposition modeling (FDM) printers. First released in January 2022, each update has seen the addition of compatibility with more machines, to reflect Creality’s own growing portfolio. It currently supports over 50 machines, including discontinued Creality models such as the Ender 2, which is a nice acknowledgment of long-time Creality users.
While Creality Print is a great resource for Creality printers, it doesn’t support machines from other brands by default, something that’s worth keeping in mind if you’ve got multiple setups and don’t want the hassle of manually creating printer profiles.
In this article, we’ll go over what you need to get started with Creality Print as well as its main features and how it can be used with Creality Cloud. It’s important to note that our discussion of the software is based on Creality Print V4.3.7, the latest version available at time of writing.
System Requirements
As with all programs that you’re downloading and installing, Creality Print has minimum system requirements to be able to operate correctly. These are usually the bare minimum, so it’s advisable to go for the recommended requirements to get a better performance and user experience.
Let’s take a look at both.
Minimum Requirements
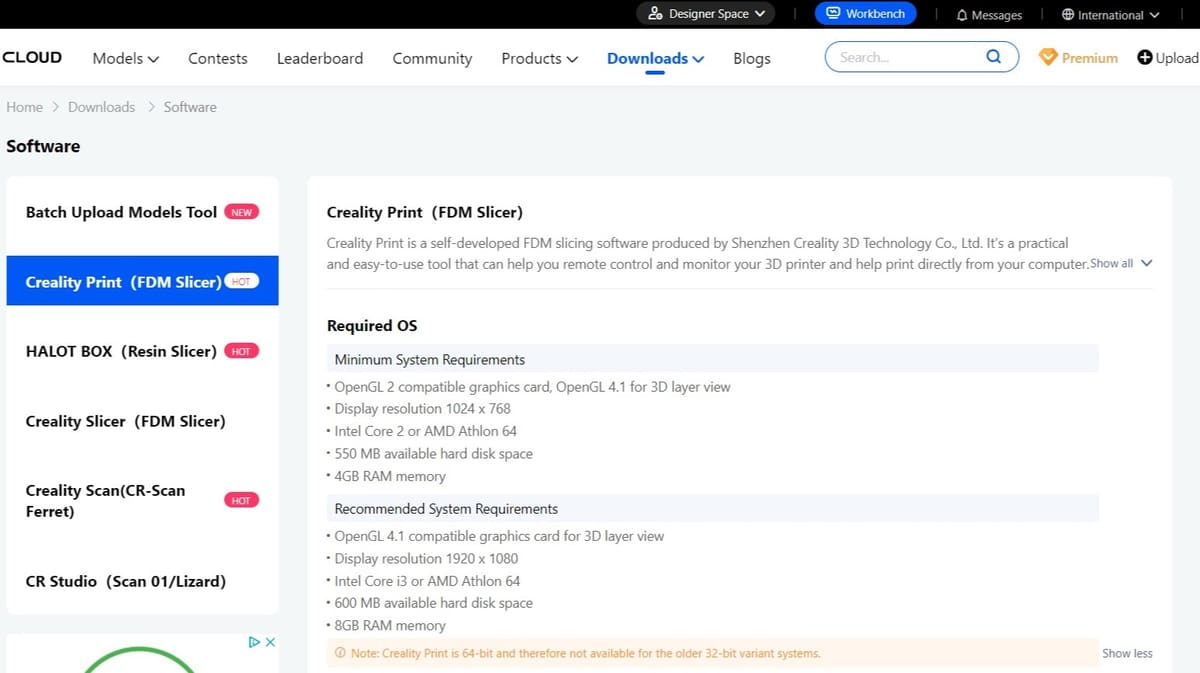
- API: OpenGL 2 compatible graphics card; OpenGL 4.1 for 3D layer view
- Display resolution: 1024 x 768
- CPU: Intel Core 2 or AMD Athlon 64
- Hard disk space: 550 MB
- Memory: 4GB RAM
Recommended Requirements
- API: OpenGL 4.1 compatible graphics card for 3D layer view
- Display resolution: 1920 x 1080
- CPU: Intel Core i3 or AMD Athlon 64
- Hard disk space: 600 MB
- Memory: 8GB RAM
If your computer meets these requirements and you want to download Creality Print, it’s important to download the latest stable version of the software. This will give you the most features while minimizing the risk of running into bugs and crashes.
However, the latest version of Creality Print isn’t always the one listed on Creality’s download page. Instead, you should download Creality Print from the Creality Cloud website, where you can find both new and previous versions of the software.
A significant improvement over Creality Slicer is that Creality Print is available on Mac and, as of version 4, on Linux, too. Just note that Creality Print is 64-bit and therefore isn’t available for 32-bit variant systems.
User Interface

Easily one of the most attractive features of Creality Print is its sleek graphical user interface (GUI). While Creality Print’s GUI is reminiscent of UltiMaker Cura, it’s distinctively modern, with a dark color scheme, rounded buttons, and an overall simplistic layout.
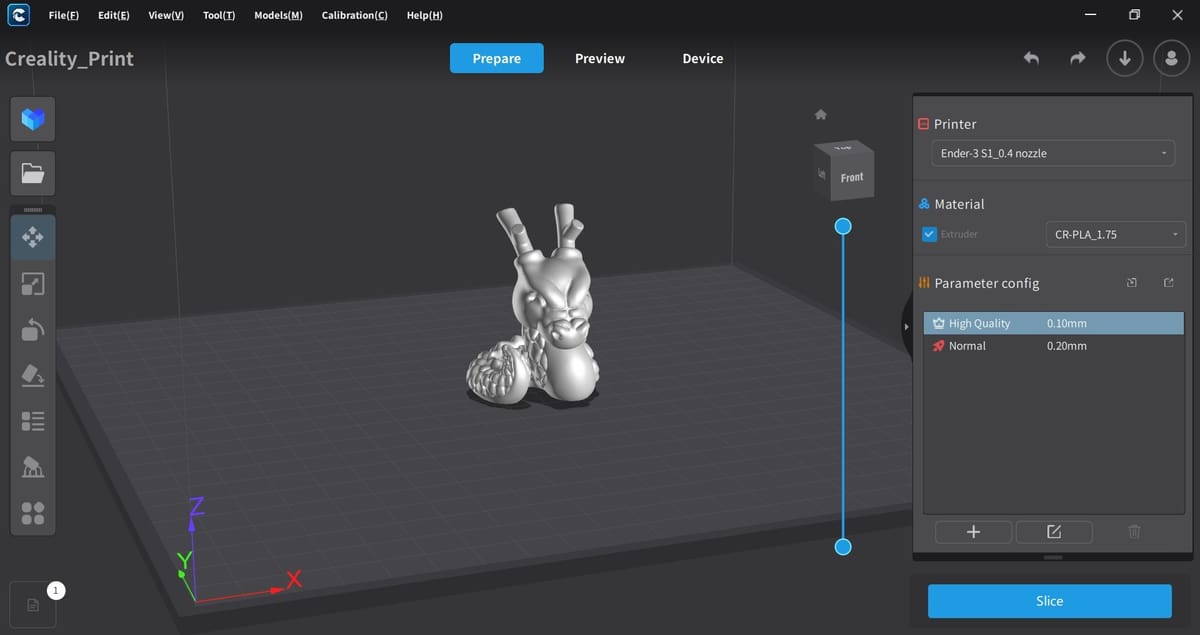
The main functions in Creality Print can be found along the top toolbar (1), including the usual “File”, “Edit”, “View”, “Tool”, and “Help” options. You’ll also notice a 3D model icon (2) in the top left-hand side of the Creality Print GUI, which is a tool for importing 3D models from the Creality Cloud online repository.
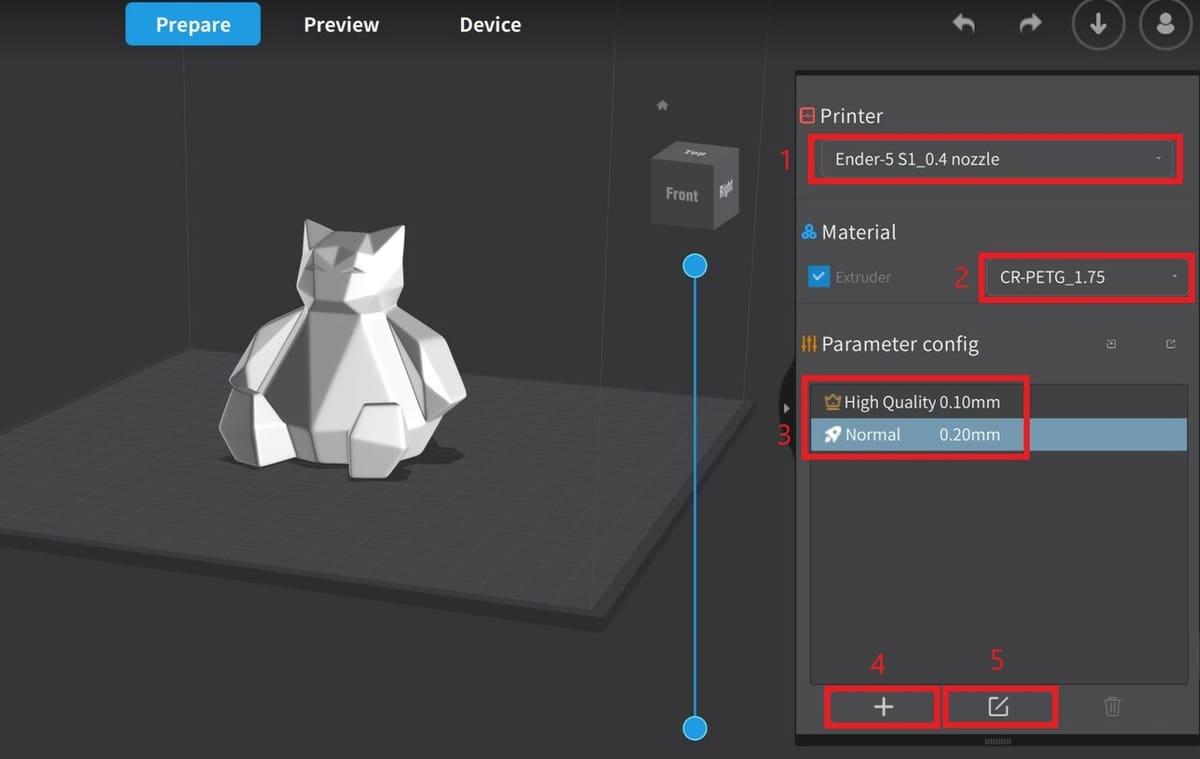
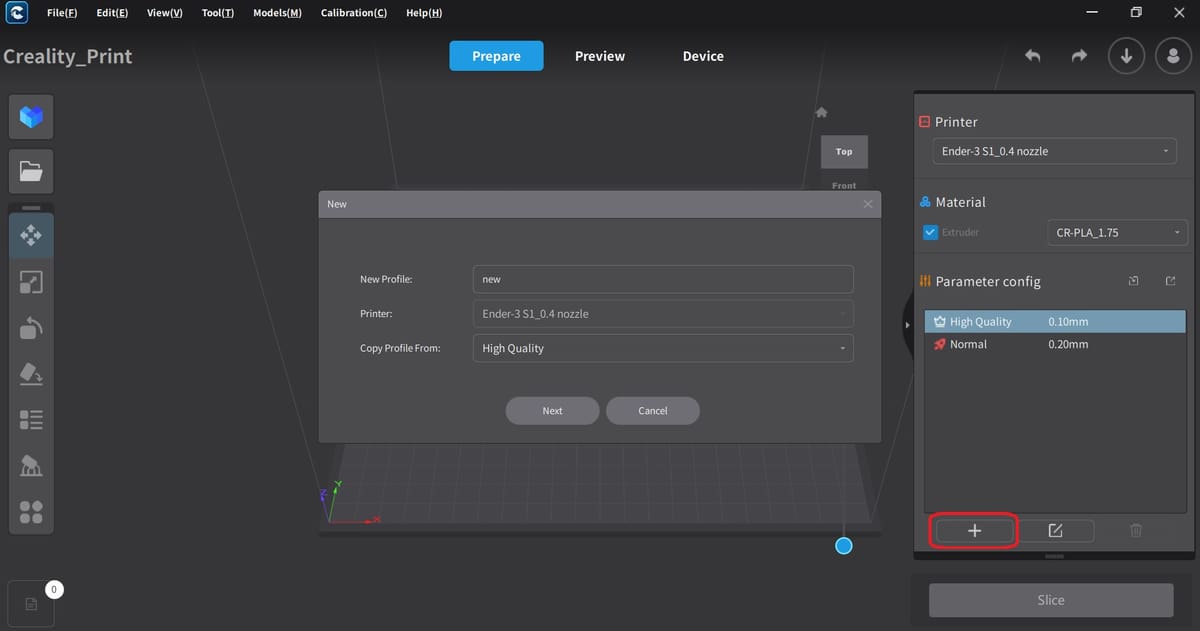
On the right side of the GUI, you’ll see where you can select your 3D printer (1), filament material (2), and slicer profile. By default, Creality Print offers you two slicer profiles to choose from (3), including “High Quality” and “Normal”; each has a different layer height and other adjustments. You can make as many custom slicer profiles as you’d like using the “+” feature (4) or Edit tool (5).
On this note, after first opening the slicer, you’re asked to add a printer configuration so that Creality Print can work properly with your setup. Unfortunately, Creality Print only natively supports (most) Creality FDM 3D printers. You’ll need a modern Creality printer (e.g. a Ender 3 Neo) to quickly configure the slicer.
If you have a non-Creality printer, you’ll have to manually add in your printer specifications, like dimensions and start and end G-code. While this is possible, the added difficulty of setting up third-party printers makes other slicers, like Cura, more attractive options.
Lastly, earlier versions of Creality Print included a “Wizard” feature, which could be found right next to the profile icon, near the top right side of the GUI. Clicking the brochure Wizard icon started you on a tutorial of Creality Print’s interface, which could be especially helpful to anyone brand new to 3D printing. Unfortunately, this feature is apparently no longer available.
Overall, Creality Print’s user interface is very well-built and more than suitable for both new and experienced users. It’s got most of the basic features from Cura and other slicers, with a few extra features like a built-in model repository and a support customization tool.
Features & Functions
As we’ve mentioned, Creality Print has a good range of features that make it a worthy competitor.
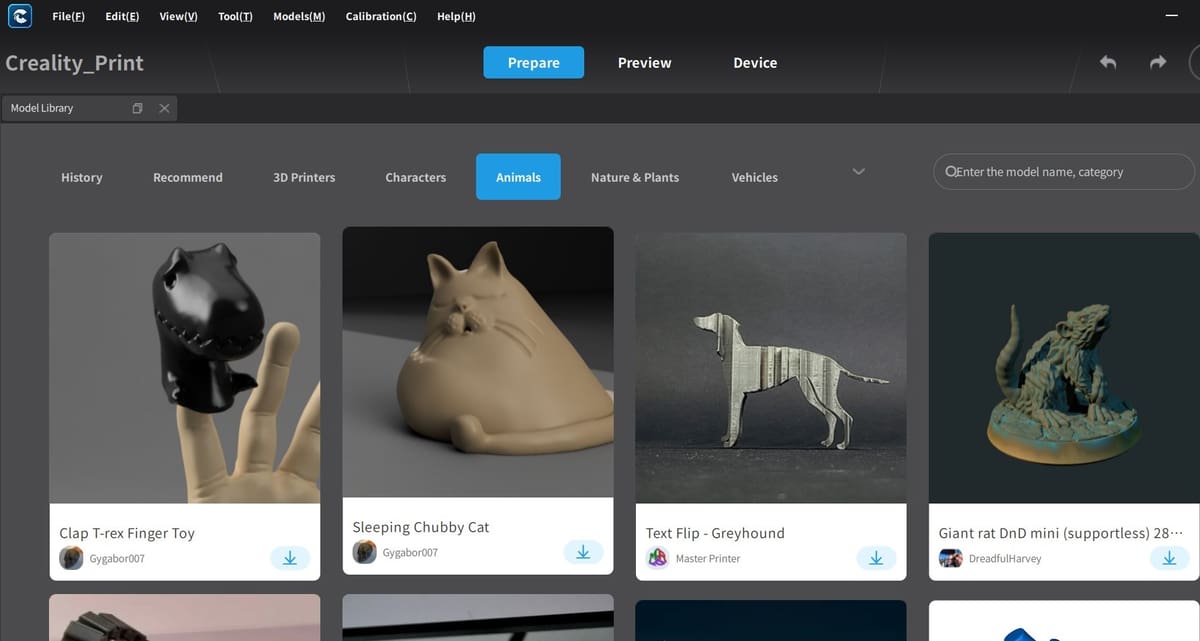
For example, the Model Library has a vast array of pre-designed models ready to be sliced. There are 20 different categories to choose from and each of these has hundreds of individual models. It’s then just a case of which one to choose first, and you can also add multiple models to the build plate at any one time. This makes printing models with multiple parts much easier, as you don’t need to slice everything individually.
You can also import designs from external sources, and Creality Print supports a large number of different file types. In addition to the usual STL, OBJ, and G-code, you can also import JPEG, BMP, and PNG files. There are other formats that can be imported as well and the full list can be found in the user manual that you can access through “Help > Use Course”.
Once the model has been sliced, the file is exported as G-code, although before slicing, you can also save files as STLs or projects in CX3D format. Creality Print allows you to either save your files on your desktop or upload them directly to the Creality Cloud, which we’ll look into further below.
Slicer Settings

Slicer settings are one of the most important elements of any 3D slicer software as they dictate your level of control over the 3D printing process.
As mentioned, you can find the available slicer settings in Creality Print by first importing a 3D model and selecting your desired quality profile (e.g. High Quality, Normal) in the right-hand “Parameter config” box. Then, click the Edit icon underneath your quality profile and scroll or search through the many available settings in the pop-up box.
Creality Print offers all of the slicer settings you might consider necessary, such as layer height, nozzle temperature, print speed, infill density, and many more.
In addition to these stock slicer settings, you can toggle the “Advanced” switch near the top of the pop-up settings menu. Doing so will provide you with additional parameters to adjust, such as settings for coasting, bridging, and enhanced cooling control. The “Experimental” section also has a handful of special settings you can use, like adaptive layers, wire printing, and fuzzy skin.
And, like many other slicers, Creality Print makes it easy to assign your adjusted settings to custom slicer profiles. This allows you to use different printing configurations depending on what you’re 3D printing (e.g. detail vs strength prints).
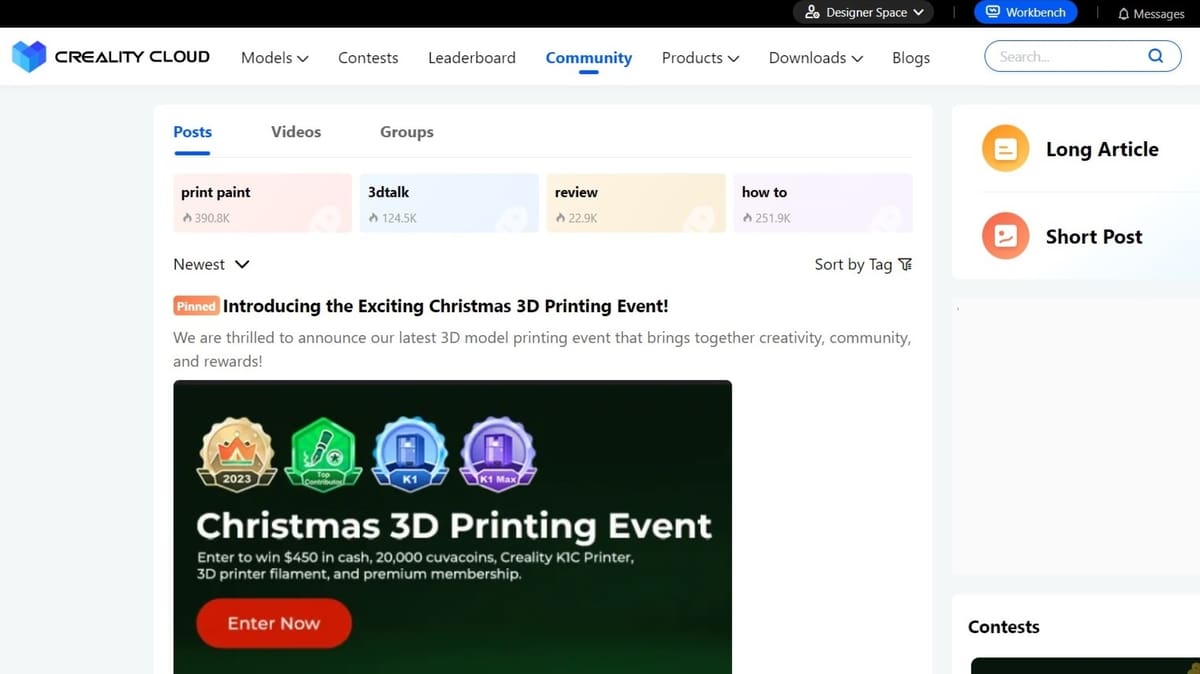
Creality Cloud
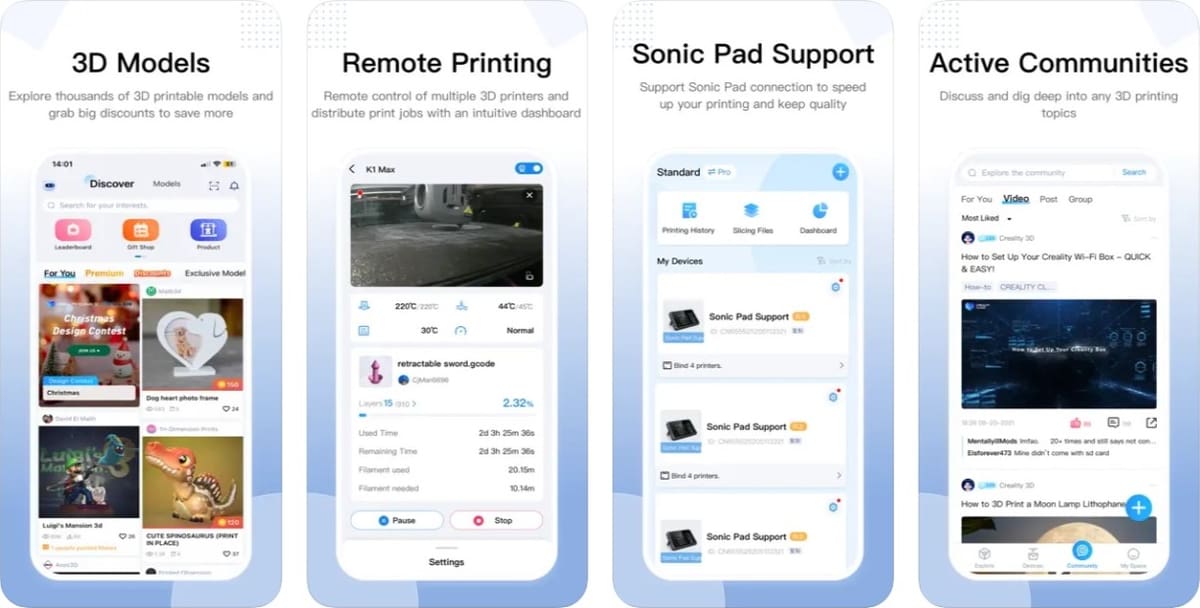
This is Creality’s app that allows users to control and monitor their prints as they happen. Once uploaded to the Cloud, the user is able to send the file directly to the printer via Wi-Fi from the app on their phone, tablet, or laptop. This is one of the features that makes Creality Print stand out from its alternatives.
The models that you’ll see in the Model Library in Creality Print are mirrored in the app, as well as many others. Users are able to add their own models and designs as well, which are then available to them and others to print. Some of the models in the app are purchasable, using Creality Cloud’s unique currency system of Cuvacoins. Users can “earn” these on a daily basis and can then trade them for the payable designs.
As we’ll see further on, the app offers community support with tutorials, advice, and designated Community Helpers who are users themselves. This means they have a working knowledge and experience of any issues that may arise.
You can find the app in the App Store and Google Play.

User Experience
Creality Print offers a simple and easy user experience through its friendly graphical user interface and organized layout. Slicing a model is very straightforward, and all you have to do is import an STL file, adjust the slicing parameters, and download your G-code file!
After adjusting your settings, you can easily save your changes to a “profile”. For reference, a profile is a list of settings defined specifically for your 3D printer, filament material, and the desired printing quality. Creality Print lets you store as many “profiles” as you want so that you can slice other models with identical printing specifications (e.g. printer, material, quality) faster in the future.
A profile is a list of settings defined specifically for a model of 3D printer, a material, and the desired printing quality. For instance, you may want to print mostly using PLA filament with a Creality Ender 3 Pro printer. You would therefore set the appropriate layer height, bed and nozzle temperatures, print speed, type of bed adhesion, and more.
To save you from having to do this every time you print, you would set up a profile based on these specific settings, which can then be saved.
Say you then wanted to change your filament to ABS or use a different printer. You could save those settings as a different profile for use whenever you need it. When you then revert to PLA, it’s just a case of selecting the appropriate profile, and you’re set.
You can add materials by going to “Tool > Manage Materials” and including the relevant information.
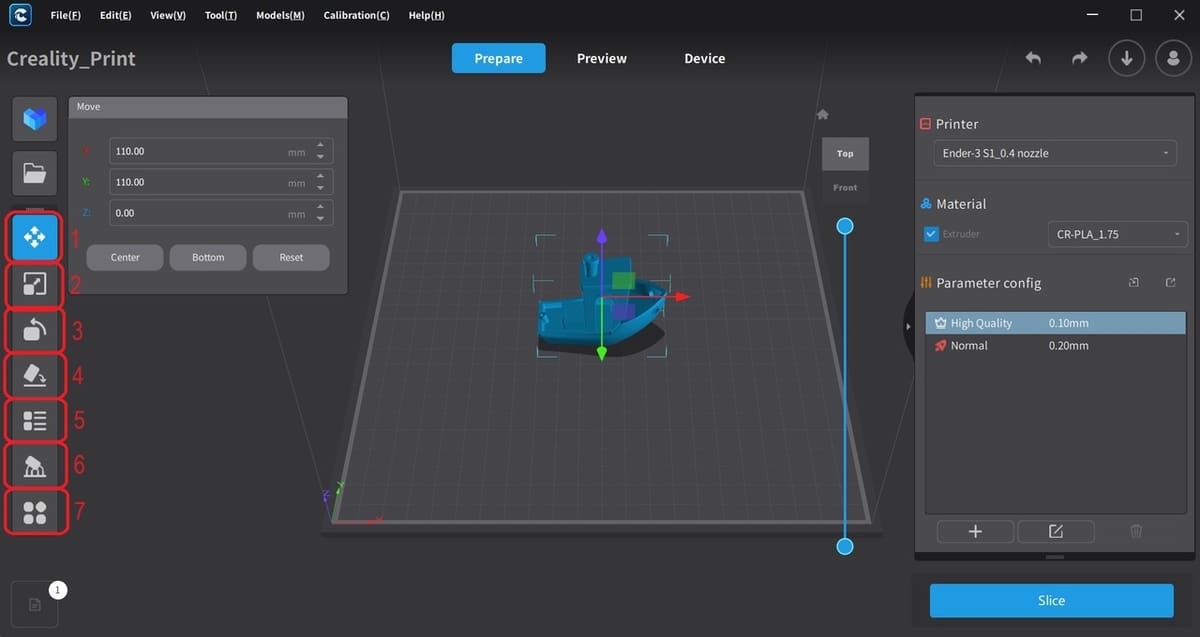
On top of the many slicer settings mentioned, Creality Print also gives you a handful of tools to manipulate the size, shape, and position of your model before slicing it. These can be found on the left-hand side of the Creality Print interface, and each has its own keyboard shortcut. Available options include moving (1), scaling (2), rotating (3), automatically laying the model on the bed (4), adjusting the layout (5), supports (6), and other options (7), such as cloning.
Once you’ve properly edited your model and adjusted the print settings, you can complete the slicing process by clicking “Slice” near the bottom right of Creality Print’s interface. The actual slicing process should be pretty quick and will leave you with an option to download the sliced G-code file.
Community & Company Support
As mentioned, Creality has its own Creality Cloud app that offers users their own “social network”. The community support is outstanding, and Creality now also has a small number of official Community Helpers who have first-hand experience using its machines and software. Users can also ask questions directly to Creality, who usually respond pretty quickly.
To be able to access everything that Creality Cloud has to offer, you’ll need to first create a user account, but this is easy and free. An account is required to print models and access the community and social assets. There’s a premium subscription at an extra monthly cost, but it isn’t essential.
The company also offers its own customer service via telephone and online. However, you’re probably best served going straight to the community for help in the first instance, as this is likely to be quicker and free!
If you prefer getting your support or tutorials via YouTube, then there’s not a lot out there that relates specifically to Creality Print just yet. However, there’s support for Creality Slicer, which is pretty similar, so it might be worth taking a look.
Among other user-based communities, you can find Creality’s Official User Group on Facebook and Reddit’s Creality and 3D printing subreddits.
Alternatives
So, we’ve looked at what Creality Print has to offer, but we’re also entitled to freedom of choice. There are a few different slicers available for use with Creality printers, so let’s have a look at what else is out there.
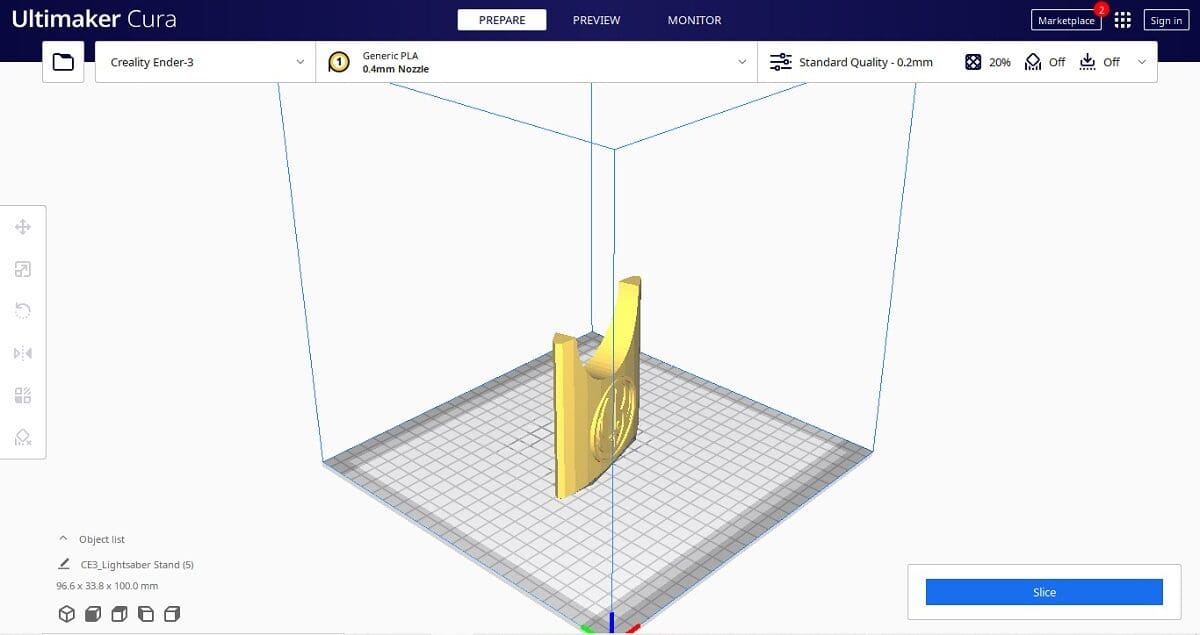
Cura
UltiMaker Cura is probably the most widely used slicer and the leading model for most other 3D printing programs. Most slicers have been based on it, so it makes sense to consider this as an alternative. The UI, features, and default profiles are very similar, so if you know your way around one, you’re likely to know your way around the other.
Cura supports virtually every brand of FDM printer you can think of (and some you may not have heard of!), but notably only directly supports around 25 Creality machines. However, there’s the option to add customized printers, which means all bases are covered. While it doesn’t have a model library, one of its plug-ins links to Thingiverse. Other add-ons, which bring more variety to what can be done, can be found in the “Marketplace” section in the top right of the screen. There’s also a PrintAndGo plug-in, which allows you to export to Creality printers. Files supported to import or export include – but aren’t limited to – STL, G-code, 3MF, and OBJ.
Creality Slicer
Creality Slicer is similar to Creality Print, except that it’s an earlier incarnation and less developed, features-wise, than its successor. While it doesn’t have a model library, there are plug-ins to allow you to browse and import designs from Thingiverse and other similar sites. Creality Slicer caters to almost all of its own machines as well as 15 UltiMaker models. Additional plug-ins can also be added in the same way as Cura, directly from the slicer. You can import or export STL, G-code, 3MF, and OBJ files, among others. That said, it appears to no longer be in active development, although it can still be found at some of the individual printer download sites, such as the Ender 3 V2’s.
PrusaSlicer
PrusaSlicer was developed primarily for use with Prusa Research printers but can also be used with Creality machines and many others. It was originally a fork of Slic3r, so you may already be familiar with the general layout under that name. There are several added features that you won’t find in other slicers, including support for OctoPrint, preset filament profiles, and a firmware flasher. PrusaSlicer’s primary and preferred file format is 3MF, but it also supports STL and OBJ files.
License: The text of "Creality Print: All You Need to Know About the FDM Slicer" by All3DP is licensed under a Creative Commons Attribution 4.0 International License.