How to Print a Colorful Lithophane with Bambu Lab Multicolor Printers

Wondering how to take your lithophanes to the next level? Read on to learn how to print vibrant Bambu Lab lithophanes!
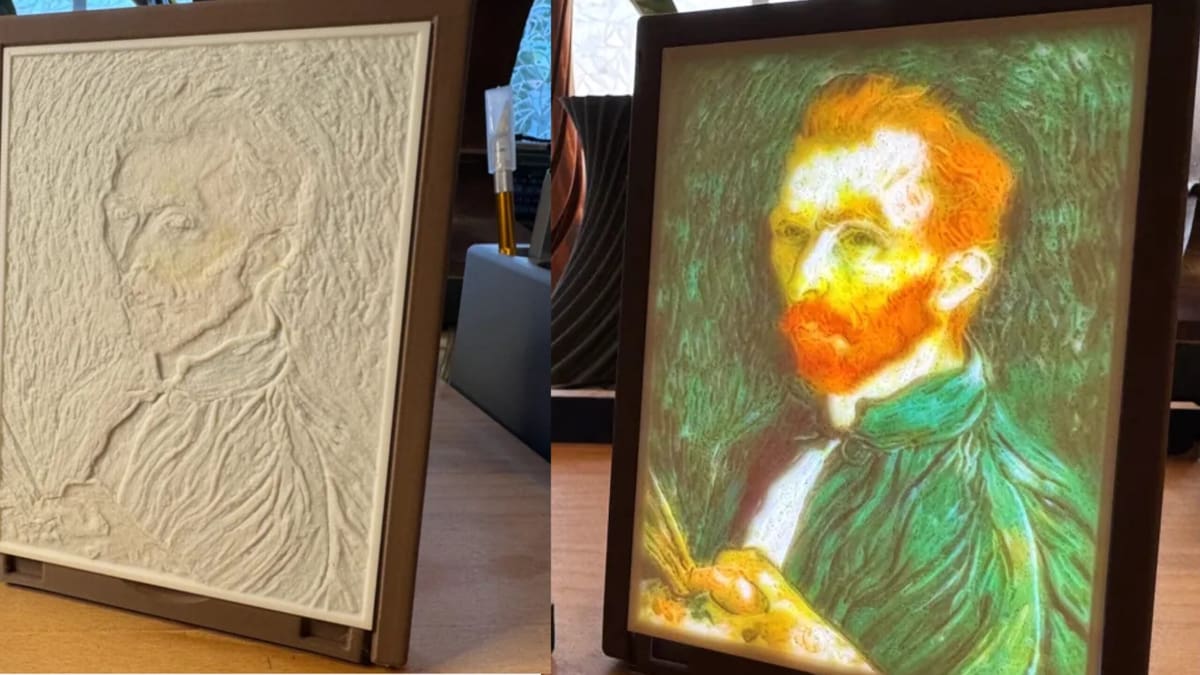
Have you seen the eye-catching, 3D printed panels or tablets that magically reveal an image when lit from behind? They’re called lithophanes, and they’re plaques of translucent material with variable thicknesses that, when lit from behind, create an image by altering the amount of light that passes through. It’s easy to create one with a fused deposition modeling (FDM) printer and white filament, but have you ever wondered about creating a colorful lithophane? If the answer is yes, we’ll tell you how to do it with a Bambu Lab printer (although one Method B below can be adapted to any multi-filament printer).
Let’s start by comparing 3D printing to its older brother, ink printing. Using just four colors of ink – cyan, magenta, yellow, and black – you can print colorful 2D images. This is possible because the printer mixes these hues as needed based on a digital version of the image to be printed.
A colorful lithophane works on the same principle: instead of ink, you stack separate cyan, magenta, yellow, and white filament layers on top of each other, and each layer’s thickness controls how much of that color’s light passes through when it’s backlit.
Generate your Lithophane Files
Making your own lithophane with a Bambu Lab printer has never been easier thanks to Bambu Lab’s own Make My Lithophane tool, which matches colors to filament slots and creates a ready-to-slice project. There’s also an option to use a third-party generator, which could enable more control over each individual color layer. We will take you through both methods, both of which feed into the same printing process which we will cover later.
Use Make My Lithophane for the easiest workflow; use Lithophane Maker if you want more control over colors and filament choices
What You’ll Need
- A Bambu Lab printer with an AMS (original AMS or the newer AMS 2 Pro) — this is what makes the automatic color-swapping possible.
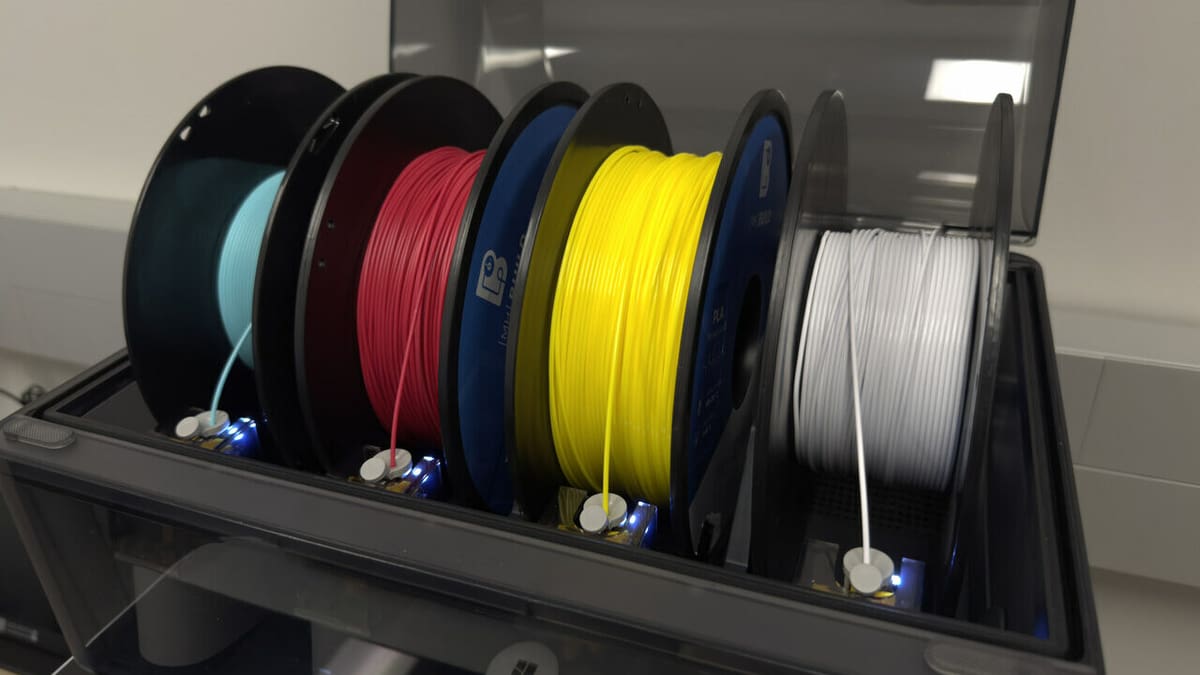
- CMYK-style filament — four spools covering cyan, magenta, yellow, and white (or black). Many brands, including Bambu Lab itself with its PLA CMYK Lithophane Bundle, now sell filament bundled specifically for this.
- A backlight source — see the hardware section below for your two current options.
- Bambu Studio, to slice and print whichever file you end up with.
Which Method to Use?
- Make My Lithophane is faster and simpler if you have a Bambu Lab account and are using Bambu-native hardware (an AMS and one of Bambu Lab’s own backlight boards) — it hands you a single pre-matched project file.
- The manual method is the better choice if you want to fine-tune each color layer individually. Another practical advantage of this method is that its not tied to Bambu Lab, and the method is applicable for any slicer. For this article, we used Lithophane Maker.
Method A: Generate with Bambu Lab's 'Make My Lithophane'
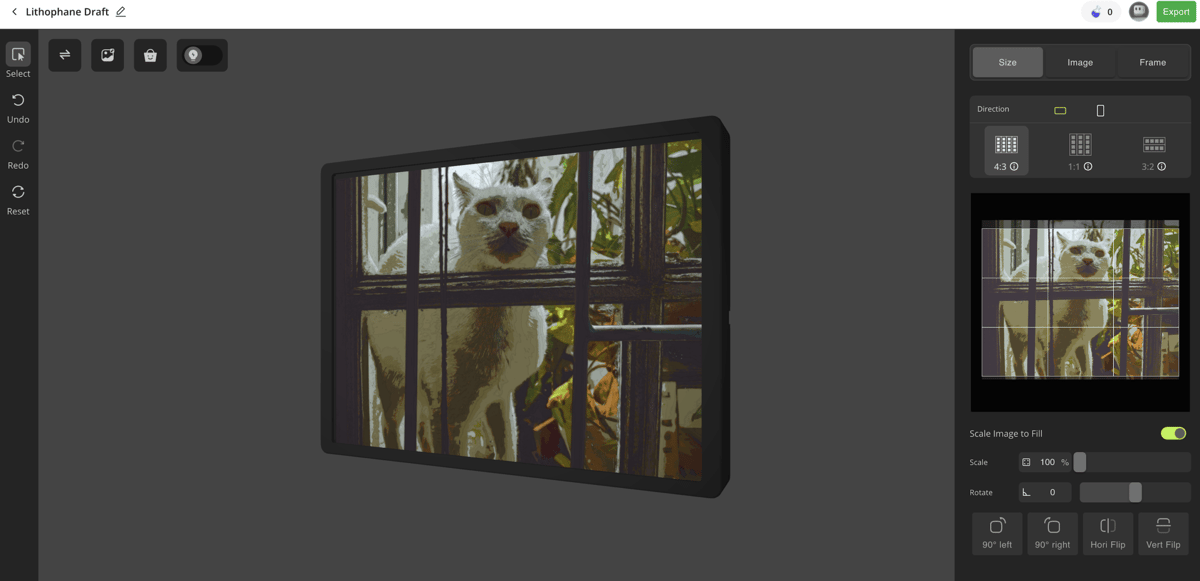
Bambu Lab’s official Make My Lithophane tool lives inside MakerLab on MakerWorld. Instead of downloading a ZIP of separate STL files from a third-party site, it builds the whole model in the browser and hands you one ready-to-slice project.
Step by Step
- Click Create from Blank
- On the Choose Lithophane Type screen, pick the option that matches your hardware. For a full-color print, you want one of the two CMYK options: Colorful Litho with Fixed Frame which pairs with Bambu Lab’s single-board backlight or Colorful Litho with 3-Size Frame which airs with the newer, modular Lithophane LED Backlight Board Kit (both covered in the hardware section below).
- Click Pick Image and upload your photo. A clear subject with good contrast still gives the best results.
- In the right-hand panel, use the Size, Image, and Frame tabs to fine-tune the result: pick portrait or landscape and an aspect ratio (4:3, 1:1, or 3:2) under Size; scale, rotate, or flip the photo under Image; and confirm your board/frame choice under Frame.
- Click Export. This downloads a single .3mf project file with the color layers already separated and matched to filament slots.
Method B: Lithophane Maker
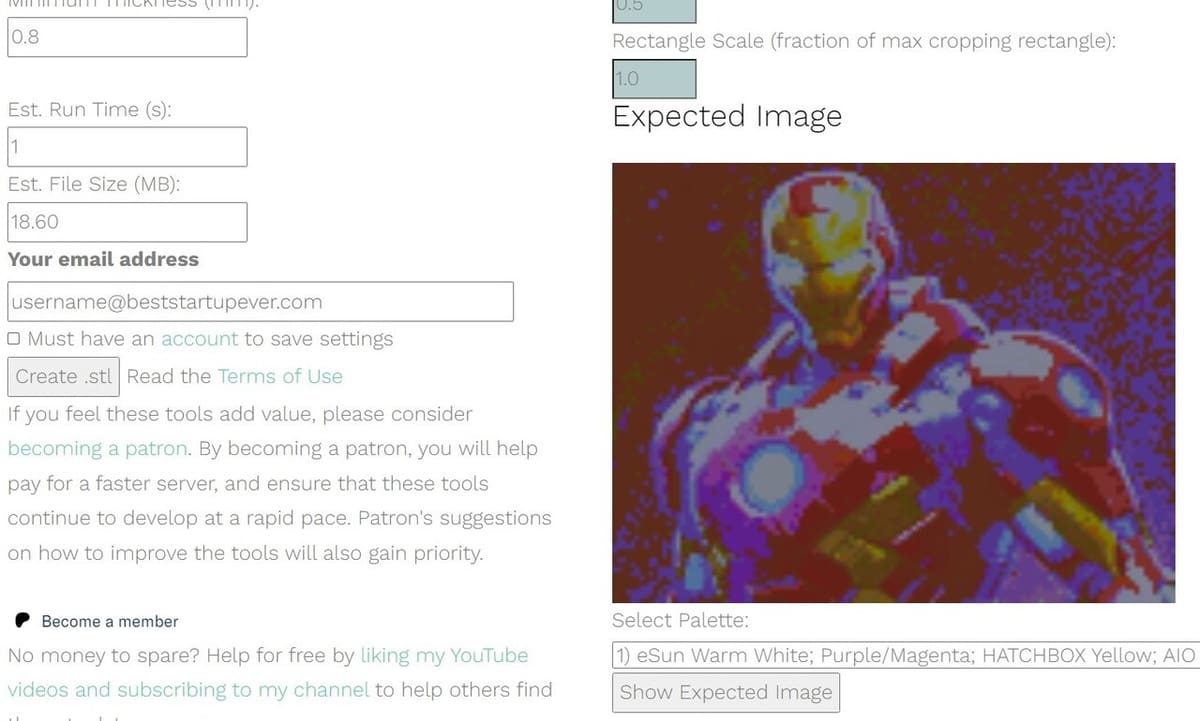
The manual method uses a tool from a popular third-party website: Lithophane Maker. This site offers a range of lithophane styles, including heart-shaped and curved lithophanes, light boxes, and lithophane globes. For this method we’ll use its Color Lithophane Maker tool specifically. It’s one of the only tools we’ve found that builds color lithophanes as one STL file per color, rather than the alternative approach of printing a single white lithophane and placing color-printed paper behind it.
Step by Step
- Select a colorful image of your choice.
- Go to the Color Lithophane Maker tool and upload your image.
- Modify the main parameters: Width: 144 (to fit Bambu Lab’s Backlight Board), Height: 108 (to fit Bambu Lab’s Backlight Board) and Maximum Thickness: 1.6
- From the “Select Palette” drop-down menu, select the first option — “1) eSun Warm White; Purple/Magenta; HATCHBOX Yellow; AIO Cyan.” Don’t worry if these aren’t the filament brands you’re using; see “Choosing Colors” below.
- Fill out the email address field and click Show Expected Image to preview the lithophane. (You won’t see the preview without signing in.)
- Click Create .stl to generate the files. You’ll get a ZIP file containing five STL files — one for each of the four colors, plus an additional white (top) one — along with a .txt file listing the settings used.
The width and height above are sized for Bambu Lab’s original Backlight Board; if you’re using the newer modular kit instead (see the hardware section below), adjust these to match.
Prepare Your Colors and Backlight
Choose Your Filaments
Choosing the right colors is crucial for good results, but regardless of brand, the underlying result should be similar. Several filament brands now bundle CMYK-style sets specifically for this — Bambu Lab’s own PLA CMYK Lithophane Bundle is one.
You don’t have to use a matched bundle, though: this tutorial originally used white, magenta, and yellow from MatterHackers’ Build Series and Baby Blue from Hatchbox, simply because that’s what was on hand. Mixing brands is fine as long as you keep track of which spool maps to which STL file.
For the most predictable result, use the filament colors recommended by the tool that generated your lithophane.
Choosing Your Backlight Hardware
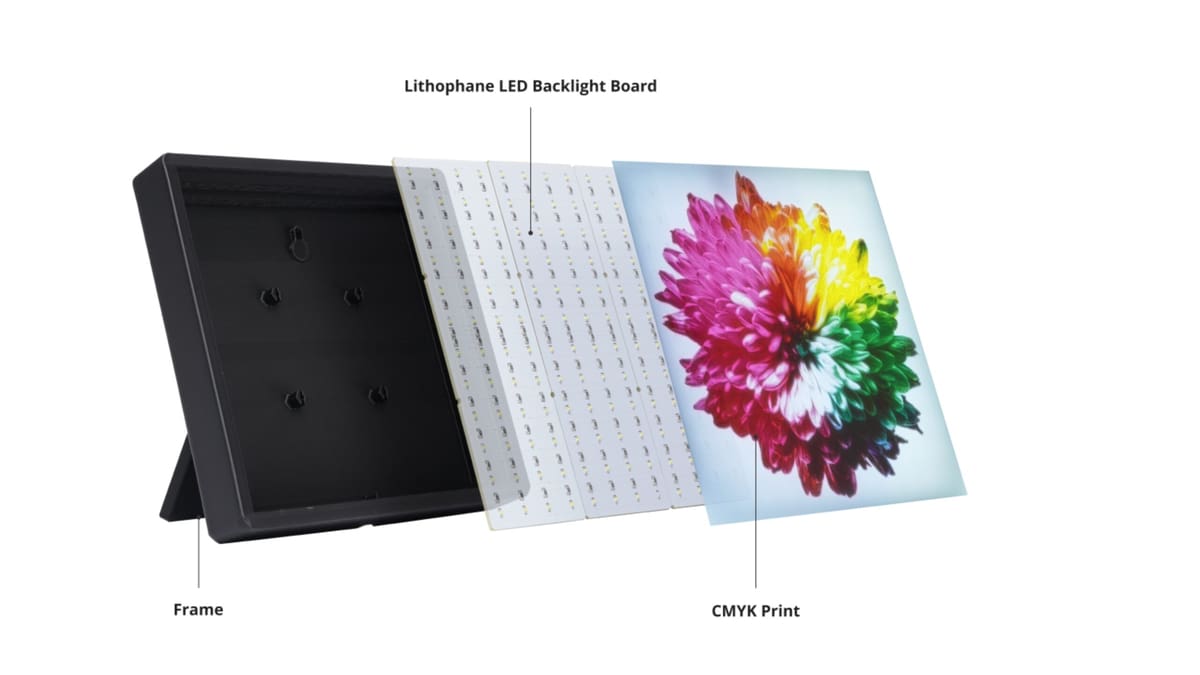
Both methods above need somewhere to mount the finished lithophane so it can be backlit. Bambu Lab currently sells two options:
- CMYK LED Backlight Board (Fixed Frame) — the original single board, sized for a 140×104 mm lithophane inside a 120×156 mm frame. This is what the Width/Height values in Method B are set for.
- Lithophane LED Backlight Board Kit (3-Size Frame) — a newer, modular kit combining 2–4 boards to support three different lithophane sizes from one kit. Worth it if you want size flexibility, or if the original board is out of stock (it happens from time to time).
You don’t strictly need one of Bambu’s own boards. A diffused LED backlight sized to your print will work. But these kits arrive pre-wired and ready to assemble, plug straight into the AMS-driven workflow above, and give us one fixed, official set of dimensions to design around rather than a dozen possible backlight sizes.
Slicing
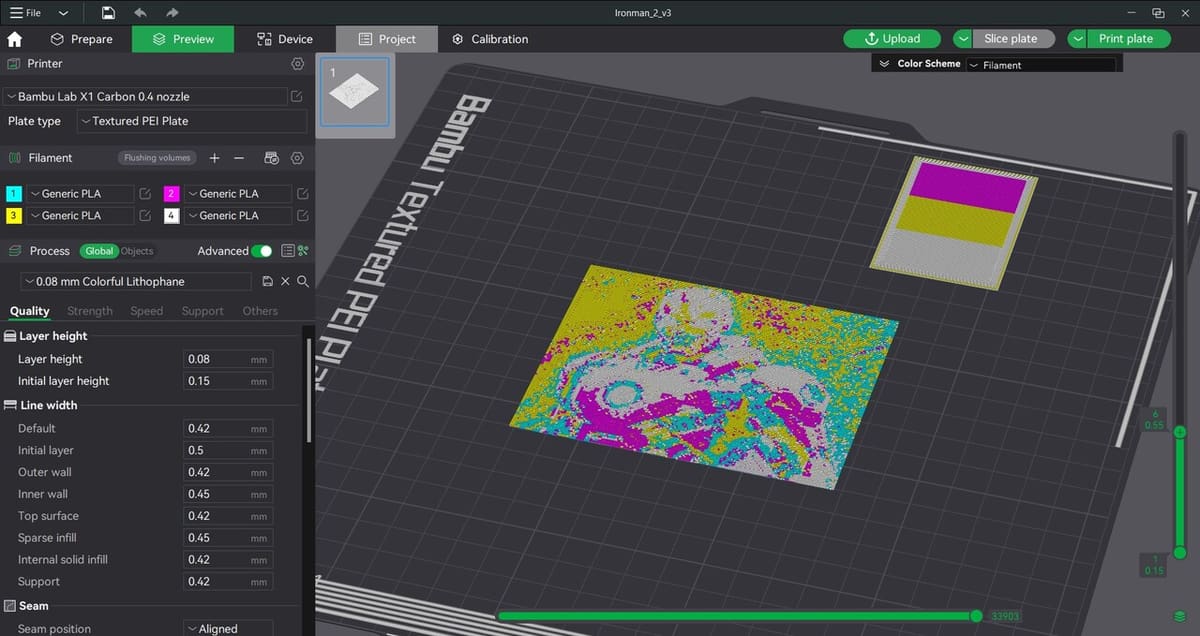
If you used Method A (Make My Lithophane), open the exported .3mf directly in Bambu Studio and the color-to-object mapping carries over automatically, so there’s no manual matching to do. Skip to the AMS/infill checks below.
Before slicing, confirm that the correct filaments are loaded and mapped to the appropriate colors.
If you used Method B (manual method), import all five STL files onto one plate as a single object with multiple parts, then:
- In the Filament section, make sure four filaments are loaded and assign each color — cyan, magenta, yellow, and white — to the matching slot in the AMS. If you’re using Bambu Lab filament and the printer is connected to your computer, click Synchronize filament list from AMS to pull this in automatically.
- In the Process section, toggle from Global to Objects, and match each STL file to its corresponding filament color, using the color in the STL’s filename as your reference.
Settings to Check for Both Methods
- Under the Quality tab, set Layer height and Initial layer height to match your source settings (Method B: check the .txt file that came with your STLs if you don’t remember them; Method A: these are set for you, but confirm if you adjusted scale during generation).
- Set infill density to 100% with a Rectilinear pattern. This is what keeps the layers solid enough for even, banding-free light transmission.
- Click Slice Plate and review the filament usage and time estimate.
Print and Assemble
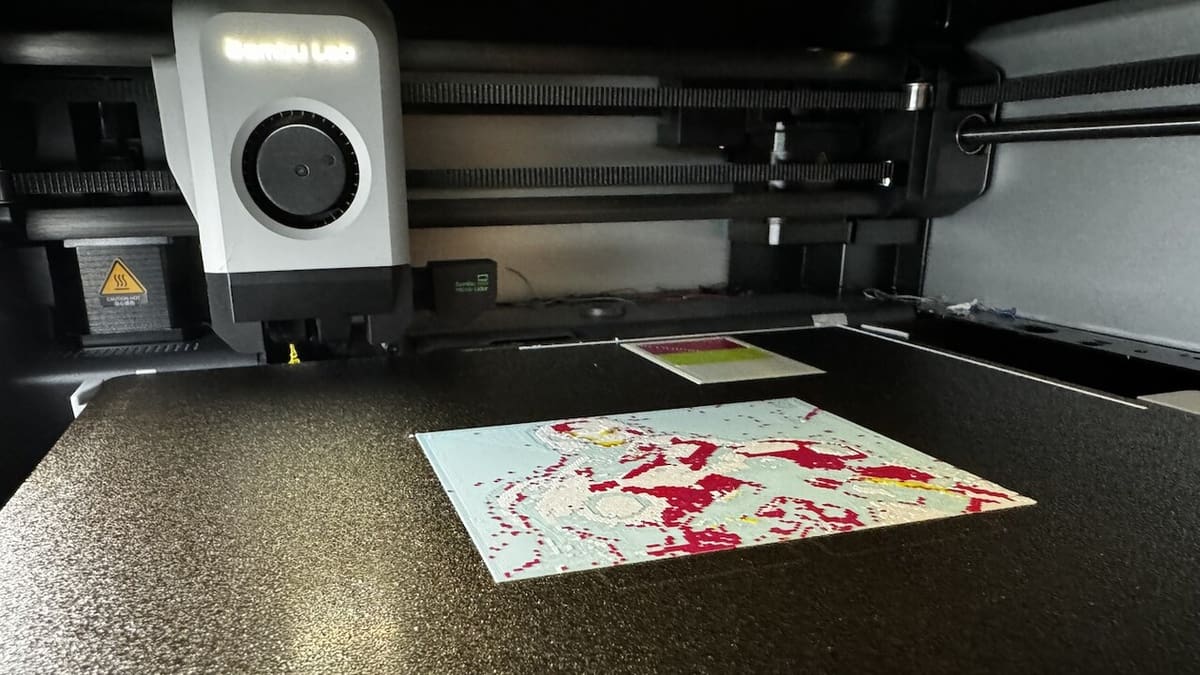
- Export the sliced file to a MicroSD card, or send it directly if your printer is connected to your computer.
- Insert the card (or start the job remotely) and let the printer run — the AMS handles color switching automatically.
- Once printed, hold it up to the light to see the magic revealed. Mount the lithophane in your frame with your backlight board behind it and power it on.
The image may look unusual or washed out before it is illuminated. Once the backlight is on, the transmitted light reveals the intended colors and contrast.
Bambu Lab’s light kits don’t come with a frame, but there are plenty of designs on Makerworld like this one which is made to fit Bambu Lab’s Lithophane LED Backlight Board Kit
And that’s it! You’ve just created your first colorful lithophane. Now, simply turn on the light and enjoy the show.
License: The text of "How to Print a Colorful Lithophane with Bambu Lab Multicolor Printers" by All3DP is licensed under a Creative Commons Attribution 4.0 International License.