The Best Anycubic Vyper Upgrades & Mods

The Anycubic Vyper is packed with features, but there's always room for improvement. Read on for the best Anycubic Vyper upgrades!
Anycubic is among the most popular manufacturers of consumer 3D printers, and over the past few years, they’ve heavily expanded their portfolio of 3D printers. The Anycubic Vyper is one of their most feature-packed fused deposition modeling (FDM) machines.
At first glance, the Vyper may look like just about any other 3D printer. However, under the hood, the printer has a lot to offer, like nozzle-based automatic bed leveling, a Titan-style extruder, and a full-color LCD display. Still, no 3D printer is perfect, and there’s always room for improvement, even on the Vyper.
In the sections below, we’ll go over some of the best upgrades for the Anycubic Vyper that improve the printing process, usability, and other aspects of the machine. Enjoy!
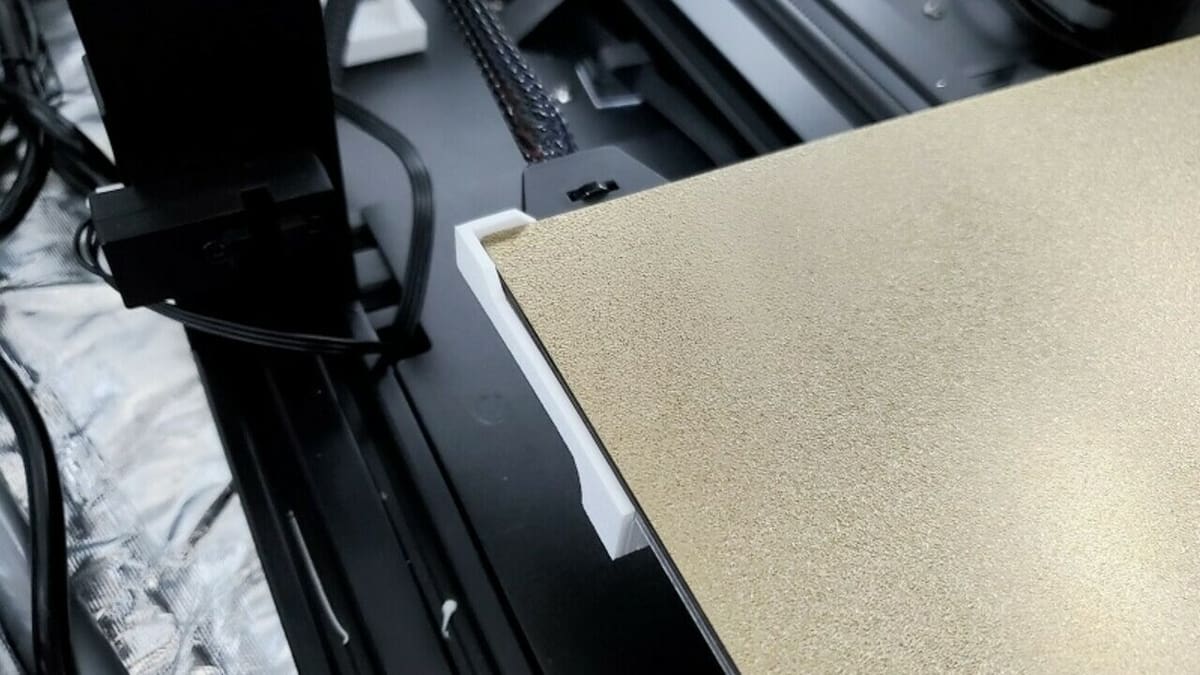
V-Slot Cover
First up is this 3D printable V-slot cover, which slides into the aluminum extrusions that make up the frame of the Anycubic Vyper. While this upgrade doesn’t impact the printing process and is strictly aesthetic, having a good-looking printer is never a bad thing.
The project page contains two models, including the regular V-slot cover and a modified version with screw holes. The latter option is for adding V-slot covers to the areas where bolt heads prevent you from using the regular covers. As for printing, the designer suggests using a 0% infill density and a 0.2-mm layer height.
- Parts used: 3D printed parts
- Cost: ~$2
- Where to find it: Thingiverse
Chain Links
While the Anycubic Vyper performs well in many ways, cable management isn’t one of them. The wires for the hot end and heated bed have a lot of slack, making them susceptible to catching on the frame of the printer and breaking. An easy fix for this issue is chain links, which ensure the containment and safety of your machine’s cables.
This project includes a few different 3D printable models, including large and small chain link pieces as well as mounting parts fitted for the Anycubic Vyper. This allows you to securely fasten the different series of chain links to the frame of the printer so they don’t fall slack. The designer suggests printing with a relatively sturdy 25% infill, and it’s noted that one of the parts requires supports.
- Parts used: 3D printed parts
- Cost: ~$3
- Where to find it: Thingiverse
OctoPrint (with Camera)
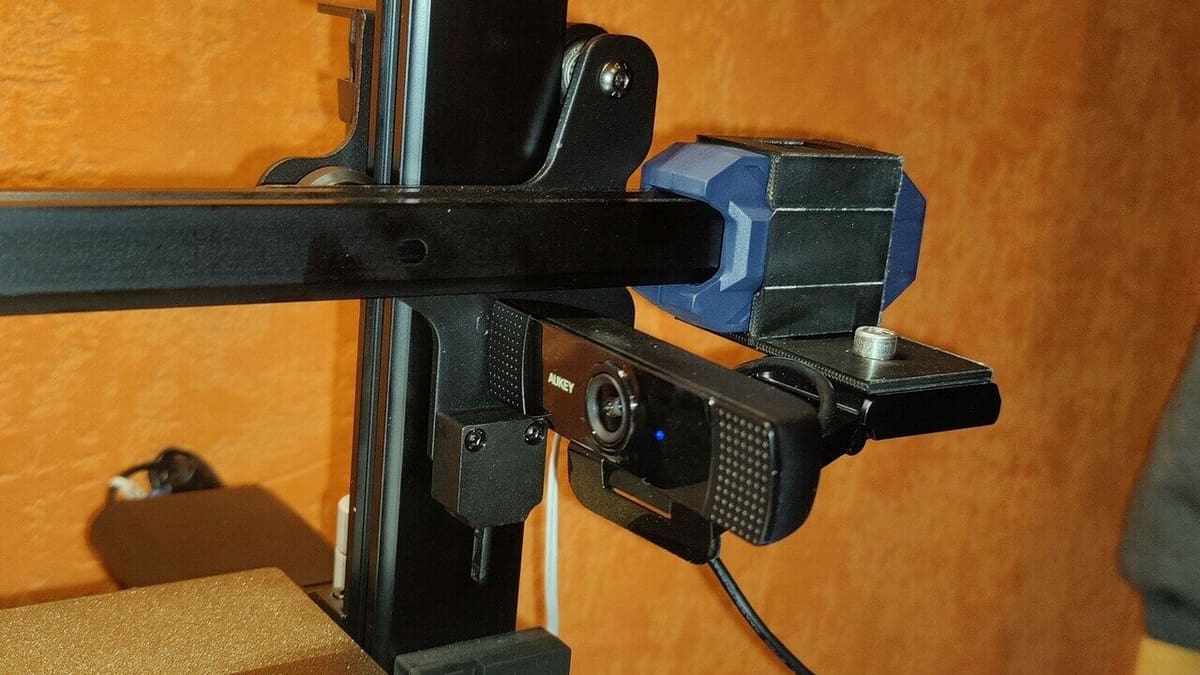
One of the most popular upgrades for a 3D printer is OctoPrint, a server that allows you to control your 3D printer remotely and is compatible with the motherboard on the Vyper. OctoPrint is meant to run on a single-board computer, like a Raspberry Pi, and you can make your own setup for under $50.
Once connected, you can start prints, set temperatures, send G-code commands, and much more through your server. OctoPrint plug-ins enable even more control over your machine.
You can also connect a camera, like a webcam, to your OctoPrint server and remotely monitor your machine through the online interface. Of course, you’ll need a way to position your camera to your Anycubic Vyper so 3D print a mount to place your camera on the X-axis gantry of the machine.
- Parts used: Raspberry Pi board (or another SBC), compatible camera, camera mount
- Cost: ~$50
- Where to find it: OctoPrint
Spool Holder
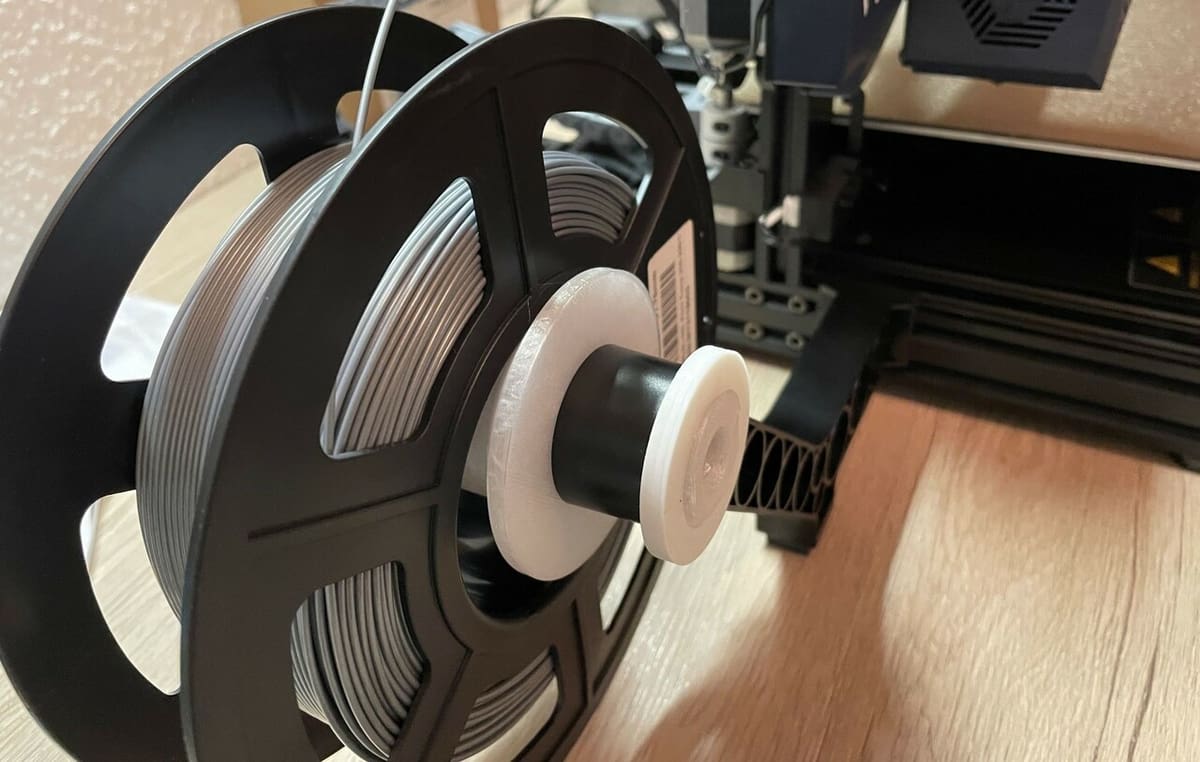
The Anycubic Vyper has a side-mounted filament spool holder, which increases the X/Y footprint of the machine but keeps the weight of the filament off of the top gantry of the printer. Unfortunately, the stock spool holder is pretty small, so it doesn’t fit larger filament spools. It’s also known to not hold onto spools very well, so there’s a risk of them falling off.
To fix these issues, one user designed the Lock-and-Forget spool holder. This assembly is comprised of three 3D printable parts and replaces the stock cylindrical holder while still fitting onto the side-mounted extension piece on the Vyper.
On top of offering more space so you can use larger filament spools, there’s also a cone-like washer piece that secures the filament spool on the assembly, so it never falls off. The creator of this project lists that they printed the model with supports and a raft activated.
- Parts used: 3D printed parts
- Cost: ~$2
- Where to find it: Thingiverse
Tool Drawer Insert
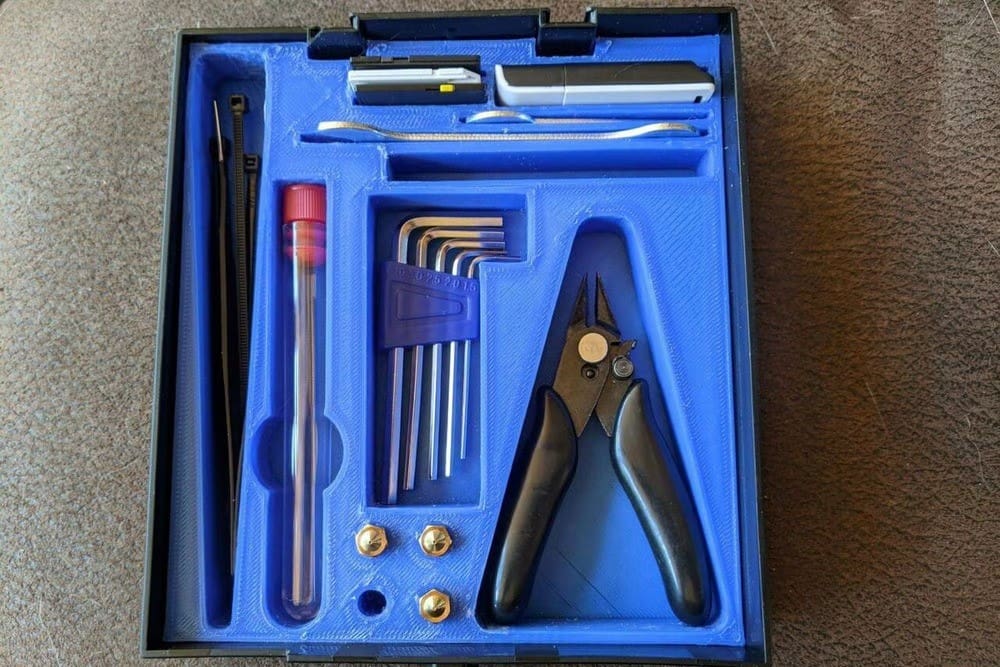
Like most consumer 3D printers nowadays, the Anycubic Vyper comes with an assortment of different tools. Although you’re probably not using every one of the provided hex wrenches, you’ll likely need a few at one point or another. To help you organize and never lose them, you can print this tool drawer insert.
This model fits inside the drawer of the Vyper and has fitted openings for a few of the different tools that come with the printer. There are two versions of the insert available, including one with a bottom layer and one without.
Printing should be pretty easy as there are no overhangs, so no supports should be necessary. One maker lists that they used a 10% infill density with a 0.2-mm layer height to successfully print the part.
- Parts used: 3D printed part
- Cost: ~$4
- Where to find it: Thingiverse
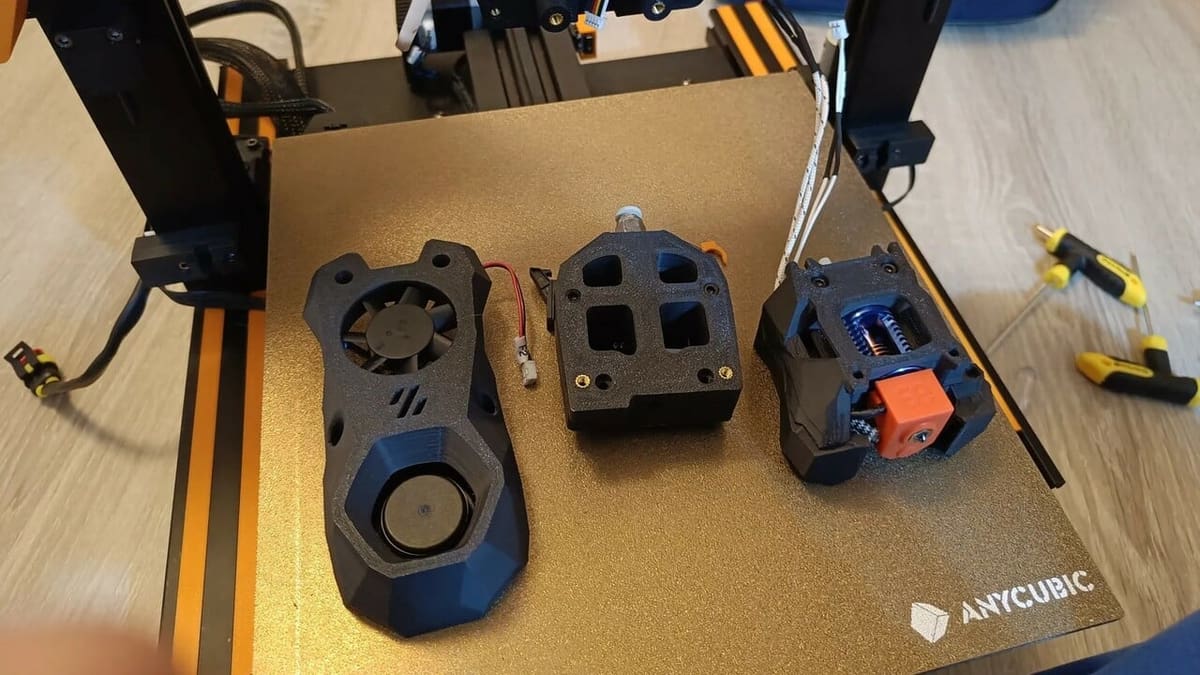
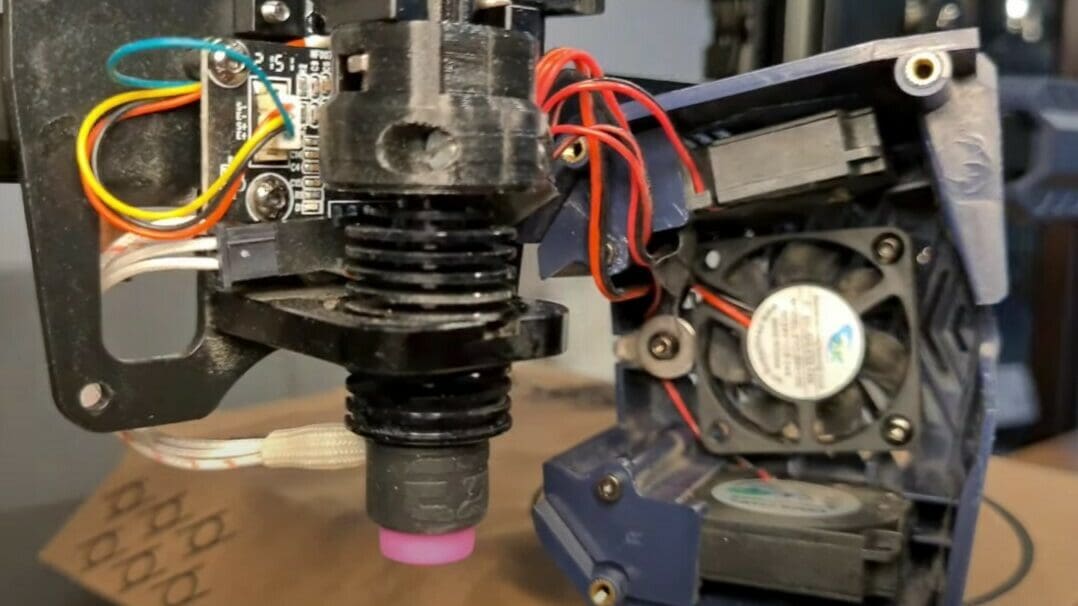
Stealthburner Printhead
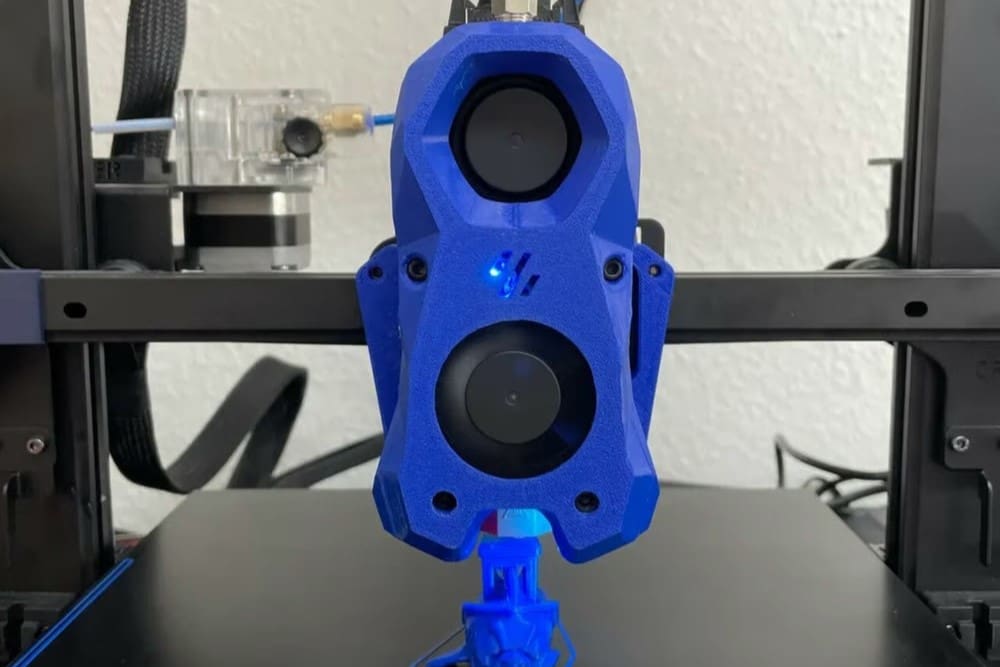
The printhead is the assembly on a printer containing the hot end, nozzle, cooling fans, PTFE fittings, and other parts surrounding the hot end. The stock printhead on the Vyper is fine, but if you’re looking for an upgrade, then consider the Stealthburner.
The Stealthburner is a community-designed and open-source printhead mod, originally developed by Voron. The printhead has a Bowden extrusion setup and has many high-quality features like multiple fans for proper cooling, E3D V6 hot end components for improved extrusion, and more.
This version of the Stealthburner fits the Anycubic Vyper, and it’s a very intensive upgrade. It’s made up of five 3D printed parts, components of an E3D V6 hot end, a BLTouch sensor, a few fans, and many screws. You can find the full bill of materials for this upgrade on the project page. As for assembly, there isn’t a direct guide for the Vyper, but the designer’s GitHub page has some helpful tips.
- Parts used: 3D printed parts, BLTouch sensor, E3D V6 hot end parts, fans, screws
- Cost: ~$80
- Where to find it: Printables
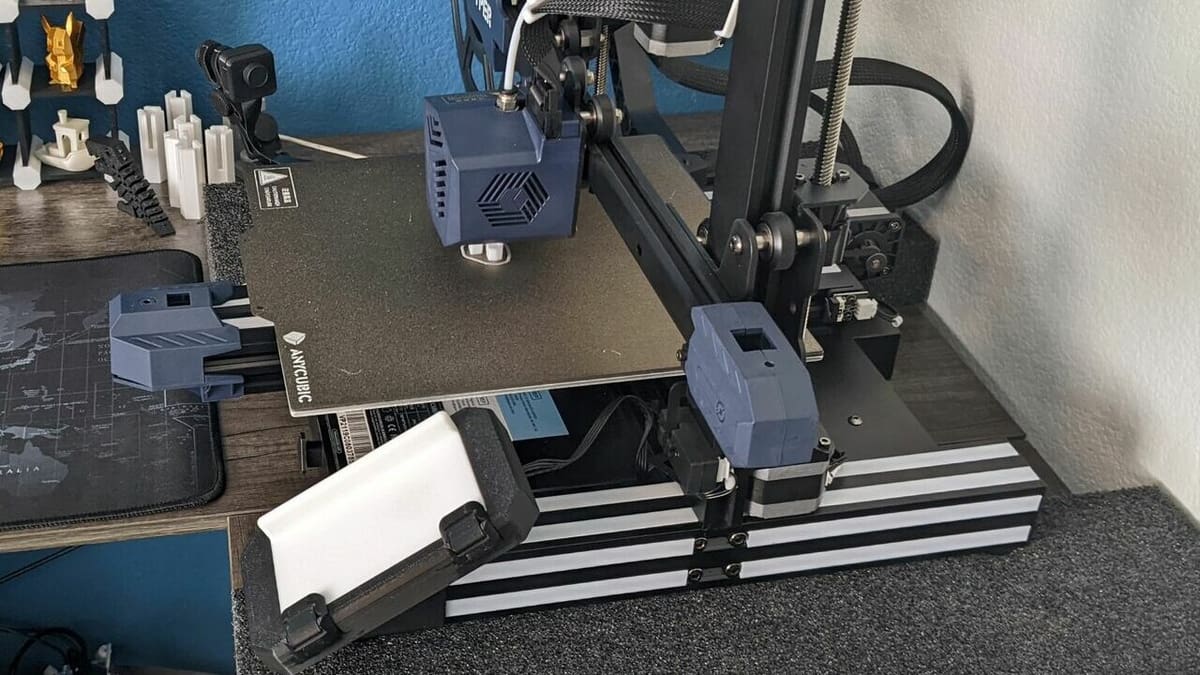
E3D V6 Hot End
While the Anycubic Vyper can reach nozzle temperatures as high as 260 °C, you’ll need even more heat if you want to print materials like PC or certain nylon composites. Upgrading the hot end on the Vyper to the E3D Revo Six (or V6), which can go up to 295 °C, will give you just that. Of course, this type of upgrade is a bit more complicated than some of the other options on this list, but it’s still very much possible.
For this upgrade, you’ll need an E3D Revo Six hot end as well as a compatible mount, such as this 3D printable option. It’s worth noting that the Revo Six is E3D’s latest edition of their V6 hot end, and it boasts easy nozzle swapping as well as excellent heat dissipation, which should lead to higher-quality prints.
Once you’ve got everything you need, just remove the original hot end, wire in the new one, mount it to the printhead, and make an adjustment to the printer’s firmware. You can check out Tom Beardy’s video tutorial to get all the specifics for this process.
- Parts used: E3D V6 hot end, 3D printed mount
- Cost: ~$50
- Where to find it:
- E3D Revo 6 hot end: Online retailers
- E3D Revo 6 mount: Printables
- E3D V6 hot end: Online retailers
- E3D V6 mount: Thingiverse
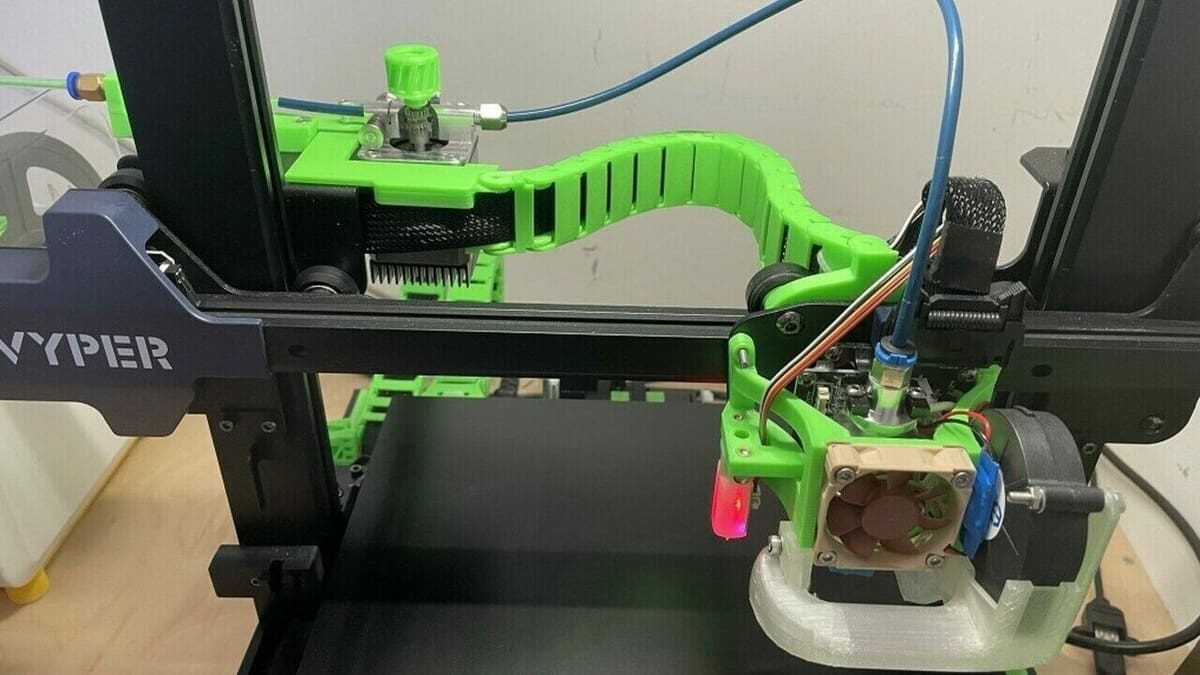
Direct Extrusion

The Anycubic Vyper has Bowden-style type extrusion, meaning the extruder and hot end assembly are separated, and the filament is pushed through a PTFE tubing. Bowden extruders make for a lightweight printhead and are usually pretty inexpensive to replace. However, they also offer less accurate extrusion compared to their counterpart, direct extruders.
Direct extruder configurations involve the extruder assembly placed directly over the hot end, with no long PTFE tube necessary. They’re also better for printing flexible filaments, as extruder issues with this type of filament are less likely to occur.
You can change your Anycubic Vyper to a direct extrusion printer by using a special mount. For this route, all you have to do is move the stepper motor and extruder assembly onto the mount and fit it on the printhead carriage.
An alternative and more complex way to convert your Vyper to direct extrusion is using a custom-designed printhead. While you may have better results with this option, it’s worth noting that more parts (e.g. fans, screws) are required for the printhead.
- Parts used: 3D printed parts, motor extension cable, extra printhead components (optional; based on the guide you use)
- Cost: $5-$50
- Where to find it:
- Relocated extruder: Thingiverse
- New printhead: Cults
Replacement Belt Tensioners
Belt tensioners are an increasingly popular feature on consumer printers, and the Anycubic Vyper features one for the X-axis and one for the Y-axis. However, to tighten the belts on these axes, you have to use one of the provided hex keys, making the actual tightening process kind of annoying. For an easier way to tighten the belts on the Vyper, you can print tensioning screws for the X- and Y-axes.
These upgraded tensioners replace the stock assemblies and allow you to control the tension of the belts with a screw that you can adjust with just two fingers. No hex key is needed!
The tensioners use the original pulley and are both made up of three 3D printable parts. But due to the strength limitations of 3D printing, it’s best not to tighten the belts too much to avoid breaking the tensioners.
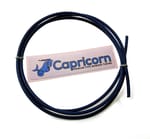
Capricorn Tubing

As previously mentioned, the Anycubic Vyper has a Bowden extrusion setup, meaning the extruder and hot end are separated. Filament flows between the two parts through a PTFE tube (known as a Bowden tube), and this part, while it looks insignificant, can have a big impact on the printer’s extrusion. The stock PTFE tube on the Vyper is known to burn up at the hot end side and eventually cause hot end clogs.
Capricorn is a 3D printing company primarily focused on making high-quality Bowden tubes, and their 1.75-mm filament tube is an obvious upgrade for the Vyper. Moreover, Capricorn’s tubing offers a tighter diameter that will allow you to use a lower retraction distance in your slicer and make your printer’s extrusion more accurate. The tube can also withstand higher temperatures without burning up, so it will last much longer than the stock option.
- Parts used: Capricorn tubing
- Cost: $10-15
Build Plate Guide
While the magnetic build plate on the Anycubic Vyper makes removing prints a breeze, there’s one issue: it’s difficult to reattach the bed so that it aligns with the bed underframe. Of course, you could use binder clips to keep the build plate square, but this reduces the usable print space. Perhaps these 3D printable build plate guide pieces are a better solution.
These parts attach to the Vyper’s bed leveling screws under the print bed and stick up a little above the bed underframe. This way, when you’re reattaching the bed, you can have a visual and physical aid to keep the bed perfectly square to the frame. And the best part is that the guide pieces shouldn’t interfere with the nozzle, according to the designer.
The model has a pretty big overhang, so support structures might be necessary. Besides that, printing should be pretty straightforward.
- Parts used: 3D printed parts
- Cost: ~$1
- Where to find it: Thingiverse
Enclosure
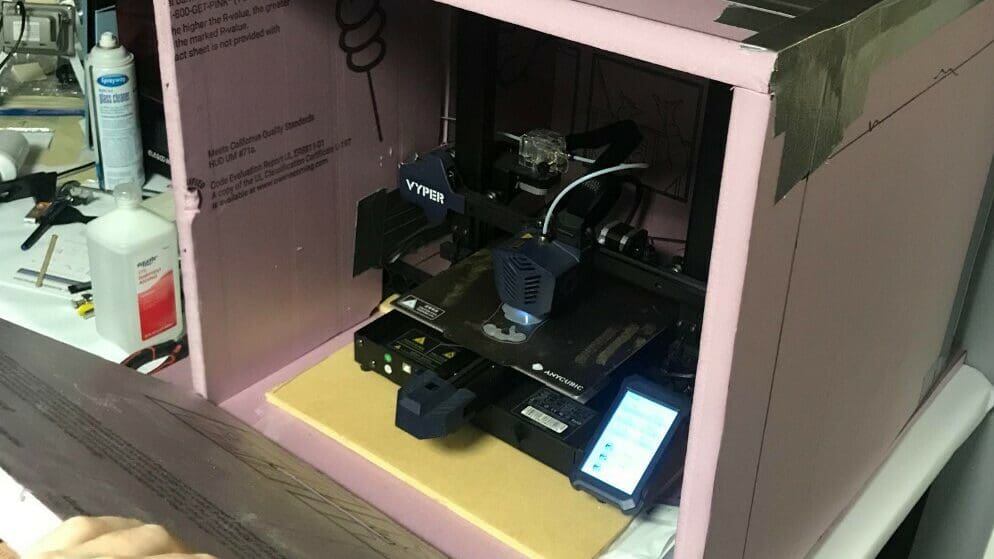
If you want to print temperature-sensitive materials like ABS, ASA, or PC, an enclosure is a recommended upgrade on your Vyper. It can also help improve print quality by trapping heat and preventing air drafts.
Enclosures enable you to print high-temperature filament materials and improve the quality of your prints because problems like warping and layer separation become less likely.
If you want an enclosure for your Anycubic Vyper, you can either build or buy one. If you’re going for a DIY enclosure, you can choose from many different online projects, including the popular IKEA Lack table enclosure. You can also make your own design using materials like wood or plexiglass.
However, if you’d rather purchase a pre-made one, Tukkari sells an enclosure that’s specific to the Anycubic Vyper. Tukkari’s Vyper enclosure is almost entirely made of acrylic panels, meaning you can see the printer from all angles. The enclosure has a few useful features, like a hinged door for easy printer access and a HEPA air filter for reducing fumes.
- Parts used: Purchasable Anycubic Vyper enclosure
- Cost: ~$225
- Where to find it: Tukkari
Glass Build Plate
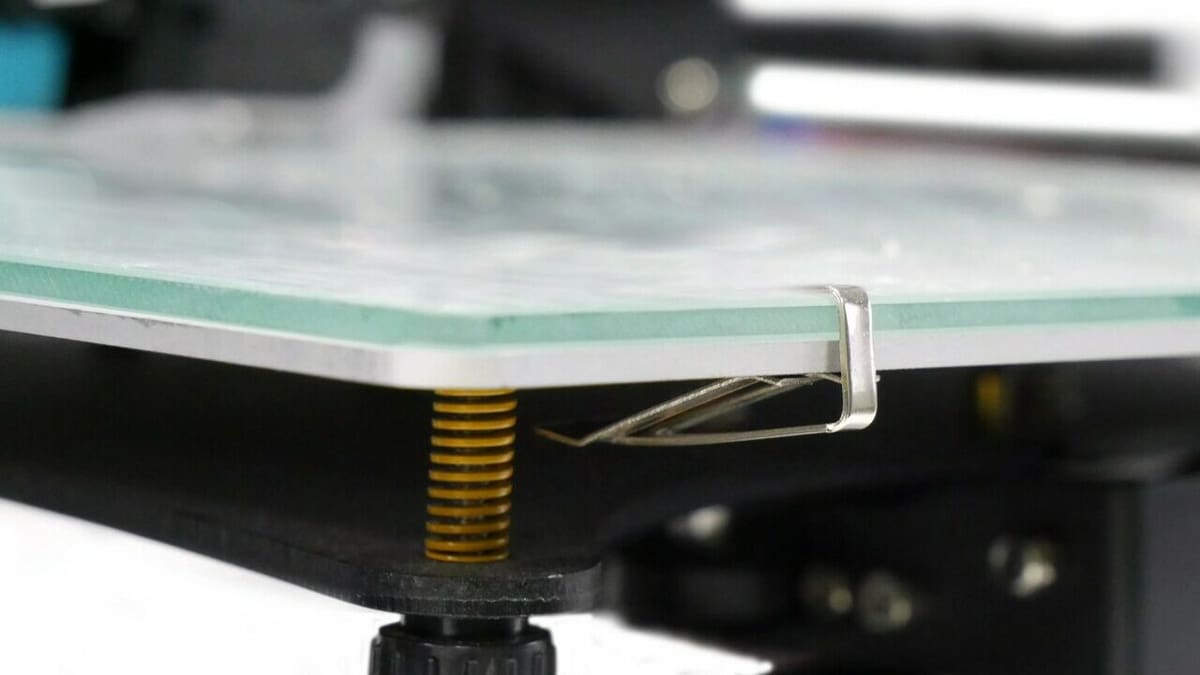
The Anycubic Vyper comes with a textured PEI spring steel build plate, which many people love because it’s flexible, magnetic, and offers terrific first-layer bed adhesion for prints.
However, some people prefer a glass build plate, as it yields a super smooth surface on the bottom of your 3D prints, which you can’t achieve with the standard textured PEI bed. Glass beds can help with bed adhesion for the first layer and are also much easier to clean than textured PEI beds, so you can get rid of glue and adhesive residue from the surface more quickly.
While there isn’t an official Anycubic glass bed for the Vyper, you should be able to use any glass bed that fits the bed dimensions of the Vyper (245 x 245 mm). Other beds with sizes 250 x 265 mm or 250 x 250 mm will work too, according to users on Reddit.
In fact, some people even use glass beds that are slightly larger than the Vyper’s stock bed, such as a Creality CR-6 SE glass bed. You just need to use bed clips to fasten the bed to the frame properly.
- Parts used: Glass build plate
- Cost: $20-40
- Where to find it: Amazon
Bed Handle
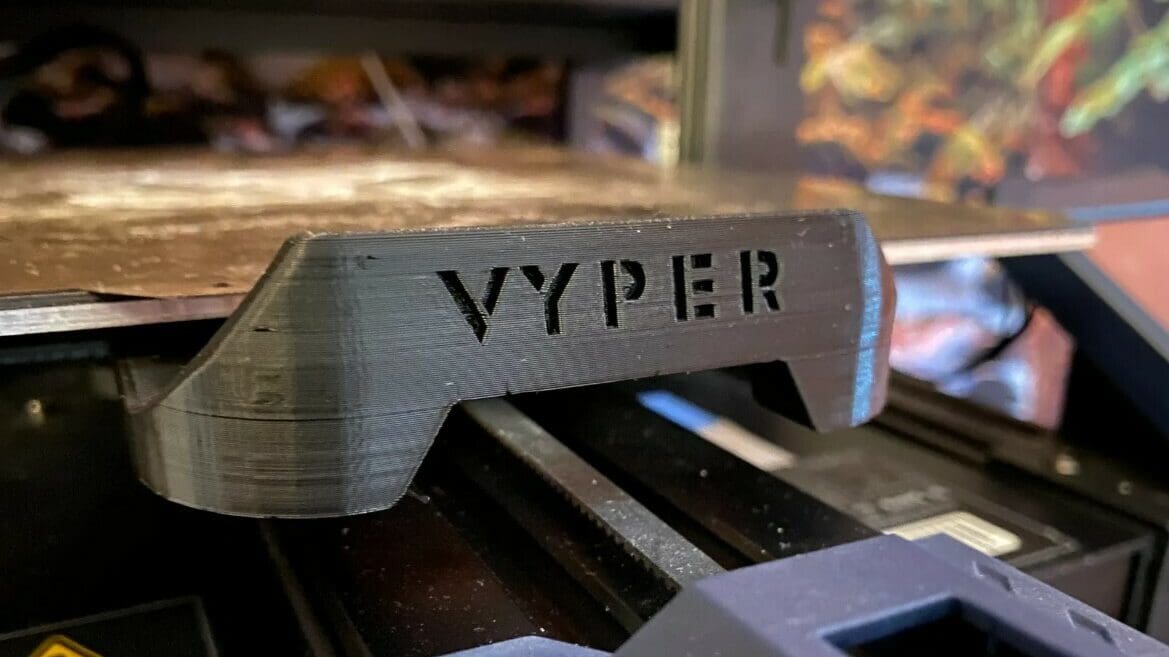
If you’re printing high-temperature materials like ABS or PC, the bed is probably too hot to grab after a print job is complete. A 3D printable bed handle can be attached to the bed underframe, allowing you to manually move the bed, even when it’s 110 °C.
Additionally, a bed handle ensures that you don’t accidentally contaminate the print surface with any dirt or grease that may be on your hands.
The handle is a single 3D print, featuring the word “Vyper” inscribed on the handle and two screw holes for mounting the handle to the bed. The designer stated that they printed the part in ASA filament to ensure the handle could handle high temperatures.
Print settings used by the designer include a 40 mm/s print speed, a 245 °C nozzle temperature, and a 100 °C bed temperature.
- Parts used: 3D printed parts
- Cost: ~$2
- Where to find it: Printables
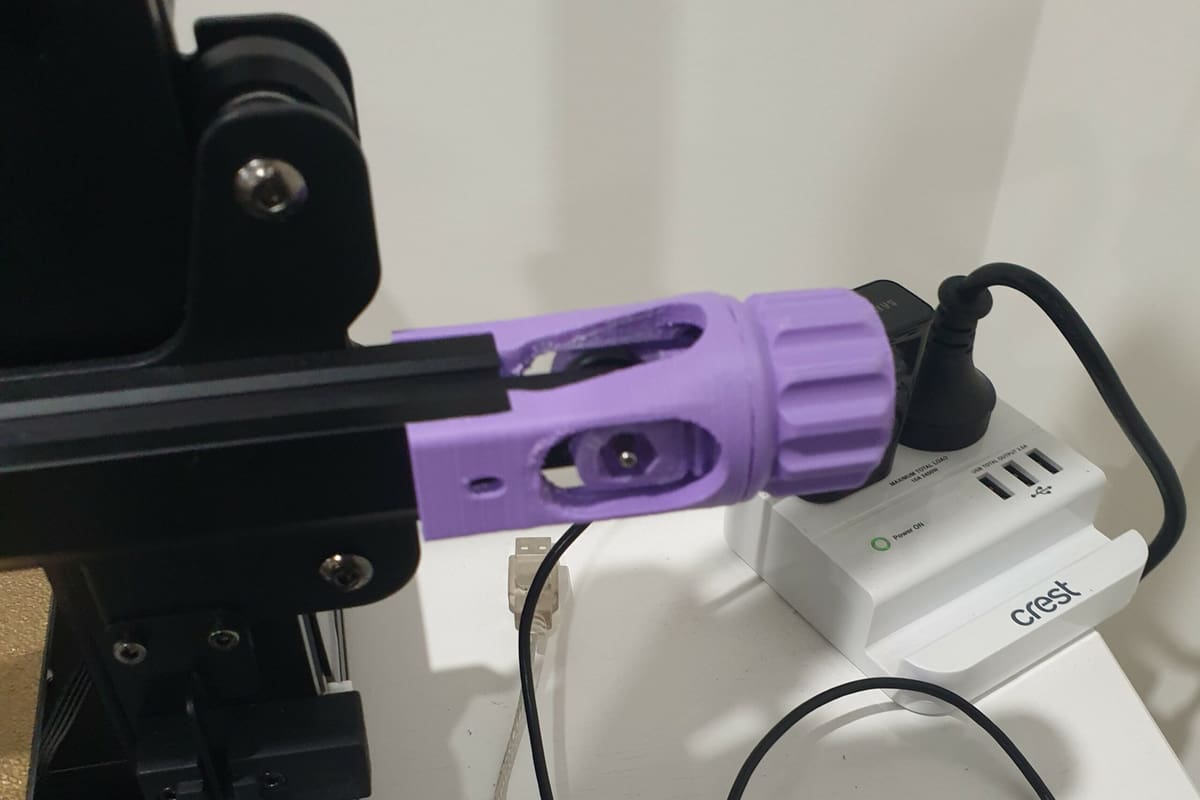
Light Bar
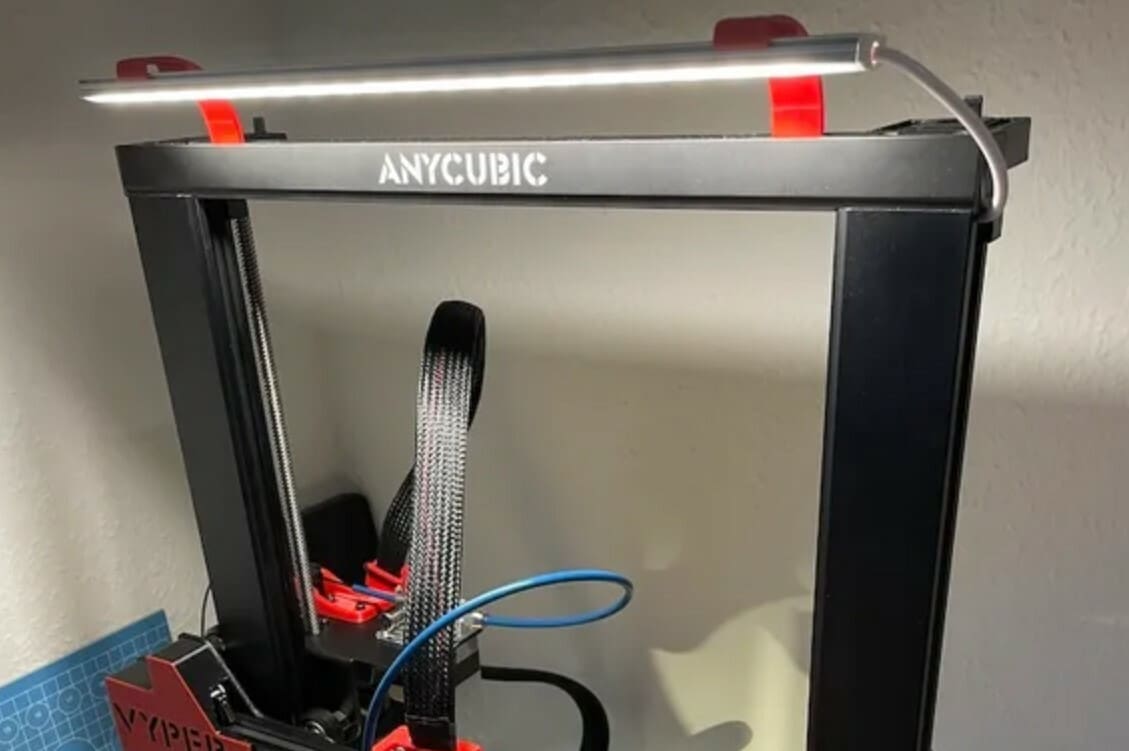
Having a light near your Anycubic Vyper is super helpful for illuminating your prints and workspace. It will especially come in handy when you’re fixing the machine or using a camera to record a print (e.g. for Octolapse).
You can add a light to your Anycubic Vyper by purchasing a simple light bar, such as this SOAIY option, and using a 3D printable mount to position the light. Of course, there are many ways you can configure a light on your 3D printer, such as using LED strips on the frame, so feel free to make this upgrade your own.
If you’re choosing to use the mount and LED light bar included here, you’ll need to make sure you have a USB wall adaptor so you can power the light bar. As for printing the compatible mount, the designer listed that they used a 0.2-mm layer height, a 10% infill, and no supports.
- Parts used: 3D printed mount, LED light bar (or strips)
- Cost: $10-$20
- Where to find it:
- Mount: Printables
- LED bar: Amazon
License: The text of "The Best Anycubic Vyper Upgrades & Mods" by All3DP is licensed under a Creative Commons Attribution 4.0 International License.
CERTAIN CONTENT THAT APPEARS ON THIS SITE COMES FROM AMAZON. THIS CONTENT IS PROVIDED ‘AS IS’ AND IS SUBJECT TO CHANGE OR REMOVAL AT ANY TIME.