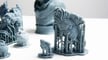
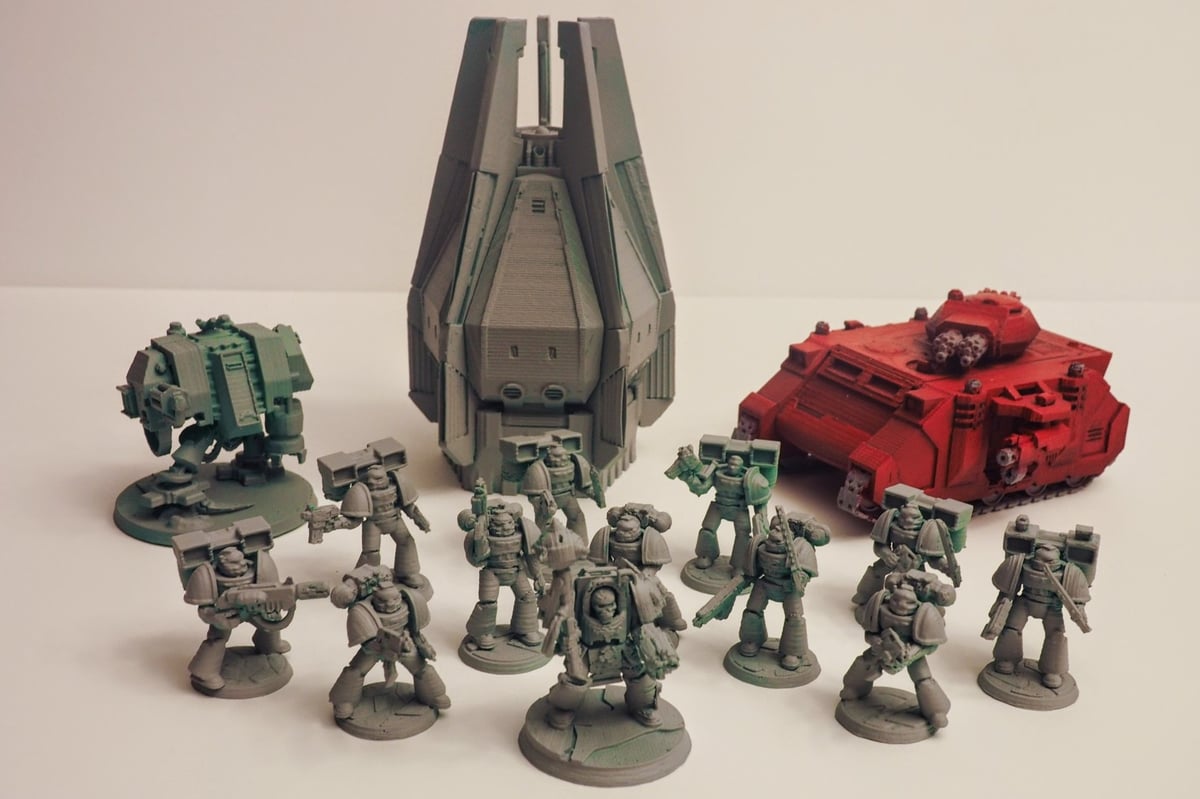
Miniatures are a central part of many different hobbies, be it RPGs, wargaming, or painting. One of the reasons people love these hobbies is that they allow for plenty of creativity, as players can create their own characters and scenes. However, it can be hard to find miniatures that exactly match the idea in our heads. Hobby stores often have a limited range of available miniatures and rarely carry models that look like customers’ imagined characters.
This is where 3D printing comes in handy. It allows you to create your own unique and custom miniatures. While this method can be more labor intensive than just purchasing a pre-made miniature, it’s an excellent way to elevate your hobby. With the proper setup and instructions, it can be made attainable.
In this article, we’re taking a look at how to get started printing your own 3D miniatures. From where to find designs to important print settings to consider, we’ll cover everything you need to know about the process. Let’s get started!
Where to Find Miniatures
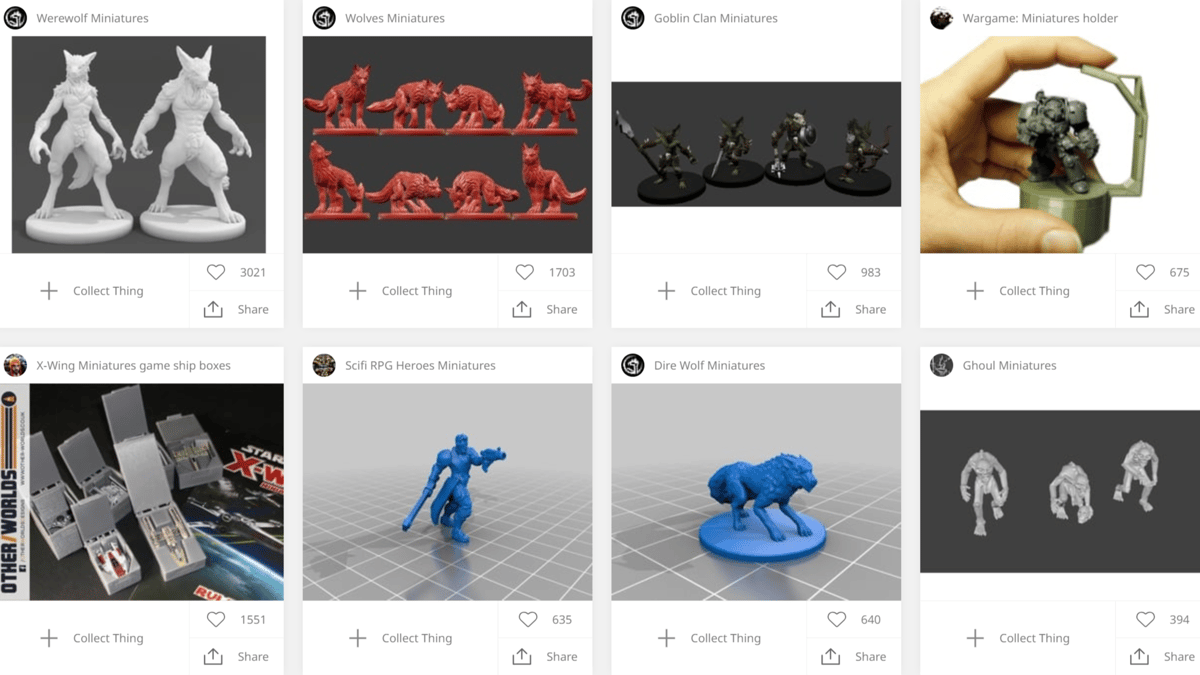
One of the best places to find 3D printable miniatures is in 3D model repositories. Perhaps one of the most popular of these websites is Thingiverse. It has a wide selection of free 3D models, although it may take some searching to find your ideal miniature.
Another excellent website is MyMiniFactory. It has a dedicated section for tabletop miniatures with premium options. A lesser-known option is The Mini Index, which, as the name suggests, is specifically for 3D printable miniatures. The website includes models compiled from several different websites.
3D Modeling
While these websites provide more options than most stores, these miniatures may not be customizable by hobbyists. An alternative option is to use 3D sculpting software, which allows users to digitally sculpt a 3D object with organic shapes. One of the most popular examples of this software is Blender, which is completely free and open-source with a great tool set.
On the more premium side is Z-Brush, which, as a result of being great software with powerful tools, has a large online community, making learning and troubleshooting easier for beginners. Z-Brush has a paid option and a free version with fewer features. While it can be difficult to produce acceptable results at first, 3D sculpting is a useful tool to learn if you want to create your own miniatures.
Custom Models
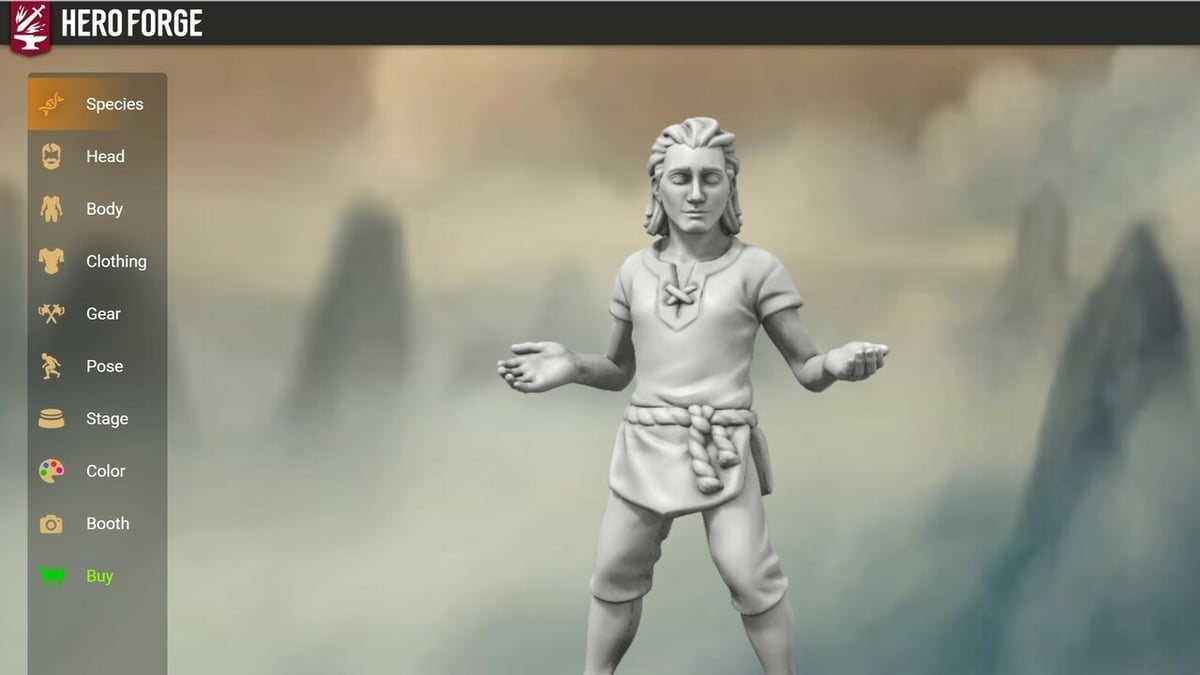
For those looking to make a custom mini without investing a lot of time, there are also miniature design websites that simplify the process. They provide a happy medium between the previous two options, as they allow a user to choose between different features or accessories for their miniature which are then combined to produce a printable character. The finished product can be purchased as an STL file or a printed figure for those who don’t own a 3D printer.
Hero Forge is perhaps one of the most popular miniature design websites due in part to its wide selection of accessories, though this selection comes at a higher price point per STL. On the other hand, DesktopHero offers free downloads, sacrificing the number of options for characters. If you’re looking for more realistic proportions, Eldritch Foundry is another good choice. It offers a product called Eldritch Unlimited, which allows customers to design and download an unlimited number of STLs in a given time period (by the month).
Model Subscriptions
For some, it does not matter so much about what a mini specifically looks like, as long as they look cool. If this sounds like you, it may be worth considering a subscription, where new printable minis are released at regular time intervals.
Loot Studios is a great example of this service, as they release models monthly for paid subscribers. Some makers will also share their work in return for support on Patreon, though it may take some digging to find a 3D sculptor you like.
In the end, there are many good places to find miniatures online. What it really comes down to is the amount of time you have and your specific skill set.
3D Printing Methods
Two of the most common types of 3D printing are resin and FDM. Of the two, resin 3D printing is most commonly used for miniatures, but FDM does have some benefits.
Resin Printing
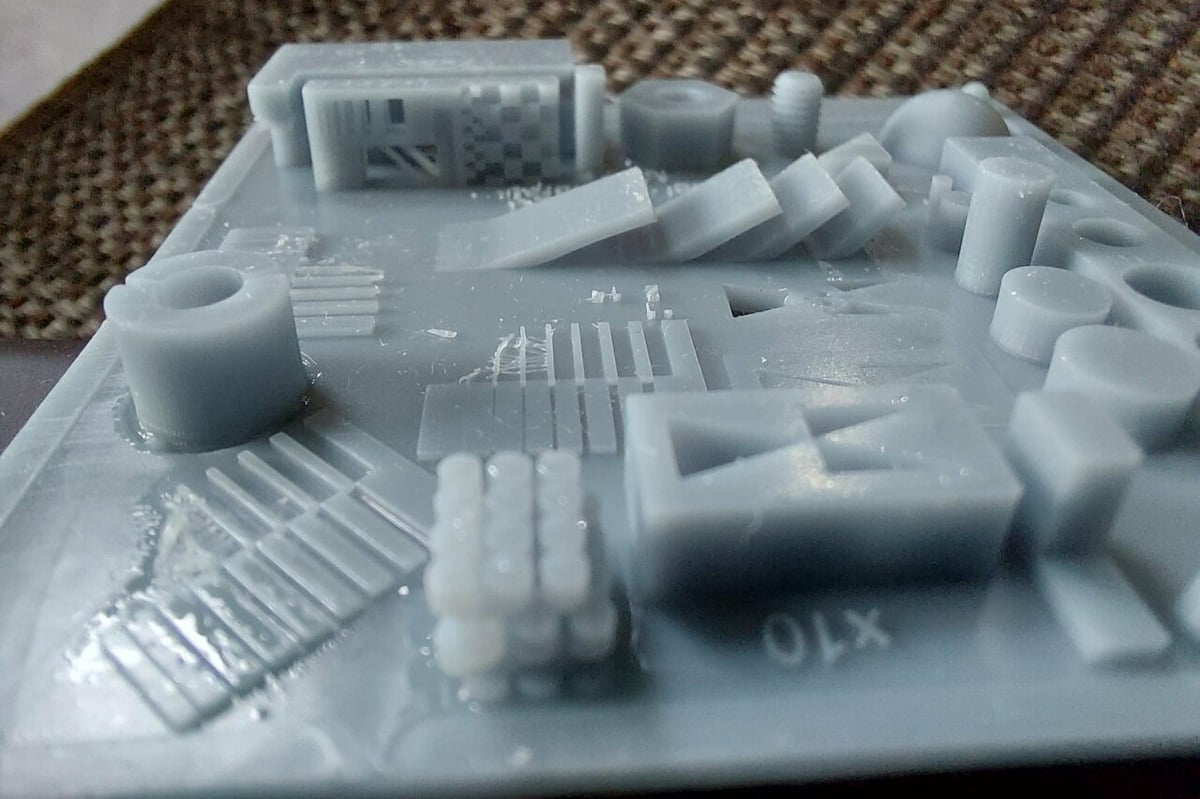
Resin printers create a 3D object by curing small layers of resin with UV light, a method that ends up accurately producing small details, which is important for miniatures.
Another reason that resin printers are commonly used to print miniatures is that, no matter how many miniatures are on a build plate, the amount of time needed to cure a layer is constant, as all objects cure simultaneously. This means that a whole army of miniatures can be printed in the same amount of time as one single model. Compare this to FDM where printing time is proportional to the volume being printed.
The material used by resin printers is generally weaker than FDM filaments and also releases fumes during the printing process. Additionally, all resin prints require thorough cleaning (generally with alcohol) and a final cure to ensure there’s no liquid resin on the model, which can be rather messy. For these reasons, resin printing is better suited for small prints; exactly what miniatures are!
FDM Printing
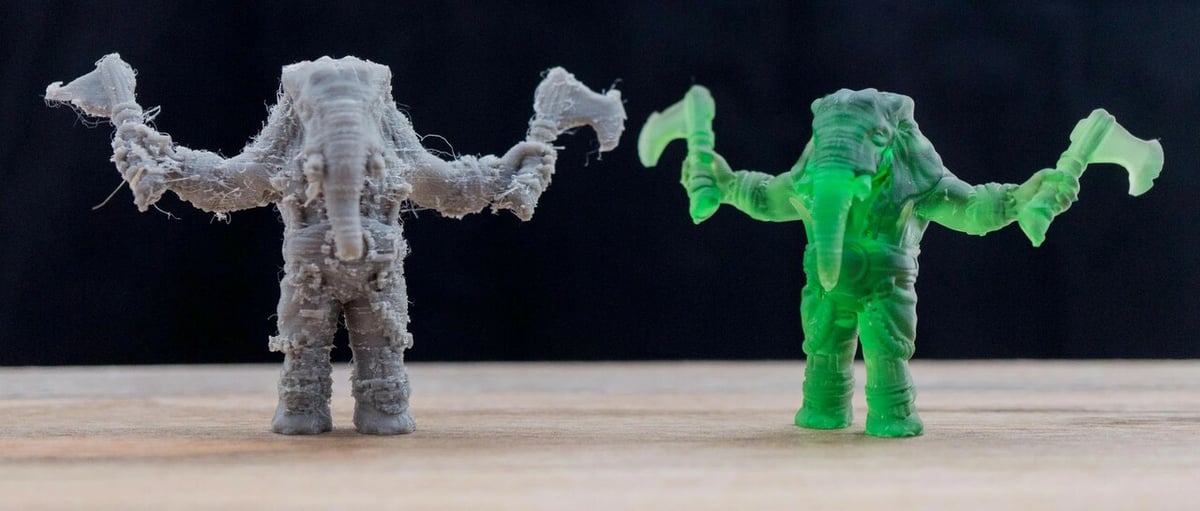
In comparison, FDM 3D printers lay down melted plastic in layers to create a 3D object with an extrusion method not dissimilar from hot glue. In comparison to resin 3D prints, FDM tends to have lower-resolution details, typically in the form of visible layers and softer edges.
Another disadvantage is that FDM supports have more contact with the model than resin supports, which can lead to more defects, a problem for dynamically posed minis with lots of overhangs. Consequently, resin supports are preferred over FDM supports in the context of printing miniatures.
One of the positives of FDM printing is that it has more adjustable settings, making it more versatile. You can easily optimize settings like print speed and more when printing miniatures. However, this can often sacrifice the print quality, as in the case of increasing layer height. Where FDM really shines is terrain, as this 3D printing method can create durable parts from a cheaper material, making it ideal for larger, functional prints.
Important Settings
Having the right settings is vital for 3D printing miniatures, especially in the case of FDM printers, which require tuning to achieve the necessary precision.
Resin Settings
Resin 3D printers do not have as many settings to tweak compared to FDM printers and can usually print miniatures well with little adjustments. However, it’s still important to calibrate certain settings to achieve sharp details. Among the most important settings to adjust is exposure, the amount of time that a layer is exposed to UV light. This setting dictates the quality of a finished print and so should be dialed in with the use of a test print.
Layer height should also always be considered when 3D printing resin miniatures because it changes the quality of the print similarly to FDM. However, it also affects the lifetime of the LCD screen which exposes the resin to UV light. With more, smaller layers, the LCD must change more times to create new layers. 0.025 mm is a good starting point, although the height can typically be adjusted to as high as 0.05 mm or as low as 0.01 mm on a case-by-case basis.
Supports are important for resin 3D prints and are needed in almost every instance. This is in part why some models come pre-supported, though supports can also be auto-generated or manually placed in slicer software.
Finally, anti-aliasing, a setting unique to resin 3D printing, smooths out the pixels that are visible on some 3D prints as a result of the screen used to cure layers. Anti-aliasing is sometimes hidden in slicer settings and defaulted to 4. However, settings such as grey level are related to anti-aliasing and can be altered. Grey level controls the brightness of the pixels that are partially lit so as to smooth out angles and generally works well at a value of 0 or 4 if prints need a smoother surface.
FDM Settings
One of the first settings to consider in FDM printing is layer height, as small layers are necessary to mitigate stepping — visible layers on angled surfaces — and achieve smooth surface quality.
Another measure that can be taken to improve the quality of FDM prints is to change the nozzle. A smaller nozzle, such as a 0.2 mm size, improves resolution as well as allows for smaller layer heights, although adequate hot end temperature is needed to avoid clogs.
Generally, temperatures above 190 °C are a good starting point for PLA, the material used most commonly for aesthetic prints. However, it does depend on the specific filament brand. Changing the print speed is also important, as slower speeds improve accuracy; a print speed of 30 mm/s is a good baseline.
Extrusion should also be properly calibrated when new material is being used so that it’s consistent and details aren’t diminished. This is done by extruding a certain length of filament and then comparing the inputted length to how much material was actually extruded and adjusting the e-steps accordingly. After this, in order to dial in the flow rate, you can make a test print and compare the size of the 3D model’s walls to the actual width of the print’s walls. The numbers can be found with the corresponding formulas.
Another thing to consider when attempting to print miniature-scale things on an FDM printer is that there are profiles available to the community online. For example, the YouTube channel Tomb of 3D Printed Horrors has a miniature profile for the Ender 3 series that produces great results.
Suggested 3D Printers
If you’re looking to print miniatures, your 3D printer can make a big difference. Here are some great options for both resin and FDM printing.
Resin 3D Printers
The market for resin 3D printers has expanded considerably over the past few years and includes some nice options.
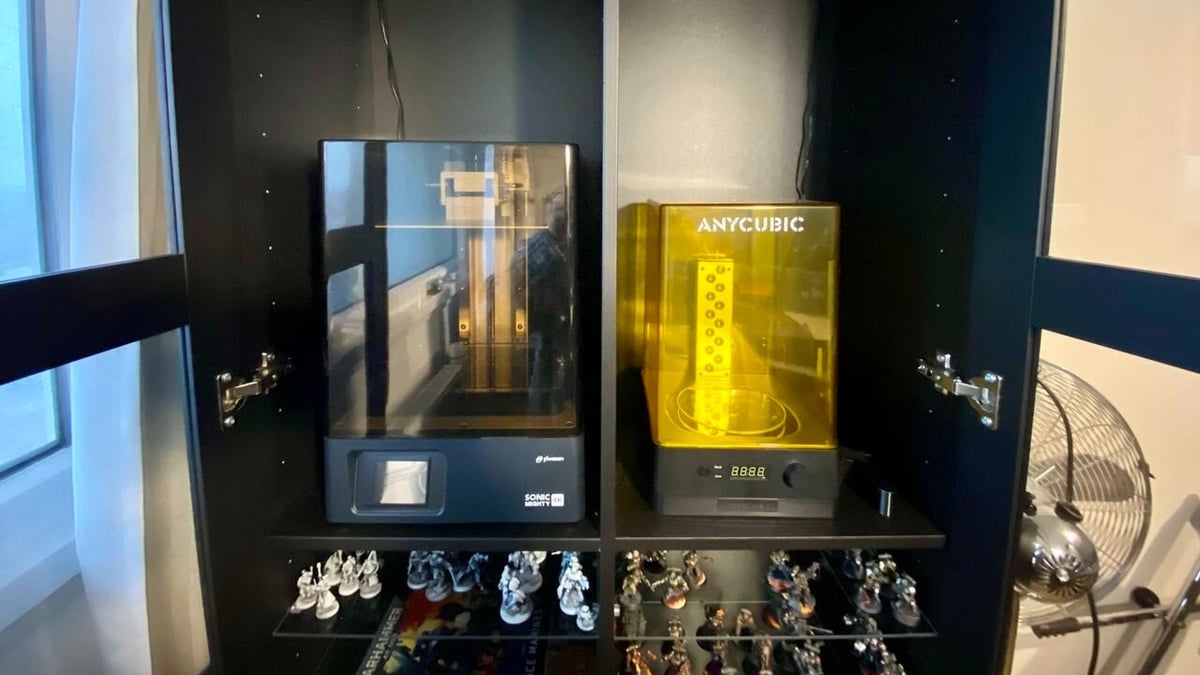
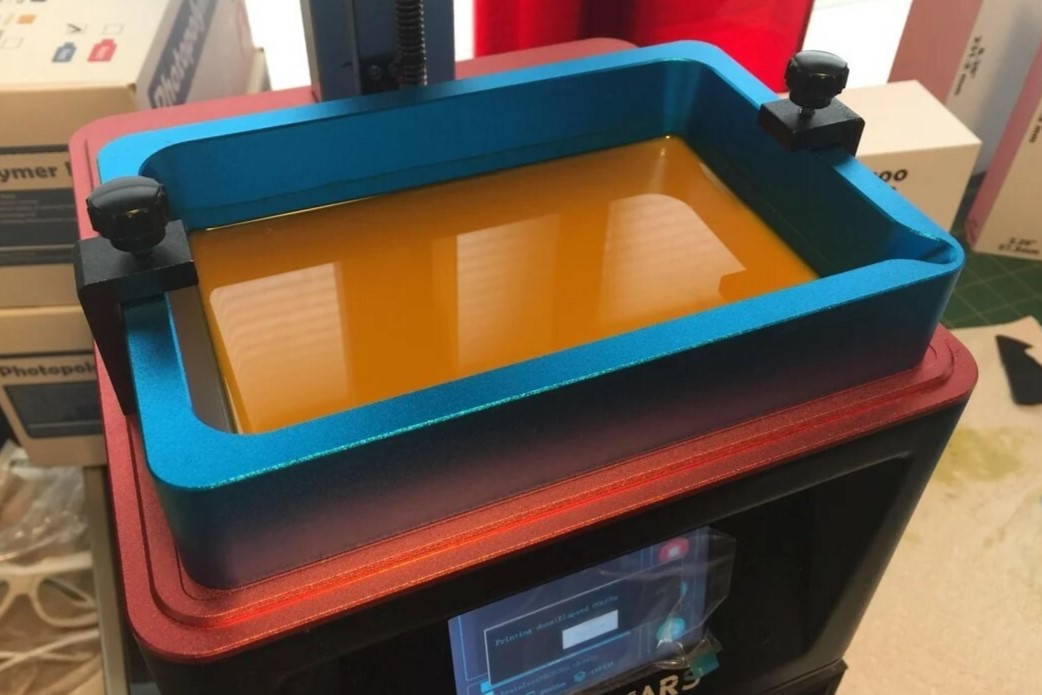
Among these is the Elegoo Mars 3. Users report that it produces great results and has an affordable price, making it a very popular option. The Mars 3 is a 4K printer, meaning its screen is 4098 x 2560 pixels, so it has a more than adequate XY resolution of 35 microns and a minimum Z height of 0.01 mm. Therefore, this printer has the specs necessary for fine-resolution 3D models. Elegoo has recently added more printers to the Mars family, so those may also be worth checking out. For example, the Mars 3 Pro adds conveniences like a glass screen protector to prevent resin from messing up the LCD screen.
The Prozen Sonic Mini 8K has earned a reputation for the incredible details it can achieve. This does come at a higher price tag, but it’s worth it for those looking to make some truly impressive models with the unparalleled XY resolution of 22 microns. Phrozen also recently came out with the Sonic Mini 8KS, which has the same resolution, linear rails on the Z-axis, and print volume of 164 x 72 x 180 mm, but for a significantly lower price tag. The general consensus among consumers is that Phrozen produces well-made machines, so those who want a premium 3D printer should look no further!
FDM 3D Printers
A well-made FDM printer can also print detailed models. There are more options in the FDM 3D printer market, although finding one suitable for miniatures can be tricky.
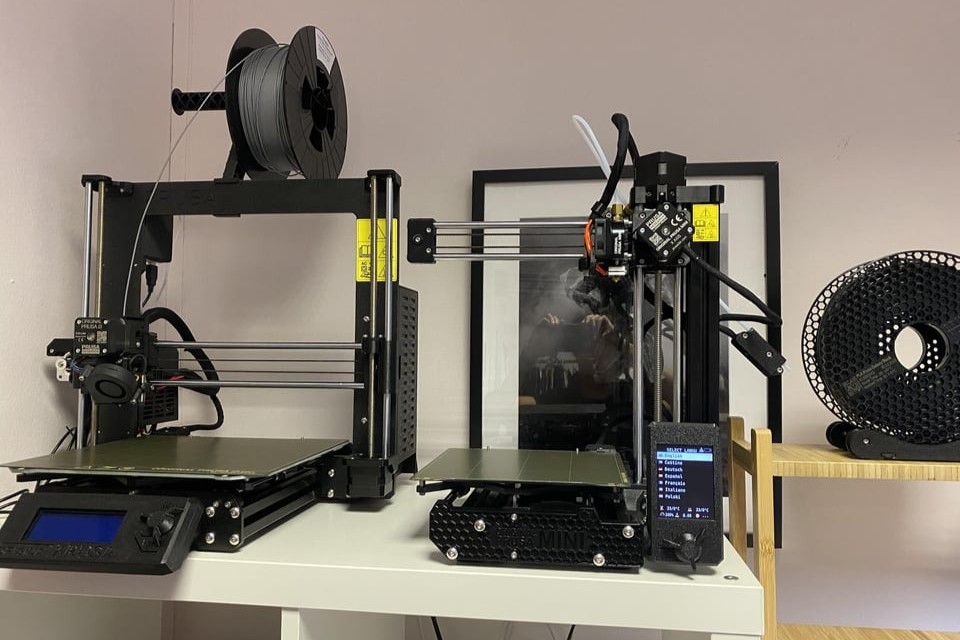
The Prusa Mini+ has a solid, cantilever-style construction of linear rods and bearings that lends itself to quality prints. It has a bed size of 180 x 180 x 180 mm, which should be more than enough to print miniatures of any size as well as terrain. Perhaps most importantly, the Prusa Mini+ can achieve layer heights of 0.05 mm. This is exceptionally low for an FDM printer and great for producing clean prints.
The Ender 3 S1, a recent addition to the Ender family of Cartesian-style printers, has many great features that make it a viable option for printing tabletop game pieces. The popular Ender 3 series is known for its affordable price. This variation has a print volume of 220 x 220 x 270 mm, so it’s suitable for printing a wide variety of miniatures and tabletop accessories. Additional features, such as automatic bed leveling, a filament sensor, and dual Z-axis lead screws should make it easier to use than previous Ender 3 iterations. Despite having a minimum layer height of 0.1 mm, the direct extruder means this printer should have more reliable extrusion than Bowden tube setups, a valuable asset for achieving consistent, fine details.
Materials
Another essential step for 3D printing miniatures is choosing the right material, as this can affect the final quality of the print.
Resin
There are a lot of options for resin 3D printing. Water-washable resin is a rather convenient option because of its ability to be cleaned with water instead of alcohol. It’s also brittle, although options like Ministry of Resin Water-Washable Resin are reported to not be as prone to this issue. Elegoo also has a water-washable resin that users confirm can clean easily in water while still printing details well. For these reasons, water-washable is one of the best choices for those looking for easy post-processing.
Those looking to print high-resolution miniatures should look in the direction of 8K resins. 8K resins are made specifically to achieve the best level of detail on 8K printers, or in other words, printers that have 8K resolution. Phrozen manufactures one such resin, which customers say has improved detail over standard resins.
Nevertheless, standard resin should not be looked over as it still works well. Depending on the quality of the brand, standard resins can achieve great-looking prints while coming in at a lower price point. Some of these nicer brands, like Anycubic and Sunlu, also offer eco-versions that are made from plants. These resins are beneficial for those with limited space as they reportedly do not produce as much fumes.
Filament
For FDM printing, PLA is a good choice due to its ease of printability and good surface finish. On the other hand, PETG tends to string and has poor bridging properties. While ABS can print fine details, its susceptibility to warping makes it difficult to work with.
PLA also has a weakness, as it’s rather brittle, but its printability makes it a better option than other materials. When choosing a specific filament brand, tolerances are worth considering, as they directly impact extrusion and produce better results when tighter. This makes filaments like Prusament PLA, which has a tolerance of ±0.02, or Hatchbox PLA at a tolerance of ±0.03, ideal options.
Post-Processing
Post-processing is the final step for completing your 3D printed miniature. This step cleans up the model and ultimately elevates the quality of the finished product. The first step is to sand away any artifacts, such as nubs from where supports touched the model.
Removing Supports
For resin, this should be easier since less area needs to be supported. On the other hand, FDM prints will require more sanding due to the nature of FDM supports and layer lines. Multiple tools can be used for this, although sandpaper, small files, or a hobby knife are the most common.
Defects can be gently sanded away with a file or scraped off by placing the blade of a hobby knife perpendicular to the model’s surface and pushing the blade along it. Something to keep in mind is that the thermoplastics used in FDM printing could deform due to the heat induced by the friction of sandpaper or files.
Alternatively, rotary tools could also be used to sand away artifacts quickly, albeit carefully since they tend to have less control. In general, rotary tools should be reserved for larger models.
Priming
After a model is cleaned up, it’s ready to be primed for a uniform finish. Priming is necessary if a mini is to be painted with acrylics, but it can also be the final step if a monochrome finish is desired. A brush-on primer can be used despite the fact that a spray primer is recommended due to the more uniform finish it produces.
The most popular spray primers for miniatures retain the details of a model, such as those made by the brands Citadel and Vallejo.
A cheaper, less specified option such as Rust-Oleum can work, too, and even be beneficial for filling the layer lines of miniatures 3D printed with FDM. Just keep in mind that it can cloud details due to its thicker consistency. Priming should be done in a well-ventilated, dry area, and a mask is a good idea. The model should be sprayed with quick, even passes from around 20 cm away so that primer does not pool in its recesses. When the model is completely covered with a consistent layer of primer and the coat has been given suitable time to dry, the character is ready for painting.
Painting
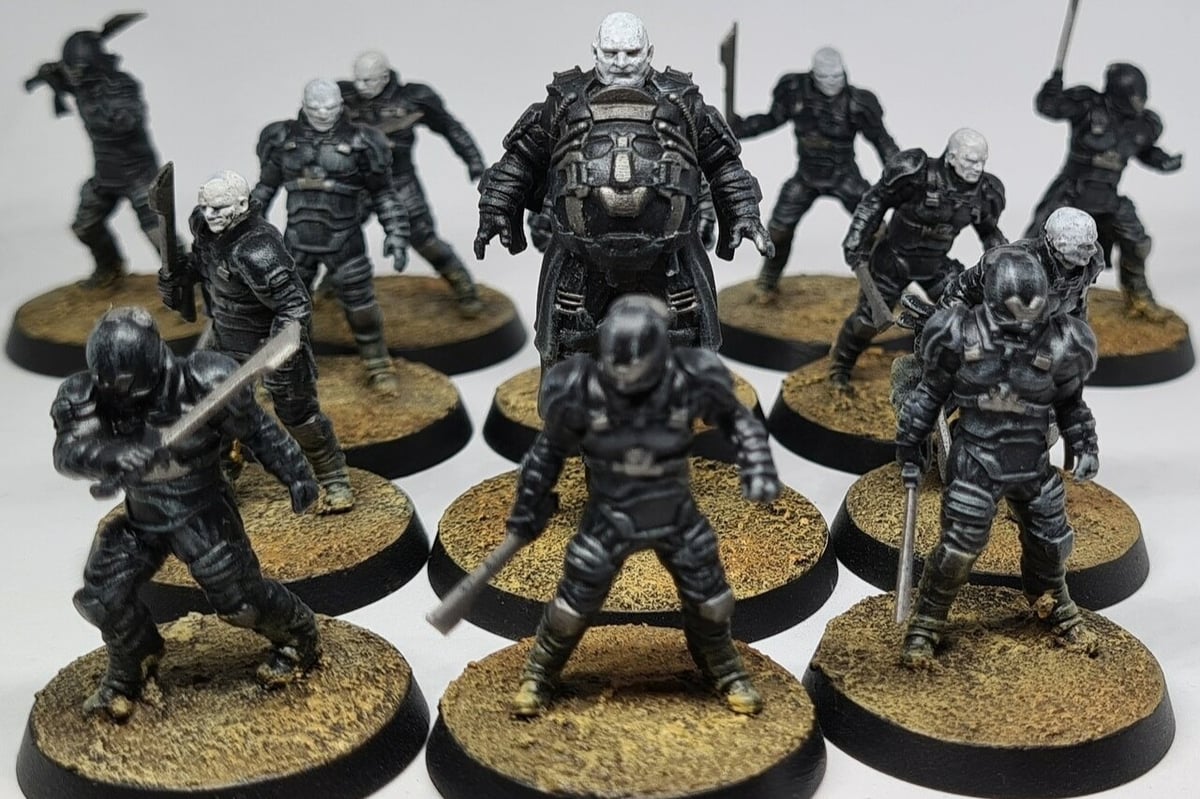
Painting can be considered an extra step, but it adds realism to the miniature that is not achievable otherwise. Acrylic paints are typically used for this and hobby paints made for minis will produce the best results. Vallejo, Reaper, and Army Painter are big names in the industry and manufacture paint with good coverage while also being more expensive than your average craft paint.
The style with which the miniature is painted is up to the hobbyist, but it’s recommended to paint multiple thinned-down layers of paint. Each layer should be given a suitable time to dry before the next one is applied.
Finishing
Finally, the model can be given a clear coat to protect the paint so that it’s not rubbed off over time. This is especially useful for tabletop pieces that are bound to get handled during gameplay. An aerosol clear coat, such as the one by the company Testors, can be applied in much the same manner as primer in even passes. And with that your model is completed, ready for the gaming table!
License: The text of "3D Printing Miniatures: All You Need to Get Started" by All3DP is licensed under a Creative Commons Attribution 4.0 International License.