Solve 3D Print “Ghosting” Defects in a few Easy Steps

No need to be scared! 3D printing ghosting or ringing is nothing to fear. Check out this quick guide for easy fixes to prevent it.
It’s not you, your 3D printer just wanted to end the relationship but was too scared to tell you … oh wait, we’re not talking about that type of ghosting.
Ghosting in your 3D printed parts shows up as faint ripples or repeated shadows on the surface of your 3D print. It’s also sometimes called ringing. It’s especially pronounced after sharp corners or text. Although the issue is frustrating, it’s also very fixable once you understand what causes it.
In fact, identifying that your defect is ghosting, and not other flaws, is half the battle.
Do You Believe in Ghosts?
Ghosting was once far more common than it is today. Newer 3D printers have mostly overcome this issue with specific hardware and software solutions like “input shaping,” which usually runs silently in the background without you needing to configure anything manually. But these aren’t always a fix. Even with input shaping, very high acceleration, loose belts, a flexible frame, or a shaky table can still cause these print defects.
Before we hit the fixes, let’s rule out some other common and similar issues that makers often confuse with ghosting.
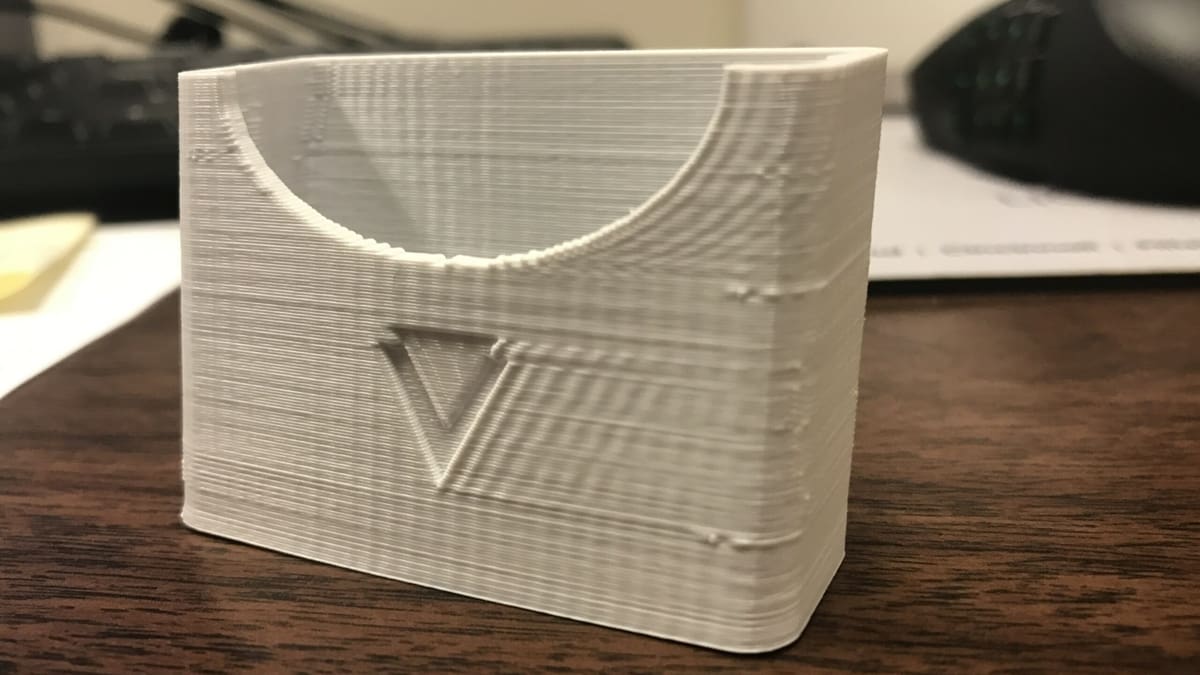
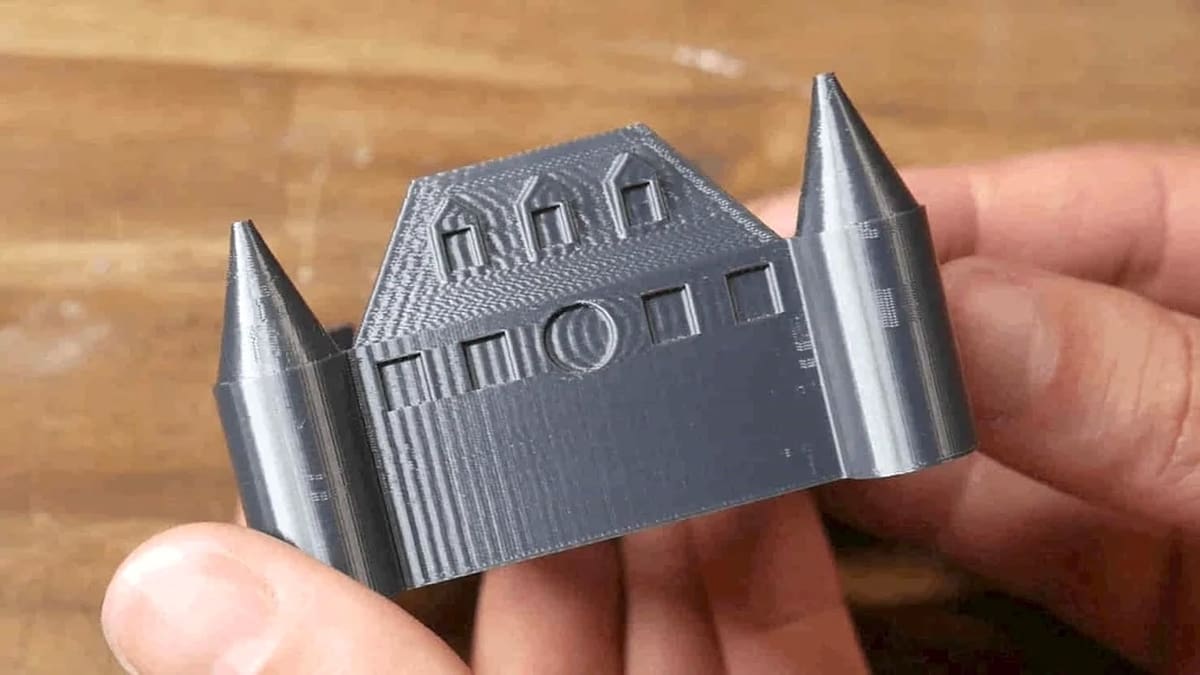
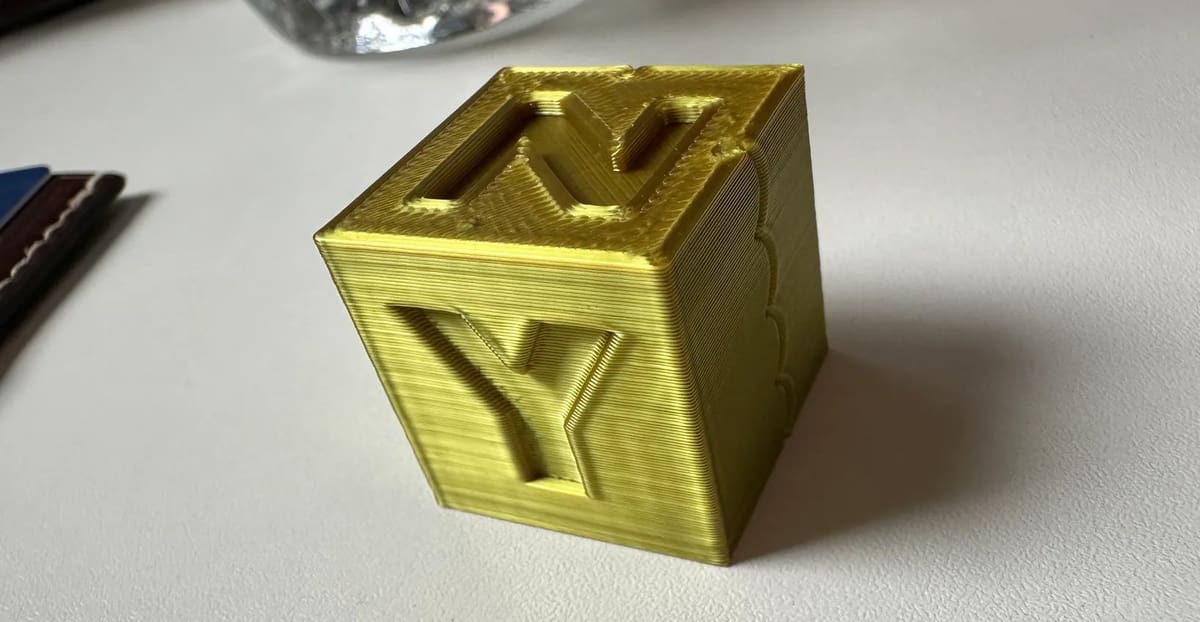
Ghosting is a very specific defect: you’ll see repeating ripples (above middle) on the surface that fade out as they get farther from a sharp feature (like a corner, hole, embossed text, or seam). The key to diagnosing it is to eliminate other causes, like layer shifting, under-extrusion, backlash, or filament issues.
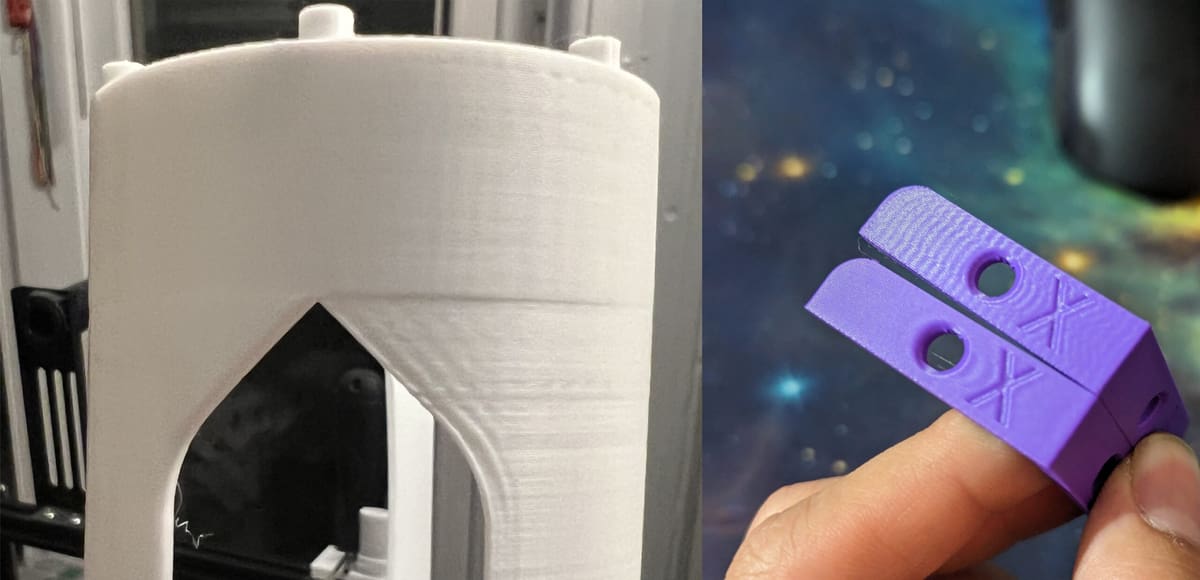
Above left is layer shifting, which has different causes and fixes. Layer shifting usually results in a printed model that shifts in one direction for one or several layers, almost like someone walking by bumped into the printer. Ghosting, on the other hand, causes layers to shift in multiple directions, back and forth, rippling.
Your defect could possibly also be visible infill (above right), which is when your wall thickness is too thin and allows your infill to bleed through the model’s surface.
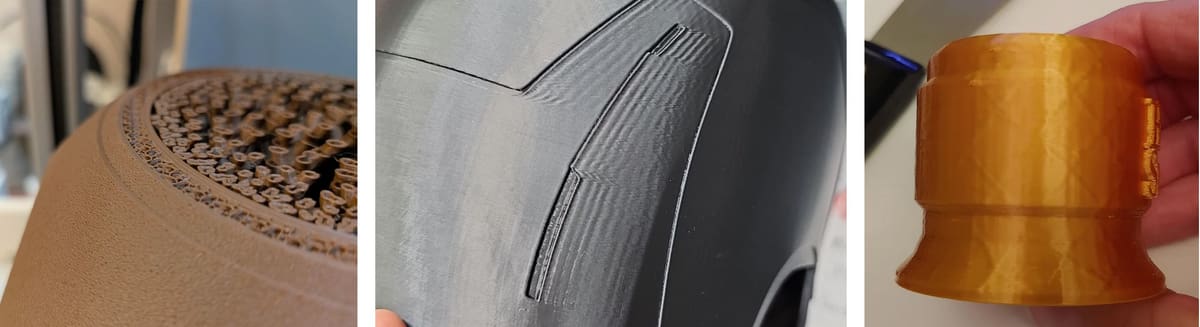
Another possibility is VFAs or vertical fine artifacts. These defects are not layer lines. Instead, they appear vertically as subtle ripples, bands, or waves running parallel to the Z-axis of the print. There’s a calibration and diagnostic test used to detect these. You can download a VFA Test print model from almost any online STL repository, like this Prusa Core One VFA Test print at Printables or this one for the Bambu Lab H2D at Makerworld.
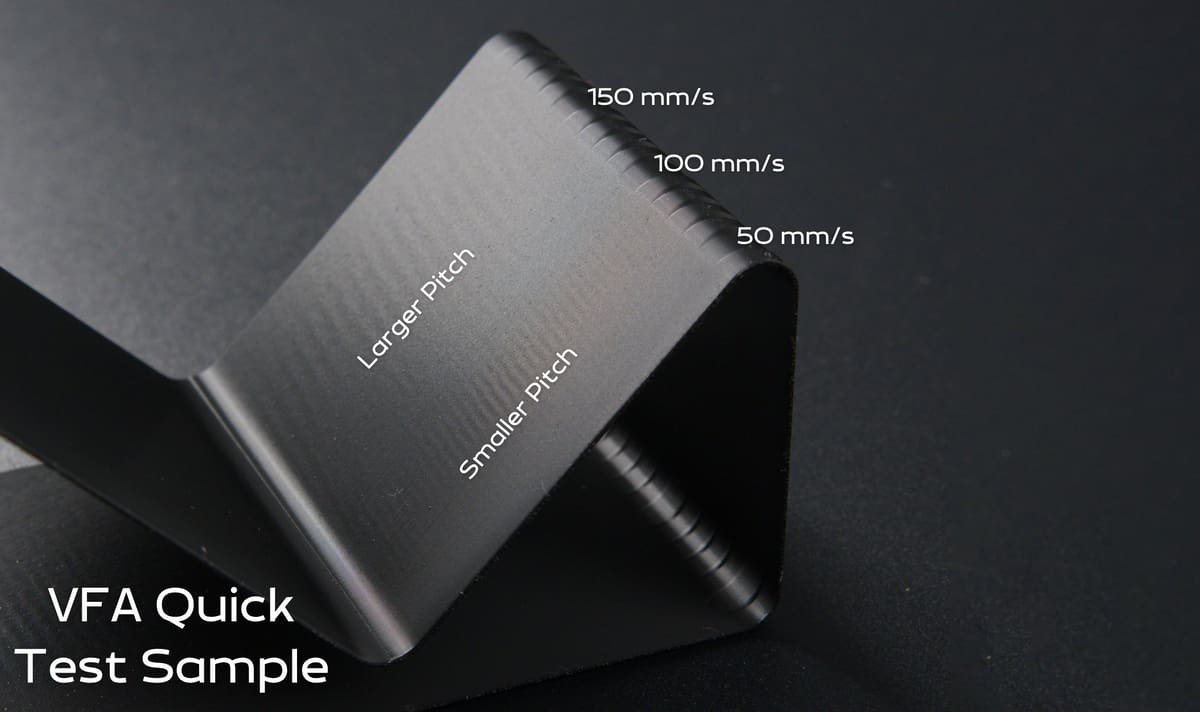
Fixes to VFAs are typically printer-specific. For example, using a Creality Ender 3D printer, you may need to just print slower. On a Prusa MK3 you could adjust your slicer settings, while on Bambu Lab, you may want to just ensure that your firmware is up to date.
Tell-tale Signs of Ghosting
- Ripples are periodic (even spacing) and often appear on the X/Y faces after sharp direction changes.
- The pattern mirrors the triggering feature (corner, letter edge, seam).
- Amplitude decays with distance (strong near the corner but weaker farther away).
Signs That It’s Likely Not Ghosting
- Defects appear everywhere, not just near corners or edges.
- Random gaps, thin lines, or rough top surfaces
- Inconsistent corner sharpness or “shifted” walls.
- Horizontal bands that repeat with a constant period throughout the entire part.
- Defect aligns with Z height, not with X/Y features
- A single vertical line of zits or scars (at the seam)
Quick Print Test Confirmation
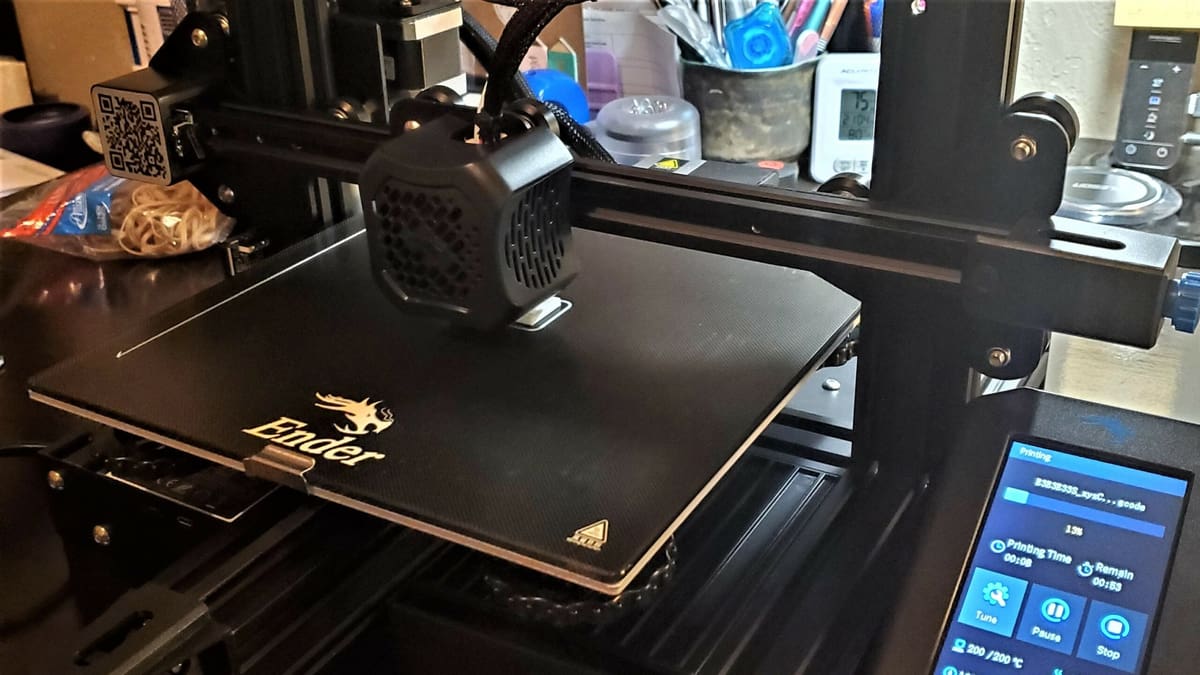
There are specific parts you can print quickly to test for ghosting, including (a cube with a sharp corner, or a “ringing tower”). If you find ghosting on your part, reprint the same file with half the print speed and acceleration to see if it affects the defect at all. If the ripples shrink dramatically, that strongly indicates ghosting (vibration). If they don’t change much, it’s likely something else.
Common Causes of Ghosting
Ghosting is no longer something you fix by slowing prints to a crawl. Thanks to modern firmware features like input shaping, it’s now possible to achieve fast, clean, professional-looking prints even on affordable machines.
In this guide, we’ll explain why ghosting happens and how to fix it using both hardware adjustments and calibration.
Basic Fixes: Calibrate & Clean

Start with the mechanical basics. If you’ve just moved your machine from your surface to another, run though all of the calibration programs again. Your surface may be just a bit more wobbly than before, so your vibration compensation needs to be reset.
Next, make sure there’s no filament particles or old, dusty lubricant stuck in any belts or moving parts. Give your machine a good clean.
If you’ve calibrated and cleaned your printer and run the above print tests and still find ghosting, you’ll need to try one or more of the four tips in the following section.
Solution #1: Reorient Your Part
It sounds simple, because it is. Try rotating your part 90°. Sometimes the direction the print head travels can have an effect.
Ghosting tends to be more pronounced along one axis than the other due to differences in belt length, motor loading, frame stiffness, or mass distribution.
When a model is rotated on the print bed, the same features that previously aligned with the more vibration-prone axis are now printed along a different axis with different mechanical characteristics. If the new orientation aligns critical edges or corners with the stiffer or better-damped axis, the resonance that produced visible ghosting is reduced or no longer excited. In effect, the printer is still producing vibrations, but they no longer reinforce themselves in a way that becomes visible on the surface of the part.
Reorientation also changes how acceleration limits and jerk are applied during the print. Because motion planning treats X and Y movements independently, rotating a model alters the sequence and magnitude of accelerations used to trace its geometry. This can move the print out of a resonance frequency that previously amplified vibrations, resulting in cleaner edges and smoother surfaces. As a result, simply rotating a part by 30, 45, or 90 degrees can significantly reduce or even eliminate ghosting without changing any printer settings.
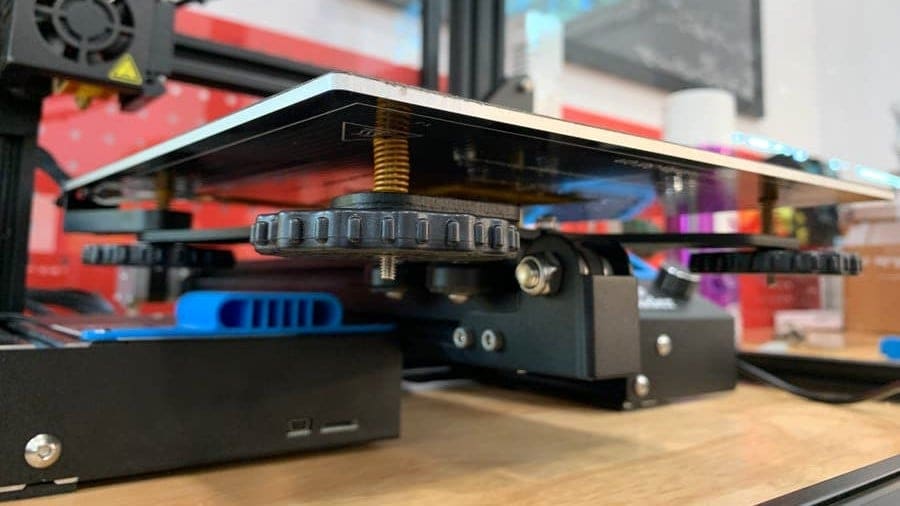
Solution #2: Tighten Your Belts
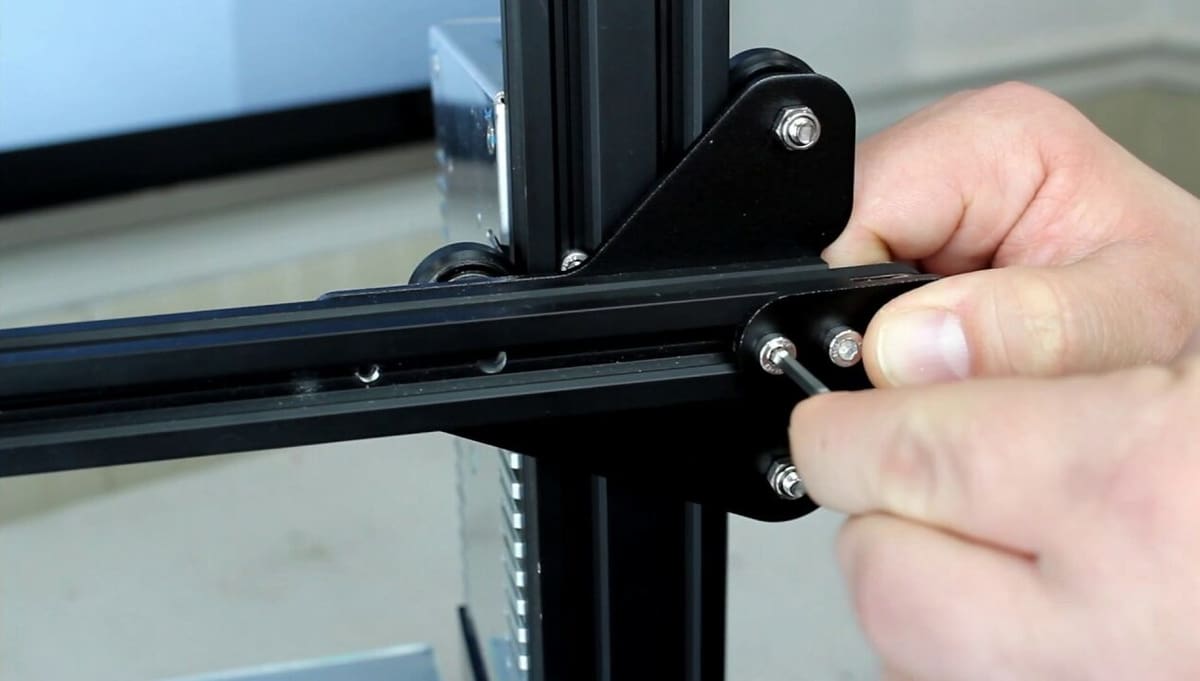
When a printer changes direction quickly, its moving parts (print head, bed, gantry) can continue to vibrate briefly. Those vibrations can get transferred into the printed plastic, leaving visible artifacts. Newer machines have software that compensates for these vibrations, but if your hardware is loose, the software may not be able to compensate enough.
Your printer likely uses belts to move a component (or multiple), such as the printhead and print bed. Over time, these belts can stretch, or the pulleys that hold them can loosen, allowing slack to get into the belt loop. When this happens, the printhead (or whichever component uses belts) will move around during printing, causing ghosting in prints.
Loose belts are the most common cause of ghosting. Belts should feel firm and produce a low, dull note when plucked, not floppy, not rigid. Uneven ghosting usually points to one belt being looser than the other.
To solve this, you can tighten your printer’s belts. The process varies depending on the printer model, but it usually involves tightening a screw on the pulley to pull the belt taut.
But before adjusting random settings, identify where the problem originates by printing a test model, like a cube with sharp corners or raised text.
Observe the direction of the ripples:
- Ripples on the X-faces = X-axis issue
- Ripples on the Y-faces = Y-axis issue
Check when ghosting appears:
After corners = acceleration/jerk related (see below)
Across the whole surface = mechanical looseness in belts or frame
A good rule of thumb is to tighten your machine’s belts until you can flick one with your finger and it barely bounces. However, don’t tighten them too much, as this can decrease their longevity.
Some machines, like the Ender 3 V2, also have integrated belt tensioners with thumb screws that allow you to easily adjust the belt tension. If your printer doesn’t have these, there are 3D printable upgrades.
Solution #3: Slow It Down
The faster your print speed, the faster your printhead will move and the more vibrations the nozzle will experience during printing. There will also be quicker direction changes, which can exacerbate ghosting on your print using many of the budget machines. For these reasons, our next solution for ringing is to print more slowly, which you can do by adjusting the speed settings in your slicer.
Print a test model a few times, starting at your current speed and reducing it in increments of 5 mm/s until surface quality improves. Keep in mind, however, that you shouldn’t need to lower your default print speed (around 60 mm/s for PLA) by more than about 25%. If significant reductions in your print speed don’t solve ghosting, chances are speed isn’t the cause.
Solution #4: Lower Acceleration and Jerk
Acceleration and jerk (or junction deviation) control how aggressively your printer changes direction.
Acceleration controls how quickly the printhead goes from standing still to moving at full speed. If acceleration is set very high, the printer tries to reach its target speed almost instantly. That sudden push puts a lot of force into the belts, motors, and frame. Even though the movement is precise, the physical parts of the printer flex slightly and start to shake, just like jerking a table quickly makes things wobble.
Those tiny shakes show up as ripples (ghosting) in your print.
Jerk is about how abruptly the printer changes speed or direction, especially at corners. With a high jerk setting, the printer is allowed to snap from one direction to another without slowing down much. That sudden change creates a sharp mechanical shock. Lowering jerk forces the printer to slow down slightly before changing direction, which smooths out the motion and prevents those sharp shocks from exciting vibrations in the frame and belts.
These are exactly the forces that loosen your belts over time. If you’re reluctant to tighten your belts, you can try lowering acceleration and jerk in your slicer settings. Prints take a bit longer because the printer spends more time easing into movements rather than snapping through them, but that extra time is a good trade-off, since the improvement in surface quality is usually very noticeable.
Not all slicers let you adjust jerk. For example, if you’re trying to reduce ghosting on a Bambu Lab printer, lowering acceleration is the correct adjustment. In Bambu Studio, there is no traditional “Jerk” setting as you might see in Cura or Marlin-based slicers. Bambu printers do not use classic jerk at all. Instead, they use a more modern motion control method called Junction Deviation (and additional internal motion planning). The internal junction deviation logic will automatically handle cornering behavior in a way similar to lowering jerk on other printers when you adjust acceleration.
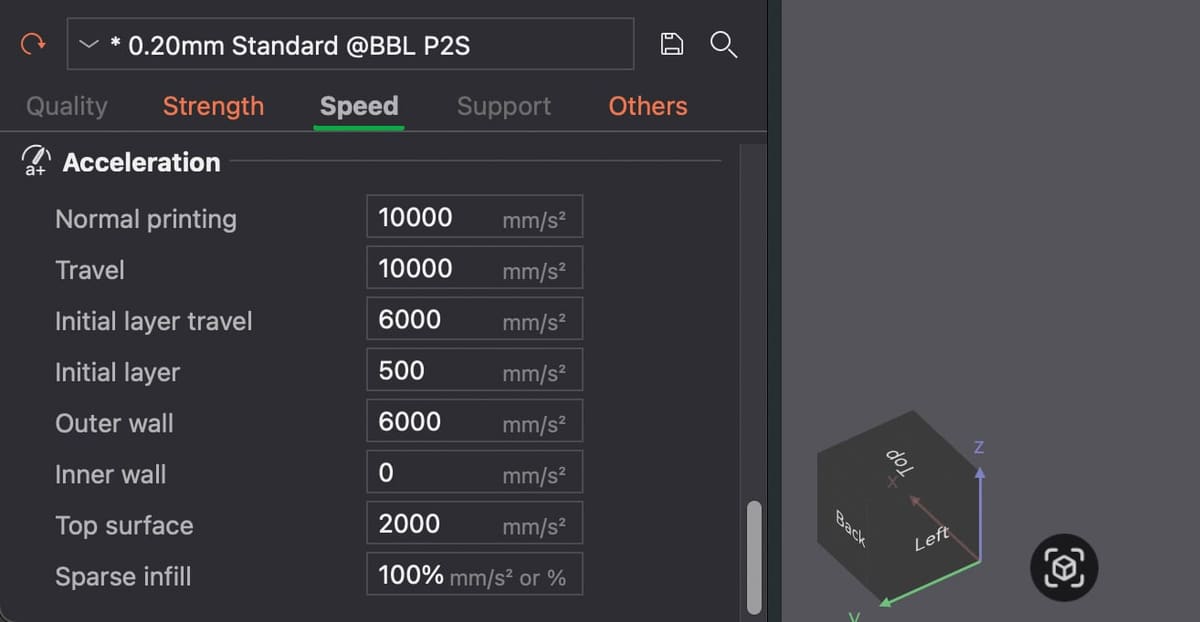
Slicer Settings: Typical Ghosting-Friendly Range
- Acceleration: 500–1500 mm/s²
- Jerk (Marlin): 5–8 mm/s
- Junction deviation: 0.02–0.05
Lower values = smoother motion.
Other Solutions
The four solutions we presented are your most likely bet to fix ghosting. However, there are also other ways you can try to solve this print quality issue:
- Use stiffer springs: One way the build plate on a 3D printer can move is if the springs that allow you to level your bed are loose. Using stiffer springs can help keep your build plate steady, minimizing vibrations on the print and preserving the evenness of the build plate.
- Adapt your design: Lastly, tweaking the design of your print can help prevent ringing. If you limit the number of direction changes in your model, you can significantly reduce ringing in prints.
- Upgrade your hardware: If applicable to your 3D printer, you can opt to install a lightweight extruder or a stepper motor damper. You can install braces to your frame to make it less wobbly or use linear rails instead of rollers.
Preventing Ghosting Long-Term
- Keep belts properly tensioned
- Periodically check frame screws
- Avoid extreme acceleration values
- Maintain bearings and rollers
- Use input shaping whenever possible
License: The text of "Solve 3D Print “Ghosting” Defects in a few Easy Steps" by All3DP is licensed under a Creative Commons Attribution 4.0 International License.