3D Printer Plans: 10 Great 3D Printer Blueprints to DIY

Using 3D printer plans to build a printer can be a fun challenge. Check out our top picks for the best 3D printer blueprints available.
An Era of Open Source
The philosophy of open-source designs has greatly influenced the 3D printing landscape. The availability of free plans for building a 3D printer, including firmware and parts needed, means that anyone can build their own 3D printer. They aren’t necessarily “free” in the sense of cost (you’ll actually need to purchase quite a bit), but rather “free” to use, distribute, modify, and even sell commercially.
Since the list of open-source 3D printers is very long, we’ve chosen the top 10 machines. So, if you want to build your own 3D printer from scratch (not from a kit) and aren’t sure where to start, read on for our overview of the best DIY 3D printer plans and available resources.
What You’ll Need
Regardless of which printer you choose, you’ll need three main groups of components: electronics, mechanical body, and extruder.
- Electronics: These include a controller, stepper motors, stepper drivers, endstops, and bed heating components (so that you can print with more filament types).
- Mechanical body: All the structural and moving parts of the 3D printer, like the frame, belts and pulleys, rods, and the print bed.
- Extruder: A cold end and a hot end.
Lastly, for software, it’s necessary to upload firmware to your controller of choice.
Let’s take a look at some of our key considerations for choosing these machines, before diving into our top picks.
What We're Looking For
Not all open-source designs are the same, so we’ve evaluated the various machines based on the following:
- Difficulty of the build: How hard is it going to be to put this machine together?
- Quality of the blueprints and documentation: Is the documentation easy to follow or does it need some research?
- Cost: How expensive is the build going to be, roughly?
- Capability of the final product: What are the specifications of the finished product and what materials can it print?
Now that we know what the ideal is, let’s take a look at the machines that you have a good chance of building successfully and that will be able to print high-quality prints for a reasonable price.
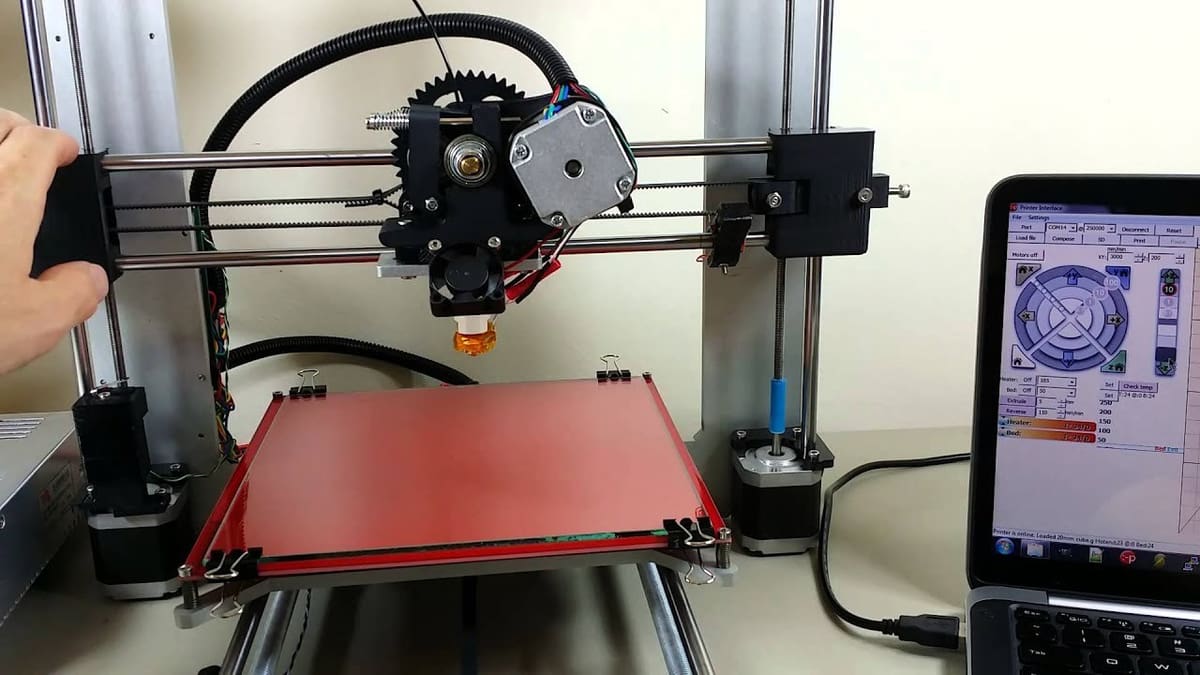
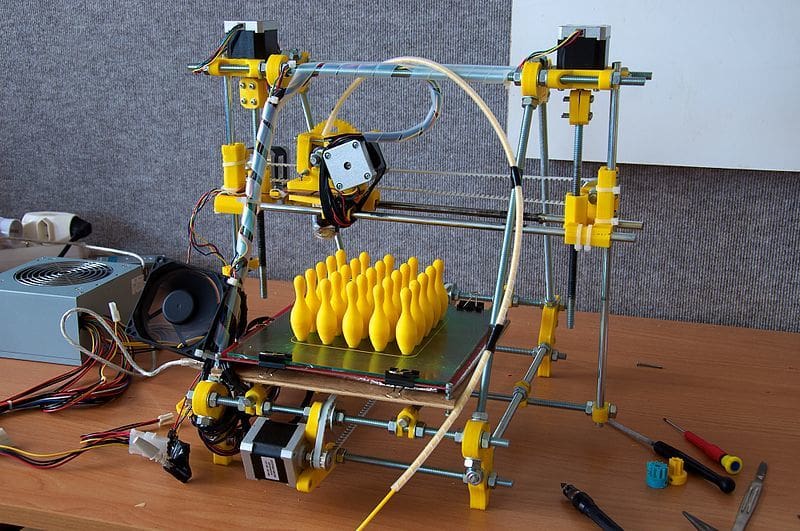
Prusa i3

The Prusa i3 is one of the early 3D printer designs that was modified from the Mendel- and Huxley-style 3D printers.
Though it’s been many years, the i3 is still a community favorite because of its simplicity and ease of use. The Prusa team has also worked on documenting the build very well and improving the electronics and user interface.
Getting Familiar
There are several places to read up on the i3, including on its RepRap wiki, the kit assembly guide, and the build manual.
For the SCAD and STL files of the 3D printed components, start by downloading or cloning the GitHub repository for the Prusa i3. To do that, click on the link or execute the following command in your terminal or console.
git clone https://github.com/josefprusa/Prusa3.git
If you want to use the files used by Josef Prusa in his workshops, you can download or clone the Prusa i3 vanilla repository.
git clone https://github.com/josefprusa/Prusa3-vanilla.git
Bill of Materials
Unfortunately, there doesn’t seem to be an official bill of materials. Instead, the Prusa i3 buyer’s guide page on RepRap wiki has a comprehensive list of parts (nuts, bolts, rods, etc.) with detailed specifications.
There’s an important distinction to make before starting a Prusa i3 build: There are two variants, each with a different style of frame. The box-style frame is commonly made out of plywood, which has a more rigid geometry and is considered more difficult to construct. The single sheet frame is commonly made out of laser-cut aluminum, which is more costly, yet the more popular variant.
Software & Electronics
While there are many options for the electronics, the original Prusa i3 uses a RAMBo board to control its electronics. The board is compatible with different types of firmware. The original Prusa i3 uses its own optimized version of the Marlin firmware.
For the firmware, visit the following repository:
git clone https://github.com/prusa3d/Prusa-Firmware.git
Alternatively, the pre-compiled hex files can be downloaded.
Build Guides
Prusa3D has provided an extensive build guide for the original Prusa i3 printer. The build guide covers in detail the step-by-step process with images and descriptions. There are also several build guides from the community.
Please note that a “homemade” Prusa i3 isn’t, strictly speaking, an original Prusa i3. You may run into uncommon problems, especially if you deviate from the original design.
Community
For community support, visit the issues tab of the GitHub repositories or check out the official support forum for the original Prusa i3. The forum covers all the topics concerning this 3D printer.
Summary
- Build difficulty: The Prusa i3 is one of the easiest builds that we’ve worked with. With many years of development, there are tons of videos and guides available.
- Documentation: Being one of the most-built 3D printers around the world, the documentation is spread across various builds. Make sure to follow one single source and understand the components before diving into building.
- Cost: The costs for this machine can vary a lot based on the quality of components used. We estimate it to be between $300 and $500.
- Build quality: The build quality and prints are great. It’s also very easy to service and maintain. The only downside is that it’s an open machine, which makes it hard to print materials such as ABS and nylon.
Prusa Mendel

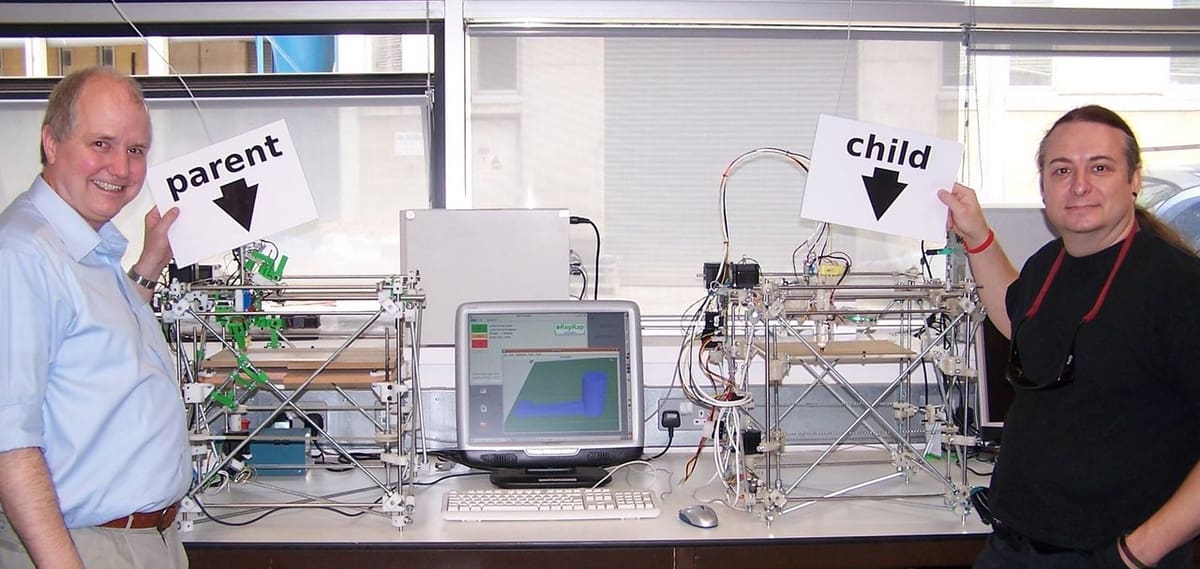
The Mendel printer was one of the very early designs in the open source 3D printing community. It was iterated from the earlier designs made by Dr. Bowyer and incorporated most of the essential components such as the frame and belts.
The idea behind the Mendel was to be able to create a machine that can replicate itself as much as possible.
Getting Familiar
We recommend going with the second iteration of the Mendel. You can check out its RepRap wiki and GitHub to start.
The SCAD and STL files can be downloaded from the GitHub repository:
git clone https://github.com/prusajr/PrusaMendel.git
Please note that it’s expressly stated that the files for the extruder in the repository don’t have the right dimensions. Instead, you should download the correct files from Thingiverse.
Bill of Materials
The material list for the Prusa Mendel was very easy to find compared to that of the Prusa i3; it’s located directly in the “docs” folder of its GitHub repository. The documentation is also excellent, even including images of the assembled parts and an assembly graph.
The RepRap Wiki page for the Prusa Mendel also lists all the parts needed.
Software & Electronics
The Prusa Medel isn’t limited to any one controller. The controller must support four stepper drivers, one thermistor input, and one heater output. If you want your Prusa Mendel to have a heated bed (which is recommended), the controller will need one more additional thermistor input and heater output.
For a list of controllers currently used by the RepRap community, check out the wiki page’s list of electronics.
As for firmware, there doesn’t seem to be any explicit mention in the GitHub repository or on the Prusa Mendel RepRap wiki page, so the generic list of firmware is what you can consult.
Build Guides
There’s a PDF with assembly instructions in the GitHub repository with numbered steps, images, and which parts you’ll need for each step.
The RepRap wiki also has an assembly guide and a video series.
Community
For community support, check out the RepRap forums on RepRap’s website, especially the general Mendel topics forum. These forums cover all things RepRap 3D printers, so you should be able to find help there.
Summary
- Build difficulty: The Mendel is one of the early-style printers that’s built with threaded rods for the frame. It’s quite an easy machine to put together, but make sure to route the wire cables carefully as many designs don’t include these instructions.
- Documentation: There’s certainly no lack of documentation: abundant written and video guides are available for this build.
- Cost: The machine is definitely one of the lower-cost builds on this list. We estimate it to come to about $300.
- Build quality: This isn’t the best machine on the list, as the frame isn’t as rigid as it could be. That being said, a few upgrades and modifications will definitely go a long way. The print quality is also not the best and high-speed printing could cause a lot of wobbling of the machine.
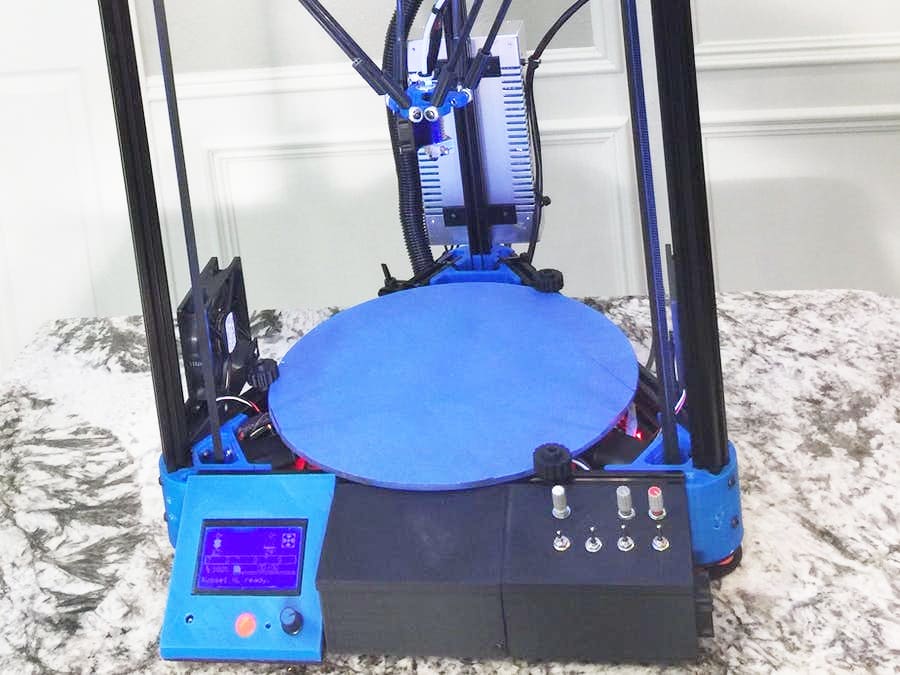
Kossel
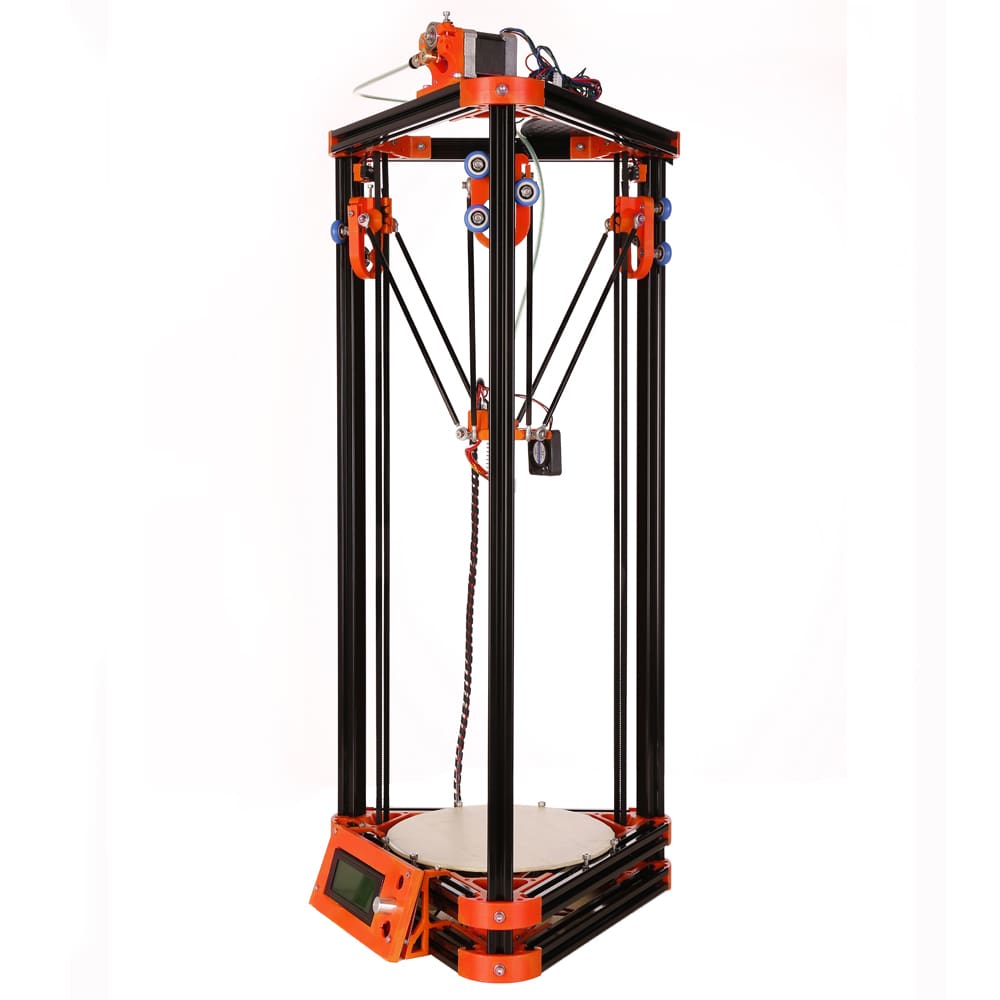
The delta 3D printer Kossel is set apart by its departure from the standard, box-like design of most Cartesian printers. One benefit of delta printers is that they eliminate backlash problems. (Backlash occurs when one of the movement axes has slack, e.g. due to a loose belt.)
The Kossel was first built in 2012 by Johann C. Rocholl in Seattle, USA, based on his Rostock prototype. The DIY 3D printer plans have been around since then, with some minor changes over the years.
Getting Familiar
The Kossel has a RepRap wiki and a GitHub page.
The SCAD and STL files for the Kossel 3D printer can be found in the GitHub repository. Click on the link to find the repository or execute the command to clone the repository.
Bill of Materials
The materials needed are listed on the Kossel’s RepRap wiki page, including all the necessary printed and non-printed parts.
Software & Electronics
The controller must be RIS 1 or RIS 1a compliant, depending on if the 3D printer will have a heated print bed or not. For a list of different controllers, see the electronic RepRap wiki page.
Select one option that’s compatible with the controller you’ve selected from the list of the firmware on RepRap wiki. For example, if you go with a Duet board, a popular 32-bit ARM-based controller board with an ethernet port, this guide for installing the Duet is very helpful.
If you’re installing an LCD display, the Kossel RepRap wiki page has some good information.
Build Guides
Thankfully, there are many good options. You can go with instructions from Blomker Industries, Think3dPrint3d, or check out this video series. There are also instructions for using a 32-bit Duet.
Community
If you have any questions about the Kossel 3D printer, go check out RepRap’s forums. The RepRap community also has an IRC channel, where members of the community will be more than happy to answer your questions.
Summary
- Build difficulty: With the usage of standard parts, we expect the build to be straightforward and easy to complete. The sourcing of the diagonal push rods is something to look for early on in the build process.
- Documentation: The Kossel is one of the first delta machines and many designs that have come later are based on it. Documentation quality is good and also lots of build videos are available for you to learn.
- Cost: As the Kossel represents a bare-bones machine, we can roughly estimate it to be around $400.
- Build quality: The Kossel has become a standard and trusted design with a solid build quality. Finished prints should be on par with other open-source builds.
Hypercube
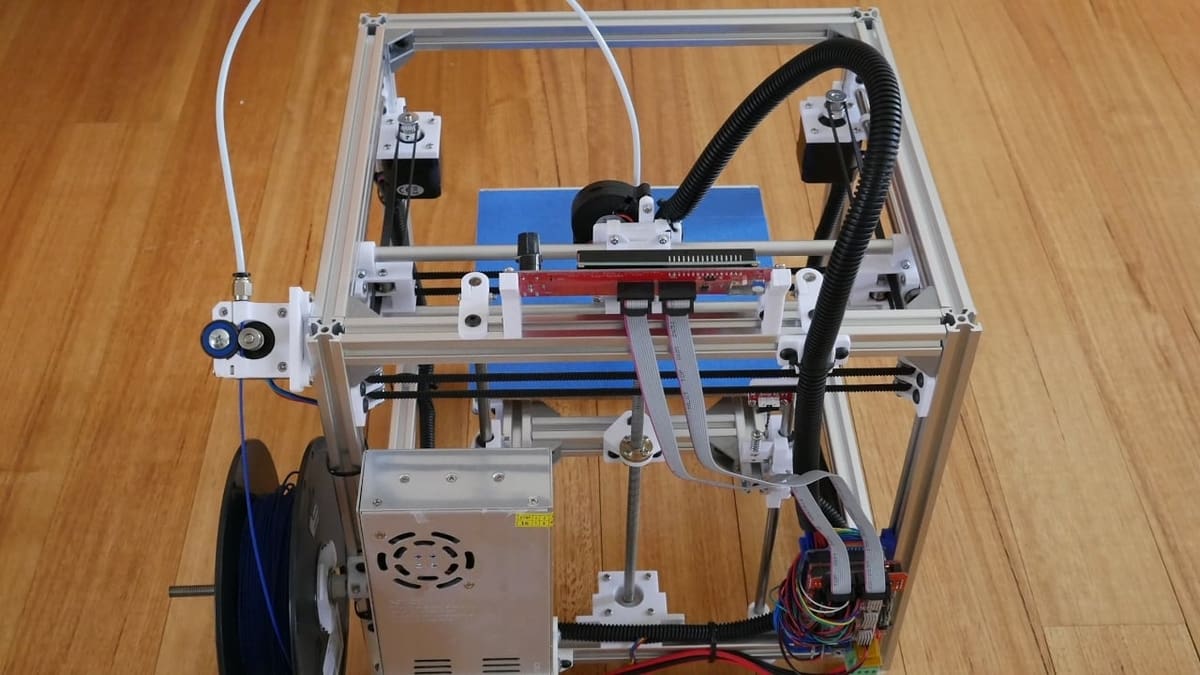
The Hypercube design is one of the CoreXY 3D printers that’s become a community favorite due to its simple and straightforward design and high print quality. It also makes use of a Bowden mechanism to reduce weight and increase speeds. The design was born after YouTuber Tech2C decided to move away from his Prusa design in search of a faster and more compact machine.
Getting Familiar
To start, check out the Hypercube files and instructions on Thingiverse. An extremely detailed overview of everything Hypercube can also be found on GitHub. RepRap wiki has limited information, but it’s useful. Lastly, Tech2C’s YouTube channel is very informative.
Bill of Materials
The BOM is explained on Tech2C’s YouTube video. You can also find a detailed list of materials from the Thingiverse page.
Software & Electronics
You’ll be looking at standard open-source boards for the Hypercube. In this case, the SKR V1.3 32-bit board with Marlin firmware is recommended. Firmware configuration can be found in the downloads section of the Thingiverse page.
Build Guides
Although the Hypercube is quite a popular machine, no central place for all the documentation exists. There are no official build guides, but Tech2C has done a great job of documenting the build process through a series of videos on his channel.
Another interesting set of videos has been made by Fugatech on his channel. Finally, there’s an Instructable that gets into the details of building this machine that can be quite handy.
Community
Hypercube users have a wide variety of platforms they are communicating on. As mentioned on their GitHub page, check out Thingiverse, Facebook, and Reddit.
Summary
- Build difficulty: The build is pretty straightforward and simple, making use of off-the-shelf parts and easy-to-work-with electronics. The build volume of 200 x 200 x 200 mm is also quite standard among 3D printers, so it’s easier to find parts available. Note that you’ll need 3D printed parts to build this machine. Either you’ll need to borrow a friend’s printer or have them printed by a 3D printing service.
- Documentation: The documentation isn’t as good as expected, with bits and pieces of information scattered over a few websites. That being said, Tech2C’s Thingiverse page along with a few videos will give you a good idea of how to get started.
- Cost: An open-frame system like this costs roughly $500.
- Build quality: The build quality is extremely good for the budget involved. The design was made with speed and print quality in mind. One of the downsides is that the machine is completely open so printing anything other than PLA is going to be a challenge.
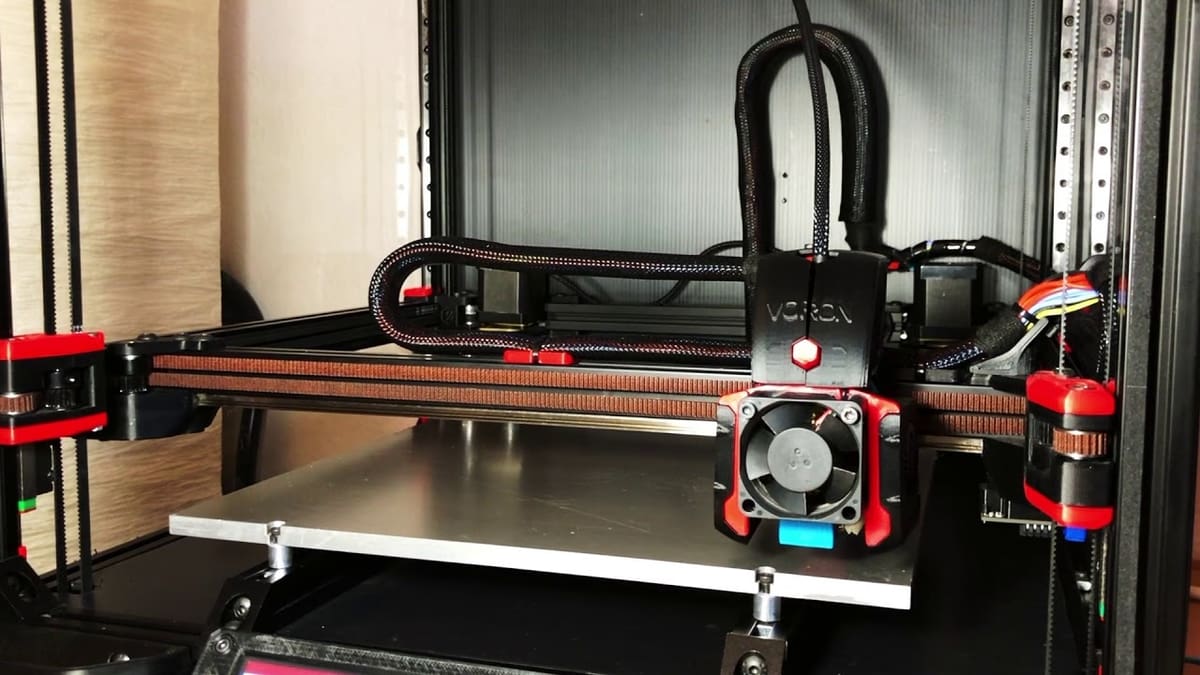
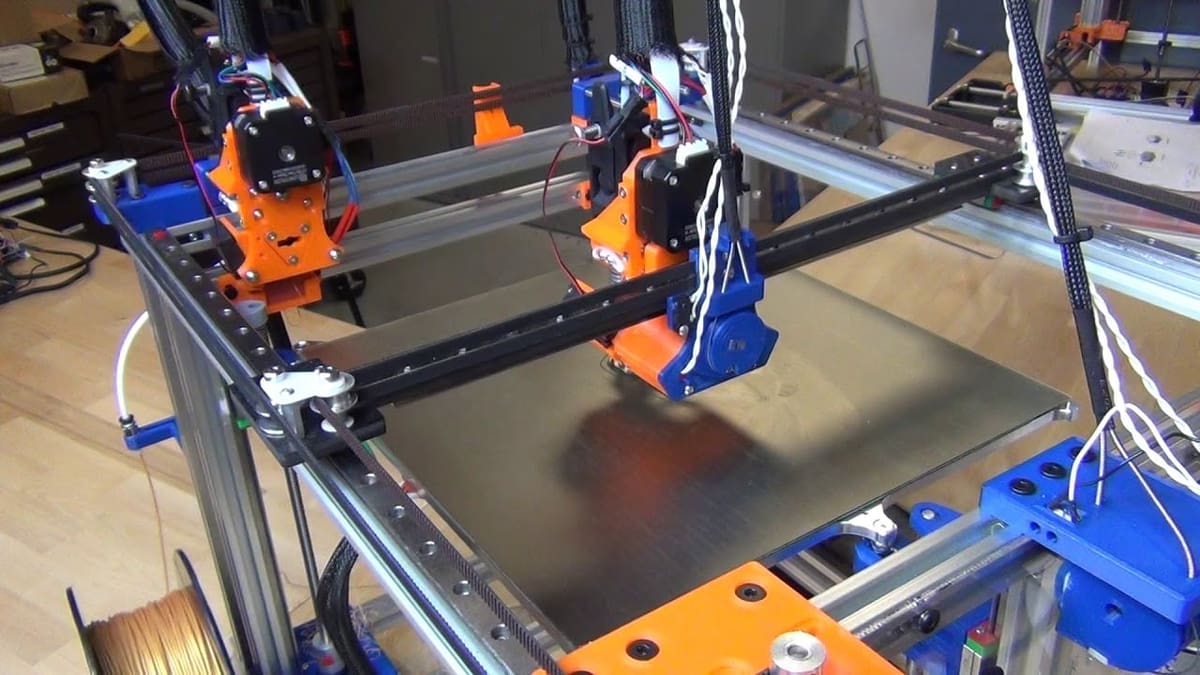
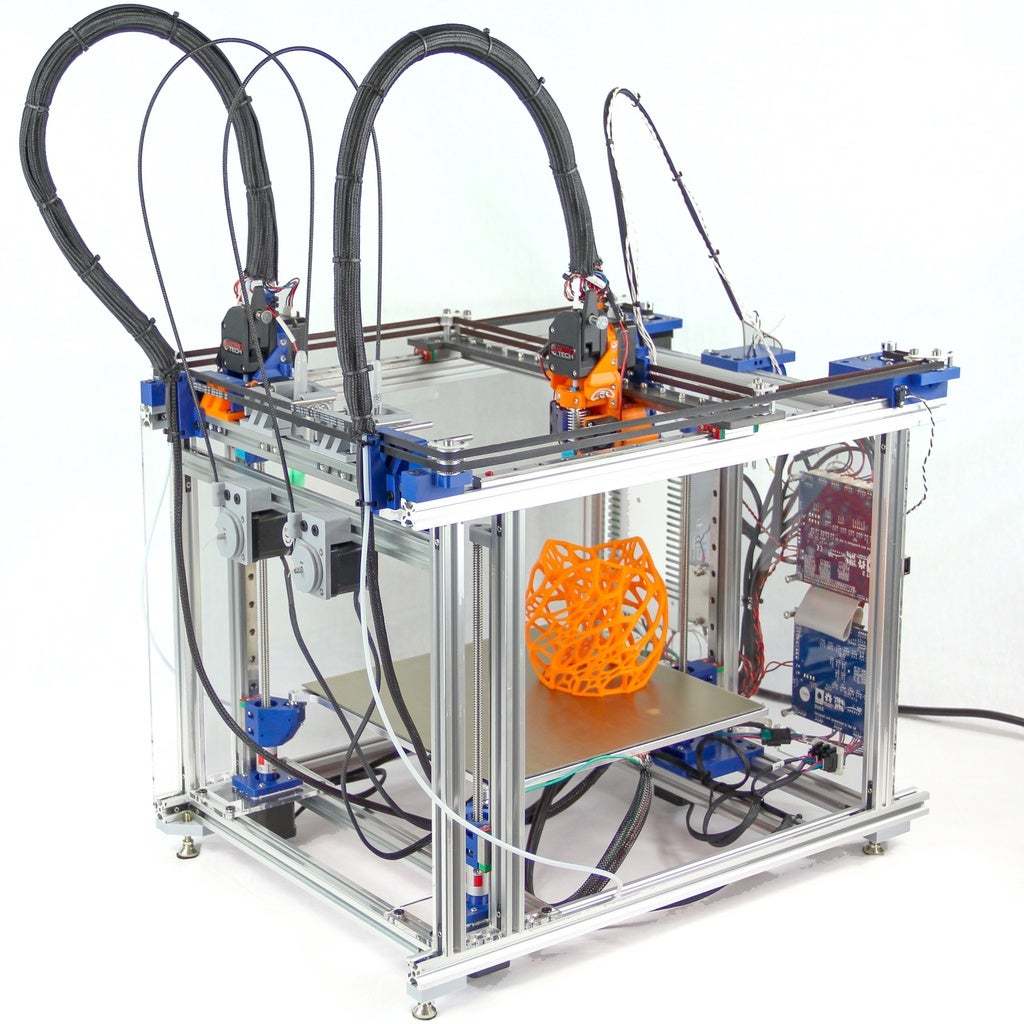
Voron CoreXY
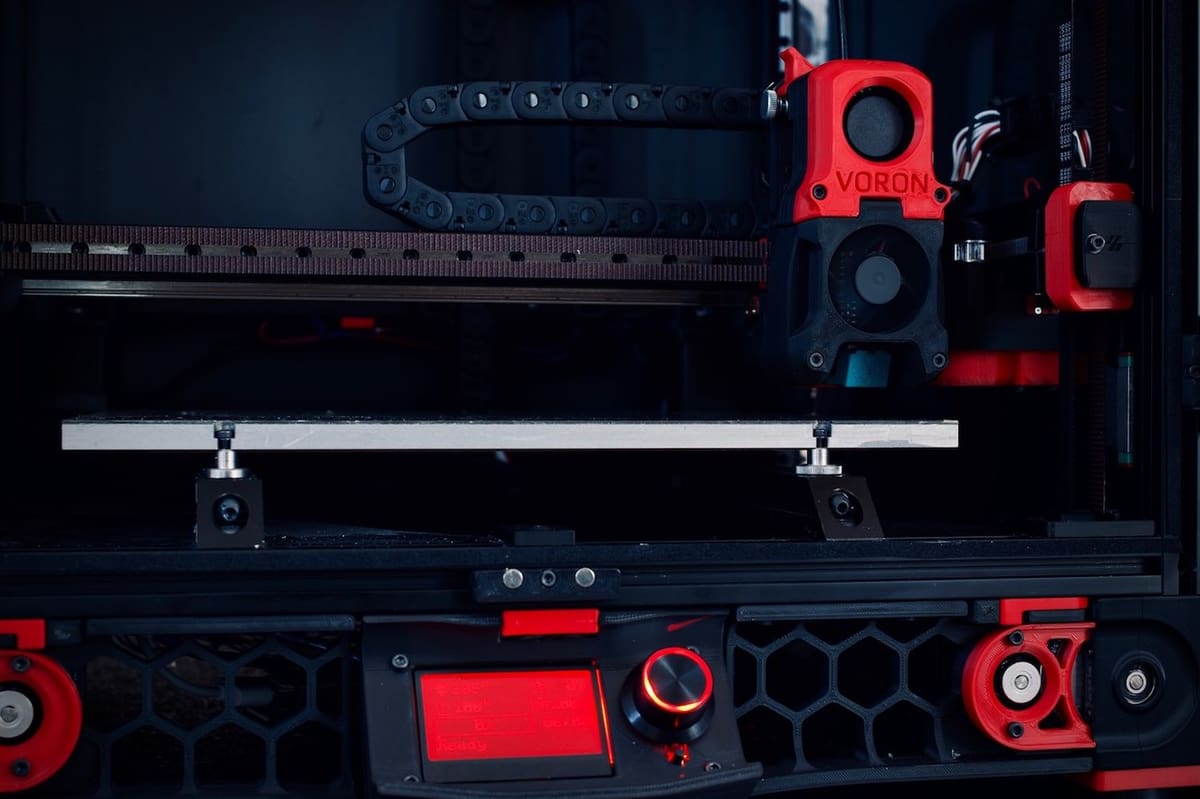
The Voron CoreXY 3D printer is designed for speed and robustness. It’s a unique printer in many aspects, including belts that are used for the Z-axis. The design for the machine was started in 2015 and took a year to complete. All versions of the Voron 3D printer except for the “Switchwire” have been built with the CoreXY framework.
We really love the way this machine has been designed. Many aspects, such as wiring and routing, have been neatly incorporated rather than having parts dangling around. The overall aesthetics are neat and the two-color system of printed parts makes this machine stand out.
Getting Familiar
Apart from just being a pretty machine, the Voron has been extensively documented. In fact, the documentation goes past any expectation that we previously had about open-source machines and has raised the bar really high. All documentation regarding the Voron can be found on their website.
You can also find videos on their YouTube channel and at their GitHub page.
Bill of Materials
The BOM can be found on their website. The latest release, which is the Voron 2.0, has a separate section and each machine can be configured differently. By clicking the configurator button, you can select the various specifications that you’re planning to build. Once done, you have the option to review your BOM and download it as well.
This is by far the most extensive method of providing a BOM. The ability to create customized BOMs is an amazing concept that we hope to see more of in future open-source builds. The creators have put in a considerable amount of effort into the fine details.
Software & Electronics
The Voron uses the SKR v1.3 mainboard with a Raspberry Pi controller to provide Wi-Fi capabilities and browser control with OctoPrint. Instructions on wiring and getting things assembled are available on their website and can be downloaded from the Manual tab.
Build Guides
Voron has done an amazing job with providing crystal clear documentation on how to assembly this machine with step-by-step images. In case you’re a more visual learner, head over to Nero 3dp’s channel on YouTube and check out his playlist on getting started with this build.
Community
The Voron team is a tight-knit group of hobbyists who are trying to improve open-source hardware in 3D printing. You can join their Discord server or Reddit page. The community is quite active and helpful for newcomers.
Summary
- Build difficulty: With a good community and detailed documentation, this build is not as hard as it seems. It also uses off-the-shelf components, which makes it a lot easier.
- Documentation: The documentation for this machine is by far the best we’ve ever seen. The team has taken quite a bit of effort into making it so extensive.
- Cost: The Voron CoreXY is a bit more pricey, costing roughly $1,000. One reason is that it uses more expensive linear block bearings for all axes.
- Build quality: The build quality is quite good, with sturdy frames and a solid print bed.
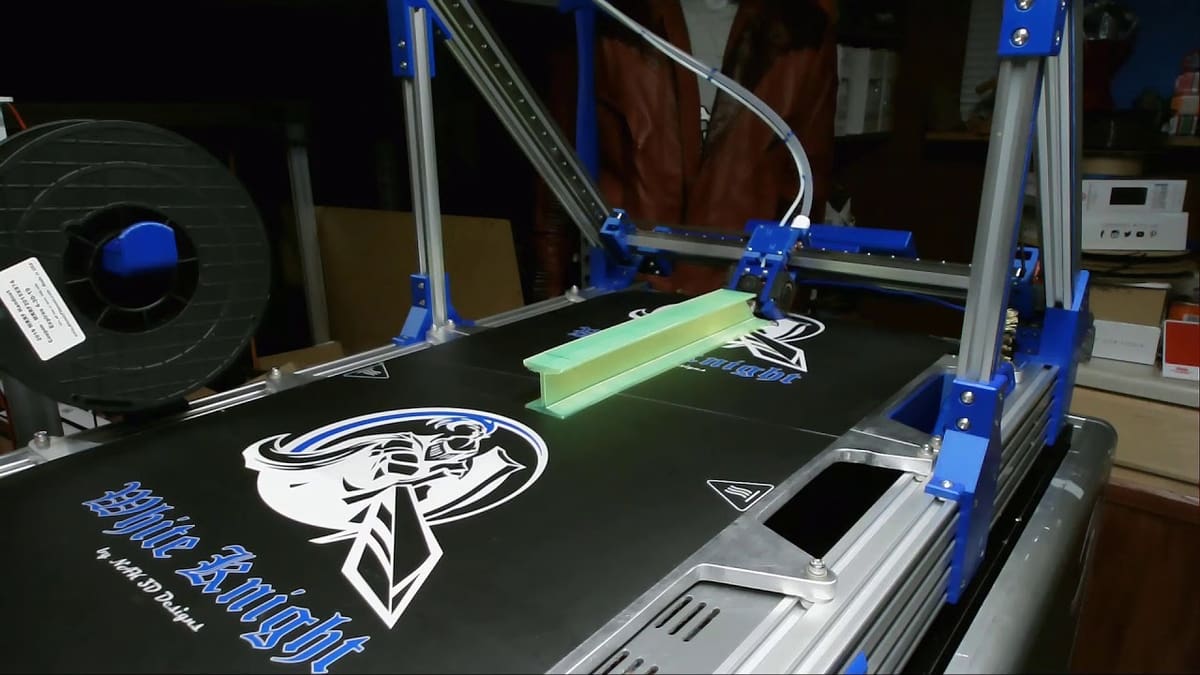
White Knight
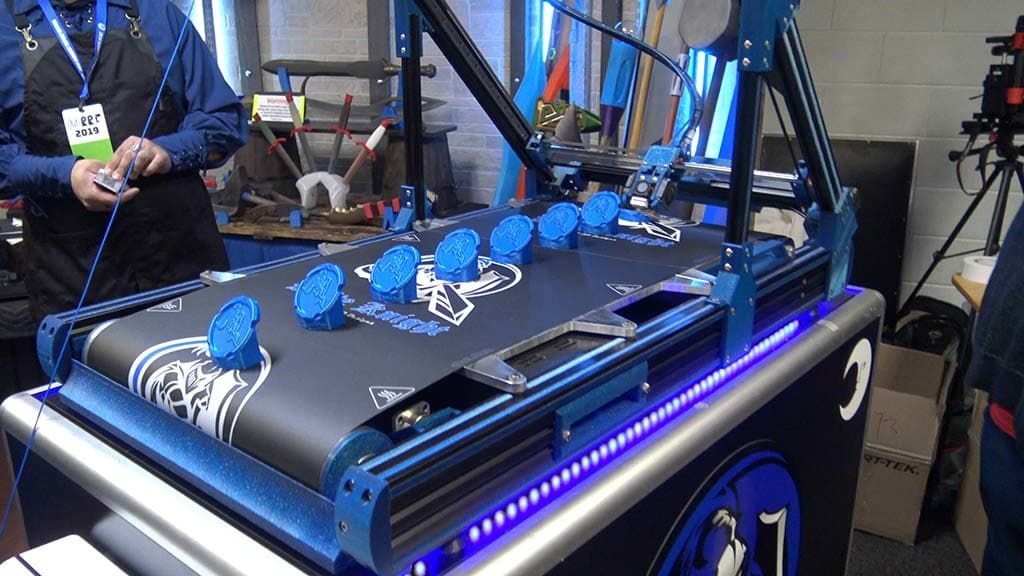
A recent innovation among desktop 3D printer styles was the introduction of belt 3D printers. This innovative type of printer has its extruder at an angle to the belt so you have the capability to print continuously.
The idea is credited to the Blackbelt 3D team back in 2017 and was funded by a Kickstarter campaign. Karl Brown from Nak 3D found the Blackbelt 3D printers too expensive and decided to create a low cost and reliable version himself. This started the journey of the White Knight open-source belt 3D printer.
Getting Familiar
The Nak 3D team has done a great job documenting their machine. All the information can be found on their GitHub page and photographs on their Thingiverse page. Nak 3D Designs also runs a YouTube channel that provides a lot of good information on getting started.
Bill of Materials
The team has documented their machine BOM in great detail down to every nut and bolt. The BOM can be found on their GitHub page under the BOM folder.
Software & Electronics
The Nak 3D team has ensured the best quality in terms of electronics and designed their system around a Duet Wifi board along with the PanelDue. This combination of electronics gives the user a lot of freedom to add more devices if need be or can be modified in case of any upgrades.
Slicing software for belt 3D printers has been made by customizing a version of Cura. It’s available on the GitHub page as well.
Build Guides
While there are several sources available, the best place to get started with the build is Nak 3D’s YouTube channel.
It could also be helpful to go through their CAD files and take a look at how things are assembled. The CAD files are bundled together on their GitHub page under the Fusion 360 folder.
Community
The ease of building this machine, it’s relatively low cost in terms of parts, and a large amount of documentation, all have helped grow a large community around this machine. Additionally, there’s an active community on the Infinity Printers website that’s dedicated to belt 3D printers.
Summary
- Build difficulty: This build is going to be a bit challenging. The infinite printer mechanism is not so common yet and several parts, like the steel belt, might be hard to source.
- Documentation: The documentation quality is good, with detailed instructions and a series of videos available. There’s also a growing community around this design.
- Cost: Karl, the founder of this project, has mentioned that the assembly costs just under $2,000. That’s a bit pricey, but, for a build volume of 400 x 430 x infinity, the cost can be worth it.
- Build quality: The parts for this build are all deliberately high quality. With all the evidence that’s available online, it looks like this is a tank of a machine that’s going to be running long, reliable prints with nice surface finishes.
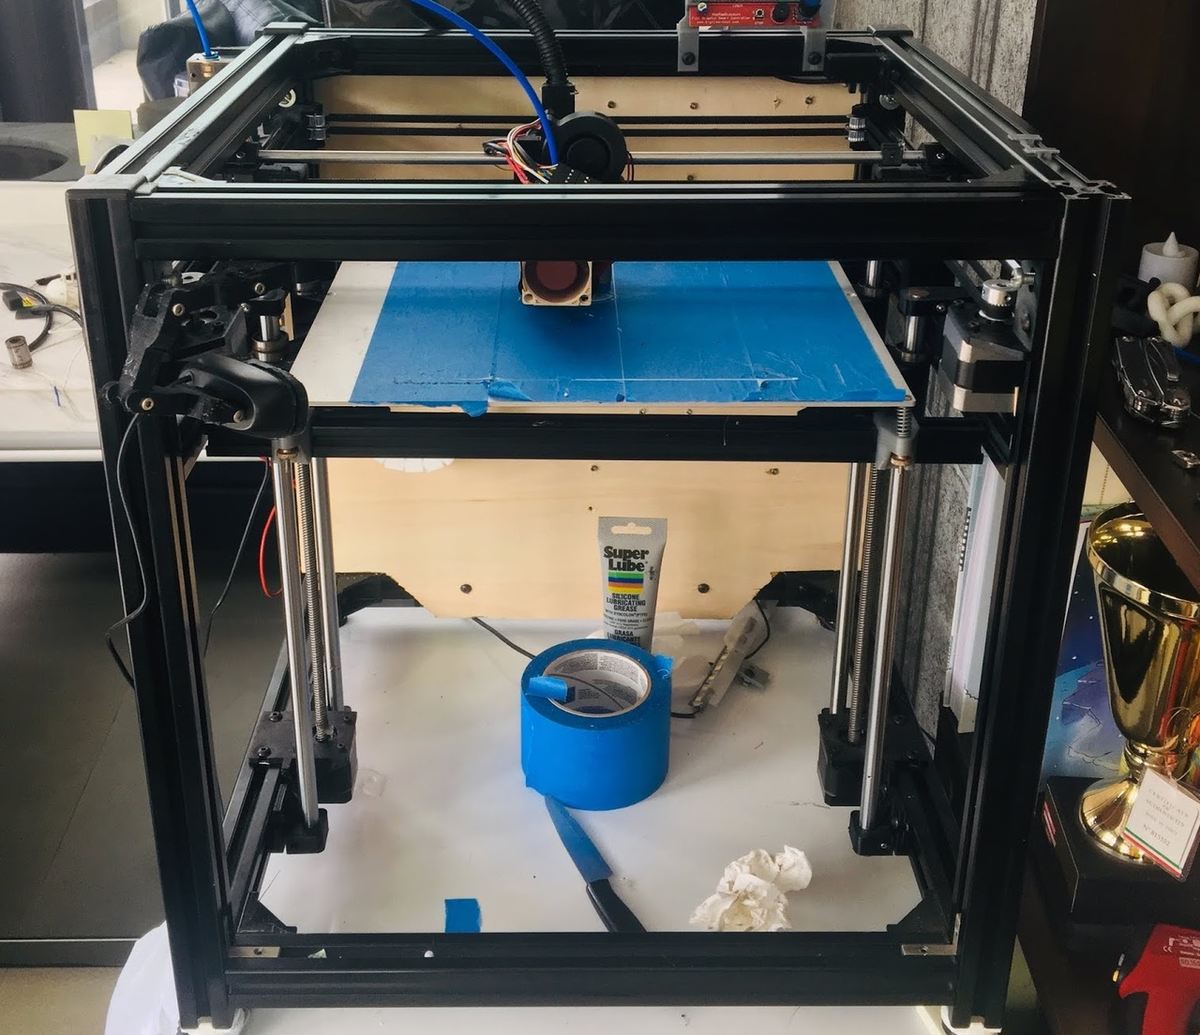
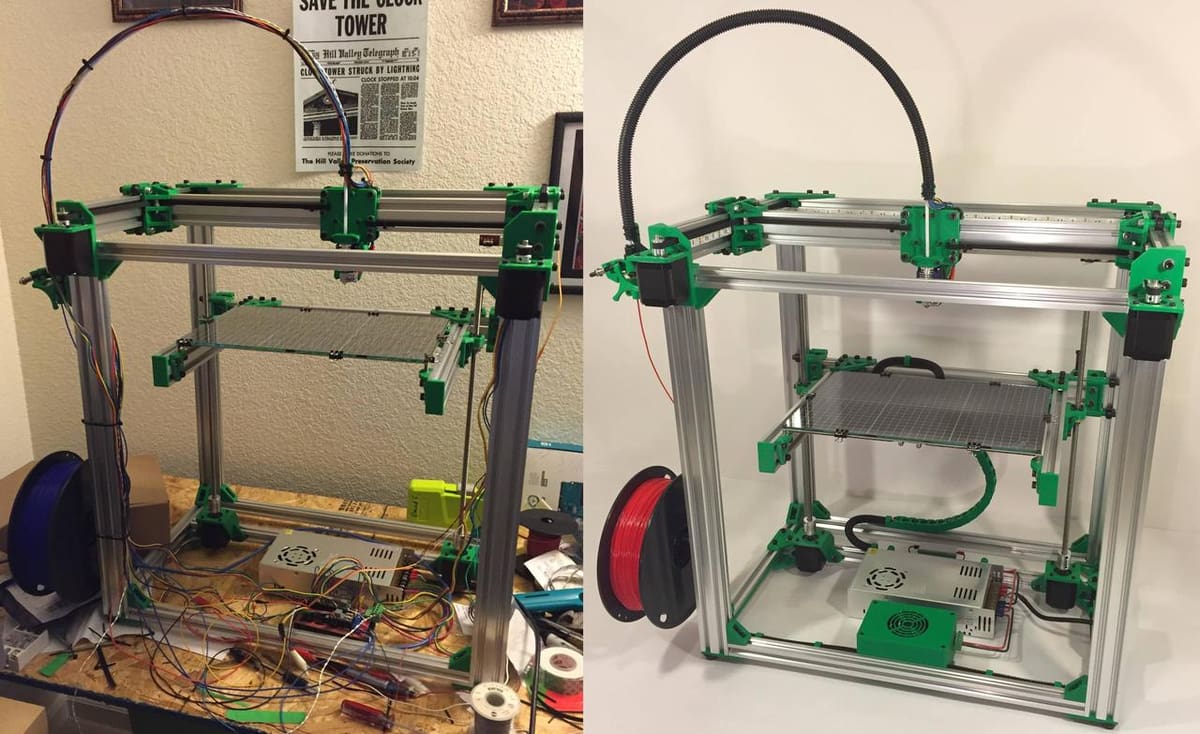
C-Bot / D-Bot
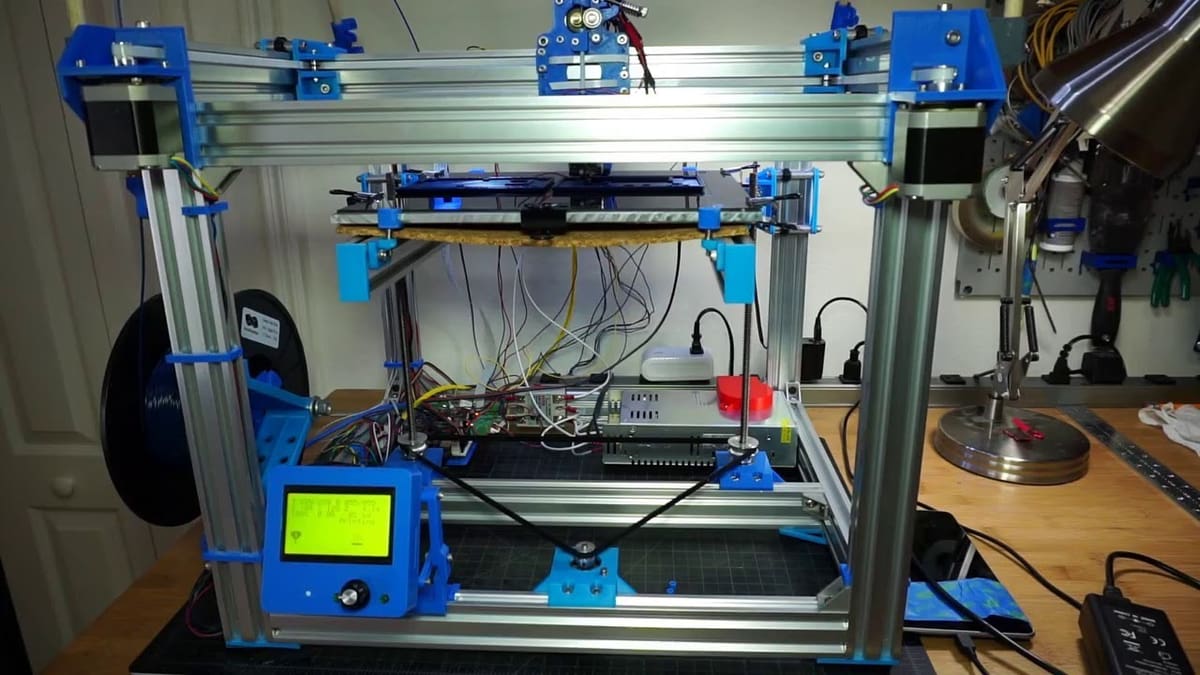
The C-bot printer designs were some of the earliest open-source CoreXY designs on the market, with the first design traced back to 2014. The printer has been remixed so many times over the years and numerous improvements have been made along the way.
The ease of the build and availability of standard components has made this design a favorite among the community.
Getting Familiar
The original C-bot built in 2014 by Carl Feniak is available on Thingiverse. Detailed reviews and build guides are also available on OpenBuilds website.
Bill of Materials
The documentation is all available on its OpenBuilds site under the files and drawings section.
Software & Electronics
The machine uses a standard Ramps 1.4 controller board with an Arduino Mega. It uses Marlin firmware as well and although the firmware files aren’t available, there are many tutorials that can show you how to modify it.
Being an open-source, built-from-scratch machine, any slicer can be used as long as the volume and settings are configured.
Build Guides
The designs for the C-bot are pretty straightforward. That being said, there are detailed guides available under the files and guidance on the OpenBuilds site. Another interesting set of detailed instructions can be found on AK Eric’s blog.
The C-bot is also a great first machine to build to understand the nuts and bolts of a 3D printer. Note that this machine has many 3D printed parts, so make sure you have access to one before you begin.
Community
With the C-bot having been around for a while, there’s quite a large following on its Facebook page. Also, the community on OpenBuilds is strong.
Summary
- Build difficulty: This is probably one of the easiest printers to build on the list. All parts can be bought off the shelf and connected together with 3D printed ones. It’s been built numerous times so you’ll be able to find support in case you’re stuck.
- Documentation: While the documentation does exist, the quality could still be better. At the same time, there’s no lack of information available, it’s just not always well organized.
- Cost: The build is very similar to that of the Hypercube and should cost under $500 as well.
- Build quality: As is true for all builds, the quality depends on how well the machine is assembled. We’ve seen some amazing prints off this machine!
Jubilee
Another printer that we’re extremely excited about is the Jubilee from Joshua Vasquez. This machine was built around the concept of having an easy-to-use and easy-to-build dual-color 3D printer that uses a pick-and-place head, similar to the E3D ToolChanger. The Jubilee incorporates many great features such as the kinematic coupling for the bed, originally introduced by Markforged for their 3D printers.
Getting Familiar
Like many of the popular open-source 3D printers, Jubliee has been extensively documented. You can find a detailed list of instructions on their website that acts as its very own wiki. You can also learn a lot about this machine on Thingiverse.
Bill of Materials
The BOM has been provided as a Google sheet that’s maintained and updated by the Jubliee team. The 3D printed parts can be sourced from their Thingiverse page or their GitHub repository as mentioned above.
Software & Electronics
This machine, like many others, makes use of the Duet Wifi along with the Duex expansion. The Duet boards are highly reliable and are one of the best boards in the market for 3D printers.
With respect to firmware, the team has provided customized configuration files for the Duet board that will help with the tool-change motion planning. They also have a customized slicing profile that works with PrusaSlicer.
Build Guides
A comprehensive step-by-step guide exists on their wiki. This set of assembly instructions would be a good starting point before moving to Joshua Vasquez’s YouTube channel where he explains the working of the machine and other cool aspects!
Community
Currently, the community is a small, tight-knit group of enthusiastic makers. You can join them on their Discord channel, which is the official community group.
Summary
- Build difficulty: Being a complex design, it’s going to be a slightly harder build than some. The unique tool-changing mechanism and the kinematic couplings are not something people are used to dealing with. At the same time, the frames and most of the other parts of the machine are straightforward and make use of aluminum extrusions. Getting perfect dual-color prints might take some experimentation.
- Documentation: The documentation is quite extensive, well organized, and professionally done. Every aspect has been thought of, including maintenance and troubleshooting.
- Cost: The detailed BOM sheet includes the costs of every single component and the total works out to roughly $2,000. It’s definitely on the expensive side, but it does give you dual-printing functionality, along with a large print volume.
- Build quality: For a dual-material tool-changing machine, the build quality is good as it’s based on the solid E3D ToolChanger mechanism. Images of dual-colored prints shared on the forums are also quite impressive.
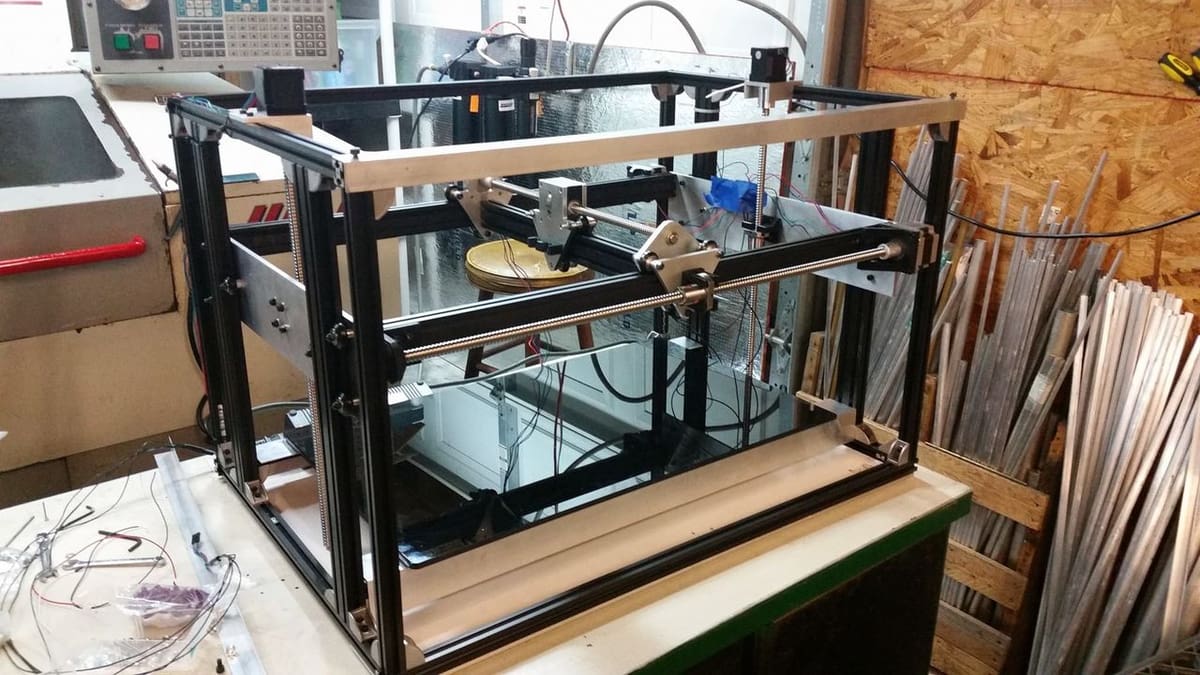
Workhorse
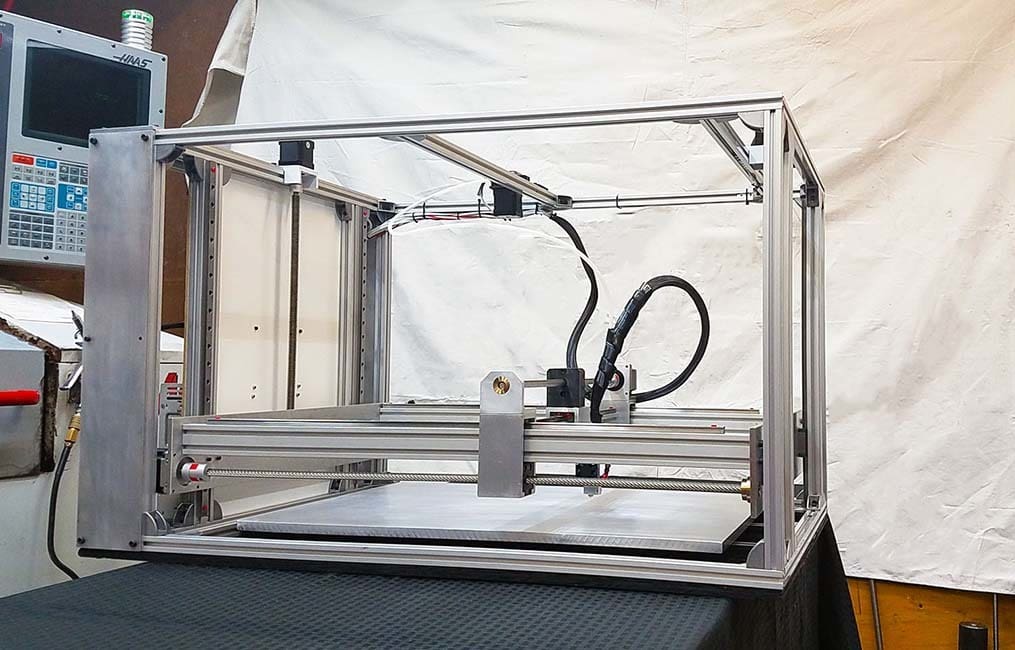
The Workhorse 3D printer, developed by 3D Distributed, looks like a simple Cartesian 3D printer. But, in reality, it’s a beast of a machine. A number of features set the Workhorse apart, such as the use of lead screws for all axes, a large build volume of 600 x 350 x 350 mm, and machined aluminum frames.
Getting Familiar
You can read all about the details of the Workhorse on 3D Distributed’s website. Also, check out how the printer works on their YouTube channel.
Bill of Materials
While the documentation for this machine can still use a bit of improvement, the BOM is listed on their website. Note that a lot of the parts (like motor mounts) are machined from aluminum instead of 3D printed. This will likely give the parts a longer life but will be harder for makers to manufacture or acquire.
Software & Electronics
No surprises here, but the Workhorse machine makes use of the Duet Wifi board as well. Like with all Duet boards, it uses the RepRapFirmware. You can find a configuration guide in their YouTube video.
Since this printer uses Cartesian coordinates, any slicer can be set up for the Workhorse without any hurdles.
Build Guides
Detailed build guides aren’t available, but 3D Distributed has shared videos of the process, which can be found on their assembly instructions page.
The build process is straightforward and uses aluminum extrusions and T-slot nuts. CAD files are also available for download on Thingiverse, in case you want to modify the drawings or customize the machine further.
Community
Currently, there isn’t a large community around this machine. There is, however, a Facebook page where updates and improvements are discussed. Additionally, the comments on their website can be a good source of information and connection to others also building this machine.
Summary
- Build difficulty: For the most part, the Workhorse 3D printer makes use of standard aluminum extrusions. Sourcing the lead screws of higher pitch and machined aluminum parts could be a challenge while building this machine.
- Documentation: While the documentation is available, we feel that more detail can be added to give a clearer picture of the build. For example, it would be nice to include firmware configurations and slicer setting profiles.
- Cost: Although there are no official sources on this data, we could safely estimate the cost of the build to be about $1,500. The use of lead screws on all axes and the large build volume, coupled with the high-quality electronics, makes this an expensive machine.
- Build quality: The quality is on par with a lot of commercial machines. Once built, as the name suggests, it’s known for its reliability.
BCN3D Sigma
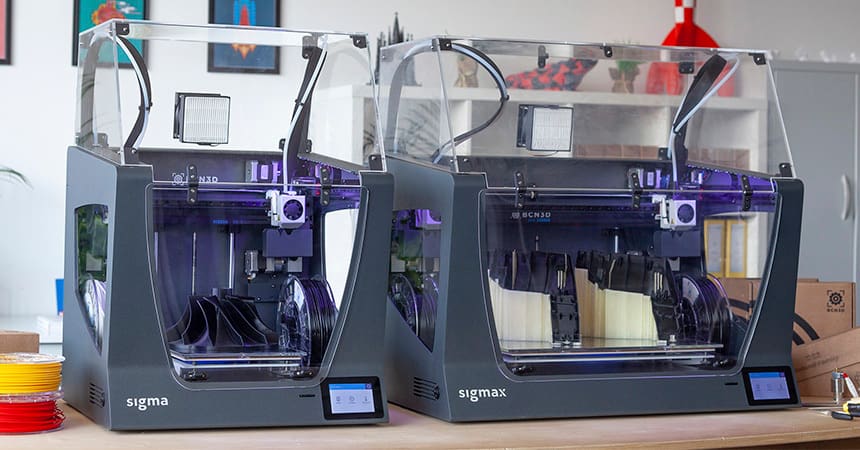
BCN3D Sigma is a professional-grade high-performance 3D printer. Although the Sigma line of 3D printers is open source, it’s not very easy to replicate the product; the machine is built with expensive techniques such as laser cutting, CNC bending, and welding.
All of these processes require a certain level of fabrication knowledge and some experimentation as well. For example, the welding needs to be supported with fixtures and certain fasteners need to be punched into the sheets.
Getting Familiar
BCN3D team has documented their journey from their early days to where they have reached today on their website. It’s a gold mine of information for up-and-coming machine builders, who can gain a ton of knowledge in the world of professional fabrication.
Bill of Materials
An extremely comprehensive bill of materials is available at their GitHub page under the mechanics repository. We do recommend checking out their other repositories as well such as the process repository that goes through the various guides and fixtures required.
Software & Electronics
Once again, the BCN3D team has provided dedicated repositories for their custom electronics and their version of Marlin, which can be found on BCN3D’s GitHub page.
Build Guides
Although BCN3D has provided a set of assembly guides, it’s quite hard to follow. You’ll have to complete the aluminum frame manufacturing process and get the custom electronics made. This can be a daunting process, especially if you’re new to DIY 3D printers.
To date, we have not seen an individual build this machine by themselves, so it’s going to be hard to find a YouTube tutorial on this as well.
Community
Unfortunately, another place where BCN3D lacks is a robust community around their products. This is probably due to the fact that the machine is quite expensive and it’s hard to build.
Summary
- Build difficulty: This machine is probably the hardest on the list to build in terms of difficulty. As mentioned before, good working knowledge with sheet metal fabrication is a prerequisite.
- Documentation: While there is a ton of documentation for this machine, we found that most of it is in Spanish, leaving many makers in a bit of a bind. You could always translate the text, but that’s going to be a time-consuming process.
- Cost: It’s hard to define a rough cost for this machine as we don’t know of any makers out there who have built this from scratch. But to take a guess, with all the manufacturing and machining involved, it’s going to be upwards of $2,000.
- Build quality: The build quality is phenomenal! The only catch is you’ll have to get things done right. For example, improper welding or sheet punching can lead to disastrous consequences.
Lead image source: Tailored Plans
License: The text of "3D Printer Plans: 10 Great 3D Printer Blueprints to DIY" by All3DP is licensed under a Creative Commons Attribution 4.0 International License.