3D printing can be a fun hobby, but there are many challenges that you can run into. Particularly troublesome is the hot end, as many issues can occur there. The entire hot end assembly is composed of several main parts, with the heater block and nozzle being the only place where filament is supposed to melt – hence, the area being known as the “melt zone”.
If filament melts elsewhere in the assembly, that’s when you’ll start to have some issues. Heat drifting beyond the melt zone is called “heat creep”, and it could lead to problem such as clogs, jams, or under-extrusion. In this article, we’ll tell you more about what heat creep is and what causes it. We’ll also offer a few solutions, as well as tips and tricks to help combat it.
Let’s dive in!
What Is Heat Creep Exactly?
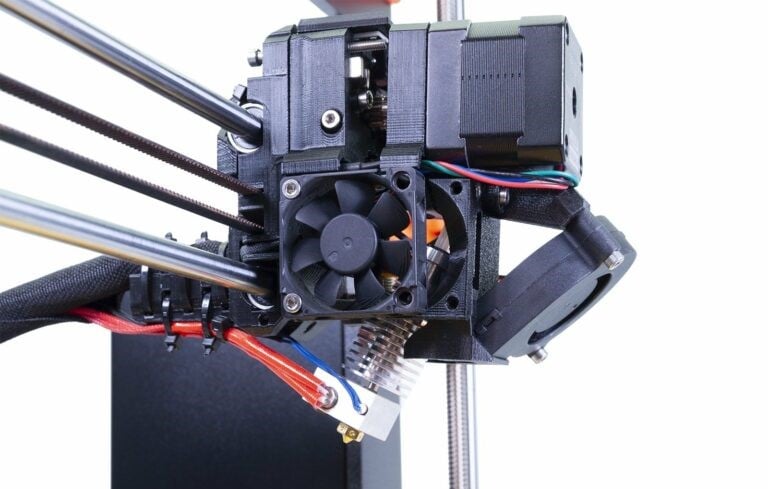
As we said above, heat creep is the movement of heat up the hot end, causing filament to melt too early, before the melt zone. It’s helpful to have the anatomy of a hot end in mind. Generally, its main components include the following (from top to bottom):
- Feed tube: For Bowden extruders, a PTFE tube feeds into the printhead. Some direct extruders include a PTFE liner, through which the filament is fed into the hot end.
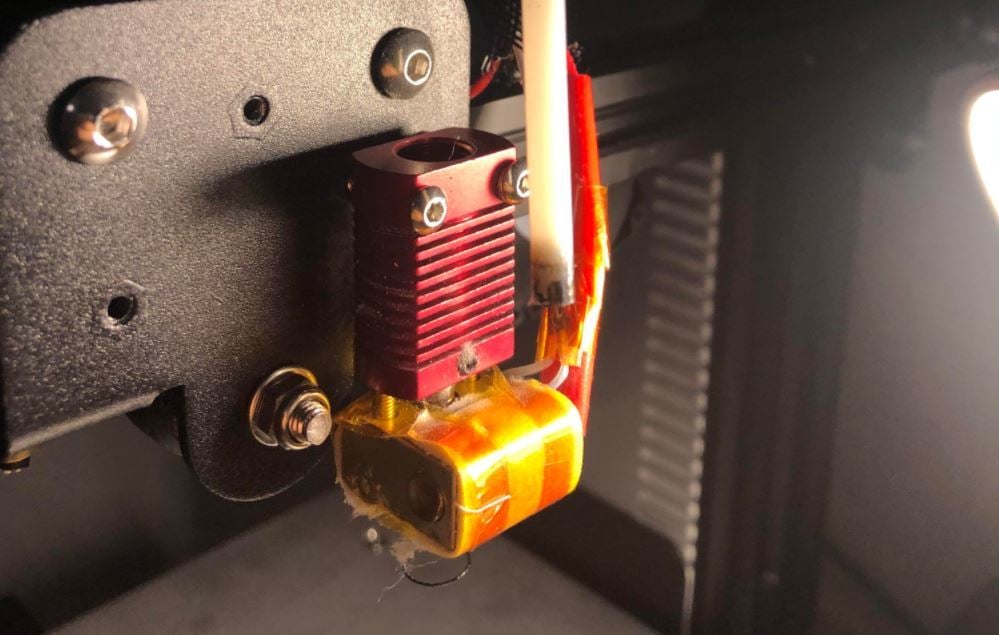
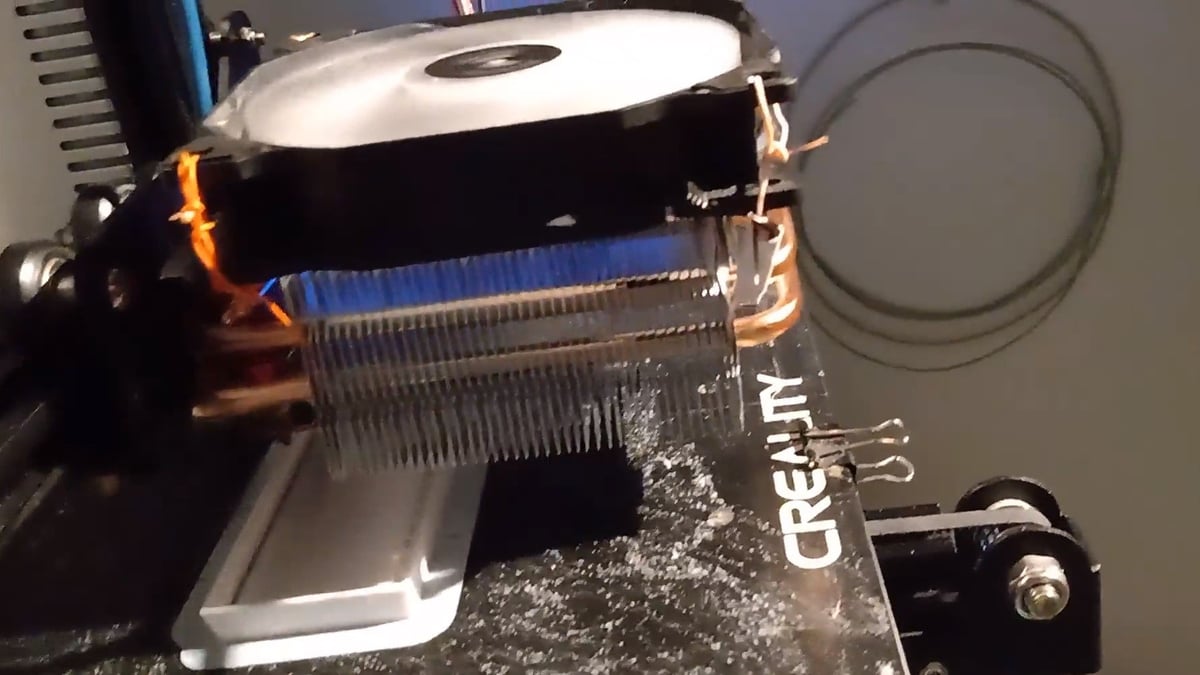
- Heat break and heatsink: The heat break is a threaded metal tube whose upper part is threaded into the heat sink and the lower part, into the heater block. The heatsink, in combination with a fan, cools the upper part of the heat break.
- Heater block: This is where things get hot! A heater cartridge heats up the block, and a thermistor allows for temperature measurements.
- Nozzle: The final and most visible part of the hot end assembly, the nozzle is also heated by the heater block. Melted filament pools inside of it, then is extruded onto the build surface.
So, if the temperature of the heat break and heatsink increases, filament will melt there and potentially accumulate, jamming the hot end. This is distinct from a simple clogged nozzle, which occurs further down on the assembly and can be resolved a few different ways.
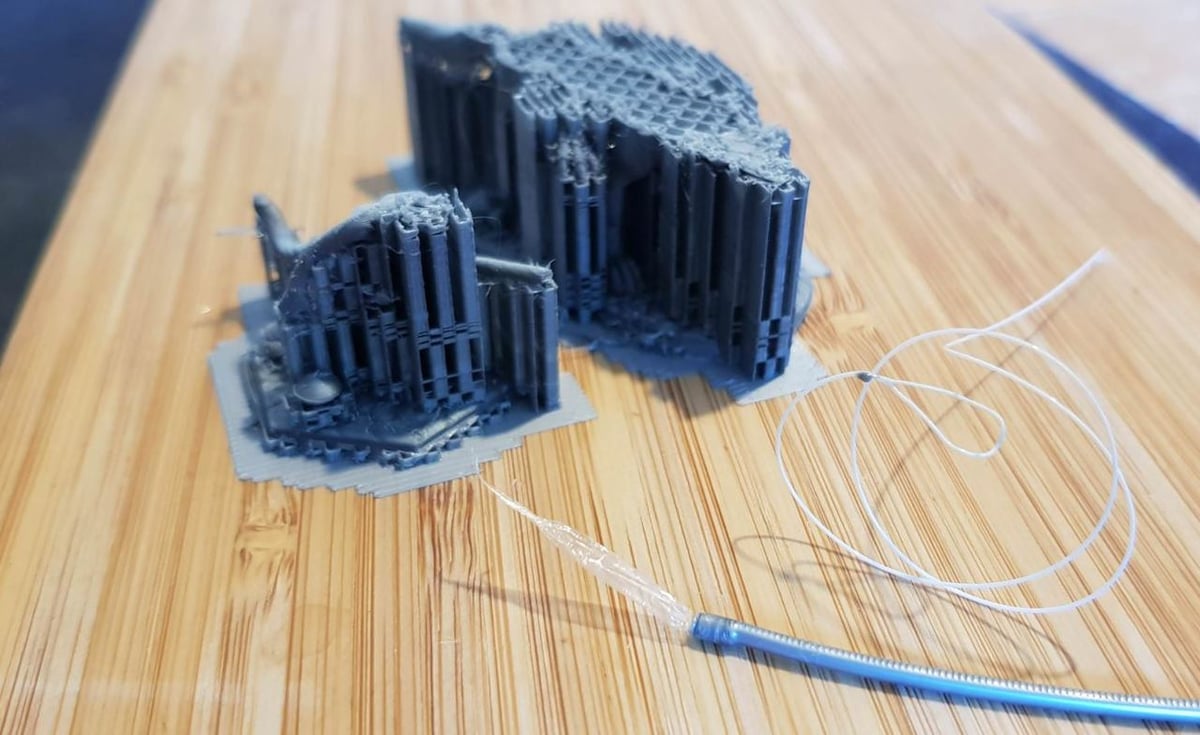
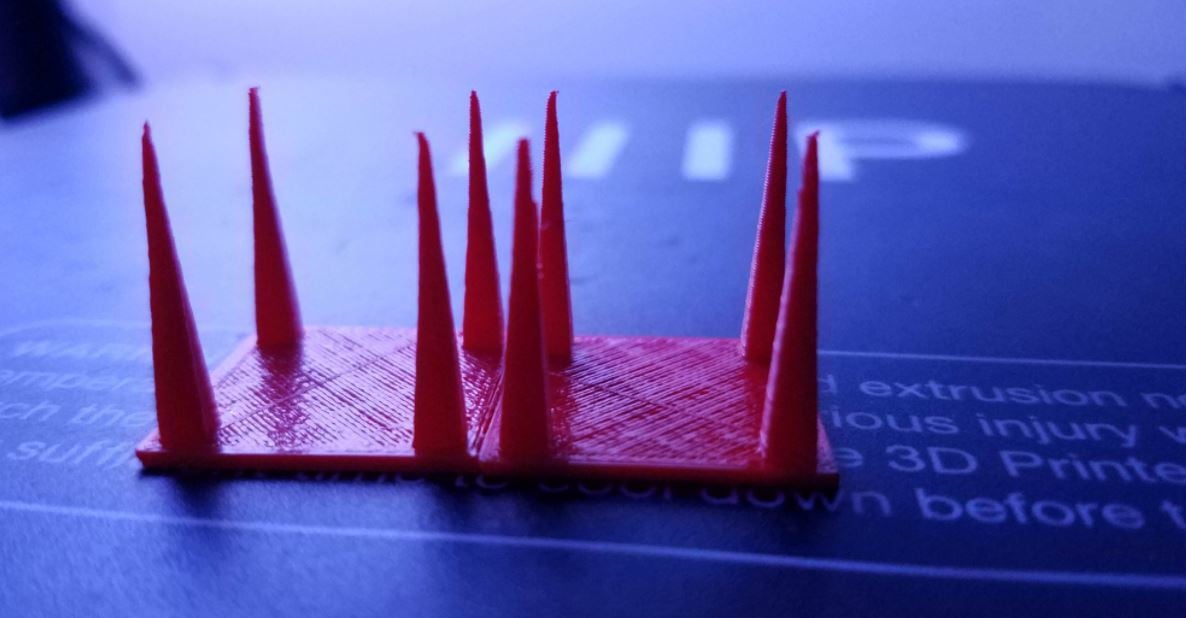
Even if your printer is still extruding filament, heat creep can still cause extrusion problems. You can see evidence of heat creep when your 3D printed part looks only half-complete with a fuzzy top (like in the above image). Signs of heat creep can also be seen on the filament when you pull it out and find that there’s an air bubble.
Lastly, it’s important to note that the consequences of heat creep are especially evident when printing filaments with low printing temperatures, like PLA. Given their low glass transition temperature, they’re more likely to soften and melt in the heat break and heatsink if the temperatures rise there.
Causes
Before we look at different solutions, let’s consider what may cause heat creep. This list isn’t exhaustive but represents the main reasons:
- Hot end fan doesn’t cool enough: If your hot end fan isn’t on or isn’t running fast enough, there isn’t enough cooling for the heatsink. Without any cooling to dissipate heat, heat creep is likely to occur.
- Hot end is too hot: If your hot end is too hot, this can cause heat creep. That’s because the hotter the heater block gets, the more heat there is, with any excess possibly traveling to undesired locations.
- Hot end design: Not all hot ends have the same capacity to deal with heat. Given the absence of a PTFE liner, heat may travel more easily in an all-metal hot end, especially if other factors result in too much heat building up. Also, beware of lower quality hot ends, as they allow heat to travel through the assembly more easily.
A problem with any of these can single-handedly lead to heat creep. All of them combined would do the same and, perhaps, exacerbate the problem. Therefore, it’s important to consider all possibilities, as dealing with one possible cause may not be enough to solve the issue. Now that we know the main reasons why heat creep can happen, let’s get to the solutions!
Preliminaries
If you’re reading an article about heat creep and suspect that your printer is suffering from it, you probably have clogged or jammed hot end, right? Assuming you were able to clear that out successfully and you’re ready to start printing again, you’ll want to do a few checks before you start tinkering with your print settings.
A Hot End Fan Is Essential
If for some reason, you’re printing without a hot end fan, that’s your problem right there! Its primary job is to regulate heat in the hot end, and without it, the heat is gonna creep.
So, if you’ve unplugged your fan, plug it back in. If you don’t have one, add a small 4020 fan (40 x 20 mm) somewhere around the heatsink, ideally attached to or blowing towards the heatsink. Make sure to mount it correctly so the fan isn’t backward.
Some makers even install two fans. Noctua and CUI Devices offer effective hot end fans, but there are alternatives.
PTFE Tube / Liner Is Properly Inserted
If your hot end has a PTFE liner or a PTFE tube feeds directly into it, make sure that it’s properly inserted into the hot end. This may look a little different depending on the type of hot end you have. For MK10 hot ends, for example, the tube or liner should sit flush against the nozzle.
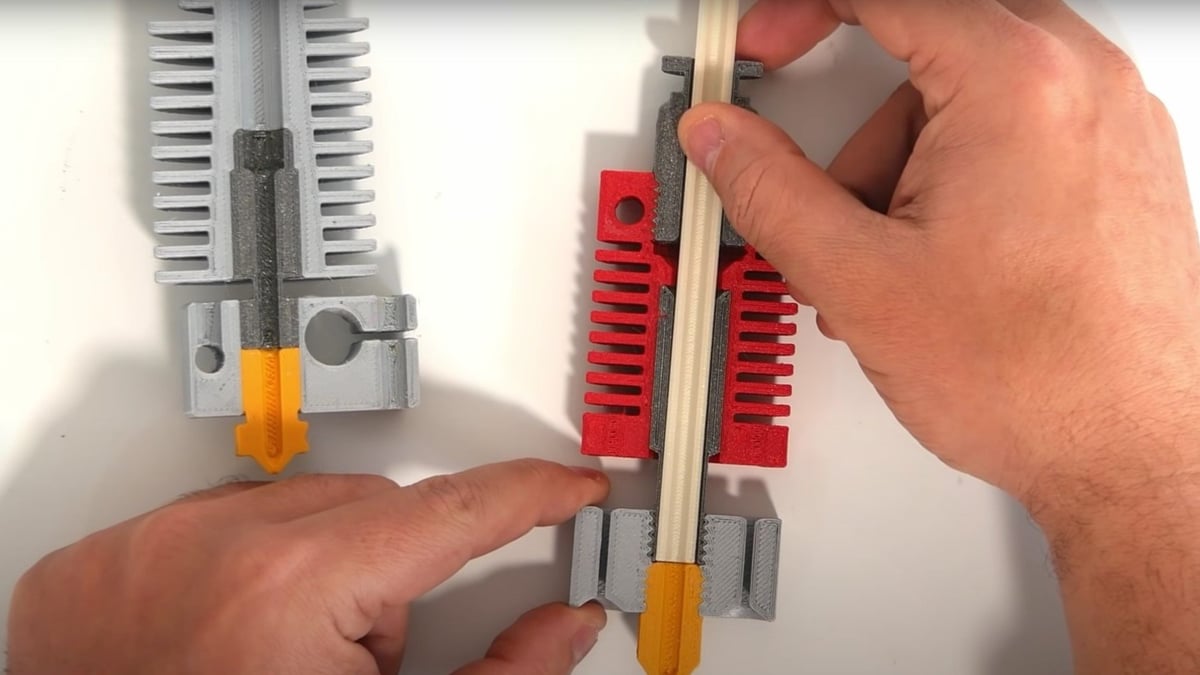
For V6-style hot ends, the tube or liner should be flush against the heat break, which is higher up in the hot end assembly. 3D Maker Noob’s video illustrates the difference. Check what the proper placement of the PTFE tube or liner is for whatever type of hot end you have, then ensure that’s the case on your printer.
If you notice that the end of your PTFE tube is deformed or burned in any way, it might be a good idea to cut the end a bit so that it sits flush against wherever it’s supposed to be touching in your hot end.
Clean Your Hot End Assembly & Fan
Even though you’ve already cleared the clogged filament from your hot end, you want to make sure give some TLC to the whole assembly. Use a damp microfiber cloth or rubbing alcohol cloth and wipe down the exterior and interior of your hot end components while they’re hot (normal printing temperature). Exercise caution, though, otherwise the hot end will “heat creep” your fingers as one Discord user put it.
It’s important to do this every few prints because dust and other particles can limit the heatsink’s ability to dissipate heat. Moreover, a dirty hot end assembly can cause more issues than just heat creep.
While you’re at it, you’ll also want to clean the hot end fan. A dirty fan can move slower and have less of a cooling impact on your hot end assembly. So, clean it occasionally with a damp microfiber or rubbing alcohol cloth by gently wiping the underside and overside of the fan.
Now, if you’ve done all of these checks and you’re still experiencing problems related to heat creep, the following are some solutions to mitigate, if not eliminate, heat creep.
Solution #1: Increase Fan Speed
You may need to increase your fan speed. The speed needs to be fast enough to dissipate heat in the heatsink so that the filament doesn’t melt before it should.
First, you should set the fan to 100% speed and make sure that the heat creep stops occurring. After it does, lower the speed in increments of 10% if you experience warping, cracking, or other cooling-related print issues.
Solution #2: Reduce Ambient Heat
The hot end fans can only be effective at dissipating heat if they’re blowing cooler air onto the heatsink. If the ambient heat around your printer is very high, the fans will be blowing primarily hot air on the heatsink. So, you’ll need to drop the ambient heat around your printer.
Since putting your printer in the fridge won’t help, start by dropping the print bed temperature in your slicer by 5 to 10 degrees. This will help reduce the heat rising up to the extruder.
If you’re printing with an enclosure, you may need to open the enclosure’s door to reduce the interior temperature – especially when you’re printing with a filament that isn’t as sensitive to temperature fluctuations.
If it’s summertime or you’re simply in a hot part of the world, a high room temperature in the place where you’re printing could be problematic. BCN3D, for example, recommends a room temperature between 15 °C and 30 °C, while AnkerMake narrows that down to 20 °C and 25 °C for printing PLA. So, if the ambient temperatures in your workspace are too hot, you might want to crank up the air conditioner or move your printing to a cooler environment.
Solution #3: Increase Printing Speed
Another simple solution, increasing print speed, is more of a heat creep mitigation strategy. Increasing speed is usually the opposite of what you want to do for hot end jams because it can cause under-extrusion. It’s a different scenario, however, for heat creep.
Heating an object takes time. Moving filament faster through the hot end means it takes less time to reach the melt zone. By doing this, you’re decreasing the chances of filament getting hot enough to melt before it should.
You should use the same temperature with a speed of 10-15 mm/s faster than what you normally use. Consider adjusting your printing speed in increments of 2-5 mm/s until you find the right mix between proper melting and preventing under-extrusion.
Solution #4: Lower Hot End Temperature
A high hot end temperature means that there’s more heat within the heater block, and the excess heat may travel up the hot end assembly. Now, it’s possible that you’ve set the hot end temperature too high, but it’s also the case that the hot end may be excessively hot due to problems in the assembly, including misalignment of components, degraded parts, poorly applied thermal paste, or a malfunctioning temperature sensor.
Confirm that you’re printing within the temperature range required by your material. If it’s too high, definitely lower it. Just make sure to adjust the print speed accordingly, too.
If you’re printing within the range and none of the other solutions are working, it may be worthwhile to test whether your hot end is consistently reaching the correct temperature.
Solution #5: Replace the Hot End
The final and more drastic option is to swap out your hot end for something better able to accommodate your projects.
Though all-metal hot ends are often seen as upgrades over others, they could act as a heat creep catalyst if other conditions are producing an excess of heat. In this case, you might want to consider using a PTFE-lined hot end.
A PTFE-lined hot end, along with the removable PTFE tube, provides more insulation for the filament and preserves the sub-melting temperature until the filament hits the melt zone. This solution prevents heat from getting into the hot end but doesn’t stop the problem.
All of that said, any quality hot end rated for high temperatures shouldn’t give you issues with heat creep (assuming your setup isn’t causing other issues). All-metal hot ends like the E3D V6 or Slice Engineering’s Copperhead should prevent heat creep.

Tips & Tricks
In addition to the guidance we mentioned above, below are some tips and tricks that should generally help deal with heat creep.
Before Printing
- Know your issue: Make sure the issue you’re experiencing is truly heat creep and not another type of hot end clog or jam. You can try replacing the nozzle to make sure the nozzle itself isn’t the problem. If you do these things and still experience issues, you’re most likely dealing with heat creep.
- Use a high-quality PTFE tube: If you have a Bowden extruder, using a high-quality PTFE tube will mean better filament insulation inside the PTFE tube. The higher the temperature resistance, the higher the quality of the PTFE tube. A good example of a high-quality PTFE tube is Capricorn.
- Use high-quality filament: Low-quality filament tends to have an inconsistent diameter and can also cause hot end jams, so we recommend using a high-quality filament with a tolerance below +/- 0.05 mm.
Printing
- Adjust one setting at a time: Adjusting multiple slicer settings or hardware configurations makes it difficult to pinpoint which tweak solved the issue. You should only adjust one slicer setting and mechanical assembly feature at a time to find what’s actually working.
- Lower retraction: Retraction is the setting that controls how much filament is pulled out after every printhead movement. Too high of a retraction can cause the hot filament to be pulled above the melt zone and can assist heat in moving through the assembly. If you think this is what’s happening, try lowering your retraction settings in increments of 0.5 mm.
After Printing
- Remove filament after printing: Another trick you can use is to remove your filament after printing. If filament stays in the hot end while it cools down, it can gradually melt higher and higher above the melt zone. You should consider removing your filament after every print, so it doesn’t melt too early and causes heat creep.
- Cool down your printer before switching it off: If turning off your printer switches off the hot end fan, you’ll want to wait to until the hot end has cooled down significantly first. Without the fan, heat will creep, even as the heater block is cooling down. There’s debate around the specific temperature, with some saying below 100 °C and others, 50 °C. A safe bet would be to let the printer cool down to a temperature below the glass transition temperature of the filament you’re using.

License: The text of "How to Fix Heat Creep (3D Printing): 5 Simple Solutions" by All3DP is licensed under a Creative Commons Attribution 4.0 International License.