
What Is Blender (Software)? – Simply Explained

Want to make your own models for 3D printing? Check out Blender, CAD software that's free, open source, and packed with great features!
Blender is an open-source 3D creation suite that supports pretty much every aspect of the 3D development process. Along with strong modeling functionality, there’s also robust texturing, rigging, animation, lighting, and a host of other tools for 3D creation. Whether you want to only work with static models or get into the world of animation, Blender is a great tool. Additionally, it contains a video editor and game engine, so your options are wide open in terms of capabilities.
As a bit of background, Blender was initially developed in 1994 by Ton Roosendaal for in-house use by his animation studio. Since the beginning, Blender has been all about access and giving people creative power to help their imagination come to life. For those wanting to make their own models for 3D printing, it’s an invaluable tool!
In this article, we’ll cover all things Blender, starting with what you need to get it up and running on your computer. Then, we’ll dive into the most popular features and give you some resources if you need to get your bearings or could use a little help. Finally, we’ll talk about some good alternatives to Blender.
Now, let’s get into the mix!

Prices & Licensing
As you may have gathered, one of the best things about Blender is that it’s completely free!
Blender has been released under the GPL (GNU General Public License), meaning it can never lose that status. If you’re not into software licenses, what this essentially means is that the software will remain free. No license, no fees, ever.
If you tinker with the code a bit, it also means that you can dig in and modify or write add-ons as you want. There are no restrictions on your use of Blender, and you can share it with friends and colleagues as you wish.
The only real constraint is that if you make a modified version of Blender that you want to share, you need to share it under the same terms. It’s also worth noting that anything you create in Blender is your sole property, and you can sell and distribute your creations to your heart’s content.
System Requirements
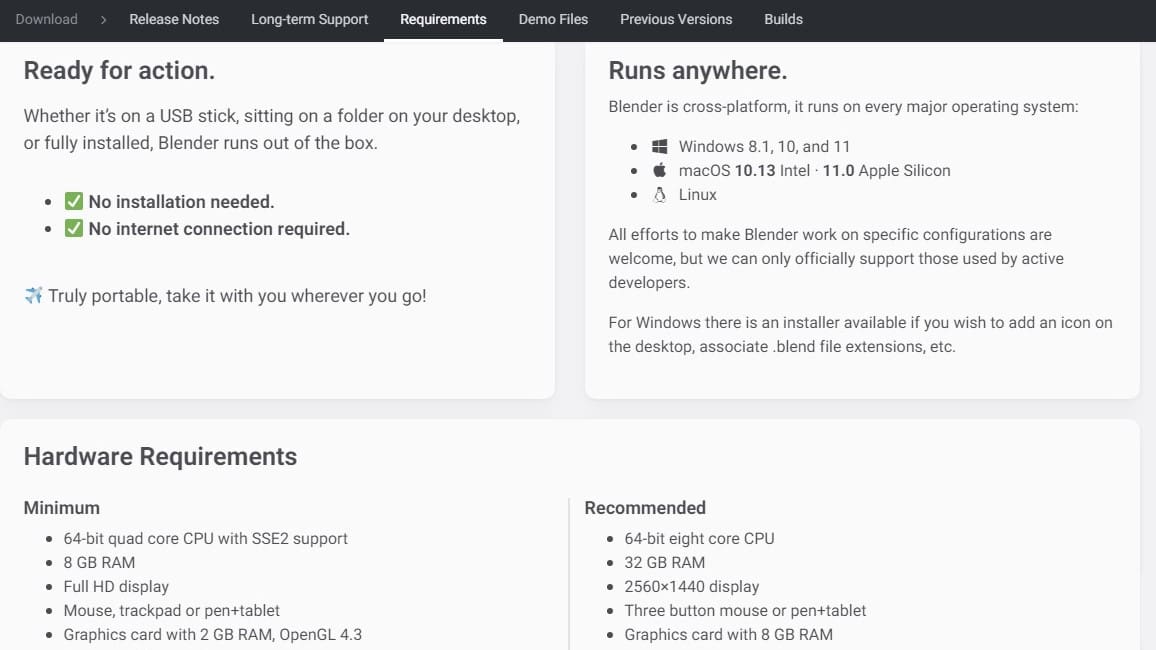
Another great feature is that Blender is cross-platform compatible, so it will run on Windows, MacOS, and Linux. If you’d like to download Blender, check out the latest system requirements. Computers over 10 years old may have a hard time running the program depending on how updated they are. Regardless, you’ll want to ensure your OS is current.
If you don’t want to install Blender on your Windows computer, you can run it off a USB stick, as it’s completely self-contained. On the download page, simply select Windows Portable from the drop-down under the main download button. This means you can take it with you, although you’ll still need a powerful enough computer to be able to handle the program. A USB 3.0 flash drive is recommended.
Blender doesn’t have extensive hardware requirements. Of course, depending on the level of detail and size of the output you’re generating, a faster processor and a bit more RAM will speed up the process. If you intend to render animations for a sequence of images, make sure you check how to enable GPU rendering with OpenCL. The newer and faster your computer, the faster you’ll generate outputs. Otherwise, you’ll want to be patient and check your computer’s cooling ducts for dust bunnies.
Here are Blender’s minimum requirements:
- CPU: 64-bit quad-core CPU with SSE2 support (introduced on Intel Pentium 4, AMD added it in Athlon 64 CPUs)
- RAM: 8 GB
- Display: 1920 × 1080
- Hardware: Mouse, trackpad, or pen and tablet
- Graphics card: At least 2 GB RAM, OpenGL 3.3
UI & Layout
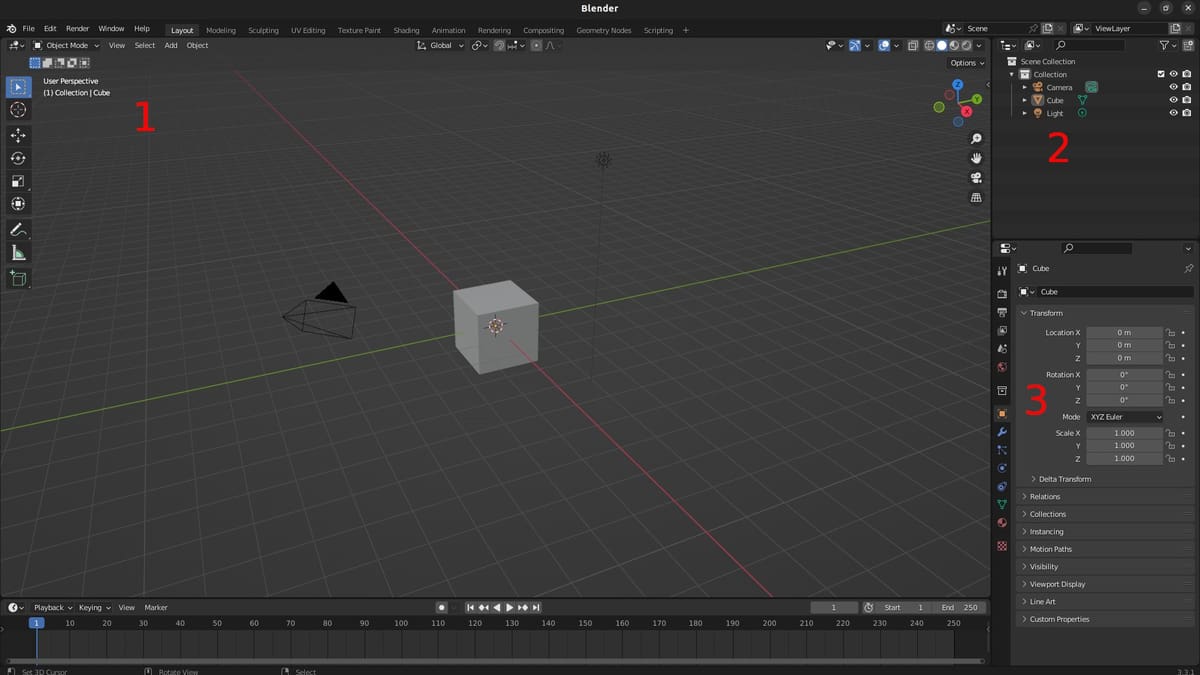
While Blender’s UI is based around a 3D viewport, it’s completely configurable. The different areas are separated by a border, and each area has its own little toolbar, with the first item on the left being the area type selection. A right-click on the border allows the user to split or join areas.
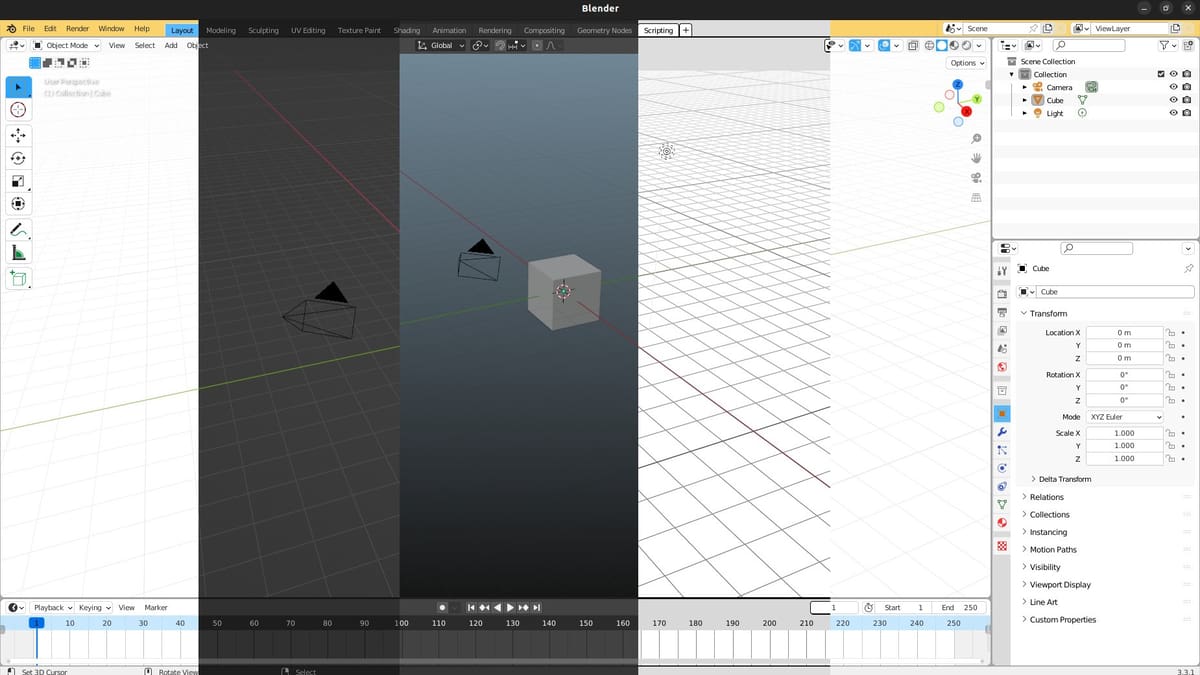
If you need a text editor to write down notes or dimensions as a quick reference, you can add them or use multiple viewports to see different angles of the work being done in real time.
Typically, when 3D printing, you may want to be able to see the front and side views to check on overhangs, although you may be editing from the top or from a free view to achieve the desired design features. You can always customize the UI to fit your workflow or screen. Check out the relevant section of the official manual for details.
In the default view, the main areas of interest for modeling are:
- The 3D viewport, which you can also convert to a 2D viewport for one of the classic front, side, or top views.
- The Outliner, which lists all the elements in the current file. This is located in the top right corner.
- Located on the bottom right, the Properties panel gives you access to several utilities for modeling, including the modifiers panel.
When you start Blender for the first time, you’ll get asked to choose whether you wish to select using the right or left mouse buttons. You’ll also be asked to choose a function for the space bar.
Longtime Blender users often use right-click for selection and assign a search action to the space bar. This opens a MacOS search-like window, allowing you to find the function you’re looking for.
Many customizations are possible in the User Preferences, including modifying the initial settings, the UI colors (there are theme presets available, but you can customize each element individually), the keyboard shortcut assignments, the 3D rotation behavior, and some additional tips. For example, users who want to use the relevant number keys for viewport adjustments can use the numpad emulation. There are also options to ease navigation for 3D mouse devices (described as NDOF in Blender), touchpads, and single or two-button mouse devices.
In short, you can customize Blender to fit your specific preferences and needs, with no limitations. The best analogy would be that it’s a blank workshop where you’re free to rearrange and paint everything to suit your tastes.
Features & Functions
Blender’s features are too many to list here. However, we’ll try to provide an overview of the highlights. If you think you’re missing a feature, chances are there is an add-on that offers it. Most add-ons are free, although some are paid.
Blender’s features are too many to list here. However, we’ll try to provide an overview of the highlights. If you think you’re missing a feature, chances are there is an add-on that offers it. Most add-ons are free, although some are paid.
Blender is an entire suite that allows for modeling, texturing, rigging, animating, rendering, and editing computer-generated imagery (CGI). In addition, there’s a game engine (like Unity or Unreal Engine, but in this case, Blender), a Python script editor, and a toolset to use motion capture from live models to animate your 3D design. Think of Andy Serkis playing Gollum with markers on his face in front of a green screen.
If you want to model, you can do so in multiple ways:
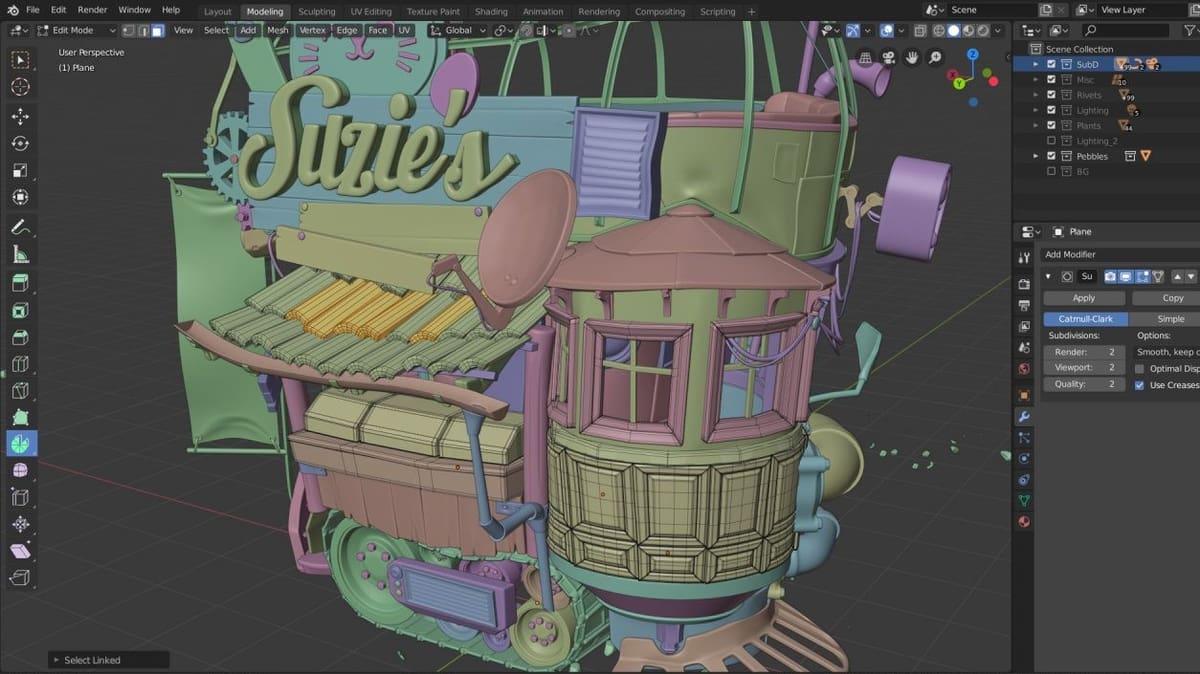
Meshes
You can work with meshes, starting from a basic shape. This means you work directly with either the vertices (the points defining the shape), the edges, or the faces of the mesh. You can choose the selection type you wish to use and then add, extrude, scale, move, and delete them at will. Be careful, however, to generate manifold meshes for export. Blender has a neat tool to check for non-manifold features. While it only works in the vertex or edge selection modes, it lets you remove internal features that would potentially break slicer engines.
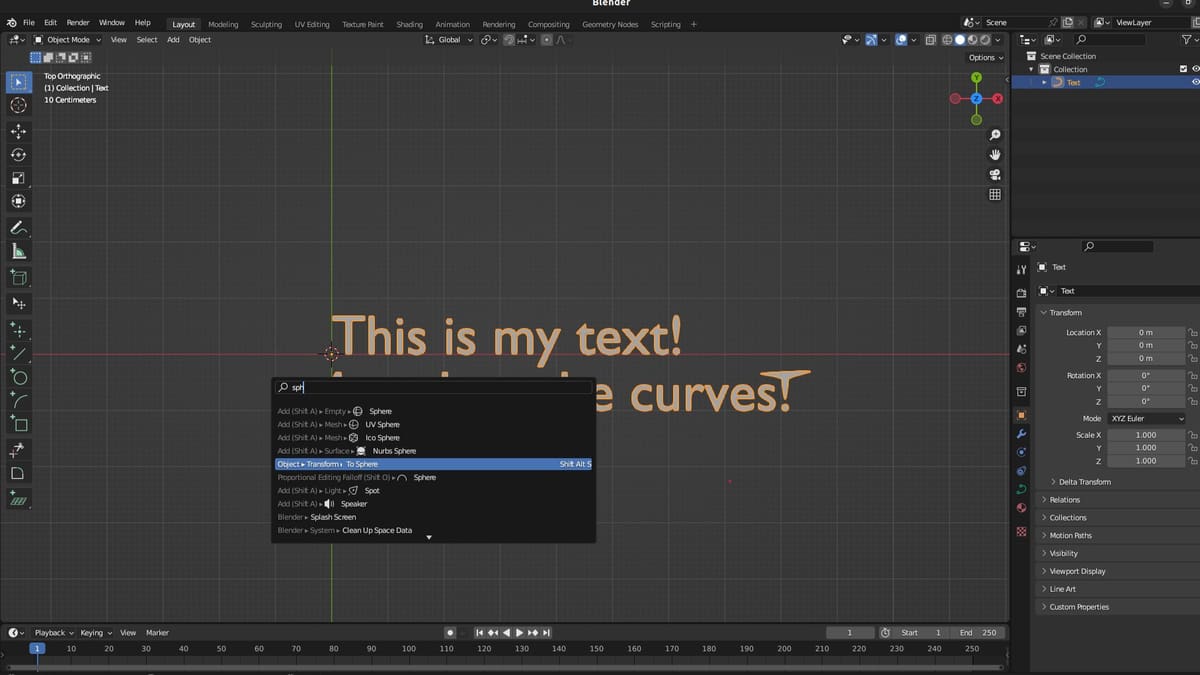
Beziers & NURBS Curves (2D)
The Bezier and NURBS curves use control points to assign weight and direction to the start and end points of a curve segment, which can be chained together to form a complex shape. This can then be converted to a mesh to add volume or exported to SVG for laser cutting or CNC input, much like a DXF file might be.
Beziers & NURBS Surfaces (3D)
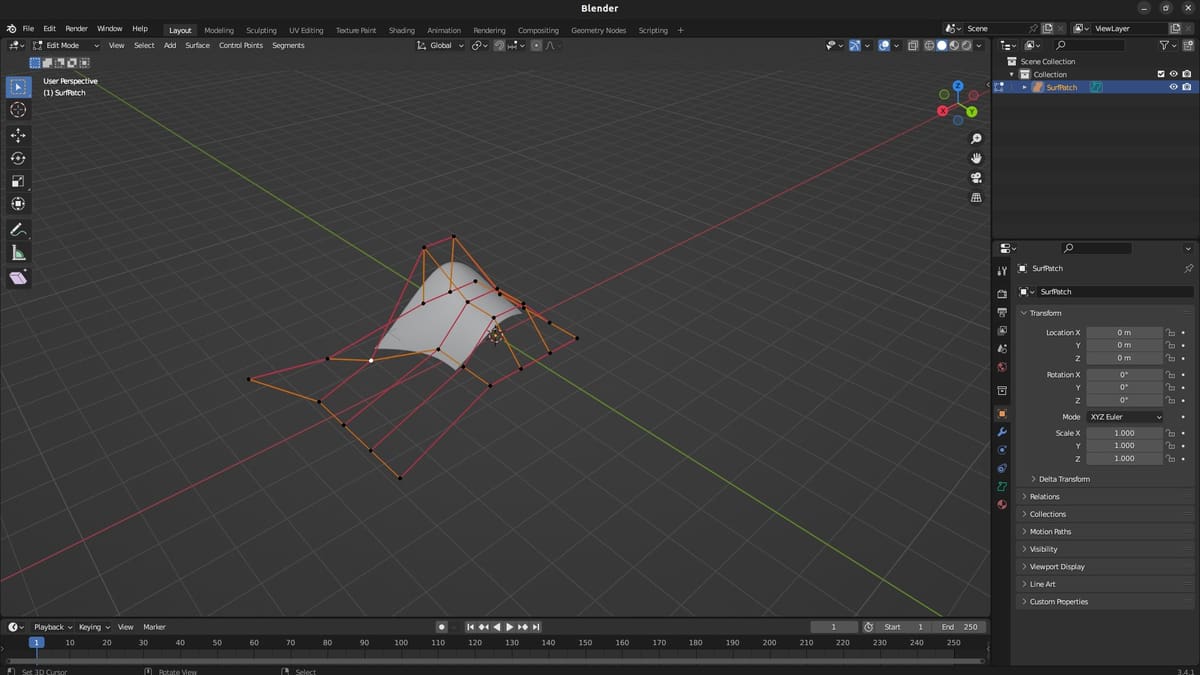
The 3D surfaces work just like the 2D curves, using control points and starting and ending points to define mathematically smooth surfaces within a given boundary. You can then convert them to mesh or export them directly to STL. Keep in mind that this will generate the mesh in the STL but not in the Blender workspace for later fine-tuning (unless you save it separately as a Blender file). The STL files can then be directly imported into your 3D printer slicer for printing or CAM tooling for CNC machining.
Digital Sculpting
This feature can be used in either additive or subtractive mode (i.e. the pointer raises material from the object or digs into it). Sculpting mode includes a dedicated workspace with many different types of brushes, and this sculpting workspace can have a different viewport layout from the main workspace.
Boolean Operations
Boolean operations are essentially used to join, cut away, or select overlapping parts of different 3D shapes. Generally, these operations are performed on complex 3D shapes, and they work best on manifold meshes but can also be done on Beziers and NURBS curves and surfaces.
For example, if you want to create a knife, you can model the handle and blade separately, then join them with a Union Boolean operation. Or if you want to just make a knife sheath, you could model the blade, the outside of the sheath, and then use the Difference operation to remove the blade shape from the inside of the sheath.
Rendering
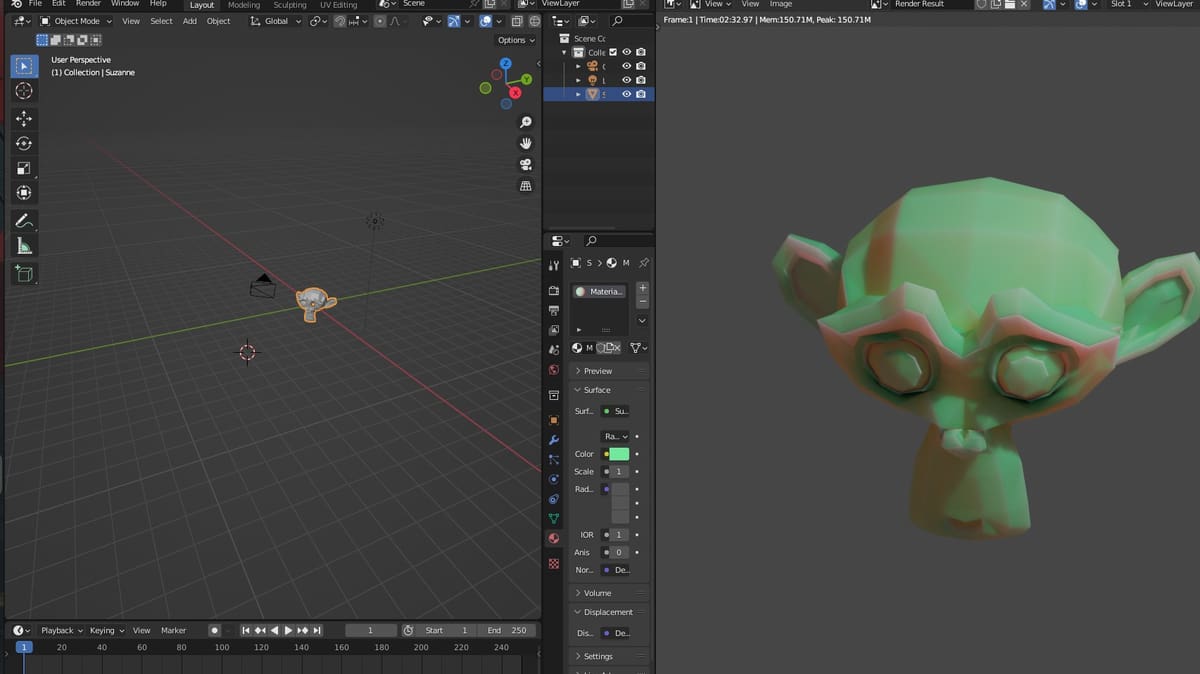
As mentioned earlier, Blender is often used for computer-generated imagery (CGI). This means that Blender can take a 3D shape, some material definitions (colors, reflectivity, transparency, etc.), and some camera parameters to transform a design in your viewport into a realistic-looking image.
There are ways to experiment with lighting or different rendering methods to create cartoon-like images and incredibly photorealistic outputs. Generally, a rendered image takes more time to render than what you see on the viewport, as Blender uses many computations to generate them. You can select different parameters for resolution and the file format of your output image depending on intended use.
Animation
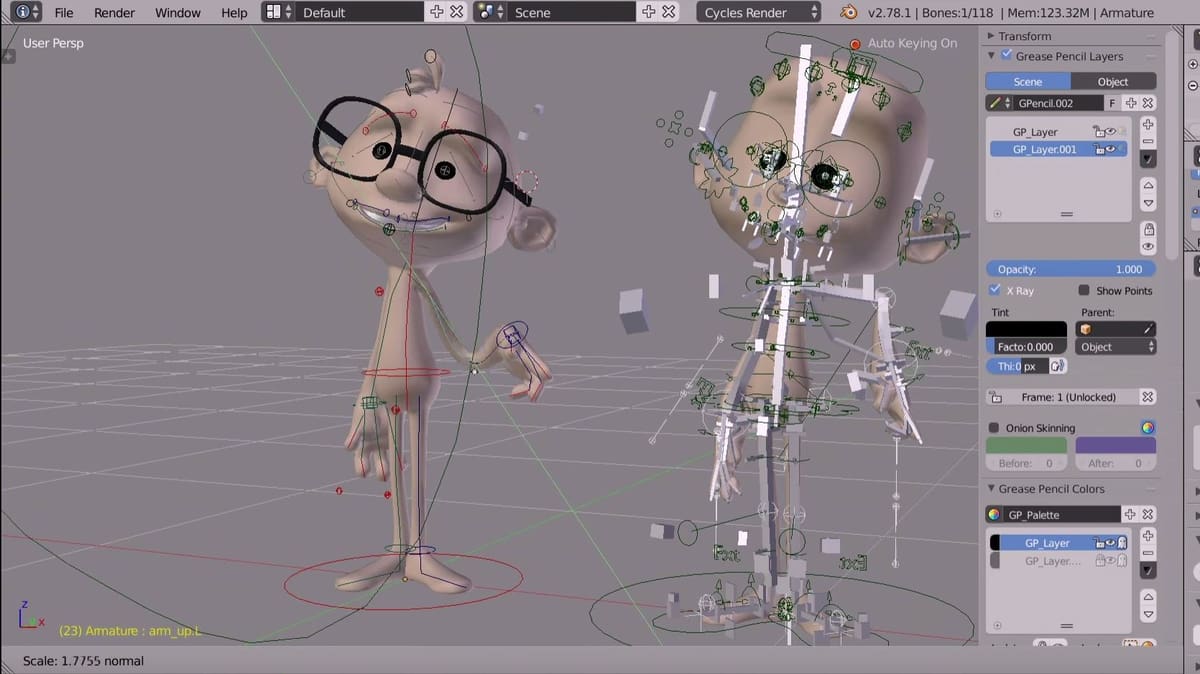
Blender is also used for animation. You can animate objects relative to one another and include special effects like hair, fluids, or smoke movements. Or you can even go a step further and create what’s called the rigging on a mesh object, and animate the elements like a doll. The rig elements will modify the way your mesh displays.
A common example is animating a character. If you want to make a model of a person walking, you would make a simple bone structure that mimics the human body.
The best way to understand how it works is to check out tutorials from professional Blender artists, and there are many, many more on YouTube and other dedicated forums.
Importing & Exporting Data
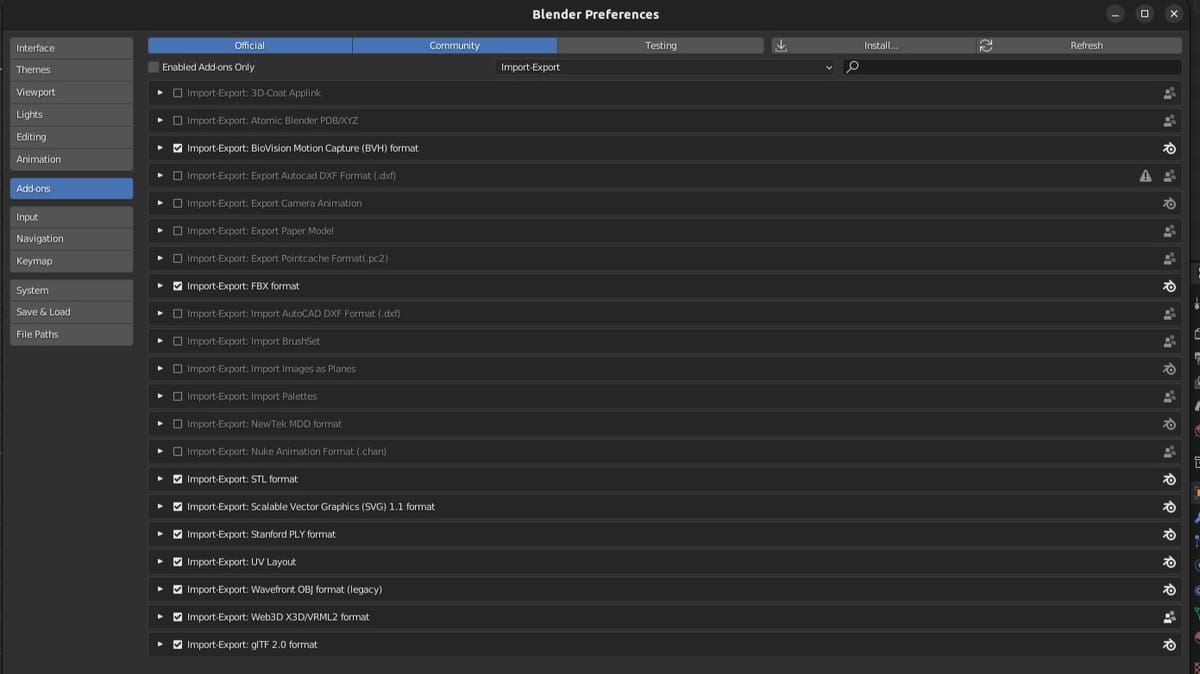
The input and output formats supported by Blender are legion. STL? Check. OBJ? Check. Collada? Check. STEP? You can, with a paid add-on. 3MF and AMF aren’t supported, as they are outside the scope of Blender’s core functionalities, but it wouldn’t be too difficult to write a plug-in for those, if you feel so inclined.
However, the default Blender file type is a .blend file. This will save everything you have in the workspace, including every texture or reference image file. If you send your .blend file to someone else, they will open up exactly the same workspace as when you last saved it. This is helpful, since it means you don’t need to attach separate files for textures or reference images. However, depending on your work, the .blend can become extremely large, particularly if you add multiple high-resolution texture files.
Also worth noting is that Blender’s .blend files are always compatible with newer versions. However, if you create a file with Blender 3.4 and try to open it with a previous version, you will likely have an issue. This is because newer versions of Blender add descriptions to objects, based on the new features. Therefore, an older version won’t know how to interpret these new features.
User Experience
Blender is an incredibly powerful program. Basically, Blender is to 3D design what Excel is to spreadsheet editors, with 90% of Excel users only using 10% of the program’s functions.
In the past, Blender had a steep learning curve. Today, the program is a lot more accessible. You can easily access functions through buttons or widgets to move, rotate, or resize elements. Holding the Ctrl key while moving, rotating, or scaling will snap the current modification to the closest unit.
The latest version (at time of writing, 3.4.1) also includes features that allow you to do most tasks with the mouse, if you prefer., although the underlying power of the keyboard shortcuts is still present if you want it. However, the new search feature makes it easier to find the function you’re looking for without diving into the manual or keyboard shortcut assignment list.
The main thing to remember when starting to use Blender is to not get discouraged too quickly. There’s always the Blender user manual, and there are plenty of tutorials to get you started and learn about different functionalities.
Use Cases & Applications

While Blender appeals to a broad range of users, it’s particularly popular with hobbyists for creative design, artwork, and object creation for 3D printing. For example, Makuta Visual Effects used Blender to incorporate CGI elements into their blockbuster movie RRR. They modeled the external scenery, incorporated real video footage into the generated imagery, and rendered photorealistic elements of scenes.
Within the 3D printing community, Blender’s often the program of choice for editing or adjusting pre-existing 3D models. However, Blender is a fantastic tool for many different tasks related to 3D printing, including:
- Rendering multiple parts together while applying lighting and material properties. You can see what glow-in-the-dark filament will do to a print or if a translucent color will match.
- Making intricate organic shapes and sculpting living creatures. It’s well-suited for making robot designs and non-articulated figurines for aesthetic purposes, as long as the design isn’t meant to have physically precise dimensions when printed.
- Quickly working on an STL to customize or fix it for slicing. If you download a file that doesn’t slice right, chances are it’s a non-manifold mesh that Blender will help you fix. You can also add custom elements like text to a surface that doesn’t have any.
- Adding custom support structures into the model so you don’t need to fiddle around with slicer settings.
- Editing time-lapses with the built-in video editor.
- Simulating a time-lapse of a print. However, you won’t see the infill unless you spend a fair amount of time on it.
Limitations

Given the variety of features available in Blender, one may imagine it’s the perfect tool for creating any 3D design. That’s true up to a point. While Blender is incredibly useful for designing models for aesthetic purposes, it’s not as well suited for mechanical functionality. If you’re trying to create a mechanical design where you need to modify dimensions to get the right fit tolerances, Blender is going to make your life difficult.
At time of writing, there’s a CAD add-on available but that’s still being developed, so it doesn’t offer the full set of CAD features one may need or expect. This means that Blender isn’t particularly suited for the following tasks:
- Designing mechanical models that require fine adjustments on tolerance fitting while maintaining alignments for critical aspects. For example, changing a circle’s diameter while not introducing non-manifold artifacts into the model.
- Being able to reuse dimensions from one object as driving constraints for another. If you adjust the first one, the other automatically resizes to match.
- Incorporating mechanical designs from other CAD programs into an assembly.
- Designing assemblies of parts while defining mechanical constraints. For example, axles that allow rotation but not the separation of parts in a given plane.
- Simulating real-world applications, like internal stress or fluid flow simulations, with data output other than visual effects.
- Measuring angles or lengths on a 3D model. The CAD Sketcher add-on only does this in 2D.
Company & Community Support
The Blender Foundation itself doesn’t offer commercial support for Blender. Instead, they have partnered with Canonical, the company behind Ubuntu Linux, to offer support on the LTS releases of Blender for enterprise-level users.
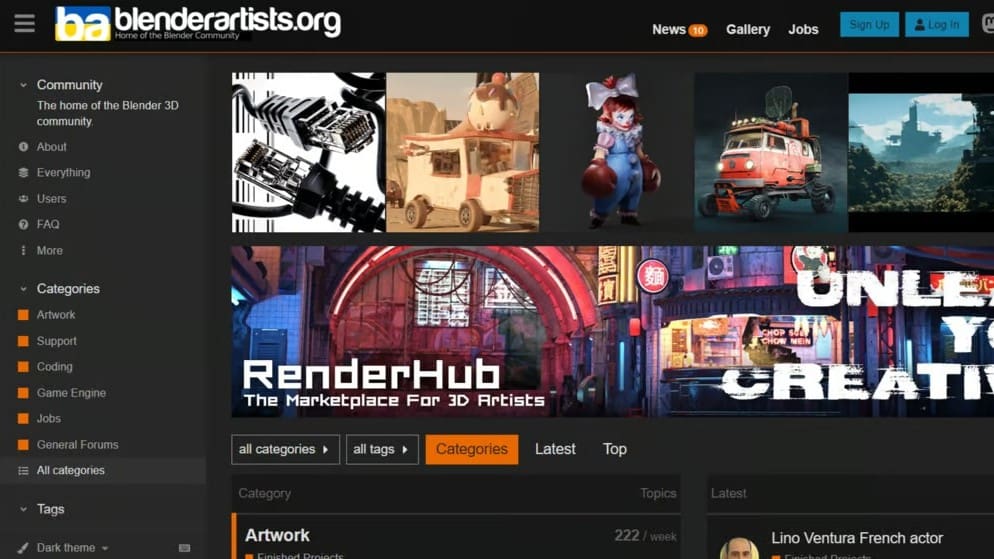
For individual users, Blender has an active community that makes it easy to get support from other creators. First, there’s the Stack Exchange, where you can ask questions when something doesn’t work as expected. There’s also the Blender Artists Community, where you can show off your work, ask for feedback on modeling techniques, and ask about which functionalities to use. The community page lists many more online forums where Blender users can find help, whether for artistic or technical purposes.
Most new user experiences with the Blender community have been very positive. Members are generally welcoming and good-natured in pointing users to the right resources. In the rare case where a technical issue is found, if the case hasn’t been documented before, the developers are quick to take a look and get involved to address the issue. Whether you’re a professional or private user, there will be helpful support available.
In addition, the Blender community has translated the software and user manuals into many languages as well since it has an international user base.
Alternatives
While Blender is great, it’s just not the right tool for some people. It could be the UI, the features, or any number of other small details that bother you. Or, maybe, you’re wondering what Blender could replace in your current workflow. Here are some Blender alternatives worth considering.
Modeling
In general, the main alternatives to Blender for modeling are Cinema 4D, 3ds Max, Maya, Rhino, ZBrush, Wings3D, Bforartists, and other CGI tools. It also shares many capabilities with Meshmixer, although some features may feel like they’re missing, specifically the automated mesh functions that are quite manual in Blender.
Cinema4D, 3ds Max, ZBrush, and Rhino work mainly on meshes, just like Blender. The differentiating features between them come down to the purpose of the software and the included rendering capabilities. For instance, Rhino, like Blender, includes a node engine for managing the visual aspects. Maya and 3ds Max, in addition to mesh modeling, also work with NURBS objects.
Cinema4D has auto-mesh completion that may be helpful for rebuilding a geometry from a broken 3D scan, for example. ZBrush has some added features when it comes to sculpting tools. While these are paid programs, most offer a free trial for you to help determine if they suit your needs or not.
Rendering
When it comes to rendering, you’ll find that there are plenty of options. For example, there are dedicated renderers, such as PBRT, Yafaray, Luxrender, or PoVray, and other programs like Cinema4D, 3ds Max, or Maya that include their own renderers. Each program has its own strengths and weaknesses. Some are meant to be run on large, multi-server rendering farms for the professional rendering of animations (like what Pixar does). Others are intended for creating single images with photorealistic quality on a modest desktop computer.
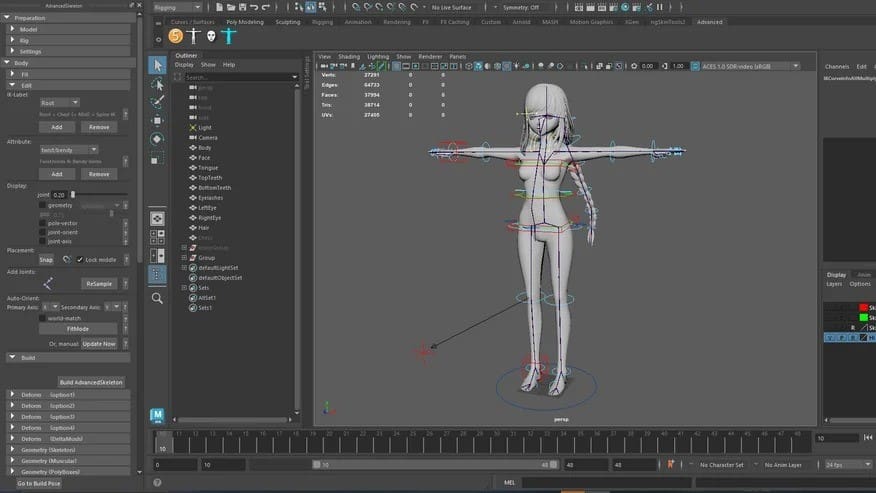
Rigging & Animation
There’s also specialized software dedicated to rigging and animation, like Akeytsu, Mixamo, and Moka Studio. In general, rigging is related to animation, and you’ll rarely find a tool that can do one with the other. Dedicated tools offer their own unique features and advantages over Blender for faster workflows.
However, few tools are as complete as Blender is from end to end. If they are, they will come at a much higher price point with more restrictive system requirements.
To call Blender a 3D creation suite feels almost insufficient, given the breadth of features it contains. However, having one program doing it all means that you may wish for more specialization. A specialized tool can be better suited for a specific task or offer certain features that may be missing. For most users, however, Blender will be a decent one-stop shop.
License: The text of "What Is Blender (Software)? – Simply Explained" by All3DP is licensed under a Creative Commons Attribution 4.0 International License.