Adding Some X-Factors
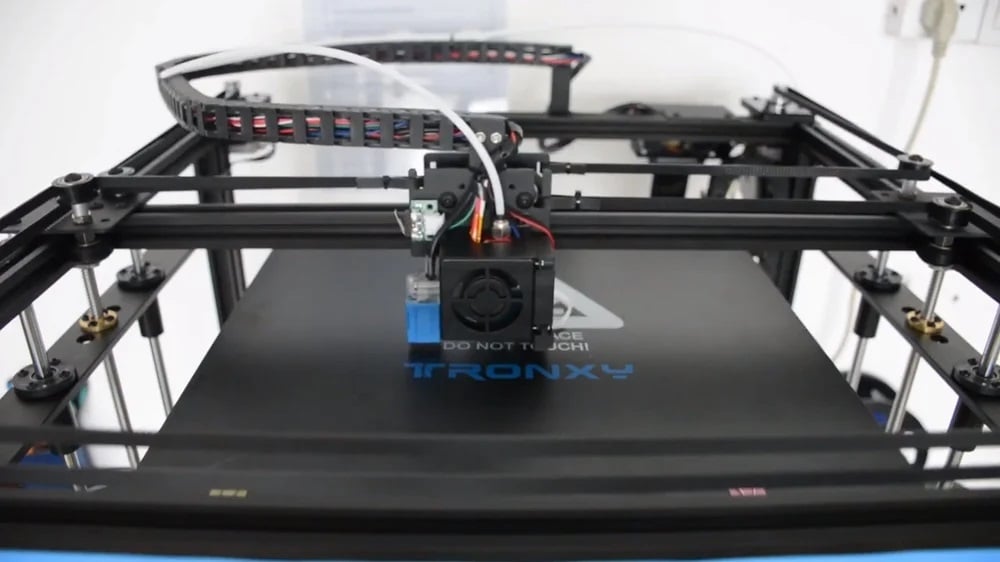
The Tronxy X5SA 3D printer and its Pro counterpart are both large-format 3D printers that utilize a CoreXY motion system (a mix of belts and pulleys). The X5SA is a great printer on paper, and the Pro model even more so, but with a low price comes lower-quality parts, making these printers popular targets for upgrades and mods.
The Tronxy X5SA is typically considered a printer for people with some 3D printing experience, as it can be a bit of a fixer-upper. For example, it’s known that the belt tensioning process is difficult, and there can be significant nozzle temperature fluctuations. As such, and due to the popularity of this printer among the 3D printing community, many upgrades and DIY enhancements have been made to improve usability and functionality.
In this article, we’ll go over a few great upgrades that can enhance the Tronxy X5SA and X5SA Pro’s printing performance and ease of use. For each upgrade, we’ll go over what you need, who made it, what it does, and more! Happy printing!

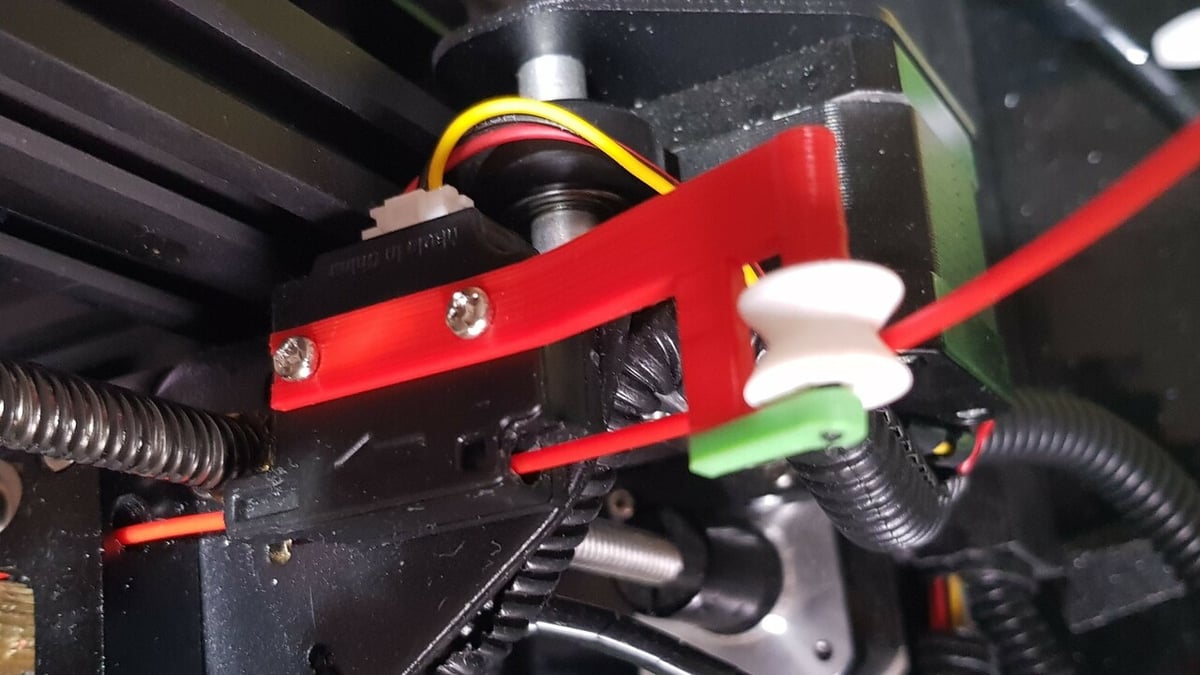
Belt Tensioner
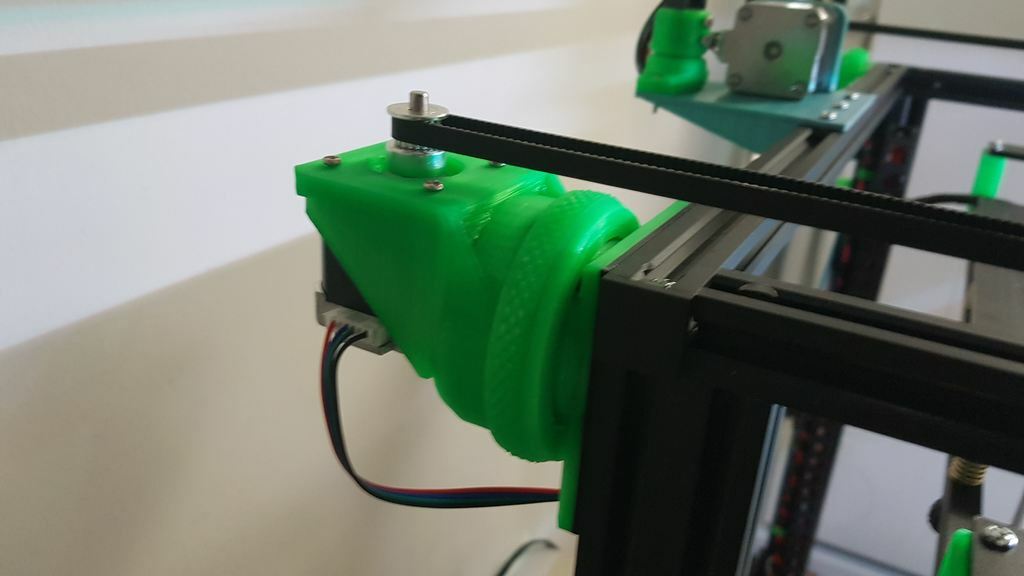
The Tronxy X5SA uses a CoreXY system for its motion across the X- and Y-axes, which uses interlapping belts and pulleys to pull the printhead to different points on the print bed. While CoreXY machines bring benefits like easier direction changes, tensioning the belts on a CoreXY machine is not as straightforward as it is for standard Cartesian printers like the Prusa i3 MK3S+ or the Ender 3 V2. If you can’t tension the belts, prints may be less dimensionally accurate, and other printing problems could occur.
This project is a belt tensioner that attaches to the stepper motor, rather than the more common location of the belt idler. The belt tensioner mounts to the frame and you can rotate the nut on the assembly to tighten or loosen the belts. This tensioner is made of five 3D printable parts, and you may need some screws to attach the mounting piece to the extrusion on the X5SA.
For printing settings, the designer listed that they used a 0.2-mm layer height with a 50-100% infill density. These settings should produce a strong part, which is necessary, as this belt tensioner might be absorbing some of the belt tension force.
- What it does: Tightens the printer’s belts
- Parts needed: 3D printed parts, screws
- Approximate cost: $2-$5
- Who designed it: Zdunlap
- Where to get it: Thingiverse
Linear Rails
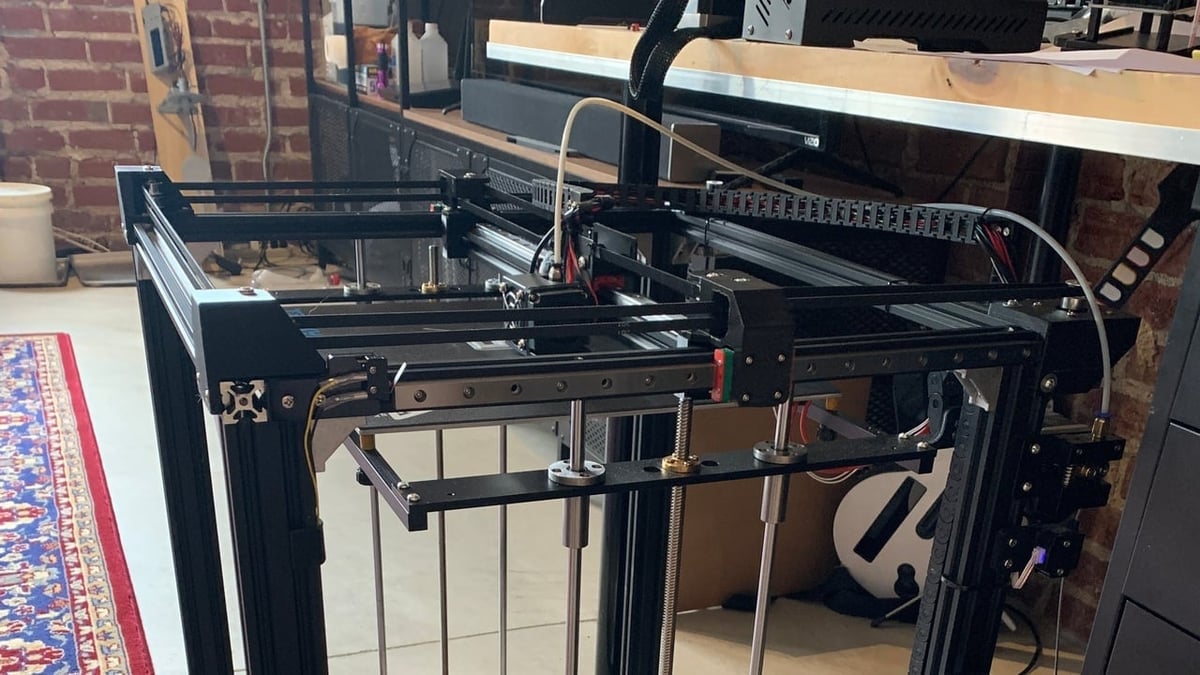
Linear rails are a more advanced upgrade for a printer’s motion axis (X, Y, Z) that allows carriages to run extra smoothly along the axis. This upgrade includes linear rails for the Tronxy X5SA’s X- and Y-axes so that the printhead can move with fewer bumps to any location on the bed. After this upgrade, ideally, you should experience less ringing in prints and be able to use higher printing speeds.
The upgrade is definitely more complex than many others on this list, as it requires a fair amount of hardware (nuts and screws), some linear rails (which can be expensive), and 12 parts to be printed. The designer has useful assembly instructions on the project page, and there are over 50 comments that may also help you solve problems. Concerning printing tips, the maker of this upgrade listed that they printed the parts with a 50% infill density.
- What it does: Provides smoother motion for the printhead
- Parts needed: Linear rails, belts, 3D printed parts, screws, nuts
- Approximate cost: $70-$90
- Who designed it: kirsch10
- Where to get it: Thingiverse
Rotatable Cable Chain Swing
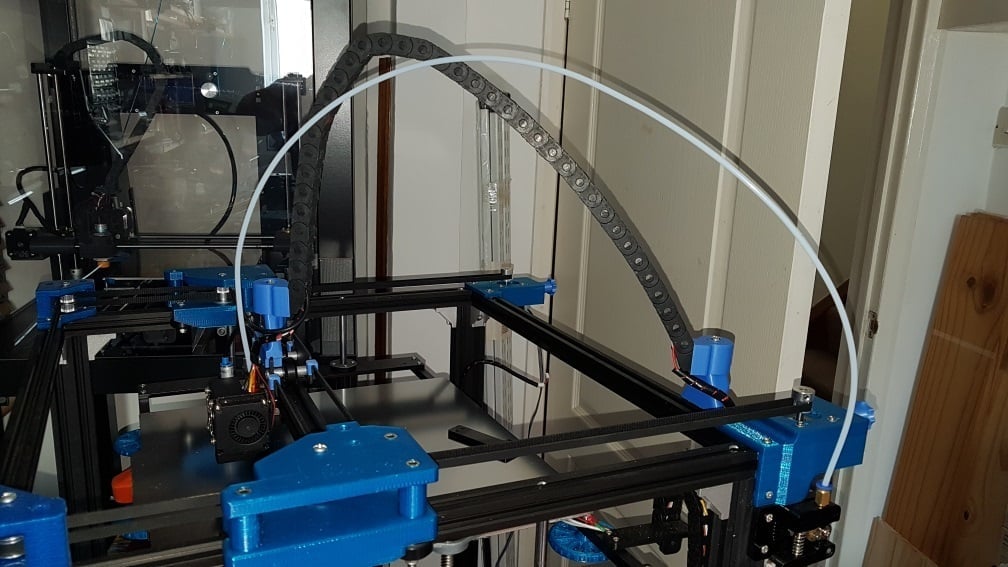
Cable management is one factor that Tronxy got right for the Tronxy X5SA, and this is seen with the wires for the hot end and fan wires enclosed in a cable chain. However, as the cables move on the X- and Y-axes, they aren’t much higher than any part being printed directly below them. This means that if they sag, they could potentially snag the print or catch on another component.
This design is a rotatable cable chain swing that props up the cable chain so it can’t fall on the print. The rotational aspect of this upgrade is that the part uses a bearing to allow the propped-up cable chain to swing right and left to follow the printhead’s motion. Assembly shouldn’t be too difficult, as only a few parts are used, including the printable pieces and four skateboard (608) ball bearings.
- What it does: Keeps the printhead’s cable chains out of the way
- Parts needed: Bearings, 3D printed parts, screws
- Approximate cost: $10-$15
- Who designed it: gnattycole
- Where to get it: Cults
Fan Duct
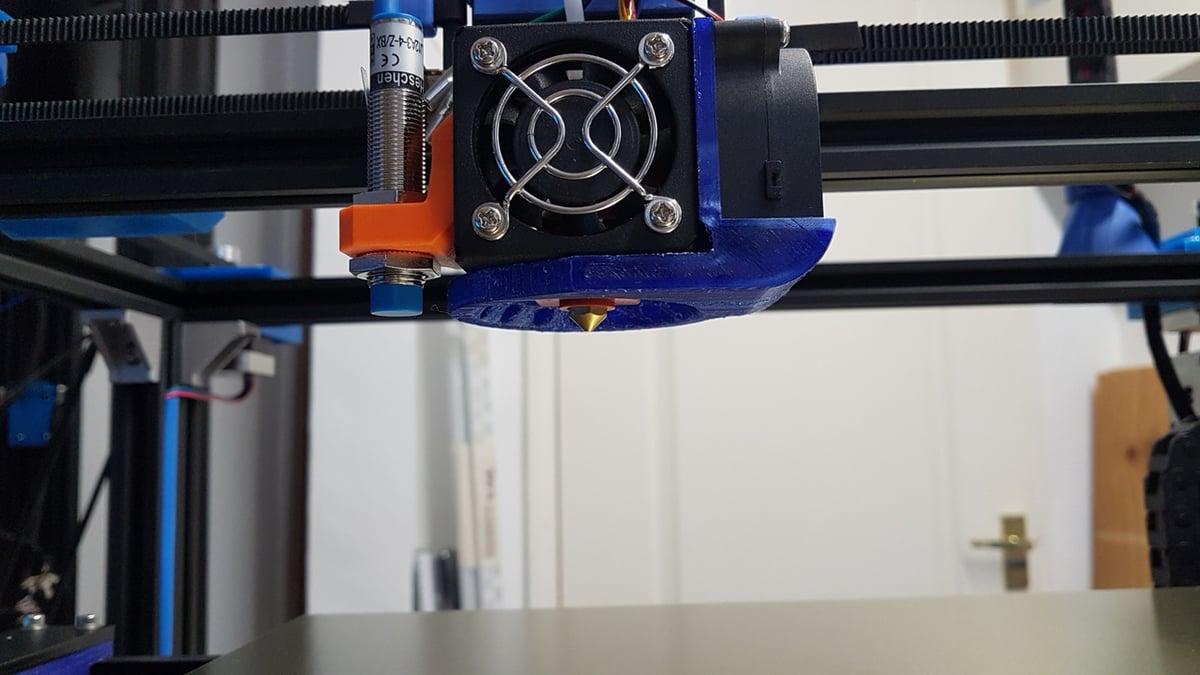
Next, fan ducts are an important part of any printhead because they move the airflow from the part cooling fan’s output to the tip of the nozzle. The melted material coming out of the nozzle should be cooled quickly to solidify; adequate cooling is especially important for printing overhangs on models. This cooling fan duct is in a ring shape so that airflow reaches the nozzle from 360 degrees, providing enhanced part cooling.
The project page contains two models; one for supporting the stock 4010 fan and one for a 4020 fan. All you need for assembly are some screws, a fan, and the printed parts, and it can fit on the stock printhead. Printing shouldn’t be too difficult even though there are overhangs; the designer listed that they used a 30% infill density and no supports to print this fan duct. Supports will be extremely hard to remove so avoid them if you can.
- What it does: Provides surround cooling to better print overhangs
- Parts needed: 3D printed parts, screws
- Approximate cost: $5
- Who designed it: gnattycole
- Where to get it: MyMiniFactory
E3D V6 Hot End (and More)
As pointed out in TeachingTech’s review of the Tronxy X5SA, the printer’s hot end has a wide variance for temperature. These fluctuations can cause inconsistent extrusion and other issues on prints. Installing a better hot end, like the widely popular E3D V6, capable of reaching temperatures as high as 285 °C, can improve printing performance and allow you to print other materials like nylon filament.
The model works with a few different hot ends, including the E3D hot ends and clones. This hot end mount is essentially a new printhead, and it includes a new and improved semi-circular fan duct. When choosing materials and settings to print, aim for getting a strong and temperature-resistant part.
- What it does: Reduces temperature fluctuation and increases temperature range
- Parts needed: Hot end, 3D printed parts, screws
- Approximate cost: $60-$100 (depending on hot end)
- Who designed it: MikeMak
- Where to get it: Thingiverse
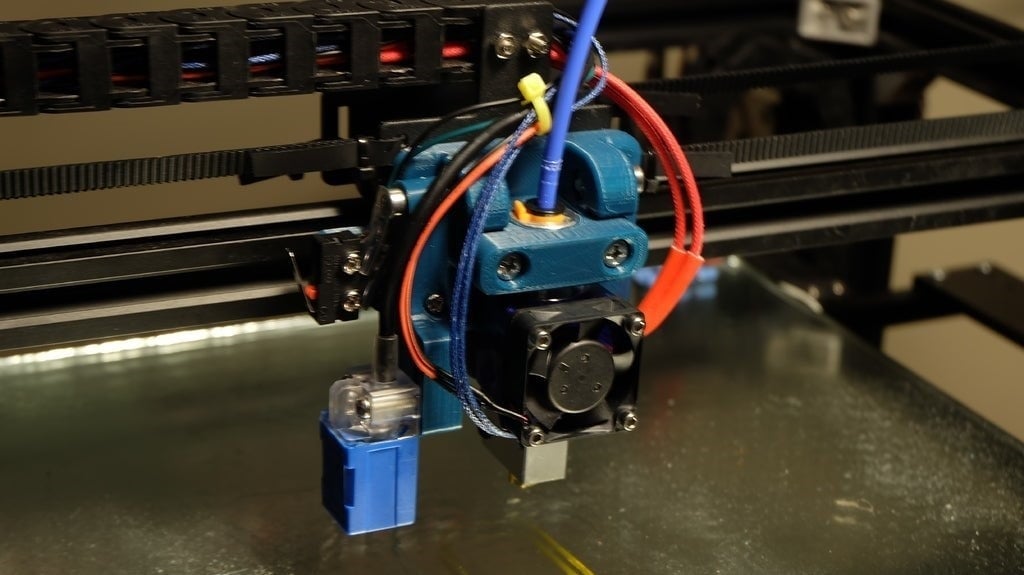
Direct Drive Extruder
The Tronxy X5SA, in stock form, uses a Bowden system, where the extruder is separated from the hot end, and the filament moves between the two via a Bowden (PTFE) tube. This setup makes it easy to fix hot end jams and is cheap to build, but it can lead to issues when printing flexible materials like TPU. On the other hand, a direct drive system places the extruder directly above the hot end and is great for printing flexible filaments.
This upgrade turns the Tronxy X5SA’s printhead into a direct drive setup with a BMG extruder (or similar), a few printed mounting parts, screws, and some other hardware. This upgrade uses many stock parts of the X5SA too, including the original extruder stepper motor, which reduces the parts list and cost of this upgrade. The designer has added some helpful instructions on the project page and recommends using a 30-50% infill density with 3-5 shells when printing.
High Spool Holder
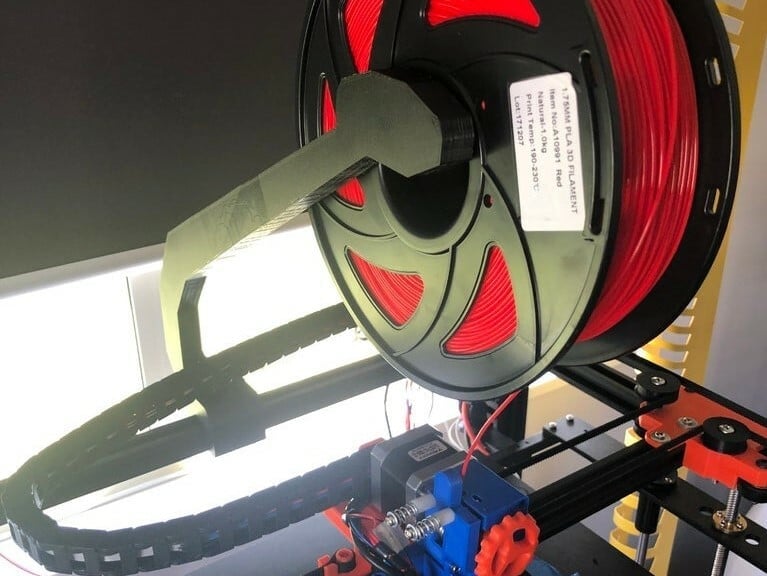
The spool holder’s location on your 3D printer is very important, and the Tronxy X5SA’s is located on the side, beneath the extruder. This is the ideal setup for a Bowden setup, but if you want to use a direct drive system, a spool holder above the extruder is ideal. That’s because, on a direct drive setup, the extruder is pushing the filament straight down, so the filament should come from above.
This spool holder is made from three parts and mounts to the top extrusion on the frame of the X5SA. The spool holder was designed to provide enough clearance so that it doesn’t get tangled with the hot end wires or other cables, but low enough so it isn’t too large of a part to produce and attach. The designer listed that they used a 30% infill density and a 0.3-mm layer height to print the parts in PLA.
- What it does: Provides a better location for the spool for a direct drive setup
- Parts needed: 3D printed parts
- Approximate cost: $3-$5
- Who designed it: alexGSofNZ
- Where to get it: Thingiverse
Filament Guide
A filament guide is a mechanism or part that provides a smooth path to guide the filament from the spool to the extruder. A filament guide’s benefit is that filament won’t get tangled around any of the printer’s other parts, like the frame or lead screw. Filament guides aren’t usually included on a stock 3D printer, and many 3D printable ones for different machines exist in model repositories like Thingiverse or Cults.
This filament guide should be a simple assembly and involves only two mounting pieces and a wheel, all of which you can easily 3D print. To attach the wheel, which will serve as the filament guide, you can cut a small piece of 1.75-mm diameter filament and slide it through the mounting plates and the wheel. Lastly, the designer recommends sanding and gluing the finished product, which will ensure a smooth surface for the filament to move along.
Z-Axis Belt Synchronizer
The Tronxy X5SA has two Z-axis stepper motors, which each rotate one lead screw to move the printer’s build plate up and down. While having two Z-axis stepper motors is ideal for a printer of the X5SA’s size, users have experienced issues with tilted belts due to lead screws being offset or motors moving at different speeds. This is a big issue, as it impacts bed leveling, so getting that critical first layer right will be more difficult.
This upgrade is a simple belt synchronizer gear that you can add to your X5SA’s Z-axis stepper motors to synchronize their motion. All you need are the printed parts, a length of G2 timing belt that’ll wrap around the gears on both sides, and a few pieces of hardware (screws and nuts).
The designer has provided excellent and thorough assembly instructions to install this upgrade on your Tronxy printer. One maker listed that they used a 20% infill density to successfully print the parts.
- What it does: Keeps the Z-axis lead screws in sync to keep the bed level
- Parts needed: 3D printed parts, timing belt, screws
- Approximate cost: $5-$10
- Who designed it: starfighter81
- Where to get it: Thingiverse
Anti-Vibration Frame Stabilizer
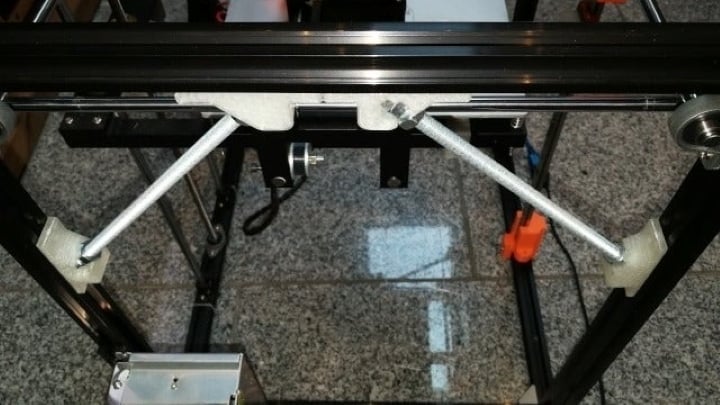
If you’ve ever worked with a large 3D printer, then you know that the frame needs to be stable to prevent extreme vibrations and excessive rattling. The Tronxy X5SA has a cube-like frame, but it can be wobbly at times, which can lead to lower print quality due to vibration-related issues like ringing or even layer shifting.
These anti-vibration frame stabilizers connect to two sides of the cube frame to bind and stabilize them, so they vibrate less. To make these, all you need are the printed parts, a threaded rod, and some nuts and screws for mounting. The designer used a 20% infill density to print the stabilizers.
- What it does: Reduces vibrations on your printer to prevent quality issues like ringing
- Parts needed: 3D printed parts, screws, lead screws
- Approximate cost: $15-$25
- Who designed it: RobinFei
- Where to get it: Thingiverse
Lead image source: Cyberspace and Time
License: The text of "The Best Tronxy X5SA (Pro) Upgrades & Mods" by All3DP is licensed under a Creative Commons Attribution 4.0 International License.