
STEP to STL: How to Convert STEP Files to STL

STEP files allow you to construct complex 3D models, while STLs let you print them. Bring your models to life by converting STEP to STL!
Computer-aided design, or CAD, is a powerful tool for visually realizing complex components and assemblies. CAD enables digital iterations to be made before physical prototypes are produced, saving time and labor in the design process.
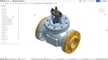
One format commonly used for CAD files is STEP, which stands for “Standard for the Exchange of Product Data”. These files contain basic information about the geometry of a model, but can also be used for parametric modeling, as they store information about dimensions, constraints, and the operations used to create the model.
The main advantage of STEP and the reason it’s so widely used is that, as the name indicates, it’s a standard exchange file format, so it’s compatible across programs and versions. This means that you can create a STEP file in Fusion 360 and open it in SolidWorks without losing data. But if you want to 3D print your model, you’ll need it as an STL file.

From CAD to 3D Printer
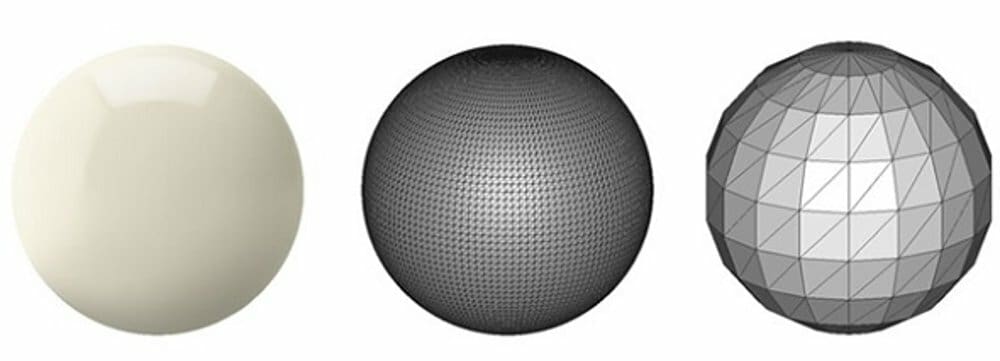
There are many suggested meanings for the STL file name, including that it’s short for stereolithography or an acronym for “Standard Triangulation Language”. In STL files, model information is stored as triangles woven into a mesh, which slicer software can interpret and slice to create G-code that can be read by a 3D printer.
However, STL files can’t be edited in parametric modeling software in a practical way. They can be opened and used in Blender, for example, as this program works with a mesh the whole time (even if your model will be stored as an OBJ file).
In parametric modeling, however, working this way isn’t practical, which is why a more convenient workflow is to start with a STEP file, and once the model is ready to be printed, convert it to STL.
Here we’ve got a few ways for you to make the conversion from STEP to STL, so you can bring your self-modeled creations to life with 3D printing.
Method #1: Your Current CAD Program
When working with STEP files, you’re usually already in a CAD program or have access to one. The easiest way to convert from STEP to STL is to stick with that program.
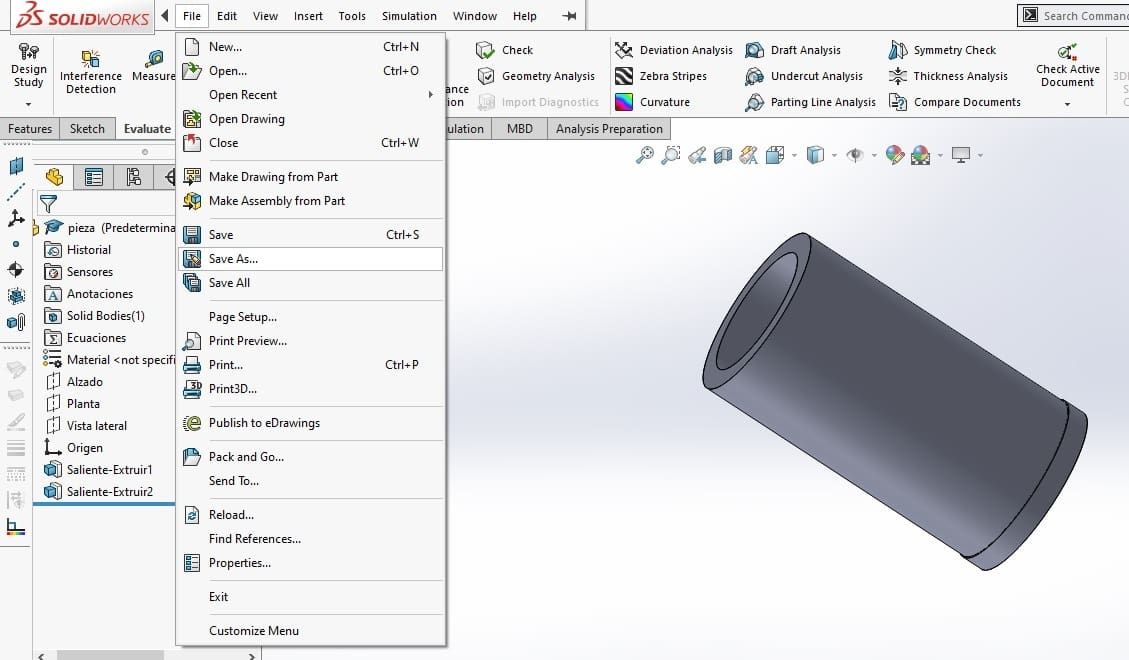
In most cases, you can directly export from the CAD program to an STL. Most programs have a pathway along the lines of “File > Export”, after which “STL” is usually available as a file format. This is true of FreeCAD and AutoCAD. In SolidWorks, the STL export option is found under “File > Save As”.
Fusion 360, another popular program, is a slight exception here, as the “Save As” and “Export” options don’t include “STL”. Instead, simply right-click on the desired body or component and select “Save as STL”.
If you don’t already have a go-to CAD program, don’t worry. Several are available for free, and most will be able to export your models from STEP to STL.
Method #2: Onshape Free
Onshape Free is a free, limited version of Onshape, another CAD tool. With Onshape Free, anything you store in the software is saved in the cloud and can be seen by the public and other Onshape users, and that is its main difference from Onshape Pro. However, we’re not going to use it like that.
Onshape Free is a useful option when you want to use an offline converter, or if you’ve lost access to a CAD software you were previously using. For example, if you used to have access to SolidWorks but don’t have a license anymore, you can still open the file in Onshape Free and convert it to STL.
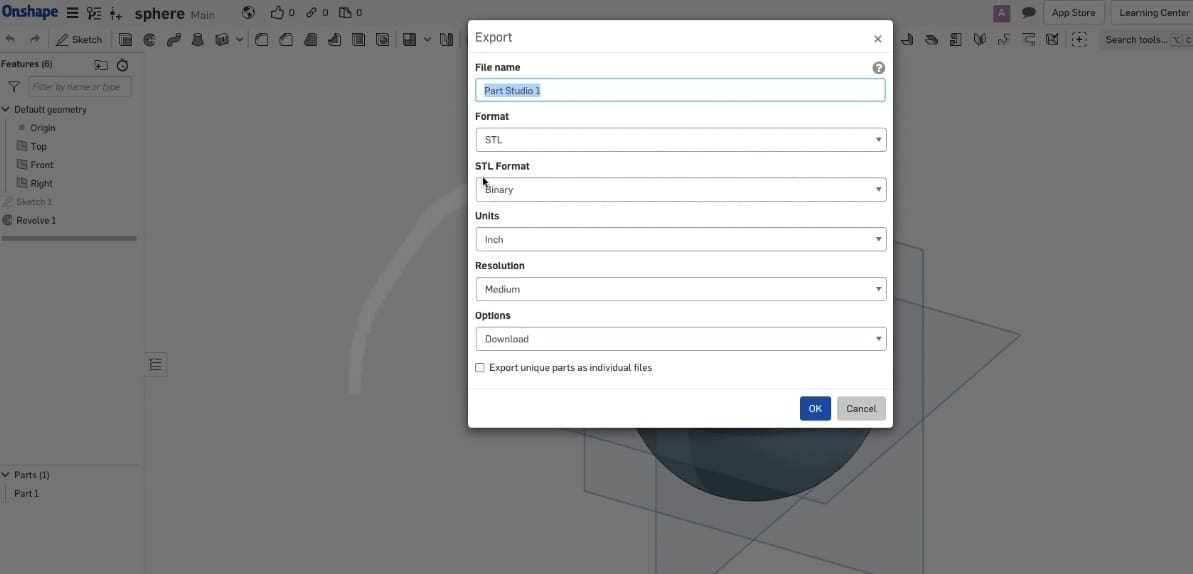
Doing so is a very simple process. Open up the file using Onshape, and once inside, select the object, right-click anywhere on the viewport and select “Export”. Once there, simply choose the file format as STL, and now you can convert STEP to STL files, offline, for free!
When you exit the program, it will ask you if you want to save the file, simply say no, and the file won’t be saved as an Onshape file in the community cloud. This way, you get to keep your privacy, and you have your STL file, too.
Method #3: Online Converters
If you don’t already have a CAD program and don’t want to install one, consider using an online converter. It’s a straightforward process where you don’t need to launch a program, and the conversion can be done on any computer (or even a phone), anywhere.
We’ve found two good options, but there are plenty more out there.
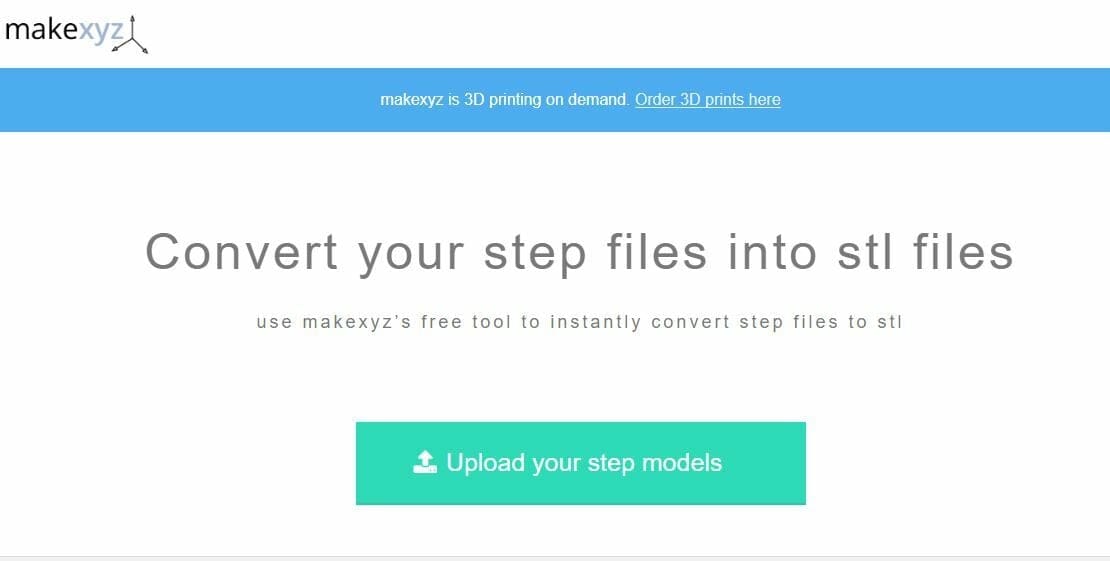
MakeXYZ
MakeXYZ is a 3D printing service, but they have a section on their page dedicated to converting file types for free. Simply drag or select a file and then convert it.
ConvertCADFiles
ConvertCADFiles is a paid service that costs €1 per conversion (with a minimum spend of €5 after a free trial conversion). It guarantees high-quality meshes and can handle files up to 100 MB. The site can input STEP and output STL, so this is a straightforward option if you’re willing to pay the small price.
License: The text of "STEP to STL: How to Convert STEP Files to STL" by All3DP is licensed under a Creative Commons Attribution 4.0 International License.