PrusaSlicer is Prusa Research’s high-powered entry in the 3D slicer market. Originally based on Slic3r by Alessandro Ranellucci, in 2016, Prusa branched off with their own in-house version, Slicer PE (Prusa Edition), which they released via GitHub.
As Slic3r PE departed more and more from the original software, Prusa officially renamed it in May 2019 to avoid confusion. Since then, PrusaSlicer has continued to develop and evolve, with updates every few months.
You don’t have to own a Prusa printer in order to benefit from this free and open-source program. Thanks to rich community support, Prusa now includes printing profiles for many other manufacturers. The latest versions come with greater resin printing functionality, automatic variable layer height, and more.
In this article, we’ll take a look at how to begin using this slicer, give you an overview of the most important features, both basic and advanced, and let you know where to get support when you need it and some good alternatives. Let’s jump in!
System Requirements
All programs have minimum system requirements, and these represent the bare minimum required for the software to be able to operate correctly. To get the best out of the program and have a smoother experience, however, you should consider the recommended requirements. Let’s take a look at what these look like for the latest version of PrusaSlicer:
- OS: 64-bit Windows 7 and newer, MacOS Sierra 10.12 and newer
- Processor: Multi-core with multiple threads recommended
- Memory: 4-GB RAM, though 8-GB RAM recommended
- GPU: Needs to support OpenGL version 2.0 and newer
UI
To best understand PrusaSlicer, there are a few fundamental aspects one should become familiar with: the two views, the three modes, and how to modify and save your settings profiles.
Note that this discussion primarily refers to the Windows version of PrusaSlicer, although most details will be the same for the MacOS version.
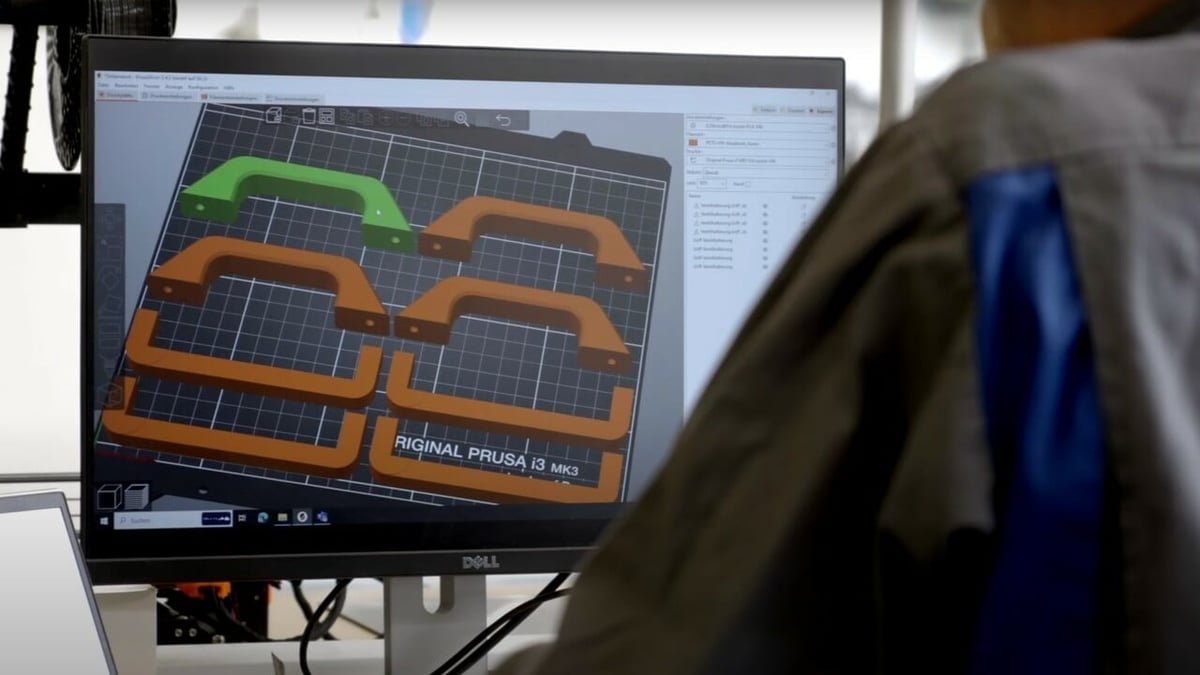
3D Editor View
Once you complete the configuration assistant, PrusaSlicer opens to the 3D editor view. This is where you’ll do most of your preparation work.
- Left toolbar: After importing a model, you can access the movement, rotation, scale, and cut tools on the left side of the screen. Additional tools include the Paint-on Supports, Seam Painting, and Measure.
- Top toolbar: Along the top are a series of tools that enable you to duplicate objects and split multi-part objects, along with other operations. This is also where you can access the variable layer height tool (more on that later).
- Right panel: On the right, you’ll see the main print-quality selection, the filament (or resin) settings, and your printer model (or models). You can change supports and the infill and brim settings, and the window just below shows an outline of imported objects along with any modifiers. There’s also a useful window in the lower right showing estimates for the cost, print time, and how much filament will be used.
Layers Preview
At any time, you can switch to Preview (4). Doing so will automatically slice your model and give you a preview of the finished print. In this view, the top and left toolbars are replaced with the Legend and Layer Slider.
- Legend: Here, you can change what’s displayed to see a visual representation of things like volumetric flow rates, retractions, Color Print previews, and more. You can toggle the Legend on and off by opening the View menu for the uppermost menu bar, then either clicking or unclicking “Show Legend”.
- Layer Slider: Sandwiched between the viewport and right panel, the slider allows you to scroll through each layer of the print. The ‘+’ icon on the slider allows you to easily add color changes (more on that below).
Modes
PrusaSlicer has three different modes for you to choose between, depending on your level of experience and the amount of tinkering you like to do. You can easily find these on the top right, above the main print-quality selection (3) as seen on the image above. Settings are color-coded depending on the mode they’re “unlocked” with:
- Simple mode: Indicated by green dot, this provides basic controls to get you started.
- Advanced mode: In yellow, it allows you to change some more complex settings.
- Expert mode: In red, this option unlocks all settings and is designed for the most experienced users.
Features & Functions
PrusaSlicer has always been a pioneer, adding new and unique tools with every release. In the past, we’ve seen the introduction of variable layer height, adaptive Elephant’s foot compensation, and ironing.
Some of PrusaSlicer’s newest features are focused more on the design and modification of models. Text embossing, for instance, is a convenient tool that allows you to emboss and deboss text. With it, you can easily modify a file without CAD software.
Another example is the recent SVG implementation, which allows you to import an SVG file and use it in many different ways. You can extrude it and create a model without needing any additional software. Alternatively, you can utilize this shape to modify other meshes, including joining the models together, cutting the original design with the SVG profile, or using the SVG as a modifier.
But one of the biggest improvements for the community has been the implementation of organic supports. Introduced with the release 2.6.0, they were inspired by Cura tree supports and have been a game-changer. They allow you to save tons of time and material while also leaving a good surface quality on the overhangs.
In terms of file formats, many are supported, including STL, OBJ, and G-code files. PrusaSlicer has been the first to also implement STEP files. Further, the software checks the integrity of the designs that you import and offers automatic repair in case of problems.
Settings
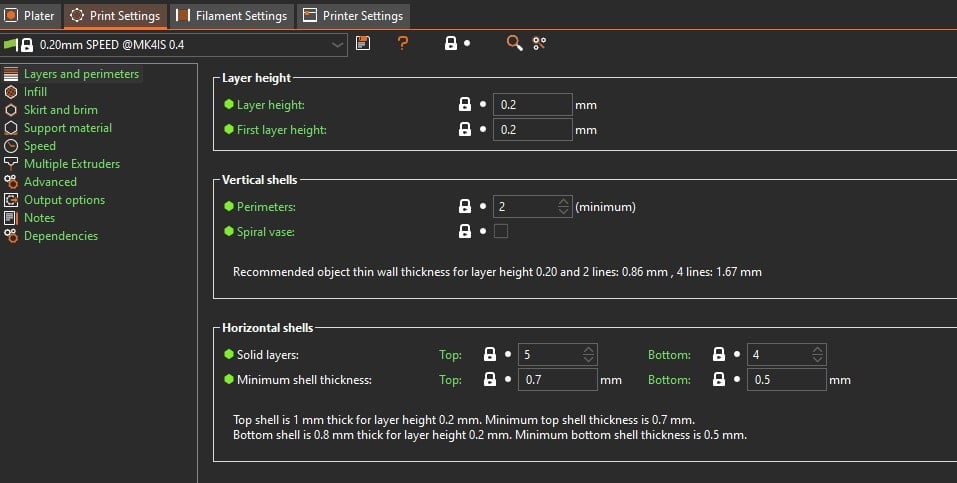
PrusaSlicer’s settings are organized into three groups, each of which has its own screen: Print Settings, Filament Settings, and Printer Settings. Each set has its own profile with specific settings (e.g. “Support material”, “Speed”, and so on under Print Settings).
Whichever mode you choose, all of the settings remain color-coded to signify their relative complexity. Additionally, if you hover over a setting, an explanation of the function will appear, so there’s usually no need to search through the online manual.
Once you change a default setting, the profile will update to “modified”, and you can save the profile to use the same settings again. You can always revert to the default setting by clicking the reverse arrow next to it.
Having done all this work to set up a print, wouldn’t it be nice if you could save it all? Well, you can! Just save the project as a 3MF file. It’ll contain all of the profiles, models, and settings just as they are.
Resin Printing

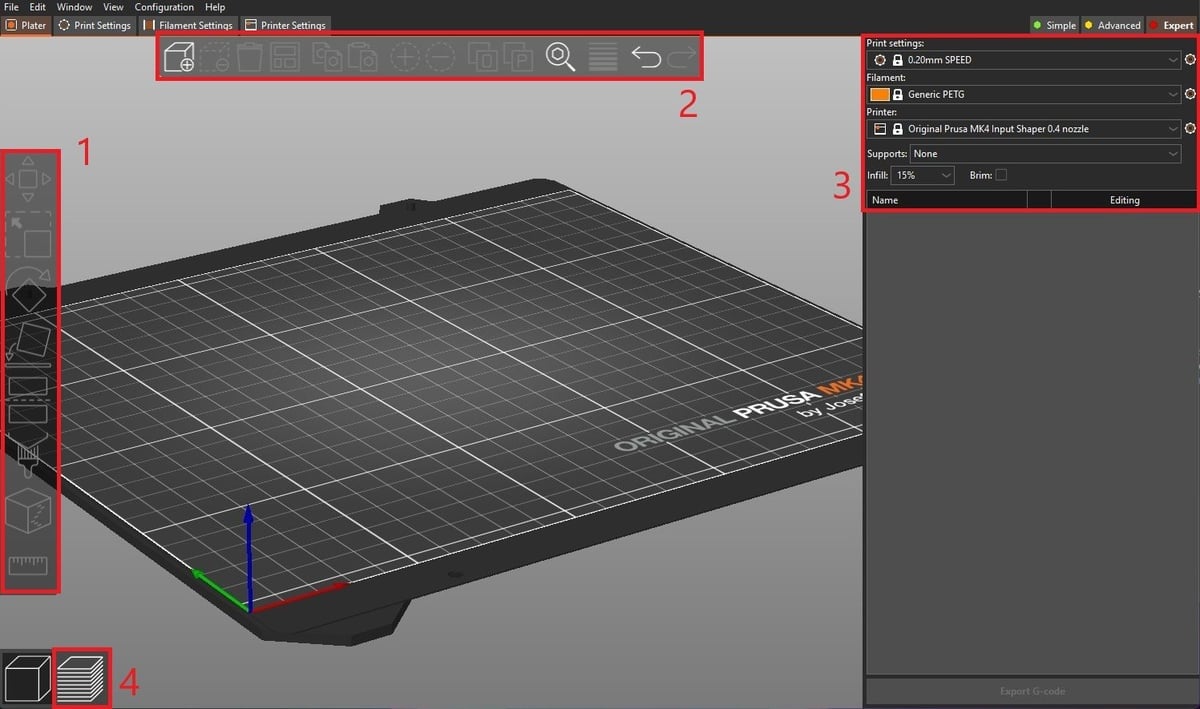
Usually, slicers for filament and resin printing are separate, but that’s not the case with PrusaSlicer. With this software, you can slice 3D models for both FDM and resin 3D printers without switching slicers! When selecting a resin 3D printer, the software automatically adjusts the interface to include resin printing-specific tools and settings, such as hollowing and object orientation optimization.
You can auto-generate supports or manually add them in both the FDM and resin printing sides of the software, but the supports for resin printing need to be really thin and have a tiny contact area with the printed object. Therefore, the dedicated SLA Support Points tool (1) focuses on the distance between and density of the support points.
Together with the different supports, resin printing needs particular attention to the orientation of the piece to obtain good strength and surface quality. To help you find the right angle, PrusaSlicer has implemented the Optimize Orientation function, which you can find by clicking on “Rotate” on the left toolbar (2). When selected, the tool will offer you three options that allow you either to maximize the print quality (“Best surface quality”), minimize the supports (“Reduce overhang slopes”), or save the most amount of time (“Lowest Z height”).
Finally, the last feature dedicated to the resin printing interface is the Hollow and Drill tool (3). By default, all the objects printed with resin 3D printers are completely solid. This can lead to robust print but also heavy parts. If you want to save material, this is the right tool for you, since it allows you to hollow out the inside of the model.
Printables Integration
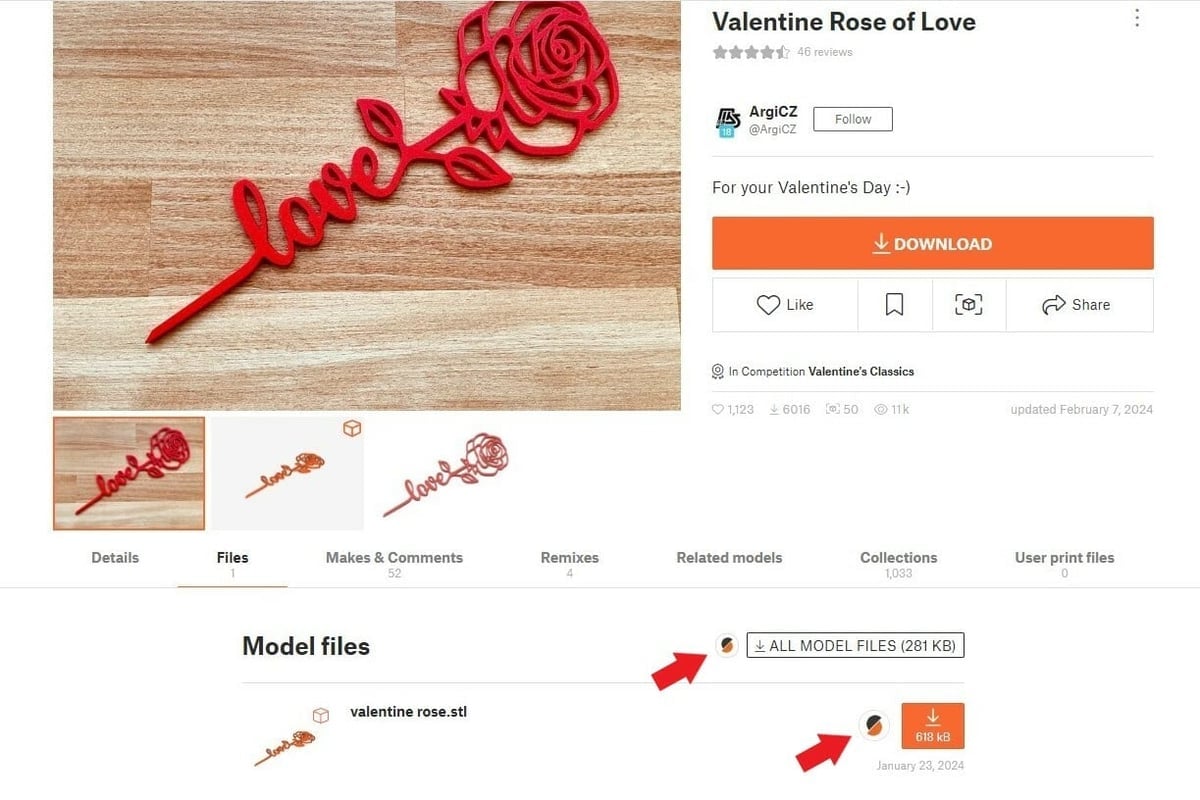
Printables is one of the largest 3D model repositories out there, offering an enormous list of files that you can download and print. If you don’t know how to design something or if you’re in a rush, you should certainly take a look at the site.
Since the 2.6.0 release, PrusaSlicer and Printables have been officially connected. If you want to print something that you find on Printables, you can open the file directly in PrusaSlicer without the need to download and import it. Let’s take a look at how to do it.
First, you’ll need to do the following in PrusaSlicer (2.6.0 or newer):
- Click “Configuration” on the uppermost menu bar, then choose “Configuration Wizard”.
- Select the “Downloads” option.
- Enable “Allow built-in downloader”.
- If you want to select a particular folder where the models will be downloaded, you can do it with the “Download path” setting.
Then, you’ll need to create or log in to your account on Printables via the login icon on the top righthand side of the website. Once you’ve done this, do the following:
- Click the Login icon, followed by “Settings”.
- Choose “Display & Language”.
- Enable the “Show PrusaSlicer button”.
And you’re done, it’s as easy as that. The next time you open a model’s “Files” tab, you’ll see the PrusaSllicer icon to open the file directly in the software.
User Experience

Thanks to the long list of features that it offers, PrusaSlicer is loved by many in the 3D printing community, novices and experts alike. Its Simple, Advanced, and Expert modes ensures novices are not overwhelmed by long lists of settings, while allowing experienced makers to have access to everything they need.
Besides the different modes, PrusaSlicers has other features that facilitate users’ print experience. For starters, it has one of the most extensive lists of printer profiles, making it an excellent starting point for those who are getting into the hobby and don’t know where to start. To help users even further, if you hover on a setting with the mouse’s cursor, a little window will appear, giving you a short description of the option and the link to the corresponding guide.
Further, PrusaSlicer offers a useful feature called “Tip of the Day”. If enabled, a suggestion about the slicing process will pop up at the bottom of the window. If you don’t see it, you can activate the tool by opening Help on the uppermost menu bar, then clicking “Show Tip of the Day”.
Lastly, to remain current, the software will automatically check for updates each time it’s opened and will notify you if there are any new versions available. If you want to proceed with the installation, you only have to click on the “Install” button. If you want to check the features of the new release, you can take a look at the dedicated page on GitHub.
Community & Company Support
Just like for the MK3S and MK4, Prusa Research provides excellent support for PrusaSlicer. The online knowledge base is extensive, from configuration and operation to all the various settings. And if you can’t find the information you need there, their user-based support forum is another option. You can search for and read other users’ questions, comments, and suggestions. You can ask your own questions, too, after signing up for a free account.
With the massive community on Printables and recently added “Open in PrusaSlicer” function, this software has become one of the most complete slicers in the game. The platform allows the owners of Prusa printers to share more detailed printing instructions, pre-sliced G-code, and dedicated instructions. Of course, all other users can still download the model and slice it by themselves, but an extra level of integration is always appreciated.
This support has extended beyond Prusa Research, as they now supply community-created profiles for several other 3rd party printers. This is in line with the Prusa ideology to keep things open source and supportive of the greater 3D printing community.
To install 3rd party profiles, simply run the configuration assistant and select your printer. They’re constantly updated and upgraded, so make sure you’re using the program’s latest version or you might miss out on them.
Additionally, Prusa provides material profiles for all Prusament filaments, as well as many other brands and manufacturers. You can easily add them to your slicer via the Setup Wizard.
Use Cases & Applications
The first job of a slicer is to slice models and create G-code for 3D printing, but thanks to the constant improvements and developments, every program has its strong points. Among PrusaSlicer’s many applications, two especially noteworthy ones include model modification and multicolor printing.
Model Modifications
PrusaSlicer is the first and (so far) only slicer that allows you to do a pretty big list of operations that would normally need CAD software. Earlier, we mentioned the software’s ability to manipulate SVG files and do text embossing, but PrusaSlicer doesn’t stop there.
One of the most powerful tools is the ability to use modifier meshes. These are shapes created within the application that aren’t printed but that affect settings for printed parts. These modifiers do things like block or enforce supports, adjust layer heights, change infill patterns or densities, and set specific numbers of perimeters.
The ability to add negative volume is another great example. The feature allows you to create a simple subtraction directly from the slicer, skipping the need for Boolean operations in modeling software. You only need to choose and place the model you need for the cut on the imported mesh, then the software will take care of the rest.
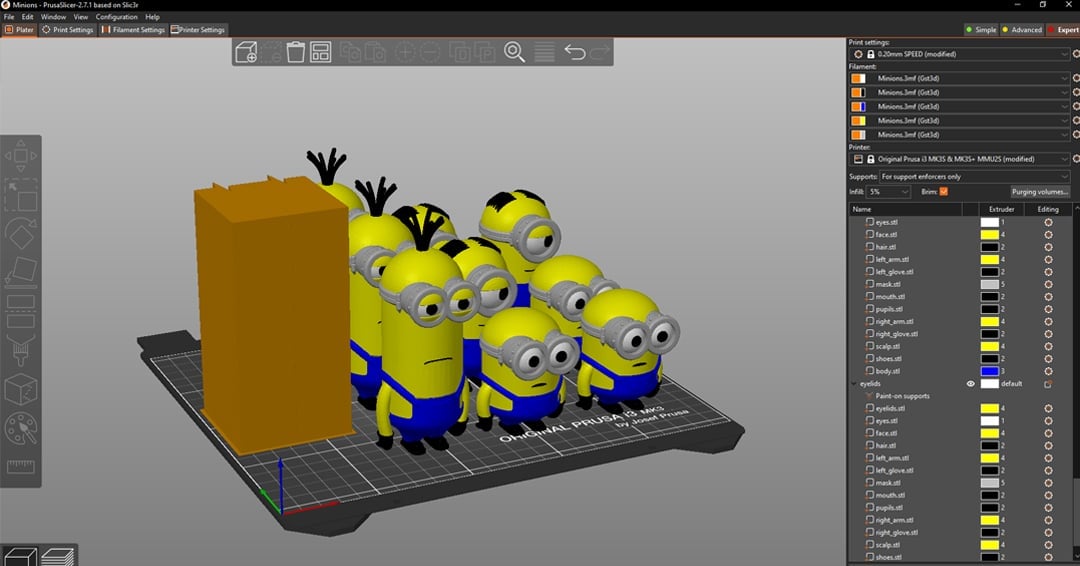
Multicolor Printing
PrusaSlicer facilitates multicolor printing whether or not you have their multi-material upgrades (MMU). For single-extruder, non-MMU printers, the simplest tool for multicolor printing is to execute a color change, which pauses prints to allow you to manually swap filaments at a programmed layer height. A color change can be added in the Preview by clicking on the ‘+’ icon on the layer slider.
Since Prusa Research offers the MMU, PrusaSlicer has implemented color painting features. When you choose a machine that is capable of multicolor printing, a Brush-and-palette icon appears on the left toolbar. Clicking on it, you’ll have access to all the instruments for multi-material painting. Simply choose the desired color and the brush size, then drag it across the surface.
Alternatives
There are several good alternatives to PrusaSlicer. Some have different strengths or functions, and most support a greater variety of printers. While earlier versions were quite different from each other, the disparity between them is becoming less significant as they are refined over time. Below are some key points about the alternatives.
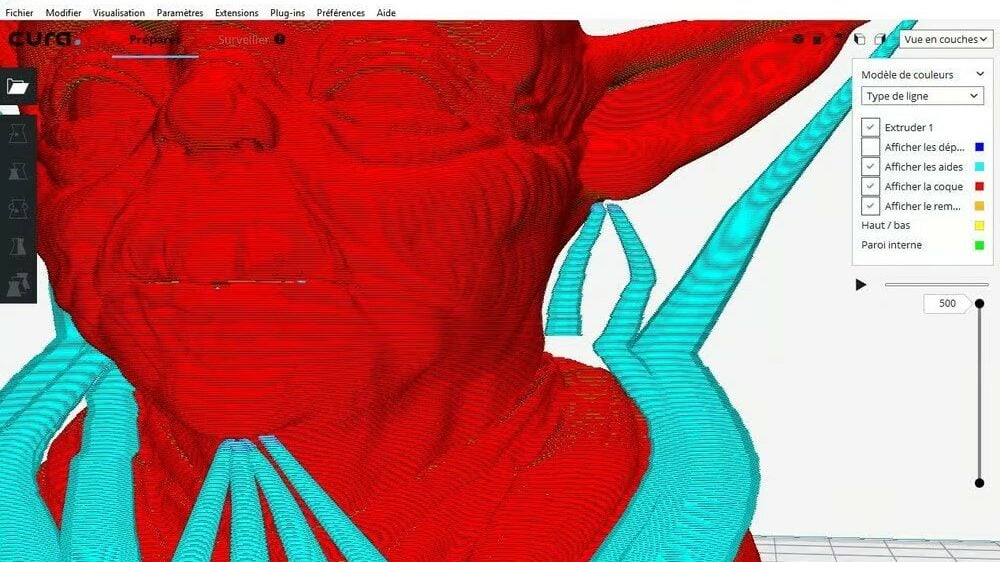
Cura
Cura is perhaps the most popular slicer among the 3D printing community. It’s free, open source, and powerful. It offers more in-depth control over the print settings as well as a completely different GUI and material profiles. However, some users find its interface counterintuitive, while many others lament the lack of specific infill or support settings.
Orca Slicer
Although it’s a fork of Bambu Studio, which is itself a fork of PrusaSlicer, Orca Slicer has come a long way from its origin, offering a workflow that’s handy for big projects. As PrusaSlicer does, this software also implements unique features, such as mouse ears, and improves existing ones, like the calibration section.
Chitubox
The resin slicer scene isn’t as developed as the FDM one, but programs like Chitubox aim to level the playing field. This free tool is cross-platform compatible. It supports all printers in the ChiTu ecosystem and includes support for the latest features in the field. The interface and preview system are somewhat lacking, as is the absence of newer tools like community-driven resin profiles, but if you’re only printing with resin setups, then it might be worth it.
License: The text of "PrusaSlicer: All You Need to Know" by All3DP is licensed under a Creative Commons Attribution 4.0 International License.