PLA Welding: How to Fuse 3D Printed Parts

Joining two printed parts by PLA welding can be tricky. Read on for tips and solutions that may help you in any situation.
Welding 3D parts may sound like something you need to do in a workshop while wearing a mask and wielding a blow torch, but this isn’t the kind of welding we’re talking about. We’re also not referring to joining two pieces of raw filament strands together (although, we’ve got you covered on that, too). Rather, PLA welding is a way to fill in gaps or “glue” parts together using melted filament.
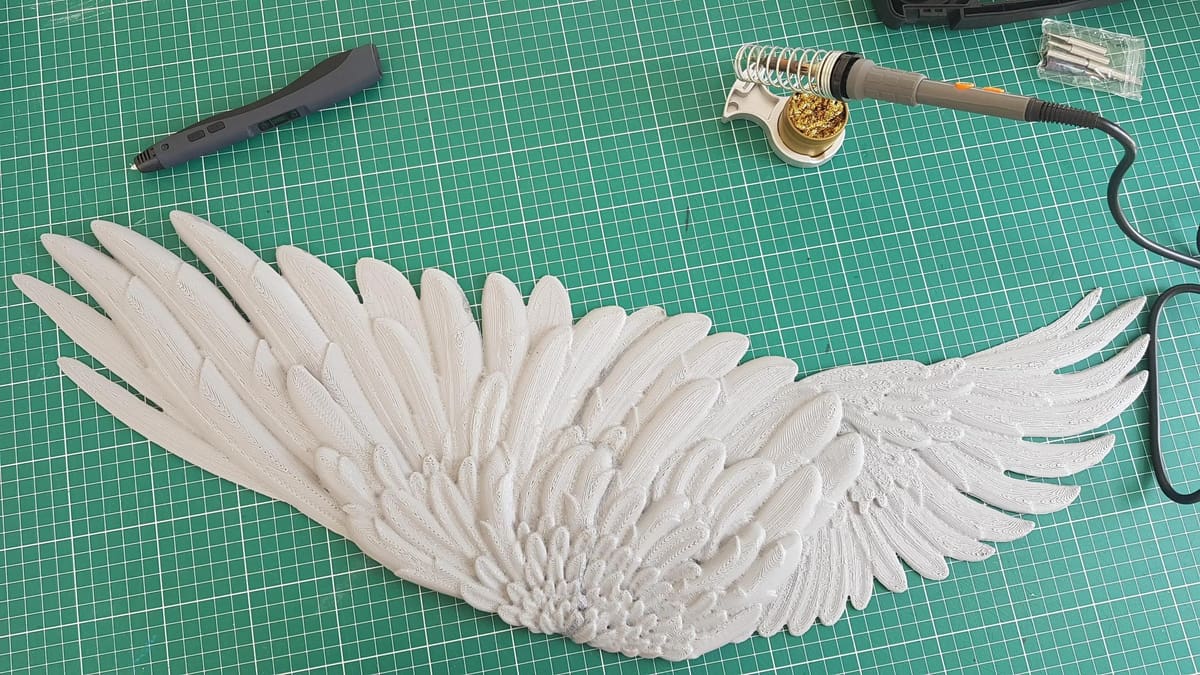
When you’re printing in 3D, there may be times when either the model is too large to be printed as one piece or it’s designed to be printed in parts and assembled later. Or maybe something just broke, and you want to repair rather than reprint the whole part again. In the first of these cases, you’ll need to split the model into smaller parts in your slicer. When making the split, it’s a good idea to hide the seam in the details of the model instead of simply making a straight line. For example, if you’re printing the wing of a bird, make the split along the curve of one of the feathers.
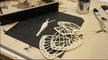
Once the parts are 3D printed, this is where the need to weld or join your printed parts together comes in. There are, of course, different ways that you can do this. In this article, we’ll walk you through some of the most effective methods we’ve found: friction welding, soldering, and using a 3D printing pen. Each of these has its own particular procedure and outcomes, but all involve the melting of filament to add to a seam connecting two prints.
To get started, let’s go over why you may need to weld your printed parts and when to choose each of the welding methods.
Which Method to Use
But why even weld in the first place? In most cases, the first instinct would be to reach for some glue to connect printed parts, but there are times when glue just doesn’t cut it. In these cases, PLA welding can really save the day. Some common situations include the following:
- Small surface area joints that require a strong bond
- Curved or spherical joints that don’t have a lot of area for glue
- Complicated shapes that make it difficult to apply glue
- Cracks in poorly printed or broken parts
- Seamless joints
On the other hand, if you need to repair delicate, detailed, or small prints, you should probably stick with glue or even fillers.
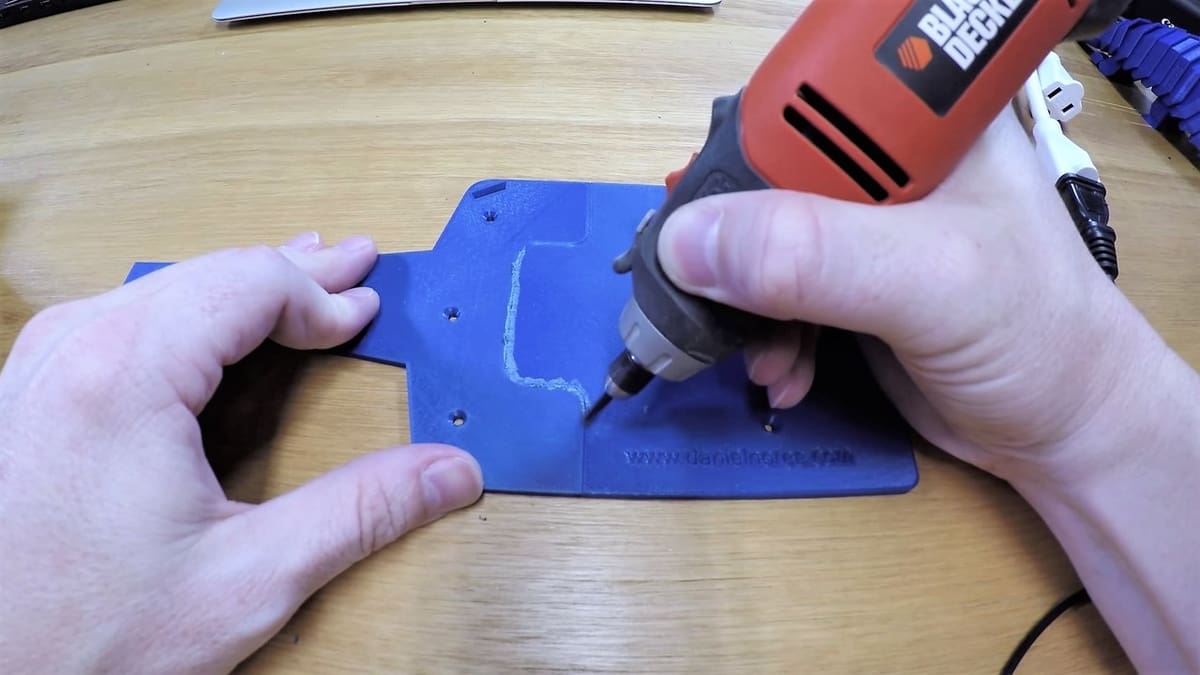
Friction welding will involve the use of a small drill or electric hobby tool, so it may be better suited for bigger parts with at least a centimeter thickness. It’s also best when there’s some sort of channel for the filament to fill up, rather than trying to join two flat pieces.
With soldering, you may have some more control over exactly where material is applied, but you also risk melting the printed piece or burning the filament. You won’t be able to work with a lot of material at once, so if you need to fix up some small parts, this may be the best option.
A 3D printing pen allows you to essentially have a handheld hot end that you can use to apply melted filaments to larger areas of any geometry. However, current 3D printing pens only work with PLA or ABS filaments, which may not be the ideal material if you’re looking for a weight-bearing bond.
So, let’s take a look at each of these methods in detail, and hopefully, you’ll be able to choose which one best suits your needs.
Method 1: Friction Welding
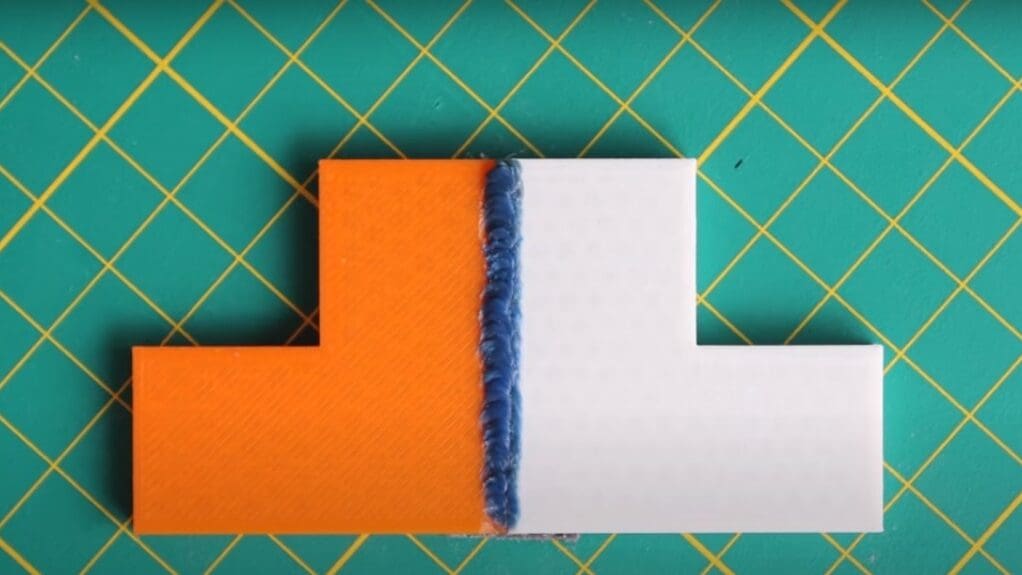
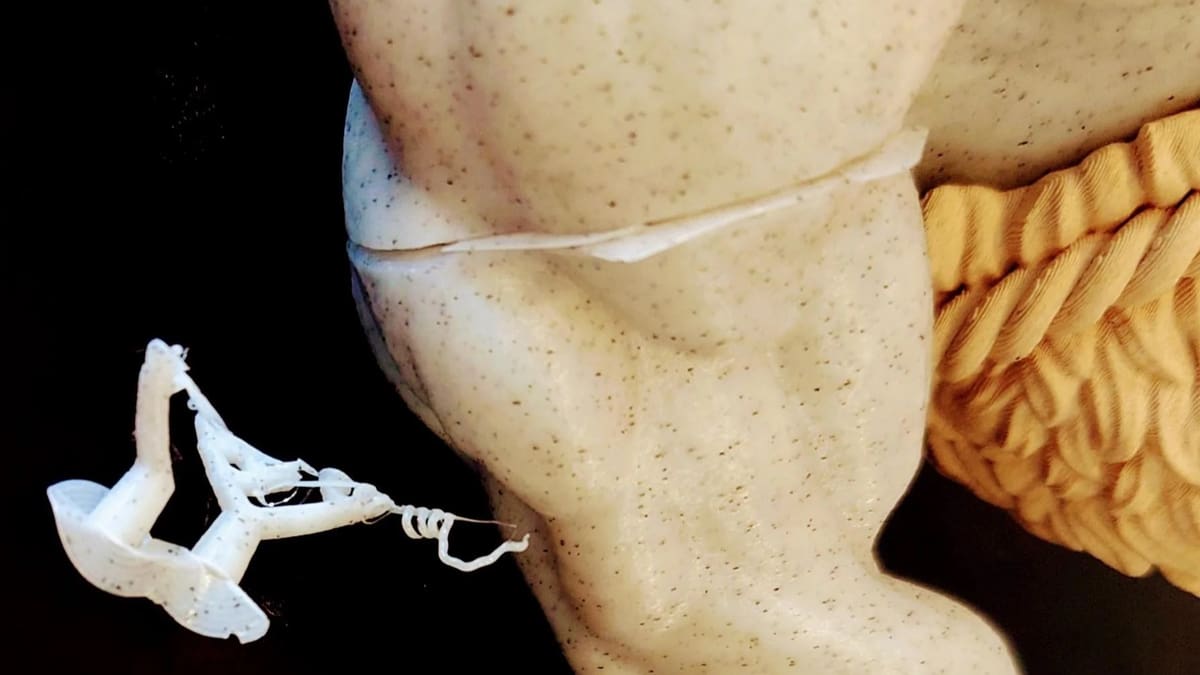
PLA welding takes advantage of the uniquely low melting point of the thermoplastic filament. This means a standard power drill is more than enough to create friction for welding. There’s no need for any specialized tools, which is great news for everyone!
The idea is to get a piece of filament moving at a high speed using a power drill so that friction is created when it comes into contact with printed parts. Friction creates heat which will, in turn, cause the moving filament to soften enough so that it can be manipulated in a similar way to hot glue. After cooling, this creates a strong bond, as if it had been part of the piece all along.
This method provides a fairly strong weld between your printed parts but will need some finishing work to make the joint look nice. PLA is definitely the preferred filament to use due to its lower working temperatures, which means it’ll require relatively less friction.
What You’ll Need
- Small drill or electric hobby tool such as a Dremel
- Collet to hold the filament in the tool, depending on filament size: 3/32″ for 1.75 mm or 1/8″ for 3 mm
- Small piece of PLA filament (a few inches, depending on how much you’d like to weld)
Steps

Safety: This electric tool works at high speeds, so standard safety precautions should be taken, such as wearing goggles.
- Prepare the surfaces to be joined. This could involve some light sanding and removal of any snags or superfluous debris that may get in the way.
- Load the piece of filament into the drill collet as you would with a standard attachment or drill bit and cut it so that about 15-30 mm is protruding.
- Position the parts together as you would like them joined. This should be on a flat surface, such as a workbench or sturdy table. It’s advisable to secure the pieces either with a bench vise, if you have one, or clamps.
- Start up the tool and apply pressure with the moving filament while running it along the joint. There are different patterns in which to do this, but that will depend on exactly what you are trying to achieve. We’ve got more details on that for you below.
- Allow it to cool, then move on to the finishing steps!
For more details, check out these tutorials from Polymaker and 3D Printing Nerd.
Tips

Welding does take some technique. Especially for beginners, it’s recommended to try it out on some scrap pieces first. With practice, you’ll become an expert in no time! Here are some tips to get you started on the right path:
- Speed: You’ll have to find the right drill and tool speed through trial and error. Too fast and filament may go flying, but too slow and the friction won’t build sufficient heat. Start out with a medium setting, and adjust according to your needs.
- Filament piece: As you’ll quickly find, longer pieces of filament can be very difficult to control. We want enough filament to work with but not so much that we can’t wield it properly. It’s also important that the filament is as straight as possible. A heat gun or even a hair dryer may come in handy if the material doesn’t cooperate.
- Pressure: You’ll want to apply the right amount of pressure. Too much and you risk damaging your part, but too little and you won’t be depositing enough material.
- Weld patterns: There are a few different weld patterns that you could use for this method. Either way, you should weld in layers until the marks go above the joint; the extra can be taken off in post-processing.
- Right-to-left: Holding the filament perpendicular to the seam, drag the drill slowly across from right to left. Since the drill rotates clockwise, melted filament gets deposited directly onto the seam. Use this method for joining two parts together.
- Circular: In this weld, move the drill in a circular clockwise motion while you move down the seam as if you were drawing tiny swirly circles. This keeps the weld neat and even on both sides. It’s best for gap filling and surface cracks, as it will result in a weaker weld compared to right-to-left.
Method 2: Soldering
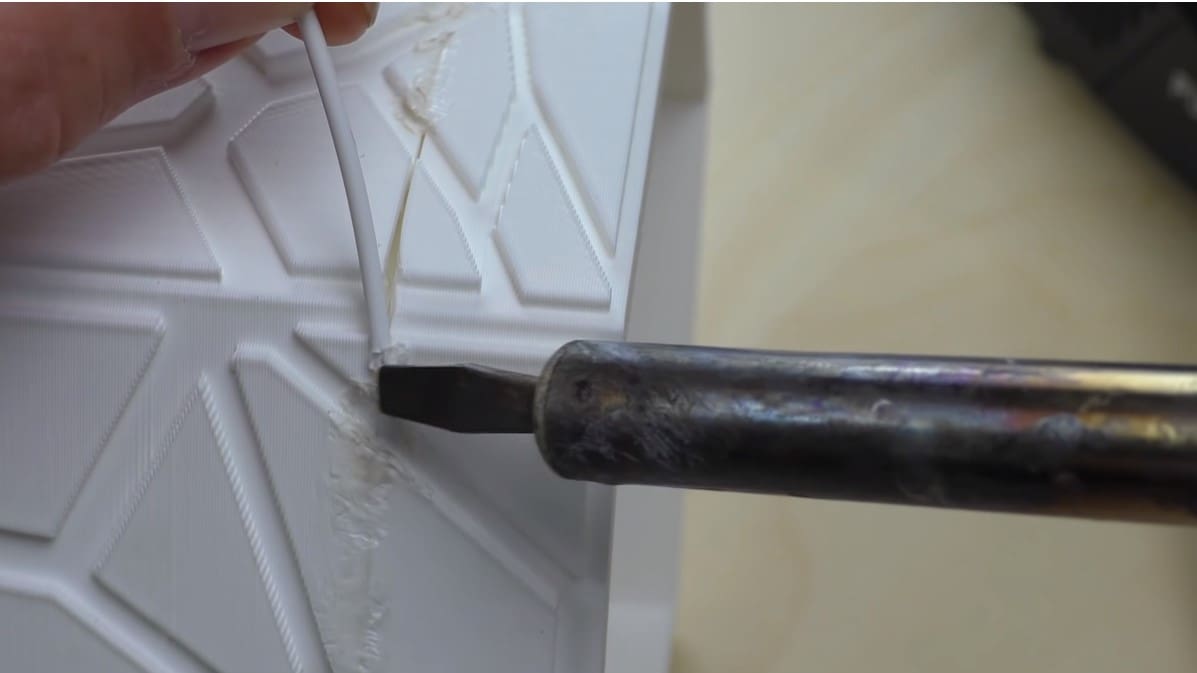
A soldering iron might not seem like the obvious choice, but it can be a lifesaver in a pinch.
The ideal use of this method would be if you’re filling or welding items where there are no parts missing and no deep gaps between the joints. Filling gaps with a whole strand of filament may result in a weak joint because the soldered filament inside the gap may not sufficiently melt and bond with the rest of the part. As you can see, soldering is more likely to be a cosmetic solution, not a practical one.
It would be best to work slowly to prevent this from becoming a messy process due to too much filament getting melted at once. There’s also the potential for overheating and burning the filament if it has prolonged exposure to the soldering iron, which will leave black marks on PLA.
On the other hand, a big plus of this method is that there are practically no temperature restraints, so you’re free to use any filament. If you wanted a stronger joint for your printed PLA parts, you might consider using a filament such as PETG or even nylon. This could be particularly useful if gluing wings or any other long protrusion to your model.
What You’ll Need
- Soldering iron
- Spare 3D printing filament or even discarded supports or parts (a good way to recycle and re-purpose otherwise wasted filament!)
- Water for cooling, if desired
Steps
Safety: Soldering irons are extremely hot (and not just at the tip), so be careful when handling or setting one down on your work surface.
- Prepare the surfaces to be joined. This could involve some light sanding and removal of any snags or superfluous debris that may get in the way.
- Heat the soldering iron and ensure that you have a suitable stand or somewhere safe and heatproof to rest it when not in use.
- Position the parts together as you would like them joined. This should be on a flat surface such as a workbench or sturdy table.
- Melt the filament onto the joint or surface using the iron. Try to avoid prolonged direct contact with the iron and the strand of filament.
- Cool using water if needed, then move on to the finishing steps!
For more details on this process, check out the tutorial from Hobby Hoarder.
Tips
For starters, if you’ve never worked with a soldering iron, really consider if super glue is a better option. If not, here are a few other things to keep in mind:
- Melting: Try to start off slowly and at a temperature no hotter than your printer’s hot end. Melt bit by bit instead of going right in; this will help to prevent burn marks. Melted PLA also likes to stick to soldering ends, which is pretty unpleasant to clean up. Remember, the filament is made to melt!
- Don’t overdo it: Be careful not to melt too much filament at once, as this will create a hot mess, literally, that will quickly cool and become something that requires sanding and even more post-processing.
- Cooling: The joint needs to be cooled quickly. Otherwise, it may continue to melt, so adding water afterward will help with this. This may not be essential, but you don’t want to damage the printed parts if you can avoid it.
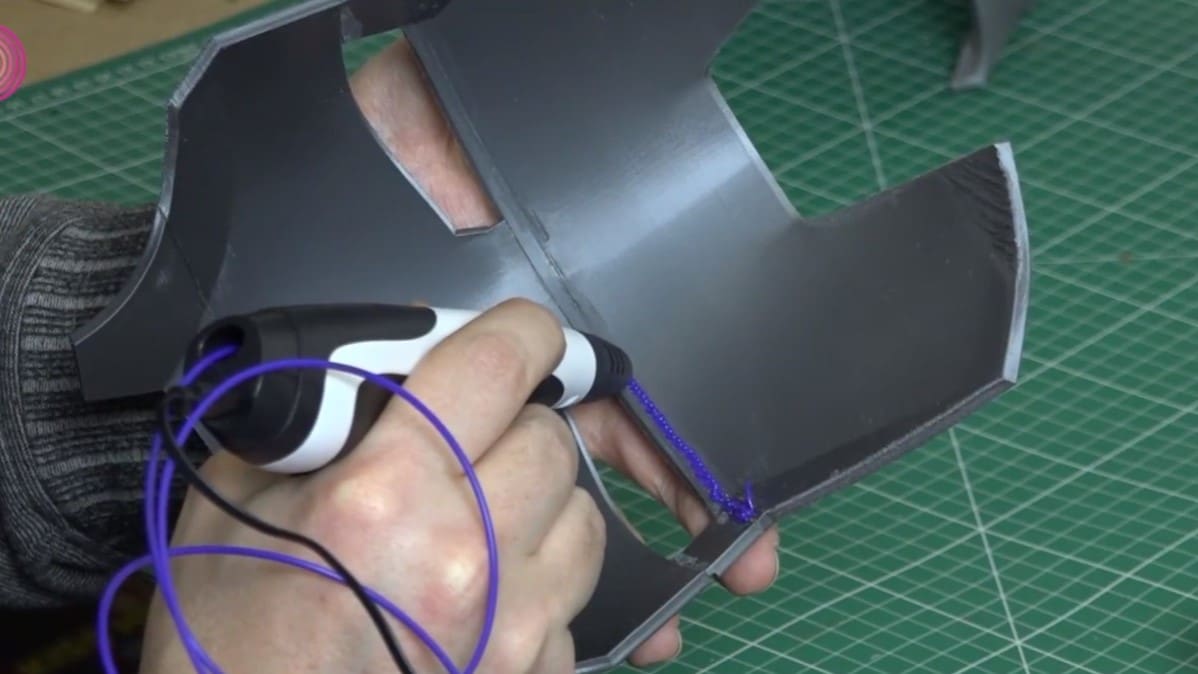
Method 3: 3D Printing Pen

A 3D printing pen is essentially a 3D printer in a much smaller form. It performs all the basic functions of 3D printers, in that it extrudes filament through a 0.4-mm hot end nozzle and produces melted filament ready for building! However, it doesn’t have any programmable element to it, no framework or build area, and works entirely on a “free-form” basis. This makes it ideal for creating small, artistic 3D formations.
3D pens were originally aimed at children and younger users, as they’re fairly cheap and fun to draw with. Now, adult makers are using them in interesting ways, including using them to mend or weld 3D printed parts.
A 3D pen will give you the advantage of being able to cover large areas quickly, which is great for the welding of larger parts. With a 3D printing pen, the filament is heated to exactly the same temperature as your printer, so there’s no risk of burning. However, try to avoid touching the tip to your printed parts.
You should also note that your choices of filament are limited to PLA or ABS. So, you need to consider whether those materials will be strong enough for your joint.
What You’ll Need
- 3D printing pen – the 3Doodler Create+, for example
- Either PLA or ABS filament
Steps
Safety: You’re using a hot tool, so don’t touch the hot end of the pen.
- Prepare the surfaces to be joined. This could involve some light sanding and removal of any snags or superfluous debris that may get in the way.
- Heat and load the pen with the appropriate filament.
- Position the parts together as you would like them joined. This should be on a flat surface, such as a workbench or sturdy table.
- Apply the filament to the joint using the 3D pen. This could be either in a straight line or a circular motion similar to the filament welding method.
- Allow it to cool, then move on to the finishing steps!
For more details, check out this tutorial from Dax79.
Tips
As this tool is suitable for even younger makers, we think this method will be pretty straightforward. But if you’ve never used a 3D printing pen before, there are a few things to watch out for:
- Work fast: Don’t linger too long at any one point because the filament will extrude quickly and can be hard to control.
- Drying: Filament from the pen will dry and harden quickly, which can be a blessing or a curse, depending on your case.
Finishing
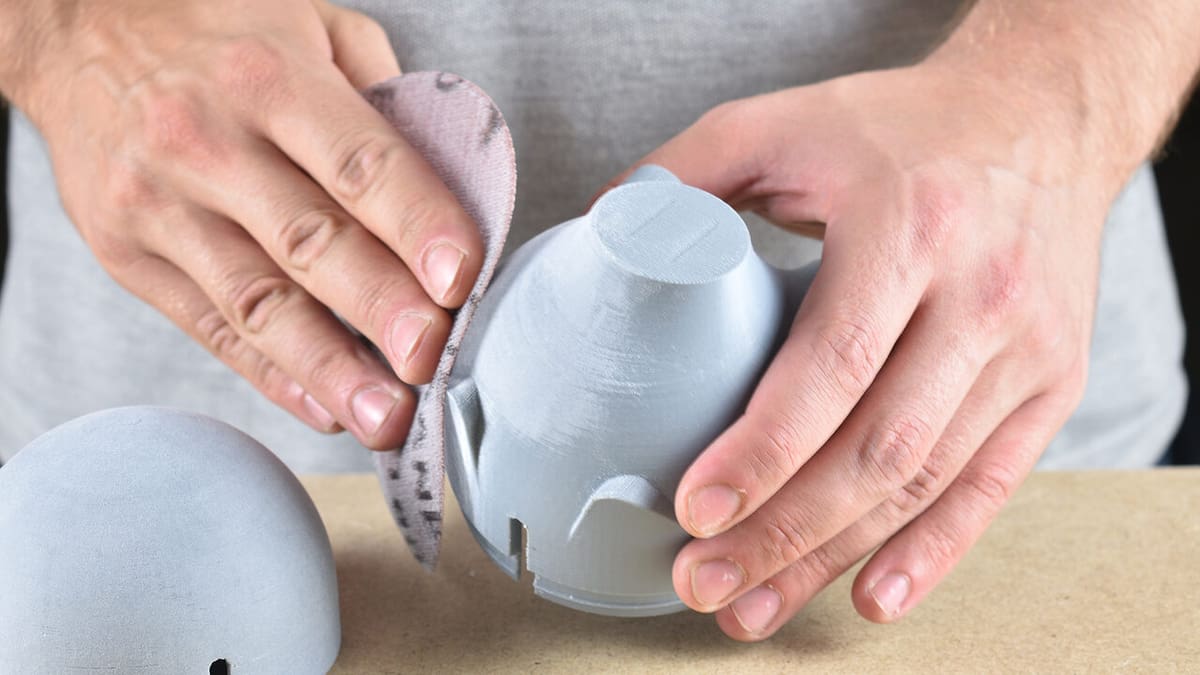
Welding may leave bumpy trails behind. Therefore, post-processing is essential to getting that perfect, seamless joint. So what’s the best way to smooth the bumps out and finish your PLA weld?
- Sanding: No matter the method you use, you’re going to have some excess material that needs to be removed. Like with sanding any other print, it’s best to start with coarse sandpaper and later switch to a finer one.
- Filling: If you have some small gaps left over, you can try using a filler to create the perfect surface. This can be done by applying a small amount of filler as you sand, then allowing it to dry before lightly sanding again.
- Paint or polish: Painting or putting polish on your print really helps to hide any blemishes from welds. This will be your final step, so make sure you’ve already sanded and smoothed the surface to your liking before applying paint.
Hopefully, this article will give you the skills to easily join your model parts together (and add welding to your 3D printing resume)!
License: The text of "PLA Welding: How to Fuse 3D Printed Parts" by All3DP is licensed under a Creative Commons Attribution 4.0 International License.