Among the many slicers available in the 3D printing community, Orca Slicer and PrusaSlicer are definitely two of the most popular options.
Developed by Prusa Research, PrusaSlicer is considered a benchmark in 3D printing slicing software. While it’s based on Slic3r, in 2016 Prusa launched its own in-house version, called Slicer PE (Prusa Edition), and distributed it through GitHub. In 2019, the name was changed to PrusaSlicer, as the differences from Slic3r had become substantial.
Orca Slicer originated as a fork of Bambu Studio and was developed by SoftFever. It’s also distantly derived from Slic3r, as Bambu Studio is a fork of PrusaSlicer, and therefore, Slic3r. Orca Slicer offers a range of innovative and intuitive features that facilitate the slicing process and make it stand out as one of the best programs of its nature.
In this article, we will look at the main differences and similarities between these two free and open-source slicers, including their usability, features, and available support. Let’s get started!
System Requirements
To get the best out of both Orca Slicer and PrusaSlicer, you’ll want to ensure you have the minimum system requirements. For PrusaSlicer, this means having 64-bit Windows 7 or newer, or Ubuntu, Debian, Mint, among others, if you’re running Linux (although the PrusaSlicer teams notes that they don’t test all distribution channels), or MacOS Sierra 10.12 or newer, plus Open GL 2.0 or newer. You’ll also want to have a multi-core processor with multiple threads and at least 4 GB of RAM, although 8 GB is recommended.
Orca Slicer is available for the most popular operating systems, including Windows, MacOS, and Linux. The exact technical requirements aren’t specified, but you can find detailed installation instructions on GitHub. Simply find the right folder for your device and follow SoftFever’s instructions.
UI & Layout
We’ll now take a look at the respective UI and layout of each slicer. As mentioned, they’re derived from the same program, Slic3r, so they naturally share some similarities when it comes to the these and the navigation.
PrusaSlicer
In PrusaSlicer, there are two views, three modes, and the option to modify and save your settings profiles. You can choose between Simple, Advanced, and Expert modes, depending on your experience level and the amount of fine-tuning you want to do. Simple mode will show the basic settings to get started, while Expert mode displays all of the available settings.
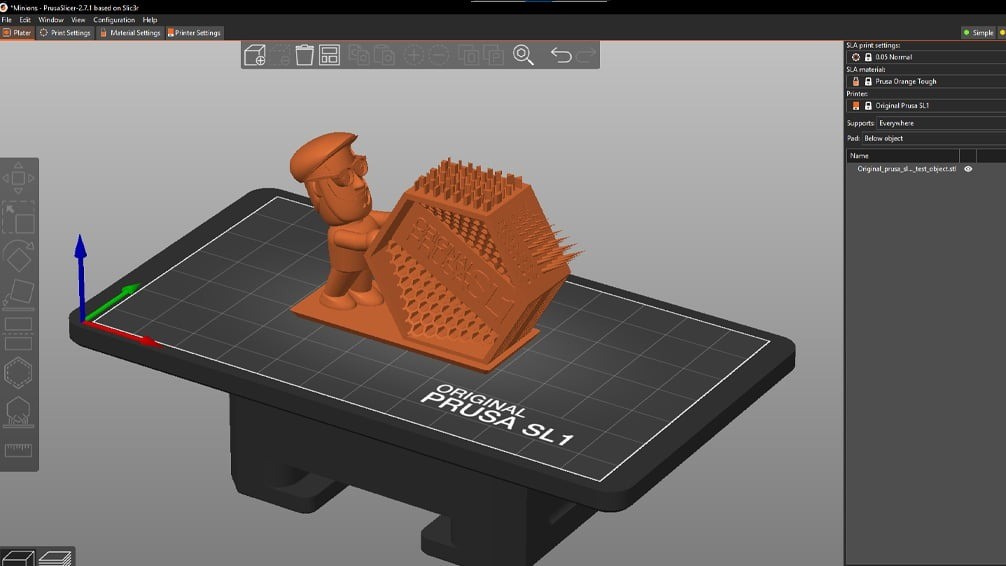
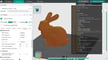
After you finish downloading and installing PrusaSlicer, the 3D editor view will open. This view is where you’ll prepare your model for slicing. On the left toolbar, you’ll find tools for moving, rotating, scaling, and cutting your imported model. There are also tools for adding paint-on supports and measuring. In the right toolbar, you’ll see options for print quality, filament settings, and printer model(s). You can adjust the infill and brim settings and view an outline of imported objects. There are also options for duplicating objects along the top toolbar, among other tools.
After you finish preparing your model, you can switch to the Preview. This will show your sliced model as it will be 3D printed. In this view, the top and left toolbars disappear, and the Legend and Layer Slider appear, showing volumetric flow rates, retractions, color print previews, and more. With the Layer Slider, you can see each layer of the print.

Orca Slicer
Once installed, you’re ready to start using Orca Slicer. This slicer has many profiles pre-installed for printers, and new ones are added with each new update. It also offers some handy features for Bambu Lab printer owners. Start by choosing your printer profile and adding the filaments with the menus in the top right corner of the slicer. Bambu Lab printer owners have the option to choose the type of build plate, for example, an Engineering Plate or a Cool Plate.
As for filament, Orca Slicer has some useful generic presets that you can start with and fine-tune later to get the best results. While there’s only one filament enabled under this section by default, you can add additional filament by selecting the plus symbol if you have a multicolor unit, such as Bambu Lab’s Automated Material System (AMS). If you have a Bambu Lab AMS, the software will automatically display all the detected filaments.
Other notable aspects of the slicer’s UI and layout include the top menu bar, which has options for creating a new project, opening an existing one, customizing your settings, previewing your sliced models, and viewing your printer interface with a Wi-Fi-connected machine. The Project tab is unique to Orca Slicer and Bambu Studio, and it lets you view an overview of your project, including a full list of materials. Another unique aspect is the “Add Plate” feature in the top toolbar, which we’ll take a closer look at further below.
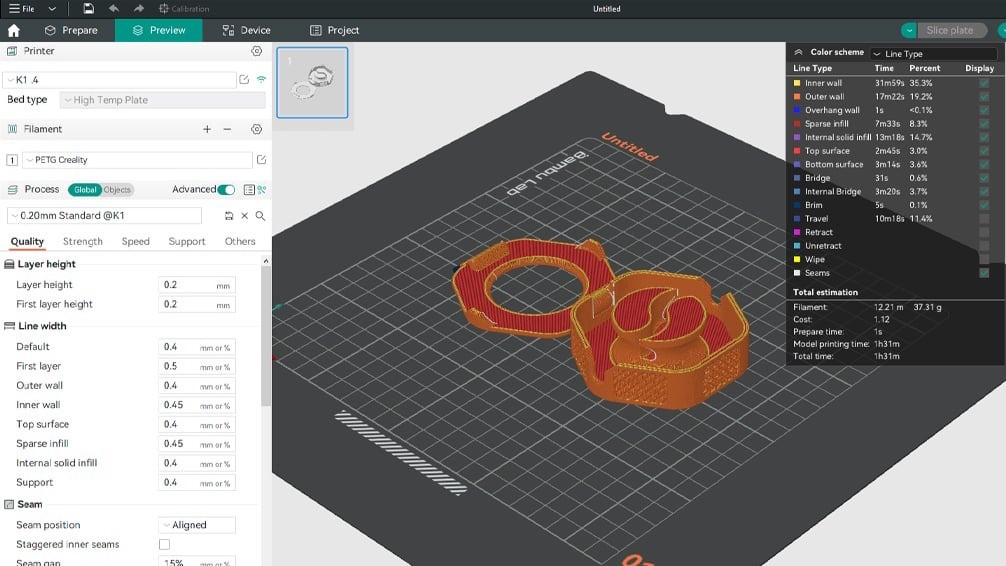
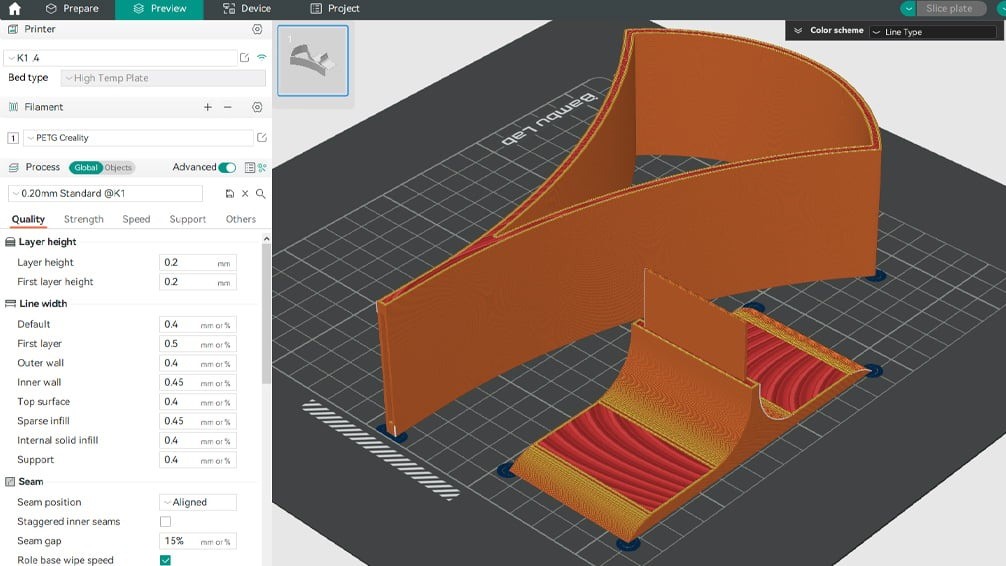
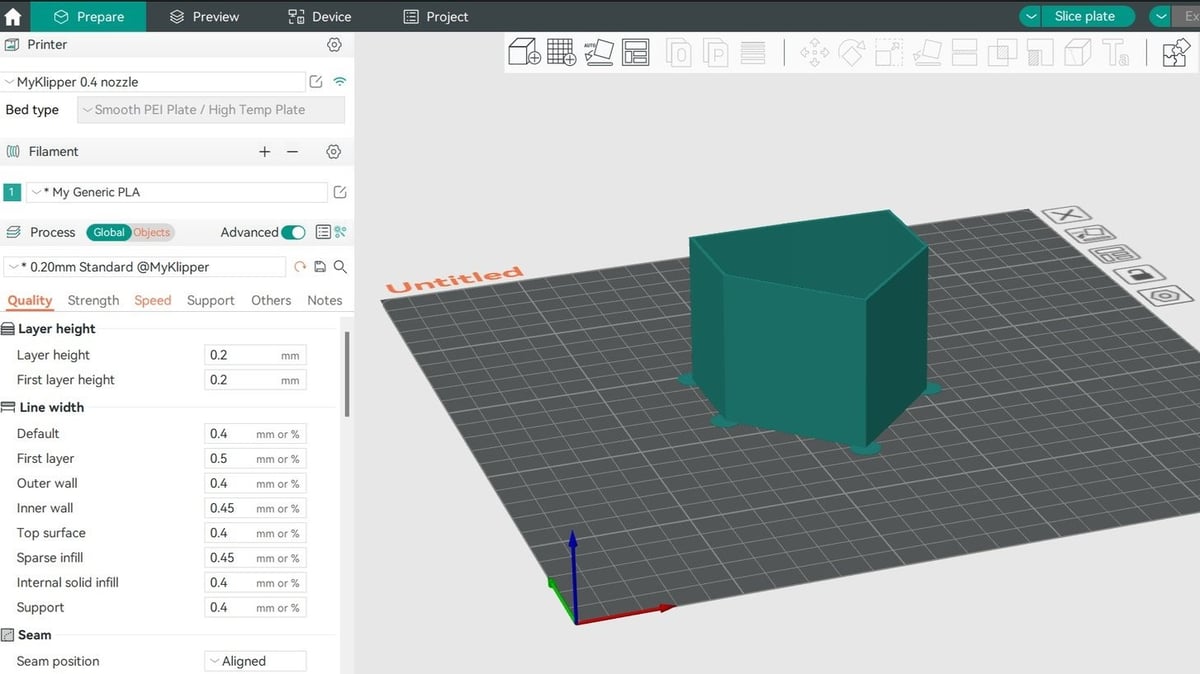
In the Process menu, you’ll find typical slicer settings, such as infill, walls, line height, and G-code output. You can adjust a wide variety of settings by selecting the Quality, Strength, Speed, Support, and Others tabs.
Selecting the “Slice” button will slice your model. The “Preview” tab will then automatically open and the “Print” button will turn green, indicating that you’re ready to start printing.
Features & Functions
Now that we’ve looked at the respective layouts, let’s cover some of the most noteworthy features of each slicer.
PrusaSlicer
PrusaSlicer has many customizable features and settings that users appreciate, including tools for cutting, measuring, and generating organic supports. Here’s a closer look at some new or noteworthy features.
Organic Supports
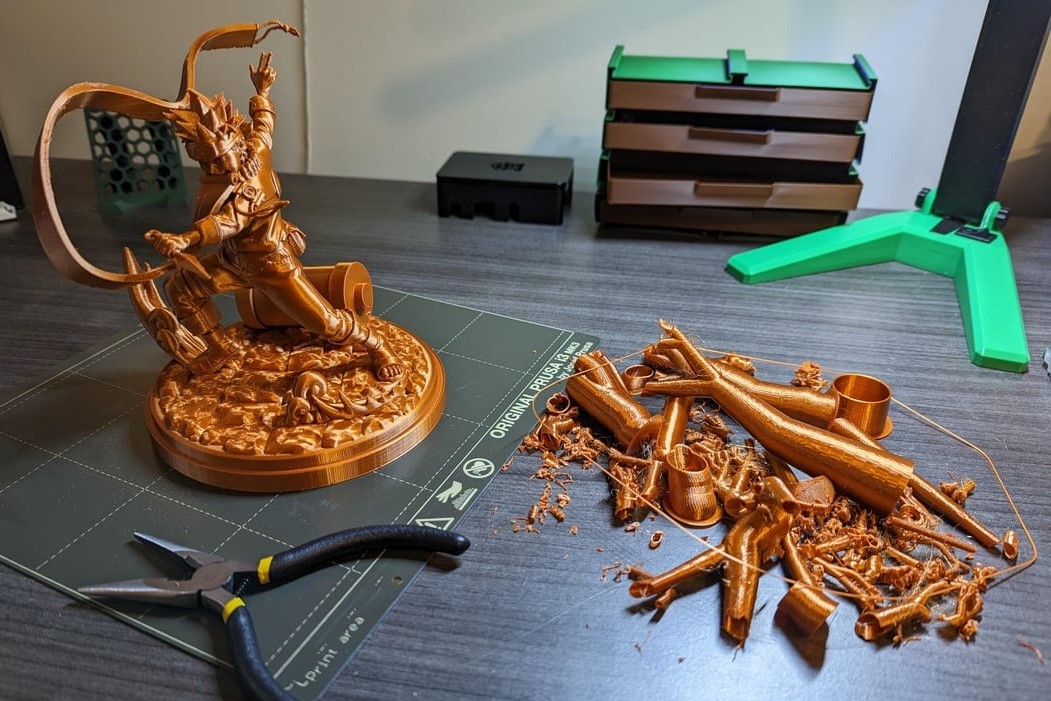
Released at the end of 2022, organic supports are an alternative to the 2D grid-based approach of the traditional grid and snug supports. They allow you to generate supports with smooth and natural shapes that decrease printing time and filament use. Since they develop away from the body of the print and only get close to support the print’s overhangs, they leave almost no marks on the surface. These supports are easier to remove than standard supports, as they hardly come into contact with the surface of the model.
To activate organic supports, open PrusaSlicer (version 2.6 or later), go to the “Print Settings” tab, and click “Support material”. Then, select either “Advanced” or “Expert” mode on the top right side of the screen. You should then see a section labeled “Options for support material and raft” with a long list of options. From the “Style” drop-down menu, select “Organic”.
Text Embossing
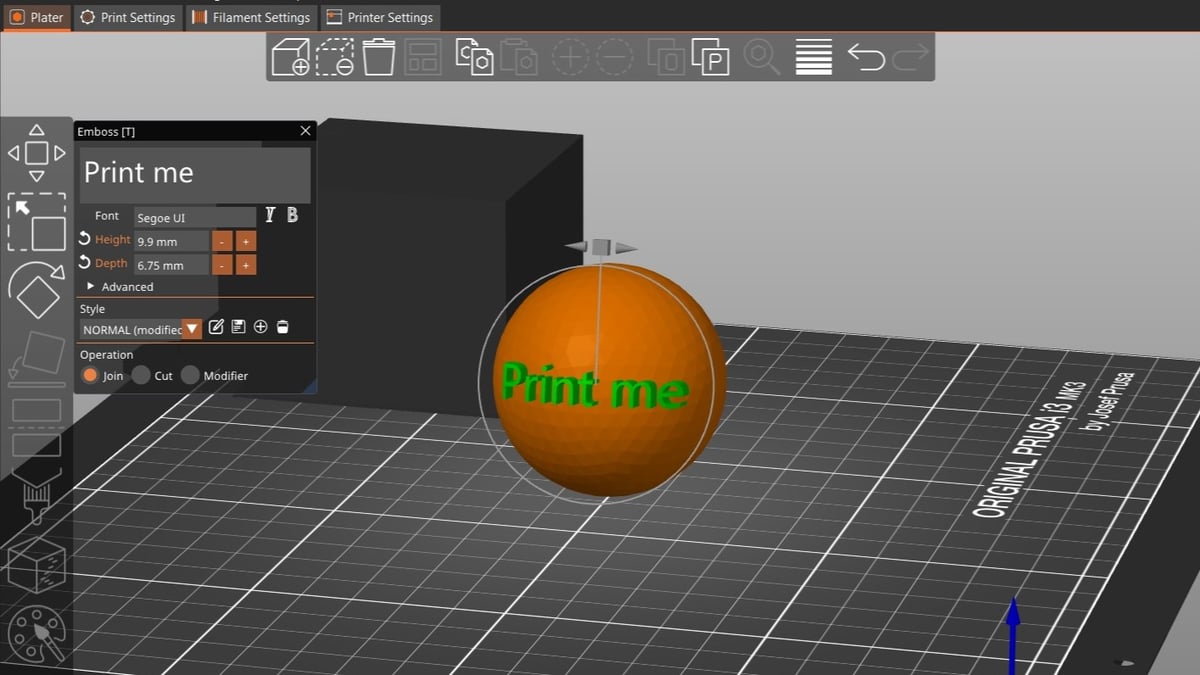
If you want to add text to your model, you can do so directly from PrusaSlicer with text embossing, no CAD software required. Introduced in PrusaSlicer 2.6, this handy tool makes it easy to customize your models with text directly in the slicer.
To use the text embossing tool, go to the “Plater” workspace and select the object that you want to modify. Right-click on it and select “Add modifier > Text”. A text modifier will then appear on your object, as well as a menu with options to the left. You can either emboss (add) the text with the “Join” option or deboss (carve) it with “Cut”, and by clicking on “Advanced”, you can look into further options, like using the surface of the original model. There’s also the option to create a standalone object with the text embossing tool. To do this, right-click on the build plate and select “Add Shape > Text”. This will cause a model of your text to appear on your plate, which you can then modify and customize.
Printables Integration
Another handy feature of PrusaSlicer, since the 2.6.0 release, is its integration with Printables, Prusa’s online model repository. On this platform, you’ll find thousands of creative and functional 3D models, all ready to be printed. It’s now possible to print models that you find on Printables by opening the file directly in PrusaSlicer; there’s no need to download and import it separately.
To set up this integration in PrusaSlicer, click “Configuration” on the uppermost menu bar and choose “Configuration Wizard…”. From “Downloads”, enable “Allow built-in downloader”. If you want to select a particular folder where the models from Printables will be downloaded to, you can do it with the “Download path” setting.
The next step is to create or log in to your account on Printables. From here, click the Login icon, followed by “Settings”. Then, choose “Display & Language” and enable the “Show PrusaSlicer button”. It’s as simple as that! Now, when you open a model’s “Files” tab in Printables, you’ll see the PrusaSlicer icon. Simply select this icon to open the file directly in the slicer.
No matter what you’re printing, once you’re set, you can slice your model and send your G-code to your printer or export it as an STL or OBJ file.
Orca Slicer
Orca Slicer also has a nice variety of handy features and functions. Many tools were adopted from Bambu Studio, although Orca Slicer does have some unique tools of its own. Let’s take a look.
Mouse Ears
In Orca Slicer, mouse ears are an effective tool for preventing warping, especially for parts with tough angles. The slicer automatically generates this brim-like feature around the corners of a print after you activate it under the “Process > Others” section and select it from the list of “Brim Type”. While the default settings work fairly well, you can play around with the “Brim ear max angle” and “Brim ear detection radius” to only place them mouse ears where they’re most needed.
Calibration
When it comes to calibration, Orca Slicer takes it to the next level. The slicer has a series of built-in tests to optimize your profiles and achieve the best quality prints for your printer and filament.
The calibration tool is located at the top of the slicer window under “Calibration”. Selecting this label will display the available tests, each of which is meant to calibrate different values of your profiles. The tests include temperature, flow rate, pressure advance, and VFA, which stands for “Vertical Fine Artifacts.”
Multiple Plates
One of the standout features of Orca Slicer is its capability to show multiple plates in the same project. You have the option to add multiple build plates to get a complete overview of the time and filament required for a project that involves printing various parts on different beds. This allows you to spread your parts across different build plates and have plates for specific filaments and print profiles.
User Experience
While both slicers are packed with features, they’re still fairly well-organized and easy to use for beginners and more experienced users alike. Many users defend PrusaSlicer as being nice to use and an improvement over older slicers. For Orca Slicer, users note that it stands out for its calibration tools and that it’s quick to adopt new features. As noted by a Redditor, PrusaSlicer is best for Prusa printer owners, while Orca Slicer is the go-to for makes with Bambu Lab printers.
With PrusaSlicer, you can manage the difficulty mode, so beginners aren’t overwhelmed by a long list of settings, and more advanced users can tinker to their heart’s content. In both programs, you can learn more about each setting by hovering the mouse over the title. And Orca Slicer also offers suggestions for your specific print with pop-ups in a little window at the bottom right corner.
Additionally, PrusaSlicer offers a long list of printer profiles, so you can easily get started if you’re new to 3D printing and want to avoid having to create the new profiles. The number of printer profiles in Orca Slicer is also growing, making it more accessible. Both programs also automatically check for updates each time they’re opened and will notify you if a new version is available.
Company & Community Support
Just like with its printers and other products, Prusa offers excellent support for PrusaSlicer. There’s an online knowledge base that contains useful information about configuration, settings, installation, and more. If you can’t find what you’re looking for there, you can also ask a question on the user forum or search through previous topics. In addition to the Printables integration, owners of Prusa printers can share more detailed printing instructions, pre-sliced G-code, and dedicated instructions. Material profiles are also offered for Prusament filament, along with other brands.
In terms of community support, you can visit the Prusa subreddit and Discord server to find helpful tips and advice from other users.
While Orca Slicer doesn’t have an official website, plenty of support is available on GitHub and the Discord server, which has around 6,000 members. As it’s becoming one of the most popular slicers, the community is constantly growing, and there are lots of helpful tutorials on YouTube. There’s also an Orca Slicer subreddit, which is filled with useful information.
License: The text of "Orca Slicer vs PrusaSlicer: The Differences" by All3DP is licensed under a Creative Commons Attribution 4.0 International License.