Obico (3D Printing Remote Control): All You Need to Know

Obico detects print failures and lets you control your 3D printer from anywhere. Read on to learn more about this 3D printing platform!
As you probably know, many consumer 3D printers aren’t the most reliable machines, and printing failures are an experience many users have encountered. This can be a concern, especially with overnight or longer print jobs where you can’t stay close to your machine to check up on it.
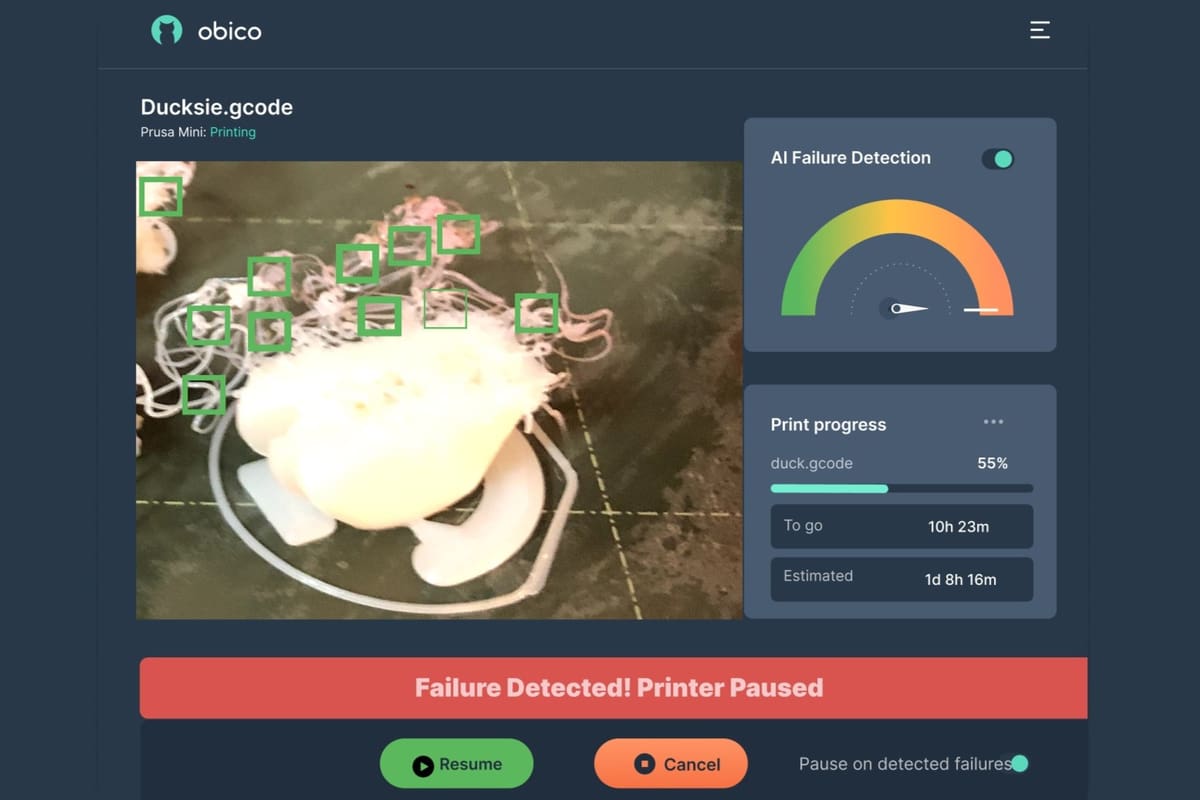
Obico is a program meant to take away the uncertainty of whether your prints are going well. Obico uses AI detection and deep learning (with YOLOv3 software) to compare images from a webcam stream of your printer to its ever-growing database of print fail pictures. Then, Obico rates your print based on its findings. You can set it up so you’re automatically alerted or the print is paused if it detects a failure.
Obico (formerly known as The Spaghetti Detective) was launched in 2019 by the developer of OctoPrint Anywhere, a remote OctoPrint control program. Obico is another OctoPrint plug-in that relies on connections to the printer and a webcam. However, it can also be configured to use on printers using Klipper firmware using Moonraker as a web server.
Previously, when it was still known as The Spaghetti Detective, the app was only accessible through a web browser, making it difficult to use on mobile devices. Thankfully, Obico’s mobile app is now available from the Apple App Store and Google Play, and it’s been open to all since January 2021. The mobile app has all the same features as the browser-based app, but their intended use is slightly different.
In this article, we’ll take an in-depth look at Obico’s features and functionality, including 3D printer monitoring, control, and time-lapses. We’ll also cover some alternative options. Let’s get started!
UI & Layout
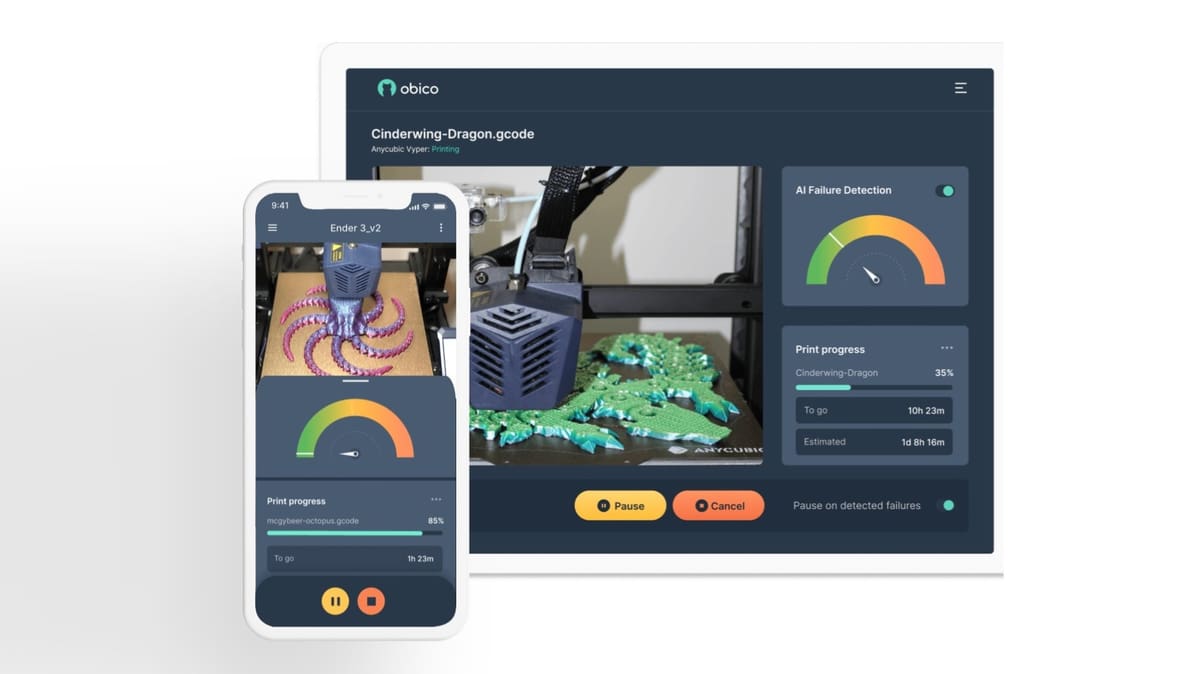
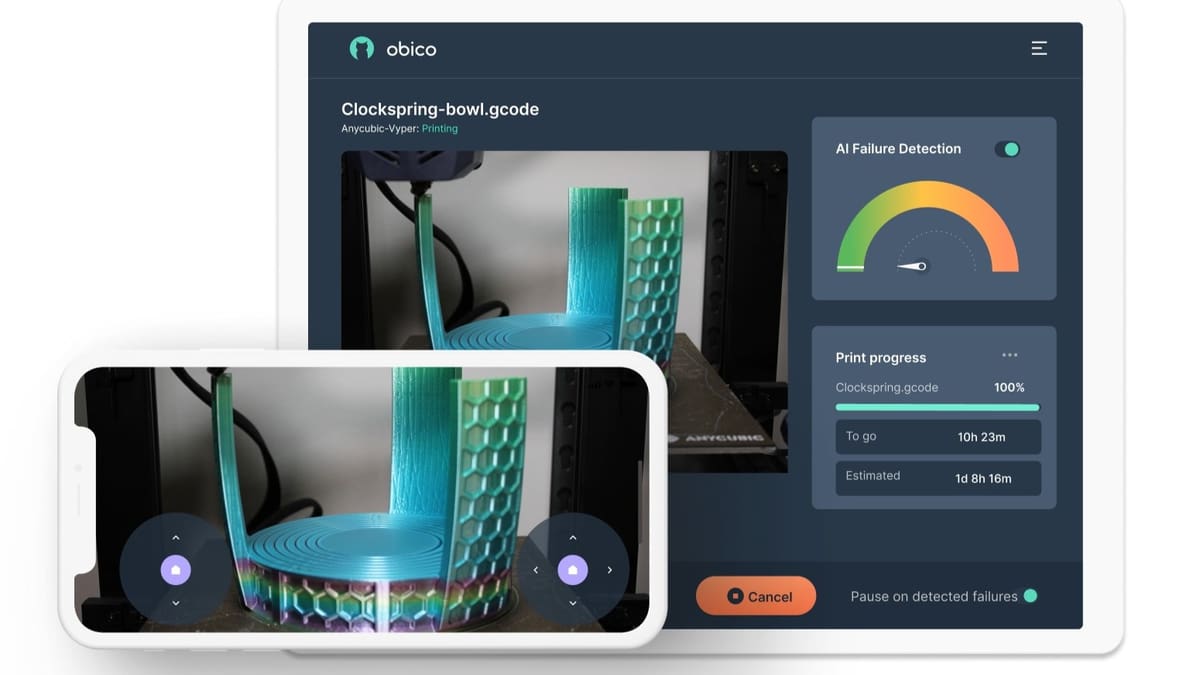
When you open the Obico app, it’s clear that the developers put thought into the interface design. Every feature and tool is only a few touches away from the home page.
The home screen features a list of your currently configured printers, along with a thumbnail showing the webcam stream for each one. Tapping on the thumbnail brings you into the main page for that specific printer, where you can access all of the remote control functions. You can also view data for the current print and toggle the AI failure detection feature on or off.
Clicking on the three-dot icon (a.k.a. a “meatballs menu”) in the top-right corner of the home screen will change the display order of the printers and which ones are shown. This feature is aimed more at users with many 3D printers to monitor or those running a print farm.
The meatballs menu’s functionality changes based on the tab you’re currently viewing. While this consolidates the features and prevents the interface from getting too cluttered, it may make it difficult for new users to find the exact setting they’re looking for.
In total, there are around 10 different views within the app for accessing all of the features. You can use the three-dash icon (a.k.a. a “hamburger menu”) to navigate through the multiple menu icons for the app’s other parts. These include G-codes, Print History, Statistics, Notifications, Preferences, and Docs & Help.
Overall, the UI is fairly intuitive, and the app should be easy to use, even for a 3D printing novice. The downside of this is that some of the more advanced settings are buried in sub-menus.
For example, the sub-menu Advanced Settings is in the meatballs menu that’s active when a printer is selected. Once you navigate to this sub-menu, you can change the failure detection settings, mainly the sensitivity of the AI detection as well as the action you want to be taken when a failure is detected. Above these settings is a warning symbol with yellow text advising you to leave the default settings unless you really know what you’re doing.
Another sub-menu that could be potentially app-breaking is Server Settings. If the URL is inadvertently changed, you’ll no longer be able to connect to Obico. Unless you’re planning on hosting your own server, this section should be left alone.
Features
Obico offers several different features to help you remotely monitor and control your 3D printer. Read on to learn about the main ones you’ll use in your remote, wireless 3D printing workflow.
Monitoring
Your webcam feed should be one of the first things you see after opening the app, setting up an account, and connecting to OctoPrint or Klipper-Moonraker. It’s located at the top of the printer page and will show a live feed whether or not you’re currently printing.
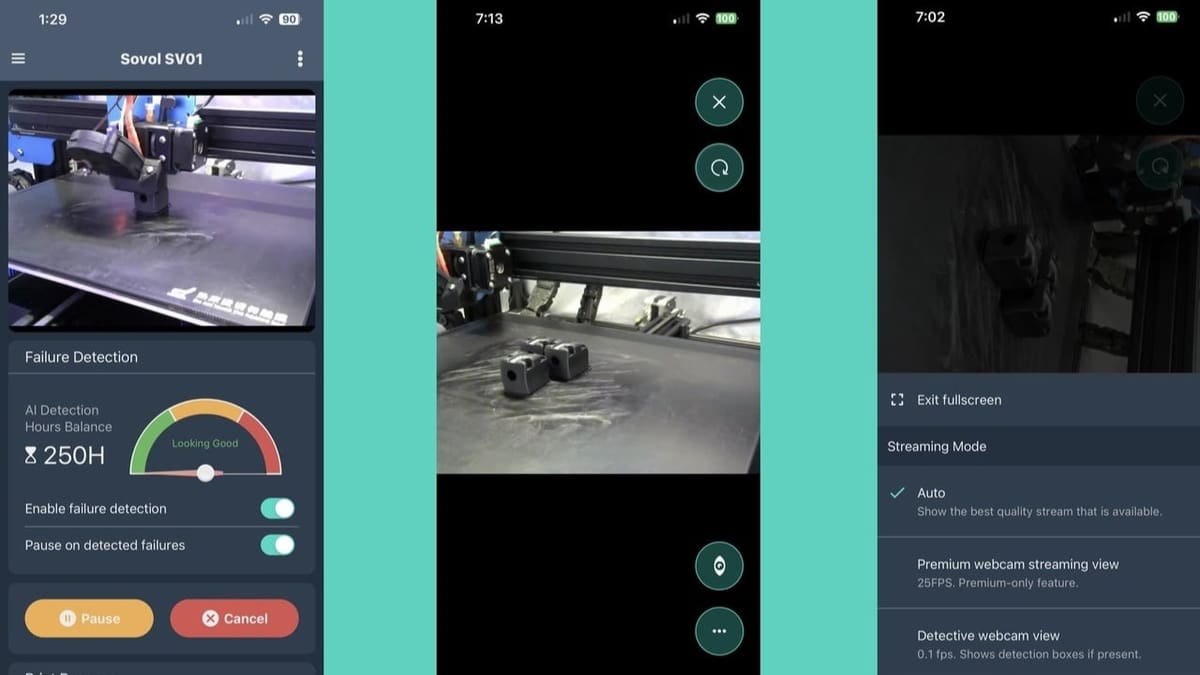
Here, you’ll be able to watch your prints remotely from your smartphone, tablet, or other mobile device. You can also tap the monitoring area to go into full screen mode. While in full screen mode, the meatballs menu in the top right corner allows you to switch your streaming mode.
By default, the camera is set to “Auto”, which should maximize your streaming quality. However, you can switch to the Detective webcam view, which will show you detection boxes that highlight problematic areas of a print. Lastly, you can also activate the Premium webcam streaming view, which increases the frame rate to 25 FPS. This is, of course, only available with the paid version of the app (~$4/month).
Another exciting feature that’s coming to Obico is the ability to use the same AI engine that monitors the overall print to monitor the first layer. This requires the addition of a “Nozzle Cam” to your printer’s toolhead, but unlocks some pretty awesome functionality. Namely, to warn you about any problems with your first layer, but also the possibility to adjust the Z offset automatically in real time. This feature is still very much in the testing phase, but it’s something to look forward to in the future!
Control
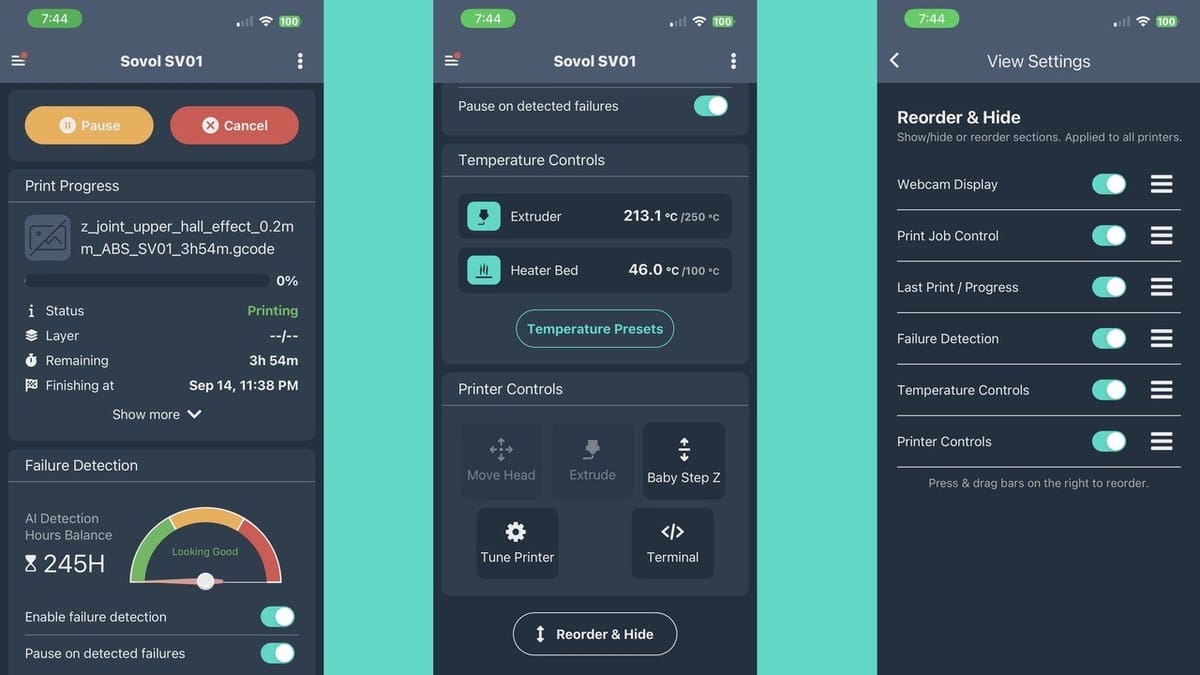
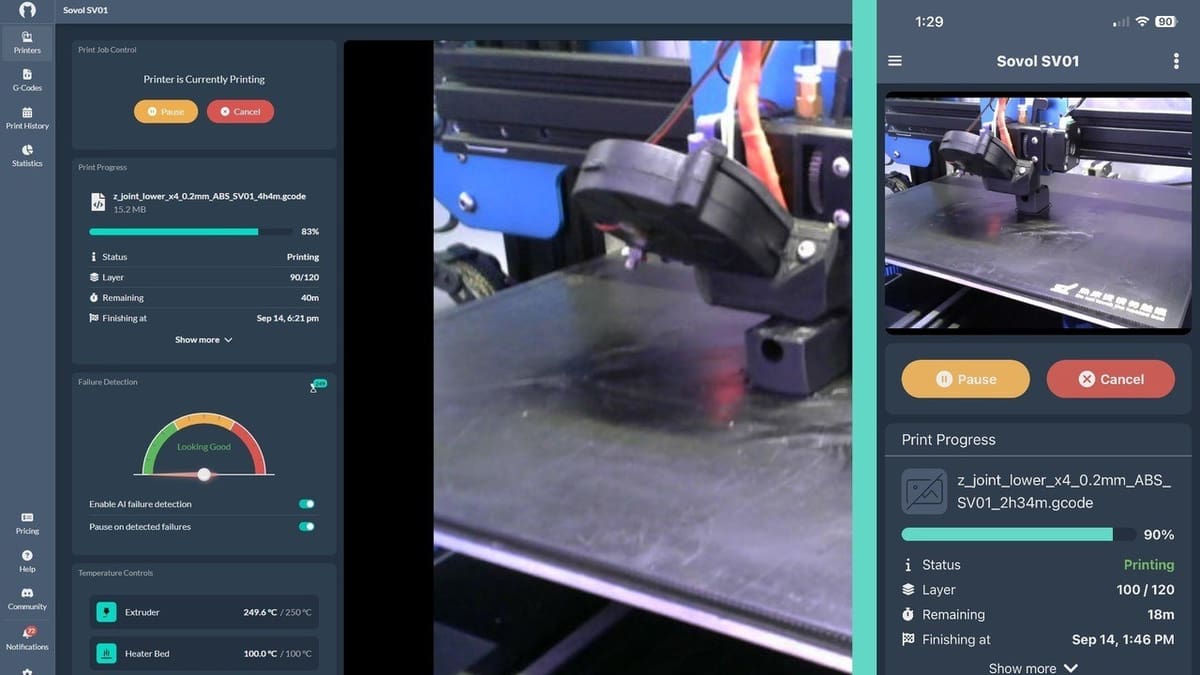
The printer control sections appear under the Monitoring and Print Progress sections when you select your printer. The printer control area of the app includes options and settings concerning controlling your machine remotely, which is one of the core features of Obico. From here, you can choose which controls are displayed and how they’re organized by selecting the Reorder & Hide option at the bottom of the printer page.
The first control section is Failure Detection, where you’ll see the options “Watch for failures” and “Pause on detected failures”. You can use the switches to turn them on or off, depending on your needs, or if you’re trying to conserve Detective hours (you’re limited to 250 free Detective Hours on Obico’s 30-day free trial). It also displays a meter that tells you whether the AI thinks the print looks good, if there’s a possible failure, or if it’s a sure failure.
After that is the Temperature Controls, which allow you to monitor and change the temperature of your extruder and heated bed. You can also select temperature presets which are configured in OctoPrint or your Klipper UI (Mainsail, Fluidd, etc.). There’s also a cooldown preset that lets you quickly shut off all heaters.
The last of the control sections is Printer Controls, where you can move the printer and extruder, baby step the Z offset, adjust the feed rate, flow and fan speed, as well as a terminal to directly input G-code commands to your printer. Basically, all of the main control features you would use on OctoPrint or your Klipper UI are accessible from within Obico.
Time-Lapse
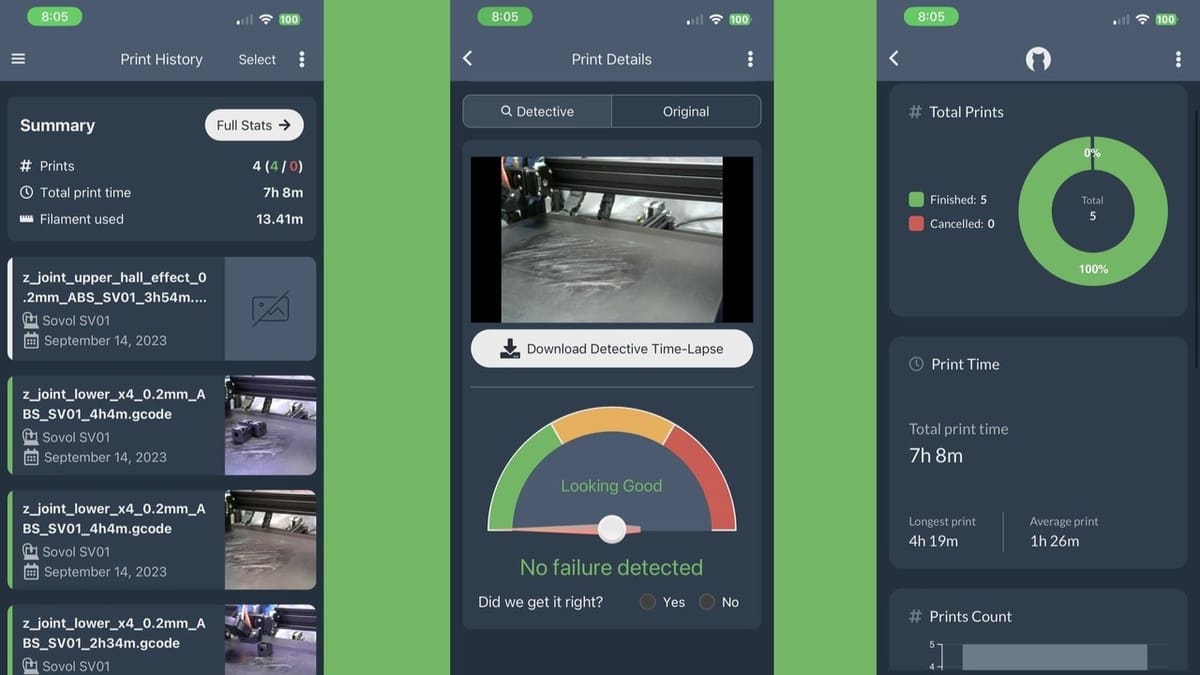
The time-lapse feature of the app is the last section we’ll be covering in-depth. Obico automatically creates complete time-lapse videos for each print when the “Watch for failures” option is activated. Your time-lapse videos are accessible from the Print History tab and can be viewed directly or downloaded to your mobile device. When downloading a time-lapse, you can choose the Detective version, which shows the AI at work, highlighting parts of the image that it thinks may be a print failure.
You don’t have to mess around with time-lapse settings like you do in OctoPrint. However, because of this, you also can’t configure what your time-lapses look like. They also won’t be as attractive as Octolapses because the images are taken when the printhead is in different positions; these time-lapses have a functional rather than aesthetic purpose, but that doesn’t mean they won’t still look cool.
You can organize or reorder your time-lapses using the Filter Options menu, which is the meatballs menu in the upper-right corner of the Print History tab. The Filter Options menu allows you to find time-lapses based on if the print was finished or canceled as well as reorder them by oldest or newest. You can also view the “Full Stats” of your printer from within the Print History tab, which displays the total prints, print time, and filament usage since you began using the app.
And finally, selecting a print from the Print History tab brings you to a Print Details section, which displays statistics relating to that print as well as a yes or no checkbox labeled “Did we get it right?”. If you answer the checkbox question, you’re able to opt into Focused Feedback, which gives Obico access to your time-lapses. It will then ask you whether or not you see a failure in a still frame from the video.
By participating in Focused Feedback, you help to continually train the AI to improve its detection ability and better reduce false failure alerts. As an incentive for participation, you can actually earn free AI detection hours that, unlike the free AI hours you are given at the start, do not expire.
Alternatives
If, for one reason or another, Obico doesn’t suit your fancy, there are other cloud-based printing apps that allow remote monitoring and control of your 3D printers. Let’s take a look at a couple of the more popular options.
OctoPrint Specific Apps
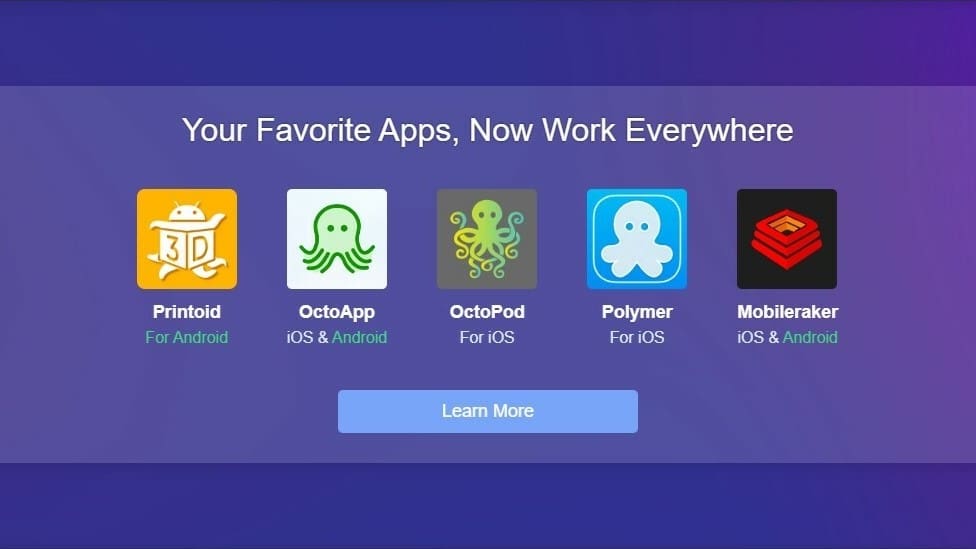
The first category of cloud printing apps, of which there are quite a few, are OctoPrint specific apps. These include OctoPod and Polymer (iOS only), OctoApp (iOS and Android) and Printoid (Android only). These apps each have a corresponding OctoPrint plug-in, which is needed to connect to the app.
All of these apps rely on the free cloud printing service called OctoEverywhere in order to remain connected when off of your home network. OctoEverywhere also has an AI detection feature similar to Obico called Gadget, as well as mobile notifications that can be set up outside of the companion apps. And speaking of companion apps, these all have very similar features and the choice really comes down to which UI you like the best. If you’re an OctoPrint user, you’re really spoiled for choice here.
However, if you want to run more than one printer using OctoEverywhere, you may be out of luck. Bandwidth limitations and the way these apps connect to the underlying UI (OctoPrint or Fluidd/Mainsail for Klipper) make it difficult to achieve multi-printer functionality. This is one of the main differences between these apps and Obico, as Obico makes it very easy to set up more than one printer and switch between them seamlessly.
These same limitations also put a file size cap on uploads of 20 MB, although this is a large size for an STL file, and you’d need a super detailed model to reach that limit. This would probably only affect resin 3D printer users, as models meant for resin printing tend to be more detailed and therefore have larger files.
Self-Contained Apps
The other category of cloud printing apps we’ll look at are the more self-contained ones. These are billed as all-in-one solutions requiring little set up to deploy. For example, AstroPrint offers its own touchscreen UI and custom injection molded case for housing the required Raspberry Pi and touchscreen. The software isn’t Klipper compatible, however, and only works with Marlin, Sailfish, and Repetier Firmware.
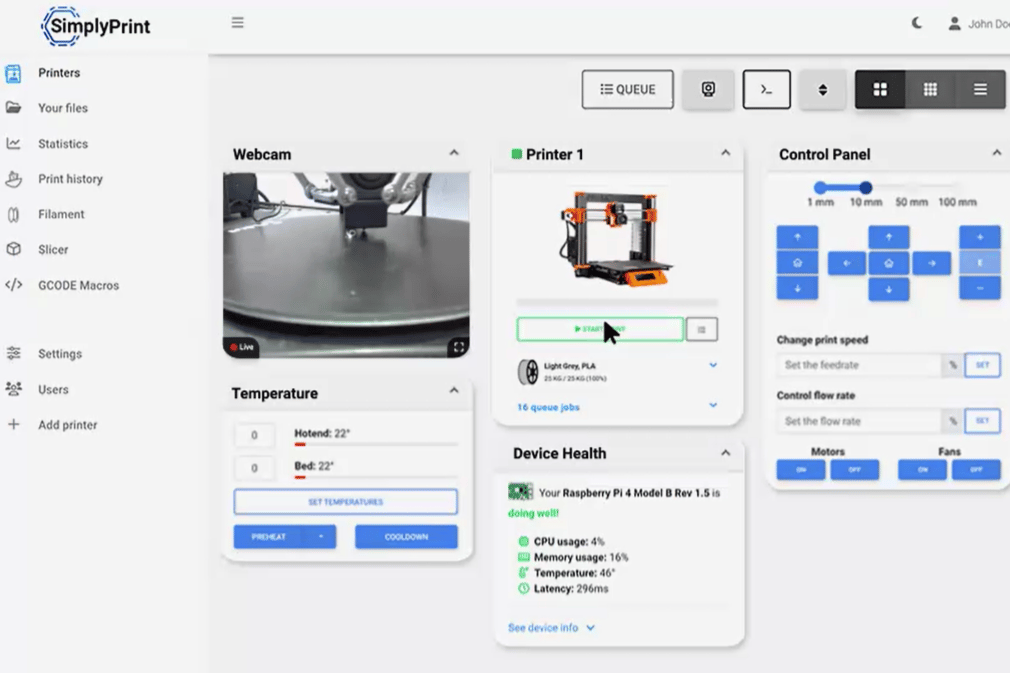
Another cloud printing software of the same ilk is SimplyPrint. This has many of the same capabilities as Obico, minus the AI detection features. SimplyPrint is compatible with OctoPrint, as well as the Klipper-Moonraker-based UIs Mainsail and Fluidd. SimplyPrint is a more complete package, featuring a built-in slicer so that you can keep your whole workflow within the software.
Both AstroPrint and SimplyPrint are aimed more at organizations and businesses than individuals. They’re designed for users who want to control and maintain whole fleets of printers, in settings like universities or print farms. Both AstroPrint and SimplyPrint are free for individuals, but offer premium packages for setting up multi-printer operations.
License: The text of "Obico (3D Printing Remote Control): All You Need to Know" by All3DP is licensed under a Creative Commons Attribution 4.0 International License.