Non-Planar 3D Printing: All You Need to Know

Non-planar 3D printing allows you to eliminate the natural stair-casing that regular printing methods produce. Read on to learn more!
Smooth & Curvy
Do you ever notice those ugly level-by-level layer lines on concave 3D printed parts? The issue is known as the staircase effect, and it’s prevalent in regular FDM 3D printing. It occurs because standard 3D printing methods, contrary to the name, are really more like “2.5D”: Only the X- and Y-axes move simultaneously; the Z-axis is only in motion when the X- and Y-axes stop to let the printhead move up to print the next layer.
Non-planar 3D printing is a different FDM printing style, allowing for “true” 3D printing on parts’ curvatures. This unique printing style grew out of experiments conducted in 2018 by researchers from the University of Hamburg in Germany.
Non-planar printing is the process of printing parts with curved layers where the curvature stretches across the X-, Y-, and Z-axes. This printing style allows you to print curved parts with a smoother external finish regardless of other factors like the filament type, hot end, post-processing, and so on.
Suitable Types of Models
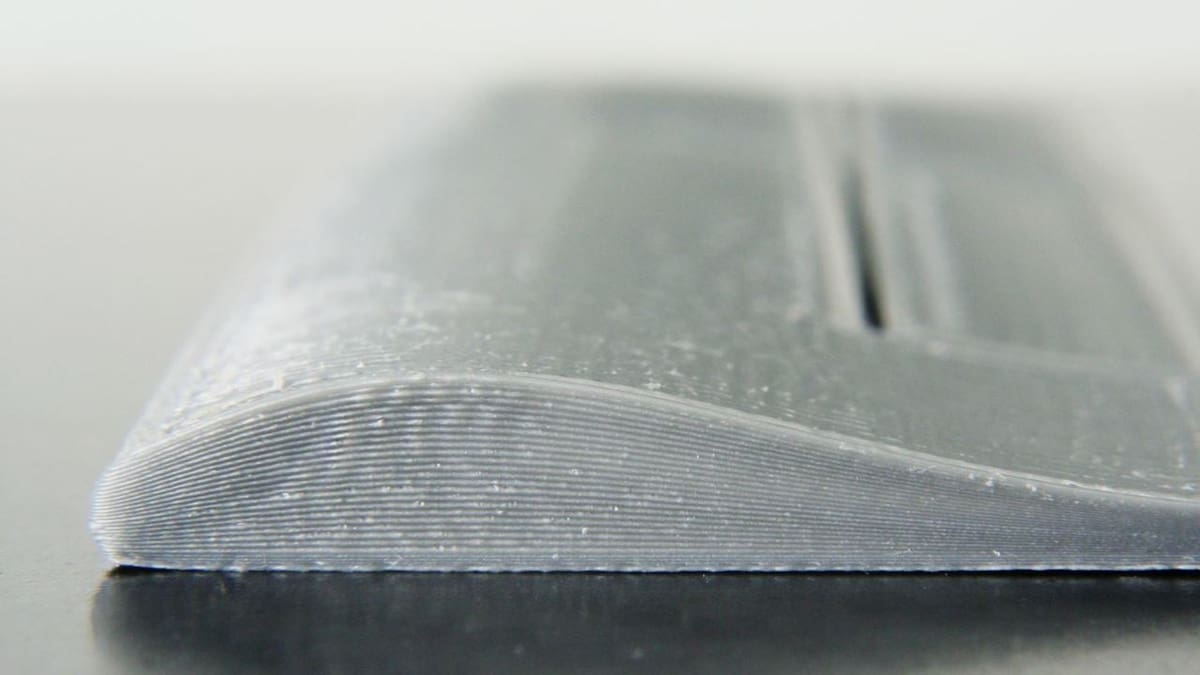
While printing in a non-planar way is difficult, due to the technology’s limitations, it can be useful to print parts with large concave features. This is especially fruitful for curved parts like the wings on an RC plane because non-planar printing can actually improve the aerodynamics of the part, according to the researchers at the University of Hamburg. For example, this airplane wing model (pictured above) has no stair-casing.
Compatible Software
The technology, specifically the software, used for non-planar 3D printing is severely underdeveloped. The main system needed for this printing style is a special program currently only available as an altered version of Slic3r. Currently, it’s the only popular slicing software capable of developing G-code for non-planar 3D printing, but if the method gains popularity, you can expect other programs to follow.
In this article, we’ll go over how non-planar 3D printing works, its benefits and drawbacks, as well as a basic guide on how to achieve it.
How It Works
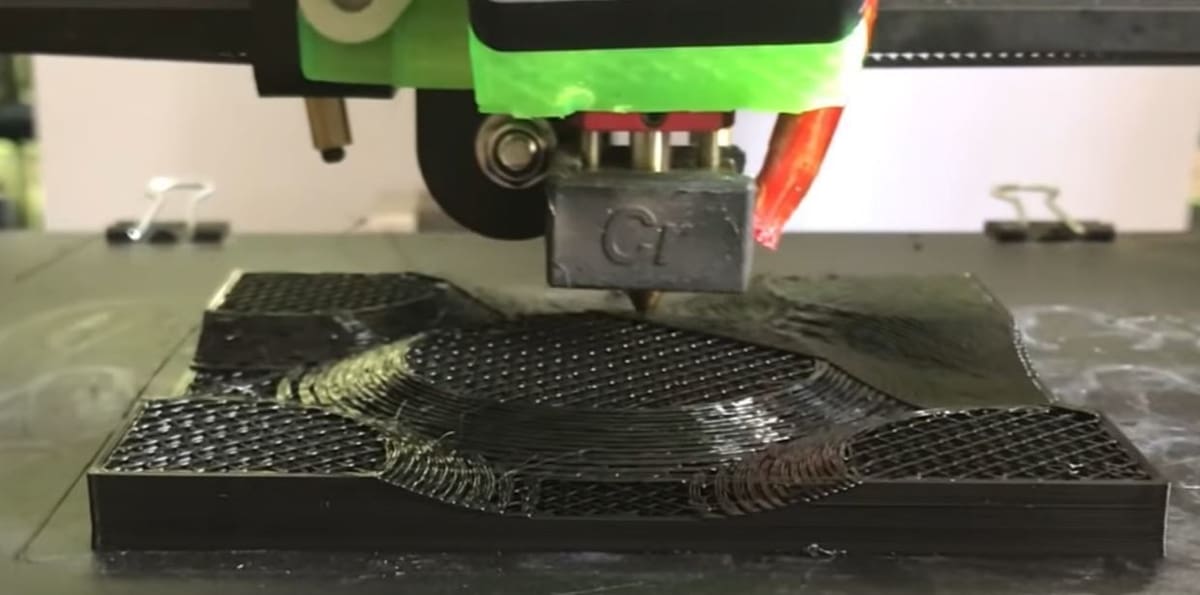
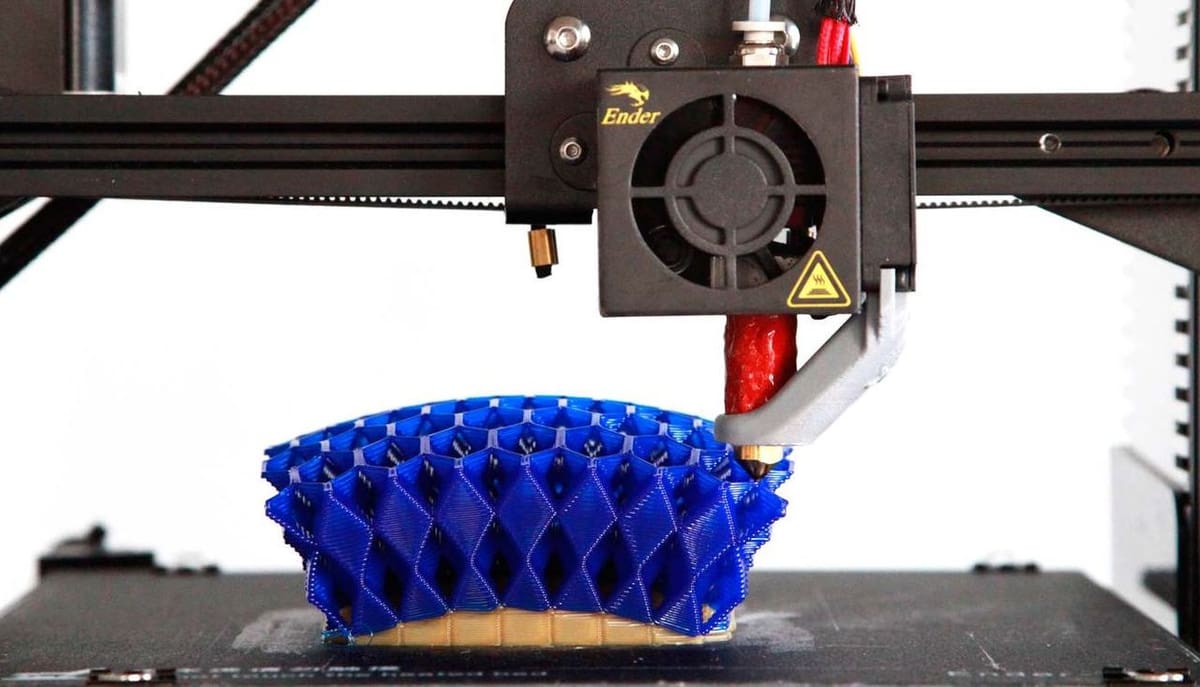
As you can probably guess, non-planar printing is significantly more complex in how it functions than regular FDM printing. It also requires some modifications to your FDM 3D printer to work, mainly concerning the nozzle and the printhead.
For this printing method to work, the nozzle needs more clearance on the printhead than some printers offer, especially if the printhead has a large heat sink, fans, and fan shrouds. This clearance allows for the nozzle to safely move along the X-, Y-, and Z-axes simultaneously. Because the nozzle extends further down on its own, the printhead can move side to side and up and down without getting in the way of the print.
When you print something using non-planar printing, the 3D printer first prints the part’s base in a normal (2.5D) way. That’s because, to print curvatures, the printer has to first establish a base with a small curve to then build on top of. The base with the small curve will likely display stair-casing, but later in the print, this will be covered up.
Once the curved base is finished, the printer then switches to a “real” three-dimensional printing style, adding layers to the small base curvature while moving along the X-, Y-, and Z-axes at the same time. You can think of this motion like adding blankets to a semi-spherical ball, with each blanket representing a layer and the ball representing the base of the print.
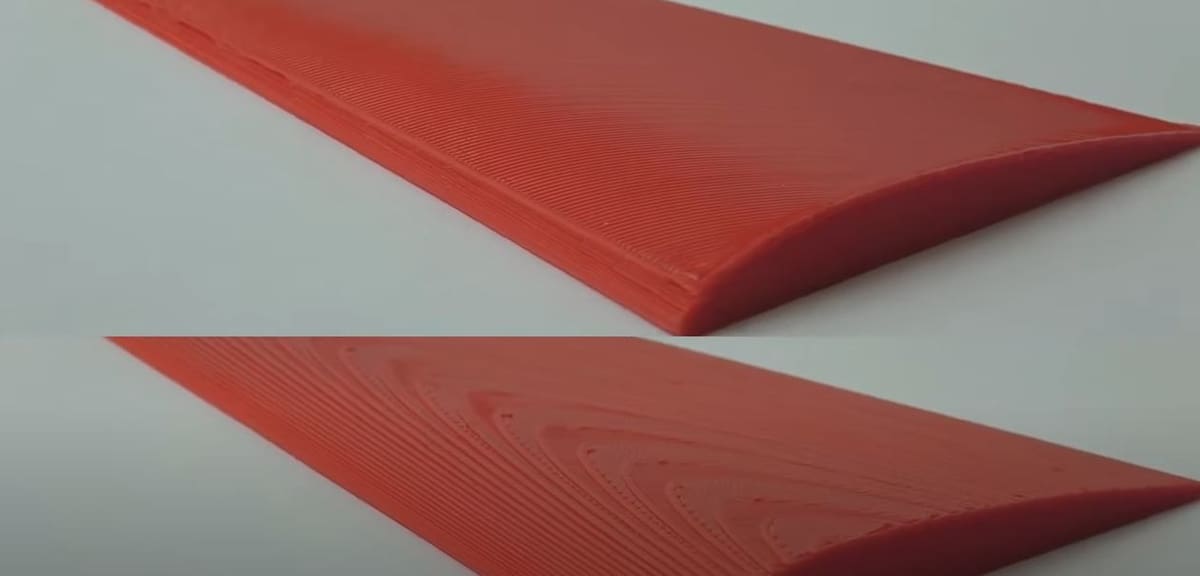
By doing this, the printer avoids producing stair-casing lines on your print. The non-planar-printed curve will still have layer lines across the Z-axis, but they will be curved instead of straight, which can look pretty cool.
Pros & Cons
Non-planar printing has, like all things, some advantages and disadvantages. Let’s take a closer look.
Pros
- Produces a mix of curved and regular layer lines yielding a smooth finish on three-dimensionally-curved objects
- Vertically stronger parts
- Improves aerodynamics for parts
- Looks cool
Cons
- Requires a specific printhead design with an extended nozzle
- Technology is underdeveloped
- You can still see layer lines (just not stair-casing lines)
- Requires Linux software to run the altered version of Slic3r (the main way to do non-planar printing)
- Not useful or efficient for prints without curves
How to Start
Setting up non-planar 3D printing can be quite difficult. For this guide, we’ll only be going over the main steps and basics.
As we mentioned previously, to make your machine compatible with non-planar 3D printing, you’ll need to have a fair bit of clearance around your nozzle. It should extend past the rest of the printhead by at least a few millimeters (try for around 7 or 8 mm). This can be done using a longer hot end throat or removing most of the additional features on your print head, such as the heat sink, fans, and fan shroud.
After you’ve made the necessary adjustments, you’ll have to download the software and adjust the settings. Here are the main steps:
- Download the files for the customized non-planar version of Slic3r on Linux. If you don’t have a Linux device, you can check out the GitHub page’s solutions page.
- Open the version of Slic3r and edit the print bed sizes, offsets, nozzle angle, and other machine settings as necessary.
- Measure your nozzle offset (distance from the rest of the printhead to the nozzle) and plug this value into Slic3r.
- Open the curved file that you want to print in a non-planar fashion.
- Slice and print!
Although it may not sound like a complicated process, it’s not as straightforward as it sounds. You may encounter program issues and error messages, and you’ll have to use the Slic3r version’s GitHub problems page to fix them.
While this process is a bit tricky now, if non-planar printing gains popularity, you can expect more slicers to offer non-planar modes or versions.
An Easy Preview
If you don’t want to set it up but still want to try out a print, you can download TeachingTech’s raw G-code for a fun non-planar model. If you want to use other test designs, you can also try this filleted rectangular model, this airplane blade-like structure, or this circular curvature design.
Lead image source: Moritz Walter via Hackaday
License: The text of "Non-Planar 3D Printing: All You Need to Know" by All3DP is licensed under a Creative Commons Attribution 4.0 International License.