Klipper: Rotation Distance – Simply Explained

Klipper uses rotation distance instead of steps per mm for the extruder. Read more about Klipper rotation distance and how to calculate it!
A 3D printer is only as useful as the accuracy of its prints. Accurate prints are linked to several factors, including straight and true guides, a level bed, and more. In addition to setting up your 3D printer properly, you can improve accuracy by calibrating it to ensure that the intended movement output, as given by G-code, translates into the correct dimensions.
Calibration is an essential step to achieving accurate and repeatable results, and the process largely depends on which firmware your 3D printer runs. If you’re familiar with 3D printer firmware, you’ve probably heard of popular options like Klipper and Marlin. While Marlin converts G-code on a 3D printer motherboard, Klipper uses a separate computer, such as a Raspberry Pi, to control the printer board.
If you’re setting Klipper as your default firmware, one of the first steps is calibrating the rotation distance. The Klipper documentation defines rotation distance as the “distance that the axis moves with one full revolution of the stepper motor”. In this article, we will clarify the concept of rotation distance in Klipper and explain how to fine-tune your 3D printer successfully with it.
Let’s dive in!
What Is It?
Rotation distance, as used in Klipper, is simple. It describes the amount of movement output achieved on any axis with one full rotation of the relevant stepper motor. Movement output refers to the movement of the print nozzle and the filament through the extruder, taking into account any gears, belts, and pulleys you may employ to connect your 3D printer mechanics. The resulting value in mm needs to be entered in the stepper sections of the Klipper configuration file.
Example
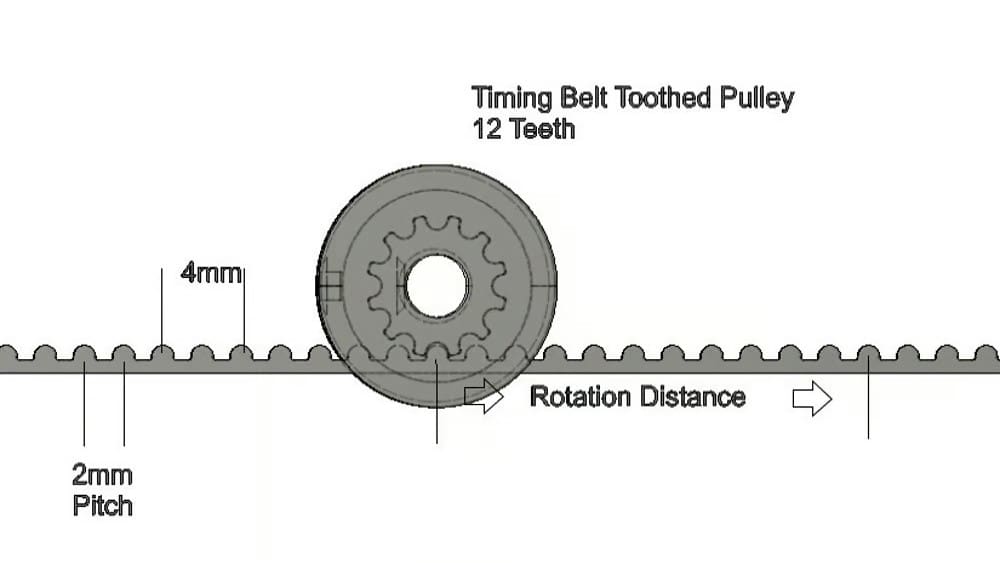
To clarify this, let’s look at the example of a pulley-driven carriage on a delta printer. The stepper motor mounted in the base of the delta printer has a toothed pulley attached to the driveshaft. A belt connects to the carriage, loops over the counter pulley at the top of the printer, goes down to the motor pulley, and then up again to connect back to the carriage.
The belt has one tooth every 2 mm, and the pulley has 12 teeth. Simply multiplying 12 by 2 provides the movement output in mm. However, this example only holds true if there’s no further increase or reduction in gearing. If the belt drives another pulley twice the size, the movement output would be half of the original.
Klipper vs. Marlin
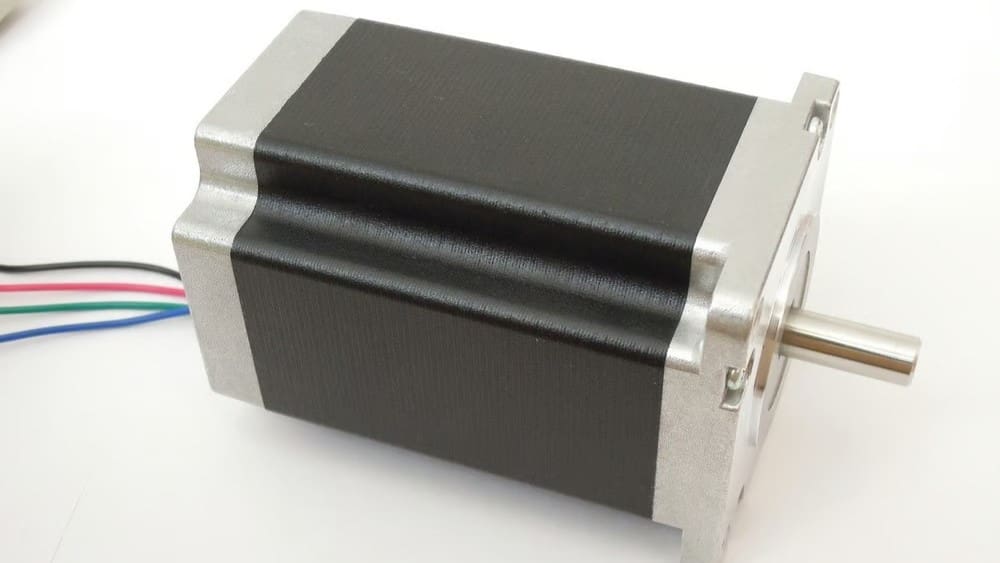
If you’re switching to Klipper from a different firmware, you may notice that other programs use a different term for movement in the settings. For example, Marlin – another popular open-source firmware for 3D printers and CNC machines – uses steps per mm. The steps per mm are essentially the number of steps the microcontroller drives the stepper motor to achieve the desired movement output.
Steps per mm are dependent on several things. They depend on the stepper motor angle for a full step (usually 1.8 degrees for a consumer machine), the stepper driver (which determines how many microsteps make up one full step), and any pulleys and belts or gears used.
For a fully calibrated 3D printer switching from Marlin to Klipper, the steps per mm are already known. The conversion can be done with this formula:
- rotation_distance = <full_steps_per_rotation> * <microsteps> / <steps_per_mm>
In practical terms, there’s no real difference between rotation distance and steps per mm. It’s just a different way to achieve the same outcome. In many ways, it’s the same. Klipper’s process in the configuration file, however, takes a different approach that confuses some users.
Klipper’s configuration file has one entry per stepper motor for rotation distance and one for the number of microsteps. Whereas the steps are explicitly set in Klipper, Marlin requires the type of stepper driver boards installed for each stepper motor. In the advanced configuration settings for Marlin, we can also set microsteps, but those are a little different and outside the scope of this article. In both cases, the firmware will limit the number of microsteps possible.
Faulty Calibration

The Klipper documentation contains formulas and tips to help successfully calibrate your stepper motors. The outcome should be functional but isn’t necessarily perfect. Whatever advice is given on websites and forums, online calculators, and spreadsheets, all of the stepper motors have to be fine-tuned, which we’ll explain later.
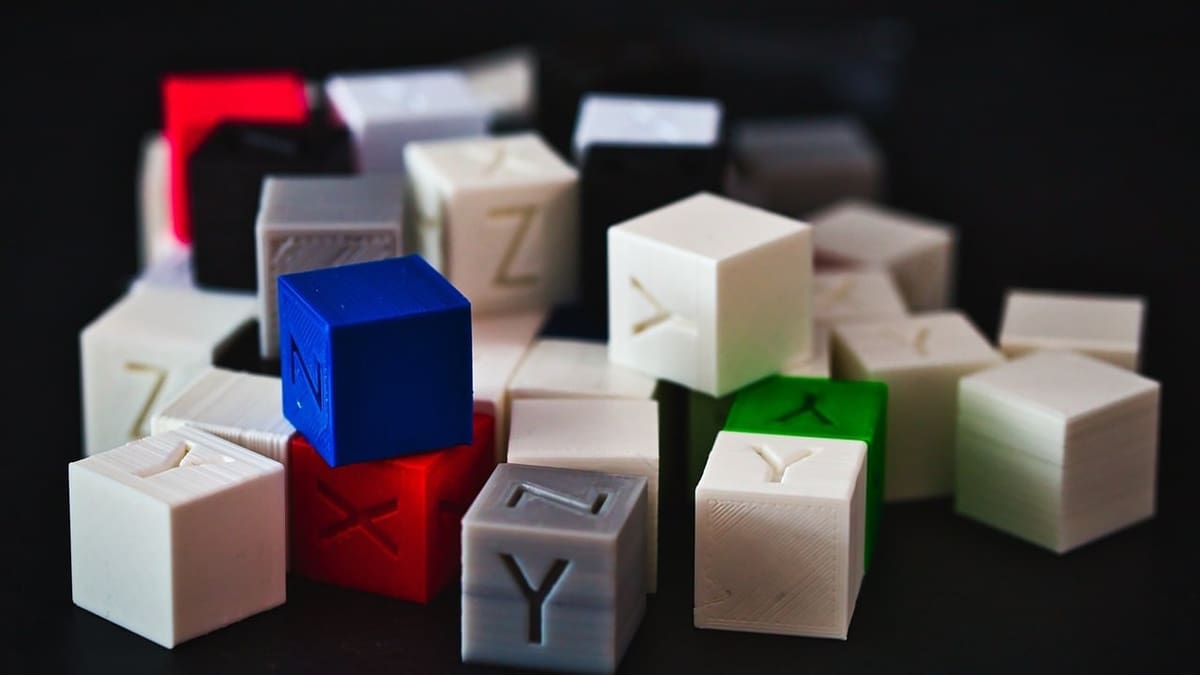
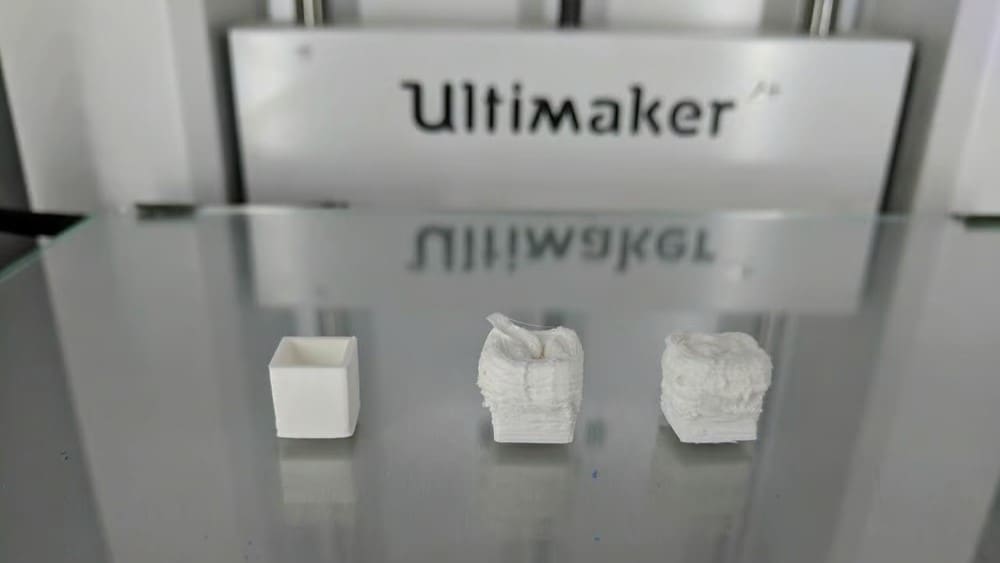
If the rotational distance is calibrated incorrectly, issues will arise with dimensional accuracy, which is important for any user who wants to produce more than just decorative items. For conventional cartesian-style printers, the solution is simple. Print out a calibration cube and tweak the rotational distance, then print and check again until the dimensions are correct.
For Klipper users with delta printers, a nice calibration tool (link automatically download the STL) is available in the Klipper documentation’s section on delta calibration. It helps recalculate the delta geometry to address any dimensional inaccuracies following calibration. However, it’s subject to certain limitations, including that it cannot compensate for physical build errors. That should be the end of it, right? The answer is that we have to find out. More on that later.
Other problems are related to the extruder. Faulty calibration can result in over-extrusion, poor dimensional accuracy, poor print quality, and under-extrusion. While you can simply increase or decrease the flow during the printing process, it would be better to calibrate the extruder properly in the first place. This will help you to easily identify issues with the slicer or the machine in case of problems. Of course, a proper initial calibration will not negate the need for fine-tuning and calibrating features like pressure advance, but it will provide the best possible starting point.
Calculating the Correct Rotation Distance
Klipper’s documentation details a calibration process for which you’ll need a marker and a long ruler or caliper. After heating the extruder to the appropriate temperature, the documentation suggests marking the filament 70 mm from the extruder and slowly extruding 50 mm before measuring again. The idea is to work out the rotation distance by comparing the desired extrusion length (here 50 mm) to the actual length, and the documentation walks you through a series of calculations to arrive at the rotation distance value.
However, the method suggested in the documentation is not perfect. While the principle is okay, it’s always better to use a longer length of filament for measurement because filament itself can suffer from inaccuracies in diameter. For best results, use filament 50 mm or longer. The longer the piece, the better we average out those inaccuracies.
Update the extruder rotational distance with the new value, then check again. Remember, never give in to the temptation to use faster extrusion, as it will skew the result.
An Alternative Method
After completing the basic calibration steps and fine-tuning your setup further with calibration cubes or the delta calibration tool, is there anything else that can be done? As you may expect, this is not the end of the story.
Unless your 3D printer remains static in a temperature- and moisture-controlled environment at all times, things will change simply due to thermal expansion. Thermal expansion affects everything from belts and pulleys to frames and different degrees, depending on material. Achieving a zero error setup would be nice, but this is almost impossible for domestic machines. However, this should not deter us from trying.
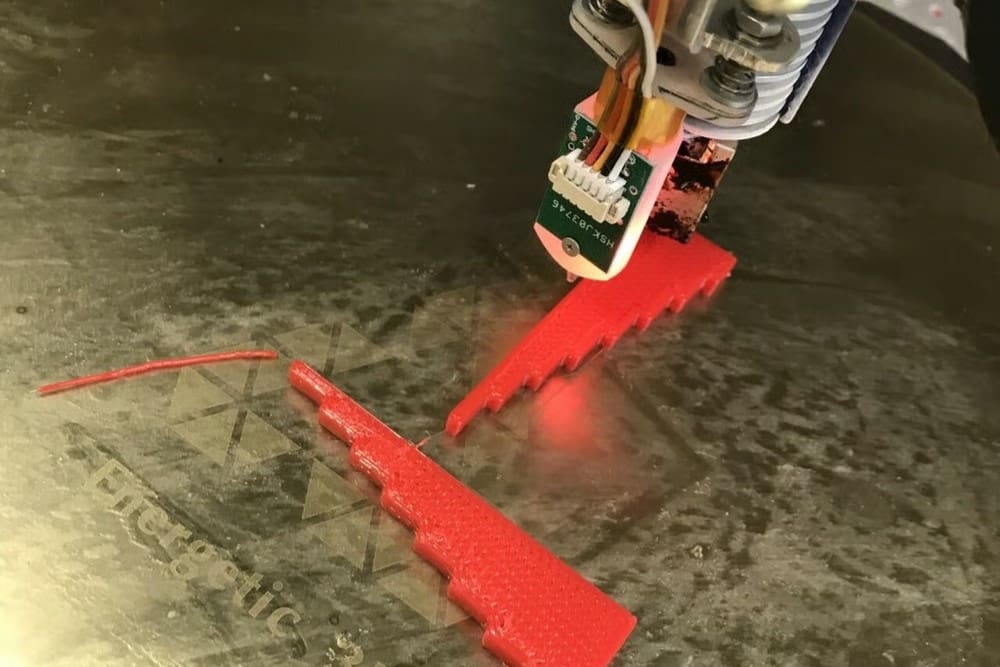
Klipper user charlespick provided some interesting food for thought on the Klipper Discourse Group. By using very fine-stepped calibration objects, we can tweak a Klipper rotation distance setting even better. The beauty is that we can produce our own test bodies and use even finer steps if necessary.
In order to perform the calibration, print out the test object in the direction of the X- and Y-axes. After the test object has cooled, measure each step for each object and note it down. Repeat the process for different values until finding the lowest variation for each axis. Variation refers to the standard variation across all differences between the expected value and the measured value of each step for a given rotation distance value. The lowest achievable variation is what we are looking for, and the corresponding rotation distance value is the one to enter in the Klipper configuration file.
Using this method, a Cartesian-style printer can thus tune every axis separately and very finely.
The Problem with Delta Printers
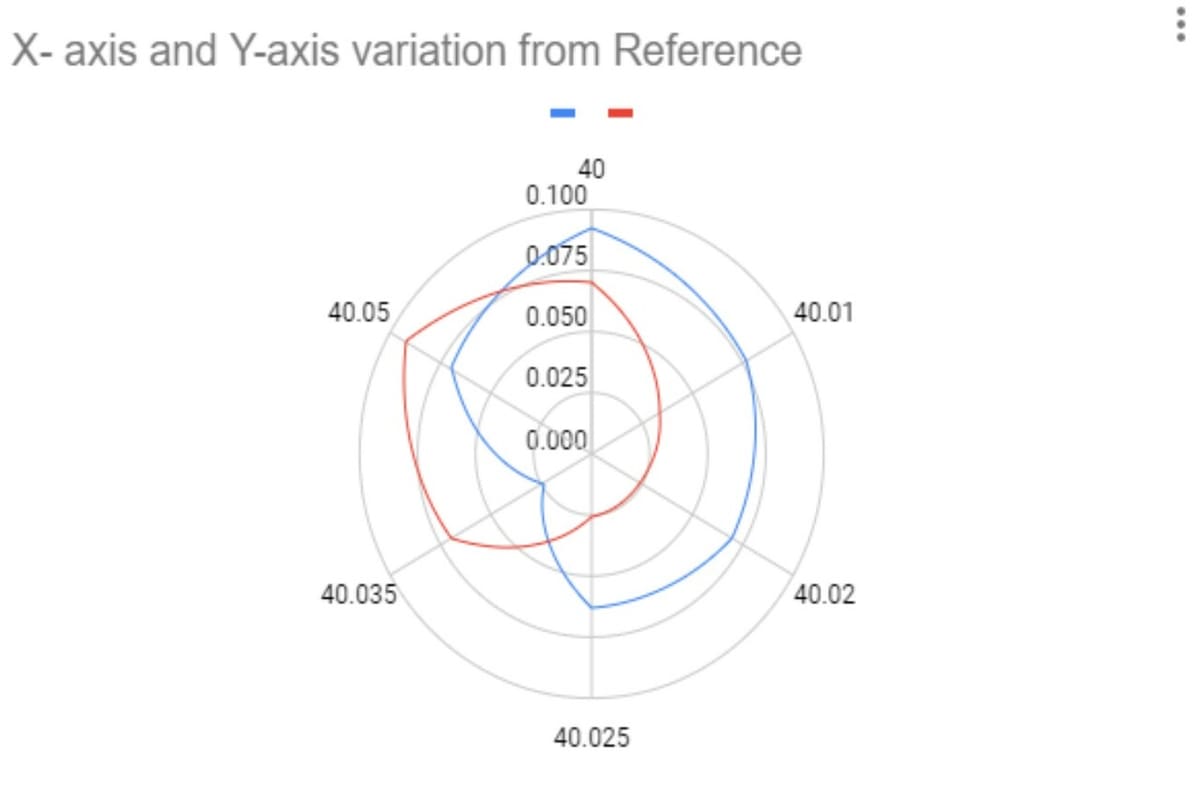
While this method is great for Cartesian-style printers, what about delta printers? We don’t believe that this method is ideal for delta printers since they can suffer from additional sources of errors that are hard to rectify if the build isn’t precise. For our delta printer, we must keep the rotation distance identical on all three motors, otherwise we change the overall behavior of the printer.
For fun, we tried it with a minute difference between the steppers, and the result was the worst of all. The best result is with the lowest deviation for both axes. To demonstrate this point, we created a polar diagram with standard deviation (center = 0 to 0.1 outside) against the rotation distance (40 to 40.05) for X (red) and Y (blue) axes. In the example shown above, we managed to achieve an improvement on our homespun delta printer to about 0.06 mm with the suggested method, settling on a rotation distance of 40.025 mm.
While there was a small improvement, we can never get rid of build inaccuracies. To improve accuracy further, we would have to address these physical inaccuracies, which is challenging. A fully adjustable yet rigid frame would be the answer. Other sources for errors include the effector rods being unequal in length. The use of a template is helpful here (which we have done). Unfortunately, the resources for delta printers are rather limited, apart from one’s ability to create a square and straight frame, equal rod lengths, and accurate angles.
Next Steps
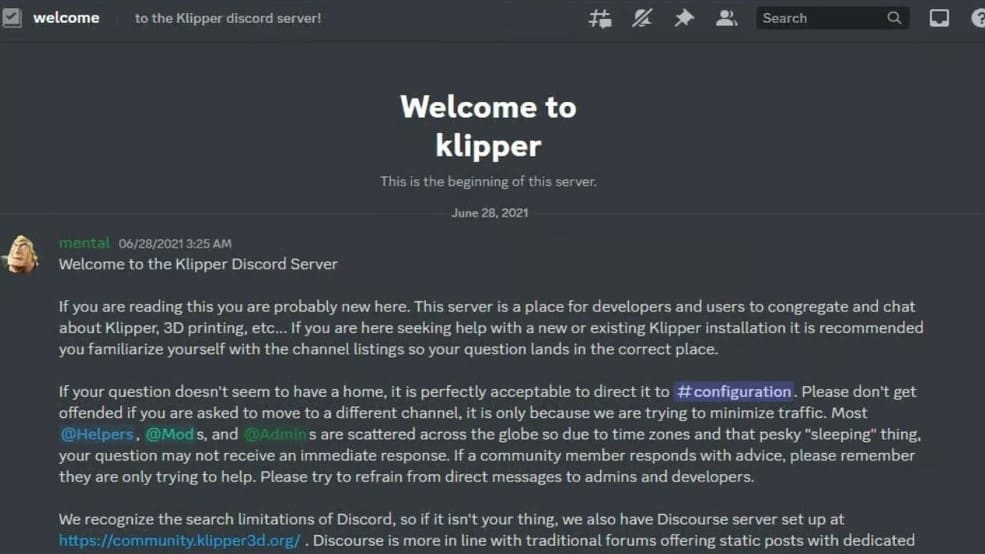
The internet is full of well-intended websites offering advice on how to deal with Klipper rotation distance. We recommend sticking to the original source and the Discord server. The documentation is well-written and should get you up and running. There’s also an active Klipper community on Reddit. We suggest using the resource of your choice, but enjoy with care!
If the calibration process proves to be too much for the user or a printer isn’t up to the desired standard, there’s always the possibility to have professionally 3D printed objects delivered to your doorstep with Craftcloud.
License: The text of "Klipper: Rotation Distance – Simply Explained" by All3DP is licensed under a Creative Commons Attribution 4.0 International License.