
Klipper: Pressure Advance – Simply Explained

In Klipper, Pressure Advance can predict nozzle pressure for more consistent extrusion and sharper corners. Read on to learn how to set it up!
Traditionally, a 3D printer’s controller board processes G-code and handles the detailed control of its stepper motors. Klipper takes a very different approach. It runs all of the math associated with processing G-code on a separate computer (usually a Raspberry Pi) and allows the printer’s controller to focus on driving its own hardware.
In theory, this allows Klipper to print faster and to a higher quality than traditional approaches, but it still isn’t free from the realities of the laws of physics. Pushing molten filament at high speed through a tiny nozzle presents a number of challenges. To print more consistently, both Klipper and Marlin have developed their own approaches to predicting how filament behaves as it’s extruded – especially when accelerating, decelerating, or going around corners.
In Marlin, the feature is called “Linear Advance“, while Klipper’s version goes by the name “Pressure Advance”. They both seek to reduce filament ooze or blobbing at the end of lines, limiting any under-extrusion at the start of lines or Z seam changes. This allows the printer to print more consistent, flatter walls.
Both Linear Advance and Pressure Advance offer improved print quality, especially at higher speeds, although they implement the approach differently. Let’s take a closer look at how Klipper does things.

How It Works
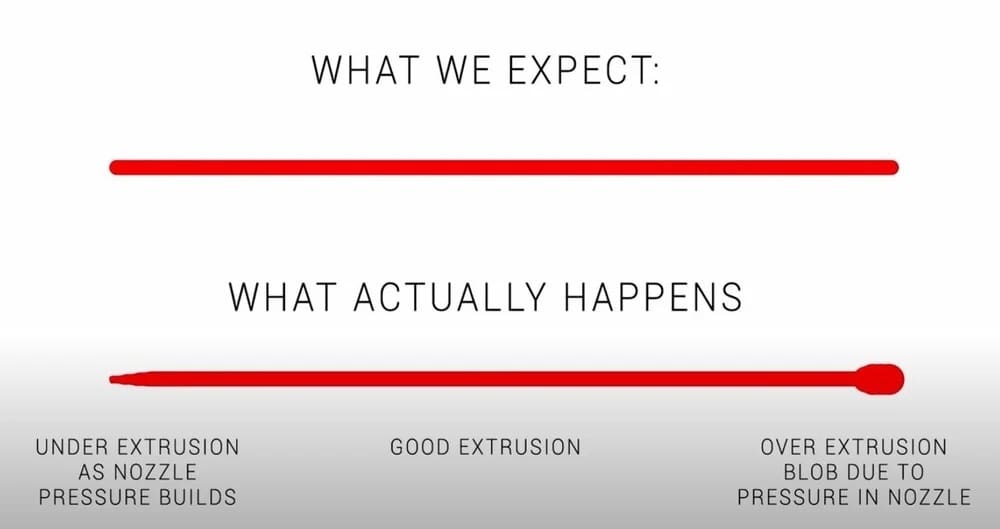
Deep in your printer’s firmware, an algorithm determines how much the extruder should move to eject the right amount of filament from the nozzle. While this is clever, it assumes that every cubic mm of filament fed into the extruder will immediately exit the extruder.
For a number of reasons, this isn’t true. Pressure dictates nozzle flow, delaying the effect of any acceleration or deceleration of the filament through the nozzle (see Hooke’s law and Poiseuille’s law if you’re keen to understand the science). This can cause too little filament to leave the nozzle at the start of a line and too much at the end – both of which have a negative impact on print quality.
Pressure Advance compensates for this by following a formula to boost the velocity of the extruder at the start of a line and reduce it at the end – effectively a small retraction. In addition, it also looks ahead for corners and makes other minor adjustments, called “smooth Pressure Advance”, to ensure that it doesn’t cause other issues by trying to make the stepper motors accelerate or decelerate too rapidly.
This particular “kinematics” model sets Pressure Advance apart from Marlin’s Linear Advance. Supporters of Klipper claim it’s considerably superior.
Pressure Advance can improve print quality significantly, especially on corners and Z seams. Remarkably, it’s defined primarily by a single Pressure Advance value: The larger the value, the more compensation is applied. Usually, printers with Bowden extruders require the highest values, in the range 0.4 to 1.0, while the values for printers with direct extruders tend to fall between 0.05 to 0.5.
But how do we determine exactly which value is best?
The Calibration Process
The optimal setting for Pressure Advance varies depending on the nozzle, printing temperature, and filament – even filaments of different colors from the same manufacturer can behave differently. For any combination of these, you can print a single test piece to establish what Pressure Advance setting results in the best printing.
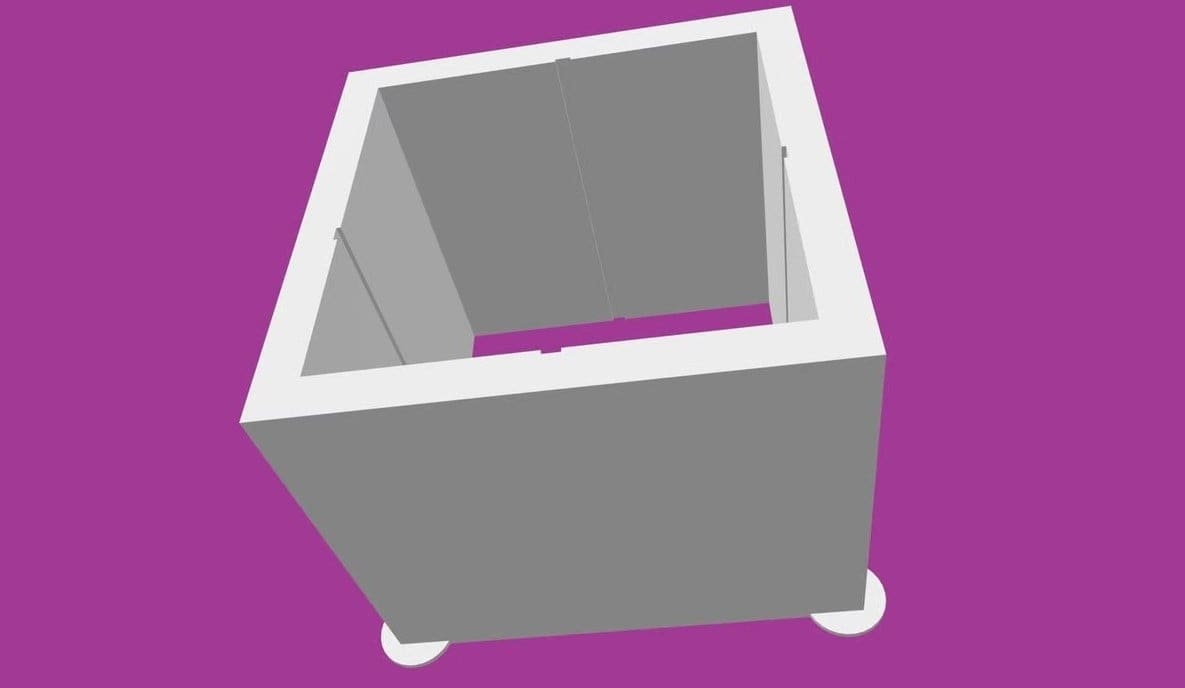
Marlin’s test piece comprises a number of individual lines printed with various settings, and the user chooses the one that looks best. Klipper uses a more real-world model that features both internal and external corners: the square tower (the link automatically downloads the STL file).
There are other models available, too. For example, there are models that reduce calibration time and material use, while others annotate the settings on the model itself.
In the following sections, we’ll show you how to determine the best Pressure Advance settings with the square calibration tower.
Setting Up
Before you start, it’s best to ensure that other key parameters in your printer are well calibrated – E-steps, in particular. To begin the process, first slice your calibration model with a high print speed (100 mm/s, for example), zero infill, and a layer height of around 75% of the nozzle diameter. Any dynamic acceleration control should also be disabled.
Next, prepare Klipper with the correct settings for the test, including limiting “square corner velocity” to 1 in order to exaggerate the effects of corner acceleration or deceleration.
Printing the Test Square
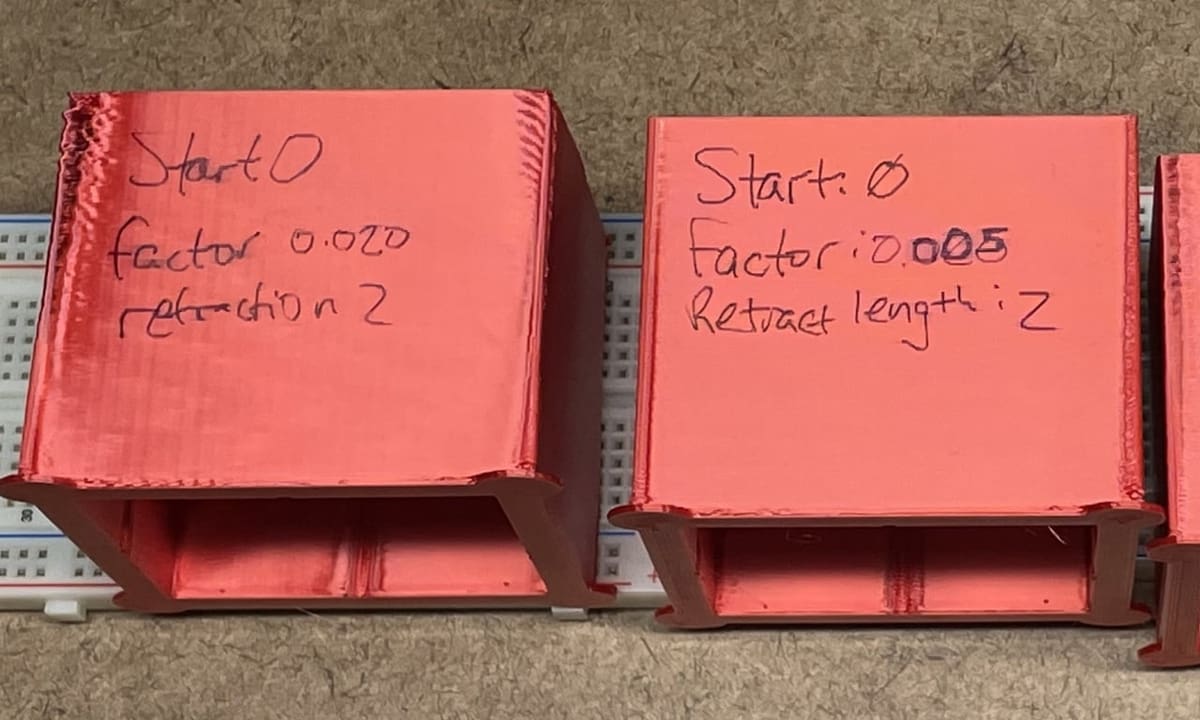
A dedicated Klipper macro prints the test square and incrementally increases the Pressure Advance value after each layer. By the end of the test piece, a suitable range of possible values have been used.
The start value is typically 0, and the rate at which it increases is determined by the printer type. As direct extrusion machines tend to have lower Pressure Advance values, it’s common to increase the value in increments of 0.005. This is written in the command line as follows:
TUNING_TOWER COMMAND=SET_PRESSURE_ADVANCE PARAMETER=ADVANCE START=0 FACTOR=.005
As machines with Bowden extrusion need higher Pressure Advance values, the incrementing factor is normally higher:
TUNING_TOWER COMMAND=SET_PRESSURE_ADVANCE PARAMETER=ADVANCE START=0 FACTOR=.02
Some trial and error may be necessary. In the image above, the factor was too high for the initial test piece on the left, so it was reduced to provide a better indication of the expected range. With some Bowden extrusion setups, it’s also useful to start with a higher number than 0 so that the sweet spot for the correct value prints sooner.
Take care to record both the start and the factor numbers used, as you’ll need these for the next step.
Tips
At some points during printing, high accelerations and high Pressure Advance values might exceed your extruder’s torque. So, listen for any clicking, and if you hear any, stop the test piece at that point.
The top of the tower may also exhibit under-extrusion – the appearance of gaps and holes – close to the corners. If you’ve reached this point, stop the test.
Determining the Optimal Settings
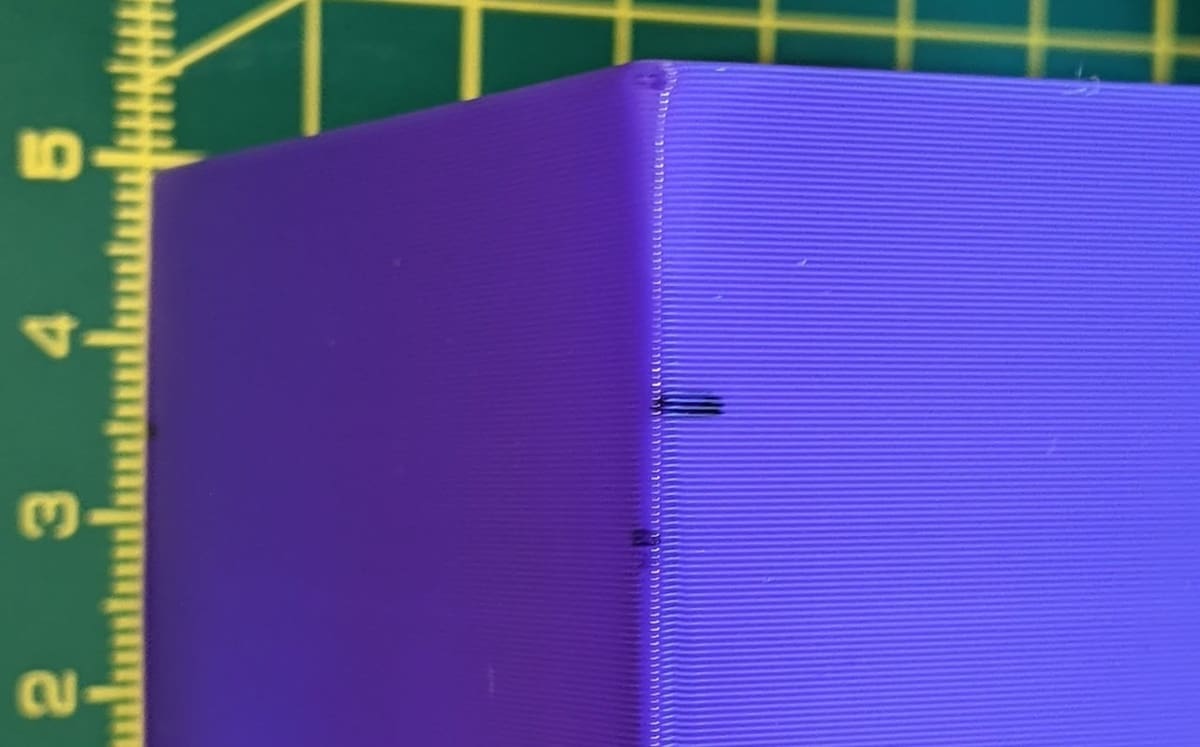
With your tower printed, it’s time to analyze what it looks like and choose the correct PA settings. In the image above, you’ll see an example of what you might expect your test tower to look like. Near the bottom, you should see that the corners bulge a little and that this should progressively improve until they look over-smoothed or show signs of under-extrusion.
Step 1
The optimal Pressure Advance value is determined by the height of the test print, where you judge the corners to be best. Simply measure from the bottom of the test print up to that point, and note the height in millimeters.
This height may be different on different corners. If so, choose the lowest.
Step 2
Next, we’ll calculate the Pressure Advance value using the following calculation:
pressure_advance = <start> + <measured height in mm> * <factor>
For example, say you determine the best corners were 30 mm up the test print and use an incrementing factor of .02. You would enter 0 + 30.0 * .020, and the resulting Pressure Advance value would be 0.6.
Step 3
You can now set this value in the section of the Klipper configuration file (e.g. pressure_advance = <pa_value>). Based on our example, the entry would look like the following:
pressure_advance = 0.6
Once that’s all done, restart for this to take effect.
That’s it. You’ve set up Pressure Advance!
Final Thoughts
After you configure Pressure Advance, you should notice an improvement in print quality. However, this does not remove the need to tune or adjust other related settings.
For example, sticky, molten filament tends to drag extra material behind it at the ends of lines, causing ooze. So, small amounts of additional retraction may still be necessary, especially with Bowden extrusion printers.
Also, remember that “Coasting” should always be set to off when using Klipper. In general, any advanced slicer feature that seeks to adjust flow, speed, or acceleration around corners should remain disabled.
Finally, your Pressure Advance setting is optimal only for the particular combination of nozzle, temperature, and filament used during your test. If any of these change, the correct Pressure Advance value may change, too, although there’s typically a fair degree of latitude.
License: The text of "Klipper: Pressure Advance – Simply Explained" by All3DP is licensed under a Creative Commons Attribution 4.0 International License.