Klipper on Ender 3 V2: How to Install It

Klipper is great 3D printer firmware but can be a bit tricky to set up. Read on to learn how to install Klipper on an Ender 3 V2!
Firmware is the program stored on a 3D printer’s mainboard, responsible for interpreting and carrying out inputted G-code commands with the connected hardware. While Marlin is probably the most popular 3D printer firmware for consumer-priced machines, it’s certainly not the only option.
A newer firmware option is Klipper, which is open source and has a unique setup compared to most other programs. Specifically, Klipper utilizes a connected Raspberry Pi (or similar computer) to process G-code commands. This way, the mainboard can focus solely on controlling the hardware, allowing your machine to print faster and more precisely.
Although Klipper offers many benefits, it comes with a few downsides, like its incompatibility with most printer’s built-in displays, unless you use upgrades like KlipperScreen to work around the problem. Another downside is that Klipper firmware can be somewhat tricky to install.
Luckily, in this article, we’ll go over exactly how to set up Klipper on the Creality Ender 3 V2, a popular, customizable, and budget-friendly 3D printer that succeeded the original Creality Ender 3. We’ll first discuss what you need for the installation and then go over the main steps for the process. Lastly, we’ll leave you with some troubleshooting tips.
Note that we’ll be using FluiddPi and the Fluidd interface to install Klipper. Fluidd is a web interface for Klipper firmware, and FluiddPi is the corresponding operating system (like OctoPi is for OctoPrint). We chose to use Fluidd because of its built-in configuration file editing capabilities, which allow you to easily and quickly make the necessary changes. However, there are other installation routes like OctoPrint and Mainsail. If you chose to use one of these, the process is very similar, but you may need to take additional steps to edit your configuration files.
What You'll Need

While it’s not uncommon for a 3D printer firmware installation to use an extra cable or two, adding Klipper to the Ender 3 V2 requires a fair amount of additional hardware.
Hardware
- A Micro-USB cable
- A Raspberry Pi or other compatible board
- A microSD card for the Pi board
- A power supply for the Pi board
- A laptop or PC device with a screen and keyboard (and the programs listed below installed)
It’s important to note that while you can use SBCs other than Raspberry Pis, that’s what we’ll be using. The process for different boards shouldn’t be too different as long as you can install FluiddPi.
Software
- Raspberry Pi Imager
- Putty
- WinSCP (Windows Secure Copy)
- Notepad (installed on most Windows devices)
Once you have all the necessary supplies, we can get started installing Klipper on the Ender 3 V2!
Step 1: Setting Up FluiddPi
The first thing you need to do is to set up FluiddPi. Let’s get into the step-by-step instructions:
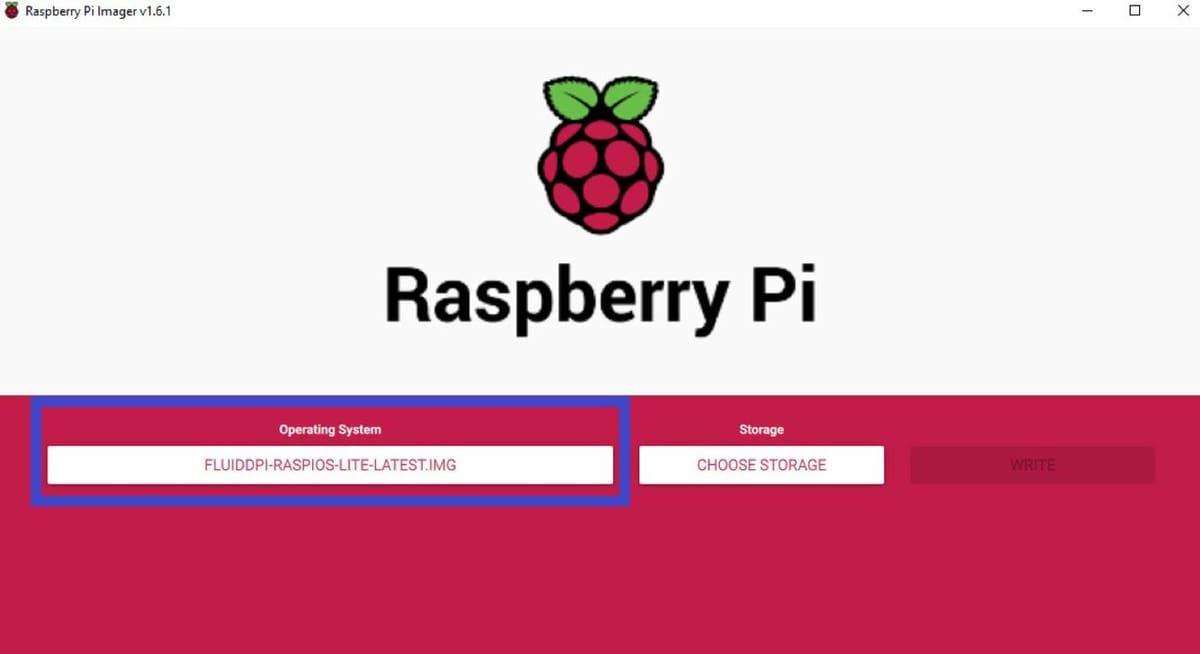
- Open the Raspberry Pi Imager software on your device.
- Download FluiddPi (click the zip file asset) from their GitHub page, and extract the single contained file from the folder.
- Insert your first microSD card (the one meant for your Raspberry Pi board) into your device.
- On Raspberry Pi Imager, click “Choose OS”, select “Use custom”, and choose your extracted FluiddPi IMG file.
- For the “Storage” portion, select your inserted microSD card, and then click “Write”. This process takes a few minutes, so sit tight!
- Once complete, take your microSD card out and insert it right back into your device. You’ll most likely be prompted to format the card. Do not format the card as this will erase the operating system you flashed.
- Open your device’s file explorer and open the FluiddPi configuration file labeled “fluiddpi-wpa-supplicant” in Notepad or a similar text editor.
- Follow the steps to connect to Wi-Fi for OctoPi as they are the same for FluiddPi. Make sure to save your changes to the file.
- Eject the microSD card and insert it into your Raspberry Pi board. Then, power up your Pi.
Finding the IP Address
While it’s not enough of a process to deserve its own official step, you’ll need to find the IP address of your connected device. You can find it by following the few steps below:
- Open a web browser and go to your router’s control page. (Usually, the manufacturer of your Wi-Fi network router has a specific page or IP address that you can go to.)
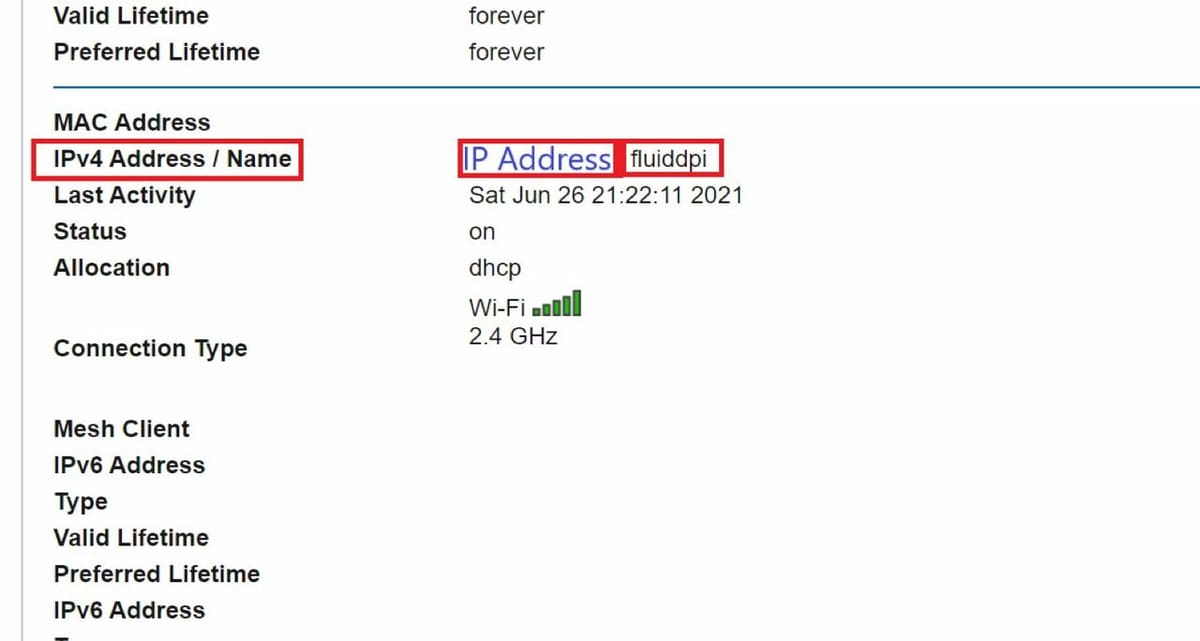
- Find the IP address page on the router control hub where you can see all the connected devices and their corresponding IP addresses.
- Locate your Raspberry Pi board, which should be labeled “fluiddpi” if it’s running FluiddPi.
- Write down the board’s IP address, as you’ll need this in a moment.
Step 2: Downloading & Configuring Klipper
Now we want to download Klipper on your Pi and then configure it for your Ender 3 V2’s mainboard. If you’re following this guide but using a different printer, make sure to use specify your printer’s mainboard and not the Ender 3 V2’s mainboard because this could result in issues.
- Open Putty on your laptop or PC.
- For the “Host name”, insert your Pi’s IP address, and click “Open”.
- In the new Putty terminal, enter the command
git clone https://github.com/KevinOConnor/klipper. - Enter the command
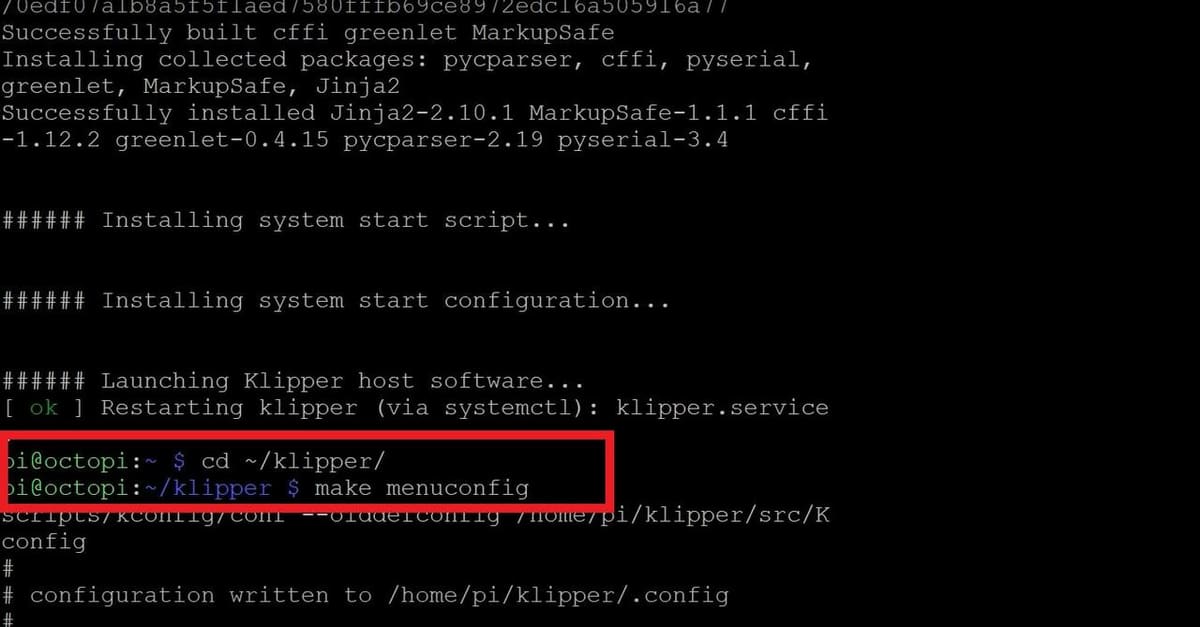
/klipper/scripts/install-octopi.sh. (This download process takes a few minutes.) - Once the previous download complete, enter the command
cd ~/klipper/and then the phrasemake menuconfig. - Use your device’s arrow keys and enter button to navigate the pop-up menu, and go to the “Micro-controller section”.
- The Ender 3 V2 uses an STM 32-bit board, so click the “STMicroelectronics STM32” option.
- After being automatically taken back to the new home menu, click the “Bootloader” option and select the “28 KiB” choice.
- On the home menu again, go to “USB connection” and choose the “serial” interaction option.
- Click the escape key on your device to exit the menu, and, when prompted, click the “Y” button to save your changes.
- Back in the Putty main terminal, enter the
makecommand.
Step 3: Uploading New Firmware
The third step in this process is to upload your new firmware to your Ender 3 V2 through Fluidd’s web interface and other programs. Follow below to complete this process:
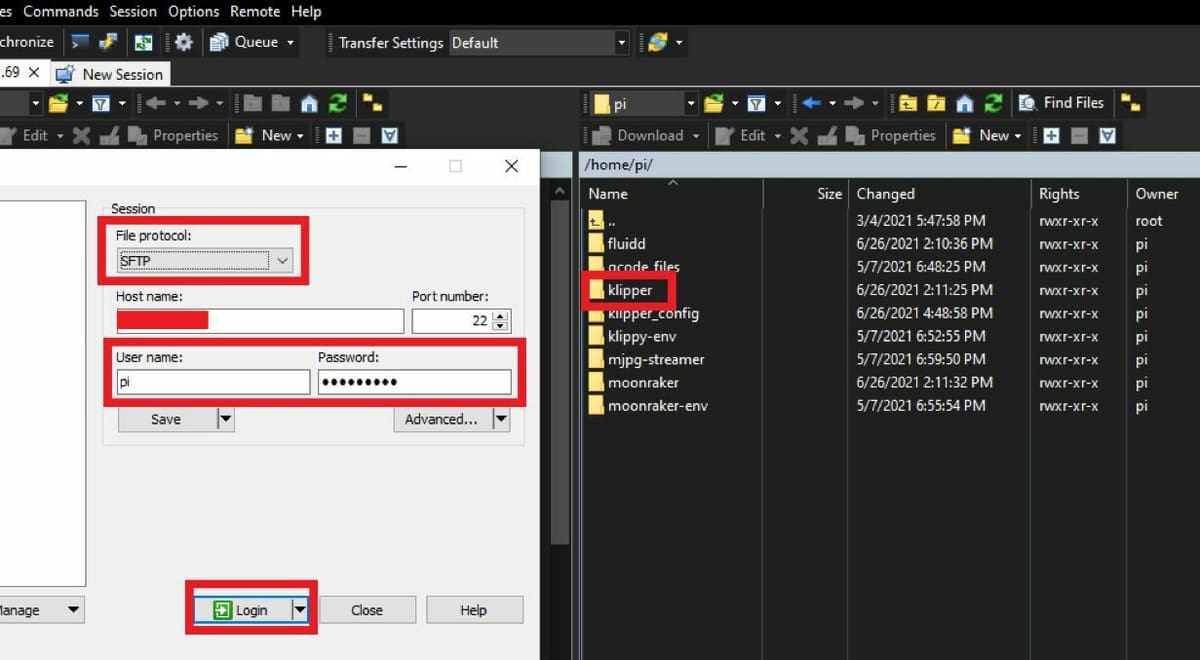
- On your device, open the WinSCP application and start a “New Site”.
- Enter your Pi board’s IP address for the “Host Name” and change the “File protocol” to “SFTP”.
- Insert “Pi” for the username and “raspberry” for the password, and click “Login”.
- Open the “klipper” folder, then the “out” folder. Locate the BIN firmware file, labeled “klipper.bin”.
- Insert your printer’s mainboard’s microSD card into your device and clear it of any files.
- Copy and paste (or drag and drop) the “klipper.bin” file to your inserted microSD card, change the name to anything other than “firmware”, and eject the card from your device.
- On your printer, unplug the cable connected to the Ender 3 V2’s color display. You won’t need this LCD because Klipper doesn’t require a direct interface to operate, and the V2’s LCD isn’t compatible with Klipper.
- Insert the microSD card into your machine and power it on.
- Wait a few minutes to be sure the firmware is updated on your printer, and then connect your Raspberry Pi board to your Ender 3 V2 with a Micro-USB cable.
Step 4: Updating Klipper for Fluidd
The final official step to installing Klipper on your Ender 3 V2 and Raspberry Pi board is to update the firmware.
- Type your Pi’s IP address into your search engine to go to the Fluidd Klipper online user interface.
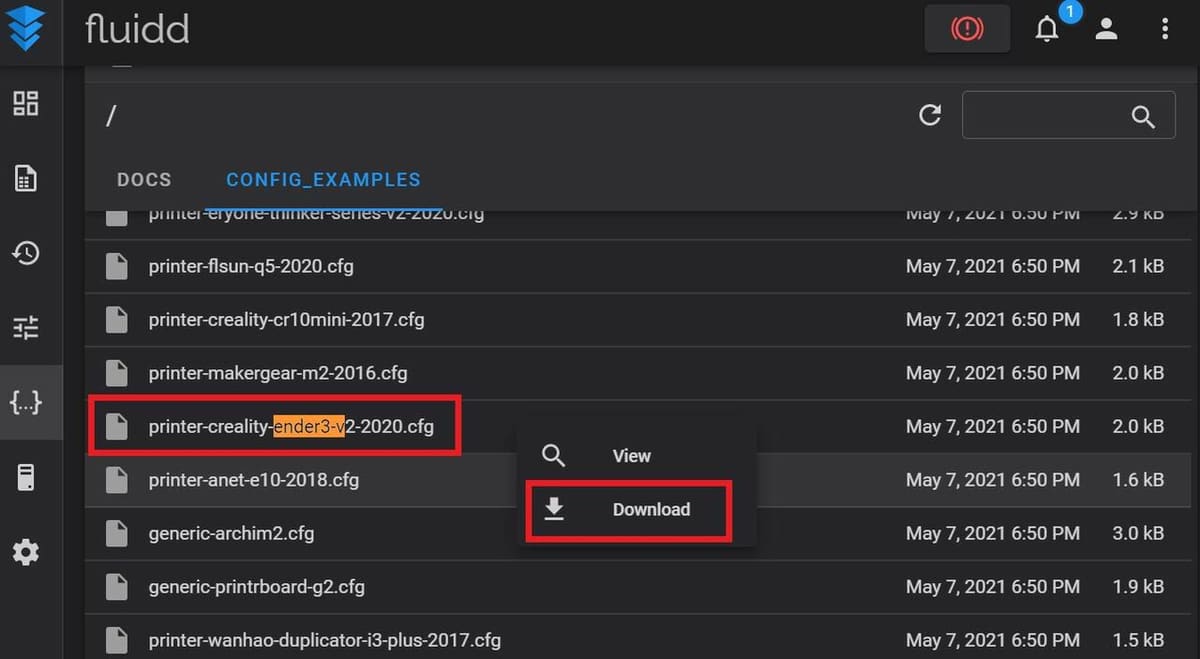
- On this website, go to the “System” section and switch to the “config_examples” tab.
- Search for the configuration example file with “ender3-v2” in the name and select “download”.
- Switch back to the “config” tab, click the “+” icon in the top right corner, choose “upload”, and select your example configuration file.
- With the file inserted, click it and change its name to “printer.cfg”.
- Click the “Firmware Restart” button on Fluidd.
That’s it! You’ve successfully installed Klipper on your Ender 3 V2.
Although Klipper is functioning on your 3D printer, you can’t really tell, as the LCD (if you choose to plug it back in, which is totally optional) doesn’t show anything. That’s because Klipper, as we said earlier, doesn’t work with the Ender 3 V2’s direct display, and you need a web interface to control your machine and start prints. You can continue reading to learn how to do this with Fluidd!
While Klipper doesn’t work with the V2’s LCD, it’s worth noting that the firmware is compatible with the stock LCD on the original Ender 3 (and CR-10). If you’re interested in how to do this, you can check out the last section of this article.
(Optional) Step 5: Set Up Klipper for Fluidd
Even though you’ve installed Klipper, you can’t use it until you set up a web interface to work with Klipper. Although Fluidd is a great option, there are other Klipper-compatible online interfaces, such as Mainsail, and you can find other guides to use these alternatives.
If you want to use Fluidd, though, you have to make some changes to the configuration of Klipper to make the two programs work together. You can follow the steps below to do just that!
- Open your Fluidd online interface, and go to the “System” section.
- Under the “config” tab, click the file you previously labeled “printer.cfg” and select “Edit”.
- Go to Fluidd’s website page with the configuration documentation of the initial setup.
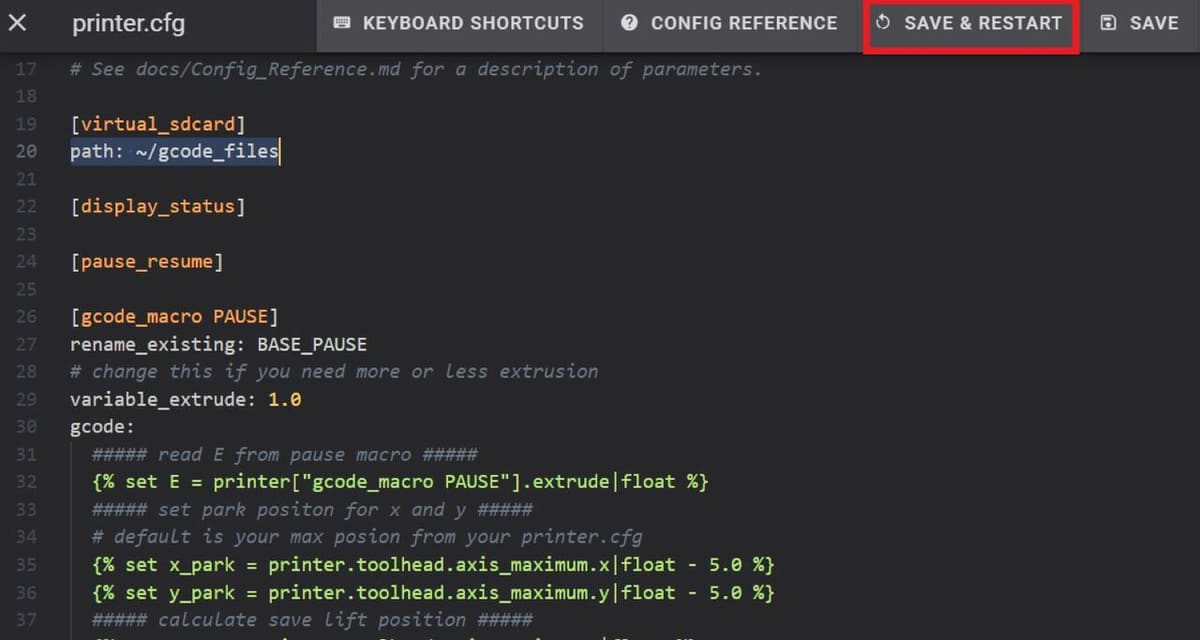
- Copy and paste each of the designated lines of code from Fluidd’s website to somewhere after line 17 and before the “stepper_X” line in the “printer.cfg” file. Make sure to place the chunks of code at least one line away from each other.
- Click “Save and Restart” in the top right corner of the editing page.
And that’s really all there is to it! You now have a Fluidd-compatible version of Klipper that you can use with your Ender 3 V2.
Changes for the V4.2.7 Board
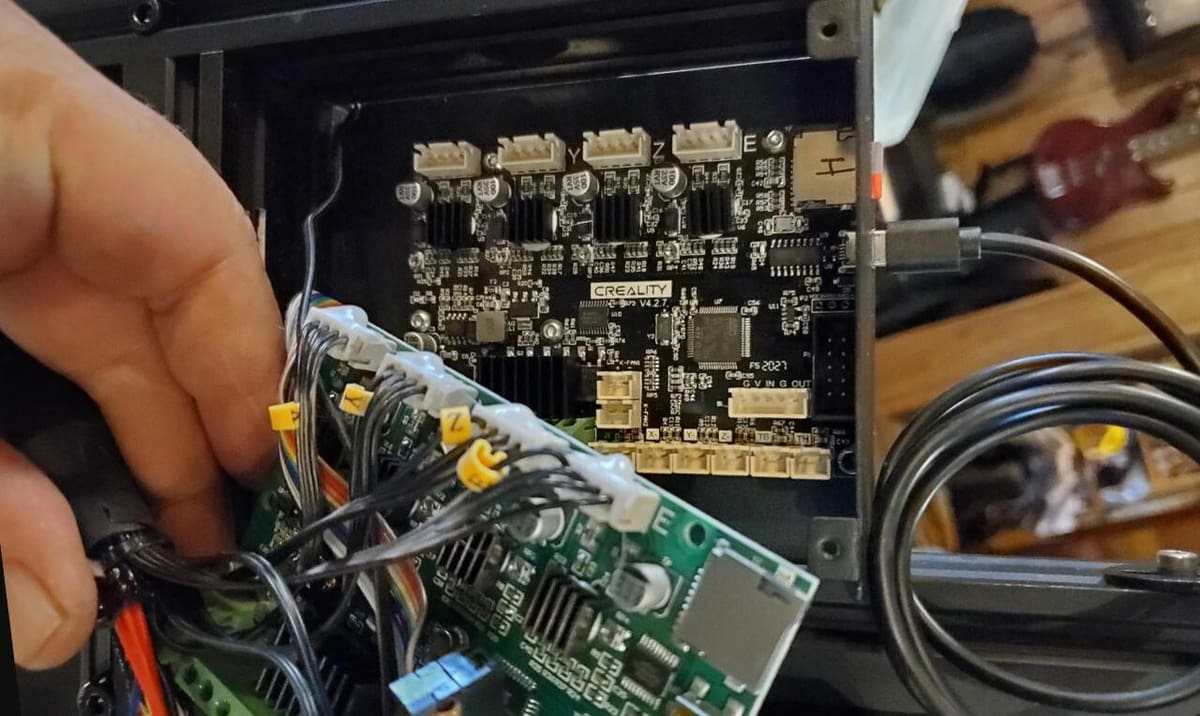
If you upgraded your Ender 3 V2 printer from the stock Creality V4.2.2 mainboard to the Creality V4.2.7 silent mainboard, you might notice some issues with controlling your machine. Most likely, you won’t be able to control the motion of components on your machine, so actions like homing an axis or moving the printhead a certain distance won’t work.
This problem is caused by a difference in the pinout schemes between the V4.2.2 and V4.2.7 boards. Luckily, one user found that all you need to do is swap the pinout numbers for the “step_pin” and “dir_pin” in the printer configuration file. You can follow the steps below to make the necessary adjustments:
- Open the “printer.cfg” file through your web interface
- Search for the “stepper_x” section and adjust the lines below to read:
step_pin: PB9 dir_pin: PC24+ - Search for the “stepper_y” section and adjust the lines below to read:
step_pin: PB7 dir_pin: PB8 - Search for the “stepper_z” section and adjust the lines below to read:
step_pin: PB5 dir_pin: !PB6 - Search for the “extruder” section and adjust the lines below to read:
step_pin: PB3 dir_pin: PB4 - Save the changes to the file and update the firmware.
Changes for a BLTouch Sensor
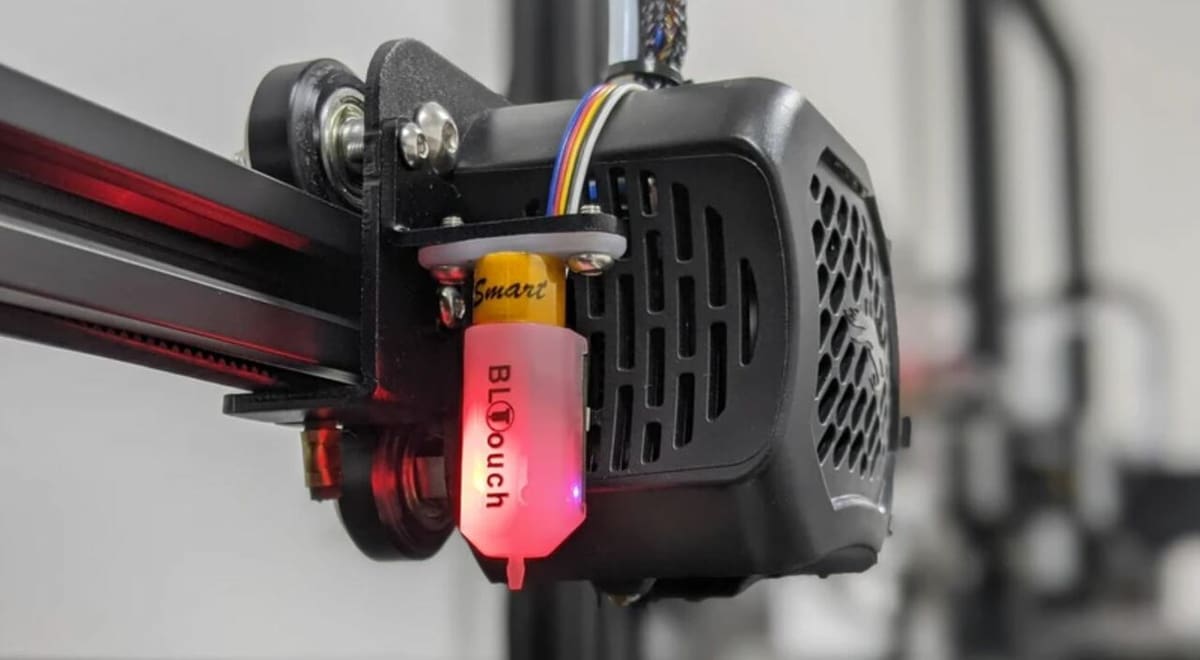
One of the most popular upgrades to the Ender 3 V2 is a BLTouch sensor, which allows you to automatically level your bed using the precise measurement probe. As automatic bed leveling isn’t supported in Klipper’s stock configuration, we have to make a few changes to make it compatible.
Luckily, there are a few guides online covering this process, such as Klipper’s official instructions, an informative Reddit post, and TechingTech’s video tutorial. An overview of the necessary configuration changes are below:
- Open the “printer.cfg” file in Fluidd or another editing platform
- Insert the following section a few spaces below the “max_z_accel” line:
sensor_pin: ^PB1 control_pin: PB0 x_offset: -42 y_offset: -10 - Insert the following section a few spaces below the end of the “bltouch” section:
home_xy_position: 117.5,117.5 # Change coordinates to the center of your print bed z_hop: 10 # Move up 10mm z_hop_speed: 5 - Set the “endstop_pin” line in the “stepper_z” section to:
endstop_pin: probe:z_virtual_endstop - Delete the “position_endstop: 0.0” line from the “stepper_z” section
- Add the phrase “position_min: -5” beneath the “position_max” line in the “stepper_z” section.
- Insert the following section a few spaces below the end of the “safe_z_home” section:
speed: 120 horizontal_move_z: 5 mesh_min: 15, 15 mesh_max: 205, 205 probe_count: 5,3 algorithm: bicubic fade_start: 1 fade_end: 10 fade_target: 0 - Save the changes and update your firmware.
- Run the following G-code commands to use your BLTouch sensor to level your bed:
M190 S60 G28 BED_MESH_CALIBRATE SAVE_CONFIG
There are a few other optional settings for setting up BLTouch auto bed leveling, but this configuration should work just fine. If you’re interested in adding other BLTouch features to your firmware, you can use the guides we linked to at the beginning of this section!
Tips & Tricks
Installing Klipper on your Raspberry Pi and 3D printer is a somewhat complex process, meaning there’s a possibility for errors and problems. Below, we’ve listed a few tips, tricks, and fixes to hopefully help solve some issues you could run into. Also, you can use Klipper’s documentation page, FAQ page, the Reddit Klippers group, and other forums to seek additional help.
- The “cd ~/klipper/” command doesn’t work: If you entered this command through a direct interface with your Raspberry Pi (e.g. connected screen and keyboard), try using Putty from another device.
- Unsure if the Pi connects to the printer: First, make sure that the USB connection is secure on both ends (Pi and the mainboard). Then, enter the
ls /dev/serial/by-id/*command phrase into Putty. If the response if a phrase like/dev/serial/by-id/usb-1a86_USB2.0-Serial-if00-port0, then the two devices are properly connected. - Raspberry Pi is reporting undervoltage errors: This is usually caused by using a power supply that doesn’t meet the demand of your Pi board. You can check out Raspberry Pi’s page on the power requirements for each model board to see what you need. If your power supply barely meets the requirements, the issue may persist, so try to go above the minimum.
- No IP address: If your Pi isn’t showing up on your Wi-Fi IP address scan, then it’s most likely not connected to the internet. Make sure to follow the OctoPi Wi-Fi connection guide and the included troubleshooting information as FluiddPi is very similar in its construction to OctoPi.
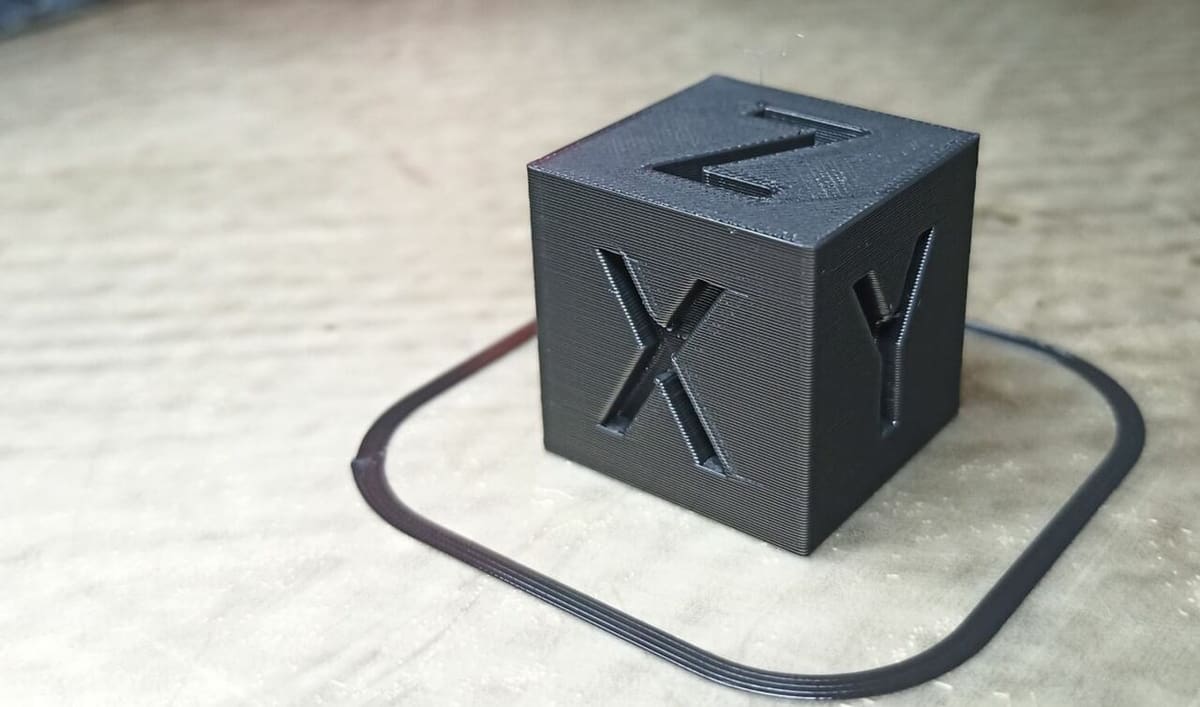
- Print calibration models: As with any major change to your 3D printer or its environment, you should consider printing a few test models. This will allow you to check that all components on the printer are working properly. You can check out our test prints article to find a few designs to choose from.
- Add support for original Ender 3 LCD: As we’ve mentioned, Klipper doesn’t work with many printer’s built-in LCDs, including the Ender 3 V2’s full-color display. Currently, Klipper only supports five different types of LCDs, and the stock bi-color display found on the original Ender 3 and CR-10 is one of them. To add support for this LCD (or another supported one), open the “sample-lcd.cfg” configuration file in Klipper’s GitHub page, locate the section referencing your type of LCD (“128×64” for the original Ender 3), and copy-paste the lines of code into the “printer.cfg” file. Lastly, don’t forget to save and update your firmware before restarting your printer with the LCD plugged in.
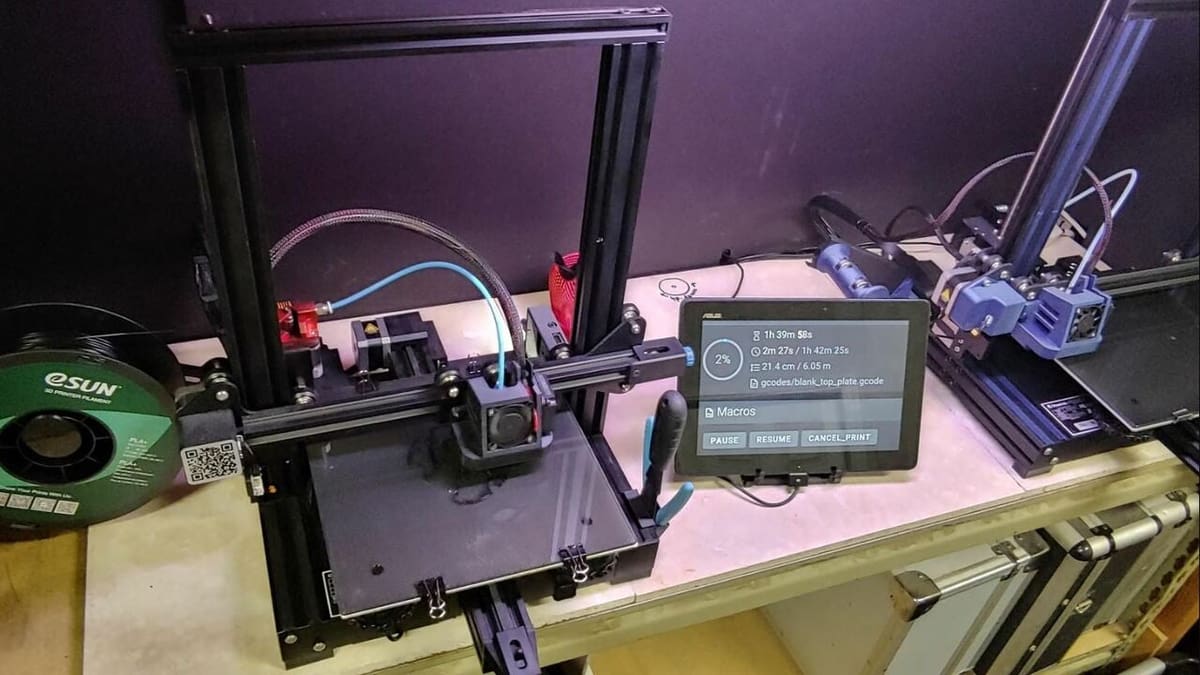
Lead image source: AcroFPV via Reddit
License: The text of "Klipper on Ender 3 V2: How to Install It" by All3DP is licensed under a Creative Commons Attribution 4.0 International License.