The $60 Enclosure: Why Every Maker Needs the Ikea Lack Hack

Stop warping and cut noise without breaking the bank by building a professional grade 3D printer enclosure for under $100.
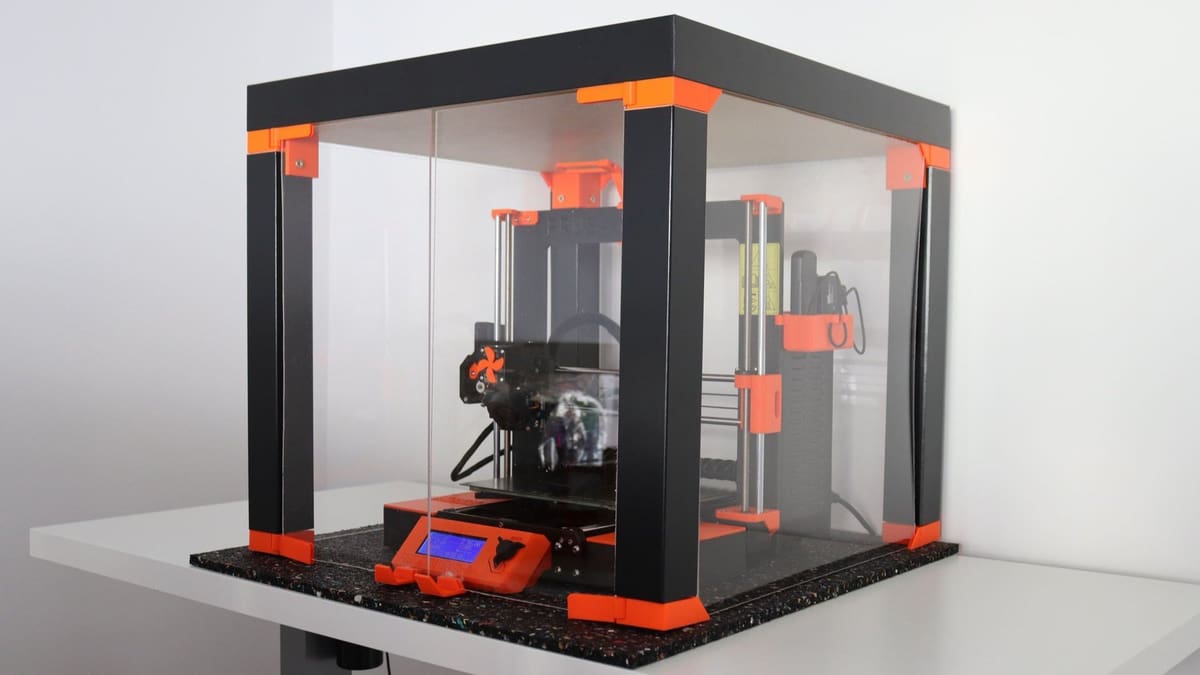
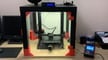
Stop warping, trap fumes, cut noise for about $60. While professional 3D printer enclosures can cost hundreds, the maker community has perfected a legendary work-around using the humble Ikea Lack side table ($16.99) that is the perfect size to fit most desktop 3D printers. This guide shows you how to build a professional-grade workstation that tames temperamental filaments like ABS, traps fumes, and looks great in any room—all without breaking the bank.
This guide will walk you through building an inexpensive printer enclosure using the Ikea Lack side table, some plexiglass, a few 3D printed parts to hold it in place, and whatever other accessories your printing setup needs.
We also include links to example makes to help you decide on the design that works better for your specific printer. Whether you’re looking for a simple dust shield or a high-tech workstation, this budget-friendly hack is the ultimate way to raise the quality of your prints without draining your bank account.
To Build or Not To Build?
So, do you really need a DIY enclosure?
Short answer: It depends on your printer and your goals.
A few years ago, most hobbyist machines were open-frame “bed slingers,” and affordable enclosed printers were rare. Today, mid-range machines often ship fully enclosed out of the box.
A DIY enclosure is still a smart upgrade if:
- You own an open-frame printer: (e.g., Ender 3, Prusa MK3/MK4, or similar models).
- You print ABS, ASA, or Nylon: These materials require a warm, draft-free environment to prevent warping.
- You print in a cold or drafty room: Even for PLA, sudden temperature shifts in a garage or basement can cause issues.
- You want to reduce noise: The plexiglass and structure significantly muffle the “whine” of stepper motors.
A passive enclosure like the Lack setup can raise internal temperatures to 35–45 °C just using the heat from your print bed. This is often the “magic range” that makes ABS and ASA printing reliable. Best of all, spending €60–150 on materials is far cheaper than the €600+ cost of a new enclosed CoreXY machine.
Building an enclosure may not be worth your time if:
- You already own a fully enclosed printer (like a Bambu Lab P1S or Creality K1).
- You almost exclusively print PLA: PLA actually needs cooling; trapping too much heat can lead to “heat creep” and clogs.
- You need active heating: If you need a consistent 60 °C+ for engineering-grade plastics, a passive wood-and-plastic hack won’t cut it.
Should you upgrade or extend?
A DIY enclosure is less about “hacking around limitations” and more about extending the life and capability of an existing printer. If your machine prints well and you just want better thermal stability, a Lack enclosure remains one of the most cost-effective upgrades available.
But, if you’re chasing higher temperatures, engineering materials, or a quieter, more polished setup, stepping up to a purpose-built enclosed printer might be the smarter long-term move.
Now that you’re totally committed, let’s move on to how to make your own enclosure!
The Shopping List: Essential Materials for a $60 Build
The key components of an enclosure are fairly simple:
- The iconic 21″ Ikea Lack table (of course). There are designs available that use 1, 2, or 3 or more tables.
- 3mm thick Plexiglass for the “walls” of the enclosure. Size will depend on the design, but you can estimate needing at least 4 pieces, 440mm x 440 mm in size, to enclose each table in your design.
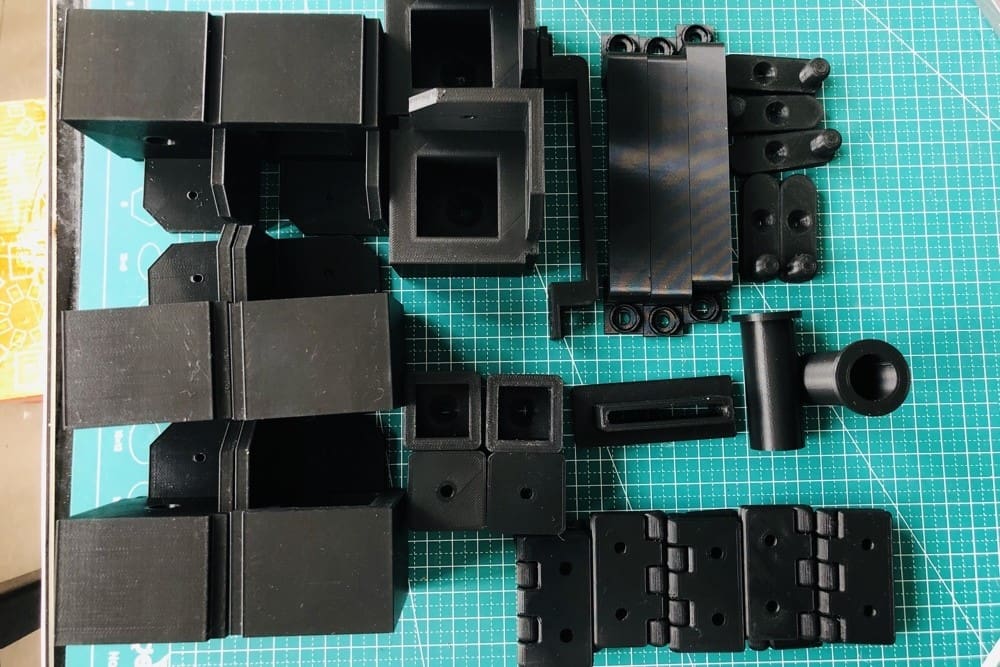
- Various 3D printed parts such as brackets for mounting the plexiglass in place, hinges for doors, and mounts to secure any accessories you are including with your enclosure.
- Screws and superglue to hold the parts together, and neodymium magnets for keeping the enclosure doors closed.
- Accessories, such as lights or filament boxes and guides.
- Screwdriver, Allen key, drill with wooden drill bits, utility knife, tape measure, pencil/marker.
Given this small list of components, we think the Lack is one of the most versatile designs for enclosures out there! Before we take a look at some great builds, we’ll go over the basic steps and accessories you might want to include.
Step-by-Step: How to Assemble Your Ikea Lack Enclosure
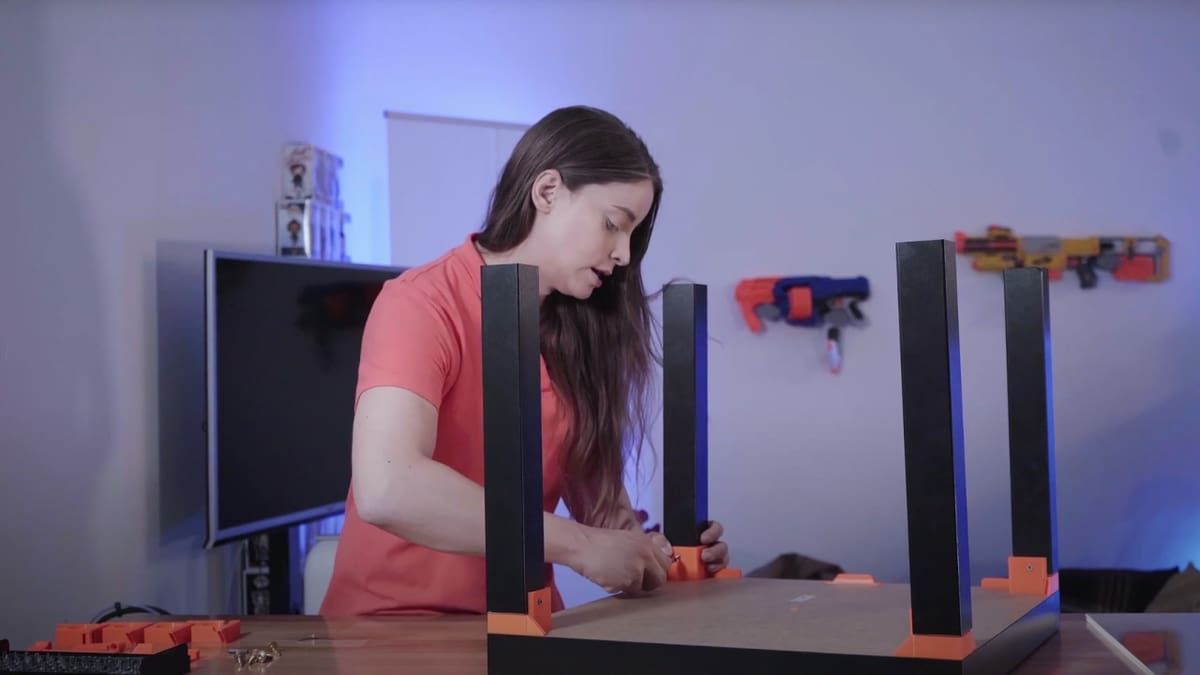
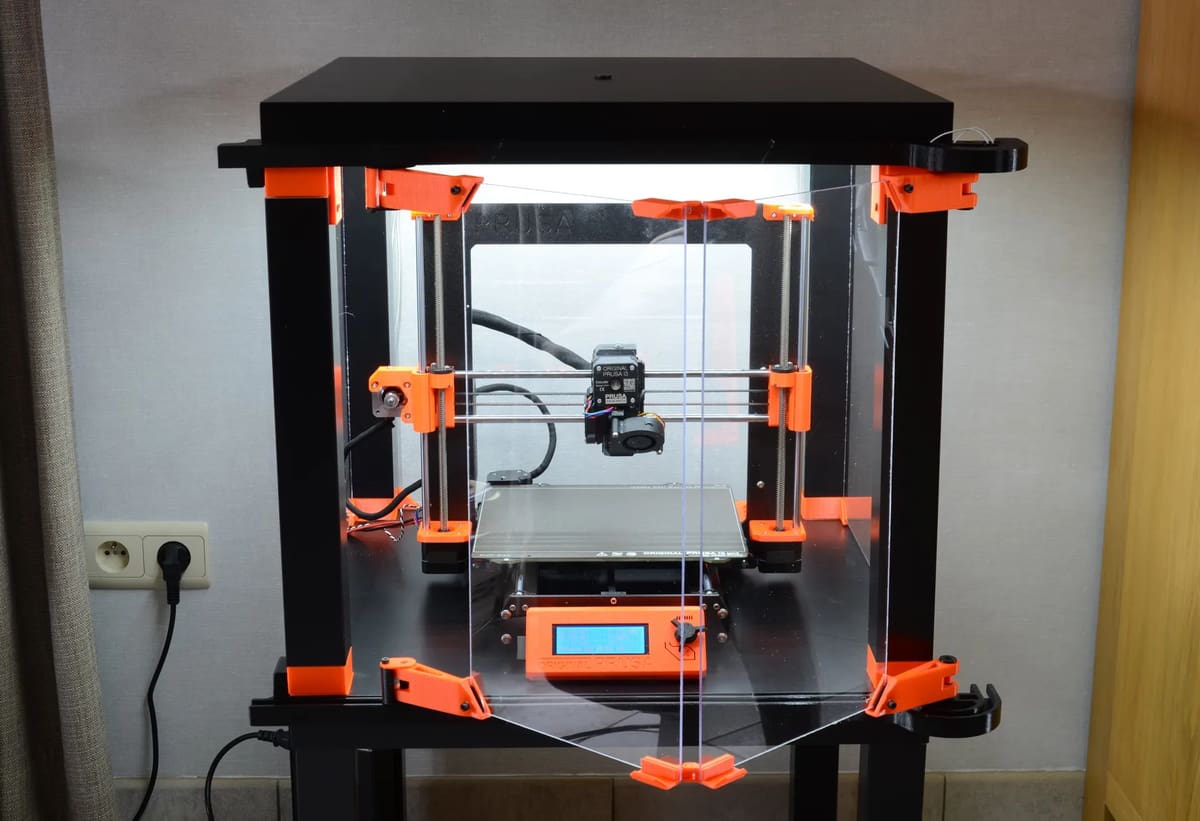
Thanks to the simplicity of the design, building a Lack enclosure is a breeze, and customization is even easier! To give you an idea of the process for a basic two table enclosure that fits a Prusa i3 MK3 printer (or a printer of similar size), here’s an overview of the steps adapted from the Prusa blog:
- 3D print the parts needed for attaching the plexiglass panels and spool holders, replacement brace (for installing the PSU outside the enclosure – recommended), and heatbed cable cover (reduces the printers footprint, so that it is able to fit inside)
- Install the corner standoffs with screws to the underside of the tabletop, and spool holders to the top surface of one of the tabletops. If you intend to include LED lightstrips, these can also be attached at this point, as well as a smoke detector. Mikolas Zuza from Prusa suggests attaching the smoke detector in the back to avoid obstructing the path of the filament as it gets fed into the printer and also doesn’t block you from taking the printer in or out of the enclosure.
- Attach the legs to the upper tabletop with screws.
- Carefully measure the areas where the plexiglass will be, and cut to size, and as the saying goes, measure twice, cut once. Generally each side will be about 440mm x 440mm, with the opening to the enclosure amounting to 2 pieces of 220mm x 440mm. Note: there are several ways to create an opening besides the double hinged opening that is often used, such as the sliding door, or the corner opening which uses 4 pieces of 440mm x 440mm plexiglass.
- Install the plexiglass and then screw in the lower standoffs, as once the lower standoffs are installed, the plexiglass walls are fixed in place.
- It’s recommended to have the PSU outside of the enclosure to keep temperatures down. Remove the PSU and attach it to the underside of the lower Lack table using the printed brace from step 1. Be sure that the corner standoff closest to the PSU has a hole for cables to be fed through.
- Prusa also suggests installing this heatbed cable cover to keep the cables from hitting up against the walls of the enclosure.
- Glue magnets to the printed door stopper, and screw it to the bottom table top, making sure it aligns with the magnets on the plexiglass doors.
- Attach the leg plugs to the bottom table top and stack the upper table in place.
- Manage your cables for a clean and tidy printing station, and voila, you have a fully enclosed printing station!
While the specific steps for making your enclosure will depend on which design you choose, these basic steps should remain the same. The trickiest part will likely be cutting the plexiglass if you don’t have a laser cutter or glass cutter handy. Although plexiglass tends to be more forgiving than glass, it’s still a challenge to cut if you don’t know how to do it. The most common issues you might face are cutting it to the wrong size or shattering its edges.
Besides dealing with the plexiglass, the rest of the assembly should be pretty straightforward. Now that we are familiar with the basic steps, let’s have a look at the different options and accessories available!
Essential Add-Ons: Lighting, Ventilation & Sensors
As every maker knows, customization is everything! Here’s a list of accessories you might want to add to your enclosure to give it that extra panache when it comes to printing, safety, replicability, and usability.
- KlipperScreen: An add-on program for Klipper-running printers that offers a GUI on compatible touchscreens
- OctoPrint: Allows you to print on-demand and monitor your prints from anywhere in the world (with a stable internet connection, of course)
- Lights: Illuminate your enclosure to see prints better
- Active ventilation: Safely print filaments while filtering harmful emissions; this is a particularly good idea if you work near your printer while it’s printing
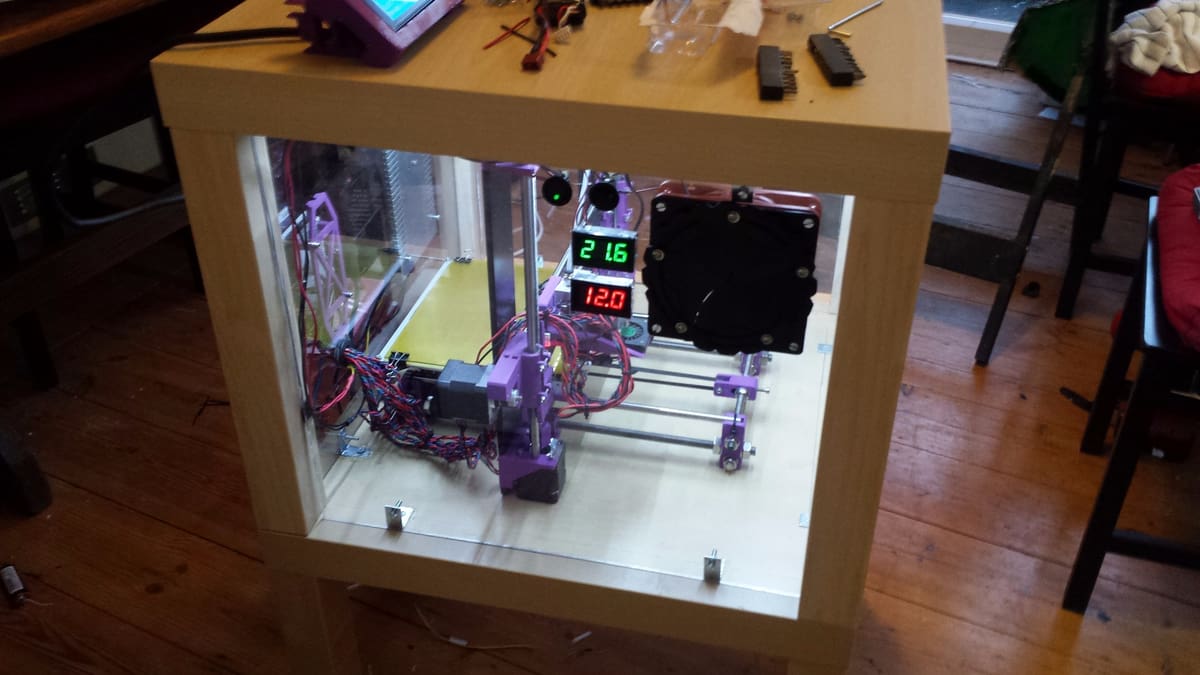
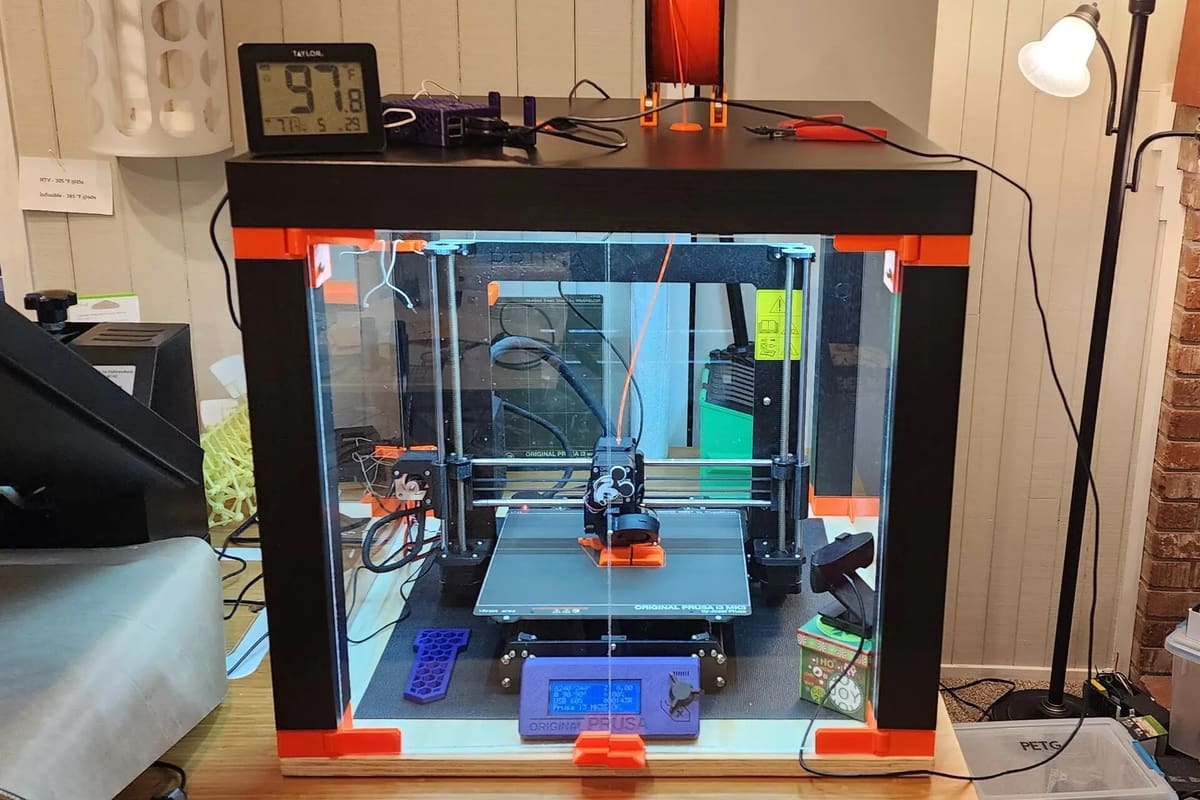
- Thermometer: Know the exact temperature in your enclosure; make sure that you aren’t reaching the glass transition temperature, which can warp your prints
- Filament guide: Feed your filament better and decrease the risk of jams or clogs in the hot end
- Filament dry box: Keeps hygroscopic filaments usable without having to dry them
- External PSU holder: Keep your PSU cool so your printer lasts longer
Printer-Specific Builds: Prusa, Bambu Lab & Creality Solutions
Since the Lack is such a popular basis for an enclosure, there are many great examples of what makers have done, including options for multiple printers. Let’s take a look!
Creality
- Ender 3 Option 1: This project is taller than other versions, so will require plexiglass that is 840mm x 440m in size. The advantage is that there is space for the filament inside the enclosure.
- Ender 3 Option 2: This build also has that double height enclosure, but is stacked on top of a third table for easier access and extra storage.
- Ender 3 Option 3: This version has a sleeker, one full door design, where the filament spool can either be mounted above or below the enclosure.
- Ender 5: A Thingiverse remix of a remix that takes into consideration the difference in size between 3D printers.
Prusa
- MK3/MK4: This build includes print-in-place hinges, doors on all 4 sides for total accessibility, and large enough to house the Ender 3 and the Anycubic i3 Mega S.
- MK3 Sliding Door: This version innovates on the original sliding door version, by making it rail free, and it also has a sleeker design.
- Mini+: This build also features an opening top cover. It’s decked out with lights and houses an internal filament holder.
Bambu Lab
- A1: A version that takes advantage of the space above to house the AMS Lite, and which requires at least two Lack tables.
Anycubic
License: The text of "The $60 Enclosure: Why Every Maker Needs the Ikea Lack Hack" by All3DP is licensed under a Creative Commons Attribution 4.0 International License.