How to 3D Print Your Own Lithophane

Lithophanes offer a unique way to add some sophistication to your photos. Check out how to make your own lithophane 3D print!
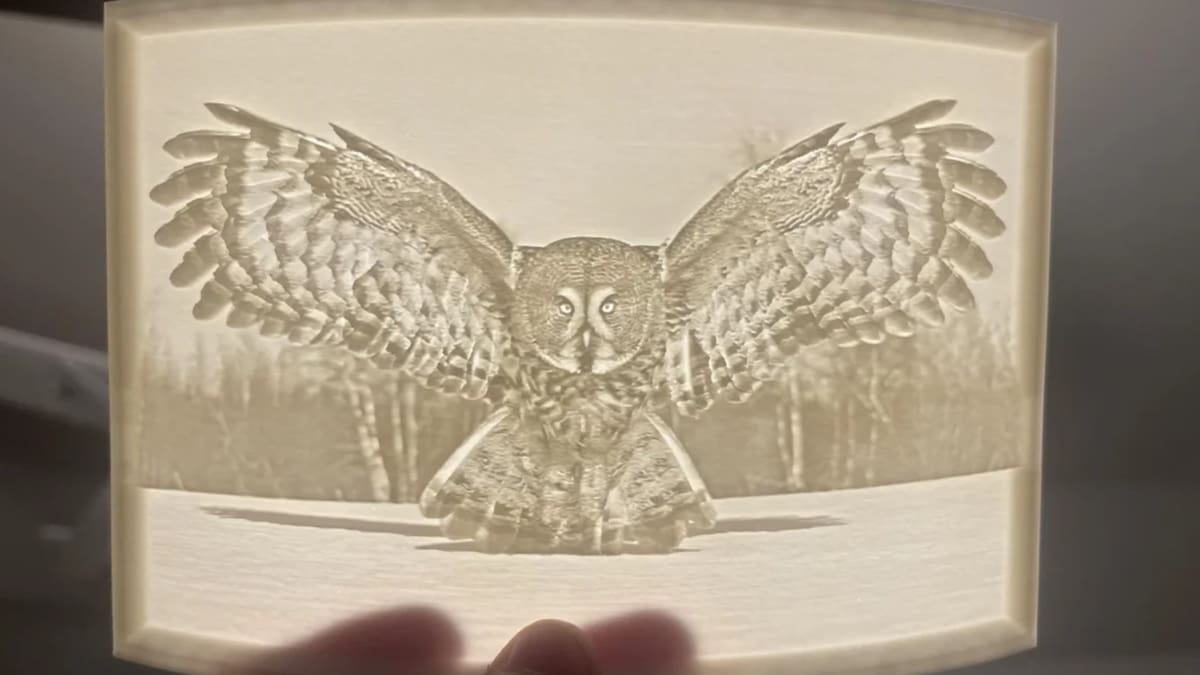
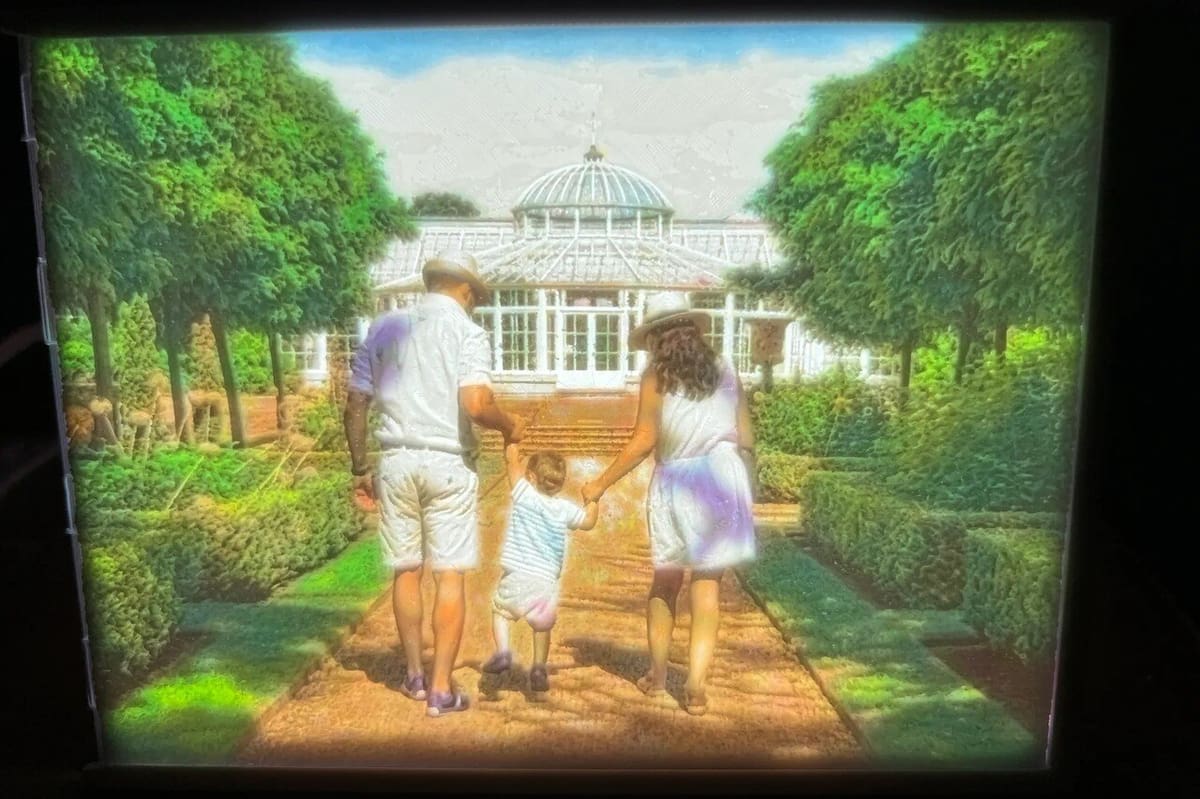
Turning photos into 3D objects gives them more impact and literally adds a new dimension. Of the various ways to do this, lithophanes are a simple way to enhance your favorite photos.
Lithophanes are essentially embossed photos generated by a 3D printer. The print results don’t show much at first, but shine some light through one, and you’ll be amazed by the details. The way it works is that light passes through the thin parts while being blocked by the thick parts. In this way, the differences in light bring out the image details.
In this article, we’ll explain how to turn a photo into a lithophane. But first, let’s take a look at what type of photos make the best lithophanes.
Picture Perfect
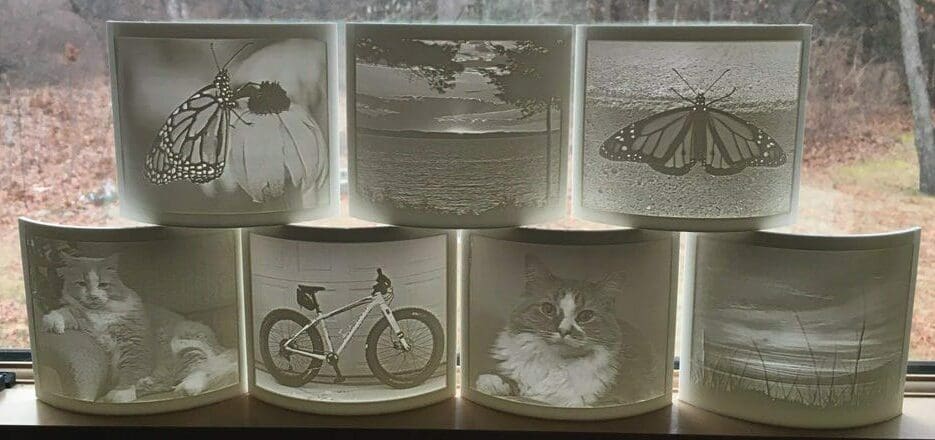
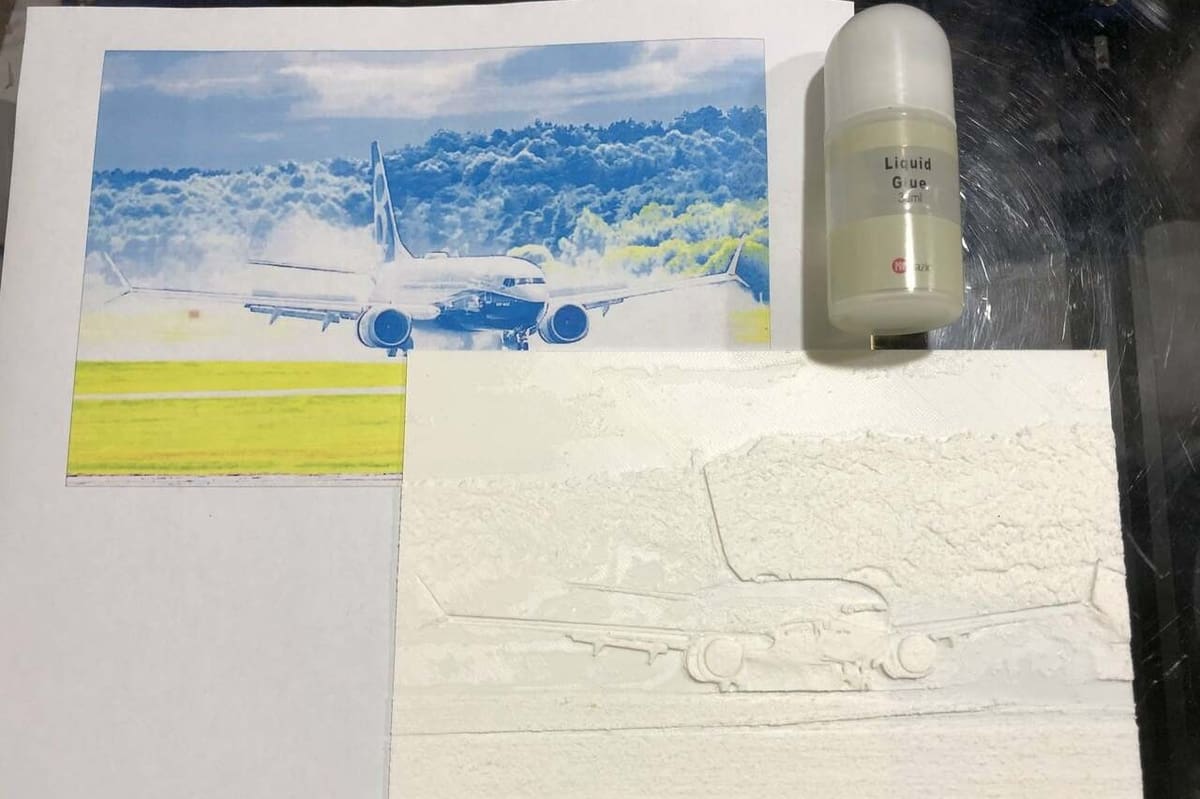
Your image is one of the most important parts of the lithophane process, and some images work better as lithophanes than others. An image that is too complicated or lacks contrast may result in an incoherent muck. So before you even think about how to convert your image to a 3D model, you should consider these tips on selecting and preparing images:
- Simplicity: The simpler your picture – whether it be colors, backgrounds, or objects – the better. When the images are too complicated, it can result in some pretty messy prints.
- Contrast: An image with higher contrast often yields clearer results. Some programs develop the 3D model for lithophanes from images based on contrast levels. Users are prompted to choose whether the darker or lighter parts of the image should be the higher part of the model, which determines how much light passes through.
Of course, there are ways to get around these limitations, but if this is your first time making a lithophane, you might want to keep them in mind in order to achieve the best results.
How to Make a Lithophane Model
There are many tools for turning your photo into a lithophane model, but virtually all of them work the same way. First, they guess the primary object of the photo and emboss it. Then, they give it a nice border and provide you with the final file in a 3D format like STL.
Below, we’ll present three easy ways to turn a photo into a lithophane model, including slicing software, CAD or 3D modeling software, and browser-based image-to-lithophane converters.
Method 1: Slicer Software
An easy method of creating a lithophane is to use 3D printing slicer software. One of the most popular slicers is Cura, by the 3D printer company UltiMaker. Cura works on a wide variety of printers and has a large user base. Besides its primary function as a slicer, it also provides extra features such as meshes and photo uploading.
There are pros and cons to using Cura to create lithophanes. On the one hand, the software is easy to use and fast, but you have less control over the process. The software also lacks more advanced options, such as adding frames to your images or molding them into different shapes. All things considered, however, Cura is still a great option for beginners.
How to Do It
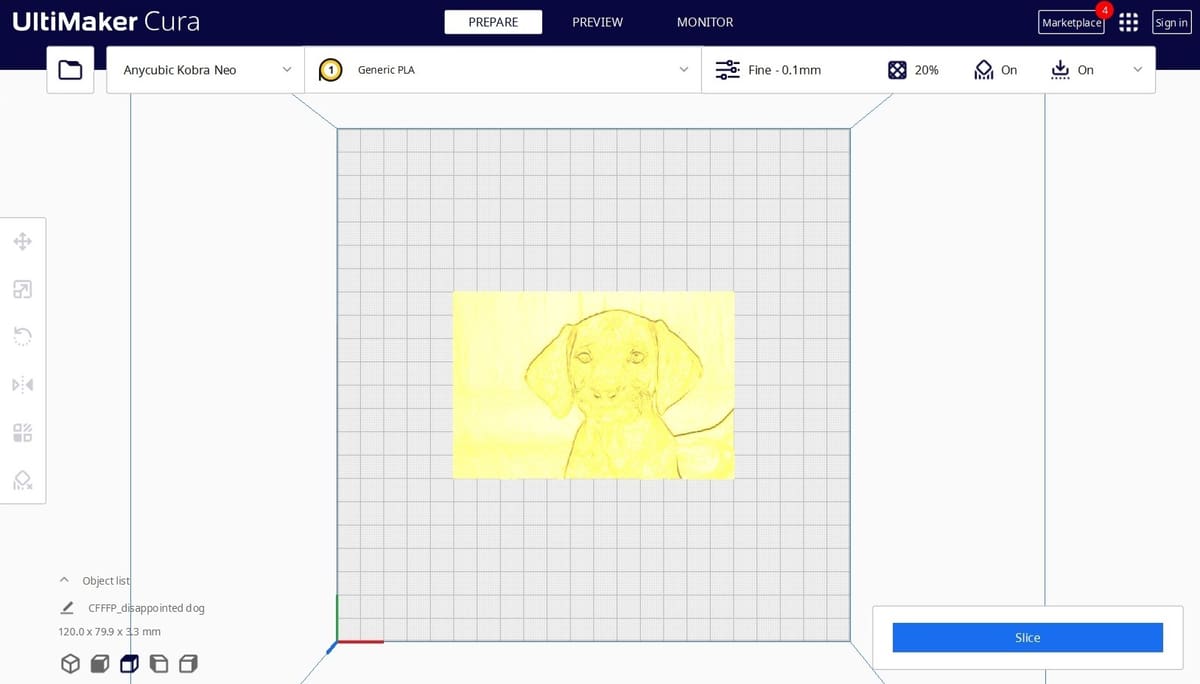
To get started, ensure that you have the image you want to turn into a lithophane saved on your computer.
Launch Cura, then import the image by selecting “Open File(s)” from the File menu. A pop-up window appears with a variety of settings that will impact how the image appears when printed.
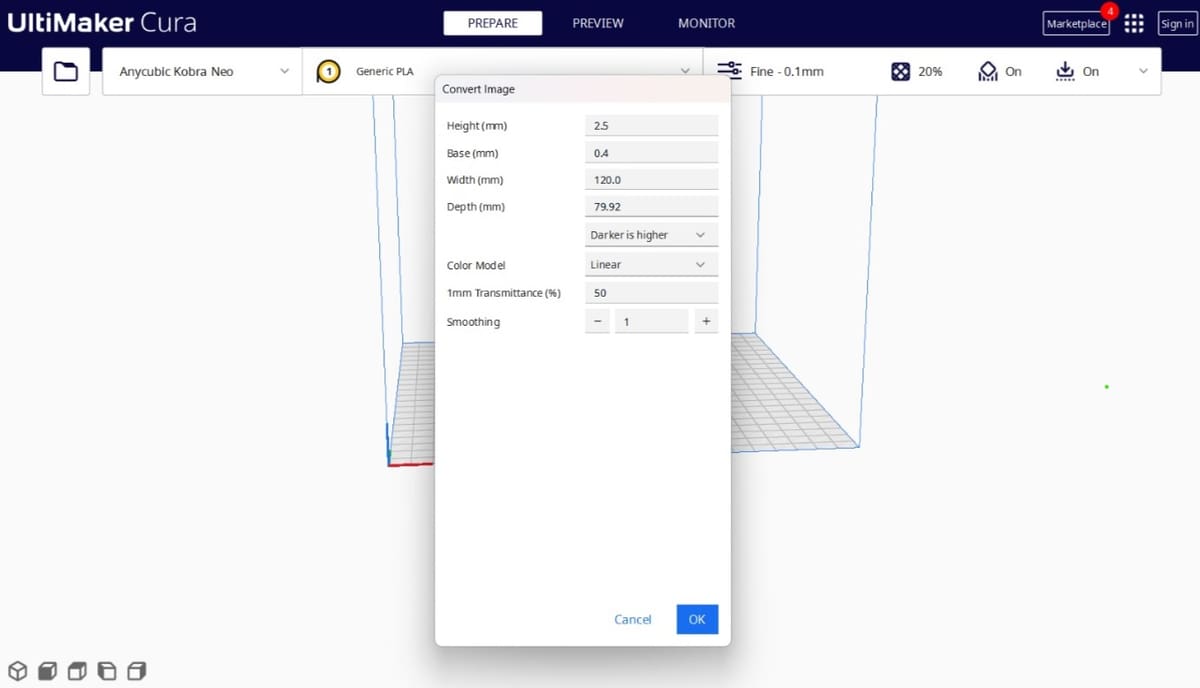
This is where the magic happens:
- Height: This is what we would normally call the thickness of the model. While you can make it as tall as you want, we recommend not going over 5 mm, as anything higher greatly increases print time.
- Base: The base is what the image will be printed on, and the height will be added to the base. Think of it as a foundation of a building.
- Width: This relates to the overall surface area of the model, and the value entered here determines its width.
- Depth: Somewhat misleading, this setting refers to the length of the model. So, increasing the value in this field will make the model longer.
- Contrast: After setting the dimensions of the model, select the “Darker is higher” option to make the darker parts of the image block the light.
- Color Model: Some Cura users have mentioned that, in theory, the translucent version would result in better lithophanes, but both the linear and translucent models should work.
- Smoothing: Increasing the smoothing will make your image less defined. For the best-looking lithophane, set Smoothing to 0 or between 1-2.
After selecting your settings, Cura converts the image to a 3D model, and at this point, you simply slice the file and save the G-code.
Before you do that, though, we recommend you take a peek at the printing tips below for recommendations on print settings, as well as the print orientation of your newly created model. So, for now, just save the model as an STL file.
Method 2: CAD or 3D Modeling Software
CAD and 3D modeling software are other options for creating lithophanes. Blender is a great choice, especially if you try online image-to-lithophane converters and they produce broken STL files.
This method gives us the most control over the final result, but there are a few more steps involved. Just follow along, and you’ll be done in a few minutes.
How to Do It
- Open Blender, then select and delete everything on the initial scene (Camera, Cube, Light).
- Click Numpad 7 to activate the top view, “Shift + A” to add an object, and choose “Mesh > Plane”.
- Click the Modifiers icon (wrench) to the right, then “Add Modifier > Generate > Subdivision Surface”, then select “Simple” (instead of Catmull-Clark) and increase the Levels Viewport from 1 to 6. Click “Apply” (there’s a drop-down arrow to the right of the word “Subdivision”).
- Switch to Edit Mode (click on “Tab” or select it from the drop-down menu on the to left of the Viewport), right-click on the plane and select “Subdivide” from the drop-down menu. Do it two more times to add more definition to the height map.
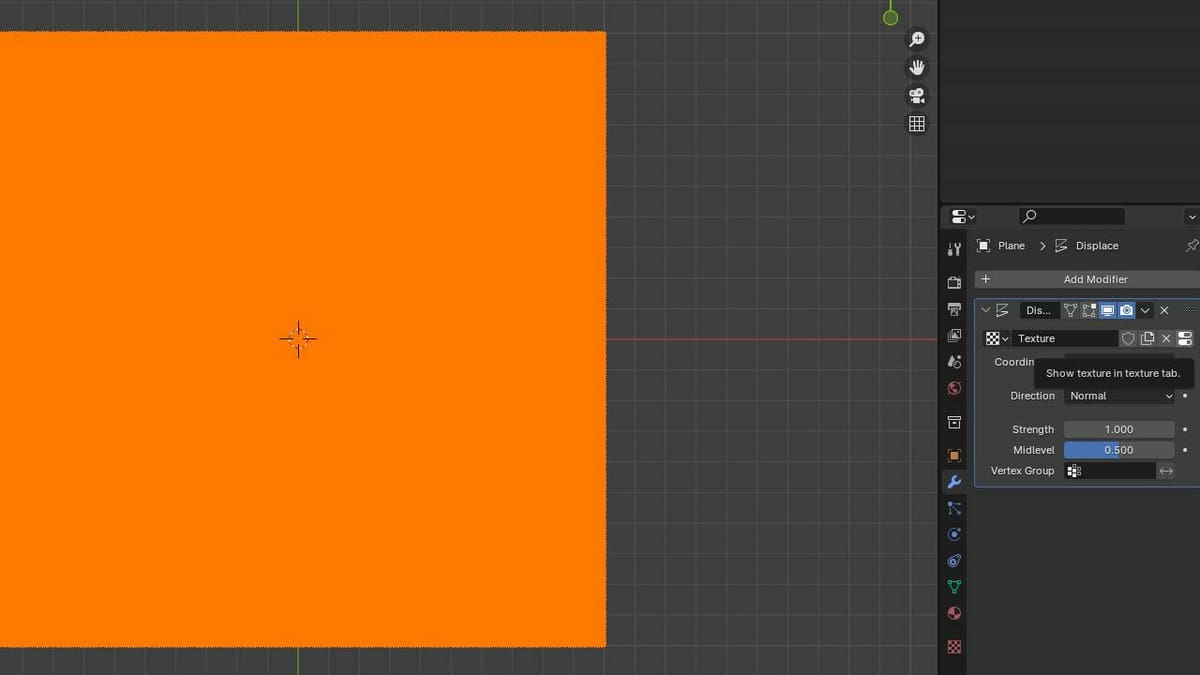
- Go back to Object Mode (“Tab”), and again in the “Properties Editor > Modifiers”, add another modifier, “Deform > Displace”.
- On the new modifier, click on New, then click on the right-most icon, which, when hovering the mouse over it, should say “Show texture in texture tab”.
- In the same modifier, you can now click on “Open” (folder icon) and select your image.
The more contrast the image has, the better, but that goes for any method of making lithophanes.
Adjusting the Results
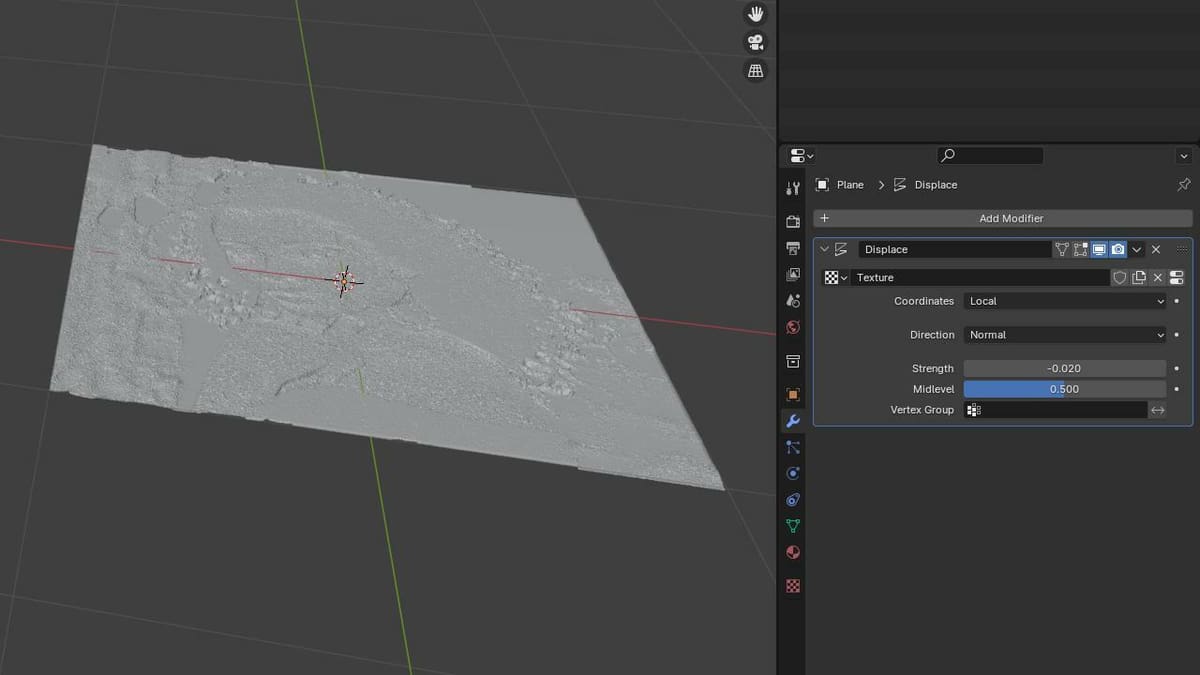
You can rotate the view by pressing the scroll wheel button while dragging the mouse to see the relief, but be warned, you might have a pretty scary image. This is because Blender usually adds too much depth. Fear not, just a few more clicks and all will be well:
- Click on the Modifiers icon again, and change the Strength of the texture to something between -0.01 and -0.07 (these values are negative just so that the darker areas go up, and we get a properly rotated STL at the end). Rotate the view to look at the model at an angle, and adjust the Strength so that you get a little more height on the darker areas, enough so that less light will shine through.
- Go back to Edit Mode (“Tab”), press ‘2’ (not on the Numpad) to select Edge mode (or select it from the top left, next to the Mode drop-down menu), click outside the plane to deselect it, then select the perimeter of the plane using “Shift” to click on all four edges. You might have to zoom in to click right on the edges. This is to indicate that the shape we want to extrude is a square.
- Now press ‘E’ (to extrude), then ‘Z’ (to lock the extrusion to that axis), and move the mouse so you see that about -20 mm (-0.02 m) is extruded (negative values again to match the direction we set before). Click the left mouse button to complete the extrusion. Click ‘F’ to fill the extrusion.
- Go back to Object Mode and rotate the view around the whole object, just to make sure the depths look fine. Then, click on “File > Export > STL (.stl)”.
Method 3: Image-to-Lithophane Converters
A third method of acquiring STL files for your lithophanes is using image-to-lithophane converters. Most of them are browser-based services that convert your image into an STL file for you. There are multiple options, such as 3DP Rocks, ItsLitho, and Lithophane Maker.
Generally, they all work the same way. You upload your image, choose the shape or frame you want, then download the STL file to your computer.
With image-to-lithophane converters, you tend to have more customizability with less complexity. For example, ItsLitho gives you the option to adjust the image’s colors and insert a frame. The converters also allow you to change the shape of your lithophane from planes to arcs and spheres. These features are hard to come by in slicer software.
So, if you want more options than a slicer but would rather not fiddle around with Blender, give an image-to-lithophane converter a try.
How to Do It
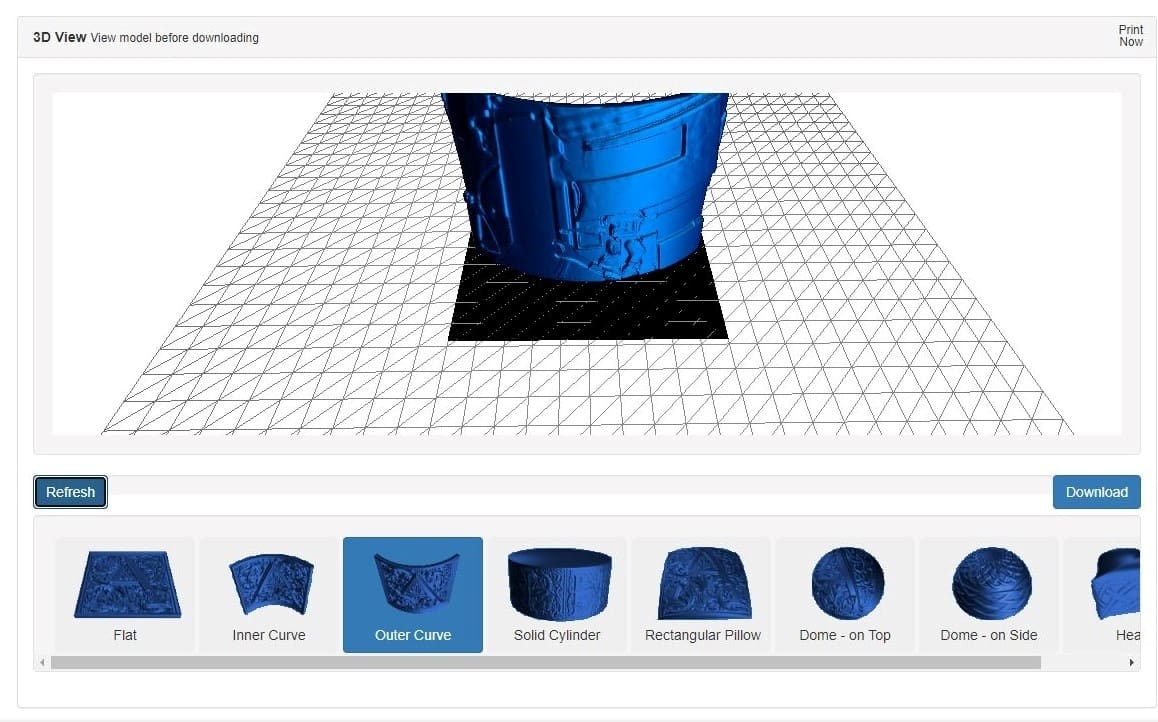
The process is very easy. We’ll demonstrate with 3DP Rocks:
- Head on over to 3DP Rocks.
- Click on the “Images” tab, then upload your image.
- Once you return to the Model tab, you’ll notice your lithophane is almost ready. You can choose different shapes for your lithophane.
- Tweak the settings in the Settings drop-down menu until you’re satisfied with the result.
- Finally, click “Download” in the Model tab.
Once you do that, your browser will download the STL file, and you’re ready to proceed!
(Optional) Adding Color
While traditional lithophane 3D printing is monochromatic, there are a number of techniques available to add color and enhance the depth and realism of your images. You can combine a regular print with colored paper, use colorful lighting, or simply use the right colors combination for the job if you have a multicolor printer.
With CMYK Filaments
Regular inkjet printers combine base colors to form the rest, usually having cyan, magenta, yellow, and black (CMYK), and the same principle can be applied to 3D printers. The big difference is that in regular printing, the white color is already present on the paper, whereas in 3D printing it needs to be added along with the others. There are many tutorial options out there following this principle, such as brockhoban5’s on Instructables.
The procedure involves using an image converter (as seen in Method 3: Image-to-Lithophane Converters), however, with a few additional steps. The big difference here is that several STL files will be generated to be combined in the slicer, where the final adjustments and configuration of the filament colors will be made.
There are currently several manufacturers, such as eSun and Polymaker, which sell CMYK colors in kits. Bambu Lab also offers a set, and there’s even an optional backlight board. Following Bambu Lab’s guide, you can check out all the details to create a colorful lithophane photo frame with lighting.
Other Methods
Multicolor setups and 3D printing with various filaments at the same time can make things very easy, but they might not be available to all makers out there. That doesn’t meant you can’t add some color to your lithophanes…
Regular Color Printing
In this method, instead of 3D printing several layers of color, you only need to print (in 2D) a color image and to 3D print a regular lithophane. In a nutshell, you need to tweak some settings to ensure they’re going to fit perfectly and then assemble them. If this method interests you, we’ve got a tutorial on it, and you can also check out this Instructable by Sunyecz06, where an interesting comment suggested using tracing paper to facilitate the passage of light.
Colored Lighting
Another approach is to use colored light sources or RGB LEDs behind the lithophane. By changing the colors of the lighting, it’s possible to create different atmospheres and highlight specific aspects of the image, without physically modifying the piece or relying on colored prints. Either way, this simple detail can make all the difference and make your space incredible. For even more tips on how to do this, check out our article on making a lithophane lamp.
Printing Tips
Regardless of the method you’ve selected, you should now have an STL file of your lithophane. The next step is to print it. Although lithophanes can be printed on both fused deposition modeling (FDM) and resin 3D printers, fans of resin printing will have the advantage here.
Resin 3D Printing

As with many other models, printing lithophanes with a resin printer gives you a much higher level of detail. Moreover, you can print them faster than if you were to use an FDM printer. Even with a high resolution, some lithophanes can take as little as 20 minutes to print.
There are a couple of things to keep in mind when printing a resin lithophane. First, the thickness of your resin print should be higher than for FDM since light shines through it differently when cured. A thickness of 4.5 to 5 mm is recommended for optimal contrast and detail, but you may have to play around a little to find the perfect thickness for your print. Additionally, adding a 7- to 8-mm frame around your lithophane can let you print without supports.
It’s recommended that you print the lithophane flat, but if you want to make a lithophane larger than the dimensions of the build plate, you can also orient it vertically. Proceed with your usual post-processing methods. For the best results, use white or grey resins and stay away from clear options.
FDM 3D Printing
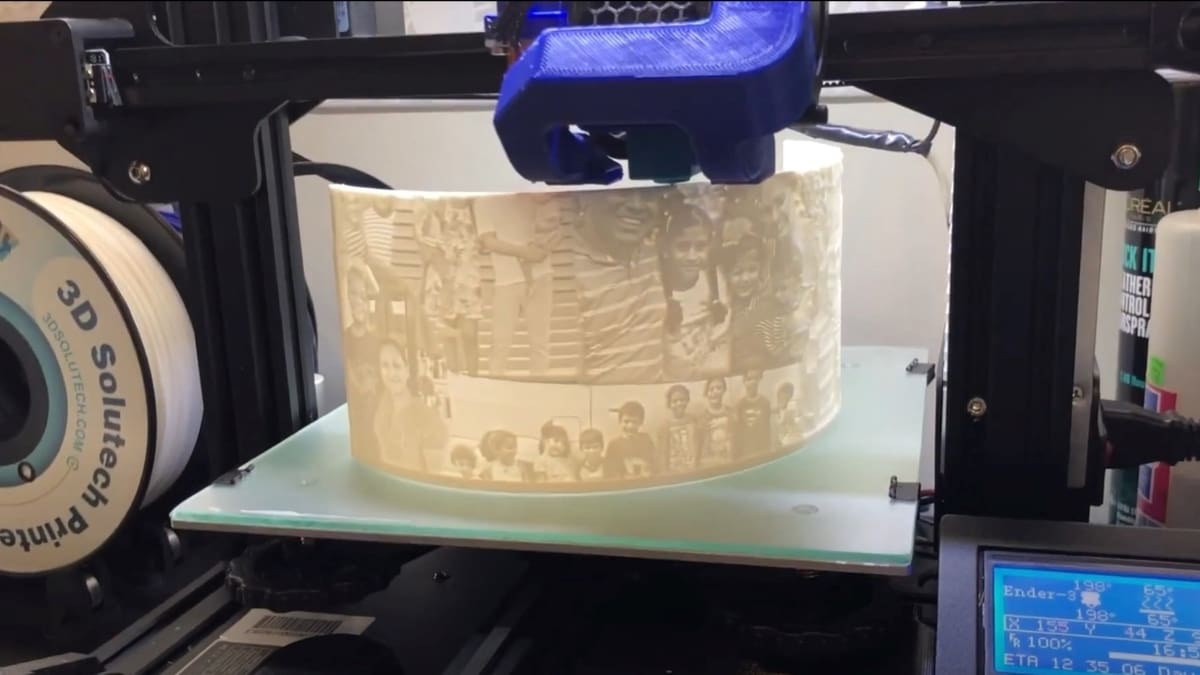
Printing a lithophane on an FDM printer should be simple. Be sure to print it vertically since FDM printer resolution is better on the Z-axis than the X and Y ones. A vertically printed lithophane will be of a much higher quality than one printed flat.
Depending on the shape of your lithophane, this may cause some bed adhesion issues, but makers have said it’s worth the risk. Some makers recommend printing with a brim or raft if you’re printing the lithophane vertically. In addition, you can decrease the chance of your print coming off by positioning it so that the longer side is parallel with the build plate’s moving, the Y-axis.
Besides the print orientation, no extra settings are required. However, there are a few tips to keep in mind:
- Material: Don’t use transparent filaments.
- Layer height: When printing vertically, it’s best to set the layer height as low as possible.
- Print speed: Since we want all the details, it’s better to print the model at a lower speed. Try to keep it lower than 33 mm/s.
- Infill: Setting the infill to 100% will let the light work its magic better.
Once it’s all set up, go ahead and print. With the above settings, a standard-sized lithophane could take up to six hours to print.
License: The text of "How to 3D Print Your Own Lithophane" by All3DP is licensed under a Creative Commons Attribution 4.0 International License.