What Is GRBL?
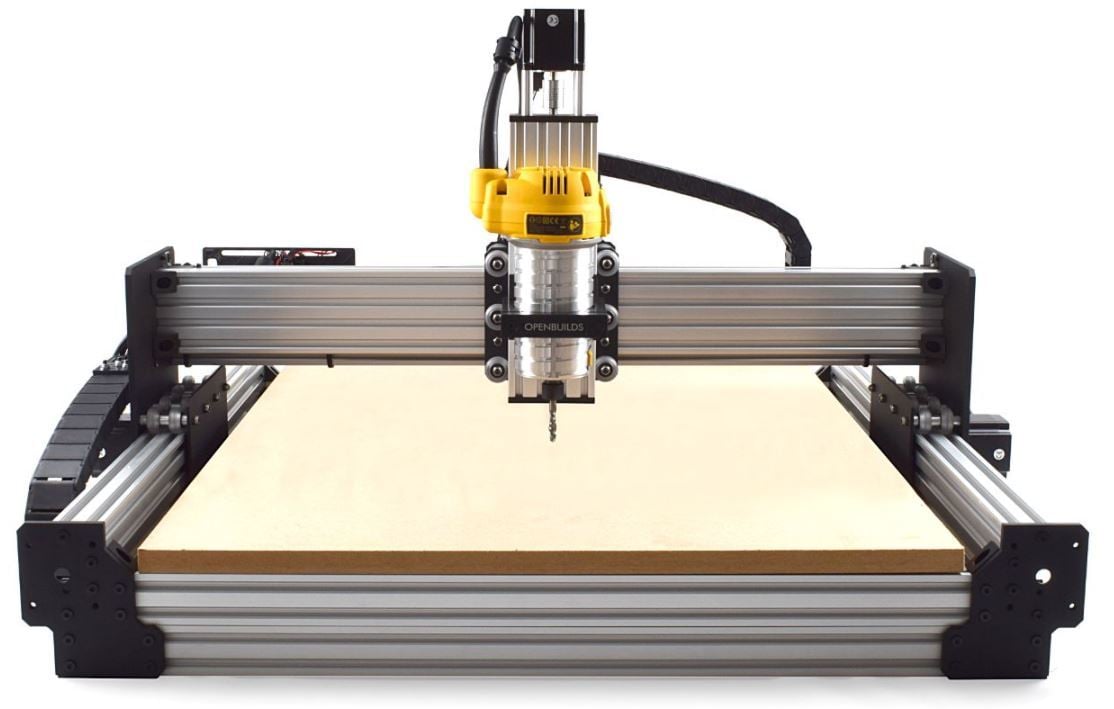
Using its basic definition, GRBL is firmware for CNC machines, uploaded onto the controller board of a machine to control its operation. Be it CNC milling, laser cutting, XY plotting, or even 3D printing, GRBL can handle it all.
Despite its wide range of applications, GRBL is used primarily in DIY and entry-level CNC mills, laser engravers and cutters. GRBL is open source and was designed to be integrated seamlessly with Arduino microcontrollers. In fact, GRBL is so common that it’s become a generic name for motion control components: An Arduino shield with motion control capabilities (motor drivers, endstop pins, etc.) is often referred to as a “GRBL shield”.
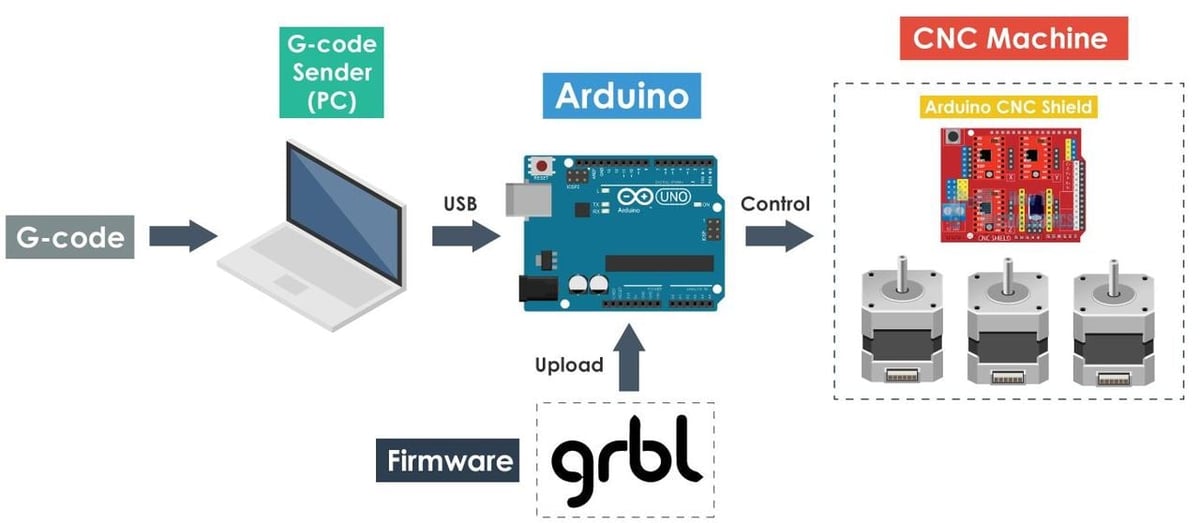
GRBL works by converting G-code motion commands into electromechanical signals to drive stepper motors according to the pre-defined motion and speed. It acts as the “middle man” between the CNC machine’s input (G-code commands) and the machine’s output (motion).
As mentioned above, GRBL is mainly popular for CNC milling and laser cutting, and it’s not as commonly used for 3D printing. Although there are few 3D printers that use GRBL, the vast majority use other firmware such as Marlin.
In this article, we’ll be going over how to set up and utilize GRBL. But first, let’s take a look at some of the key advantages and disadvantages of GRBL features.
The Competition
When examining the differences between GRBL and Marlin, it becomes clear why GRBL is so popular for CNC mills but less so for 3D printers. For example, GRBL has the ability to change coordinate systems during operation, while Marlin doesn’t. This feature is practically useless in 3D printing but very useful in milling. Another example is that Marlin has the ability to control the extruder flow rate during operation while GRBL doesn’t (it’s not applicable to milling operations).
Despite its prominence, GRBL does have its limitations:
- Motion: It can only control three axes of motion, which doesn’t allow for complicated machining operations.
- Communication: It requires serial communication, while other firmware can work in “standalone” mode just with an SD card.
- Adaptability: Unlike firmware such as Marlin, GRBL doesn’t easily allow users to alter the base code of the software, which might be problematic for enthusiastic tinkerers.
However, GRBL does have several key advantages, with the main one being the ease of setup.
Setup

Before actually setting up GRBL, it’s crucial to understand its position in the CNC machine. As shown in the image above, GRBL is usually uploaded onto an Arduino board by connecting to a computer. It receives input from a G-code sending software (more on that later), and outputs control signals to the machine’s motors drivers. Therefore, the first step in setting up GRBL is uploading GRBL onto an Arduino board, which is a simple process:
- Download and install the latest version of Arduino IDE.
- Download the GRBL code and install it as an Arduino library in one of two ways:
- Extract the folder from the zip file into the Arduino libraries location on your hard drive, or
- Use the “Add .ZIP Library” tool in Arduino IDE.
- Connect your Arduino board to your computer.
- Open the example file “grblUpload” from Arduino IDE. It will have only one line of code:
#include <grbl.h> - Hit the “Upload” button.
And that’s it!
If you’re having problems with the process, there are many detailed guides on how to do this, including on the GRBL GitHub wiki and on YouTube.
Configuration
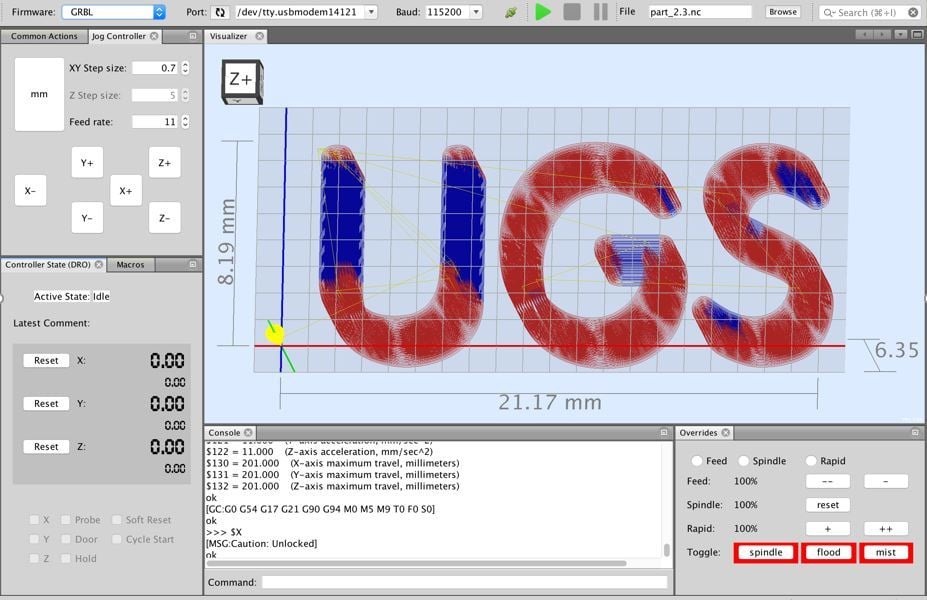
In order to communicate with GRBL, you’ll need some sort of communication software (Universal Gcode Sender is a great example). This is software into which you’ll load the G-code file on your computer, and it’ll transmit to the GRBL controller.
These programs usually pack several other features, such as tool path simulations, but the most important feature in this context is the ability to control and configure the settings of GRBL via a command terminal.
There are several types of GRBL settings, some intended for initial setup, some for general communication, and some for real-time control. Most GRBL commands and settings are called and defined using the dollar sign ($), which sets them apart from standard G-code commands (that usually begin with a G or M). The following section will discuss the various types of GRBL settings and commands, with code examples.
Settings & Commands
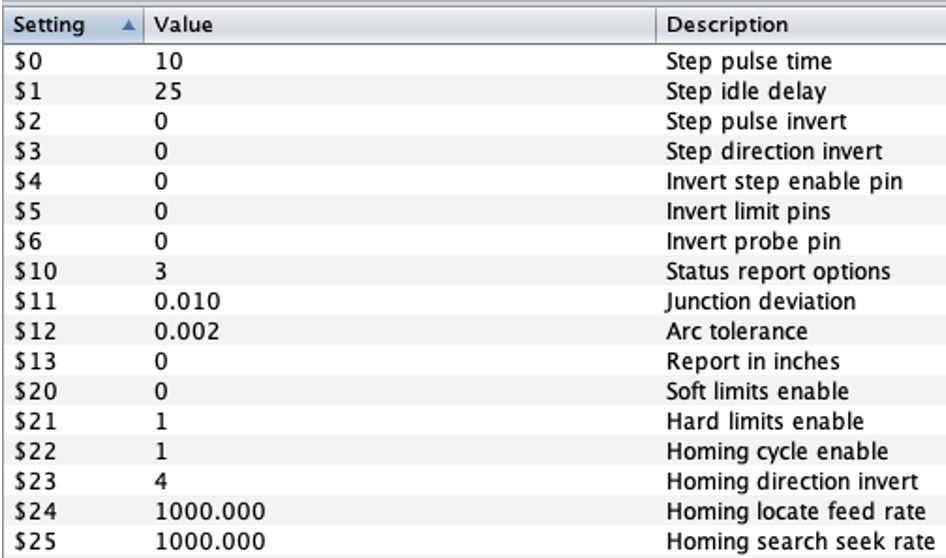
Calibration settings include defining steps-per-mm, axes directions, max feed rates, and so on. These settings are used when a new machine is being set up to work, or after a modification of the machine. Here are a few examples of calibration settings:
- Set X-axis steps per mm setting to be 314.961:
$100=314.961 - Reverse Y-axis direction:
$3=2 - Set Z-axis maximum feed rate to 635 mm/min:
$112=635.000
General GRBL commands include functions such as display saved settings, save current settings, and so on. Here are a couple of examples:
- Display the current GRBL settings:
$$ - Display the coordinates and tool length offsets settings:
$#
Real-time commands include actions like soft reset, perform homing cycle, get current machine position, and so on. These commands can be used during a program run or between different operations. Most of these commands do not begin with a ‘$’, but they are GRBL commands nonetheless. Here are a few examples:
- Pause operation:
! - Get current machine and work coordinates:
? - Reset GRBL:
ctrl-x
The most common GRBL settings and commands can be found in DIY Machining’s pocket guide, as well as the GRBL commands wiki page.
Final Thoughts
GRBL is powerful and versatile firmware for CNC machines such as mills and laser cutters. It allows highly-detailed control over machine settings as well as real-time operations. GRBL is also very easy to upload and configure. All that’s needed is an Arduino board and control software (such as Universal Gcode Sender).
Because GRBL is so common and useful, getting to know GRBL settings and configurations is one of the best first steps for entering the world of CNC milling.
Lead image source: Protoneer
License: The text of "GRBL Settings / Configuration: The Basics" by All3DP is licensed under a Creative Commons Attribution 4.0 International License.