Cura Extrusion Multiplier: How to Improve Your Prints

Cura's extrusion multiplier is actually called "Flow". Read to learn what it is, how to tune it, and how it can help fix print issues.
The extrusion multiplier, which is called “Flow” in Cura, specifies the rate at which your printer will extrude material. Based on the value for this setting, Cura automatically calculates how fast to move the extruder motor for certain print speeds or filament diameters.
By default, the flow rate is 100%. However, not all 3D printers or filaments are created equal. You may need to adjust this value to print successfully with your specific machine and materials. Most materials use a flow rate between 90% and 110%, but you can deviate further than this range if you need to.
Now that we know what we’re working with, we’ll dive into how to adjust these settings to rid your prints of extrusion issues. Note that this article focuses purely on Cura’s “Flow” setting, but other slicers might have similar settings – “Extrusion Multiplier”, for example – for you to experiment with.

Possible Problems
Multiple problems, including weak prints or poor dimensional accuracy, may result from an improperly tuned flow rate. Therefore, it’s important to get your flow rate in the Goldilocks zone: neither too high, nor too low.
Some problems, however, may be caused not only by an improper flow rate but also by other problems in the printer. Below, we’ll discuss two common extrusion problems as well as how to determine whether your Flow setting is the culprit.
Under-Extrusion
Under-extrusion is a problem where insufficient plastic is extruded in the print. This causes bad bonding between layers and lines, largely reducing a part’s layer adhesion and strength.
If a print shows consistent and relatively minor under-extrusion, it’s highly likely caused by too low of a flow rate. As the flow rate directly links to how much plastic is extruded by the extruder, minor under-extrusion can be directly correlated to a low flow rate. To resolve minor under-extrusion, you can try tuning the Flow setting based on recommendations in the “Tuning” section below.
However, if the under-extrusion is more extreme, it’s likely that other issues are at play. As almost all materials extrude at 90-110% flow rates, it’s unlikely that an improper flow rate causes major under-extrusion issues. Instead, the cause may be a clogged or partially clogged nozzle or hot end, which would prevent the appropriate amount of plastic from flowing through. Under-extrusion can also be caused by too low of an E-step value, which controls the steps of the extruder stepper motor. Lastly, other print settings may be the source of the problem, including too low of a print temperature or too high of a print speed for a particular hot end setup.
For a more detailed look at other problems causing under-extrusion and how to solve them, check out our article on fixing under-extrusion for Ender 3s.
Over-Extrusion
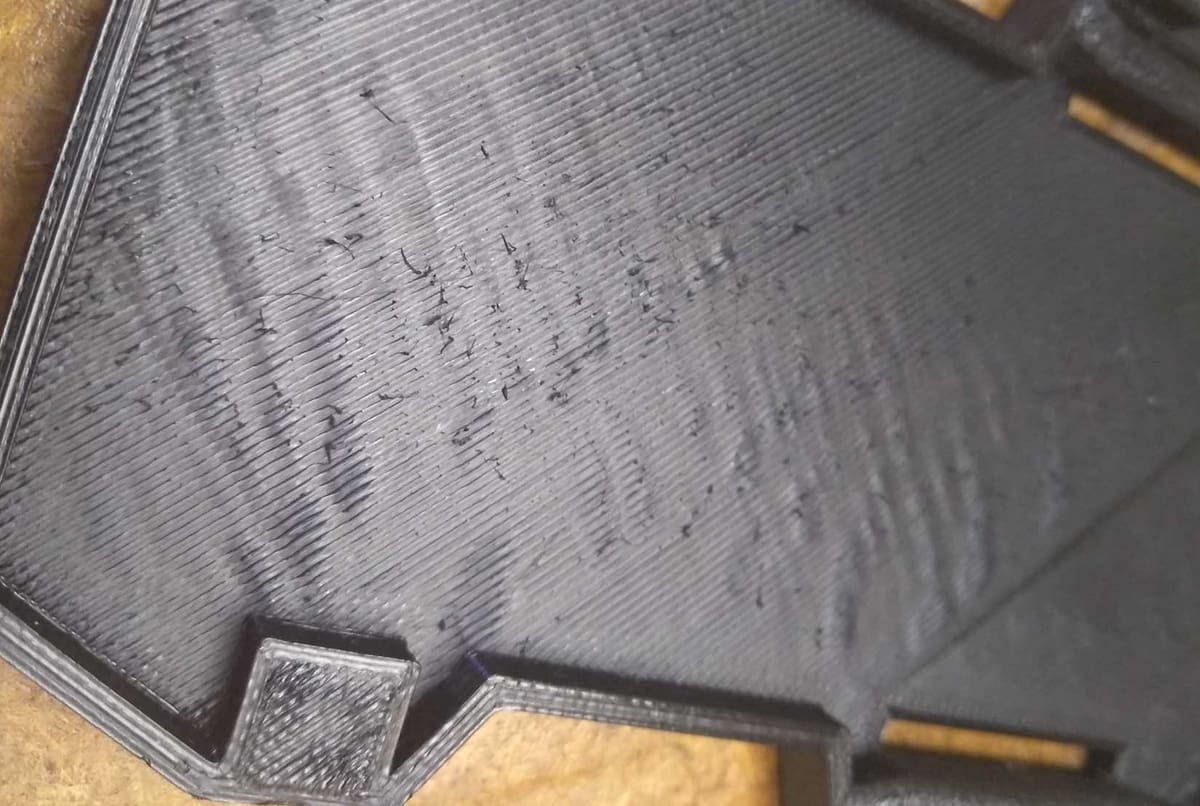
Over-extrusion is the opposite of under-extrusion. It happens when too much plastic is extruded, causing the top surface to be bumpy and the print to be dimensionally inaccurate – especially larger than anticipated.
If over-extrusion is minor, it’s likely caused by a flow rate that’s a bit too high. This can be resolved by tuning the Flow setting in Cura.
If major over-extrusion occurs, it’s highly likely due to an overly high E-step value, and you’ll need to calibrate your extruder to resolve the issue. In some cases, you might notice over-extrusion occurring in the infill or at corners. This indicates that pressure/linear advance values may be too low. You can check out our guides on linear/pressure advance for solutions.
How to Do It
Given the problems that may occur, you now see why flow rates are important! Below, we’ll show you how to tune Cura’s Flow setting.
Initial Checks

Before beginning to tune, it’s important that we make sure there are no underlying problems or limitations of the printer. You’ll first need to tune your printer’s E-steps as well as linear/pressure advance. You’ll also want to verify that the hot end and nozzle are not clogged. Make sure that settings such as temperature, acceleration, and speed are set appropriately (do not “outrun” your hot end – that is, exceed the hot end’s volumetric flow rate at a certain temperature).
Flow Settings
Here’s how to locate the flow settings in the newest Cura version (5.6.0 at the time of writing):
- Open Cura, then the Print settings panel.
- Switch to “Expert” mode using the hamburger button (the 3 lines) beside “Search settings” field.
- Scroll down to and toggle open “Material”. Among the Material settings, you should see the Flow setting along with a range of sub-settings, such as “Wall Flow”, “Top/Bottom Flow”, “Infill Flow”, and others.
Changing the “Flow” setting will change the value for all the sub-settings, so changing only the “Flow” setting will be sufficient for now. Most of the time, a constant flow value for all sub-settings works fine (assuming no other problems with the printer play a role), but feel free to play around for best results.
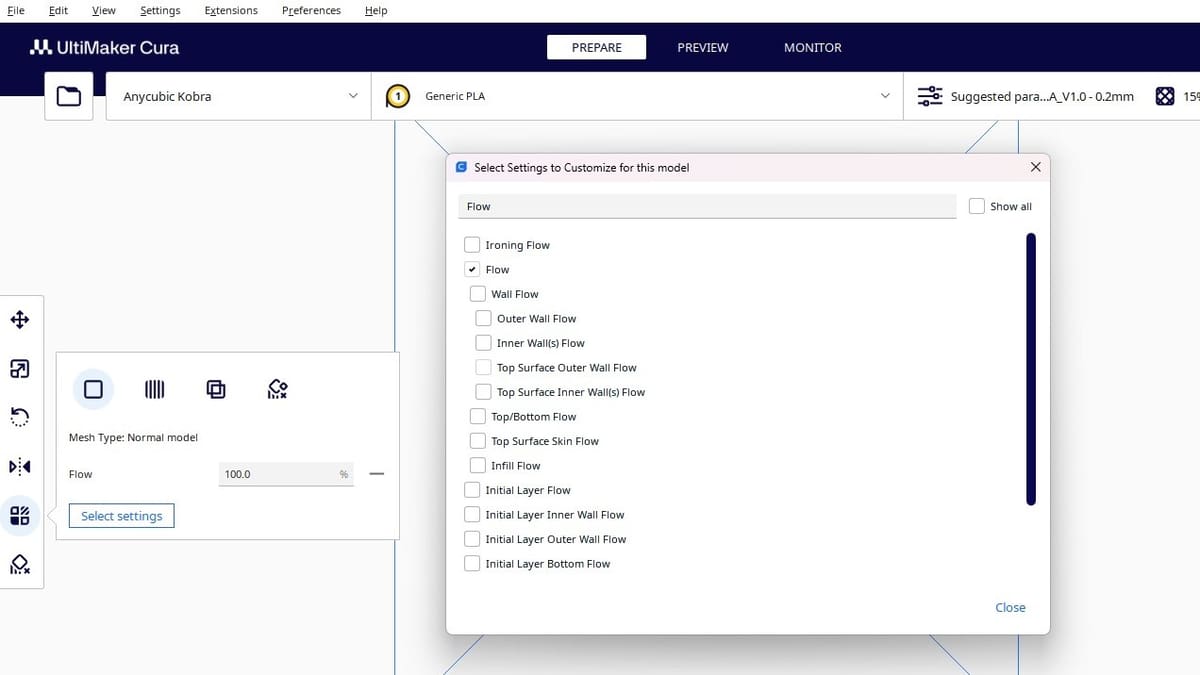
Per Model Settings
Lastly, if you have multiple models loaded in Cura, you can adjust the Flow settings per model using Cura’s Adjustment Toolbar (the toolbar at the left side of the screen when you click on a model):
- Left-click the model whose settings you want to adjust
- Click the “Per Model Settings” menu on the Adjustment toolbar
- Click the “Select settings” button, then type “flow” into the Filter field.
- In the pop-up window, check all of the settings you want to adjust, then press “Close”.
All of the settings should now appear in the Per Model Settings menu on the Adjustment toolbar, and the values can be changed as you please.
Tuning
Now, let’s get to tuning! Here, we’re going to use the “visual” method. This method doesn’t require any tools and can give highly accurate and repeatable results – even with small unavoidable variances such as slight axis inaccuracy or filament diameter fluctuations.
You might also have encountered the popular wall thickness tuning method, which involves measuring the walls of a test print with calipers. We’re not going to use this method because it can be inaccurate due to a few reasons:
- The maximum accuracy of a high-quality caliper is only ±0.01 mm.
- As the measurement is based on many layers, even very slight inaccuracies caused by other parts of the printer will affect the measurement. For example, a small 0.01-mm (10 microns) X- or Y-axis deviation or a tiny bit of Z wobble can add up and result in tens of microns of inaccuracy.
- As the measured wall is thin, the reading you get is largely based on the amount of pressure you squeeze the caliper. Squeeze the caliper slightly too hard or too soft, and the reading will easily be off by another tens of microns.
These variances are unavoidable and quickly add up. For a wall of 0.5 mm or 1 mm, a 0.04-mm inaccuracy translates to 8% and 4% of maximum accuracy respectively. This makes the wall thickness tuning method problematic.
The visual method directly uses real-life print results. As it doesn’t require any tools, the limitations of a caliper won’t get in the way. Since the results are shown in an actual print, small printer variances will be already compensated, making this method highly repeatable. Furthermore, it allows for small and accurate intervals (e.g. 0.5% flow rate intervals) for extra precise tuning.
Set Up
The steps are as follows:
- Import multiple 30 x 30 x 3 mm cuboids into Cura.
- Decide on the range of flow rates you’re testing. For example, PLA and PETG will be around 96-102%, and ABS around 89-94%, but this can differ by brand.
- Set differing flow rates for each cuboid, each 1% from each other (For example, 89%, 90%, 91%, 92%, 93%, 94%). To do this, select each cuboid, then adjust the Flow settings via the “Per Model Settings” icon on the Adjustment Toolbar.
- Using the Print Settings Panel, set two bottom layers, two layers of dense (less than 30%) infill, and as many top layers as possible for all the cuboids.
- Slice the file by clicking the “Slice” button at the bottom right corner of the screen.
- Save the sliced .gcode file to an SD card or use a wireless interface to start the print!
Analyzing Results
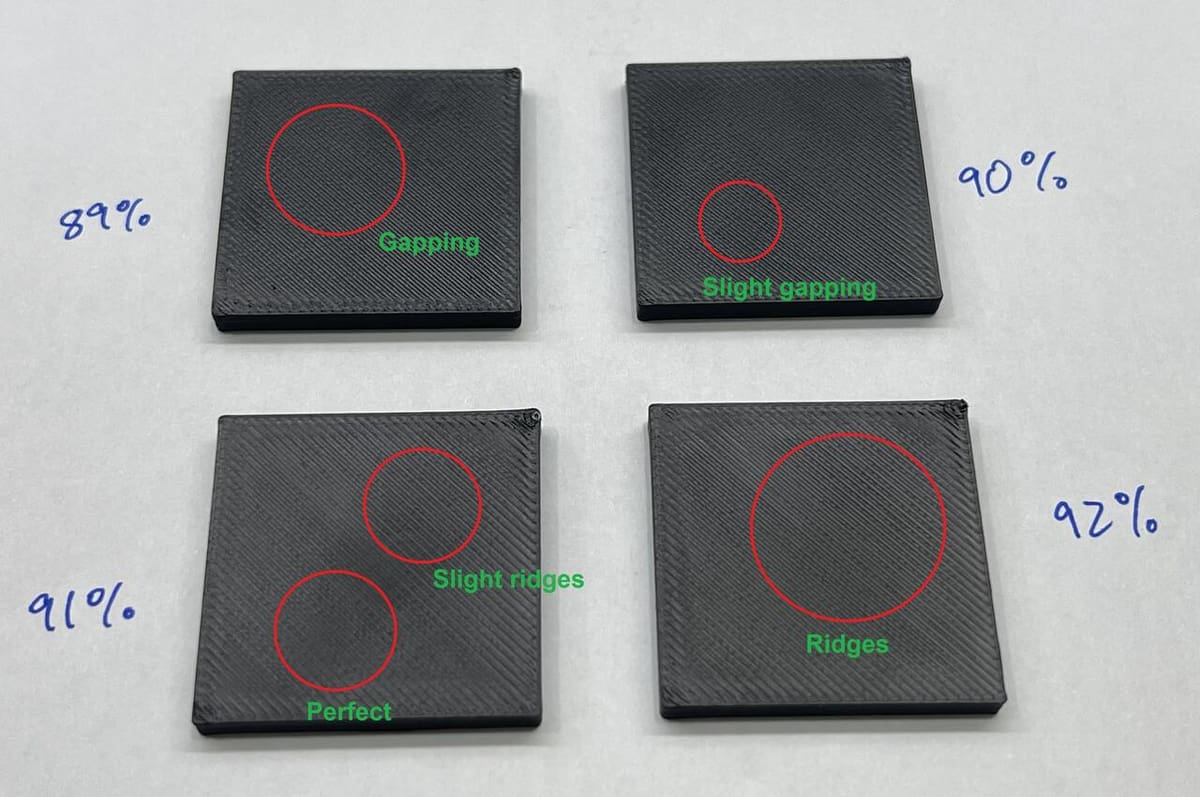
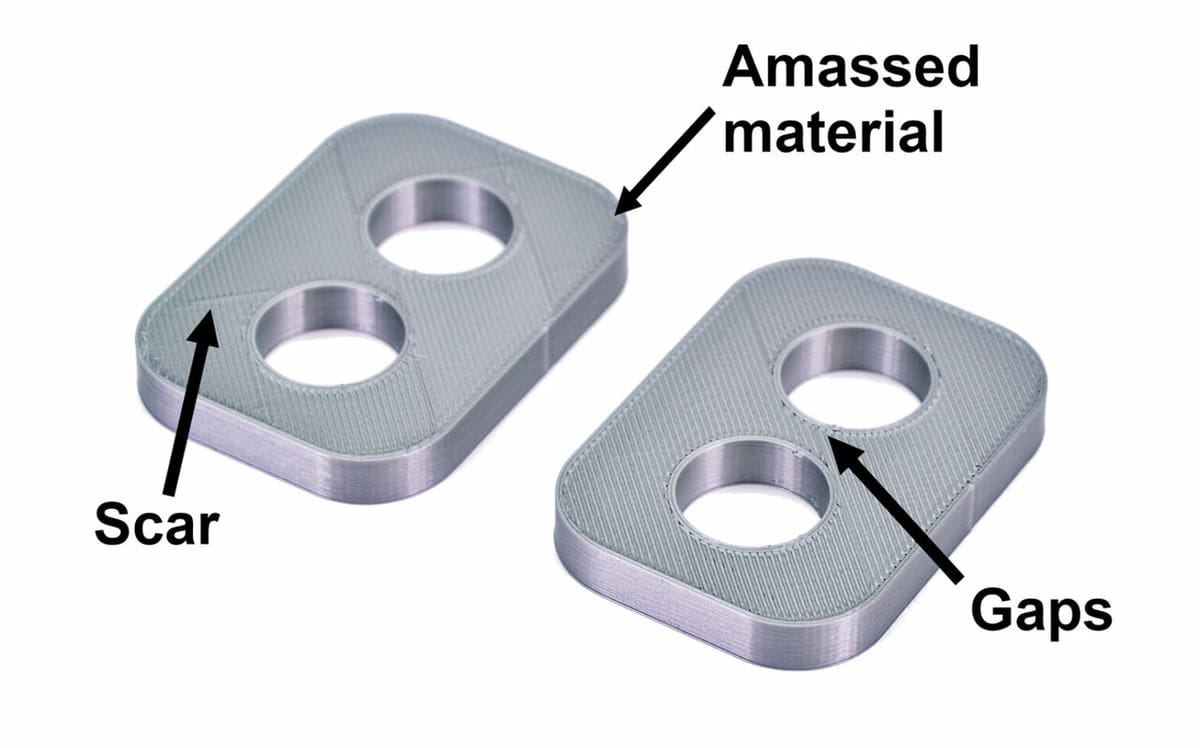
To analyze the results, mark each cuboid with the flow rate it was printed at. Then, look at which cuboid shows an optimal flow rate. There should be few, if any, “ridges” – which are protrusions in the top layer that signal over-extrusion. Also, be on the lookout for “gaps” in the top layer, which are signs of under-extrusion.
For example, among the samples in the picture above, choosing 90.7% would be a good choice. The actual optimal flow rate is between 90% and 91%, but closer to 91%.
Keep in mind that there is no “perfect” result. Small variations in filament diameter, the infamous inconsistent extrusion problem (for example, Prusa’s Issue #602 or Voron’s Issue #6), and other small problems play small roles in causing slight inaccuracies. Choose the best result, and feel free to run the test in smaller intervals – say 0.5% or even 0.2% – for extra precise tuning.
Most importantly, don’t forget to update your Cura settings with the tuned flow rate!
License: The text of "Cura Extrusion Multiplier: How to Improve Your Prints" by All3DP is licensed under a Creative Commons Attribution 4.0 International License.