Ender 3 (V2/Pro/S1) Laser Engraver: How to Upgrade

If you want your Ender 3, V2, S1, Pro, or S1 Pro to do more than 3D print, read on to see how to upgrade your Ender 3 to a laser engraver!
Creality’s Ender 3 is a popular and affordable hobbyist 3D printer with a decent build volume and mostly sheet metal construction. The printer’s original success led Creality to offer improved evolutions, including the Ender 3 Pro, the Ender 3 V2, the Ender 3 S1, and the Ender 3 S1 Pro (plus a few more).
Contrary to 3D printing, laser engraving works by subtraction rather than addition. Laser engraving uses a high-power laser to engrave a base material like wood, acrylic, or aluminum.
The Ender 3, being open-source and community-supported, can be easily turned into a laser engraver with just a few parts and modifications. You can complete the conversion using Creality’s laser engraver module ($70-$200; the price varies depending on the laser intensity).
Creality’s newest laser modules can be found in two versions. One includes a control module, which removes the management through the printer’s mainboard, and is compatible, according to Creality, with the Ender 3, V2, Pro, Neo, V2 Neo, Max Neo, S1, S1 Plus, 3 S1 Pro, and more. The second version of the laser module is only compatible with the Ender 3 S1 and S1 Pro and offers a slightly higher temperature range, and it requires an update to the firmware as it doesn’t include the control module.
According to Creality, their module is capable of engraving into a wide range of materials, including wood, paper, acrylic, aluminum, and a few other metals. That said, several makers have contradicted Creality’s wood and acrylic claims in the comment section of the tutorial video.
In this article, we’ll be going over how to install Creality’s laser engraving module on any of the Ender 3s. But before we get into the upgrade and how to do it, let’s go over some safety considerations.

Safety First
Laser engraving utilizes a high-power laser that produces an intense beam of heat to engrave objects. For reference, a laser’s power or intensity is measured in watts. The higher the wattage, the more powerful (and dangerous) it is.
Laser modules typically have a wattage ranging from 500 mW to 20 W. The upgrades we’ll be describing use 1.6-W, 5-W, and 10-W lasers, and can be hazardous. Just like you shouldn’t touch the nozzle on a 3D printer, you should never put your hand under the laser.
Also, because laser beams are very bright, looking directly at the light could cause serious eye damage. Always wear proper eye protection to look at the laser engraving module when it’s at work. While kits often come with a pair of safety glasses, they may not be of the best quality, so you may want to invest in some reliable (and comfortable) glasses.
Next, let’s take a look at what you’ll need to add the laser engraver to your Ender 3.
What You'll Need
This upgrade has a relatively short list of requirements.
Hardware
- Creality’s laser engraver module
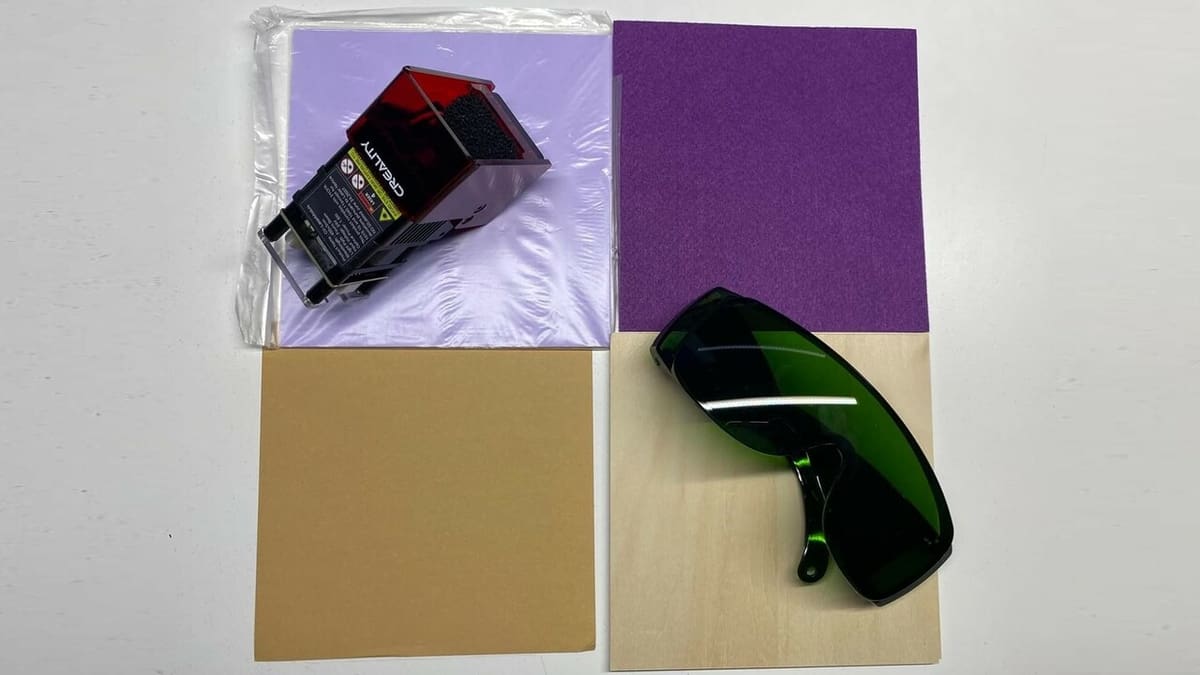
- A material or plate to engrave into (two wooden boards are included in Creality’s kit)
- Safety glasses capable of protecting eyes from the laser (included in Creality’s kit)
- A MicroSD card to save your files to
- Binder clips for holding the engraving board down
- Zip ties for cable management
- A material or plate to protect the 3D printer (to avoid possible accidents should the laser go through the engraved material)
Software
- Creality Print, which you can download for free
- (Optional) G-code editor (if you want to change some of the auto-generated values)
Before we get started, you may want to watch Creality’s official installation video, a video by Creality After-sale, or 3D Prints&Builds’ setup video (which, as mentioned, includes a firmware update because the upgrade doesn’t include the control module). These quick glances will give you an idea of what skills and how much work are required, so you can decide if they’re a challenge you want to take on.
Tech Specs
Before buying the upgrade, it’s good to know what it can do and whether its capabilities will suit your needs.
The 500-mW laser used for the older Ender 3 series is no longer supported or sold directly from Creality. The company moved on to larger lasers that can be more easily installed and are more straightforward to control.
Here are some of the technical specifications for the larger lasers to help you decide what meets your needs. For shared parameters, they all work with Creality Print, LightBurn, and LaserGRBL, and can create a detail of 0.06 mm.
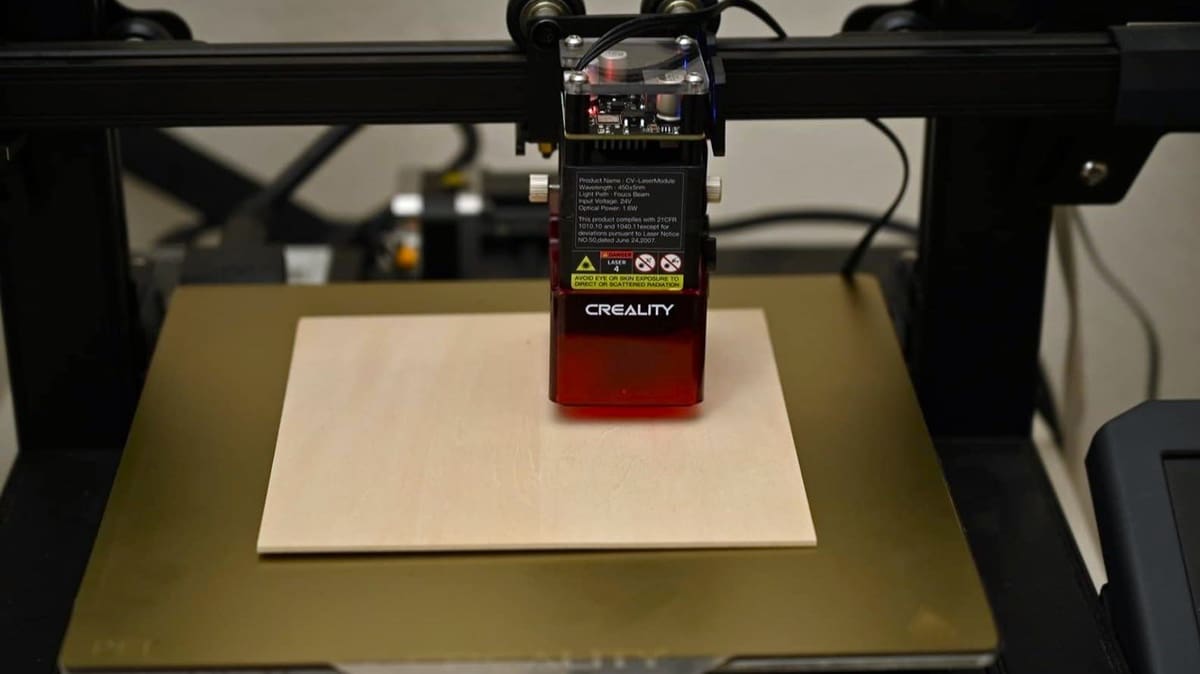
- Creality 1.6-W laser
- Wavelength: 450 nm
- Engravable materials: cardboard, paper, wood, bamboo board, rubber, leather, fabric
- Cut depth: 0.05-mm balsa wood
- Creality 5-W laser
- Wavelength: 455 nm
- Engravable materials: cardboard, paper, wood, bamboo board, rubber, leather, fabric, acrylic, plastic, lacquered metal
- Cut depth: 5-mm balsa wood
- Creality 10-W laser
- Wavelength: 455 nm
- Engravable materials: cardboard, paper, wood, bamboo board, rubber, leather, fabric, acrylic, plastic, lacquered metal, cloth, PVC, ceramics, matte stainless steal, metal spray surface, anodized surface, electric surface, dark metal surface
- Cut depth: 12-mm balsa wood, 10-mm plywood, 18-mm wood, 12-mm acrylic
Printer Compatibility
The newest lasers from Creality won’t plug into the fan power supply like the older 500-mW models did. This is better as you won’t have to take apart the motherboard for the installation.
The laser modules (as sold by Creality) are compatible with the Ender 3, 3 V2, 3 Pro, S1, S1 Pro, 5, and 5 Pro, among others, and they include a control board that makes installing and controlling it a lot faster. The inclusion of the bracket means that you can avoid 3D printing one – unless, for aesthetic reasons, you want to.
As mentioned, Creality is also (at time of writing) offering the CV laser module specific to the S1, S1 Pro, and S1 Plus with 1.6 W and 5 W. This version doesn’t include the control hub and, as such, requires a firmware update to the 3D printer (which adds a few more steps to the upgrade but shouldn’t be too challenging).
With a clearer understanding of which module and printer will work best for you, let’s look into installation of the laser upgrade that includes the control module, starting with the hardware.
Installation: Hardware
Installation isn’t difficult at all, taking at most an hour if you’re unfamiliar with the Ender 3. Make sure you follow all instructions. Let’s get started!
- Turn off your printer.
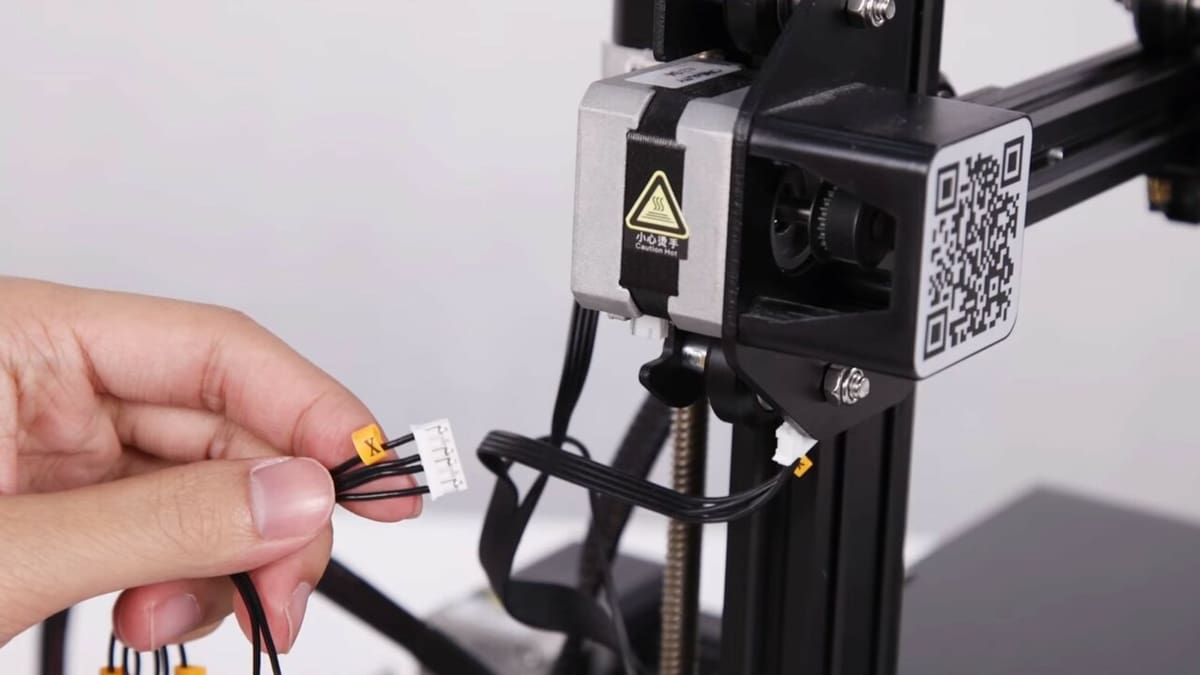
- The X- and Y-axis wires going to the stepper motors and endpoint safety switches need to be removed.
- Insert the wires included with the laser into the corresponding pins for the X- and Y-axis (see image above).
- The ‘Z’ marked cable needs to be connected to the laser module.
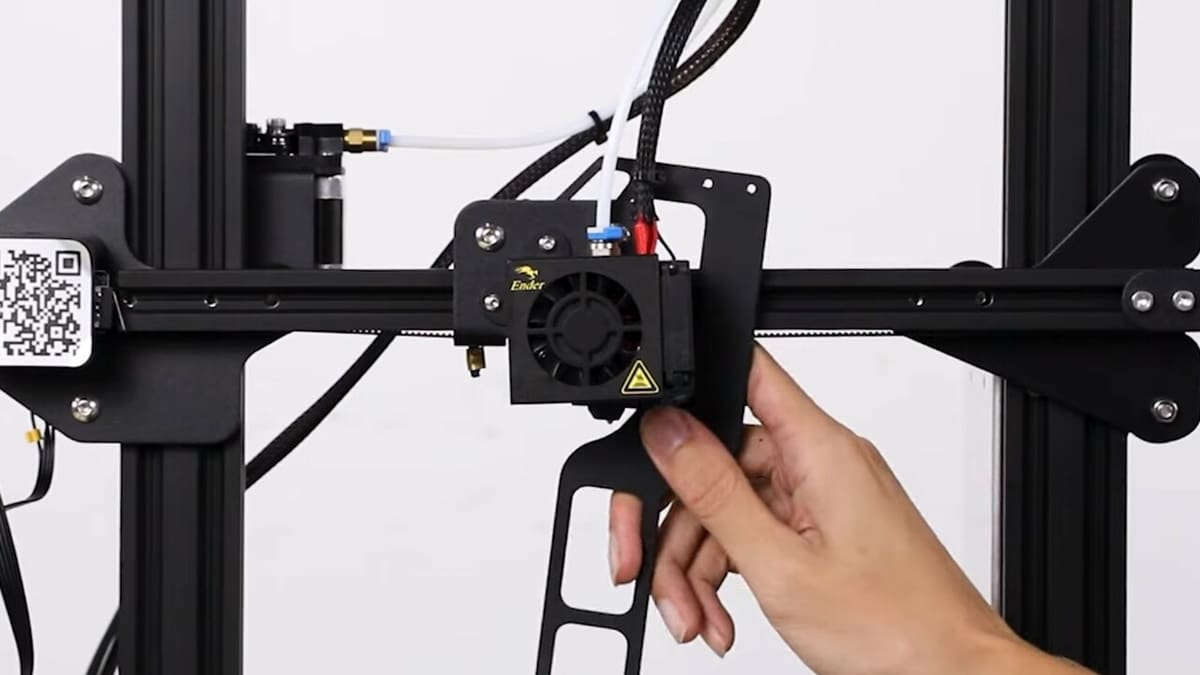
- Wire the laser engraver module to the printhead and attach it using the magnets on the side of the module.
- Organize the wires using zip ties to prevent any kind of issue or entanglement.
- Attach your base engraving material to the print bed using the binder clips or magnetic strips.
- Connect the power adapter to the laser control hub and plug it in.
- Put on your glasses.
- Your laser can now be turned on.
Note that in order to turn your Ender 3 back into a 3D printer, you’ll need to do these steps in reverse.
That’s it! You’ve successfully turned your Ender 3 into a laser engraver!
Please note that all of the lasers might interact with other upgrades depending on how you choose to install them. For example, the BLTouch isn’t needed for laser engraving and could get in the way based on the laser engraver mount you decide to use. While removing the BLTouch might seem like a task, it doesn’t add much work relative to what you will need to do to convert from 3D printer to laser engraver.
Installation: Software

To start an engraving, you’ll need proper software. Older Ender models could make use of the Creality Workshop, but as this is no longer supported, users are encouraged to make use of Creality Print. Make sure to follow the steps below, which will include default settings based on the 1.6-W laser:
- Download and open Creality Print.
- The first time you open Creality Print, you’ll be prompted to add a machine (in this case, the “Ender-3 S1 Laser”). If you’ve already used Creality Print in the past, find the printer selection bar on the top right (listing the printers that have already been added), and select the model from the drop-down menu or click on “Add > Ender-3 S1 Laser” if you haven’t added it before.
- In the top right, you should see two tabs: “FDM” and “Laser”. You will need to click “Laser” to view the 2D build plate and view your advanced laser engraving options.
- Download the JPG, SVG, PNG, BMP, PDF, NG, TIF, or DXF file that you want to engrave.
- From the menu on the left (with five icons), click on the second one, “Image”, and select your file. You also have the option to add text, a circle, or a rectangle.
- On the right menu, under “Object List”, select the object and, under “Configure”, adjust a variety of settings.
- “Parameter” includes the options to move, size, or rotate the design, which you can also do manually by selecting the objects on the build plate.
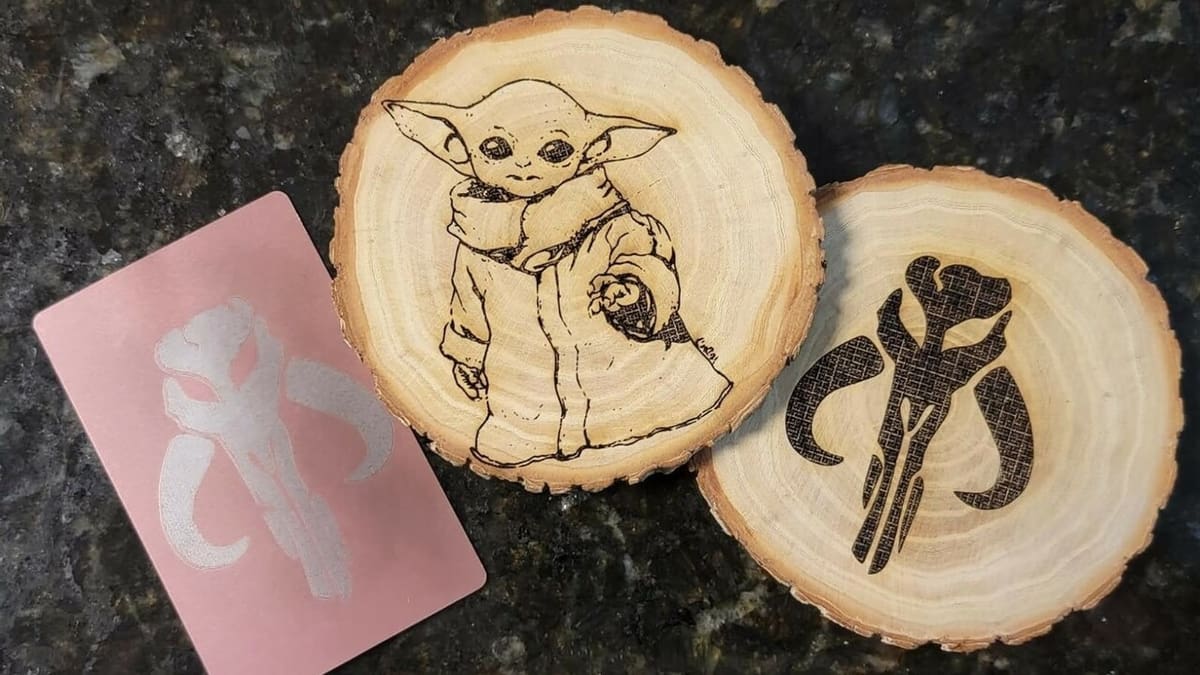
- “Processing Mode” lets you choose between “Black”, “Line Gray”, “Jitter Gray”, and “Vector”, each with their own subset of settings (e.g. contrast, brightness, density); see more information below.
- “Working Parameters” refers to different combinations of speed and power to achieve the desired engraving darkness. This will depend on the power level of your laser, your material of choice, and your objective.
- Adjust the size and placement of the design to match the position on the plate of the object you’re engraving onto.
- You can add more image files, and they will appear in the Object List. You can either select them all and change all their settings together, or opt for an individual design and only change its settings to generate different colors or levels of engraving.
- Click “Generate Gcode” and save the file to your MicroSD card.
Processing Settings
- Run Count: This refers to the number of times the laser will go over a spot. You could opt for multiple runs and a lower power rate, or one run and a higher intensity. Research and trial and error can help you find the best results, especially as this is so dependent on your laser’s wattage and the material of choice.
- Power Rate: 0-80% is recommended for wooden materials and the 1.6-W laser.
- Work Speed: Up to 4,000 mm/s at around 80% power, and as low as 120 mm/s work for very dark finishes, and since the exposure is so long, you won’t need excess power.
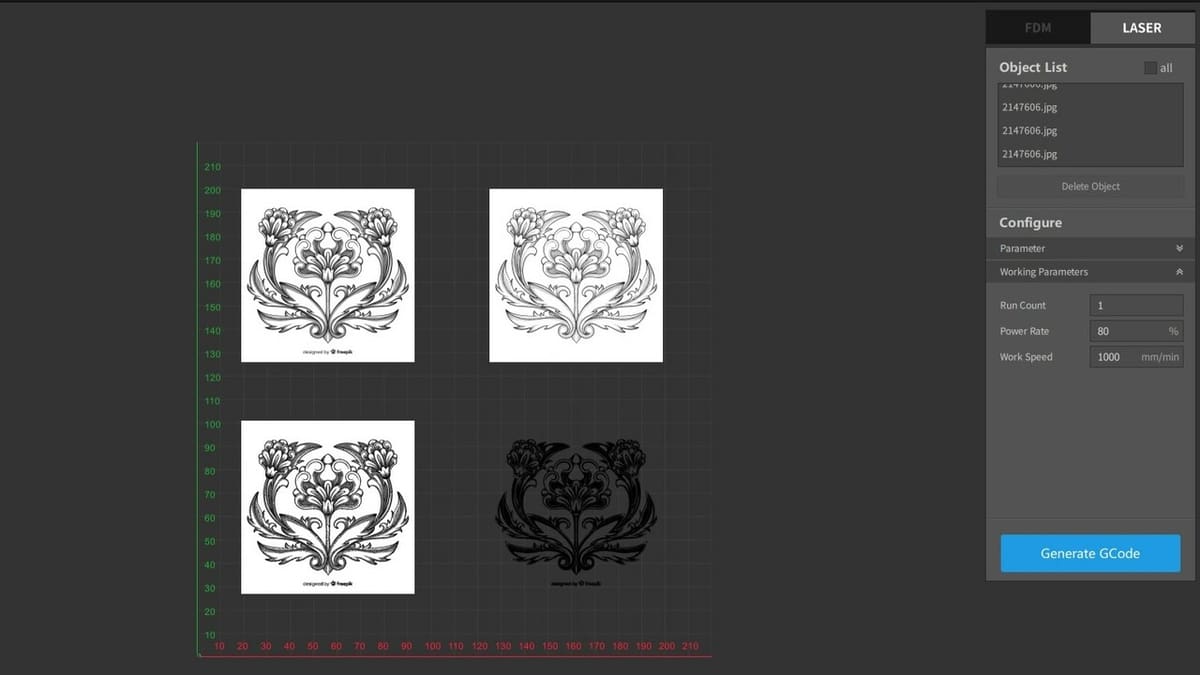
If you want to try different processing modes, you can select a series of images and change their configuration. For example, as seen above, the same design would be engraved with “Black”, “Line Gray”, “Jitter Gray”, and “Vector” processing modes.
LightBurn
As an alternative to Creality Print, you can also try the premium software LightBurn, which is available with a 30-day free trial for you to evaluate if the investment is worth it or not, depending on your needs. LightBurn includes explanations of all its options and applications, so it’s great if you are a first-time laser engraver and want to learn. That said, with a price tag of ~$120 (depending on the license), if you’re just getting started or don’t have a dedicated interest in laser engraving, the free trial might just be enough to get your bearings.
Engraving
Now that everything’s ready, here’s how you can start an engraving on your Ender 3:
- Attach your base engraving object to the print bed with binder clips, at the position you included for engraving in your G-code.
- Insert the MicroSD card into your control board. (Alternatively, you can control the engraving from your computer if you’ve connected it – it depends on whether you want to work with the devices or if you want to simply work on the control module.)
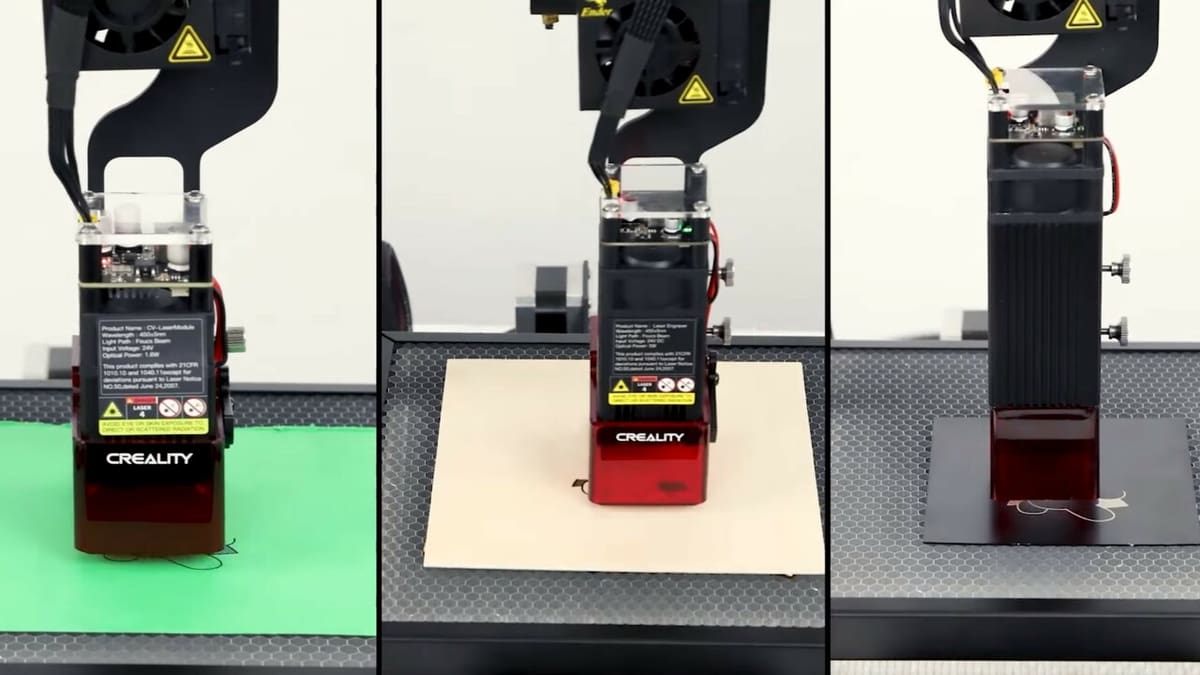
- Next, you will adjust the laser focus to the appropriate height. With the 1.6- and 5-W laser, the focusing bar needs to touch the engraving surface and is then rotated up and out of the way. With the 10-W laser, a focus strip is used that has different heights depending on the width of the material to be engraved.
- Press the control board button once to preview your engraving area.
- Put on your safety goggles.
- After previewing is completed, you can press the control button again to start engraving.
And that’s it!
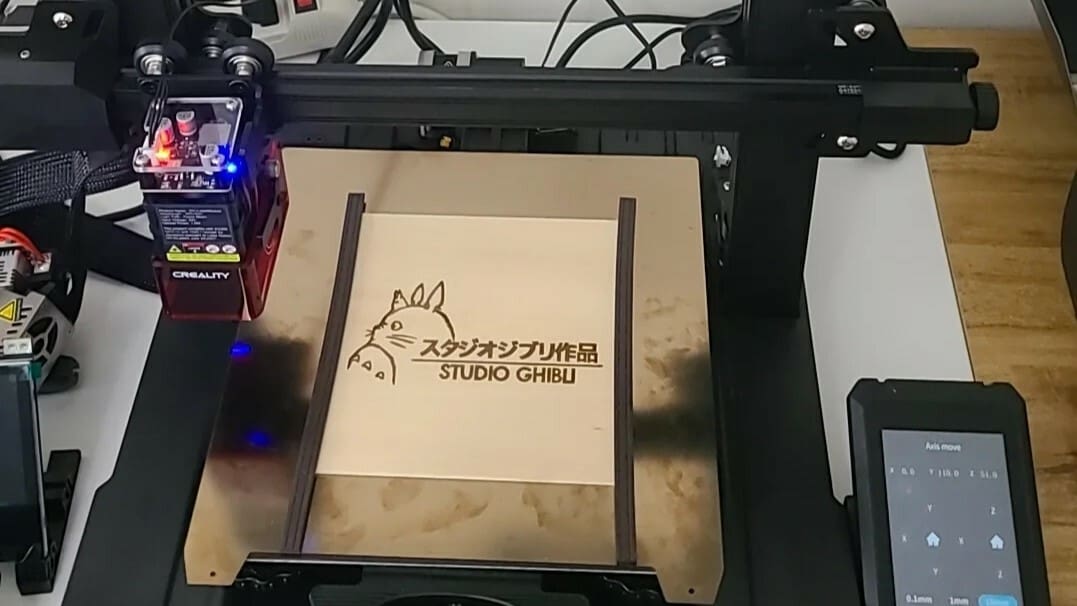
As the laser engraver module takes up some space, you’ll lose some build area. However, you should be able to safely engrave within an area up to 200 x 200 mm for Ender 3 models, which is suitable for many small projects.
Tips, Tricks, & Tests
If you have a problem with engraving or just want to be prepared, check out the following tips and tricks for getting the most out of your new laser engraver:
- Adjust the focus: Your laser probably won’t be focused when you first use it. As a result, the engravings won’t be as precise or detailed as you might want them to be. Rotate the knob around the laser to adjust the focus. Make sure not to put your hand under the laser!
- Find the right height: Depending on the type of material and the thickness of the board, you may need to change your Z-axis height. If you’re trying to engrave a strong material, you should move your printhead lower on the Z-axis. You can adjust the default Z-axis height in your G-code editor.
- Know the limits: While your Ender 3 is now a laser engraver, it’s not the most powerful one. As we’ve mentioned, the laser module can engrave plastics, wood, and soft metals like aluminum, so don’t try something like steel!
- Center your laser: If your laser beam isn’t centered on your engraving platform, where you place a design on Creality Print won’t be the same location on your engraving surface. A misplaced engraving could accidentally burn the frame underneath the print bed or the binder clips. Make sure you center your laser beam by adjusting in your firmware or on your display, just like you would with a nozzle.
- Check your power: Make sure you don’t have power or voltage issues by using a multimeter. This is both for safety and so that your laser receives enough power to perform as instructed.
If you want to test out your new laser engraver, you can try a 2D Benchy, a small box, an owl pendant, or even your own logo.
License: The text of "Ender 3 (V2/Pro/S1) Laser Engraver: How to Upgrade" by All3DP is licensed under a Creative Commons Attribution 4.0 International License.