Ender 3 (V2/Pro) Dual Z-axis Upgrade: How to Install It

If you're having stability problems on an Ender 3, V2, or Pro, a dual Z-axis upgrade is the way to go. Read on to find out all about it!
Easy Does It

The Ender 3 is regarded as one of the best budget 3D printers, especially for hobbyists and people who want to learn more about 3D printing through trial and error. Part of the reason it’s so popular is that the Ender 3 and its successors (the Ender 3 Pro and Ender 3 V2) are open source and don’t use any proprietary firmware or hardware.
The Ender 3 models aren’t without their problems, though, and one way to fix problems or improve the printers is through installing upgrades, both physical (hardware) and digital (firmware). There are many upgrades available for the Ender 3s, both to buy and to 3D print, which can improve printing quality and functionality.
In this article, we’ll be taking a look at a popular upgrade to the Ender 3, Pro, and V2 that adds stability to the X-axis gantry through the use of another Z rod. The following sections will inform you about the specific upgrade and guide you step-by-step through the installation process. Let’s jump in!

Dual Wielding
The upgrade we’ll be presenting fixes one of the most frustrating annoyances for printing on the Ender 3s: X-axis stability. The Ender 3, Pro, and V2 are excellent printers, but they only have one Z rod to support the X-axis gantry. (The gantry is the apparatus that holds the hot end carriage above the print bed.)
The Problem
On a stock Ender 3, the X-axis gantry can sometimes lean and tilt because of how much weight it puts on the one Z rod. This can compromise print quality, including causing bed leveling issues, as the hot end can be at a different height along the X gantry if the gantry is tilted or wobbles. This wobbling can also lead to other issues, such as ringing in a print.
The Solution
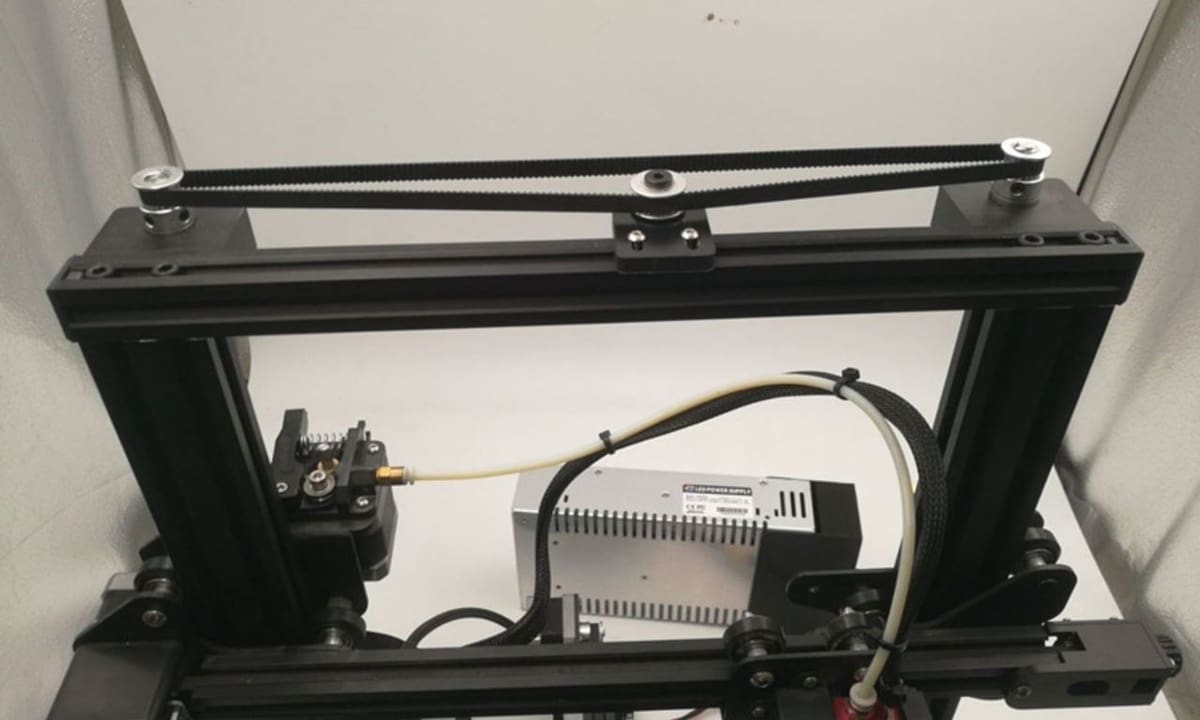
Some people tighten the X gantry screws when they experience a tilted or wobbly gantry. However, this is more of a temporary fix for a larger issue, whereas installing an additional Z rod should resolve the issues permanently. With this upgrade, you’ll be adding an additional Z rod on the other side of the gantry, to offer more stability and ensure a level hot end carriage.
The Caveat
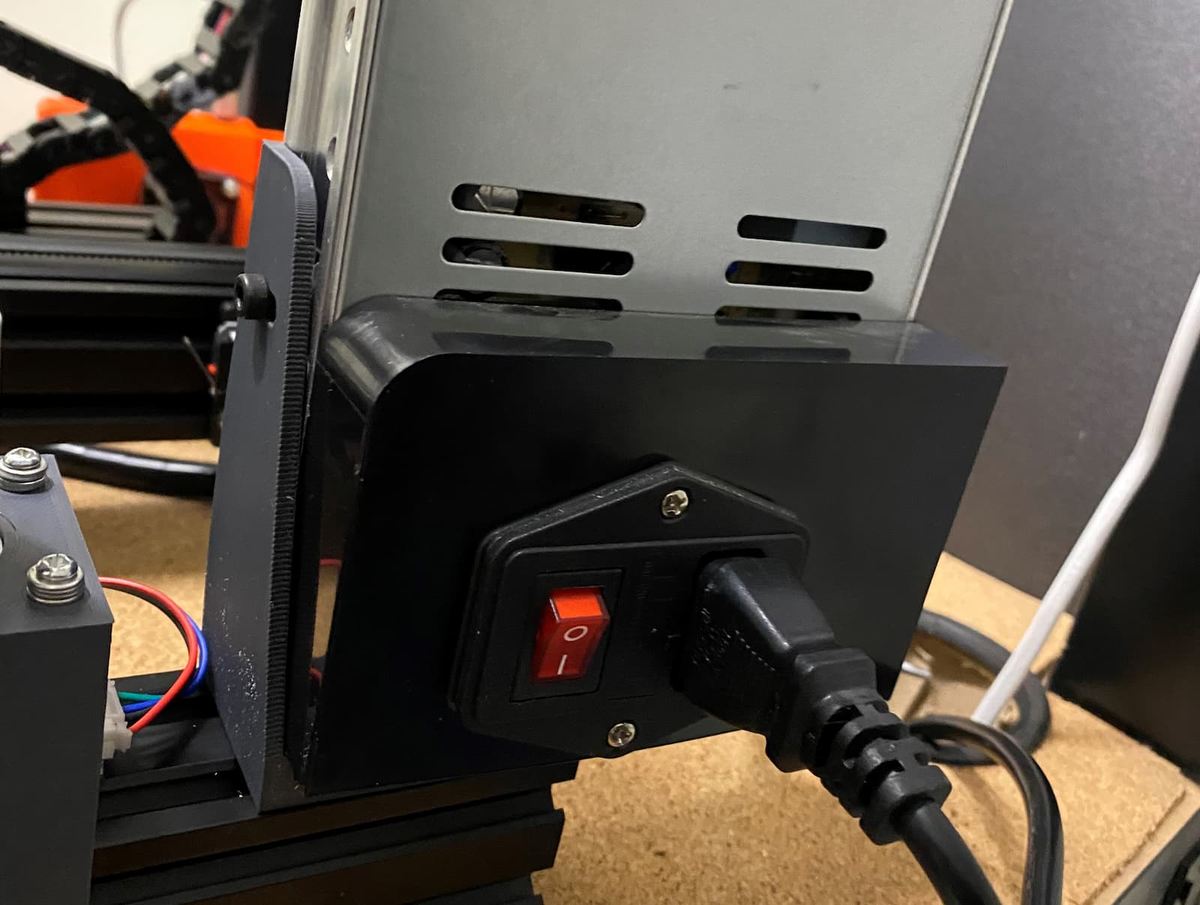
One important note is that, if you’re upgrading an original Ender 3 or Ender 3 Pro, you’ll have to find a new spot to put your power supply unit (PSU), which is on the right side of your machine behind the LCD screen. You can reposition your PSU by shifting it using a 3D printable PSU mount to keep it out of the way of your new Z-axis rod, while still keeping it attached to your printer.
On the other hand, if you’re upgrading an Ender 3 V2, the PSU is conveniently stored beneath the frame, so you won’t have to worry about moving it.
What You'll Need

For this upgrade, you’ll need some tools that should’ve come with your printer as well as some parts that’ll need to be purchased. We’ve chosen to use TH3D’s Ender 3 Dual Z Upgrade Kit, which is well documented and reasonably priced (around $70). If you’d like a cheaper option, you can also check out a non-brand option. Either way, you’ll be getting an array of different parts.
As we mentioned, you’ll first need to move your PSU. To reattach it to your printer rather than just having it lying next to it, you can 3D print one of the models TH3D has listed on their website. As a bonus, moving your PSU to a more inconspicuous location by mounting it will make your printer look more organized.
For this upgrade, make sure you have the following materials (all should be included in the TH3D kit or whichever kit you choose):
- 4x M4 screws with T-nuts for bearing blocks
- 2x all-metal Z bearing blocks for Z-rods with bearings preinstalled
- 2x M3 screws with T-nuts & washers
- 3x M5 spacers
- 3x M5 screws
- 1x ACM tensioner bracket with idler preinstalled
- 2x M8 Pulleys
- 1x GT2 belt
- 1x Z rod
Also, make sure you have all of the following tools:
- A double-ended wrench
- An assortment of Allen keys (1.5, 2, 2.5, 3, 4 mm)
- A small grub screw key (extra small Allen key)
Once you’ve got all your equipment, it’s time to begin!
The Steps
Below is an overview of the steps. However, if you want to watch someone else do it, The Edge of Tech’s YouTube video is a useful guide. You can also read TH3D’s documentation.
- Unscrew and remove the PSU.
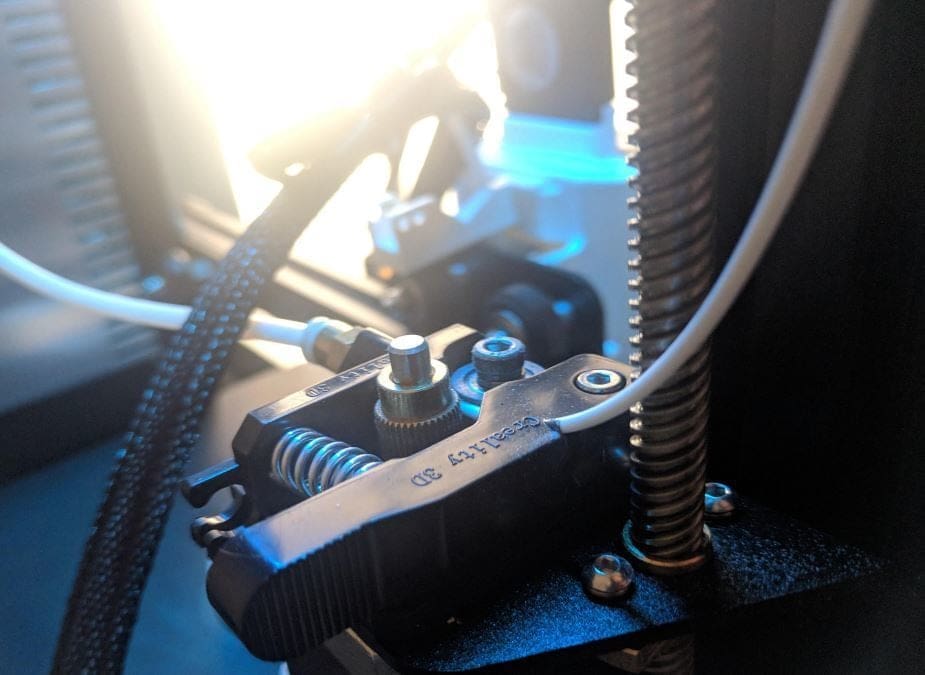
- Unscrew and disassemble the bracket attached to the threaded Z-axis rod.
- Assemble the new bracket. by taking your old J-shaped bracket and putting one of the original bolts along with a washer through the back of the second-highest hole in the old bracket. Then, slide the eccentric nut, bearing, and spacer onto the bolt. Finally, attach the new bracket on top and screw on a nut to secure it.
- Attach the bracket piece onto the other side of the printer by attaching it to the X-axis gantry and the frame.
- Slide one of the provided bearing blocks through the top extrusion over where the PSU used to be and screw it in.
- Remove your original Z rod from the other side by unscrewing it with your hands.
- Slide your old Z rod through the bearing block and screw it through the bracket rod coupler.
- Slide the other bearing block over the stepper motor where the old Z rod used to be.
- Slide your new Z rod through the bearing block, bracket rod coupler, and stepper motor rod coupler.
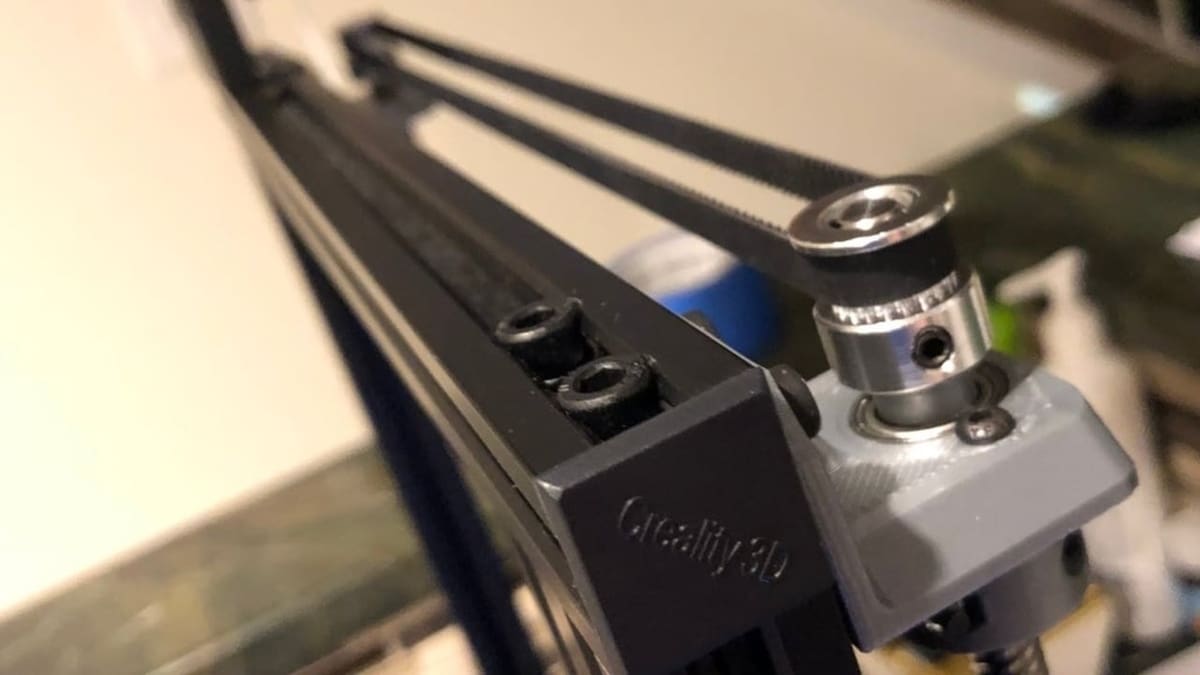
- Attach the geared belt pulleys to the top of each bearing block by screwing them on the sticking-out part of the Z rods.
- Attach the belt tensioner to the top extrusion of the printer and wrap the provided belt around each pulley.
- Extend the belt tensioner as far out as you can and lock it in by screwing it.
That’s it! You’ve just completed this helpful upgrade!
Troubleshooting
Now that you’ve gone through the installation process, here are some common things to pay attention to or that might help if you get stuck:
- Remove the filament spool holder if it’s on the top of your printer.
- Level the X-axis gantry by measuring its height on both sides.
- Make sure your Z rods aren’t at all crooked.
- Unscrew the bracket rod coupler screws just a little bit to allow the Z rod to go through more easily.
- Unplug your printer to disable the stepper motors from locking in place.
- Wiggle the T-nuts on the bearing blocks and belt tensioner to get them to go through.
- Remove any extrusion end caps you have so that the T-nuts can go through.
- Level your bed and print test prints before using your upgraded printer.
If you have any other issues that these tips don’t solve, you can find most fixes online. Reddit, Thingiverse forums, and YouTube can be very helpful for upgrades like this one. TH3D also states that they offer product support for the upgrade and can help you with any issues.
Many users have noticed an improved print quality on their Ender 3, Pro, or V2 after installing the upgrade, but it may take some testing and leveling to get the best results. Happy printing!
Lead image source: Scuddy via Thingiverse
License: The text of "Ender 3 (V2/Pro) Dual Z-axis Upgrade: How to Install It" by All3DP is licensed under a Creative Commons Attribution 4.0 International License.