
Cura Guide to the Best Infill Patterns

Infill can look cool, add strength, and save money, but it all depends on the print. Find the best Cura infill patterns for your application.
Often, 3D printing is used to produce parts that could just as easily be made using another manufacturing technique. Although the final results might look the same, it’s what’s on the inside that counts.
One major benefit of 3D printing is the ability to vary the hollowness of a part. In manufacturing terms, a hollow part requires less time and material than a solid one, thereby reducing the overall weight and cost!
The inside of a 3D print is called infill, and it can be adjusted in terms of density – 0% is hollow while 100% is solid. Furthermore, how a part is filled in can be adjusted according to a wide variety of patterns, each with their own unique strengths and benefits.
In this article, let’s take a look at a variety of different infill patterns, specifically those that are available in Cura. Let’s get to it!
What Infill Patterns Are There?
In the latest version of Cura (5.10.0), there are 14 types of infill available for use. We’ve grouped them according to what they’re best suited for:
- Models and figurines: Lightning, lines, zig-zag
- “Standard” 3D prints: Grid, triangles, tri-hexagon
- Functional 3D prints: Cubic, cubic subdivision, octet, quarter cubic, gyroid
- Flexible 3D prints: Concentric, cross, cross 3D
Since Cura 5.5, there’s also the possibility of generating custom tiled infill patterns, including Honeycomb, but more on that later. For now, we’ll break down the standard patterns found in Cura.

Models & Figurines
Typical infill density: 0-15%
If they’re used as models or figurines, 3D prints don’t typically require a great deal of strength. That’s because they’re not subjected to heavy handling or put under stress. Some prototypes are also good candidates, as long as they’re not being tested for strength.
For such applications, the lightning, lines, or zig-zag infill patterns are best because they give the fastest prints.
- Lines: Similar to “rectilinear” in other slicers, this is a 2D grid of non-continuous lines where only one axis is printed per layer.
- Zig-zag: Essentially the same as Lines infill if “Connect Infill Lines” is selected. In other words, it’s one continuous line per layer, oriented in one direction.
- Lightning: An internal support structure that resembles lightning bolts, where it gets denser toward the top of the model. Since it can reduce material use by 90%, this infill type is great for faster prints.

Standard 3D Prints
Typical infill density: 15-50%
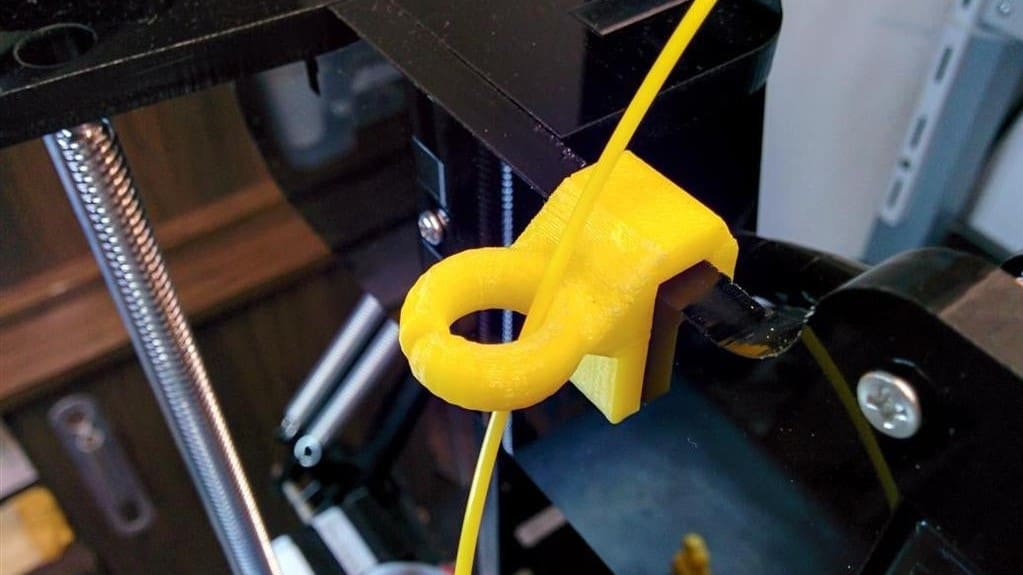
For 3D prints subjected to low stress, such as the above filament guide, a medium-strength infill pattern should be used. Infill patterns such as grid, triangles, or tri-hexagon are also appropriate. Note, however, that these patterns may increase print time by up to 25% compared to lines.
- Grid: A self-explanatory 2D pattern, the main advantage of a grid is print speed, as it’s the least complex of the three.
- Triangles: A 2D mesh made of triangles, this pattern has an inherent advantage in strength when a load is applied perpendicular to the object’s face. It also makes sense for parts with thin, rectangular components, which might otherwise have very few connections between walls.
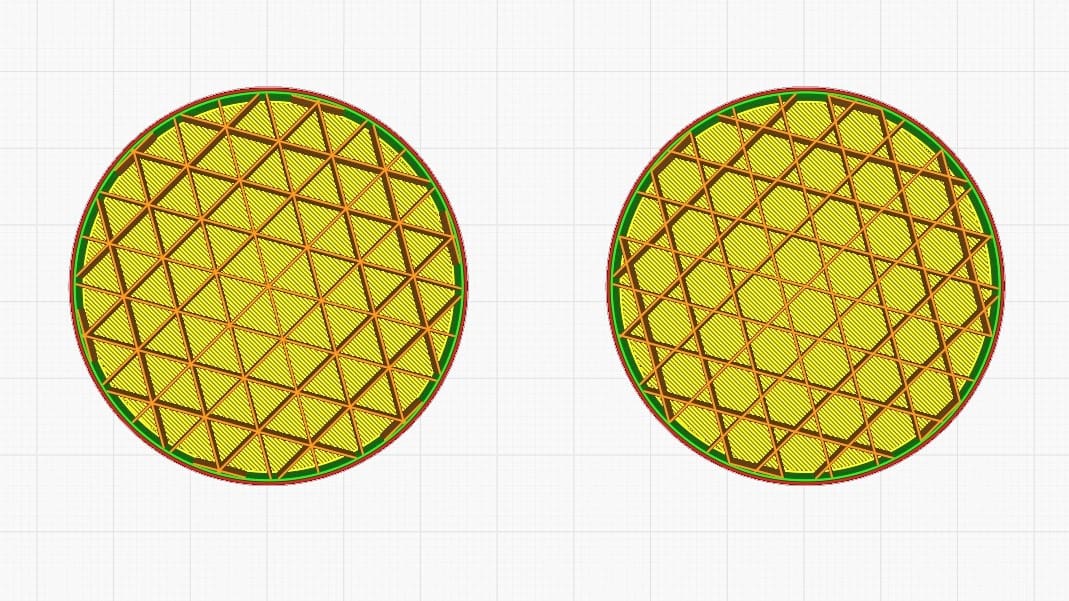
- Tri-hexagon: This 2D pattern produces hexagons interspersed with triangles. One advantage is that hexagons are an efficient shape, making them a strong infill pattern relative to their material usage. In addition to that, the tri-hexagon infill has shorter lines to connect each side, leading to fewer issues with bowing from poor print cooling.
Functional 3D Prints
Typical infill density: >50%
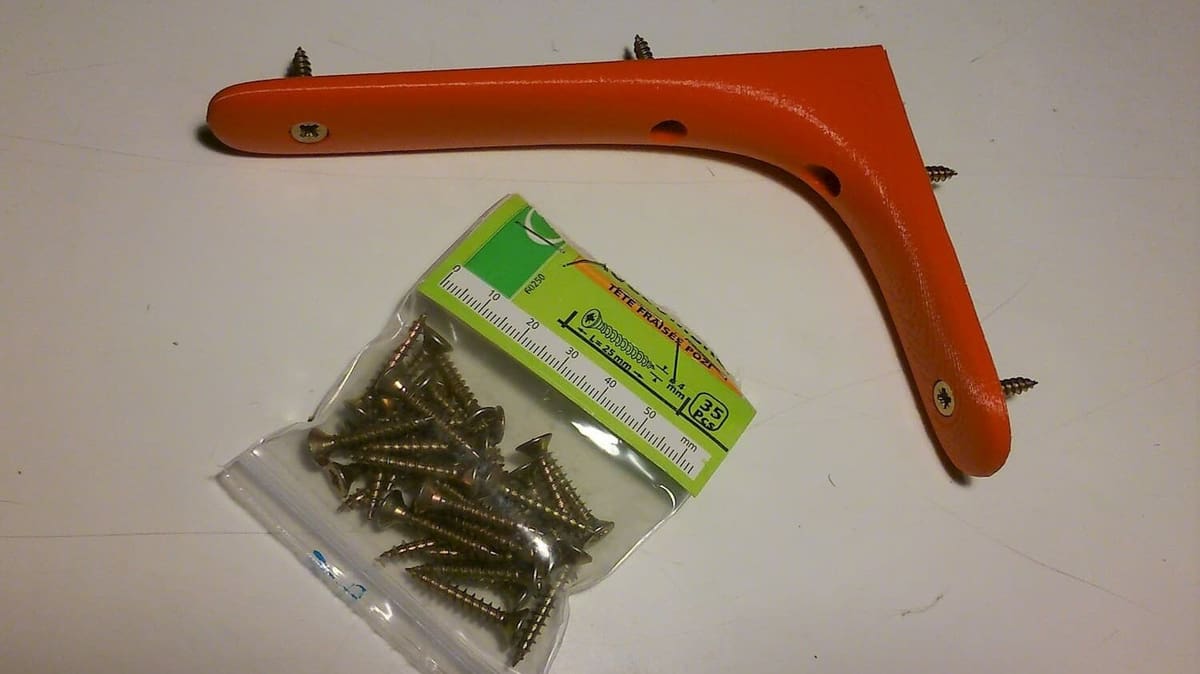
Functional 3D prints, such as the above shelf bracket, require high strength in multiple directions. Strong candidates for infill patterns include cubic, cubic subdivision, quarter cubic, octet, and gyroid.
- Cubic: This is a 3D pattern of stacked and tilted cubes.
- Cubic subdivision: This variation of cubic uses less material.
- Octet: Also known as tetrahedral infill, this pattern stacks pyramid shapes.
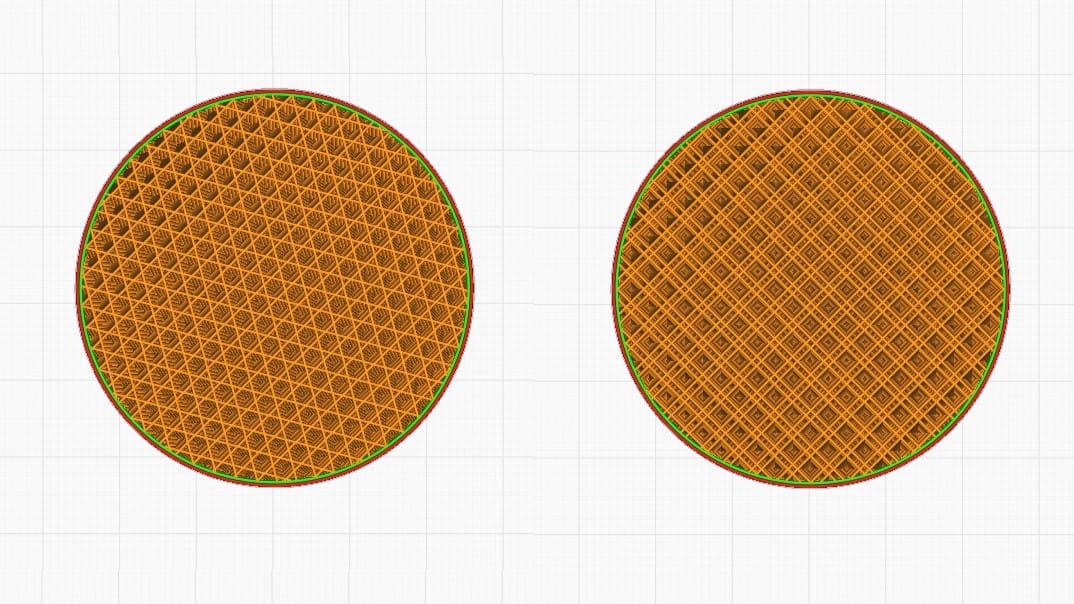
- Quarter cubic: This 3D pattern is like octet, but half of the pyramid shapes are shifted with respect to the other half.
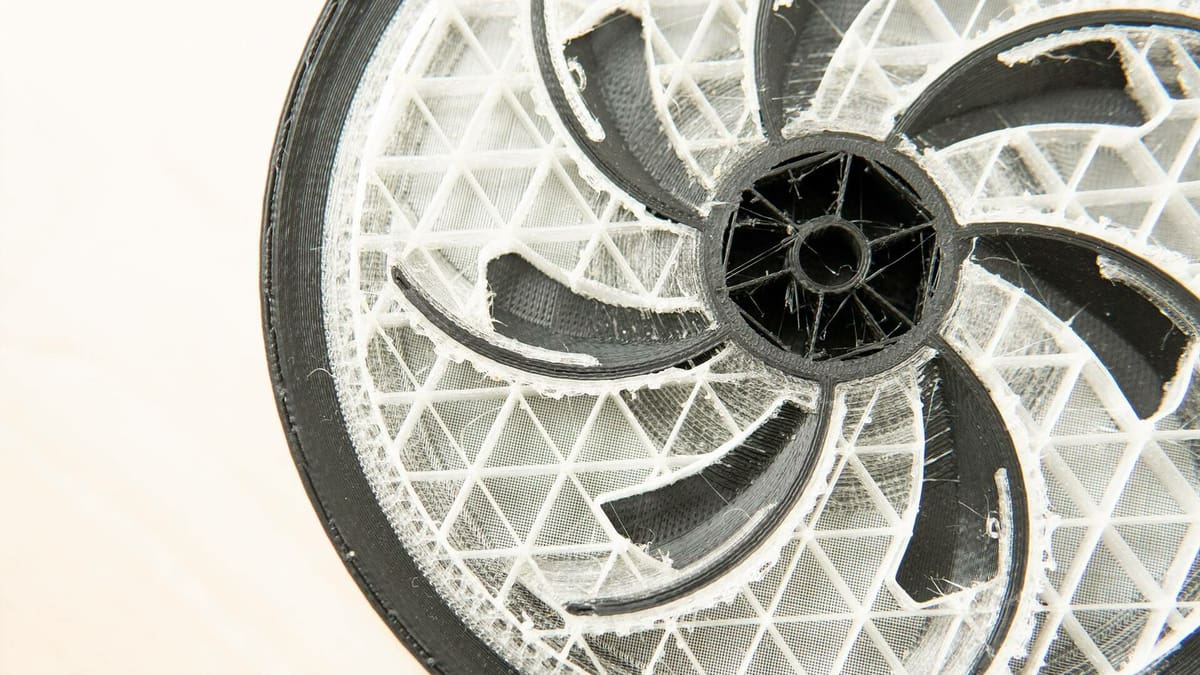
- Gyroid: A particularly unique 3D pattern, which gives the impression of waves. This results in a print that is equally strong in multiple directions. This infill pattern would therefore be a good choice for a part that will be stressed in multiple ways.
Often, the above patterns are even used for lower infill densities because of their aesthetic appeal. Some makers like this type of effect, as shown in this gyroid vase.
Flexible 3D Prints
Typical infill density: 0-100% (depending on how “squishy” you want your print to be)
Flexible filaments should use flexible infill patterns to preserve the bendy nature of the print. Infill patterns like concentric, cross, and cross 3D work best for these types of prints.
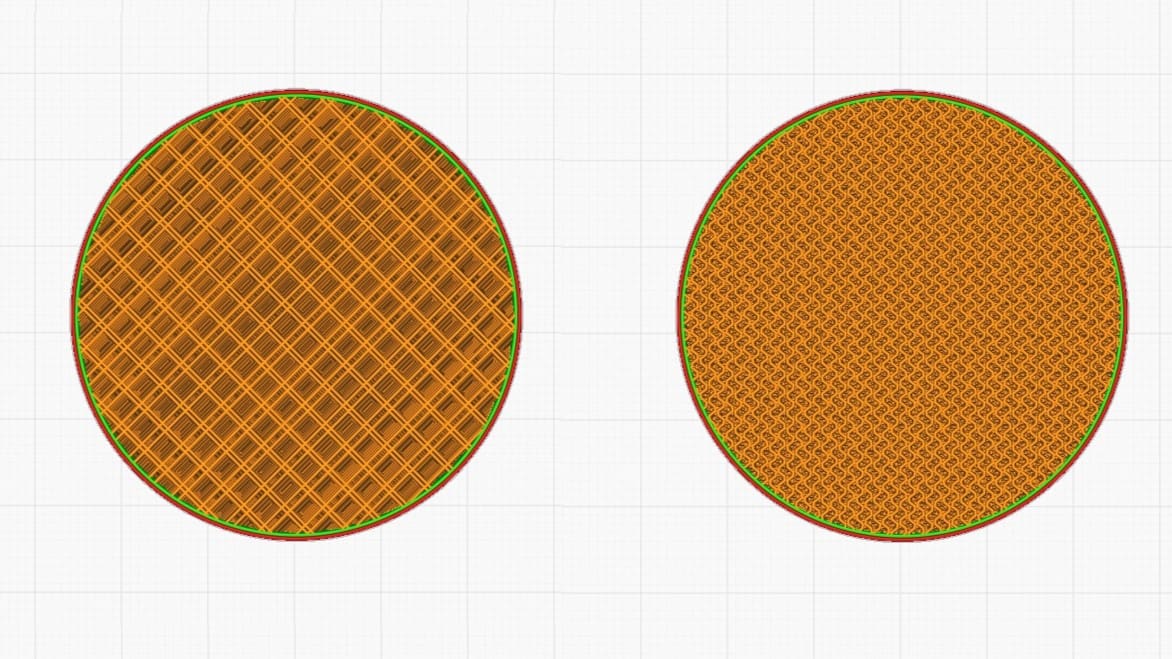
- Concentric: This 2D pattern produces “waves” through the interior of the print, mimicking the shapes of the outer walls. This resembles a stone thrown into the water that makes concentric circular ripples on the surface.
- Cross: Another 2D pattern, cross, produces grids of what appear to be very fancy crosses. The spaces between the crosses allow for bending and twisting.
- Cross 3D: This 3D pattern is similar to cross, but as the print grows, the lines move at inclines. The end result is an object with slightly more rigidity.
Experimental Settings
Want to push Cura to the absolute limit? Take a look at some of these Experimental Settings, which open up more niche ways to customize your infill.
Infill Travel Optimization
If you want to speed up your prints as much as possible, look no further than “Infill Travel Optimization”. This setting changes the order in which infill lines are printed, minimizing the total distance moved by the nozzle. It’s at its best when you have a large print with a high infill density, but Cura warns that it may take significantly longer to slice some models this way.
- Pros: Reduces print time and easy to implement, simply check a box.
- Cons: Slicing time can be increased, and performance is sensitive to the geometry of the 3D print. There may not be any improvement in print time at all in some cases.
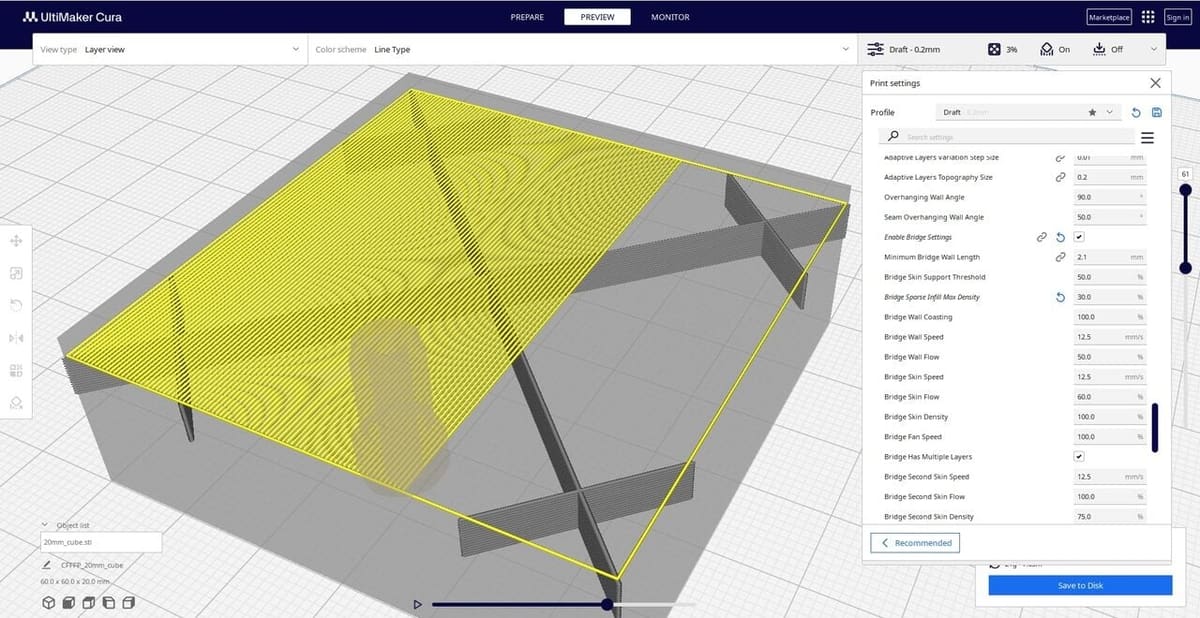
Bridge Sparse Infill Max Density
This one sounds complex, but it’s actually quite straightforward. Bridging describes overhanging material printed without support – effectively being printed into thin air. It’s important that bridging is tuned properly and this setting can help.
When printing a top layer over areas with little to no infill, Cura may consider there to be no support beneath it, which means that the layer itself is considered bridging. This can result in different speed and cooling settings being applied. “Bridge Sparse Infill Max Density” adjusts the infill density over which a new layer can be considered to be bridging – meaning that you can decide exactly how these outer layers are printed. Make sure to adjust this alongside your infill density, and use the G-code previewer to confirm you’re getting the exact behavior you want.
- Pros: Helps ensure the behavior of your slicer is exactly as you would expect at all points. Improves print performance where used well.
- Cons: Complicated to implement as bridging options need to be adjusted accordingly. Needs to be re-evaluated by the user every time infill density is changed.
Tips & Tricks
Choosing an infill pattern is important, but there’s more to it than that. Here are a few things to keep in mind the next time you’re adjusting print settings in Cura.
Infill Line Direction
One commonly overlooked setting with infill is the infill line direction. This is set at 45° by default so that both the X and Y motors work together to print infill at maximum speed. However, it may be advantageous to orient the infill at a different angle in order to provide maximum strength or flexibility to the part, especially if its walls are diagonally aligned.
Gradient Infill vs. Gradual Infill
When it comes to infill, we usually think of it as being uniform throughout the inside of a part. However, it doesn’t have to be this way.
Using gradient infill, you can set up a print to have greater infill density towards the perimeter. Generally speaking, this should maintain a part’s effective strength and stiffness while using less material. This setting isn’t native to Cura, but it can be accomplished relatively easily using a Python script.
Gradient infill shouldn’t be confused with gradual infill, which does something similar, but in the Z- rather than X- and Y-axes. In other words, this setting makes infill denser near the top of the print compared to the bottom. This can save material and time while still providing sufficient strength to an end that requires rigidity.
Custom Tiled Infill
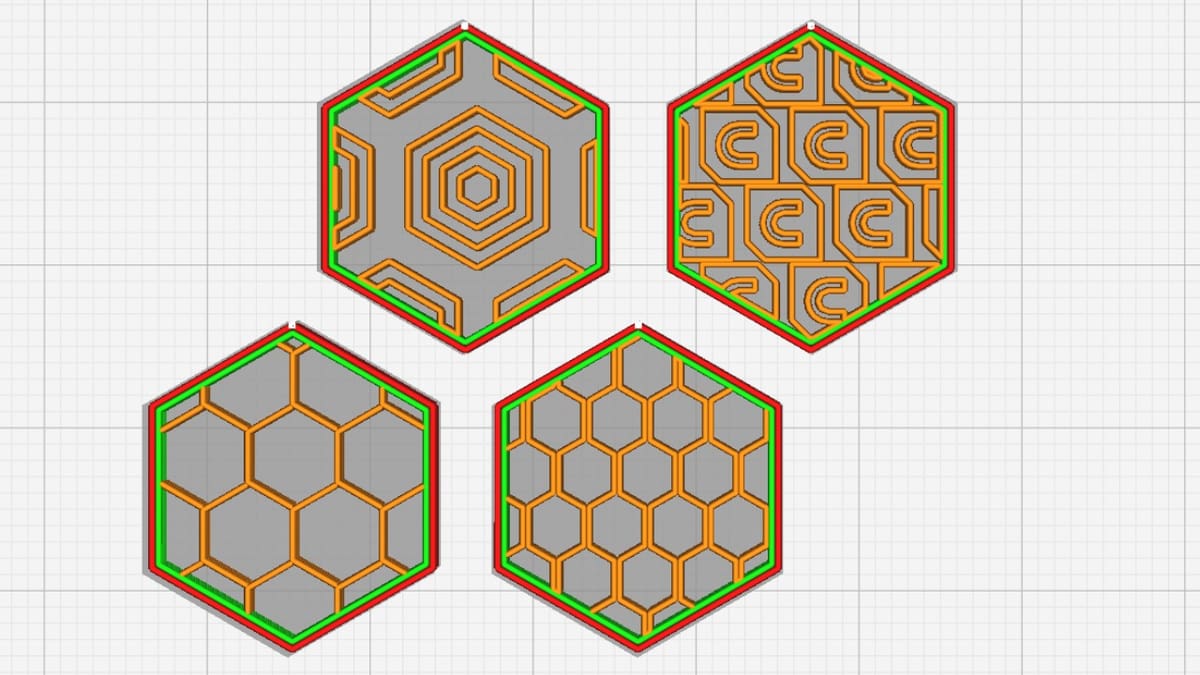
Those missing the Honeycomb infill popular in other slicers like PrusaSlicer can sigh no more since Cura improved its engine plug-in capabilities in version 5.5. This update allowed for the creation of a custom infill pattern plug-in. While still in beta, CuraEngine Tiled Infill Generation comes preloaded with infill patterns like Honeycomb and a Cura logo. It’s worth noting that an earlier version of the plug-in apparently caused some issues with Mac users; while developers suggested using an older version (5.8) to prevent the issue, a fix was published on GitHub in late August 2024.
Users also have the option of adding their own custom infill patterns right into the Infill Pattern drop-down menu. Note that patterns must be in *.wtk format and will be tiled, so you don’t have total design freedom just yet. In any case, it’s great for creating aesthetic infills like a soap dish, as maker 3d prints, and leaves demonstrates. You can find more information in the GitHub documentation.
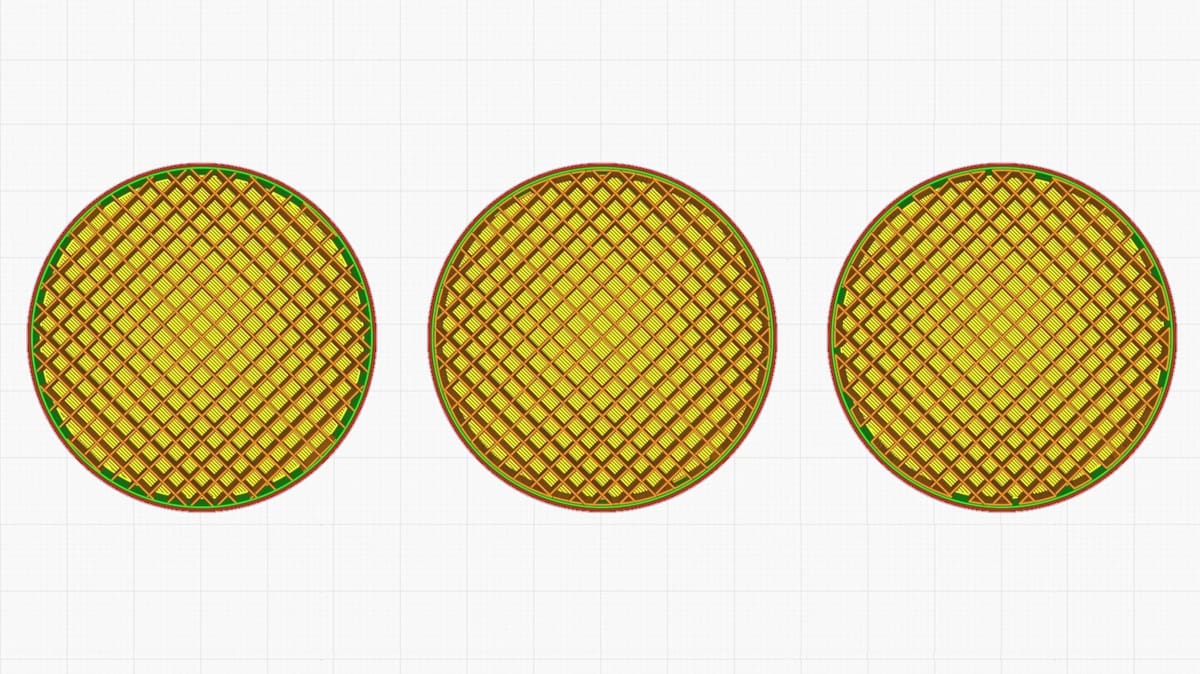
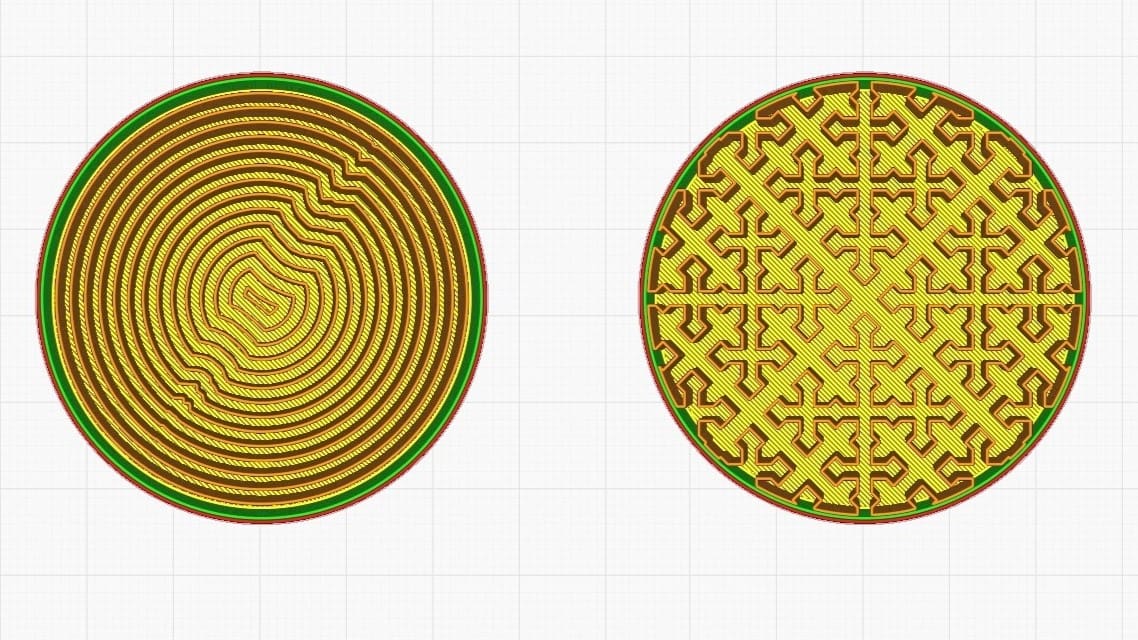
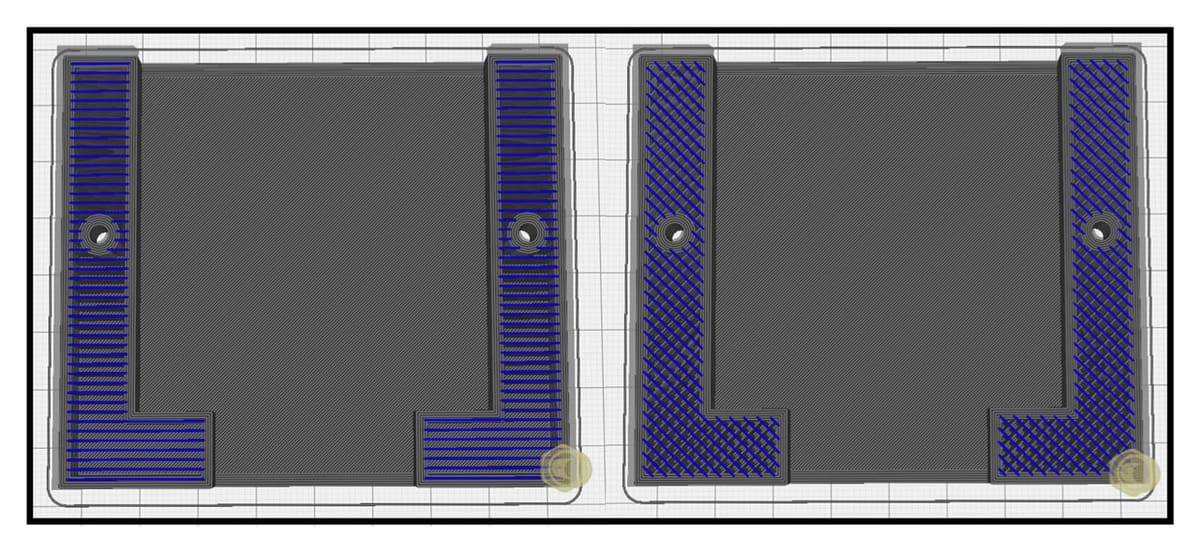
Multiple Infill Densities
Since the fourth version of Cura was released, there’s been the possibility of setting “per model” infill densities. This feature is advantageous because it allows for some nifty design tricks, including multiple infill densities and types in the same print, as seen in the video below. While there may not be a huge number of uses for this type of flat, coaster-like infill setting, we think there’s more to this method than meets the eye.
With the ability to set custom settings for each imported model and Cura’s ability to mesh them together seamlessly, it seems possible to provide specialized support in specific areas, although this is certainly a lot of work to do manually.
Efficient Support Infill
Supports are crucial for nailing tricky overhangs on prints, but they can increase print time significantly. “Support Infill Density Multiplier Initial Layer” can help here. This setting governs the ratio of relative support infill density on initial layers compared to the rest of the support. Like infill in the rest of the print, increasing this can improve strength and reliability at the cost of increased print time and material usage. It’s best to use this on big prints where large supports are necessary.
Skin
Skin refers to the top and bottom layers. It can affect the amount of material and print time required but also the strength and weight of models. As related to infill, a setting that can be changed is “Skin Overlap Percentage”, which controls how much the walls overlap with the inside filling. The infill will be more attached to the exterior skin of the print the higher this percentage is, and the model will be less brittle.
If you want to go the route of reducing layers, you can change the “Skin Removal Width”. The value you enter will be removed from the top and bottom layers. This can be seen, for example, in slimmer or smaller designs or details in which sturdiness isn’t a necessity.
Fast Prints
There are a couple of ways to achieve faster print times by tweaking your infill settings. For example, infill lines typically print at a 45-degree angle, which allows the X- and Y-motor to achieve maximum speed. The infill layer thickness can also play a role in speed. You can tweak this setting to a thicker layer height to take less time. The Valve plug-in can make sure that you get faster infill while staying within the flow rate capabilities of your printer.
You can also play around with the patterns to reduce print time. Generally, the lightning pattern results in the fastest prints. If your print does not require mechanical stability, you can use this pattern to see 25% faster speeds. Concentric, grid, and triangle are also relatively simple patterns that should lead to quick prints.
License: The text of "Cura Guide to the Best Infill Patterns" by All3DP is licensed under a Creative Commons Attribution 4.0 International License.