Creality Slicer: All You Need to Know

If you have a Creality printer, Creality Slicer is optimized for you! Read on to learn all the basics about this slicer.
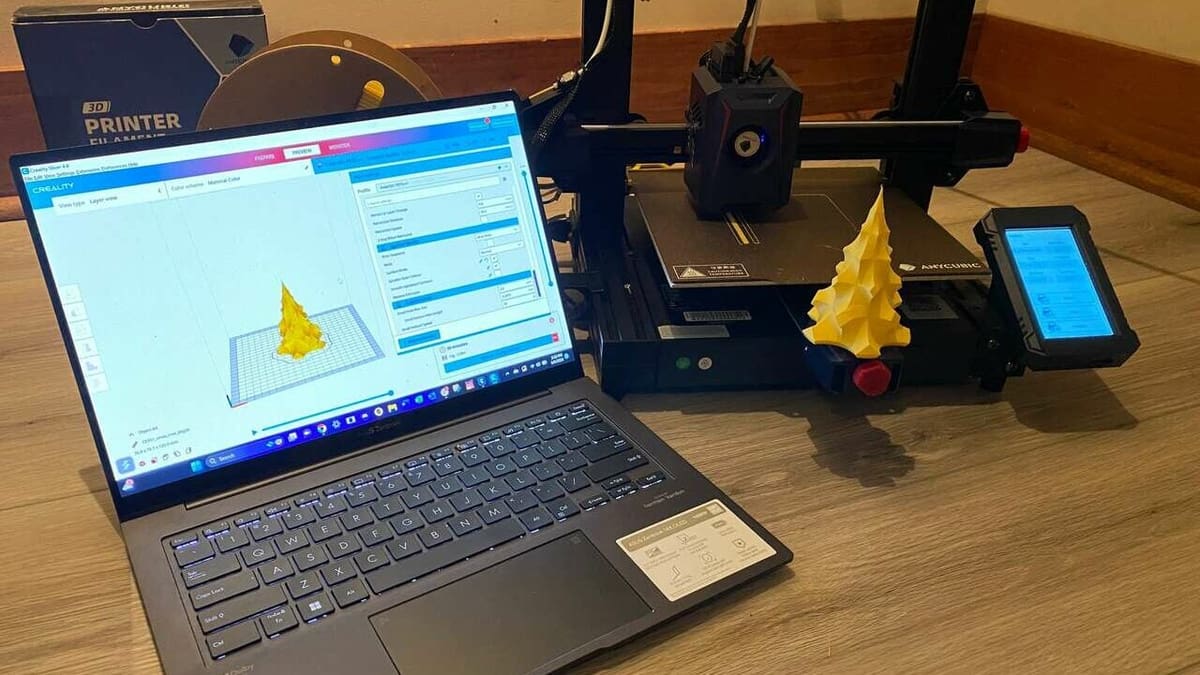
Slicer software is used in 3D printing to “cut” 3D models into layers (slices) and draw a printing path that the 3D printer can follow. Creality, a company that produces many popular 3D printers like the Ender 3 series, has its own proprietary option, Creality Slicer.
If you’re familiar with Cura, you may notice from the get-go that Creality Slicer looks very familiar – and it is. There are, however, some slight differences. Creality Slicer is indeed based on Cura, but it’s optimized for Creality printers.
Creality Slicer can also be used with UltiMaker printers straightaway, as UltiMaker is the brand responsible for Cura. For any other printer brands, you’ll have to create custom printer profiles.
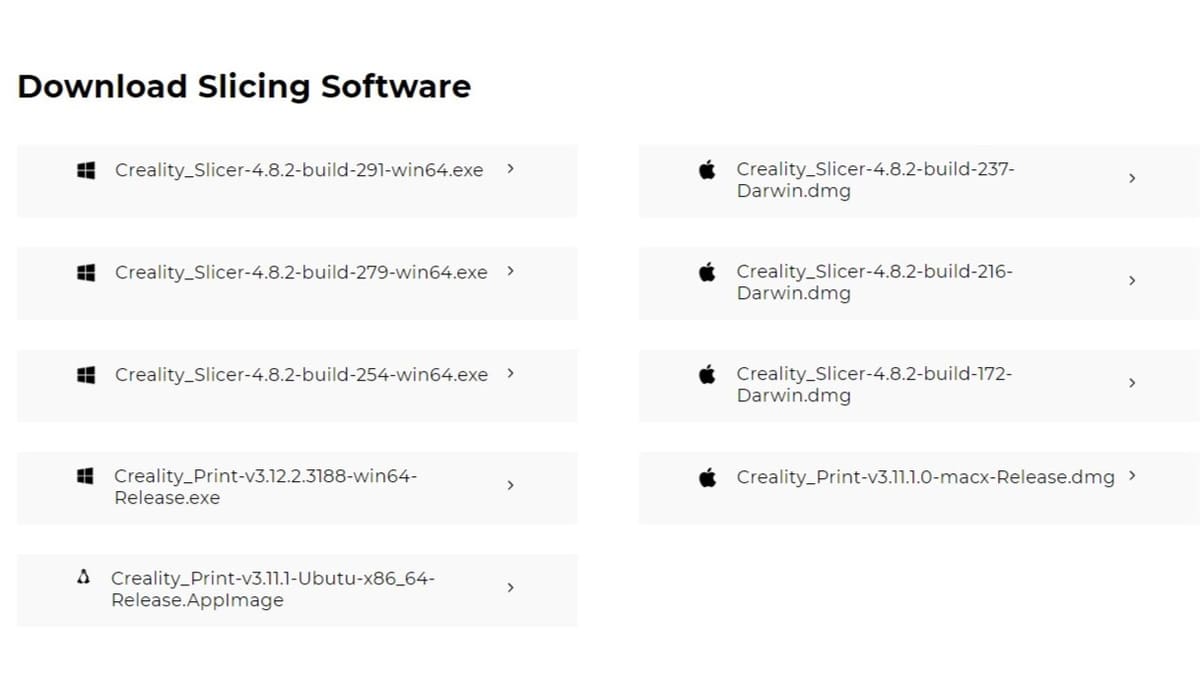
The software is usually included on a USB stick when you purchase a Creality printer, but it can also be downloaded from the official site. If you’re looking to update to a newer version, you have to uninstall the current one and go to the download page to get the newest one.
Creality also has resin 3D printers, but Creality Slicer isn’t a suitable option for these because it’s slicer software for FDM machines. For such cases, Creality recommends instead Halot Box.
Now that we’ve covered our basis, let’s take a closer look at the slicer.
System Requirements
Creality Slicer is a very light program thanks to its simplicity. Even though it’s made from Cura, Creality Slicer takes up less space and processes much quicker, albeit not prettier, because it gives less importance to graphics. However, remember that the more complex the model, the more time it will take to slice.
- Operating system: Windows and MacOS. That’s right, Creality Slicer used to only run on Windows, but now they have one build for Mac as well. Unfortunately, there’s no version for Linux yet.
- Free space: 4 GB RAM, 550 MB available on your disk
- Processor: Intel Core 2 or AMD Athlon 64, but faster would be better
The above said, if you’re into printing, chances are you’re also into modeling, meaning you use modeling software too. In this case, you should already have much more space and processing power than what is required for Creality Slicer!
UI & Layout
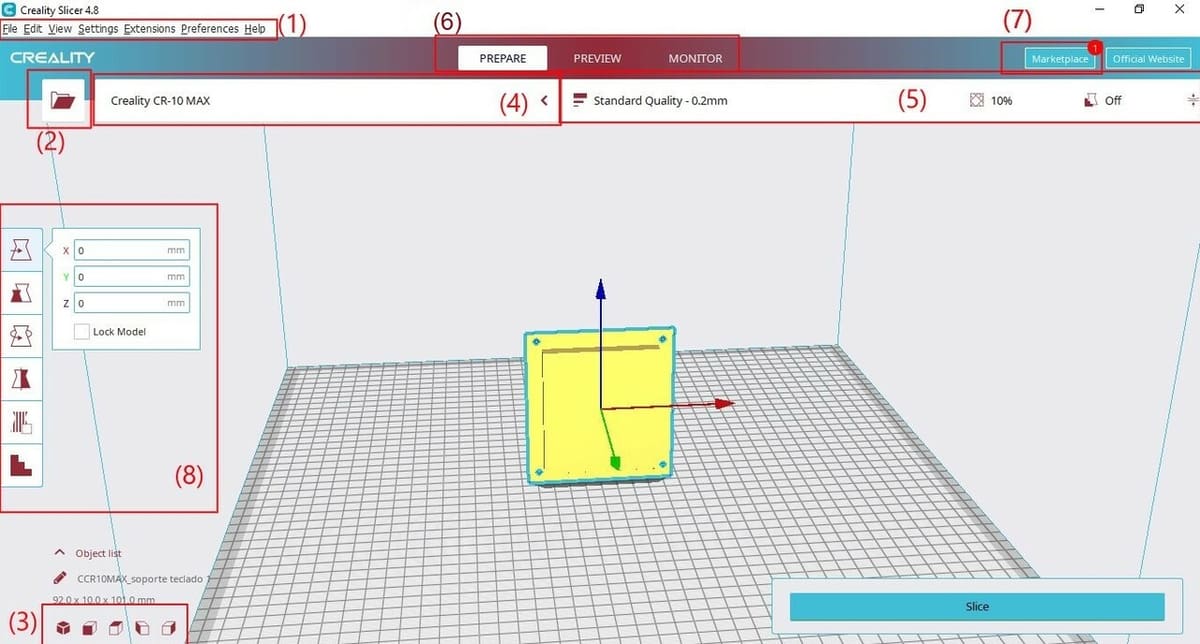
Oftentimes, starting with a new program can be intimidating because you know what you want to do but don’t know how to locate the tools to do it. Here’s a rundown of Creality Slicer’s user interface (UI).
- App menu bar: In this bar, which usually exists for all software, you find tools relating to the basic functioning of the program, such as creating new, opening, or saving files, as well as changing settings or preferences.
- Open file: By clicking on the option, you can load a 3D file, typically an STL, into the print bed. Creality can also open 3MF and OBJ, as well as other less popular 3D file formats.
- Camera position tool: You can set the camera view of your model using your mouse, but this tool, located on the bottom left of the screen, also allows you to choose between the main views of the model.
- Printer selection panel: Here, you can see the existing printer profiles and easily switch between them.
- Print settings panel: This is where the slicing actually happens. In this menu, you choose parameters like layer height, number of shell lines, percentage of infill, supports, and more.
- Stages: Here, you can switch between the stages of slicing: Prepare, Preview, and Monitor. For the Monitor stage, your printer has to be connected to the PC during the printing operation.
- Marketplace: Located to the right of the Stages panel, this button directs you to an app store filled with open-source plug-ins that enhance the functionality of Creality Slicer even more.
- Adjustment tools: This menu only appears once you’ve loaded a model, so it’s possible that the first time you open Creality Slicer you won’t see it. This menu is essentially like a “Modify” menu in other programs, where you can move, rotate, and scale your model. This is useful, for example, if your model needs to be rotated to use fewer supports.
Features & Functions
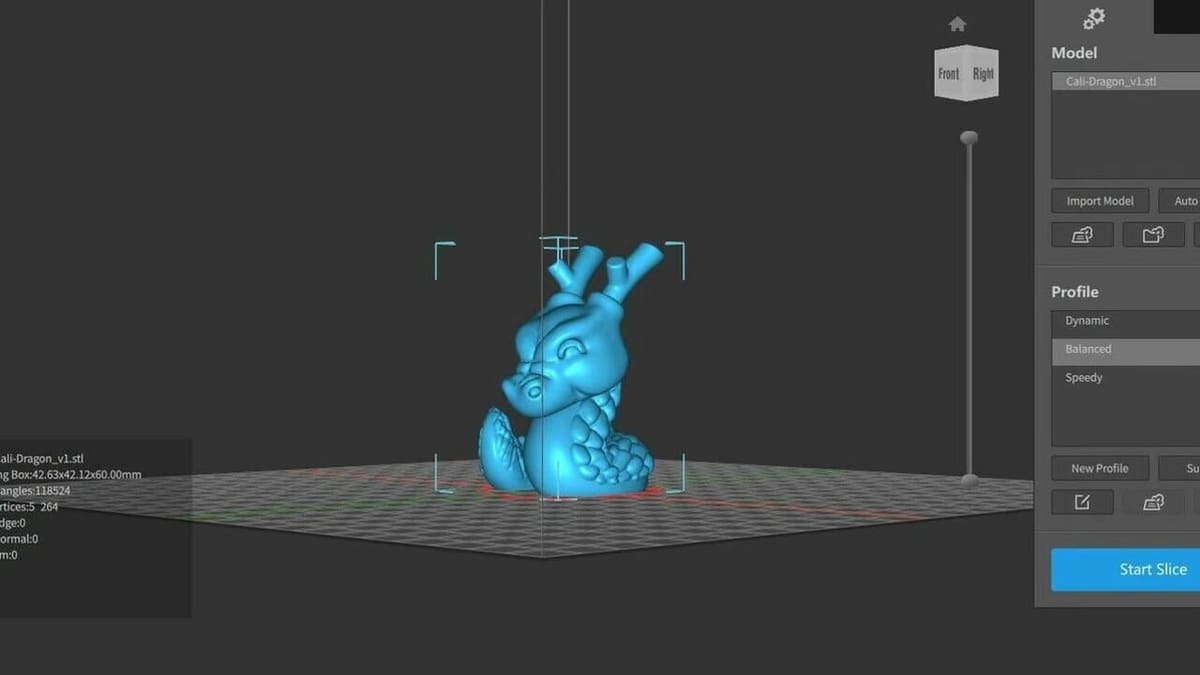
Creality Slicer has a very intuitive process. You pick a printer, load a model, choose slicing settings, slice, preview, and you’re done! You can tweak the printing process to add supports, change layer height or infill, and more.
Printer Setup
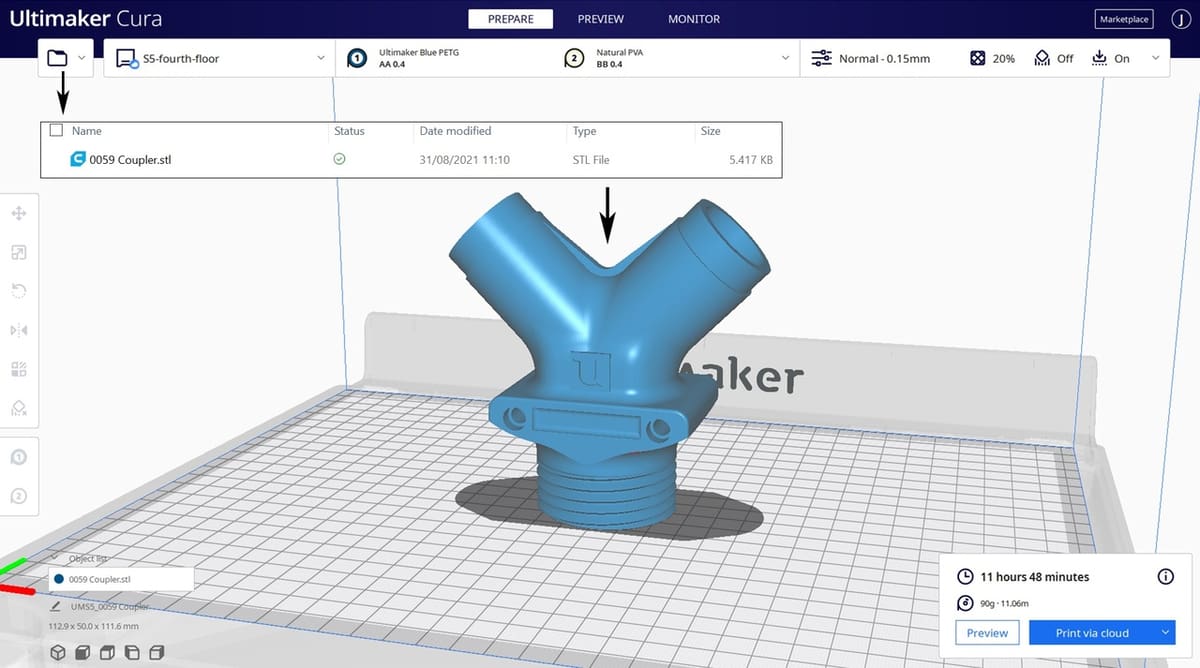
Setting up a 3D printer in Creality Slicer is very simple and almost identical to how you would set up a printer in UltiMaker Cura.
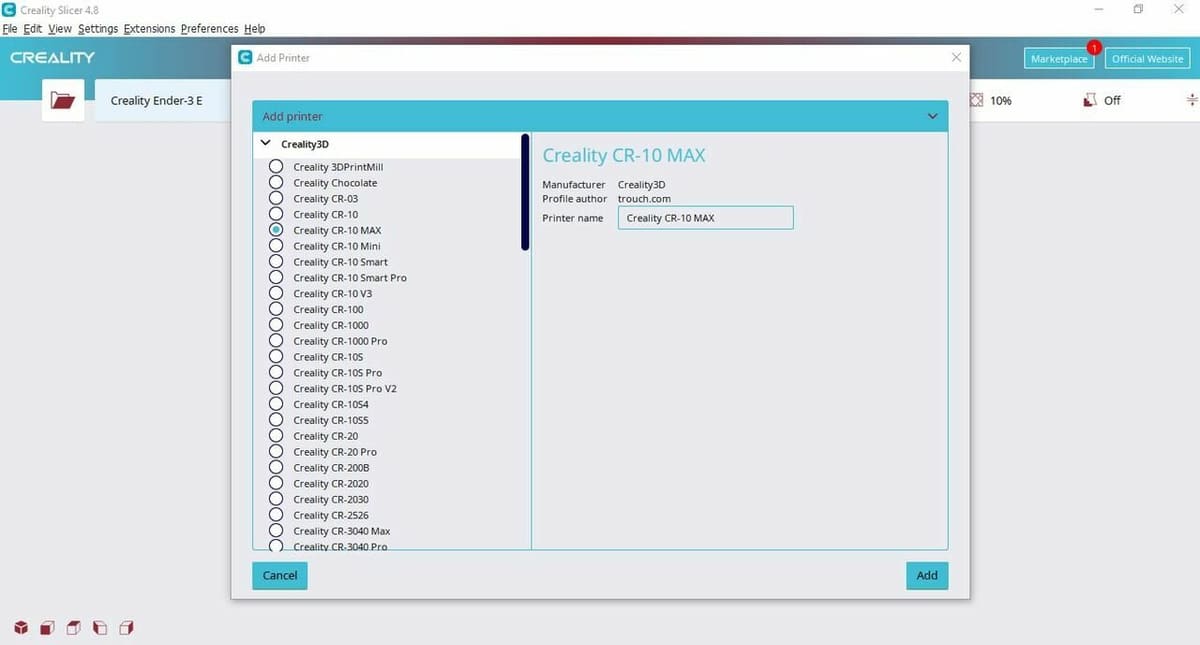
After opening Creality Slicer for the first time, you’ll be prompted to add a new printer profile from the available list of brands and models. The printer profile stores important information about your 3D printer that’s used to slice every model, including the printing dimensions, start and end G-code scripts, firmware flavor, filament diameter, and more.
Be sure to verify the printer profile information before adding the printer. You can also name your printer profiles so you never confuse two of the same 3D printers.
On that note, Creality Slicer also allows you to store multiple printer profiles, which is very helpful for users who need to slice models for different 3D printers. To add, modify, or switch your 3D printer profile in Creality Slicer, go to the “Settings” tab, select “Printers”, and click “Manage Printers”.
Unfortunately, Creality Slicer only natively supports most Creality FDM 3D printers as well as many UltiMaker printers. You can set up custom 3D printers in Creality Slicer through the “Guest Customization” tool, but this will require a lot of extra work and configuration.
It’s worth noting that Creality isn’t adding support for their newer FDM printers, like the Ender 3 V3 SE or the K1, to Creality Slicer. This may be due to Creality shifting their focus towards Creality Print, the company’s newer in-house 3D slicer software, while still offering Creality Slicer for their older printers.
Slicer Settings
Slicer settings are one of the most important elements of any slicer software, as they dictate the level of control you have over the 3D printing process. More settings available in a slicer means more tools that you can use to improve the quality of your prints and eliminate common issues like warping and stringing.
Creality Slicer software is loaded with over 200 adjustable settings, including critical parameters for FDM 3D printing, such as layer height, nozzle temperature, and print speed. Creality Slicer also features some rather advanced slicer settings such as “Fuzzy Skin”, “Wire Printing”, and “Infill Travel Optimization” to allow you to further customize the outcome of your 3D prints.
As Creality Slicer is a fork of Cura, many of the platform’s settings, both basic and advanced, were likely copied directly from UltiMaker Cura’s source code. While this means Creality Slicer’s features aren’t exactly novel and probably won’t yield noticeably better results, the settings should be reliable.
On a separate note, the available slicer settings can be found in Creality Slicer in the right-side menu titled “Print settings”. Also on this menu is a hamburger icon (three dashes) that lets you control what settings are visible depending on your level of 3D printing expertise.
Printing Setting Profiles
Instead of manually choosing the slicing settings every time you slice a new model, you can save “Profiles” (not to be confused with “Printer Profiles”) and store them with different names – for example, “High-Res Print” or “Trial Print” – to easily change between premade printing options.
If you want to create a new Printing Setting Profile, select “Create Profile from current settings”, which is an option in the “Printing Setting Profiles” list. If you want to modify an existing setting, simply make the desired changes and select “Update profile with current settings”.
Preview of Printing Process
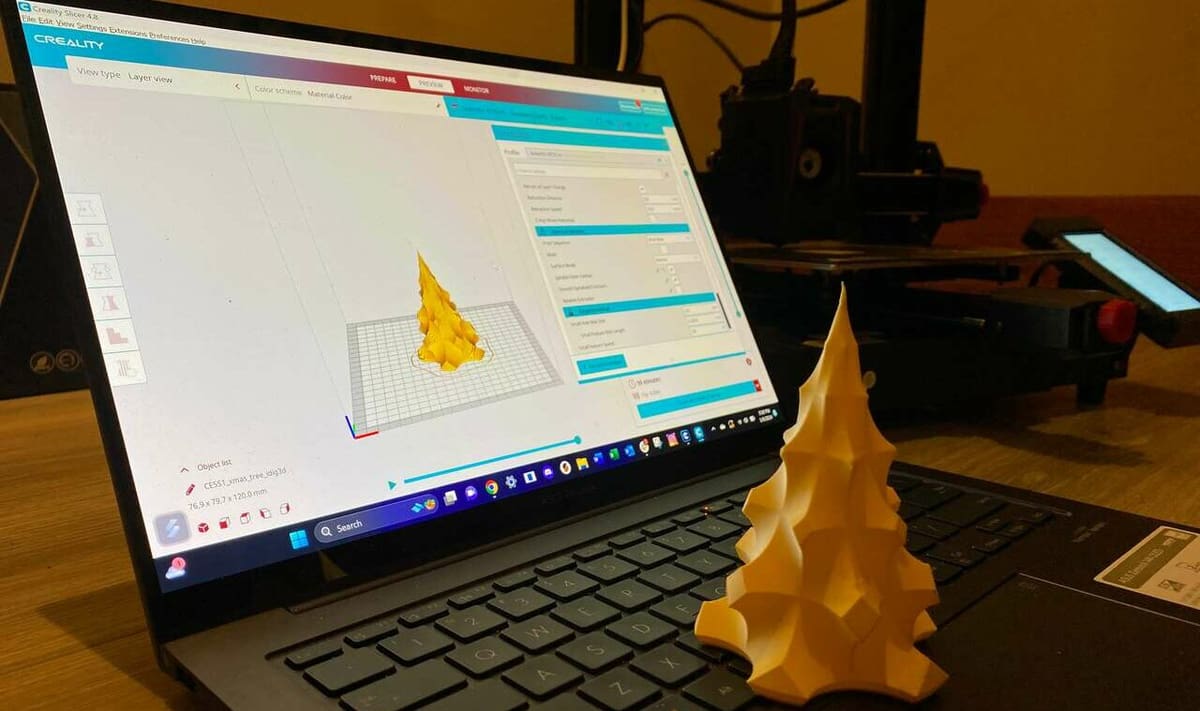
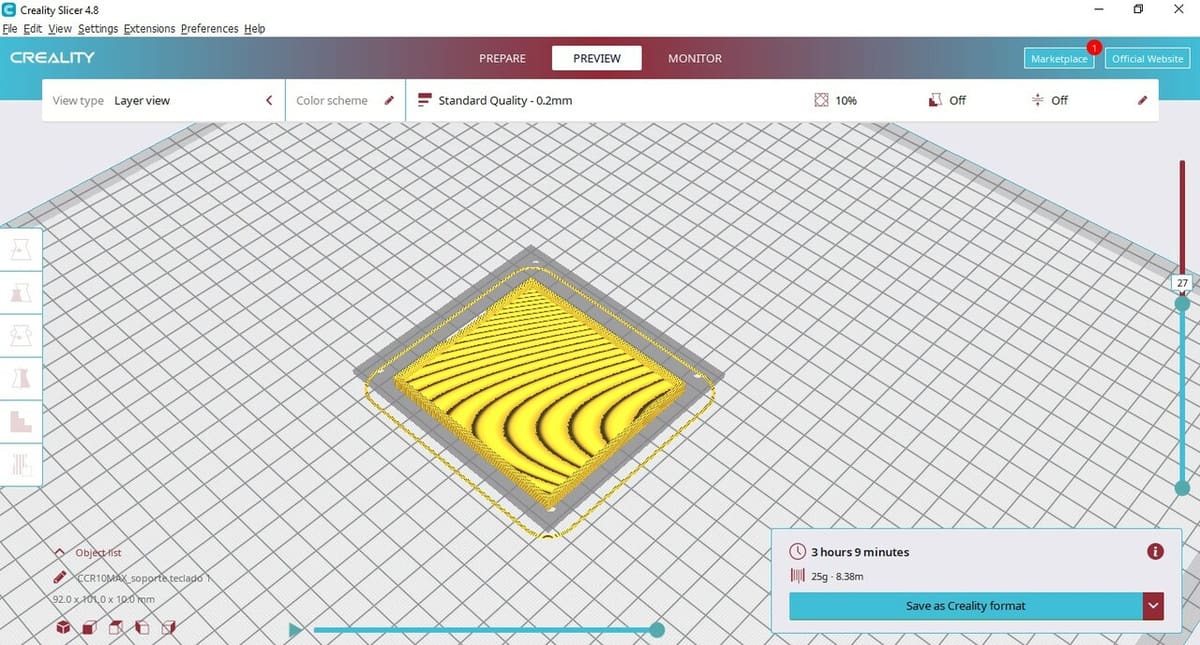
Once the settings are selected and done, you can click on “Slice” and Creality Slicer will turn your 3D model into a series of filament layers. In the Preview tab of the Stages menu, you can see how much time printing such a model will take and how much material will be needed.
You can simulate the printing process line-by-line, layer-by-layer. This is useful to avoid mistakes, schedule your prints for large projects, and budget material and energy.
Extensions
Creality Slicer comes with some default extensions, such as a Model Library and a panel to modify G-code. In the Model Library, you can find and download models, but note that you have to be logged in to Creality Cloud to do this.
To add more plug-ins, you can do so in the Marketplace. There are premium plug-ins and community plug-ins, which are made by the community and tend to be quite useful. For example, there’s the Blender Integration plug-in, which allows for Blender files to be directly imported into Creality Slicer. Another is Calibration Shape, which creates a test shape, such as a cube, cylinder, tube, or sphere.
User Experience
Creality Slicer isn’t the most popular software, but it’s preferred by many users because it ensures the quality of the result despite the looks of the software. It also has a much more simplified set of options than Cura.
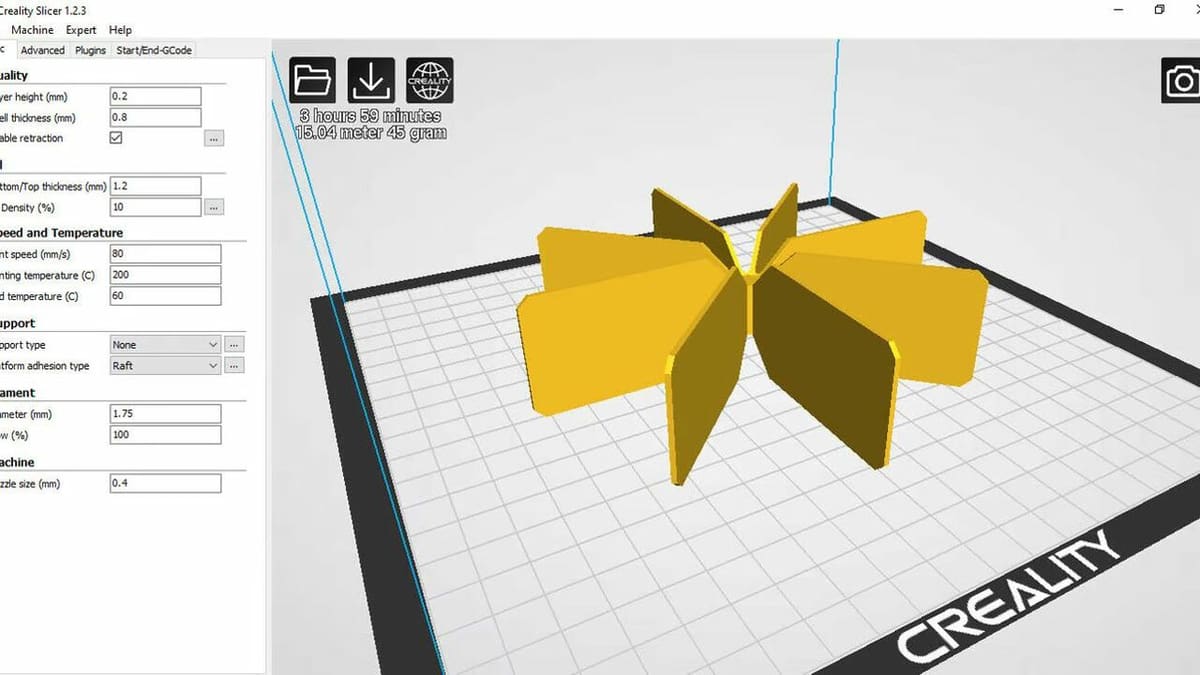
A popular version of Creality Slicer is actually an older version, 1.2.3, which you can find on the Creality Forum. This version has somewhat of a retro look and is even more simplified than the current Creality Slicer, which is why some users prefer it. It was replicated from an earlier version of Cura, so it also appears more distinguishable from the Cura that we currently recognize.
Beginner users will find Creality Slicer, both version 1.2.3 and 4.8.2, easy to understand because of how simplified and straightforward it is, although some people do find it lacking in advanced features such as multiple processes during one print. In other words, it’s not possible to change the infill density midway through the printing process, for example.
But there’s more to Creality Slicer than slicing.
Company & Community Support
There’s not much in terms of official support for Creality Slicer. While Creality has an official Service Support Center, it’s for all things Creality-related, not specifically for troubleshooting the software. However, there’s the very active Creality Forum, where you can ask questions about all things Creality, including the software. Threads are very active and may get hundreds of replies after only a few weeks.
There are also many non-official printing communities where you can get information and ask for advice, especially on Reddit. The subreddits 3D Printing, Ender 3, and Creality are popular and active. There, you can find makers who are constantly helping each other achieve better prints.
Creality Slicer vs Creality Print
First launched in January 2022, Creality Print is original slicer software as opposed to the Creality Slicer, which is a spin-off of Cura. It can be downloaded from Creality’s webpage and is available for Windows, MacOS, and Linux. As the program is updated, compatibility for more printers will be added.
It looks quite different from Creality Slicer and doesn’t have that many reviews yet, but the few it has gotten have been mixed. However, it seems to work better on MacOS than Creality Slicer. Time will show what more users think of this software.
If you’re looking to get accustomed to a new slicer program, it may be worth looking into Creality Print, as it seems it will be supported in the long run while Creality Slicer is phased out.
Alternatives
As we’ve mentioned, there are many more slicing options than just Creality Slicer. Below is an overview of the most popular ones, all of which you can find in our article about the best slicers for Creality printers.
Cura
Cura is one of the most (if not the most) popular slicers out there. It’s free, open source, and can be used as a third-party slicer for many printer brands. Cura is constantly updated, and it’s not hard to learn if you’re a beginner. Plus, you can preview the printing process to avoid mistakes. However, if you want a simplified version that has fewer requirements and an straightforward UI, Creality Slicer will give you that.
Simplify3D
Simplify3D is another beloved alternative that can work with many file formats like 3MF, OBJ, or STL. It also allows direct access to check or manually modify G-code. Like Cura, Simplify3D has a simulation preview of the printing process. Geared towards professional users, you’ll have to pay for this one ($149, with a two-week trial available). Creality Slicer is a great alternative if you’re under a budget.
PrusaSlicer
PrusaSlicer was based on Slic3r. Like Cura, it’s free and open source. PrusaSlicer has a number of remarkable features: It can work for SLA, offers custom supports, and allows you to repair models within the slicer without having to export a file to modeling software. PrusaSlicer is optimized for Prusa printers, so if you’re using Creality printers, you’ll probably do better with Creality Slicer.
License: The text of "Creality Slicer: All You Need to Know" by All3DP is licensed under a Creative Commons Attribution 4.0 International License.