The 30+ Cool Things to CNC Right Now

If you need inspiration for your next DIY creation, check out our picks for the coolest CNC router projects!
As CNC machining becomes a more accessible hobby in terms of the price and ease of use of the machines, you need projects. Here we focus on CNC routing, a sub-type of CNC machining designed primarily for cutting softer materials like wood, foam, plastics, and metals, like aluminum, yet most of the projects below are for wood.
If you’re looking to etch a surface, carve a design, or cut out a shape for your hobby or small business, budget CNC routing tools have changed the way we sculpt, carve signs, and make jewelry. And getting into CNC routing is easier than ever. Tools range from inexpensive learning kits to monster production routers big enough to mill an entire kitchen’s worth of cabinet doors in a single setup.
In this article, we’ll look at an assortment of CNC router projects that not only produce great end-products, but can be perfect learning or teaching exercises to keep you happily cutting for many hours to come. Enjoy, and good luck with your masterpiece!
Furniture
The following projects are intended to be functional pieces of furniture, whether you use them for sitting, sleeping, eating, or working.
Parametric Desk Cubby
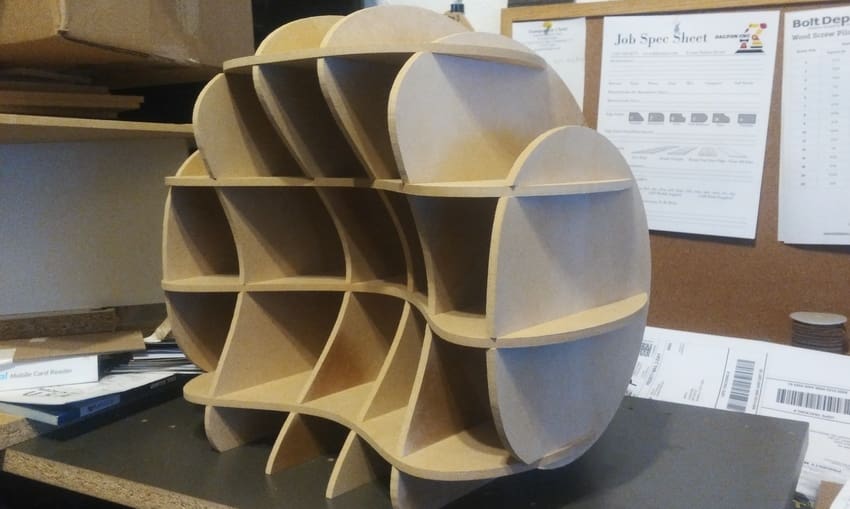
Medium-size hobbyist CNC routers (such as an X-Carve) can do some very precise work with care and a little tuning. This parametric desk cubby, milled from MDF, slides together without fasteners. To achieve this level of precision, belts and wheels need to be tight, the spindle aligned, and the cutter sharp and straight.
This parametric cubby holder is an easy way to show off your machine’s capabilities without breaking the piggy bank or investing tons of time. A great afternoon project, this unique storage solution is sure to bring some organization to your desk or workbench!
- Who designed it? WorkinWoods
- How popular is it? This model has over 100 likes and over 1,300 downloads on Inventables.
- Where to find it? Inventables
Bedside Table
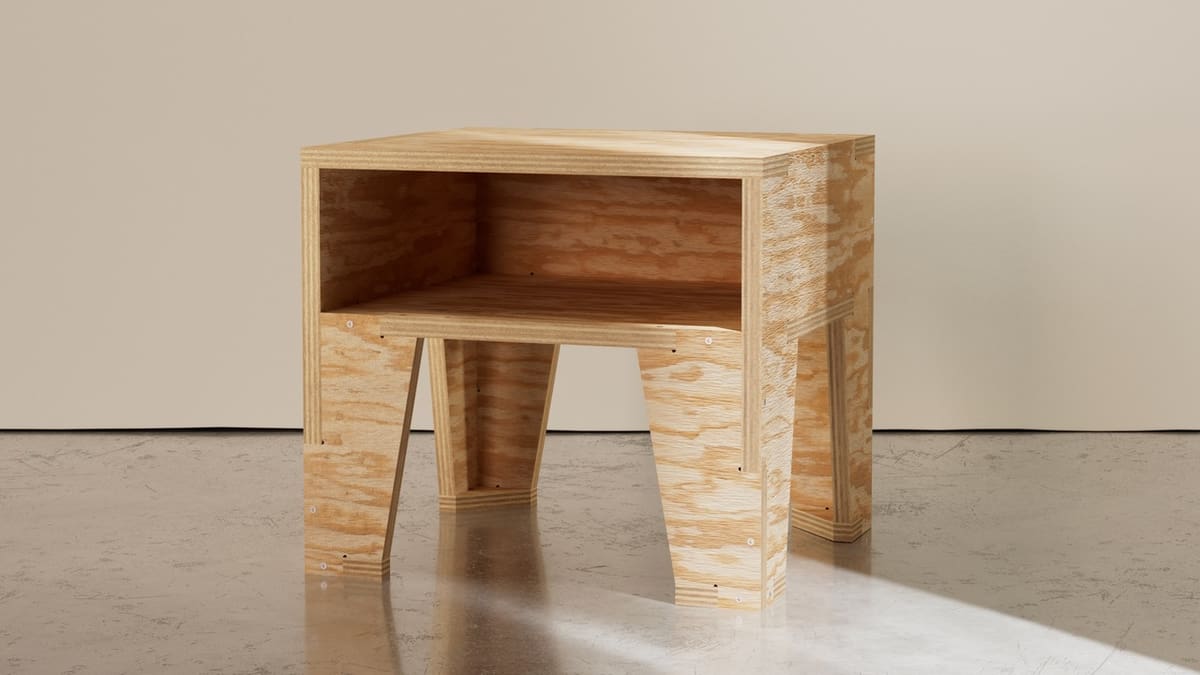
As part of the AtFAB open-source furniture line, this bedside table offers functionality and adaptability. The design includes a side table with convenient shelf storage, so you can keep your books, pens, and other essentials close at hand. The piece fully assembled measures 17.7 inches in width and depth and 15.9 cm in height.
Regarding material usage, each table is composed of eleven parts and two complete pieces can be crafted from a single 4 x 8-foot sheet with a 3/4-inch thickness. In the download, you’ll find the DXF cut files, assembly instructions, and helpful construction tips, such as how to use a test piece to verify your material thickness and machine settings.
- Who designed it? Filson & Rohrbacher
- How popular is it? While there’s no information about how many makes this design has, the high-quality instructions should be easily replicable at home.
- Where to find it? AtFab
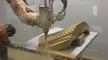
Bench Dustpan

Yes, a dustpan can be beautiful, and your shop deserves the best. This dustpan is made with sculpted, laminated hardwood. Follow along with this project’s video tutorial to learn how to laminate curved forms using Origin, and to grow your skills with spokeshaves, rasps, files, and scrapers.
- Who designed it? Aspen Golann
- How popular is it? Nearly 150 people liked this project.
- Where to find it? Shaper Hub
Bear Shelf
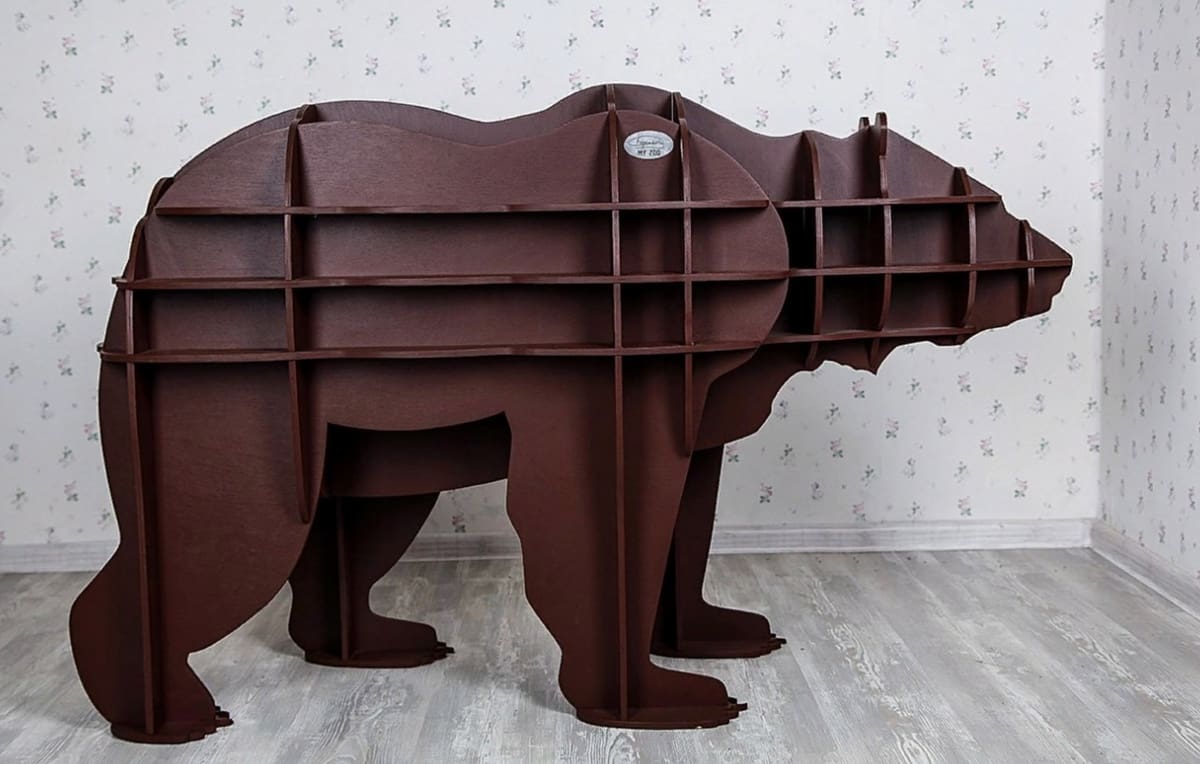
The Bear Shelf is a charming addition to any child’s room or play area, boasting an eye-catching bear-shaped design. This sizable shelf requires three 4 x 8-foot sheets for assembly, and it stands at 4.2 feet in length, 2.6 feet in height, and 2.3 feet in width.
Certainly a large piece of furniture, it offers ample storage space for toys, books, and other personal belongings. The whimsical design adds a playful touch to any space.
- Who designed it? 3axis.co team
- How popular is it? There’s no information about the number of downloads and makes, but it’s a unique piece that’s sure to have plenty of fans.
- Where to find it? 3axis.co
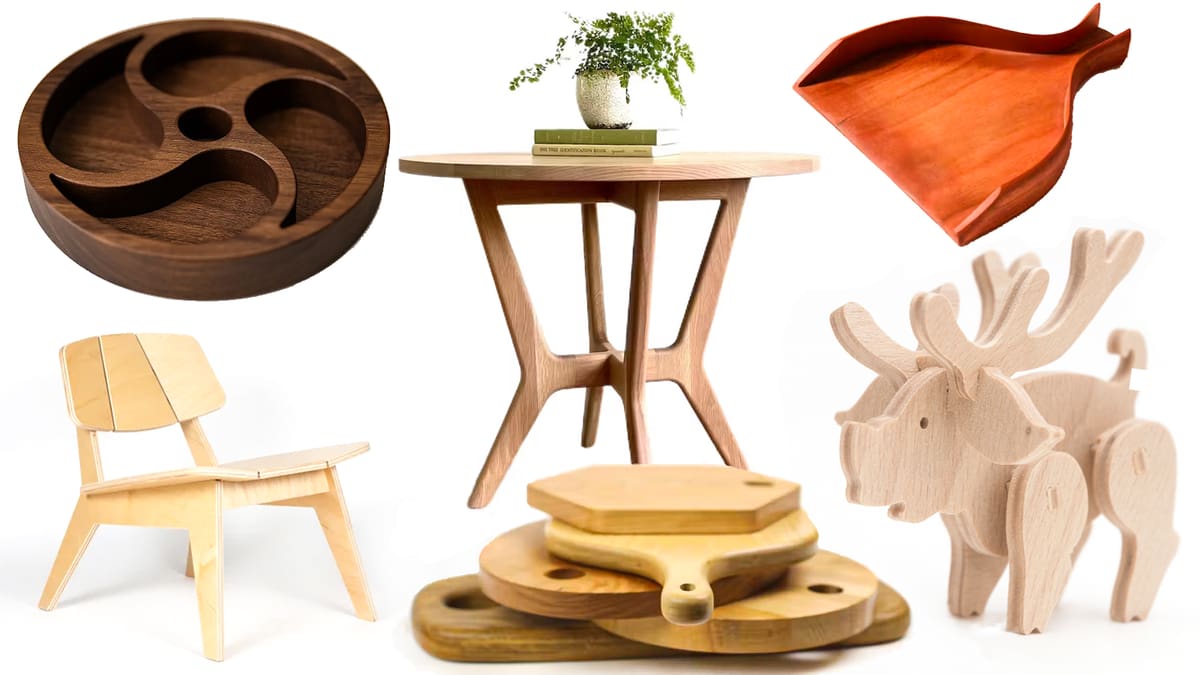
Lounge Chair
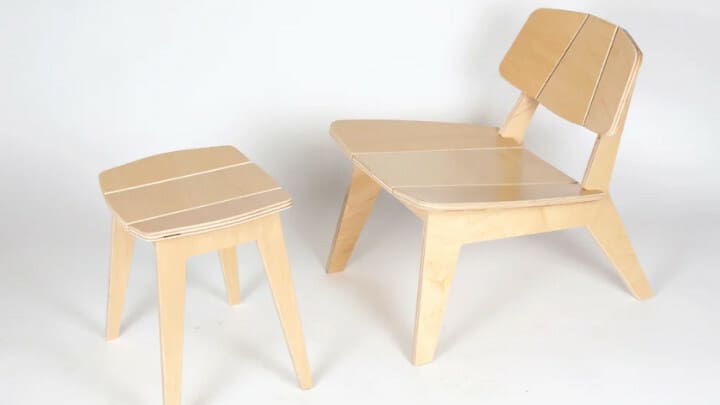
This chair was specifically designed to demonstrate that high-quality furniture can be achieved with a CNC machine. With that in mind, all of the interlocking parts were created to be as invisible as possible with the help of pocket cuts. The result is an exquisite, beautiful chair that is the perfect option to opt for, to kick back and relax.
Aside from a CNC and other tools, all you’ll need is 3/4-inch plywood and some wood glue. On the Instructables page, the maker has provided extensive information about how the project was conceived and how to make it for yourself. Even if you’re not a seasoned CNC maker, you can feel confident giving it a try.
- Who designed it? alepalan
- How popular is it? This beautiful chair has garnered over 700 likes and 10 makes so far.
- Where to find it? Instructables
Interlocking Bed Tray
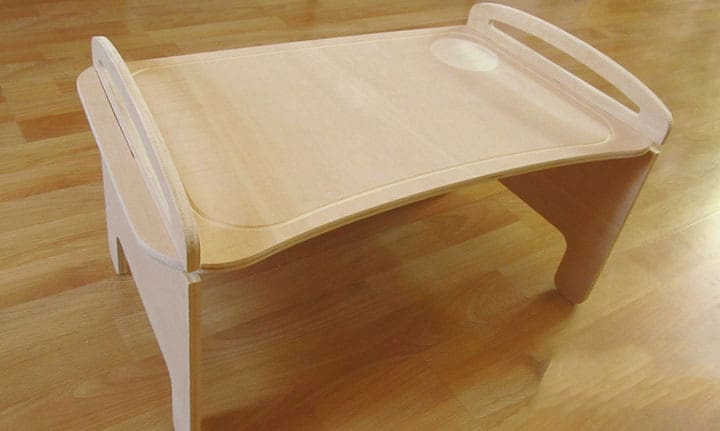
Whether you want to enjoy breakfast in bed or get some work done on your laptop, this tray is sure to come in handy. Its lightweight and compact size makes it an ideal addition to small living spaces, and it’s easy to store when not in use. The top of the tray features a space for cups and can be further customized to your preference.
The interlocking design adds structural integrity to the tray, and assembly should be straightforward. The designer notes that you will need a piece of 3/8-inch thick plywood, about 24 x 27.5 inches in size. It should take about an hour to carve the tray, apply sandpaper, and finish with polyurethane.
- Who designed it? BCNC Custom by Jeanik & Alejandro
- How popular is it? This design has over 1,100 downloads and more than 130 likes on Inventables.
- Where to find it? Inventables
Space Frame Stool
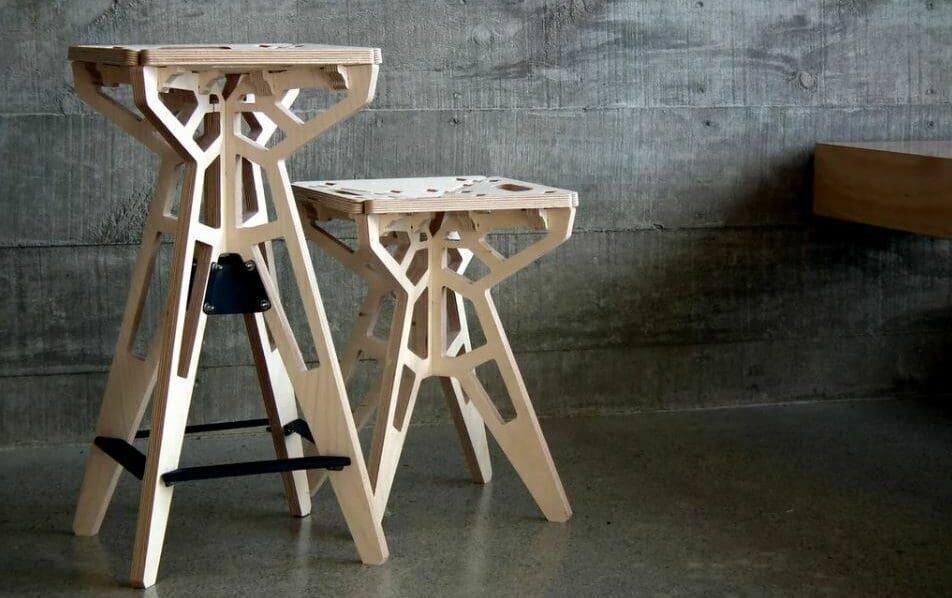
If you have a CNC router with a larger capacity (such as a Maslow) and you want to showcase its capabilities, try taking on this space frame stool as a project. The designer has both large and small stools available. However, the larger one requires some metal hardware.
The look is inspired by the crisscrossing frames commonly seen on spacecrafts. These stools, designed and created in a fab lab, would be a robust addition to your house or workshop. The best part is that you’ll have somewhere stylish to sit while you watch your CNC make tons of other cool projects!
- Who designed it? bwardesign
- How popular is it? This model has four makes on Thingiverse.
- Where to find it? Thingiverse
Piggy Coffee Table
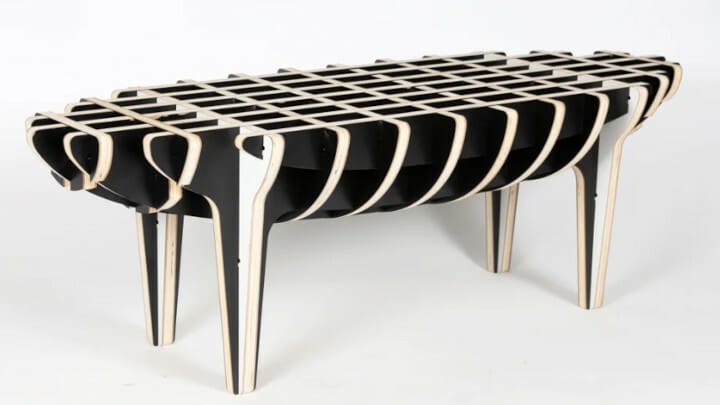
What about a piece of furniture designed with an animal in mind? What if that animal was a pig? Yes, somebody made a pig-inspired coffee table and did a great job turning their vision into a reality.
The table features a waffle-like construction consisting of crossing profiles for the structure, making it strong and durable. With a bit more than 2 inches (50 mm) of spacing between the boards, you can set plates and mugs on it with no problem.
This type of construction requires many interlocking connections between the parts, so double-check your material thickness before cutting to avoid ending up with extra work while putting the parts together.
- Who designed it? alepalan
- How popular is it? This wild coffee table has over 350 likes, and counting!
- Where to find it? Instructables
Gadgets & Kitchen
The following items are designed to be useful for daily life, including kitchen gadgets, organizers, and light fixtures. They serve a practical purpose and can help make life a little easier.
Swirl Tray
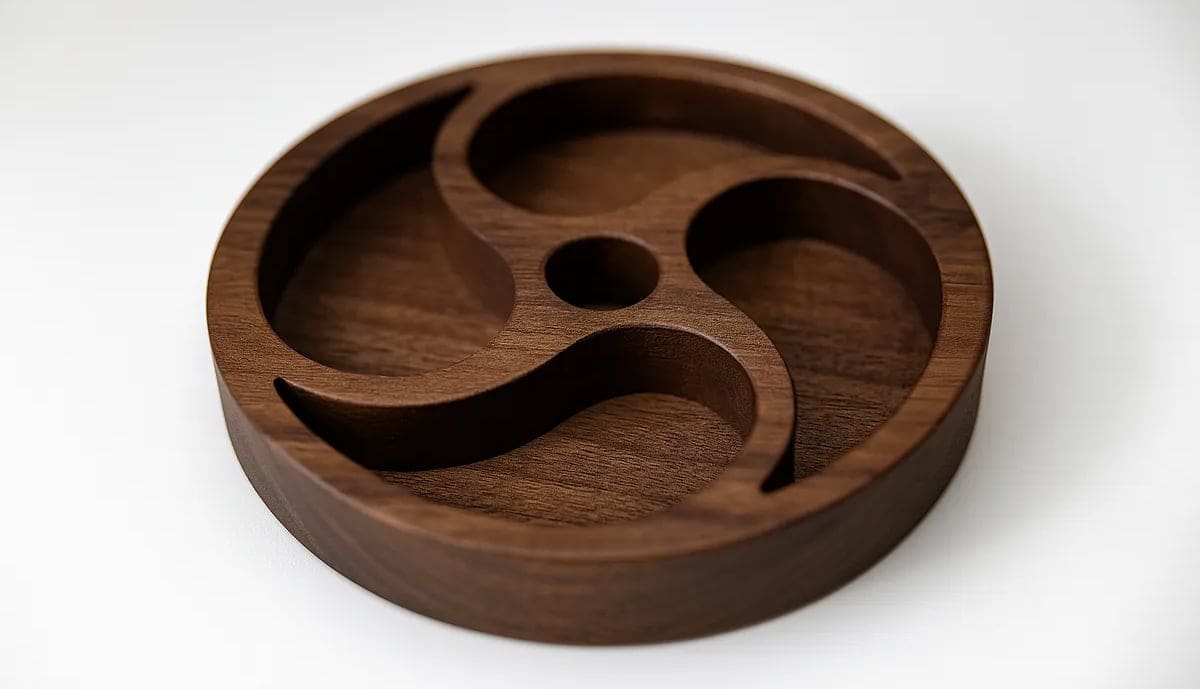
This small tray has five compartments to store items. It is made to fit on a 3018 or other small bed CNC machine, but can be scaled up to a larger size for bigger items. As shown above, the tray is made in a wonderful walnut.
- Who designed it? Zach Kaplan
- How popular is it? This model is brand new at Inventables, using Easel
- Where to find it? Inventables
Trivet
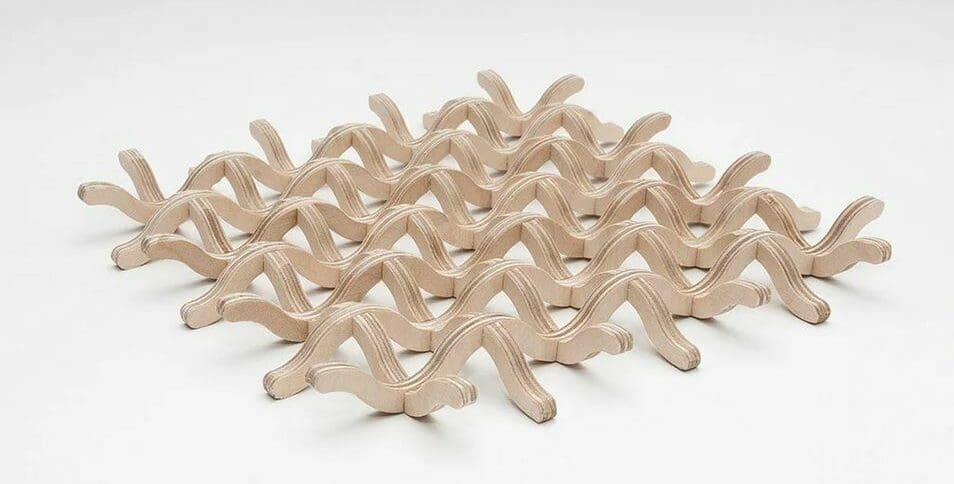
This cool trivet is unique because it holds pots and pans off the table using a wavy, 3D structure. The pieces that make up this design are identical and conveniently easy to make on just about any CNC machine. You could even scale them down to make a smaller version to use as coasters for mugs and cups!
Take your time during the assembly process. You’ll need to use wood glue and clamps on each of the joints. It’s not recommended to apply any sort of wood finish to this model if you intend to set hot pots and pans on it.
- Who designed it? ZenziWerken
- How popular is it? This model has two makes on Thingiverse, both of which used the same 6-mm plywood that the designer recommends.
- Where to find it? Thingiverse
Sunglass Case
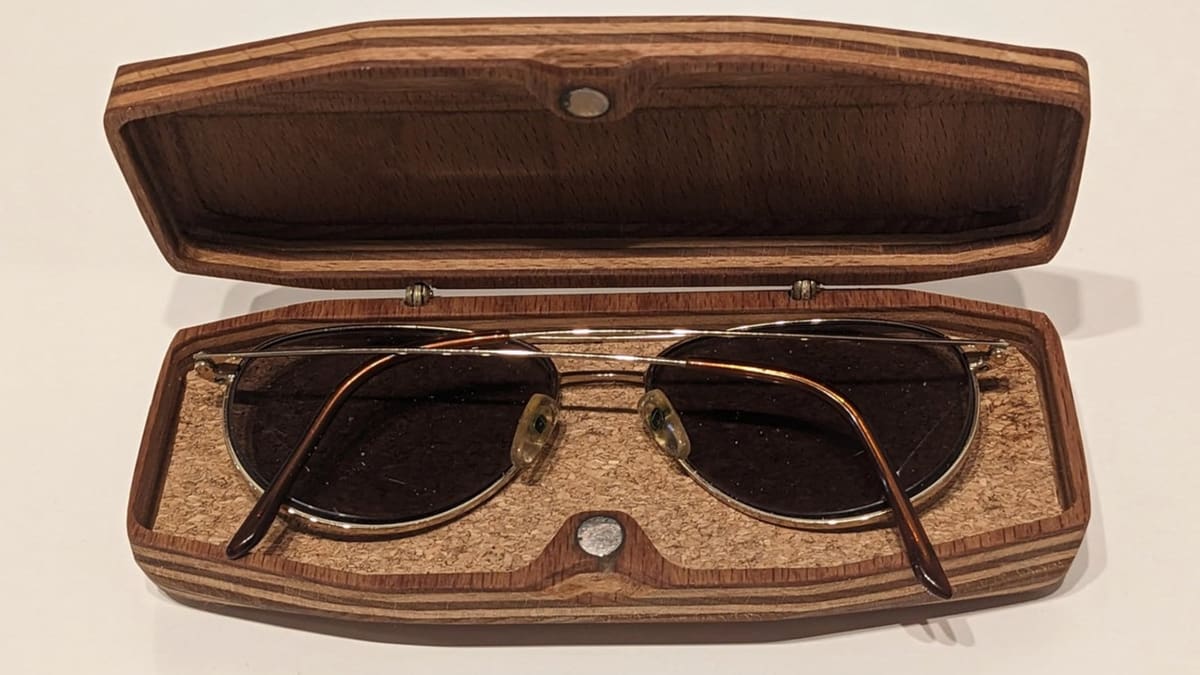
This is a meticulously designed case that impresses with its sleek appearance. The designer prototyped the part with 3D printing before milling the wood case itself, ensuring that the sunglasses would fit the case. The provided instructions on Instructables are straightforward, so you can easily create a stylish and functional accessory for yourself.
The case is composed of two parts, a top and a bottom. Note that each part has to be milled on two sides, making this a bit more complex than the average CNC router project. You’ll have to flip the piece you’re milling and place it correctly to work the second side.
The designer’s choice of maple as the material lends a sophisticated aesthetic to the finished product, but other materials could look just as nice or even better. In addition, hinges and neodymium magnets are required for the lock mechanism. To make the case shine, you’ll want to use sanding paper, oil, and wax.
- Who designed it? alepalan
- How popular is it? This groovy design has over 16,000 views and 1 shared make so far.
- Where to find it? Instructables
Knife Block
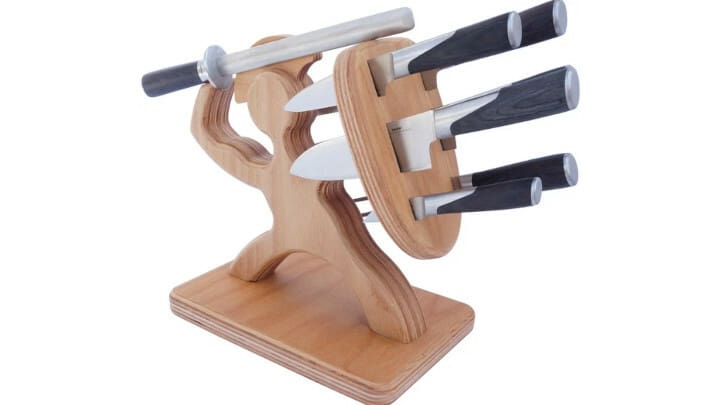
This unusual yet practical knife block is capable of holding knives of different sizes. The small and relatively simple construction makes it fairly fast to mill, but some finishing touches are required, such as gluing, adding a magnet, and rounding the corners.
The piece has a creative sandwich-like assembly, with flat parts of 15-mm plywood positioned side by side. Besides the plywood to mill, you will need a 25-mm magnet of 5-mm thickness (or adjust the design to the magnet you have), some 6-mm dowels, felt pads, wood glue, and the wood finishing of your choice. Recommended finishings are clear varnish or walnut oil. Since this is a kitchen piece, a food-safe finish would be a good option.
- Who designed it? Christian Knuell
- How popular is it? This powerful-looking knife block has received over 3,200 likes, and 10 makes have been shared so far.
- Where to find it? Instructables
Bent Spiral Bowl

Here’s a great example of an advanced CNC project. This bowl is made from one piece of plywood and is quite easy to cut on the CNC, although all the magic happens after cutting. This design requires you to bend the fingers of the plywood so that they stack one on top of another and subsequently hold each other up in the form of a nice, decorative bowl.
The designer recommends that you soak the wood in water and heat it in the microwave prior to forming it so that it’s easier to bend. There’s an art to heat-bending wood, and that’s what makes this such a stunning yet challenging project.
- Who designed it? ZenziWerken
- How popular is it? This cool, functional model has two makes and two remixes on Thingiverse, and one other maker has shared their creation on Instructables!
- Where to find it? Thingiverse, Instructables
Pendant Lamp
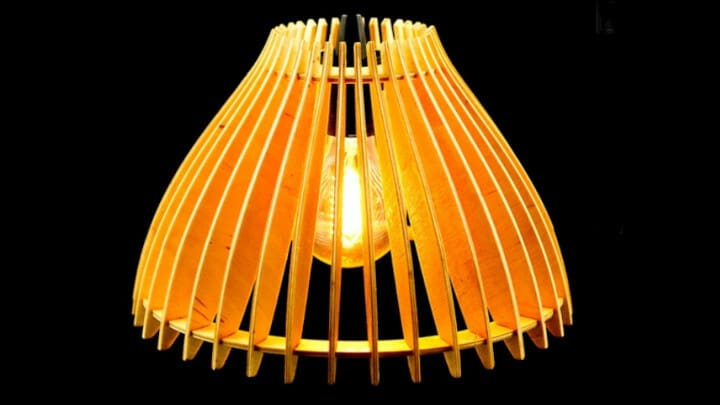
A nice light fixture is essential for creating a beautiful living space, whether in a living room, dining area, or entryway. Here is a modern and delicate pendant lamp made with 4-mm plywood that will look perfect over a dining room table. Of course, you can varnish or paint it to complement any room!
This is compatible with a standard EU 40-mm lamp holder fitting, so make sure it fits the cord set you have before cutting or make the necessary adjustments to the drawing.
- Who designed it? tomaq
- How popular is it? This fancy light fixture has over 330 likes and 2 makes so far.
- Where to find it? Thingiverse
Dodecahedron Lamp

This model requires precision from you and your CNC machine because it was originally intended to be made with a laser cutter. That said, with a small diameter bit and the correct speeds, you should be able to do this on a variety of different CNC routers as well.
You can cut all the pieces out of thin plywood or acrylic and then assemble them with glue. Mount a standard socket inside, and you’ll be off to the races! It should also be easy to scale this model up and turn it into a multi-bulb hanging fixture using some thicker material. Either way, this cool dodecahedron lamp is sure to brighten up your day!
- Who designed it? IliasBarthelemy
- How popular is it? This model has three makes and two remixes, proving its popularity.
- Where to find it? Thingiverse
Clamp
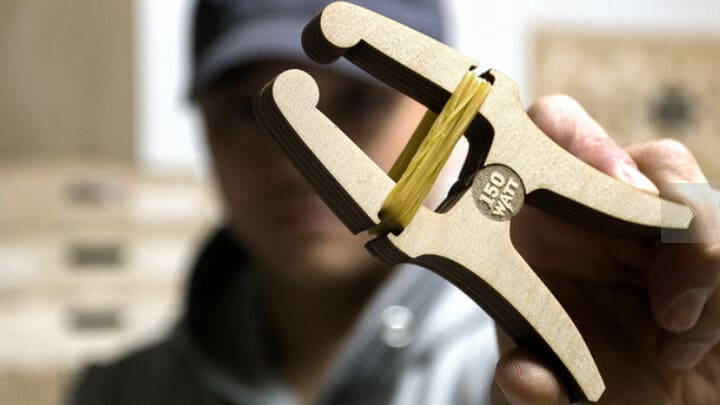
While this model was originally designed for laser cutting, you can mill it with the right tool. It’s a practical clamp with a creative construction process that involves using rubber bands to compress the milled parts. It will make your work easier the next time you have to glue together your CNC-cut parts.
The assembly of one arm of the clamp consists of layering two different profiles in alternating order to make each arm of the clamp. The layering order of the other arm should be opposite to the first. Then, these arms can be interlocked and kept in place with rubber bands. The designer provides a YouTube video that clearly explains the build process.
In addition, cutting files for three sizes of clamps are provided. The recommended material is 3-mm plywood, but you can try other kinds of non-brittle sheet-board material with a thickness compatible with your equipment.
- Who designed it? Sotoshi
- How popular is it? This handy tool already has over 550 likes, 3 makes, and 1 remix.
- Where to find it? Thingiverse
Decor
From vases to figurines, here are some stylish decorative items for your home, office, and beyond! These items may not be the most practical, but they can add a personal touch to any room.
Friends-Themed Frame
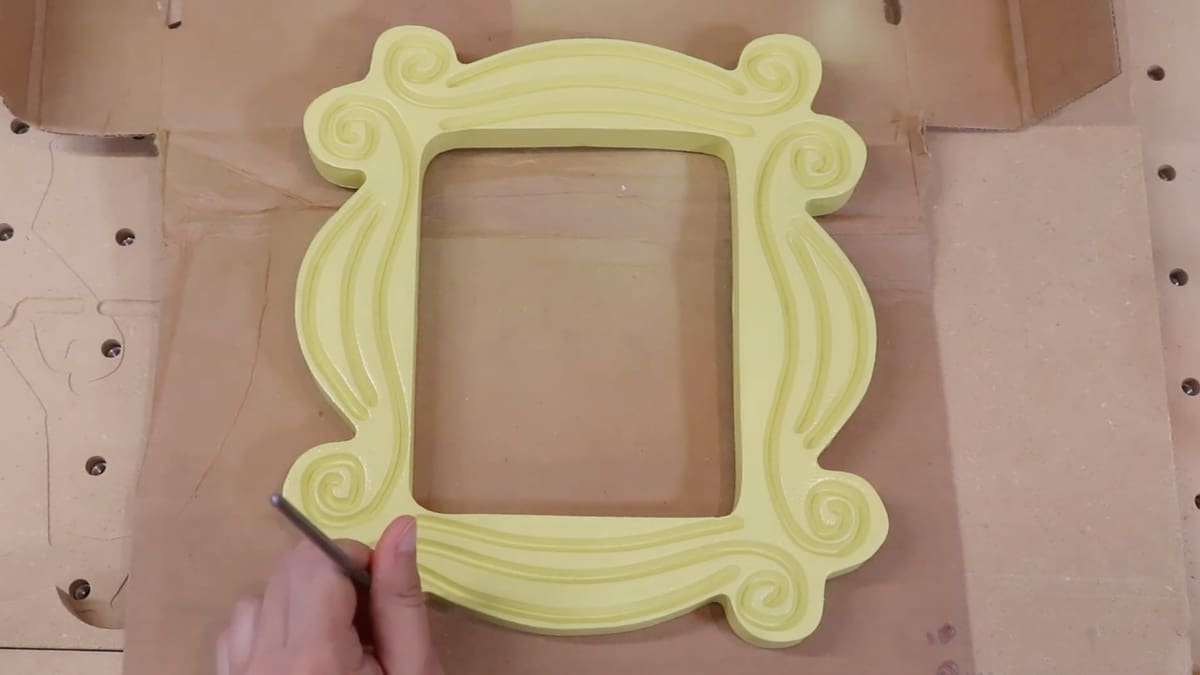
If you’re a fan of Friends, you’re sure to recognize this nostalgic nod to the beloved TV series. This is the frame that hung on the door of Monica’s apartment. With CNC milling, you can recreate the piece for your own home.
The project includes clear instructions for working with DXF files for milling, helping enthusiasts of all skill levels. A detailed video shared by the creator offers valuable insights into the design and making process, showing the vectorization of a black and white image. The DXF file is processed to make the toolpaths in Carbide Create, including a V-bit toolpath.
- Who designed it? Hearthhomedesigns
- How popular is it? This nostalgic design has over 3,000 views and more than 800 downloads.
- Where to find it? CutRocket
Roman Numeral Clock
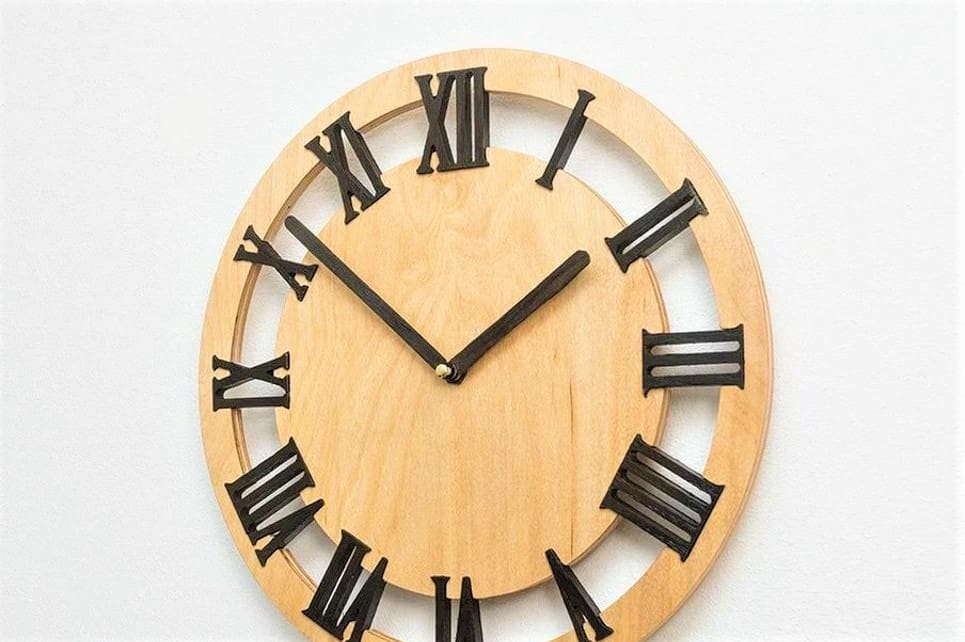
The internet is loaded with CNC-cut wooden clocks. Just search “CNC router clocks”, and there’ll be no shortage of designs!
While there are many clocks out there, this design is unique because the Roman numerals are used as butterfly joints to hold the rest of the clock together. Although this piece may take some work to construct, it will definitely look great on any wall.
- Who designed it? ZenziWerken
- How popular is it? The online community on both sites has rated this model with plenty of likes and downloads. There’s also one make and two remixes on Thingiverse.
- Where to find it? Cults, Thingiverse
Christmas Ornament
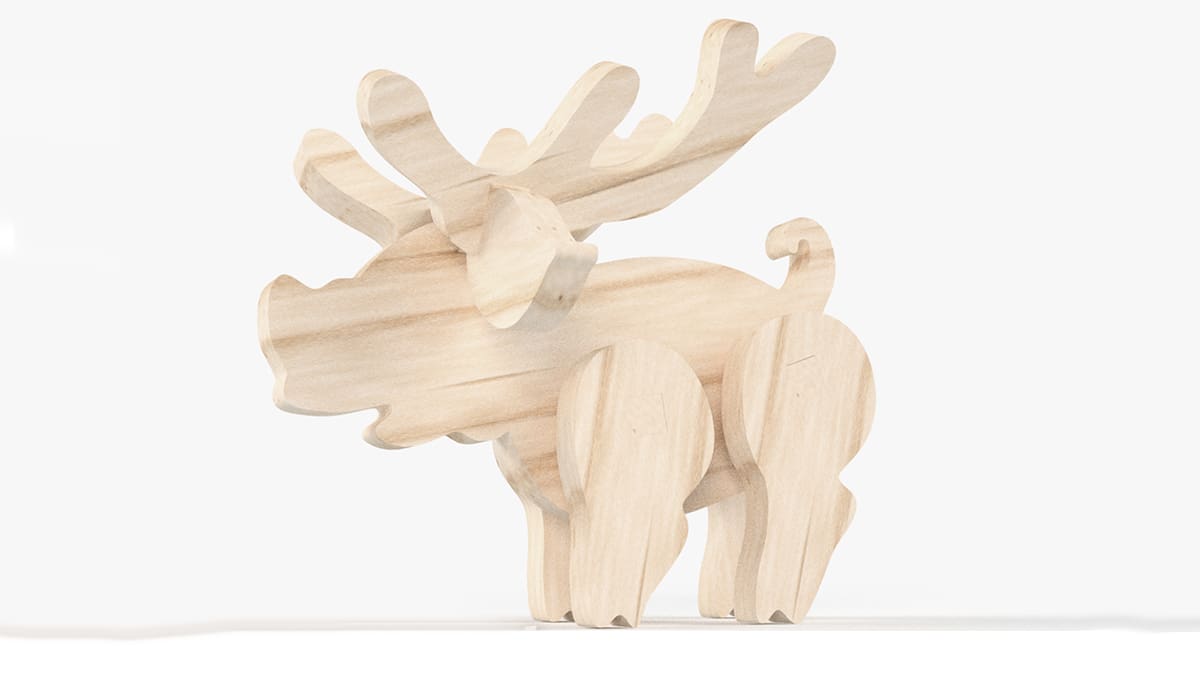
This small Christmas tree ornament, a pig reindeer or Christmas piglet, is designed to fit inside greeting cards. The ten pieces can be attached nicely using glue dots. The legs are slightly offset outwards with cross connections due to the thin material. Otherwise, the little pig would have turned out a bit too slim.
- Who designed it? ZenziWerken
- How popular is it? The online community on both sites has rated this model with plenty of likes and downloads. There’s also one make and two remixes on Thingiverse.
- Where to find it? Cults, Thingiverse
Serving Tray

The serving tray is a classic piece, exuding timeless charm. Use it as a coffee table decoration, or keep it ready in the kitchen for the next time you have company. You can easily customize and adapt the tray with various sizes or materials, depending on your preferences.
Crafted with quality wood and attention to detail, the tray is designed to stand the test of time. You’ll need 3/4-inch lumber, 1/4-inch plywood, sandpaper, wood glue, and spray lacquer for the project. For detailed assembly instructions and to see how the tray was created, check out this video from the designer.
- Who designed it? Steve Carmichael
- How popular is it? This design has over 1,400 downloads and more than 200 likes so far, not to mention plenty of comments from people on YouTube.
- Where to find it? Inventables
Kinetic Sculpture
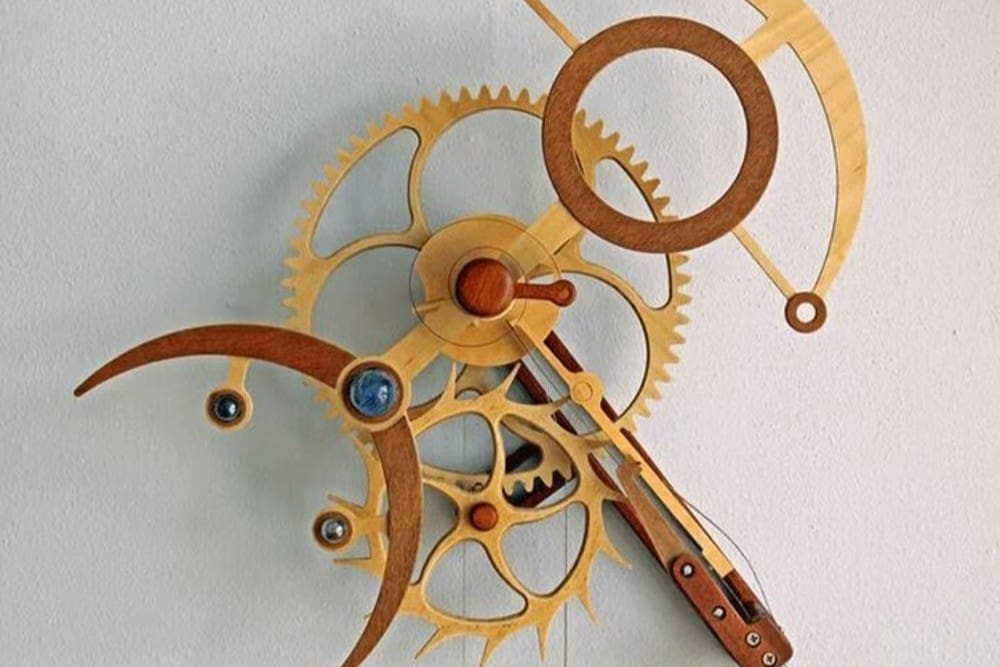
This CNC kinetic sculpture is sure to look great on your wall. It’s about 50 cm (20 inches) wide and runs for several hours on a single winding. The plans are available from Clayton Boyer, who has developed an assortment of designs for CNC clocks and other moving artwork.
Most hobby-level CNC routers would work well for this size of this project, and without the need to cut metal parts, it’s a good step up from simple milling.
Just keep in mind that wood isn’t typically used for mechanical assemblies for a reason: The material doesn’t easily allow for accurate meshing. Issues such as compressing, chipping, and snapping can quickly get in the way of an accurate mechanical assembly. Treat this project more as an exercise in aesthetics rather than engineering.
Also, keep in mind that the DXF files for this cool piece will set you back $37. While this is by no means cheap, we haven’t found any similar models for a better price. If you’re paying for the files, you’re – in a way – committing to making the model, so make sure that you and your machine are up to the challenge!
- Who designed it? Clayton Boyer
- How popular is it? This incredible sculpture has over 82,000 views and more than 200 likes on YouTube.
- Where to find it? Clayton Boyer Clock Designs
Cryptic Calendar
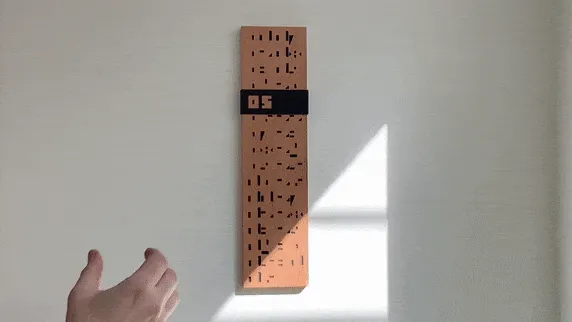
This calendar uses negative space and a sliding black bar to make the dates visible. All of a sudden, you’ll see those random markings come to life while they’re helping you keep track of which day it is. The design is quite modern and it’s rather refreshing to see an abstract take on familiar items.
You might ask yourself, “How does it work?” As you can see above, the clever design keeps track of up to 31 days, and all you have to do is flip the black bar over to continue ascending in numbers. You can see the lengthier video on the project page.
The creator gives some detailed instructions on how to assemble this calendar. Be forewarned, they mention in the tutorial that you want to make sure to adjust the G-code to work with your CNC height and your own bits.
- Who designed it? cfb70
- How popular is it? With over 82,000 views, 1 make, and around 700 likes, this calendar will turn heads at your next group event.
- Where to find it? Instructables
Marvel Maya Calendar

These days, it’s hard to find someone who isn’t familiar with Marvel’s Cinematic Universe. This is a beautiful abstract interpretation of the Aztec calendar for Marvel fans. Think of it as something you never knew you needed until you laid eyes on it.
This design impresses with its creative detail and many hidden Easter eggs. It’ll probably take admirers a while to absorb all the intricate details.
The creator of this piece used Vectric Aspire to draw everything and convert it into G-code. He spent 60 hours adding content and redrawing everything to make it machinable. The creator also noted that it took 10 different iterations of designs before they got it just right. Hopefully, this reminds you to not get discouraged when you design something, especially when it doesn’t go as planned.
- Who designed it? sandyeggocnc
- How popular is it? Marvel fans are definitely showing their support by producing 17 makes. It even inspired someone to make a remix of it!
- Where to find it? Thingiverse
Layered Skull
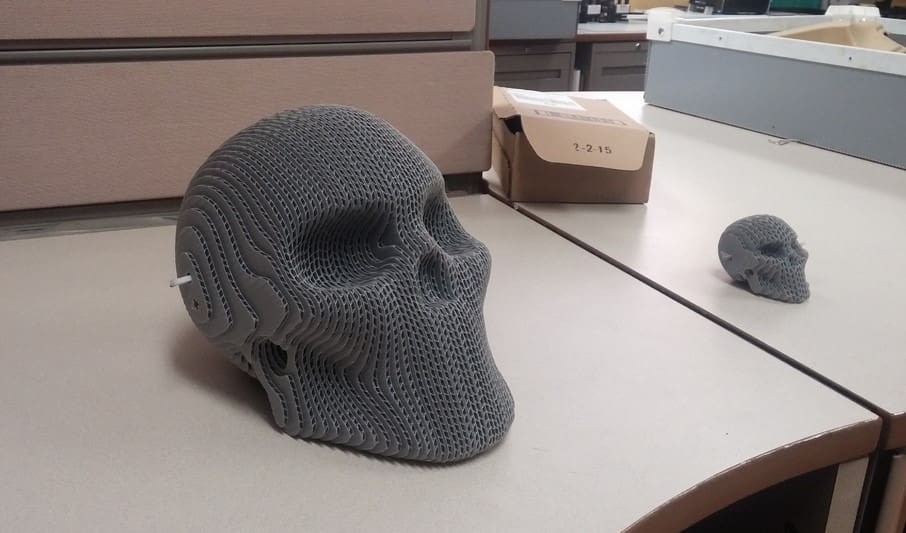
If you’re in the market for an awesome desktop trinket, paperweight, or downright cool model, look no further! This skull is made out of multiple layers of recycled corrugated plastic, each cut two-dimensionally and fastened together. Cardboard, plywood, acrylic, MDF, and pretty much any other sheet of material of the same thickness would also work.
The best part is that a model like this is easy on your machine, but the end result is a unique 3D model made on a fancy 3-axis CNC.
- Who designed it? Brap69
- How popular is it? This model has three makes and two remixes on Thingiverse, including a particularly cool one made out of clear acrylic.
- Where to find it? Thingiverse

Fun & Games
Want to have some fun? Check out these entertaining items. Whether you’re looking to unwind after a long day, spend time with friends and family, or explore new hobbies, there’s something for everyone here.
Tabletop Arcade
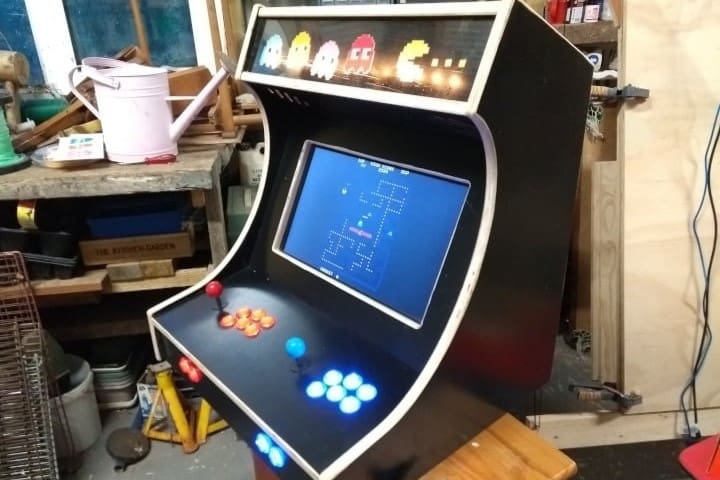
The tabletop arcade is a compelling project, catering to retro gaming enthusiasts. With well-detailed assembly instructions, it provides a user-friendly experience for those looking to build their own gaming console. However, makers should be aware that some customization may be required to accommodate their desired screen size.
While this flexibility can be a positive point for some, it may be a drawback for those seeking a more straightforward setup. The time-lapse video of the production is a valuable resource for getting a glimpse of the project in action.
- Who designed it? KingOfScolboa
- How popular is it? This design has a few beautiful makes shared on the forum.
- Where to find it? Maslow Community Garden
4x2 Brick
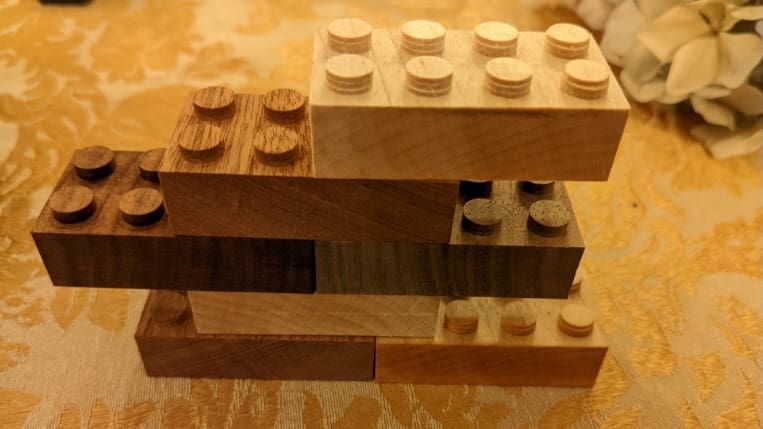
This design presents a twist on the classic Lego brick, offering a larger version of the iconic toy. One notable aspect of this brick is the challenge it presents in milling a double-sided part. To craft this piece, you’ll need to mill one side before flipping it to mill the other. To help with this endeavor, the designer provided a specially developed part entitled “workholding”, which serves as an accessory piece to position the part to be milled on the second side.
Additionally, due to its larger size, the brick demands a thicker material, typically around 3/4 inches (approximately 19 mm) in thickness. Despite these challenges, the end result is a unique rendition of a childhood favorite.
Solitaire Game/Puzzle
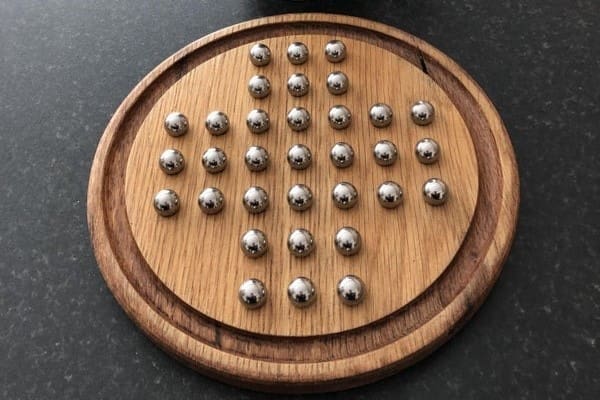
This next project doubles as a board game and coffee table decoration. The designer was inspired to create this solitaire marble game after being given two wooden toilet seat lids, proving that when life gives you lemons, you can use them to make lemonade (or at least a fun game).
The provided instructions for replicating the game in Fusion are comprehensive and user-friendly, ensuring that even beginners can successfully accomplish this project. The designer has also provided rules to the game on the Instructables page, in case you need help getting started.
- Who designed it? Kevr102
- How popular is it? This design has over 6,800 views and more than 40 likes.
- Where to find it? Instructables
Robot Arm
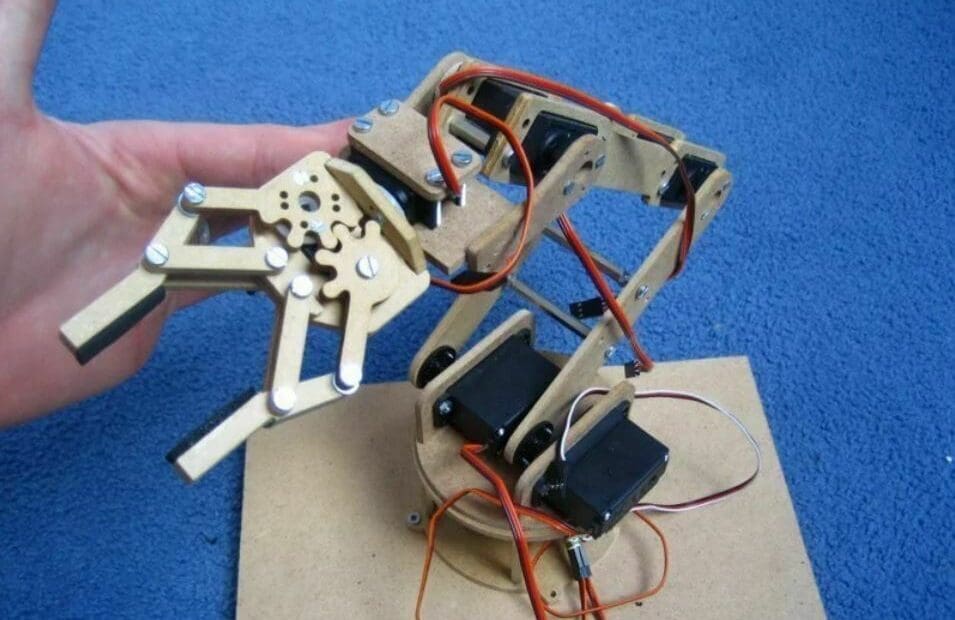
Need a robot arm? Quite a few variations can be found online. Many require a 3D printer for some of the parts, but the one shown here (barring hardware) is composed purely of router-cut pieces.
Milled from 40-mm plywood, the arm is moved by seven servos connected to an Arduino. Details, as well as a YouTube video and assembly instructions, can be found on Thingiverse.
- Who designed it? jjshortcut
- How popular is it? This cool, functional model has 10 makes and 1 remix on Thingiverse, while the files have been downloaded over 45,000 times!
- Where to find it? Thingiverse
Elephant Puzzle
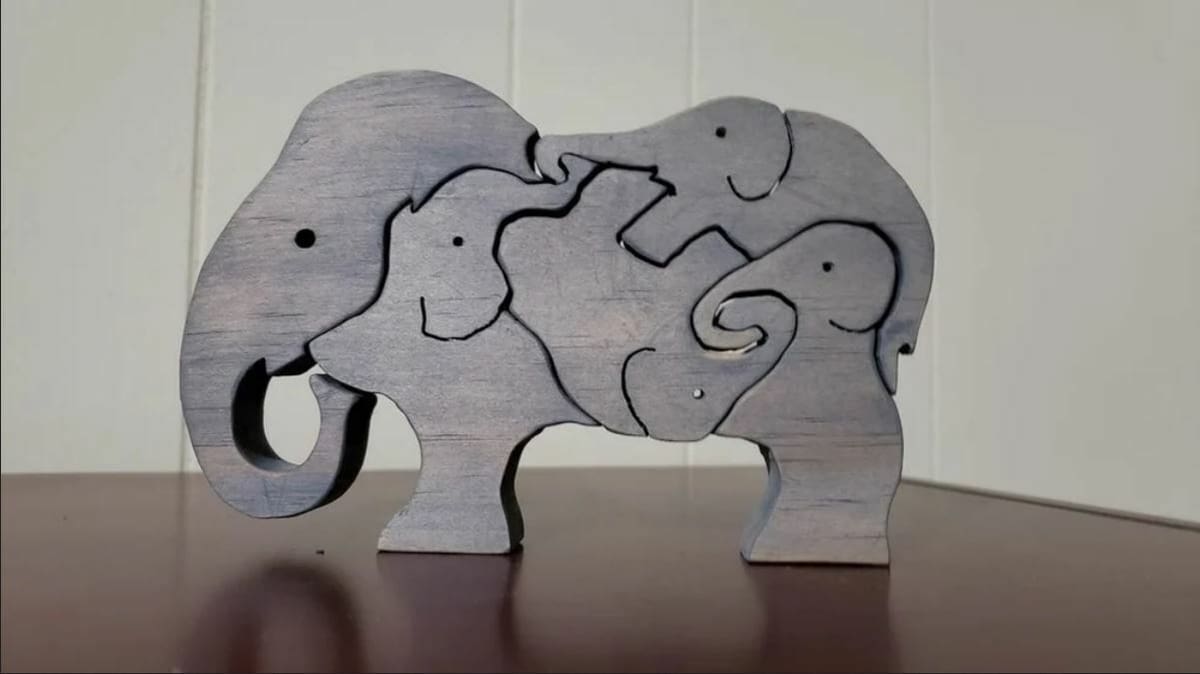
Not every CNC router project needs to be elaborate. This elephant puzzle is perfect for small children. It was designed to be made by hand using a scroll saw, but it can be easily adapted to a small CNC router using a 1/4-inch bit for the outside and a 1/8-inch bit to separate the pieces. The available pattern can be imported into most standard pieces of CAM software and made into a toolpath.
The original is cut from a 1-inch thick pine board to help it stand upright, but you could also go thinner and make a flat puzzle. With a little sanding, stain, and sealer, you can create an heirloom.
- Who designed it? LTDWoodworks
- How popular is it? The Instructables page for this model has over 18,300 views and over 110 likes. That’s a lot of popularity!
- Where to find it? Instructables
Mahjong Tiles
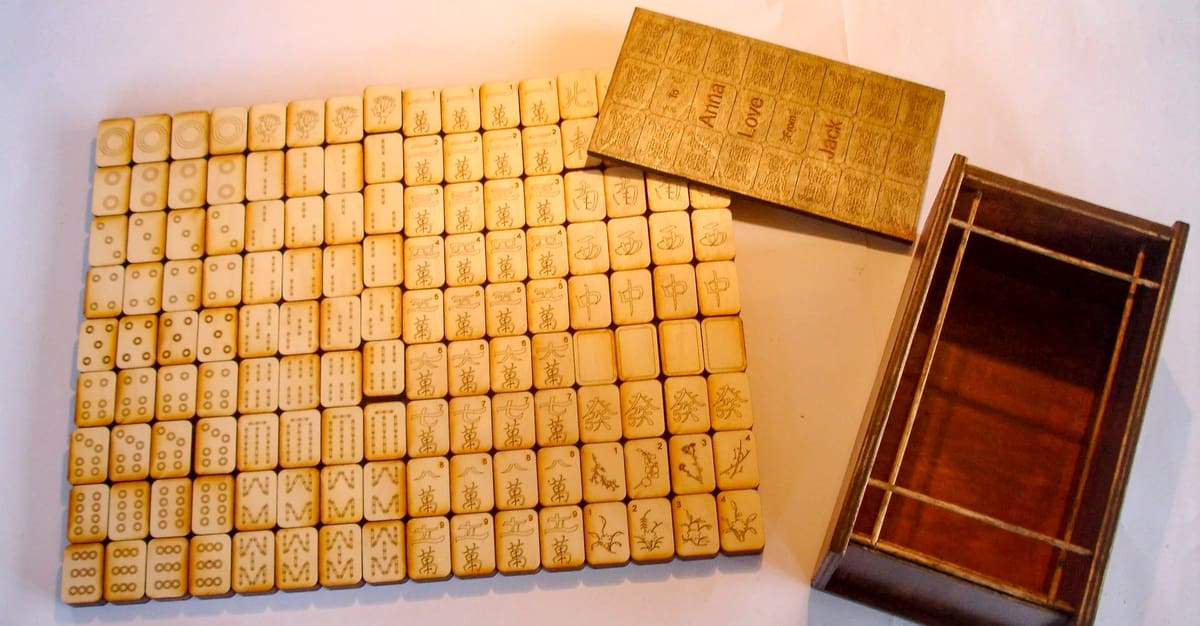
This design includes all of the symbols required to make a 144 piece Mahjong set. There are 144 fronts and 144 backs. It fits on a 450 mm x 800 mm sheet of 6mm birch. One idea is to stain the backs a darker color than the fronts. The fronts are glued to the backs using wood glue.
- Who designed it? Jack Moreton
- How popular is it? There’s no rankings on Obrary, but who wouldn’t want to learn this game!
- Where to find it? Obrary
Keycaps
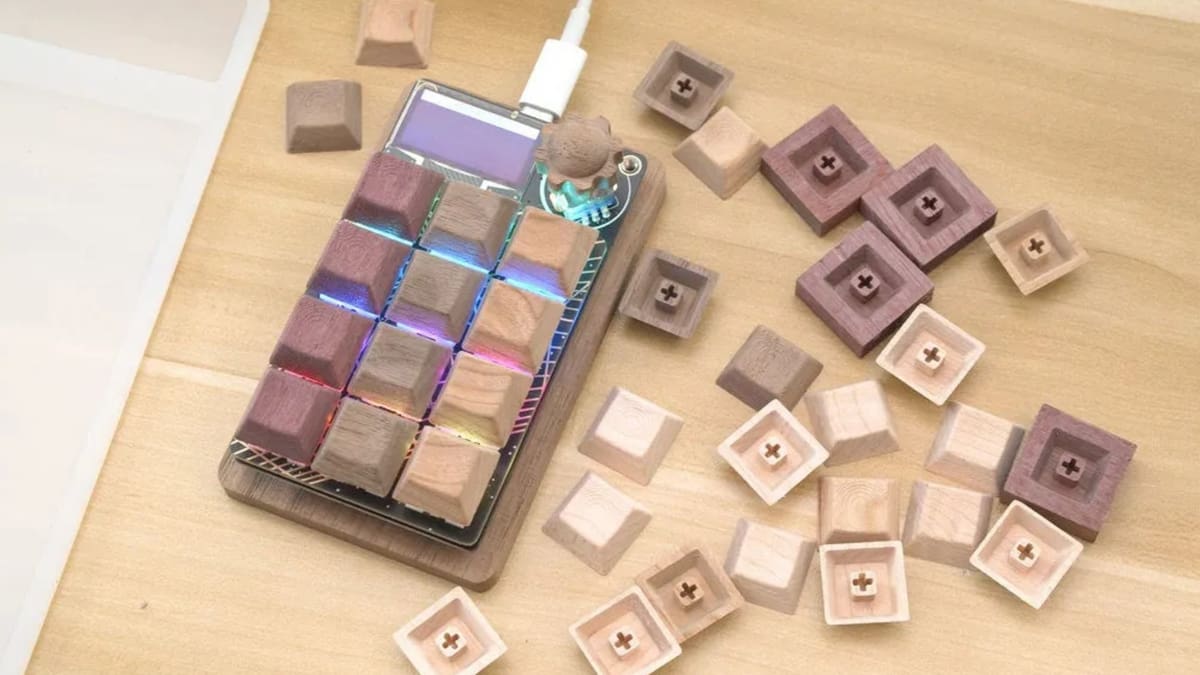
We see custom keycaps growing in popularity yearly, and we believe they will continue steamrolling forward. It’s amusing to see all the different and exciting keycaps that have been made and are for sale. Yet, wouldn’t you agree that there’s a certain satisfaction in knowing you made them yourself?
Adafruit has been nice enough to post an instructional video on YouTube. It showcases how to make these DSA keycaps in different woods, such as purple heart, walnut, cherry, and maple. They provide detailed instructions on how to design them and what size mills to use.
If you or a friend have a laser engraver, you can make an entire keyboard from different custom-designed wood keycaps. Plus, you can add your personal flair to their design.
- Who designed it? Adafruit
- How popular is it? These CNC keycaps have garnered around 500 downloads combined from both sites; we don’t see it stopping there.
- Where to find it? Cults, Thingiverse
Ribbon Box

Even though you’ve probably seen a lot of ribbon boxes, there’s something especially elegant and clean about this one. It’s made with a two-sided operation for the box and the ribbon, and they assemble with ease.
The creator of this project gives thorough details on how to mill this without worry. Included in the instructions are useful notes for what they advise after completing this project.
The ribbon is designed to be cut with two passes. The need for this stems from the bit used, which is the Carbide 3D #112 1/16″. That bit’s depth of cut has to be relative to the thickness of the stock for the ribbons to come out right.
- Who designed it? Makesthings
- How popular is it? While no makes have been posted, this cute box surely has plenty of admirers.
- Where to find it? CutRocket
Double-sided Circular Maze
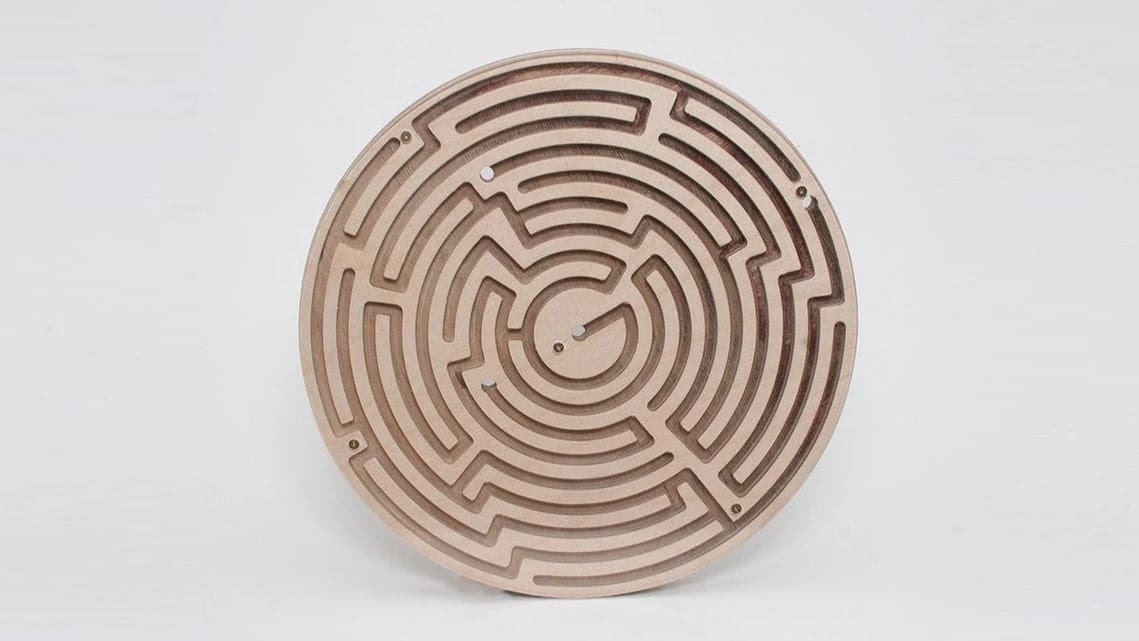
Some mazes lose their pizzazz with people over time. They may feel too simple when you can see the whole maze and figure out how to get to the center just with your eyes. This maze challenges that very problem.
The double-sided circular maze is made in a way that forces you to flip it over at least twice, making it more challenging to get the ball to the center. The maze brings a welcome twist to a classic that people of all ages can still enjoy.
The tools you’ll use are a spiral-toothed 3-mm flute for the wood and a 2-mm end mill for the acrylic. Supplies include a couple of 6-mm beech plywood sheets, a couple of 2-mm acrylic sheets, and a 3-mm steel ball. The ball that the designer used was taken from a bike wheel hub.
- Who designed it? ZenziWerken
- How popular is it? This maze has proven its popularity with over 8,000 downloads on both sites, and 2 shared makes on Thingiverse.
- Where to find it? Cults, Thingiverse
License: The text of "The 30+ Cool Things to CNC Right Now" by All3DP is licensed under a Creative Commons Attribution 4.0 International License.