The Best Resin 3D Printer Settings for Perfect Results

To get your resin prints right, it's all about the settings. Learn the most important slicer settings for resin 3D printers!
Resin 3D printing has become more accessible with the decreasing prices of resin printers. New machines are being released more frequently, and many people are considering a resin printer for their projects.
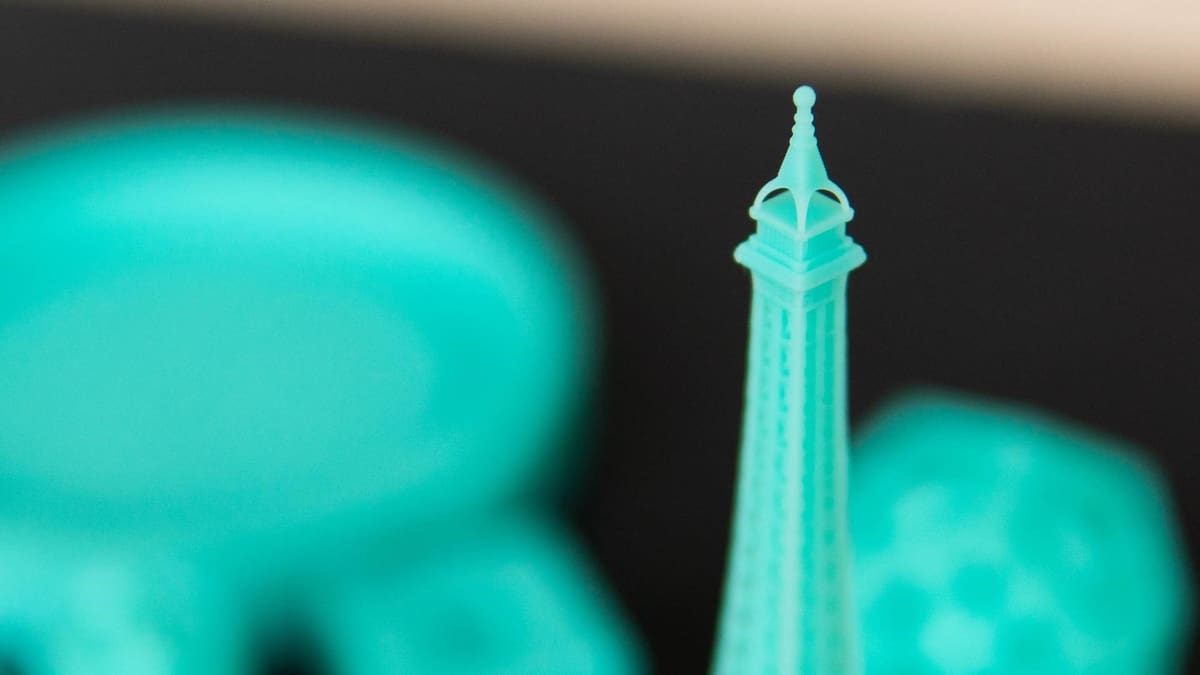
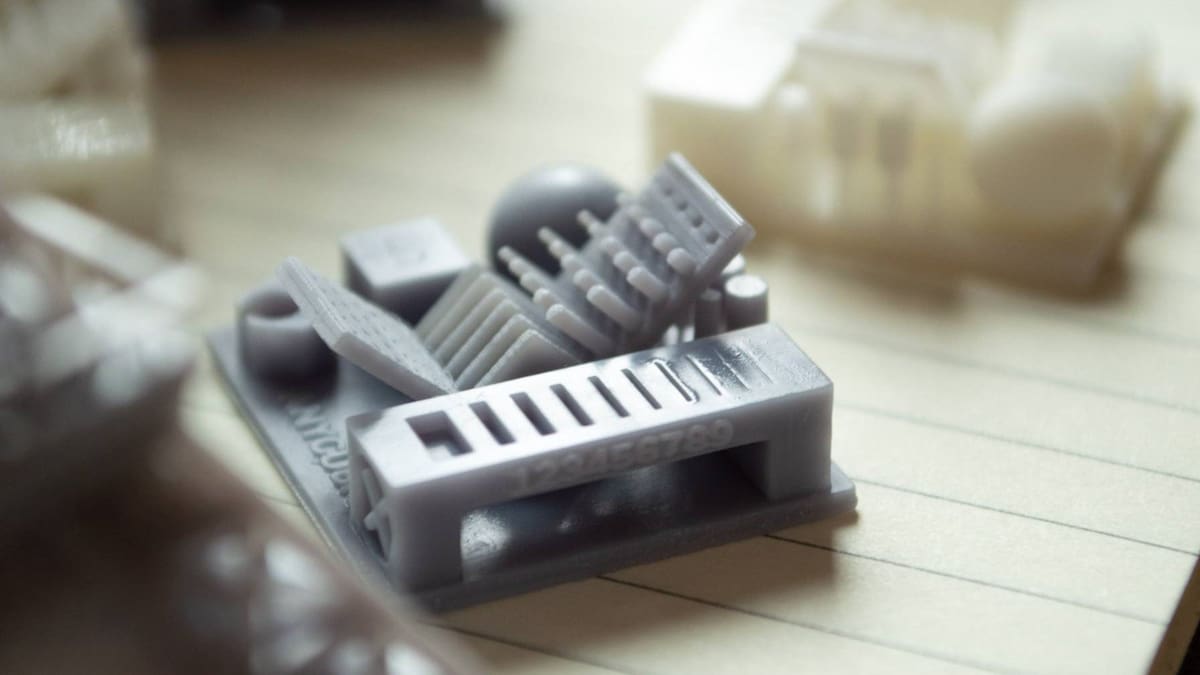
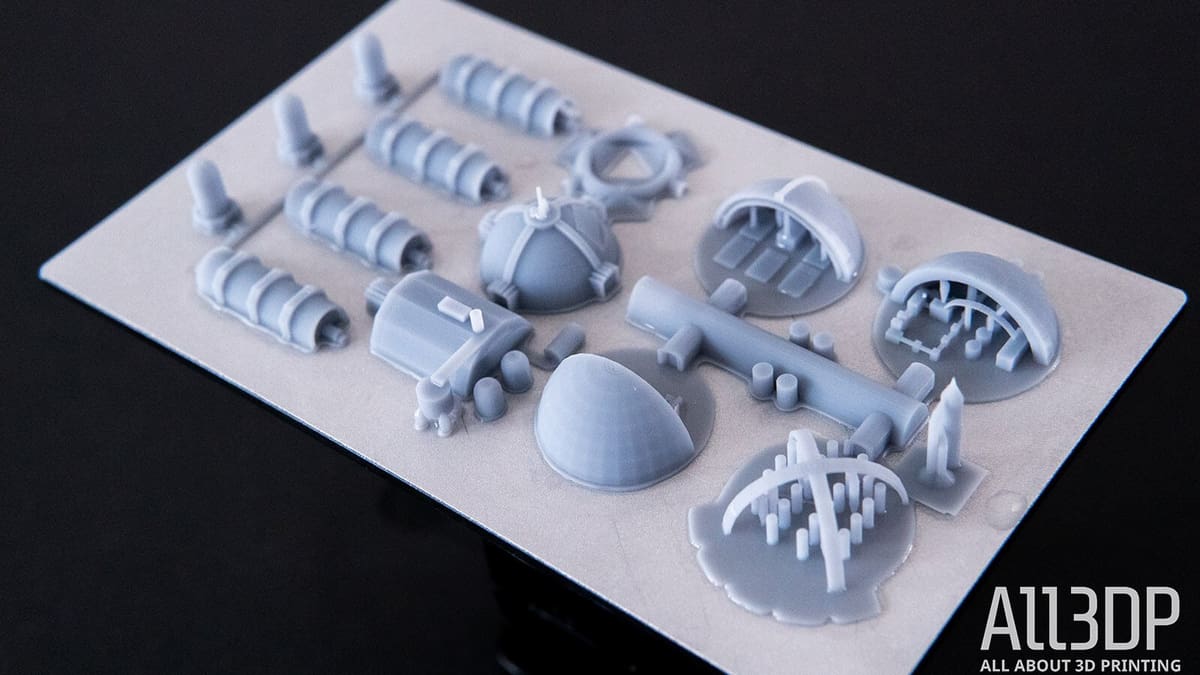
Resin printing generally offers better print quality than fused deposition modeling (FDM) printing and is excellent for miniatures, figurines, and action figures, where minute details are of significant importance. But if you want to reap the benefits of resin printing, you’ll need to know the right slicer settings to achieve the best possible prints.
In this article, we’ll discuss some of the most important slicer settings you should keep in mind. Although other resin printing technologies, slicers, and approaches are out there, we’ll focus specifically on LCD-based resin printing and basic settings available in Chitubox. Before diving into all of the settings, though, let’s quickly review how LCD-based resin printing compares to other resin printing technologies.
Technologies Compared
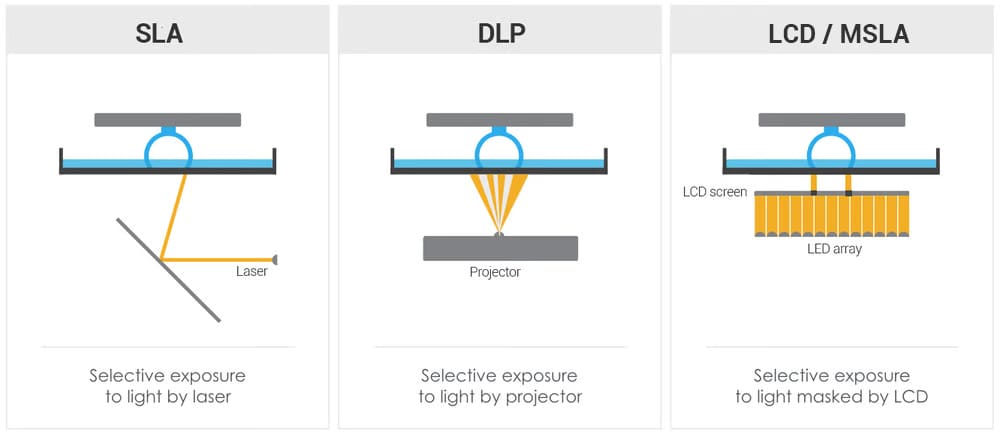
Resin 3D printing works by exposing the resin material to a light source to cure (harden) it. In addition to LCD-based resin printers, there are two other main types of resin printers: stereolithography (SLA) and digital light processing (DLP) 3D printers. All three are differentiated based on the light source used.
SLA
SLA 3D printing uses a laser as a light source to cure the resin, tracing each pixel in a layer one at a time. This was the first type of resin printing invented and, indeed, the first type of 3D printing ever. These printers provide exceptional quality and are often used in high-end 3D applications. The Formlabs printers are a great example of SLA 3D printers.
DLP
DLP 3D printers use a UV projector instead of a laser as a light source for curing resin. Directed through a complex system of mirrors, the projector cures a whole layer at the same time, which can make it faster than the SLA printer’s laser.
LCD
LCD-based 3D printers are somewhat similar to DLP printers, in that they also cure an entire layer at once. They differ in that the light is passed through an LCD screen, which masks particular areas, selectively permitting the light to pass through certain regions. Hence, these printers are also termed “masked SLA” (mSLA) printers. LCD-based printers are comparatively cheap, and most of the hobby 3D resin printers, such as the Anycubic Photon and the Elegoo Mars series, use LCD technology.

Layer Height
Layer height is a parameter that indicates the height of each individual layer in your 3D printed part. A lower layer height means a more detailed 3D print because it will give a smoother surface finish.
Standard Layer Heights
With resin printing, the layer height is already one-quarter to one-tenth of what it would be with FDM printing. With FDM, standard layer heights hover around 0.2 mm, whereas resin printers typically operate between 0.01 to 0.05 mm, or 10 to 50 microns.
In Chitubox, the default layer height is set to 50 microns. This value prioritizes speed over quality, and it may lead to a slight dip in the surface finish and the overall quality of your 3D print. Meanwhile, a layer height of 25 microns provides a good balance between print speed and quality. At this height, you can get a smooth surface finish, and the time required would be roughly half of that with a 10-micron layer height.
Small Layer Heights
Right off the bat, it’s worth mentioning that not all printers are capable of 10-micron layer heights. Regardless of what you set in the slicer, actual layer height will be limited by how minutely your printer’s Z-axis can move up or down. Also limiting might be the resin, but most should be capable of 10-micron layers, even if the recommended layer height is higher.
All things considered, it’s debatable whether very fine detail is worth the added print time. Below 25 microns, it becomes difficult to see differences in quality.
Exposure Time
Resin 3D printers cure the resin by exposing it to the UV light source. The exposure time is therefore the duration for which the uncured resin at the bottom of the tank is exposed to UV light. It’s essential to get this setting dialed in perfectly, as it directly affects the quality of your 3D prints.
If you keep a low exposure time, the resin may not cure properly, and the following layers may not stick to the build plate. In contrast, a high exposure time can lead to brittleness and cracks in prints as well as light scattering throughout the vat. The trick, then, is to find the sweet spot.
Each resin is formulated differently, so it isn’t easy to generalize the exposure time setting. Usually, resin manufacturers suggest exposure times on their resin bottles, and it’s best to stick to that. Otherwise, an exposure time of 1.5-3 seconds is a good range for monochromatic resin 3D printers.

Bottom Layer Count
The bottom layers, as you can imagine, form the base of a resin print. These layers give the model a solid foundation and help it stick to the build plate. Because of how crucial they are to print success, several settings have special values just for these layers. One such setting is the bottom layer exposure time, which we’ll look at next.
In a slicer such as Chitubox, the bottom layer count is the number of layers to which these special values are applied. In general, between 5 and 10 layers are standard for a successful print, but some community members report saving time by using only two layers (even one)! If you’re unsure, start with the value that’s provided for your printer profile and then, if you like, you can decrease it as you become more confident with your understanding and application of other settings.
Bottom Layer Exposure Time
As mentioned above, the bottom layer exposure time is the exposure time used only for the bottom layers, the number of which is set with the bottom layer count setting.
The reason for having specific settings for exposure time is that a print’s success is heavily dependent on these first layers. If the bottom layers are properly cured, they will stick better to the build plate and won’t detach because of the weight of the rest of the print. In practice, this means that bottom layer exposure time is higher than regular exposure time in order to “overcure” the bottom layers.
As a rule of thumb, the bottom layer exposure time should be 8-12 times the regular exposure time. So if your regular exposure time is around 1.5-3 seconds per layer, the bottom layer exposure time should be anywhere from 12-36 seconds per layer.
Technically, setting this value higher will increase overall print time, but given that it only applies to the first few layers, the increase is marginal. It’s therefore not recommended to decrease this value or the number of bottom layers in order to reduce print time; a good base is worth the extra couple of minutes.
Lifting Speed
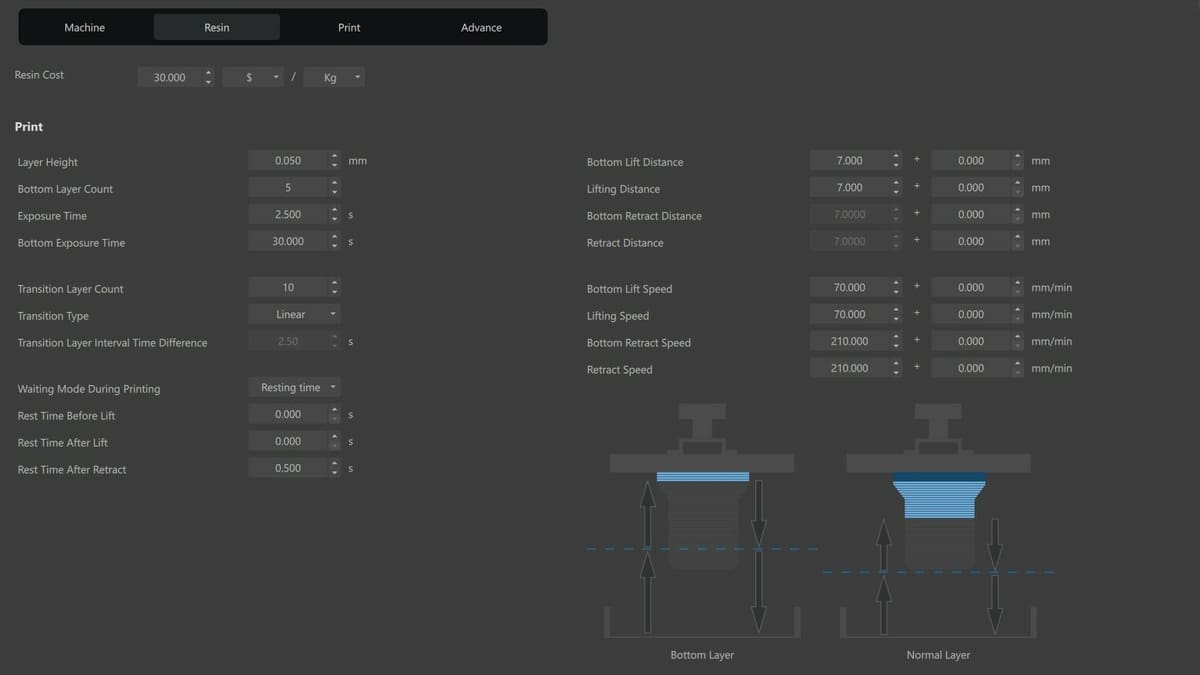
A single layer of resin is cured near the FEP film at the bottom of the resin vat. To cure successive layers, new, fresh resin needs to be introduced underneath. Thus, the build plate needs to be raised in order to pull the cured resin away from the FEP film and create a space.
Simple enough, right? Well, in Chitubox (and similar slicers), it’s actually a bit more complicated. That’s because the entire between-curing process is actually composed of several sub-processes, all of which can be adjusted. Adjusting them is worthwhile, as this process usually takes more time than curing!
Lifting, Retracting, & Resting
In Chitubox, there are three main settings groups to be aware of: one for lifting, one for resting (or pausing), and one for retracting. (Note that, if present, they may be labeled differently in other slicers.) In this article, we’ll mostly focus on lifting.
Lifting is where the build plate moves away from the print surface, peeling the cured resin off the FEP sheet and creating a gap for uncured resin to flow into. Here, there are four settings to be aware of: lifting speed, lifting distance, and the bottom layer versions of both.
Speed Settings
Generally, lifting speed and bottom lifting speed can be manipulated to reduce overall print time. Just keep in mind that, as the model is peeled away from the FEP film, a suction force is introduced. Thus, if the speed is too high, more delicate features and weaker model areas might be damaged. In the worst case, the print can detach from the build plate.
A good lifting speed should be in the range of 60-150 mm/min. Try adjusting the settings until you get a good balance between the printing time and the speed. For larger models or larger print volumes, avoid going too fast; the added weight from the print or the build plate favors slower movement for successful printing.
The bottom lifting speed shouldn’t be increased too much because you risk creating unstable bottom layers, which could lead to issues with the print. Furthermore, this setting only applies to a few layers, so you don’t stand to reduce the print time much by changing this.
The equivalent retraction settings control how quickly the build plate moves back toward the build surface. Generally, these can be much faster than their lifting counterparts because they will not be doing any delicate peeling.
Lifting Distance
The lifting distance is how high the build plate lifts after each layer is cured. It goes hand in hand with the lifting speed and is equally important for minimizing damage to the weaker areas of the model while it is being lifted.
The lifting distance should be high enough to allow enough uncured resin to flow into the newly formed gap but not so high that it unnecessarily increases printing times. In Chitubox, the lifting distance is set according to the current printer profile, but the value tends to float around 5 mm.
This can be reduced to perhaps as low as 4 mm if layer areas are small because not as much resin needs to fill the gap. Similarly, you might want to go up to 6 mm if the layer areas are large.
The equivalent retraction settings should be set to match their lifting counterparts.
Hollowing
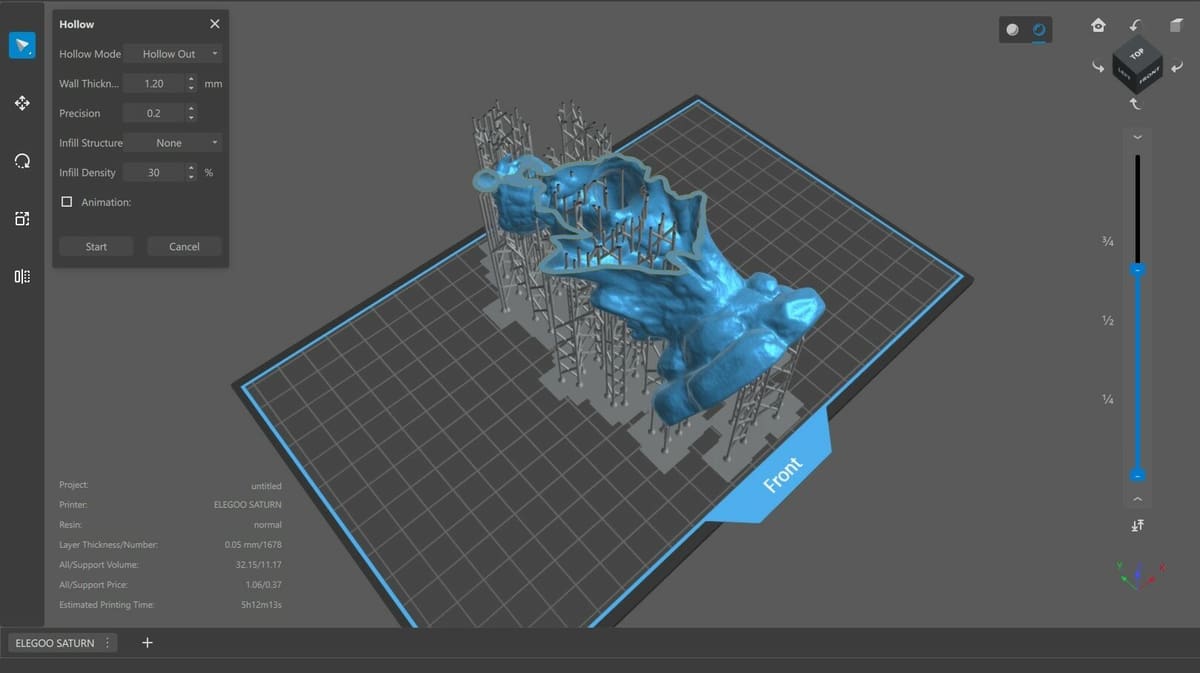
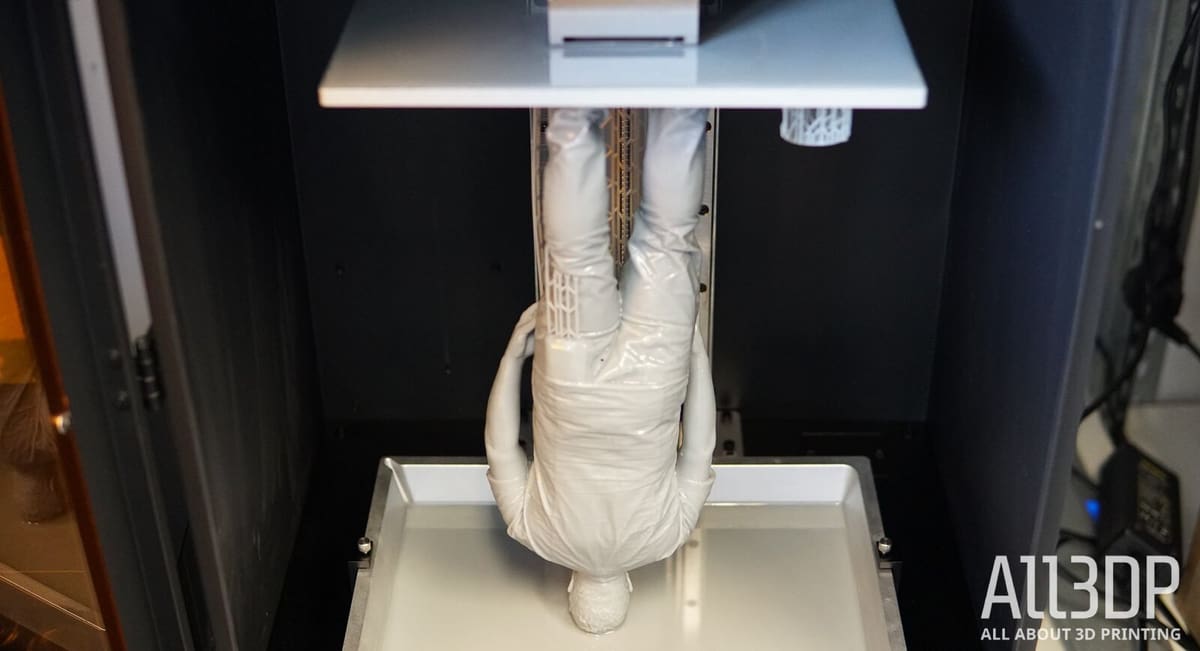
As we’ve already alluded to, lifting forces are a big deal. Adjusting the lifting settings helps, but another great tool we can use is hollowing. When cured resin is peeled from the FEP sheet, a suction force is created. This suction force is greater when the layer’s surface area is larger. Among other benefits, hollowing a model can reduce the surface area of a layer, thereby reducing the suction force.
Furthermore, resin is an expensive material, and if you’re printing many solid objects, you could finish an entire bottle faster than you would expect. Hollowing solves this problem rather simply: an empty model uses less resin.
In Chitubox, you can find the Hollow option in the top menu bar. You can choose the wall thickness as well as whether or not you want an infill. For the best results, select a wall thickness that’s not too thin. Otherwise, you could end up damaging the model. The infill should be selected only if it’s a functional component. For models and miniatures, infill isn’t necessary.
A wall thickness of 1.2-2 mm should provide a good balance between strength, print success, and resin usage, especially for small prints. Larger resin models may be too fragile for such thin walls.
Any time you hollow out a print, you should also create at least one hole per empty compartment. This allows resin and air to flow out of the model as it’s printing; a hollow model with no drainage is effectively a suction cup during printing.
Anti-Aliasing
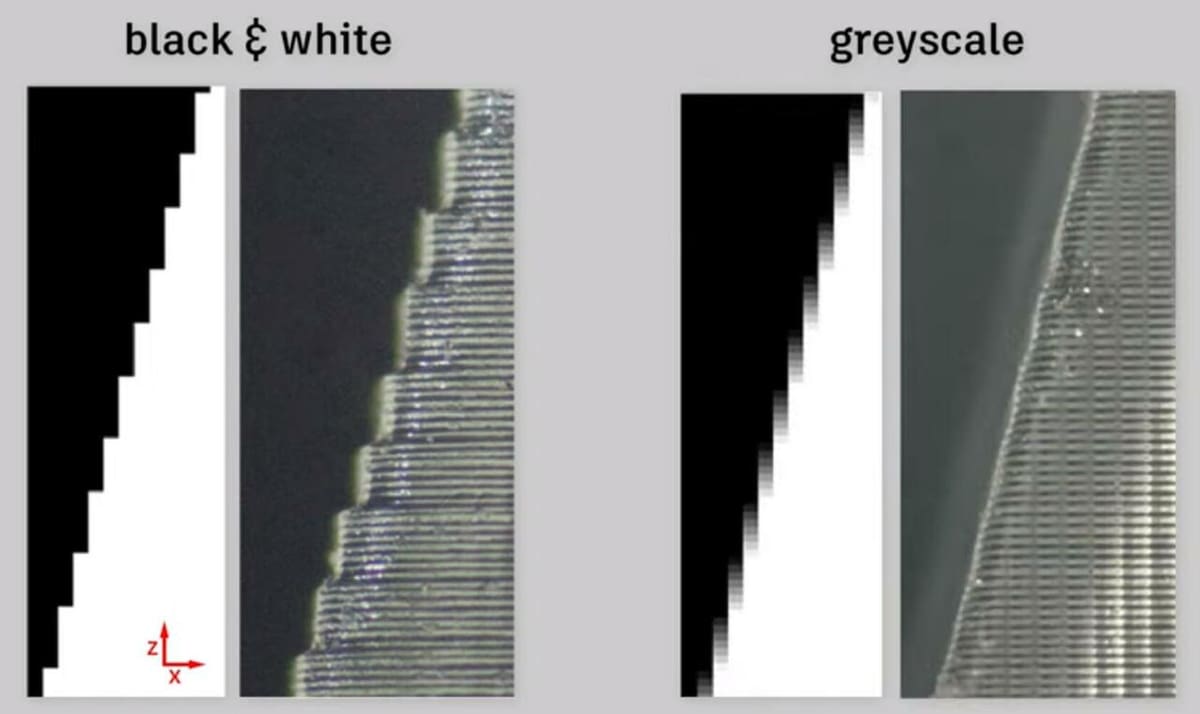
In theory, anti-aliasing reduces the staircase effect produced around the corners and round edges of your 3D print. It decreases the vertical artifacts and aims to smooth out the overall surface finish of your model.
For many printers, Chitubox’s anti-aliasing value is hidden; you’ll only have the option to adjust grayness and blur. However, if you’re curious, you can find the anti-aliasing value by creating a custom printer profile.
There are three anti-aliasing levels: 2, 4, and 8. The default setting is 4, whereas 8 effectively turns anti-aliasing off and 2 causes pixels to be darker. This is where those other settings come in. “Grey level” controls the brightness of those anti-aliasing pixels, while “image blur” controls how many fall inside or outside a layer’s external boundary (according to the original model).
All of these settings should be adjusted depending on the resin used, but many consider the results to be a mixed bag. Nevertheless, it’s a setting you might want to play around with if you’re looking to perfect your resin prints.
There’s a detailed article by Chitubox on the topic, and it serves as a comprehensive guide for fine-tuning your anti-aliasing settings.

Print Orientation
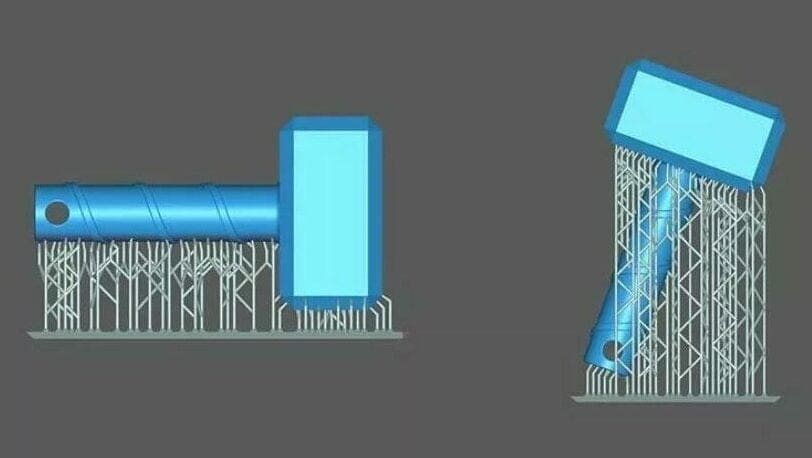
The print orientation plays a crucial role in the success or failure of your 3D printed object. Your part should be oriented such that it requires fewer supports, doesn’t have large cross sections, and takes less time to 3D print.
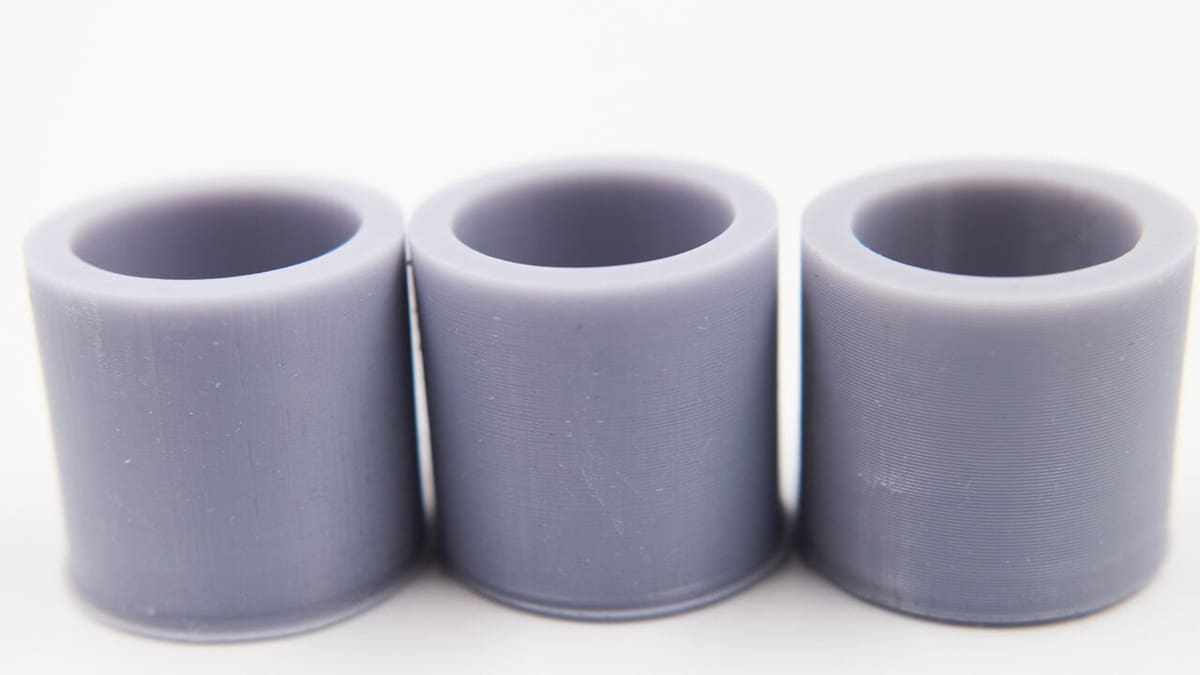
In the case of most resin 3D printing, the print time is directly proportional to the object’s height. This means that a figure oriented at an angle, such that its horizontal area is increased and vertical height is reduced, will take less time to 3D print. For example, a cylinder printed at a 45° angle will take up less time than that same cylinder printed at a 90° angle.
Just remember that a larger cross-section will increase the peeling forces during the lifting of the build plate. Similarly, if the model has too many supports, it will require more material and increase the chances of failure.
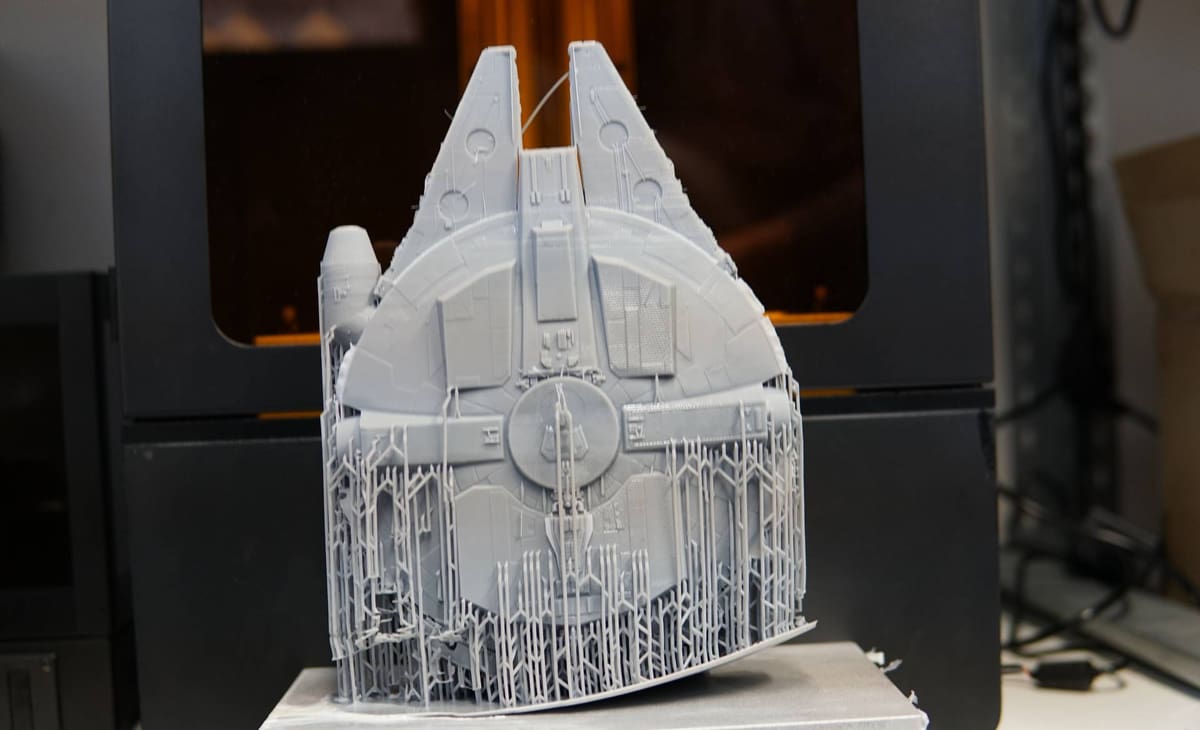
Supports
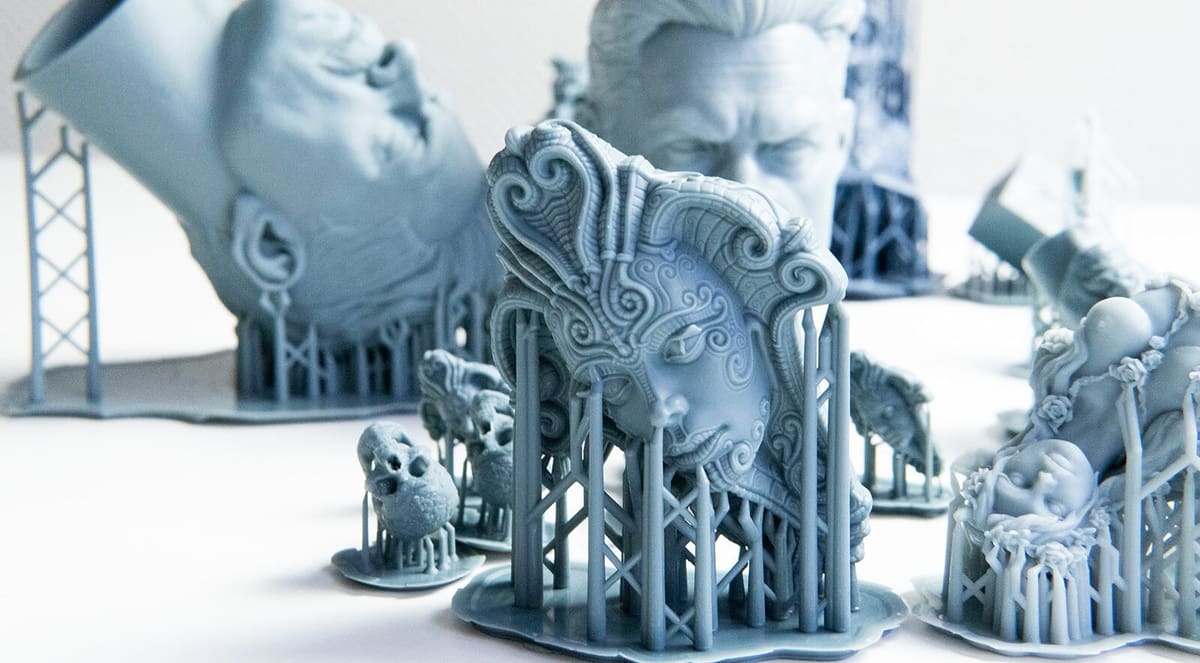
Supports in resin 3D printing are very different from those in FDM 3D printing. While the function is identical, the way they work is slightly different. Resin supports are cylindrical with an angled end and a pointed tip. This way, you save some resin, and the slicer generates supports only in the crucial areas of overhangs and not for the entire overhang.
In Chitubox, there’s a separate section to customize your supports. You can add manual supports or even automatically generate supports for your models. This is great if you want to create supports quickly and don’t want to spend too much time. For parts with fine details, you may want to check out our guide on supports for miniatures for tips on how to avoid support-related defects.
However, if you truly want to customize your supports, you should use Meshmixer supports.
License: The text of "The Best Resin 3D Printer Settings for Perfect Results" by All3DP is licensed under a Creative Commons Attribution 4.0 International License.