From the calculator to the cash register, demand for microcontrollers spans as far back as the 1970s. In the 1980s, they became even more popular due to their use in keyboards for personal computers. Today, microcontroller production is in the billions per year, and they are integrated into many appliances we have grown to love.
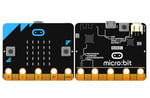
While programming courses are plentiful, how does a beginner learn about physical computing? In the last decade, there has been a wave of devices designed for just that purpose. There are dozens of small, powerful devices priced at just a few dollars to a few hundred dollars. One such example is the BBC’s Micro:Bit, released in 2016. The board was specifically intended for education and was distributed for free to every UK pupil in year 7 in 2016.
The Micro:Bit is equipped with built-in sensors, 2 pushbuttons, 25 programmable LEDs, Bluetooth functionality, and general-purpose input/output (GPIO) pins. Found at the edge of the board, these GPIO pins are easily accessible with either alligator clips or via a breakout board for prototyping on a breadboard!
The Micro:Bit is the ideal entry point to physical computing for young people and other beginners. Let’s take a look at some popular beginner projects that utilize the Micro:Bit!
Everyday Projects
The Micro:Bit has an edge connector with a total of 25 pins which allows you to connect it to various sensors. But that’s not all, it can also be used to modify everyday objects! Simply connect alligator clips or a breakout board to its edge connector, and you’re good to go!
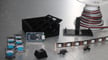
Lego Power Functions IR Sender
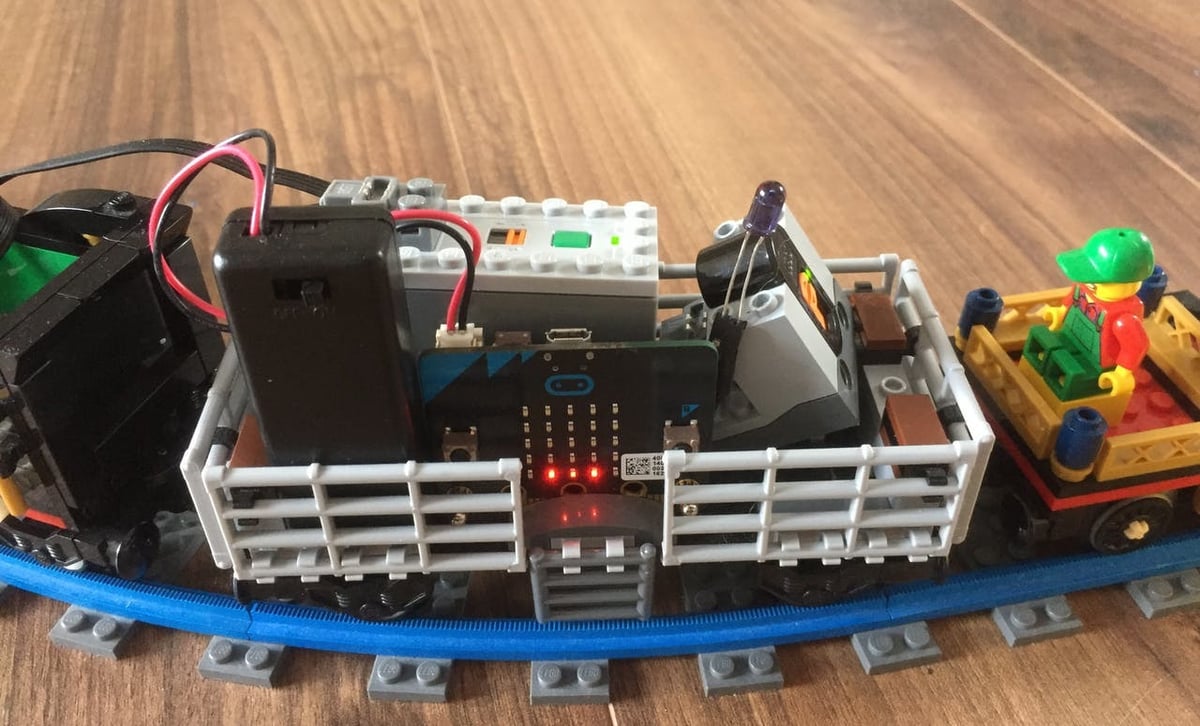
Ever wanted to hack your own Lego creations? This project shows you how to control a Lego train with a Micro:Bit, using an IR light and receiver to start and stop the train.
All programming is done with web-based visual programming in Microsoft MakeCode, and the full package is available on GitHub.
- Who designed it: philipp-henkel
- What you’ll need: BBC Micro:Bit board, infrared LED, Lego Power Functions IR Receiver (8884)
- Where to get it: Hackster
Fruit Keyboard
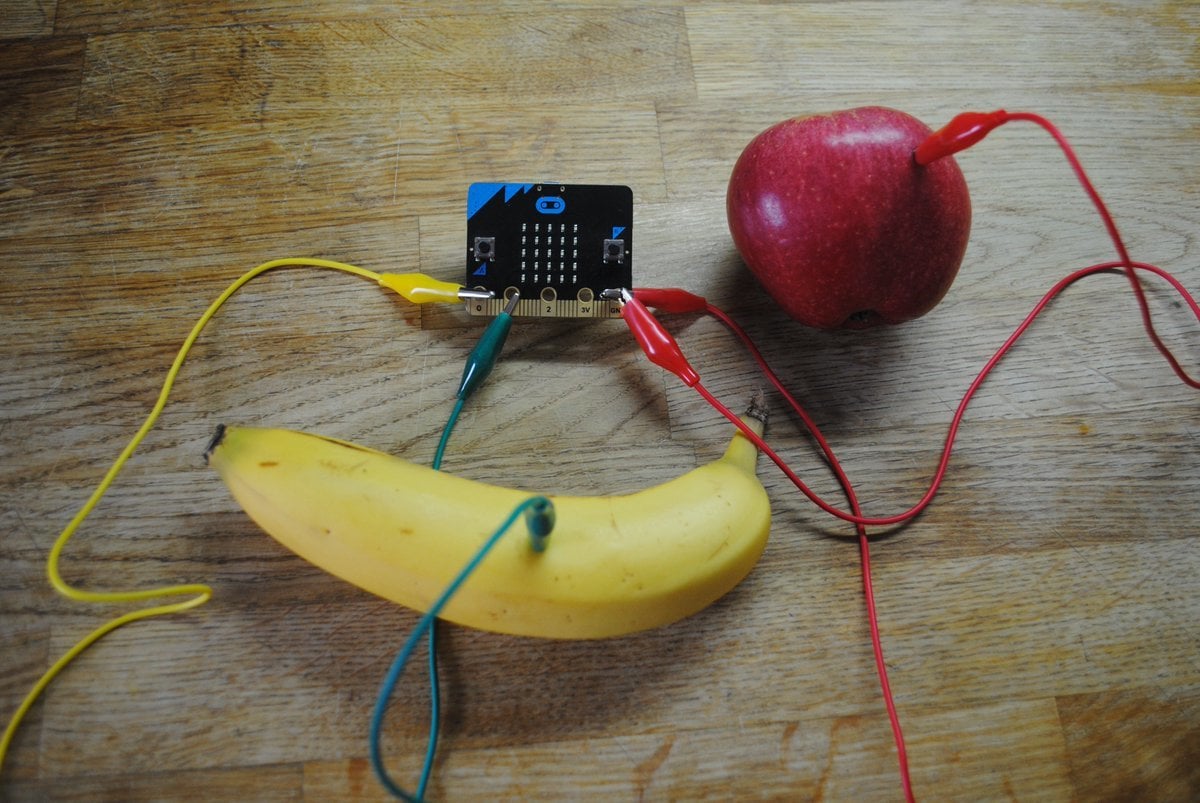
Make musical instruments out of fruits and vegetables, with just a Micro:Bit and some alligator clips! The same project works to turn just about anything into a keyboard, and the detailed instructions will have you playing fruit-based tunes in no time.
- Who designed it: Microsoft MakeCode
- What you’ll need: BBC Micro:Bit board, alligator clips, fruit
- Where to get it: Microsoft MakeCode
Light-Up Bicycle
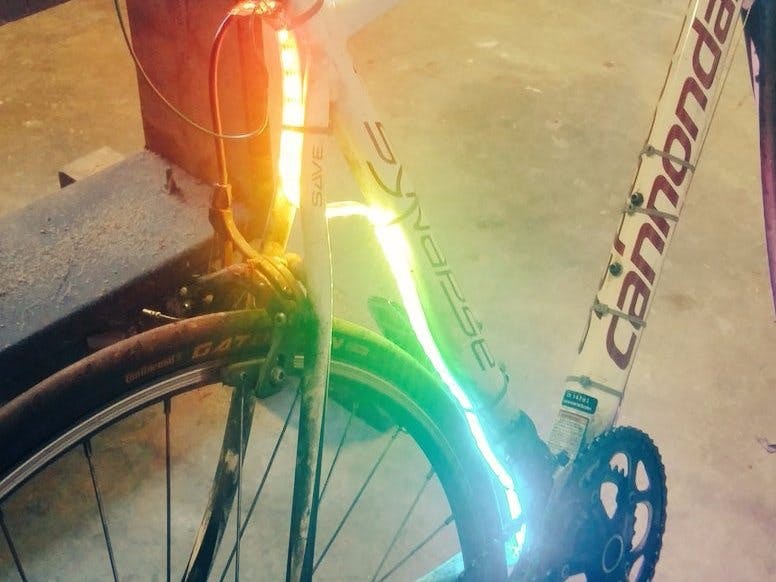
Cycling at night can be dangerous without appropriate lighting. Why not ride in style while also ensuring your bike is safely visible? Using a Micro:Bit and a NeoPixel strip, you can create your custom lighting for night rides.
These LEDs could be attached to anything, but they look pretty amazing lighting up a bike.
- Who designed it: pelikhan
- What you’ll need: BBC Micro:Bit board, NeoPixel strip, rain-resistant USB battery charger, cable ties
- Where to get it: Hackster
Robotics
It’s risky business to make a robot slave, it always seems to end up with a robot rebellion! But why not make a robotic friend with the Micro:Bit instead?
There are plenty of robotic case designs for the Micro:Bit on Thingiverse, from a mini bulldozer to a biped robot. You could even turn your Micro:Bit into a 3D printed microbot.
With its built-in sensors and buttons, the Micro:Bit is already well equipped to be turned into a friendly robot buddy. Check out the following projects for some ideas.
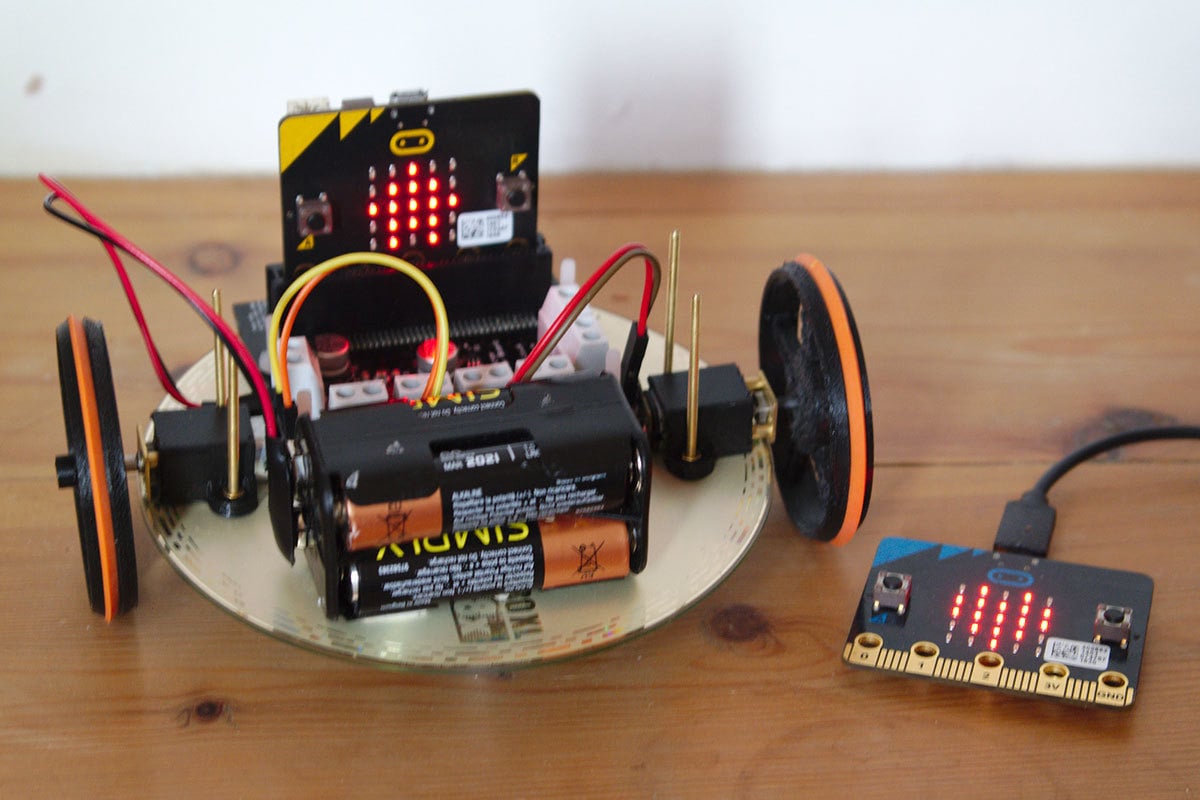
Multitasking Robot
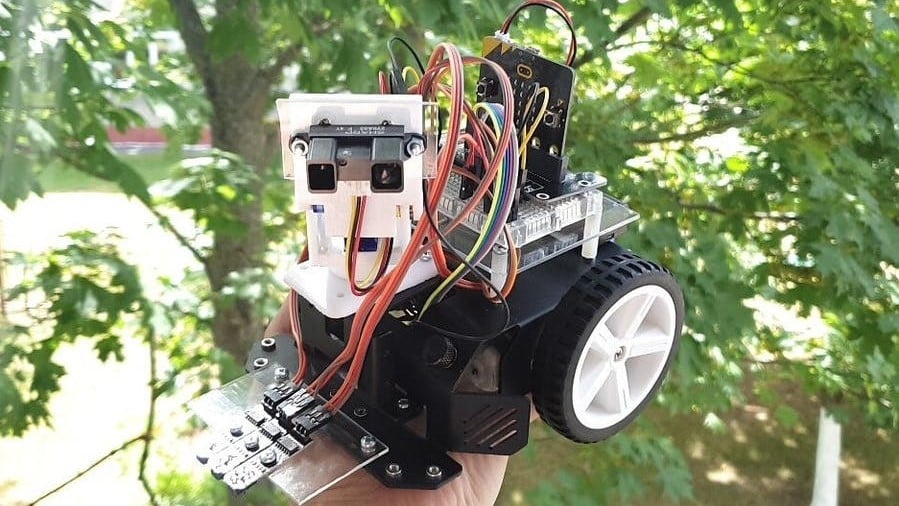
There are plenty of more advanced and 3D printed robotic projects, many of which utilize an Arduino or a Raspberry Pi. But these very same functions can also be achieved with the tiny Micro:Bit!
This project helps you create your very own multitasking robot. This nifty little rover has object avoidance and line-following functionality, and you can buy a kit to build it. Watch it in action!
- Who designed it: maxxlife
- What you’ll need: BBC Micro:Bit board, expansion board, 2x TCRT5000 line sensors, L298N Motor driver, pan-tilt mechanism for 9 g servos, 20-150 cm distance sensor, two-wheel drive robot chassis, breadboard, AAA battery case, 7.4 V battery, switch, wires
- Where to get it: Hackster
Robot Unicorn
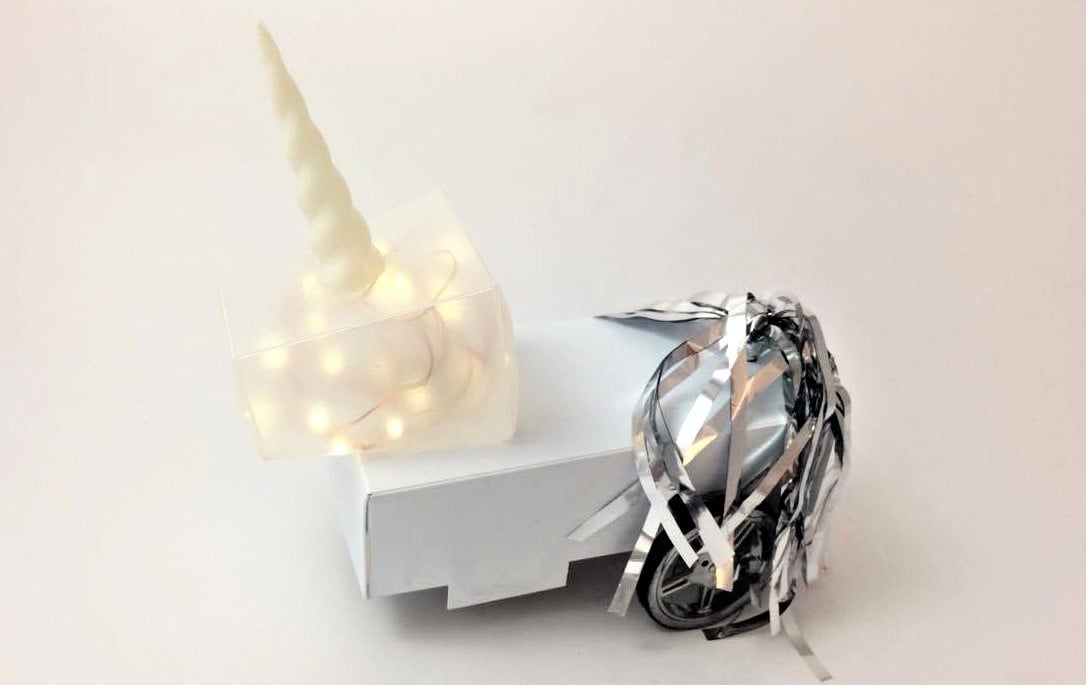
It’s not just a robot, it’s a unicorn that sparkles! Create your own silly gesture-controlled robot unicorn with the Micro:Bit in this project.
A file to 3D print the unicorn horn is included, but if you don’t have access to a 3D printer, you could use a 3D printing service or craft a replacement horn from paper.
- Who designed it: Microsoft MakeCode
- What you’ll need: BBC Micro:Bit board, AAA battery pack 2x continuous rotation servos, 2x wheels, swiveling castor wheel, nuts and bolts, AAA battery pack, alligator clips, 3D printed unicorn horn, paper, electrical tape, double-sided tape
- Where to get it: Microsoft MakeCode
Remote-Controlled Robot
While an autonomous robot is awesome in itself, how about a remote-controlled robot? This project goes into step-by-step detail on how you can create your own remote-controlled Micro:Bit robot.
The project includes 3D printed wheels and mounts, but if you haven’t got a 3D printer, plastic lids will work for the wheels, and you can glue a piece of cork to each lid to attach them to the shafts.
- Who designed it: huffee
- What you’ll need: BBC Micro:Bit board, motor driver board, 2x micro gear motors, battery box, old CD, nylon nuts and bolts, metal nuts and bolts, 3D printed wheels and mounts, elastic bands, jumper wires, sticky pads
- Where to get it: Instructables
Wearables
Remember when the most complicated thing people wore was a ticking wristwatch? These days, we wear smart watches, smart glasses, wireless headsets, and many more gadgets every day. And you can make your own, or upgrade existing items, with a Micro:Bit!
Smart Watch
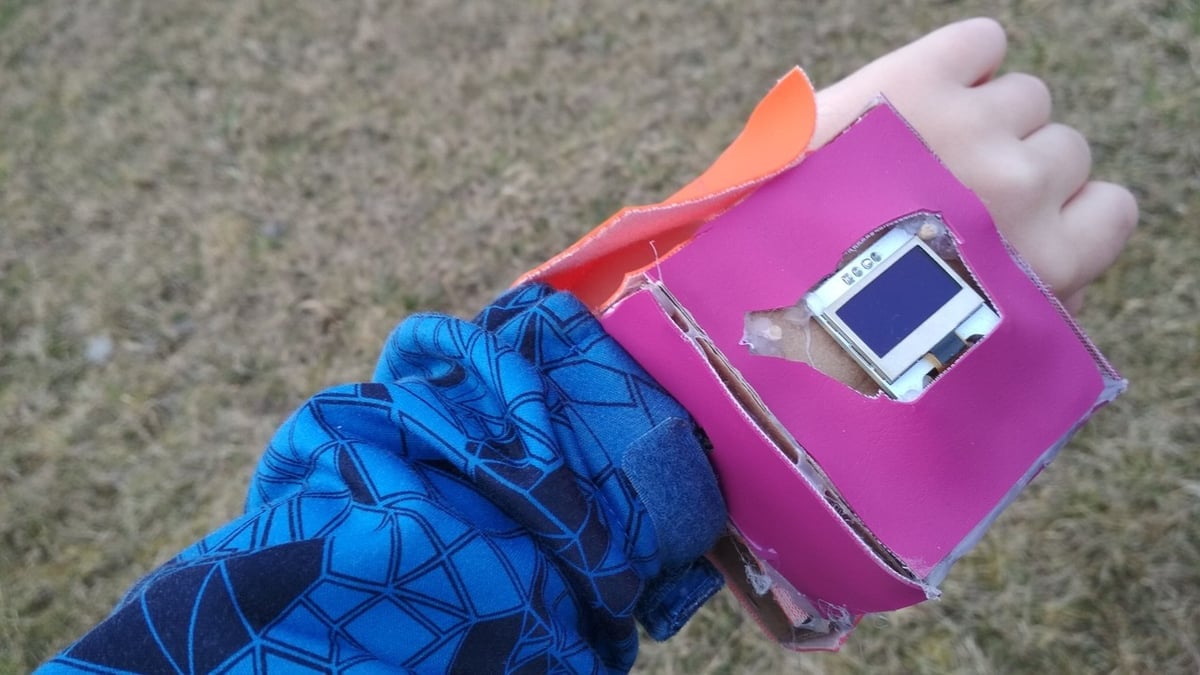
What do you do with a smart home kit designed for the Micro:Bit? Create your own DIY smart watch! You can fully assemble the watch, or you there are kits to buy that include a wristband.
This is more about learning what’s possible with programming than creating a truly wearable watch, but it’s still a cool project, especially for kids jealous of your Apple watch!
- Who designed it: TomasraketakX
- What you’ll need: BBC Micro:Bit board, smart home kit, OLED display, cardboard, imitation leather, cables, paperclip, adhesive tape
- Where to get it: Instructables
Step Counter
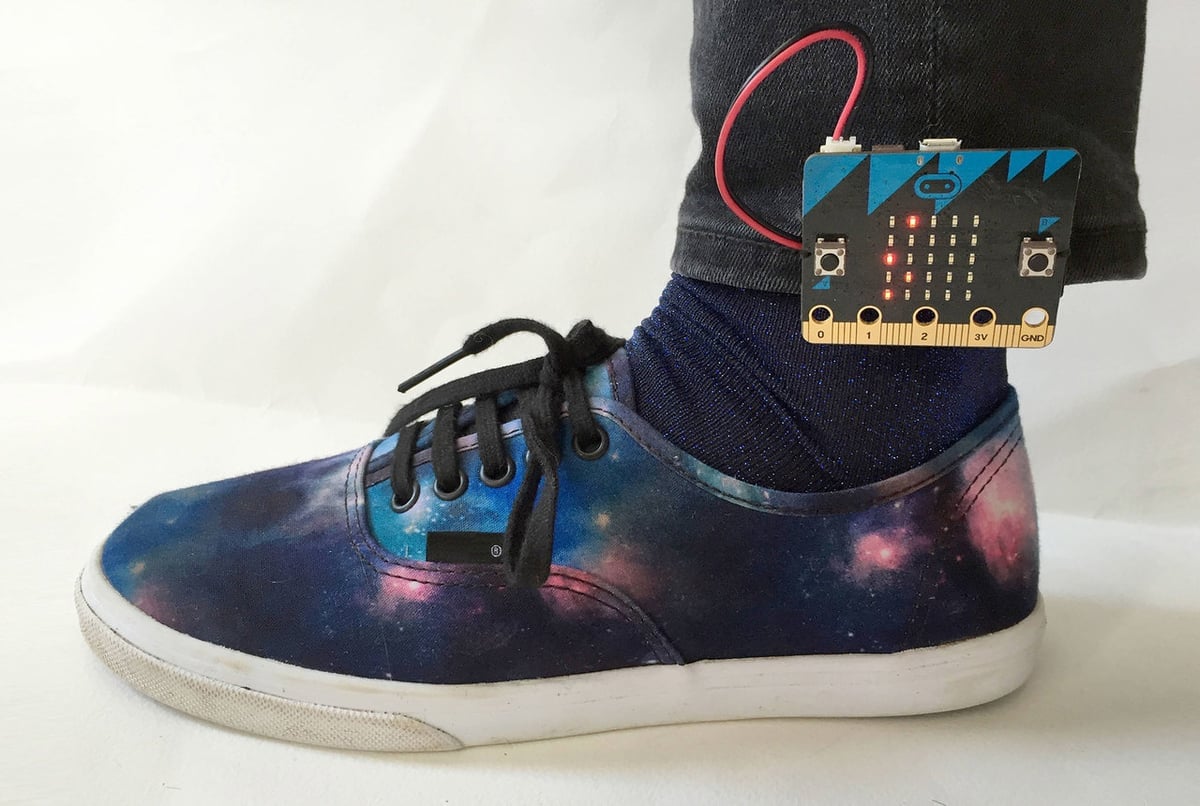
The average person walks at least 3,000 steps a day, do you know how you compare? Count the number of steps per day that you take with this step counter.
Due to the Micro:Bit’s small form factor, this makes it a perfect lightweight step counter.
- Who designed it: Tech Will Save Us
- What you’ll need: BBC Micro:Bit board, AAA battery case
- Where to get it: Tech Will Save Us
Felt Badge
With some felt and the Micro:Bit, you could create your own interactive badge! Take it a step further when programming it to have the badge display emoticons, or sense the environment and update its visuals accordingly.
- Who designed it: ScienceOxford
- What you’ll need: BBC Micro:Bit board, felt, hot glue gun, battery pack
- Where to get it: Instructables
Light-up Helmet
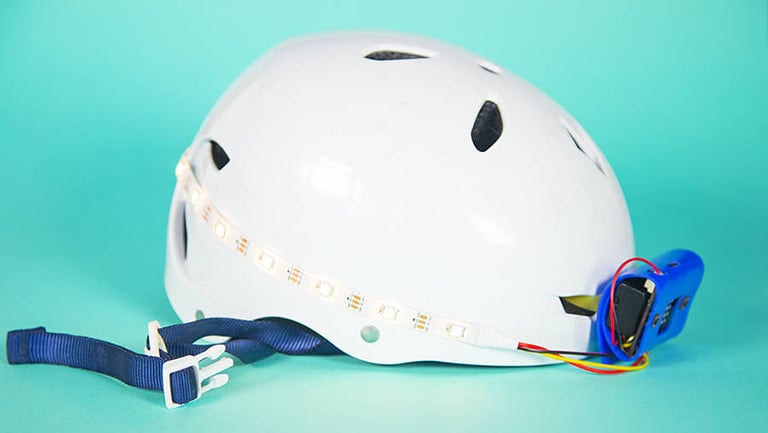
Night riding can be a lot safer and faster with a helmet light in place. In addition to mounting lights on your bicycle, why not go a step further and upgrade your helmet, too!
This project could be used to add LEDs to any item of clothing or accessory, but it makes the most sense to upgrade things you plan to wear at night.
- Who designed it: Tech Will Save Us
- What you’ll need: BBC Micro:Bit board, Micro Mods Kit
- Where to get it: Tech Will Save Us
Lead image source: EZContents Blog
License: The text of "The 10 Best Micro:Bit Projects" by All3DP is licensed under a Creative Commons Attribution 4.0 International License.
CERTAIN CONTENT THAT APPEARS ON THIS SITE COMES FROM AMAZON. THIS CONTENT IS PROVIDED ‘AS IS’ AND IS SUBJECT TO CHANGE OR REMOVAL AT ANY TIME.