25 Best Arduino Cases to 3D Print

Protect your Arduino with a functional, customizable 3D printed case. Check out our selection and find the Arduino case to 3D print for you!
Arduino boards are quite a marvel: They’re small, versatile, hackable, and surprisingly sturdy. As these microcontroller boards are often used in labs or mobile environments, it’s always a good idea to have a case so that they don’t get damaged by your day-to-day hacking.
Simply put: Better safe than sorry. So, we’ve delved through the major 3D printing repositories for the greatest Arduino cases that are also easy to 3D print. Because Arduino boards come in all shapes and sizes, we’ve categorized the list into the best cases around for the Uno, Nano, Mega, and Micro.
If you want a case to protect your Arduino but don’t have the tools to print it yourself, try Craftcloud. You can have your chosen case printed in the material and color of your choice and delivered straight to your door.
But first, you’ll need to choose a case. So, let’s get to the list!
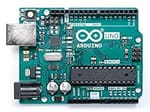
Arduino Uno
The Arduino Uno was the first of its kind. It’s an entry-level board with a handful of variations and clones. It’s known for its low cost and massive community online, which makes it a great starting point for a range of projects!
Folding
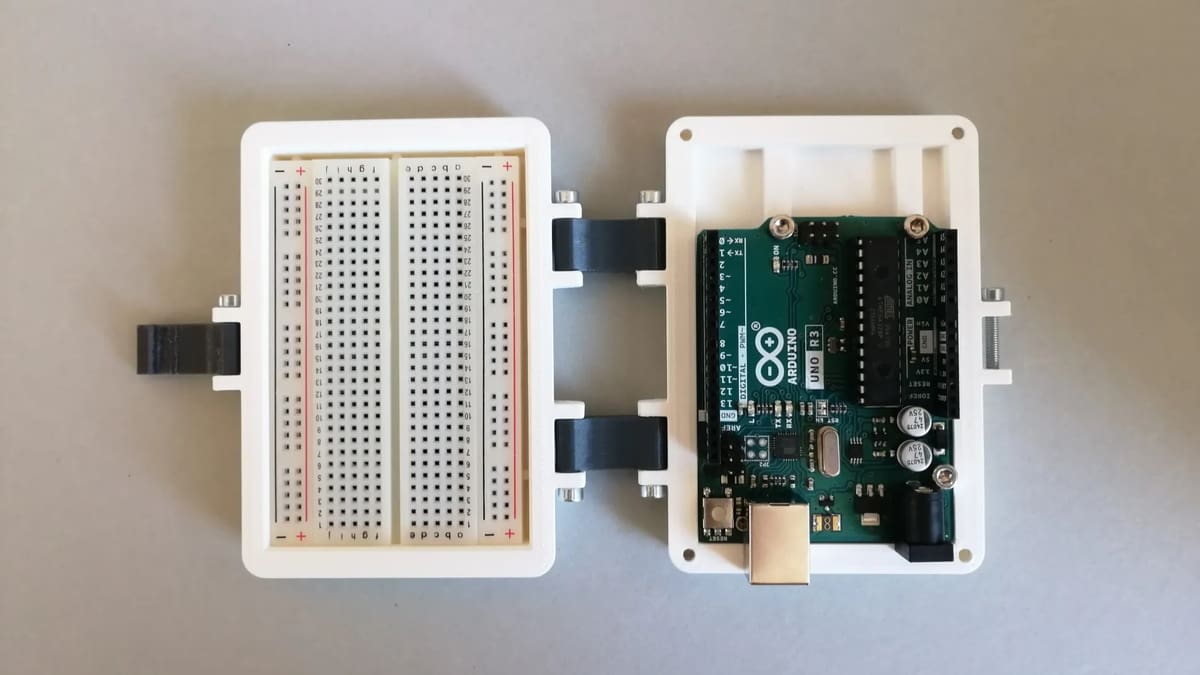
This folding case has dedicated space for an Arduino Uno and a breadboard all-in-one.
The board is fixed to the base of the case with four screws. A top cover connected to the base with hinges protects the board from the outside world while also providing access to all pins and connections. You can then close everything by folding the case and latching it shut when on the move.
The maker also provided details about the printing process (0.2-mm layer height and 15% infill) and the assembly procedure, both of which are remarkably straightforward.
- Who designed it? 3DP
- How printable/popular is it? There’s currently 12 makes posted for this design and over 1,000 downloads.
- Where to find it? Printables
Overheat Protection
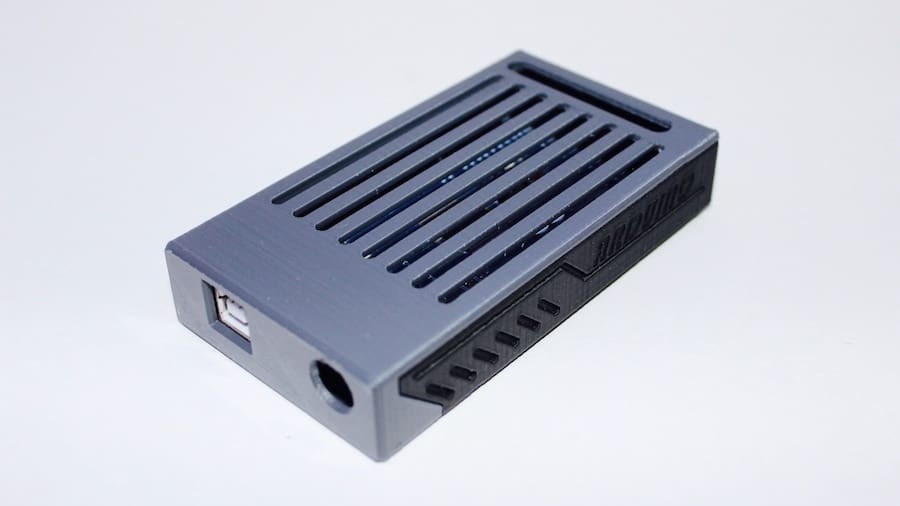
This well-designed Uno case has holes to easily access all of the ports. It also has ventilation slits plus a large grid surrounding the walls of the case for improved heat dissipation.
It is a two-part design with a main case body and a cover. The cover is designed to be attached to the main body with M3x8-mm screws, and the entire case can be mounted with M2.5×4-mm screws.
The print paths are optimized for a 0.5-mm nozzle, so you can quickly print this case in a pinch for any project that needs to be quickly finished. If you don’t have a 0.5-mm nozzle for your printer, it’s quite alright; this case has been tested and successfully printed with other size nozzles, including 0.25, 0.3, and 0.4 mm.
- Who designed it? J-Max
- How printable/popular is it? Across both sites, 17 makers have shared their prints.
- Where to find it? Thingiverse, Printables
CustoBlocks
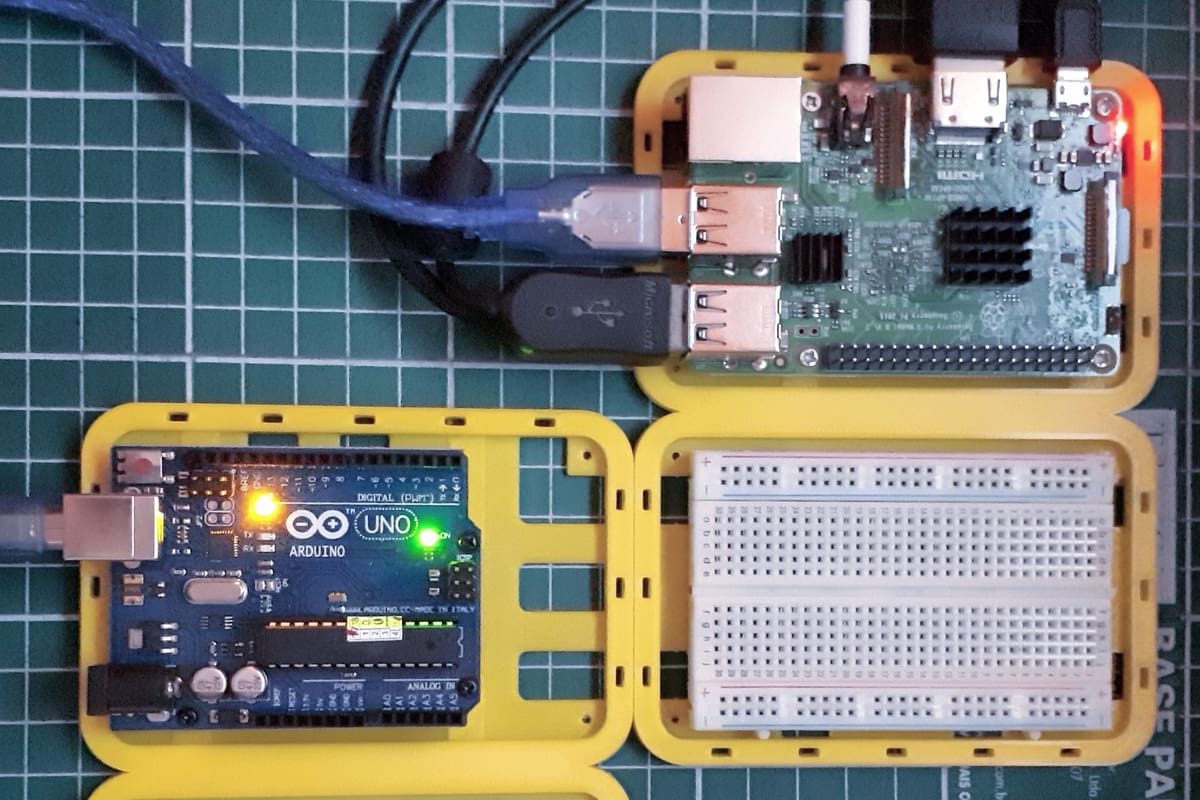
These modular cases can be especially useful for securing different boards and components in electronic projects. The different parts connect together to create a platform for your project, no matter how many PCBs and other components need to be attached.
Each individual frame serves a purpose: holding breadboards, Raspberry Pis, and of course, Arduinos. All the elements fit each other and are kept together by screws, so you can extend your project infinitely. Although it might look complicated, each part is actually easy to print.
- Who designed it? ZygmuntW
- How printable/popular is it? This model has 17 makes and a handful of remixes on Thingiverse. It also has some positive feedback on Instructables.
- Where to find it? Instructables, Thingiverse
Curved
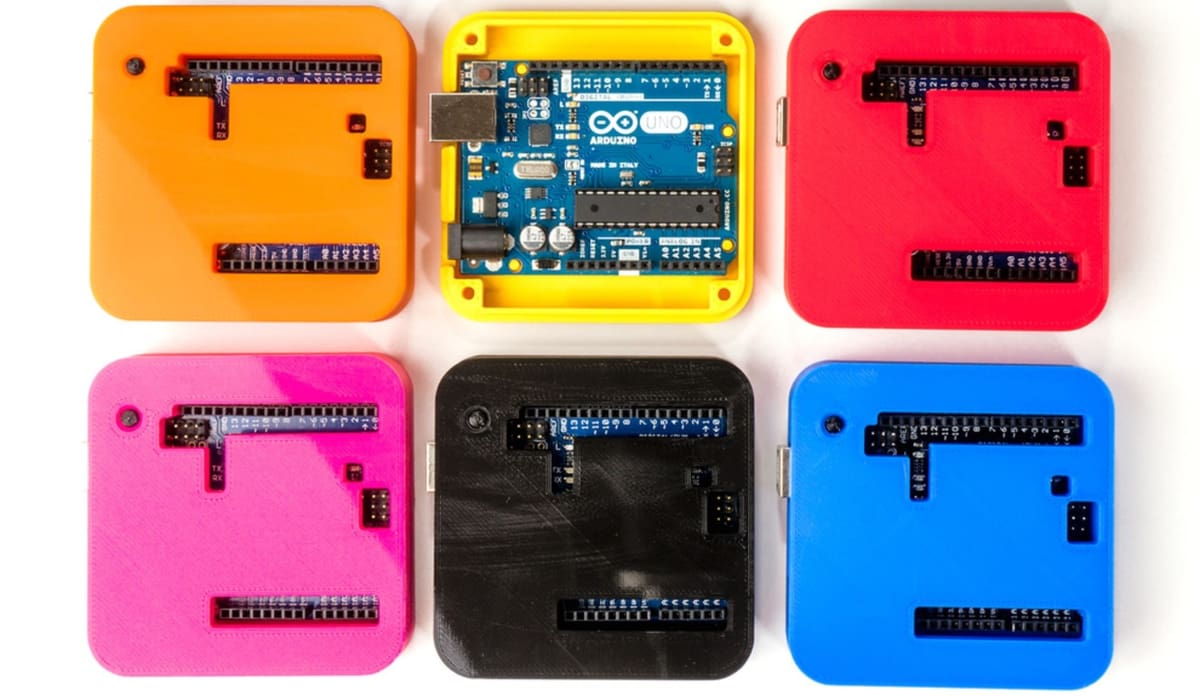
This Uno case has a very simple yet curious design. It’s made of a base, a top, and – quite handily – a 3D printed reset button that’s larger than the one from the board itself.
The parts are fairly easy to print as no supports nor bridges are required. Just make sure to get the right printing files, as there are different versions for the Uno and Leonardo.
- Who designed it? ZygmuntW
- How printable/popular is it? Its Thingiverse page boasts over 60 makes, 19 remixes, and plenty of positive comments.
- Where to find it? Thingiverse
Snug
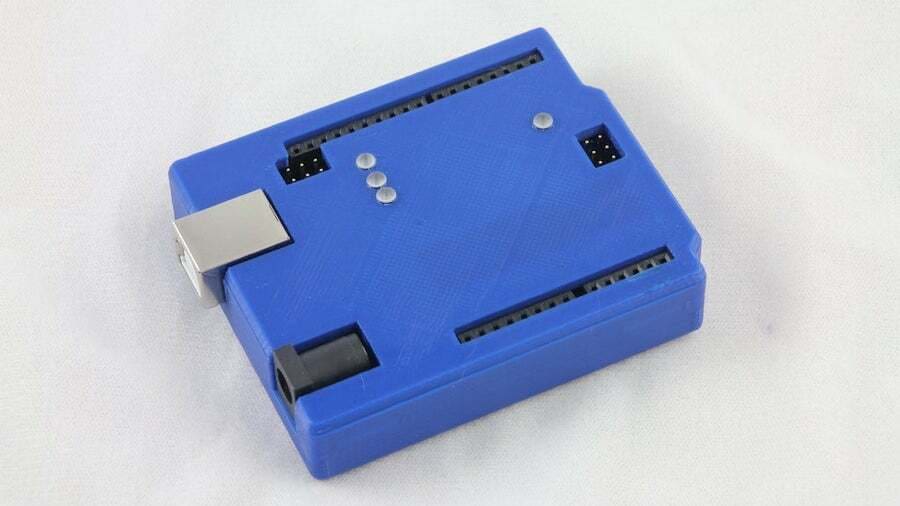
This is a snug-fitting case that has received lots of love for its simple design. The printing process is easy enough, as is mounting the board afterward.
For this design, the Uno board is attached to the bottom part by four screws, and the top is snapped in place. Arduino shields may also be installed over the top of the case with no issues.
- Who designed it? Esquilo
- How printable/popular is it? There are currently more than 130 makes and 31 remixes for this design.
- Where to find it? Thingiverse
Versatile
The Arduino Uno case designed by Jimit5 is handy and versatile. There are a few configurations to choose from: a bottom-only case, a complete hinged case (with bottom and top covers), and both variants with or without mounting holes.
The complete hinged case can be closed shut with a small screw and includes a button for resetting the board without having to open the case. A couple of screws and threaded inserts are also required to build it, as well as a small shaft for the hinge (a paper clip should do the trick according to a posted make).
- Who designed it? Jimit5
- How printable/popular is it? This case currently has 10 makes and over 600 downloads and counting!
- Where to find it? Printables
Lab
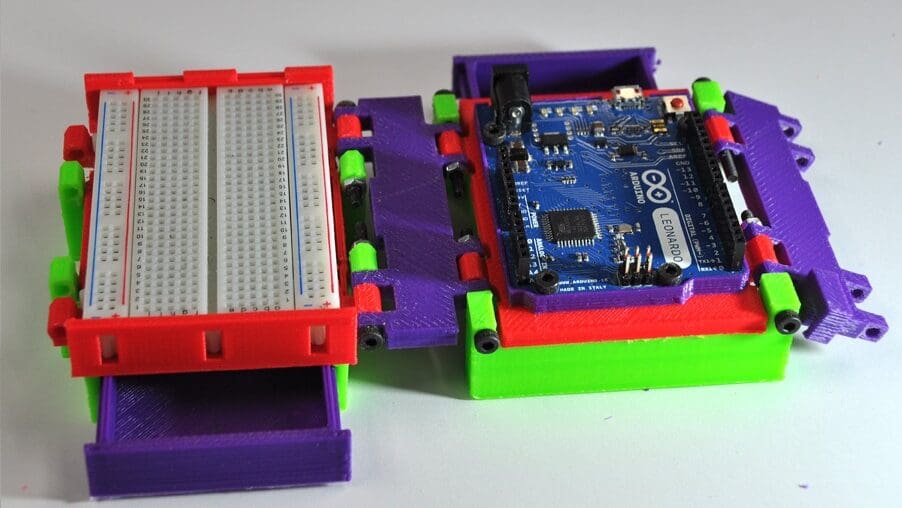
This folding Arduino laboratory case is truly an ingenious idea. Not only can it hold an Arduino Uno with a breadboard, but it also comes with two drawers for component storage like resistors, caps, and much more.
If both the breadboard and drawer are removed, there’s even room for the Arduino board and a shield to fit inside. The Folding Arduino Lab 2.0 might look a bit overwhelming at first, but making one is not all that hard, although some fasteners might be required. There’s a helpful video to give you an idea of the process.
- Who designed it? jasonwelsh
- How printable/popular is it? So far, 32 users have shared their makes, with lots of comments of appreciation. It has also been remixed seven times.
- Where to find it? Thingiverse
Workstation
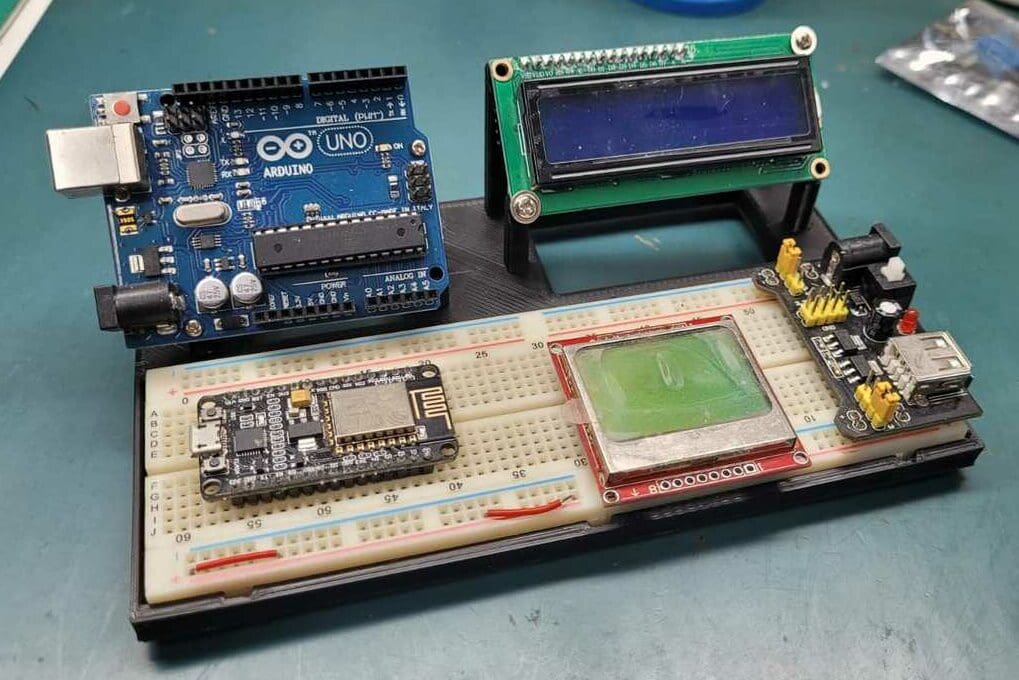
This design is a prototyping station that can be used by developers to quickly bring any idea to life. The entire model can be printed in one piece and includes space for an Arduino Uno, a standard 16×2 LCD, and a breadboard.
A maker printed this model successfully with a standard layer height and 20% infill; however, they did run into some sizing trouble. They wrote that they had to cut the tabs from the breadboard as well as the printed part in order to make my breadboard fit. Based on the other makes’ pictures, though, no one else seems to have had that problem, but it may be worthwhile to check the sizing of the model and your components before you print it.
- Who designed it? tonyrod
- How printable/popular is it? This prototyping station has some positive feedback from users and three posted makes so far.
- Where to find it? Thingiverse
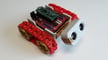
Hinged
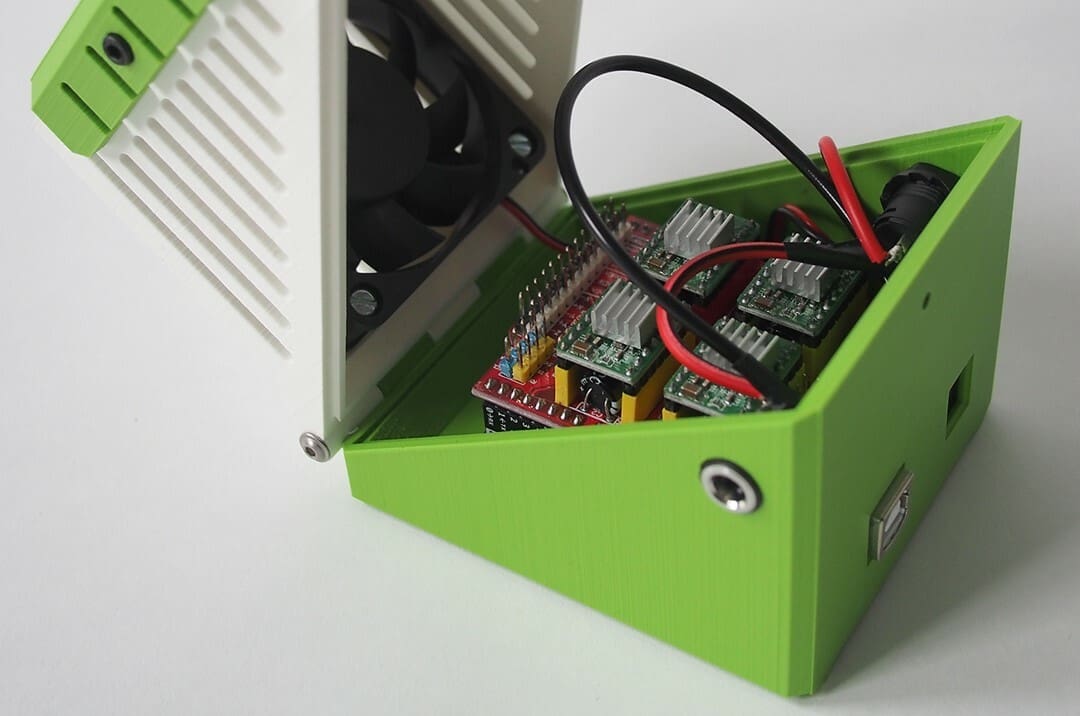
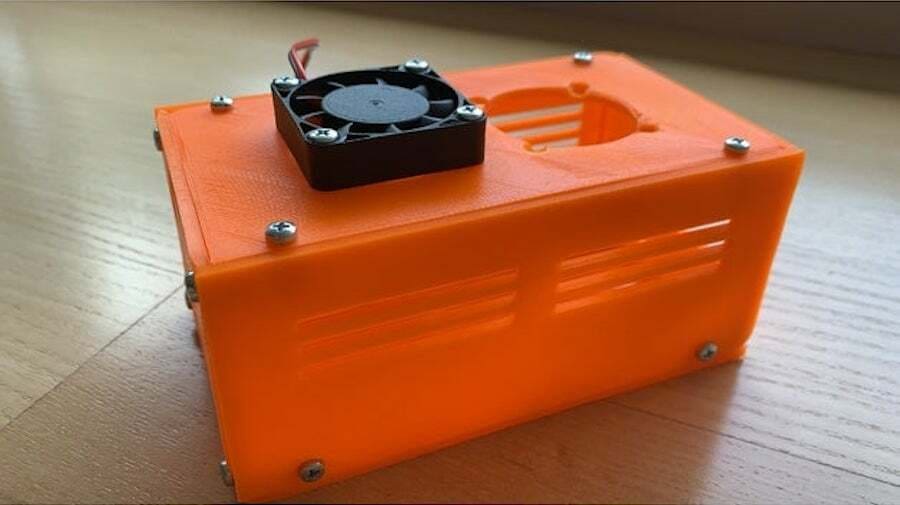
The combination of Arduino Uno and CNC shield is a powerful one, capable of driving a bunch of DIY machines, including CNCs and laser engravers. This hinged box is not only useful but also looks awesome.
It can easily fit both boards plus a 60-mm cooling fan, a power connector port, and a 12-mm push button. The holes for the motor wires are also well designed, each identified by a different letter.
- Who designed it? FriendlyBeans
- How printable/popular is it? There haven’t been any prints shared so far, but the model has been downloaded over 500 times.
- Where to find it? MyMiniFactory
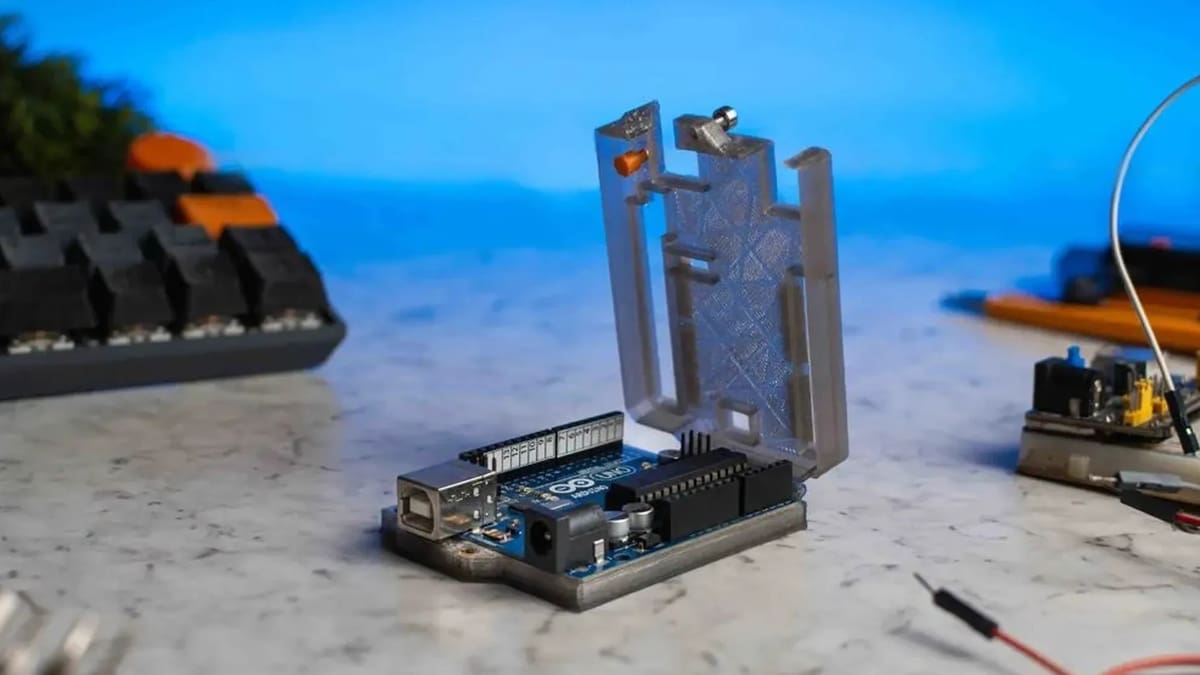
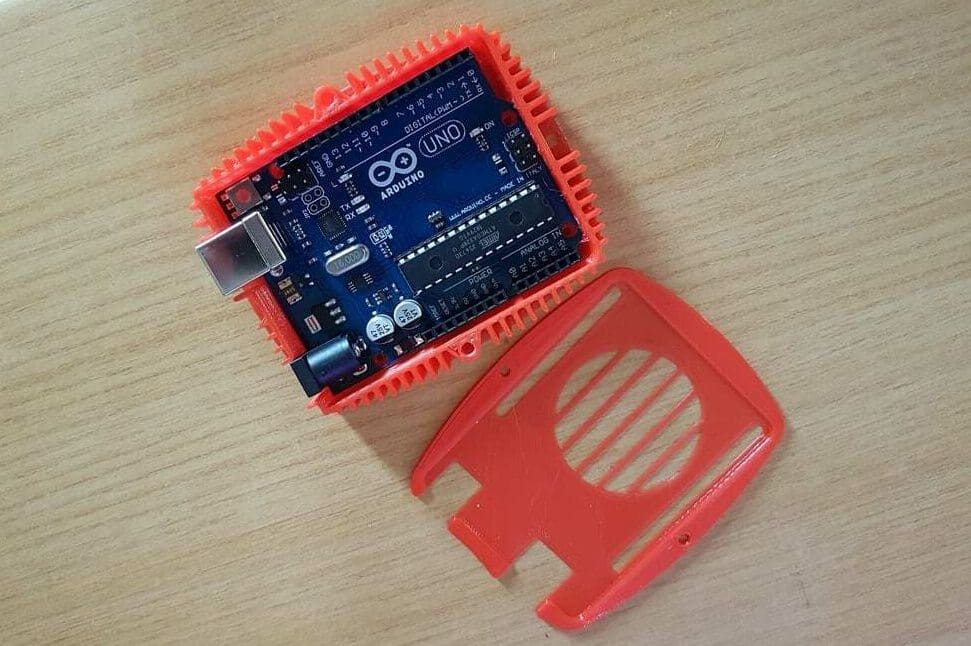
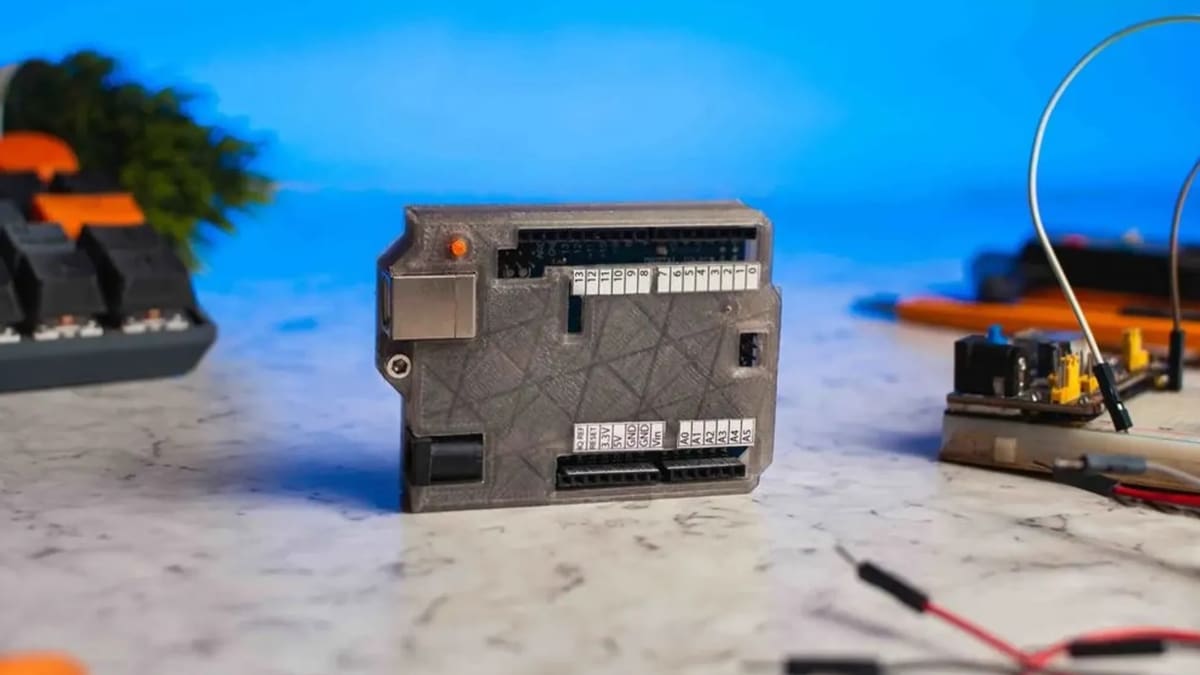
Detailed
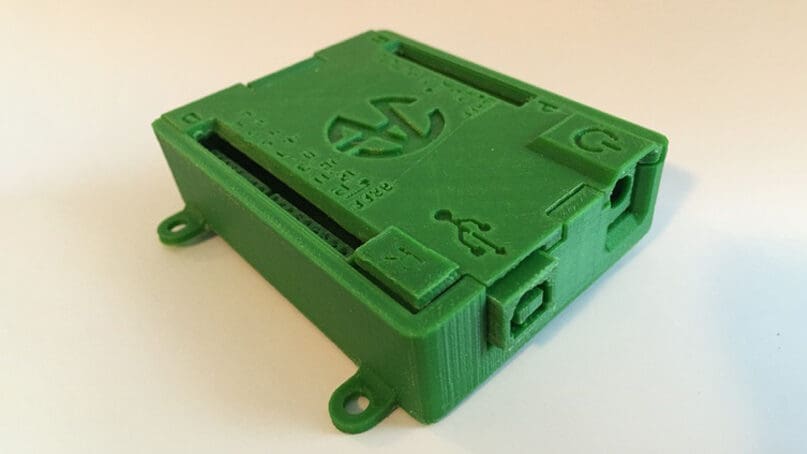
This cleverly-built case features internal mounting holes for the Arduino Uno board and external ones for attaching the case wherever you need it to be. It also brings a 3D printable button that can be assembled with a common pen spring to activate the reset button on the board.
There are two options for the top cover: a plain cover with just the USB and Power icon, and the other one with plain text denoting all pins in the board (as seen in the picture above).
- Who designed it? JamesEckdahl
- How printable/popular is it? There are 18 posted makes and 6 remixes of this model, showing that it’s quite popular.
- Where to find it? Thingiverse
Bumper
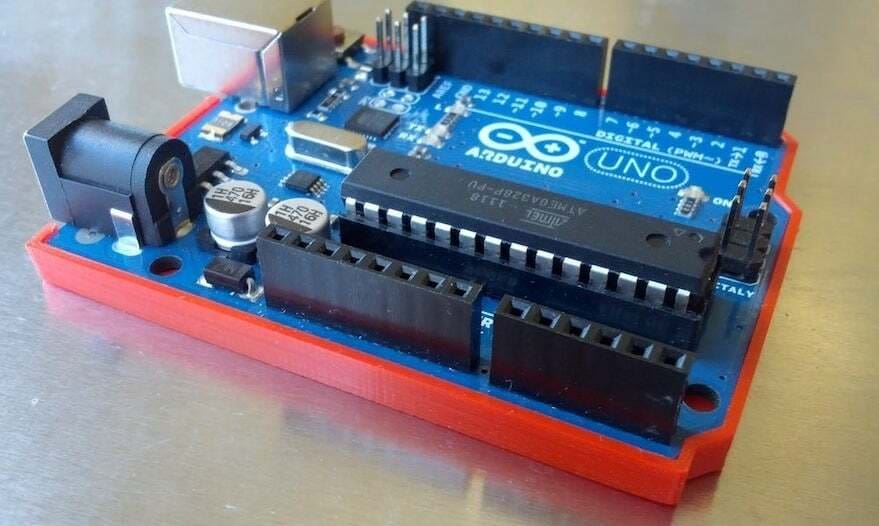
This simple board-wrapping design by Chu, an industrial designer in San Francisco, feels a bit like a smartphone bumper and mainly covers the sides and the bottom of the board.
The bumper is press-fitted onto Uno and Leonardo boards, no screwing required. Recessed grooves under the pins allow the back of the board to sit flat in the bumper. This is a very straightforward and easy 3D print; the designer recommends a 0.1-mm layer height and six top and bottom layers.
- Who designed it? Chu
- How printable/popular is it? There are 129 makes and 40 remixes posted on Thingiverse, so we’re inclined to think it’s pretty popular and printable.
- Where to find it? Cults, Thingiverse
Arduino Nano
The Arduino Nano is very similar to its older brother Uno but in a much smaller form factor. It’s powered by a Mini-USB port instead of the big power jack, making it perfect for projects with space constraints.

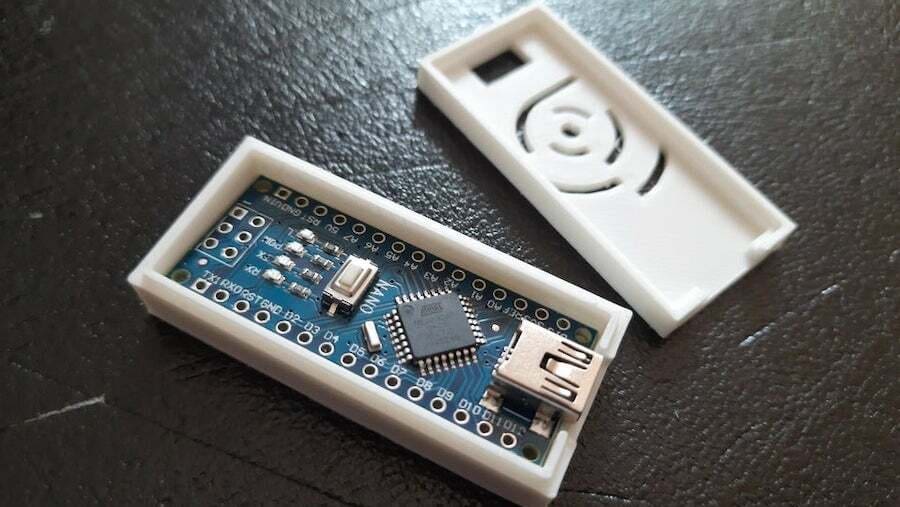
Slim
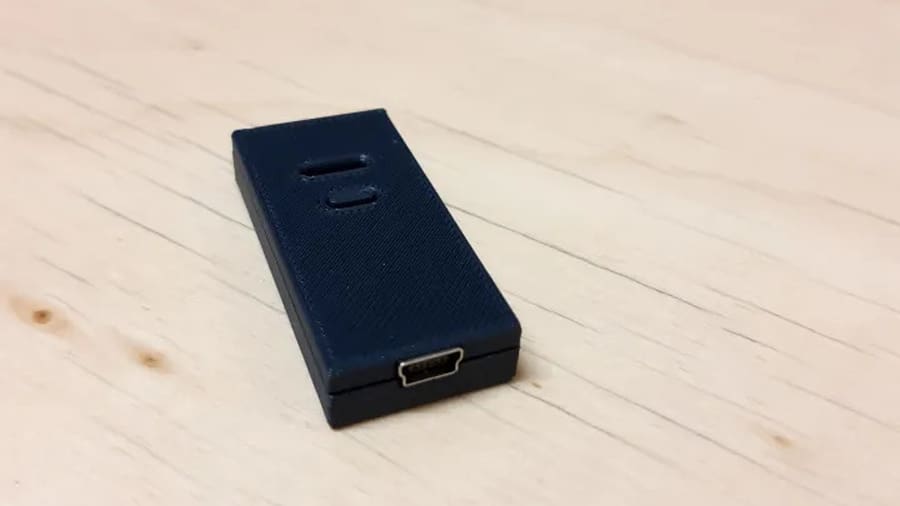
Here is a small Arduino Nano case for boards without soldered header pins and with minimal details. This slim case is a quick and easy solution for safeguarding your microcontroller board, requiring no screws whatsoever.
The case also features a small opening for the LEDs, a printable reset button that reaches inside the board, and a 3-mm gap for wires and cables coming to and from the Arduino (plus the opening for the USB port, of course).
- Who designed it? El Manu
- How printable/popular is it? Simplicity is bliss. Perhaps, that’s why this case has hundreds of downloads and eight makes.
- Where to find it? Printables
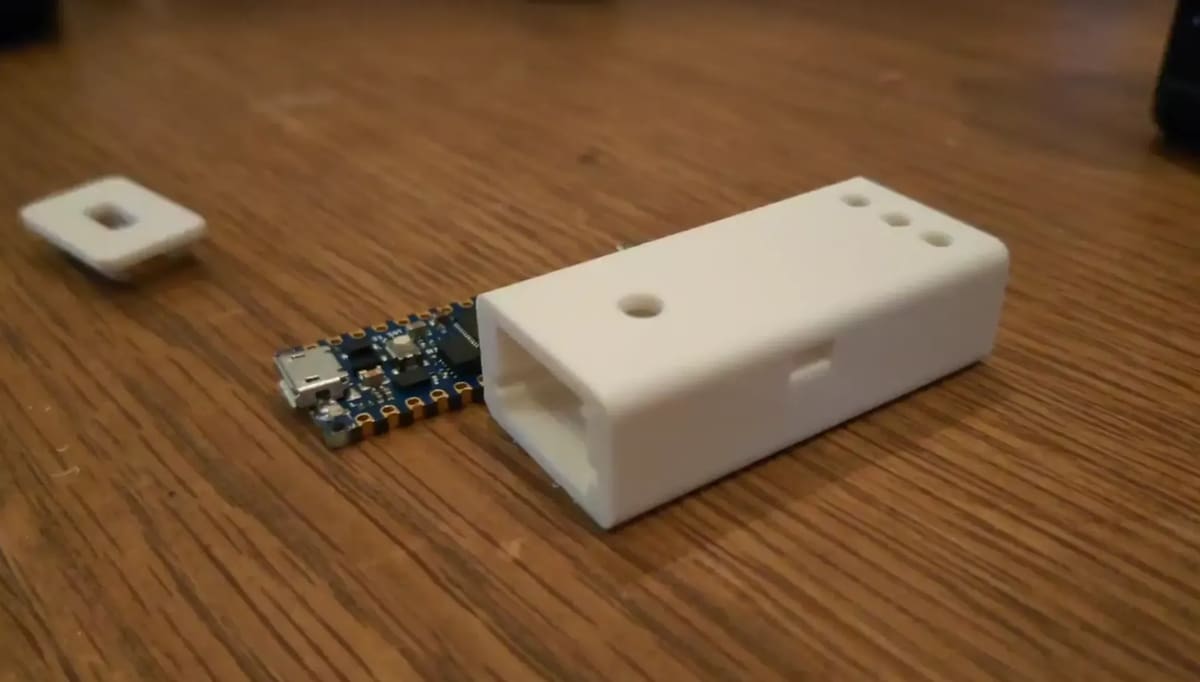
Accessible
This is a very light and snug case made of two parts. The board sits at the base part, which has openings for the headers at the bottom.
No screws are required as the top lid is snap-fitted onto the base to secure the board in place. The lid also has a small window for the board LEDs and the USB port.
3D printing this case is very easy, with no supports needed and, according to the designer, it will only consume 3 grams of material.
- Who designed it? Idee Design
- How printable/popular is it? No community prints have been posted, but the design has been downloaded over 500 times so far.
- Where to find it? MyMiniFactory
Lego-Compliant
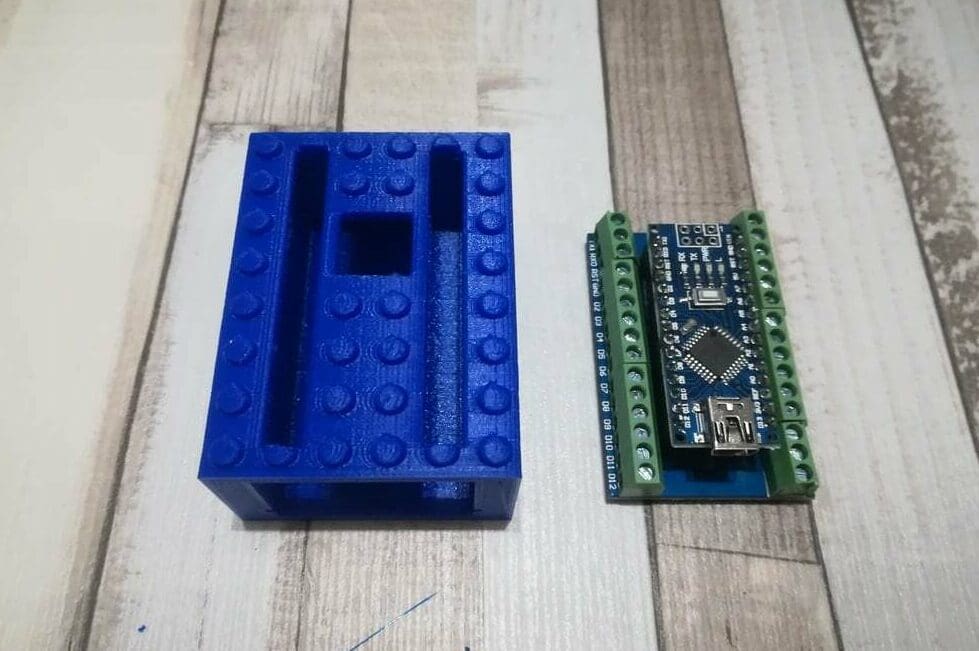
The next case is unique, as it’s compliant with Legos. With this model, you can effortlessly incorporate the Arduino Nano into your Lego creations, allowing you to build interactive robots, gadgets, and machines. Whether you’re a beginner or an experienced maker, this versatile case opens up a world of imaginative possibilities for tinkering by merging Legos and electronics.
This case is designed to be used with a screw terminal adapter. The adapter allows a Nano with headers to be connected to it, allowing a wired but solderless connection to peripheral devices like sensors.
Lastly, this case is a one-piece design that should be printed with supports and has a total of 32 studs. You have the option to download a model with or without a slot for the USB port.
- Who designed it? Krustyzeclown
- How printable/popular is it? The model has over 1,000 downloads.
- Where to find it? Thingiverse
Zip Tied
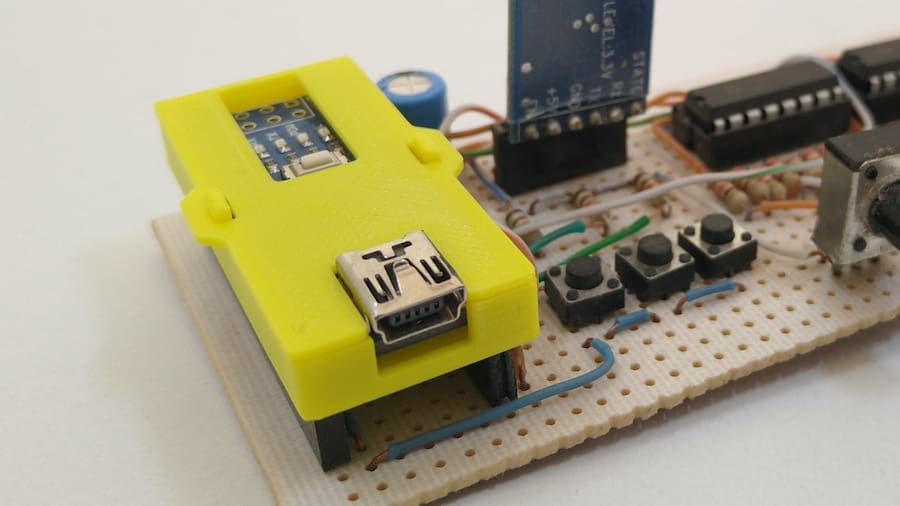
The Arduino Nano 33 IoT has a built-in inertial measurement unit (IMU) that can capture and record any forces and movements experienced by the board. The case by Permethious has small channels for tie wraps so the case can be quickly attached to any object to record their inertial data.
Not only that, but the case is also cleverly designed so that the Arduino Nano simply slides into the main body and a cap keeps it inside. The cap can be secured by either a connected USB cable or a small amount of glue. The print process is also very straightforward.
- Who designed it? Permethious
- How printable/popular is it? There aren’t any shared makes yet, but the design has been added to 9 collections and downloaded 65 times.
- Where to find it? Printables
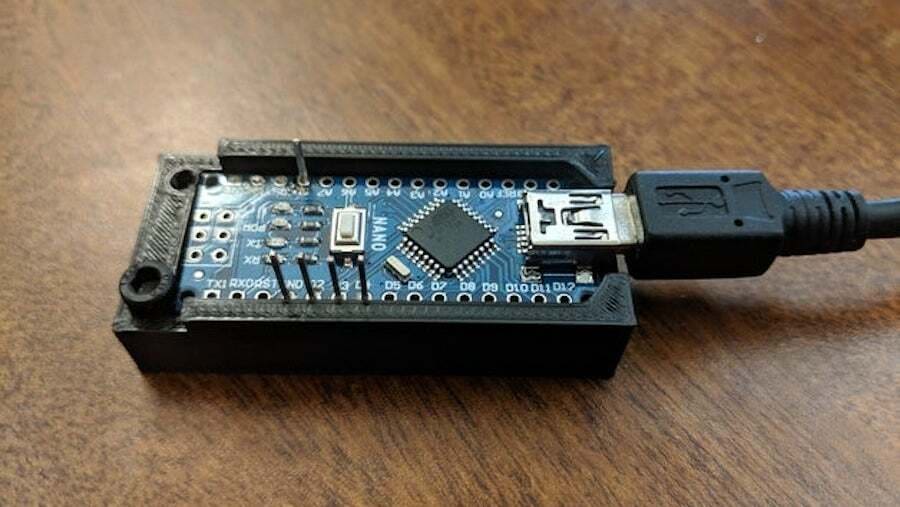
Box
Yet another simple but reliable case, this enclosure fits the Nano V3 very well. The top part allows access to the reset button through the center hole and provides enough visibility for the four onboard LEDs.
The base and top are held together by simple friction between the parts. The printing bit is quite easy, although some users commented that enlarging the parts by 1% makes for better results.
- Who designed it? spradlinb
- How printable/popular is it? There are currently 31 makes and 9 remixes of this case.
- Where to find it? Thingiverse
Holder
This is perhaps one of the simplest cases on the list to 3D print. The Arduino Nano Holder is a small 3D printed bracket that comes in two different versions, one of which has mounting holes at each side.
The board is secured in place with a couple of M3 screws, although some users reported that even without them the Nano “fits nice and snug”. Note that there’s no space for the pins under this case, so the pin header must be facing the top side.
- Who designed it? AlpoHassinen
- How printable/popular is it? So far, nine users have shared their makes, and seven others have remixed it.
- Where to find it? Thingiverse
Arduino Mega
Finally, the Arduino Mega. With its high number of input and output pins, this is the go-to Arduino board for large-scale projects. It can also be used as a control board for 3D printers, so you can 3D print a case in a 3D printer ran by a board you’re printing a case for. How’s that for a virtuous circle?
Simple
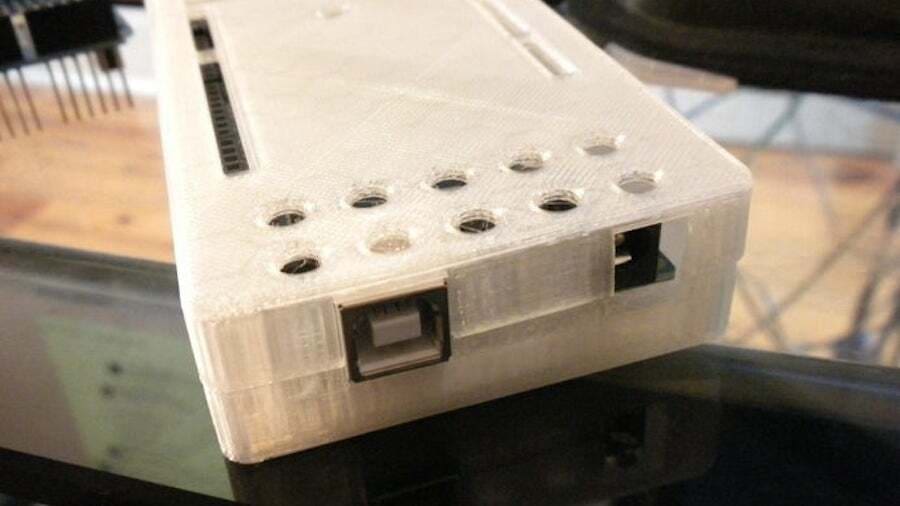
With this case the Arduino Mega is fully enclosed, although the bottom part can be used by itself for easy access.
The board is mounted to the bottom by four screws, while the top lid also requires some screws for closing the case securely. All in all, printing and assembly are quite straightforward.
- Who designed it? icare
- How printable/popular is it? So far, six different makes and three remixes have been posted.
- Where to find it? Thingiverse
Flip Cover
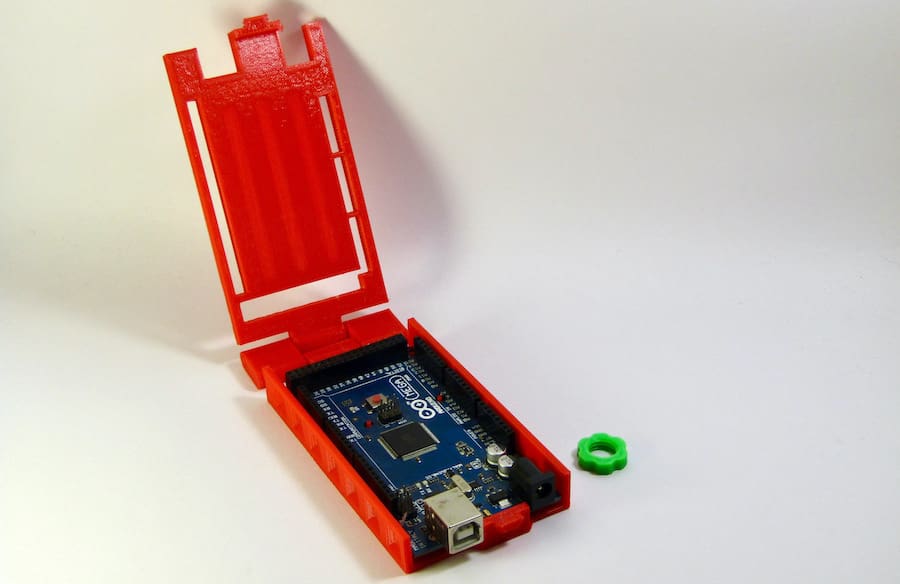
This hinged cover for the Arduino Mega is an interesting solution for both safekeeping the board and having quick access to its interface. The cover is held closed by a screwed-in knob at its front.
But perhaps the coolest thing about this design is that it’s print-in-place, meaning that the entire case is printed at once, including the moving hinge. No supports are needed for it and the case was printed in PLA by its creator.
- Who designed it? 3dtinkerer
- How printable/popular is it? There are over 200 downloads and more than 7,000 views on its Cults page.
- Where to find it? Cults
Basic Bumpers
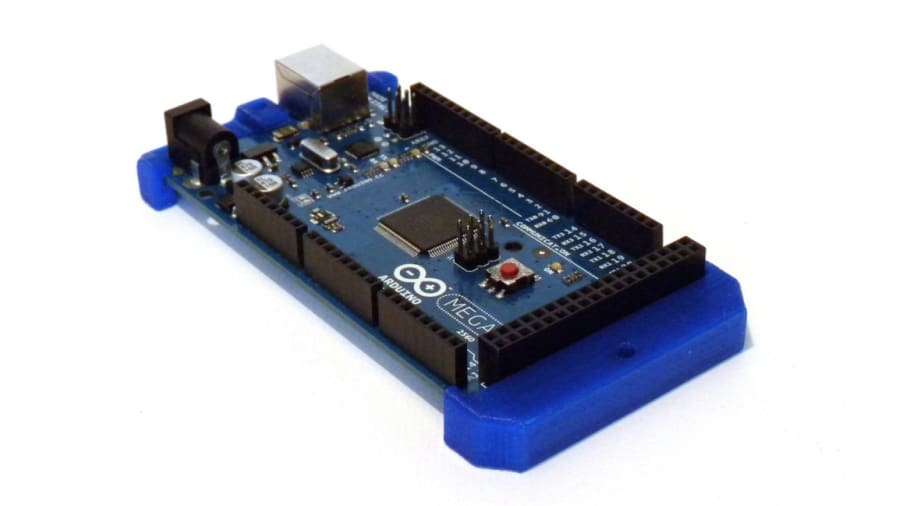
These bumper-like parts are by far the most uncomplicated design for the Arduino Mega you’ll find.
Each part is fitted on either side of the board and is secured by either a bolt and nut or a regular tapping screw. This design is ideal for working with the Mega on a workbench without having it sitting on its own base.
Prototyping Station
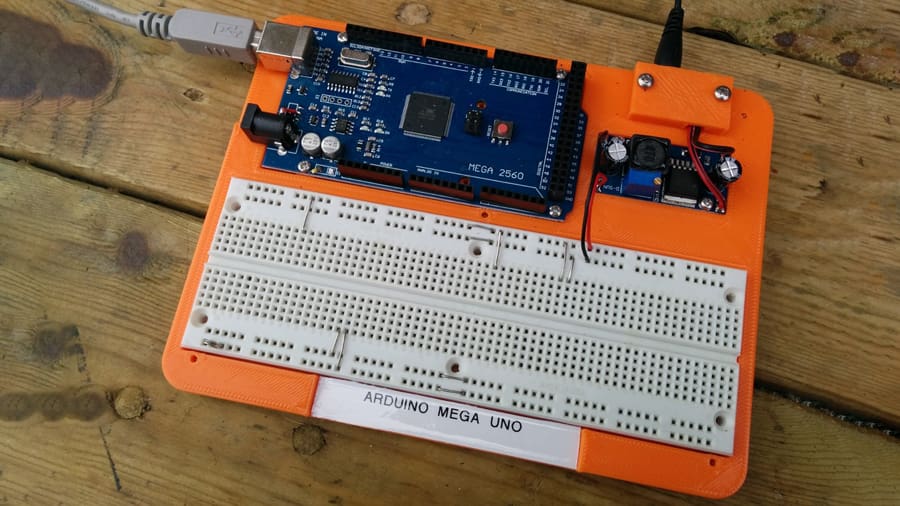
This case for the Arduino Mega packs a lot of functionality. Besides the slot for a large-sized breadboard, it also includes dedicated space for an additional buck converter module, a 2.1-mm jack socket, rubber feet, and optional mounting holes that make it compatible with Arduino Uno boards, too.
The microcontroller board and converter module are fixed in place by screws, whereas the jack socket is held in place by a 3D printed cover. The designer provides additional information about the extra components as well.
- Who designed it? Dimwit-Dave
- How printable/popular is it? This case/prototyping station has currently four posted makes but thousands of downloads.
- Where to find it? Thingiverse
RAMPS
In the 3D printing game, the Arduino Mega is sometimes used as a printer control board, especially when combined with a RAMPS 1.4 board. Accordingly, cases for this bundle are quite popular, so we couldn’t leave it out of this list.
The case has plenty of internal space and enough openings for proper wire management. All six walls can be printed separately to avoid supports and then assembled together with M3 bolts and nuts.
- Who designed it? iPa64
- How printable/popular is it? This model has lots of positive comments on Thingiverse, as well as 26 posted makes and 21 remixes.
- Where to find it? Thingiverse
Vented
Finally, this cool-looking design is available at MyMiniFactory for a small fee. The model costs $2, and the board can be mounted with or without screws.
The advantage of this design is that it comes with six different lid options – each one providing distinct functionality, including a regular case, storage box, and a sort of “black box”.
- Who designed it? Tuitxy
- How printable/popular is it? This design has over 9,000 views and 23 likes on its MyMiniFactory page.
- Where to find it? MyMiniFactory
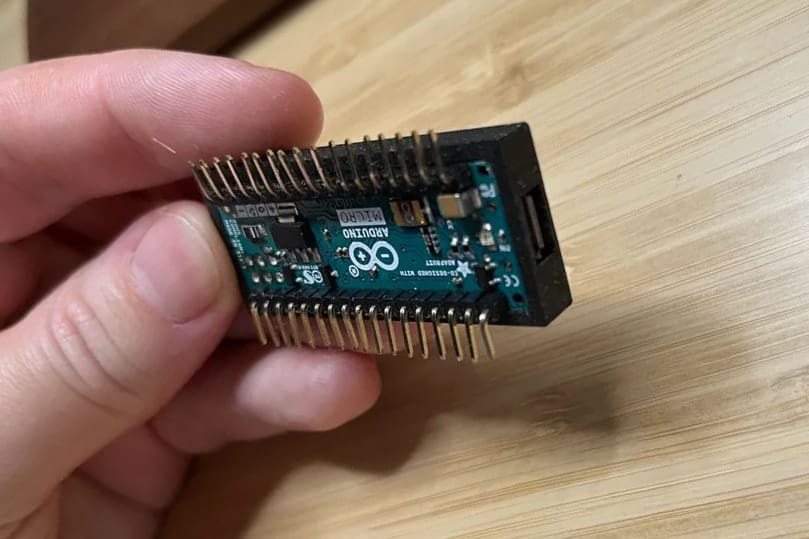
Arduino Micro
This bite-sized board is also great for projects with limited space. It has a built-in Micro-USB connection, and once connected, appears to computers as an additional available serial port.

Simple
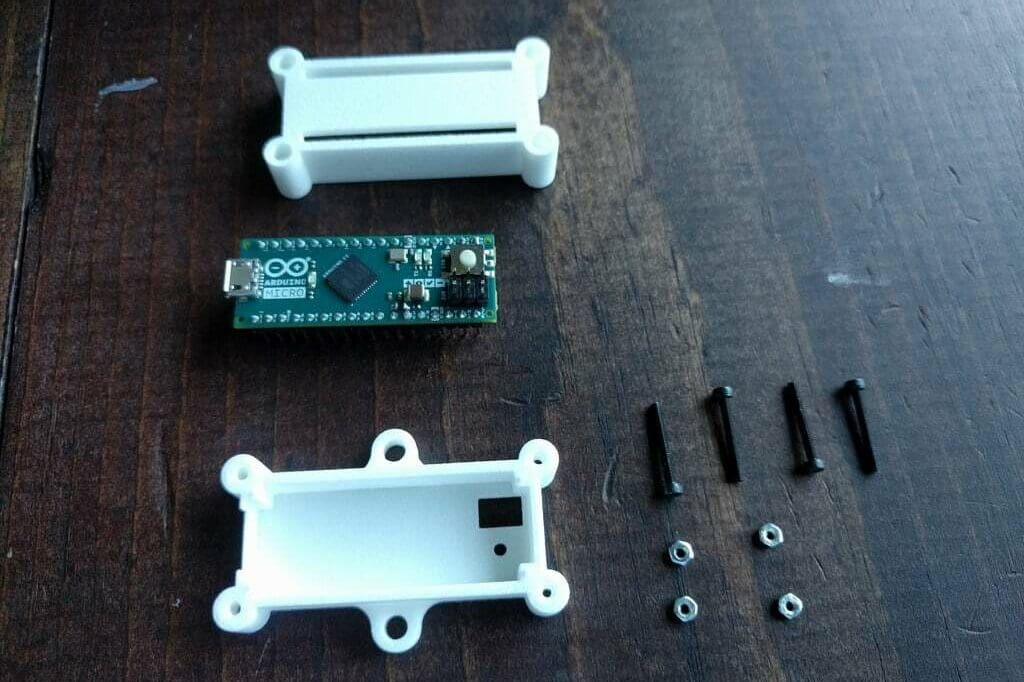
This case is specifically designed to fully enclose an Arduino Micro along with its pin headers. The top part of the case has three slits to provide easy access to the two rows of I/O headers as well as the 3×2 SPI pins on the Micro. Additionally, there’s a hole on the top to access the reset button.
The two-piece design is thoughtfully crafted and is held together with 4x M2x16-mm bolts. The case also has two mounting holes on the sides for installation.
- Who designed it? natosaichek_ubiome
- How printable/popular is it? Although no one had made this case yet, there are a couple of remixes. Also, over 3,000 people have downloaded the design.
- Where to find it? Thingiverse
Holder
This is a simple protective shell for the Arduino Micro. It’s a small case for a small board, so it should be a quick print for any printer.
The case is designed to fit around the perimeter of the Micro, with a slot for the power and data port. While it doesn’t offer protection for the top and bottom of the board, it can be easily customized by anyone with basic 3D modeling skills.
- Who designed it? vladimiraubrecht
- How printable/popular is it? This design has been download 48 times, and one make has been posted so far!
- Where to find it? Printables
License: The text of "25 Best Arduino Cases to 3D Print" by All3DP is licensed under a Creative Commons Attribution 4.0 International License.
CERTAIN CONTENT THAT APPEARS ON THIS SITE COMES FROM AMAZON. THIS CONTENT IS PROVIDED ‘AS IS’ AND IS SUBJECT TO CHANGE OR REMOVAL AT ANY TIME.