What Is a Microcontroller?
Microcontrollers are a extremely popular devices used by tons of makers. Essentially, they’re little circuit boards that can be programmed to read and control electronic signals. A degree simpler than a simplified single-board computer like the Raspberry Pi, they have a processor and memory to store and run programs.
Microcontrollers can process many different types of inputs and outputs to control electrical systems. As a result, they’re very useful in a wide variety of hobbyist electronics projects. With the correct shield, you can even use them to control a 3D printer. The maker community is bursting at the seams with projects that can be 3D printed and controlled with a microcontroller and some additional electronics.
Zooming In
Microcontrollers come in many shapes, sizes, and feature sets. Arduino, Teensy, and ESP32 are some of the most popular. Teensy microcontrollers are known for their speed and processing power, while ESP32-based boards usually incorporate Bluetooth and WiFi.
With over eight different board designs, the Arduino family of boards has something for everyone. Arduino Leonardo, for example, has built-in USB communication and can act as a keyboard or mouse. Meanwhile, the Arduino Due has a fast and powerful 32-bit processor.
Yet, the most popular device in the series, and the best for beginners, is the Arduino Uno. It’s a very simple microcontroller with plenty of features to tinker with. Since the board is open-source, many Chinese clones can be found for very cheap on online marketplaces, but genuine Arduinos are usually the most reliable. Furthermore, supporting the company that designed them is an added bonus.
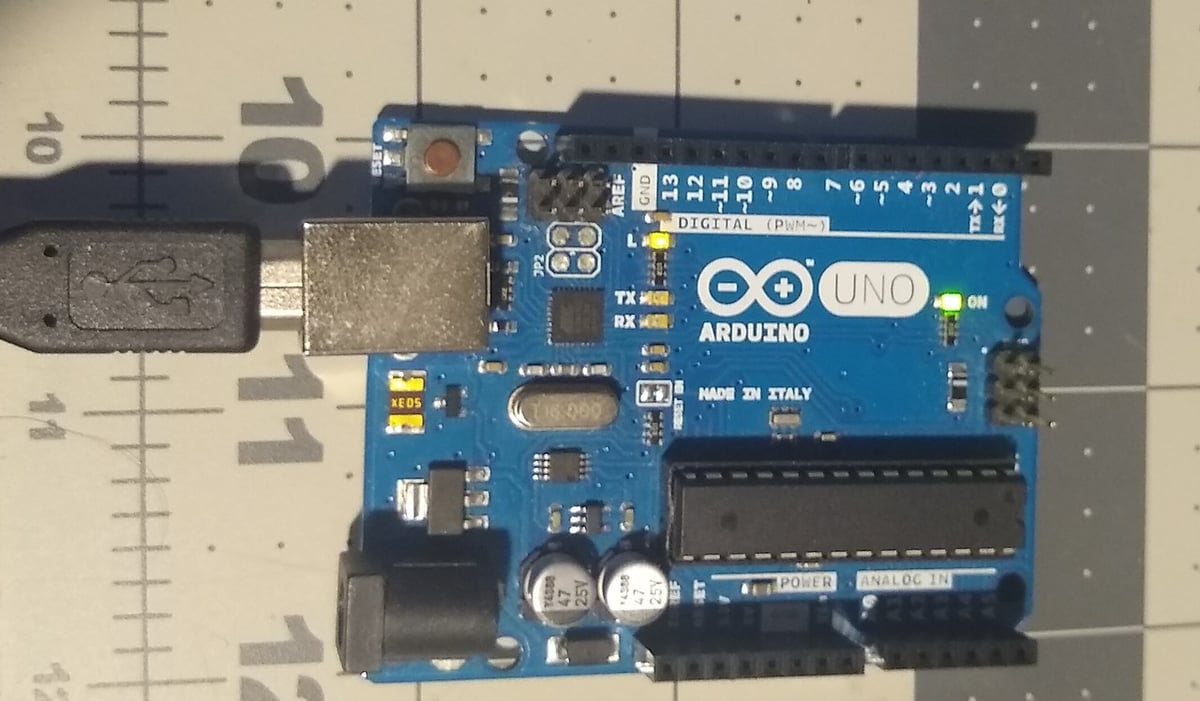
Meet the Uno
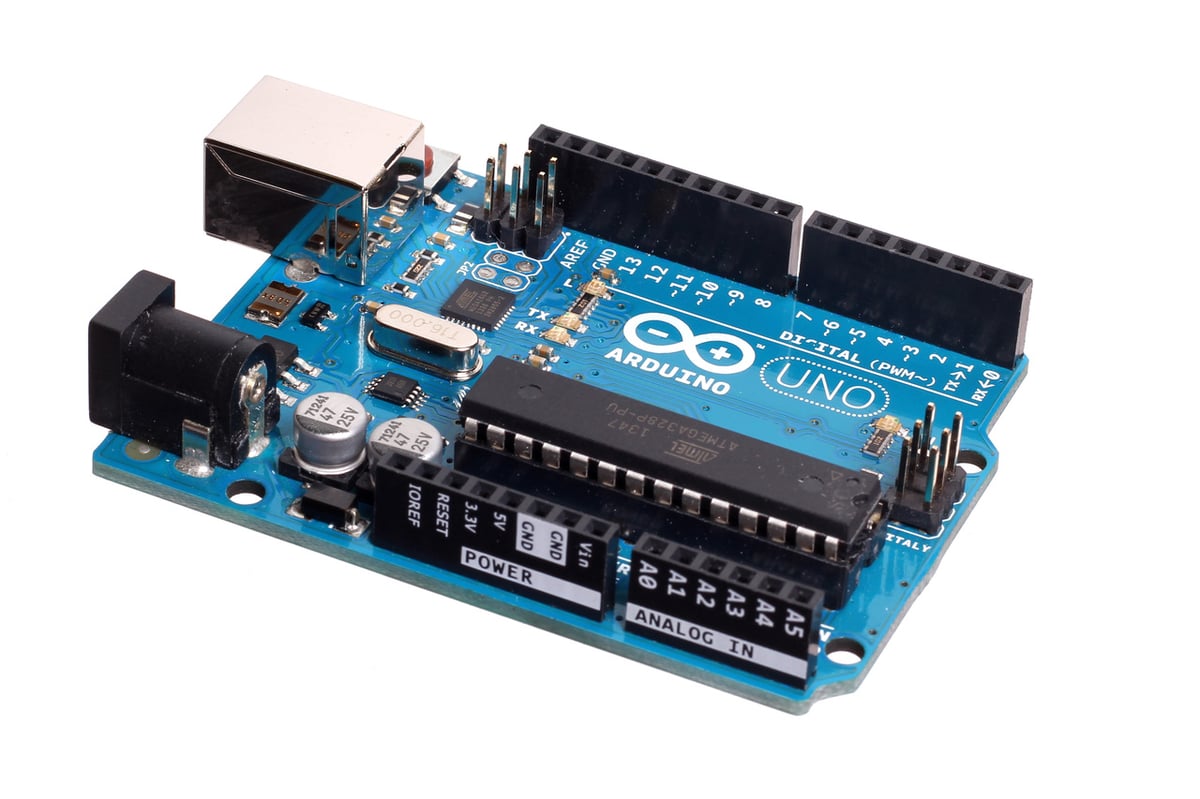
The Arduino Uno has made a name for itself as the go-to hobbyist microcontroller. Its main processor, the ATMEGA328P, handles all the microcontroller’s functions and provides plenty of processing power.
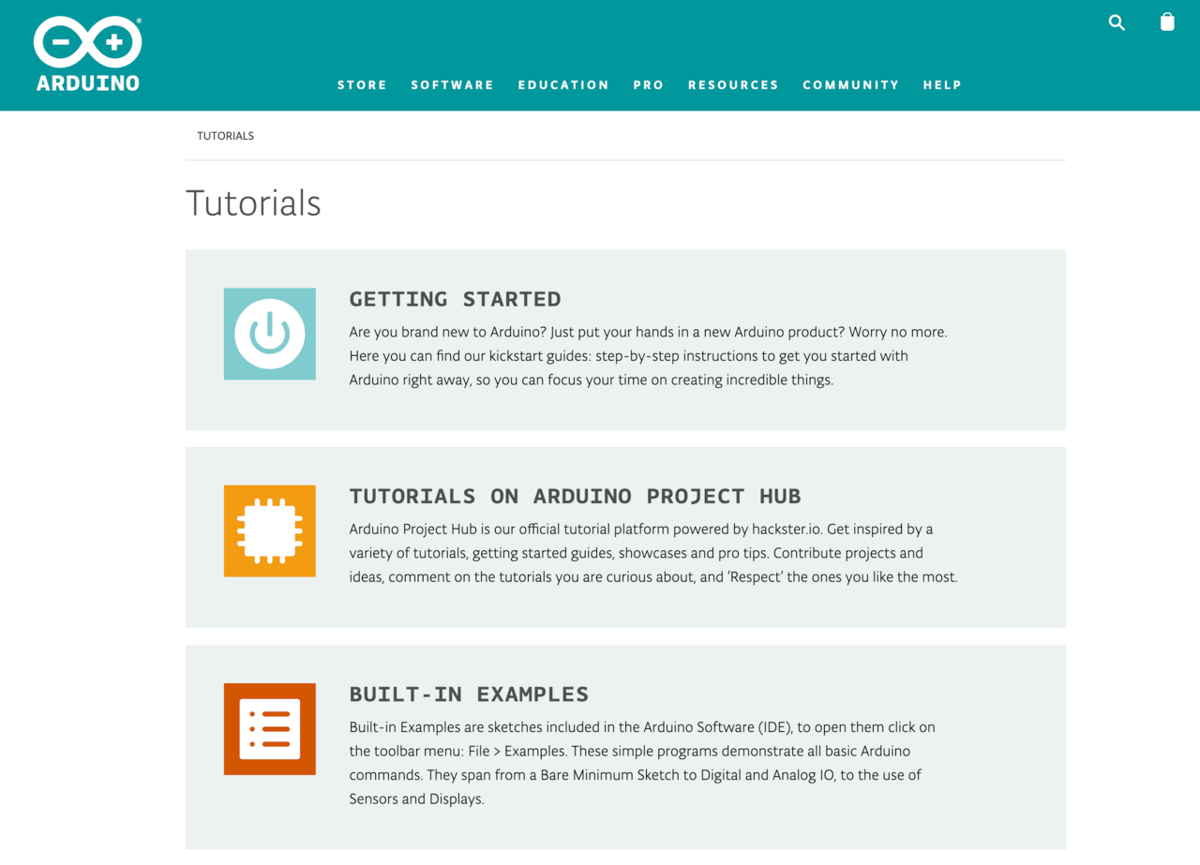
Arduinos are programmed using a slightly modified C programming language. Through the USB, you can upload and run code with the right software, the easiest to use being the Arduino Web Editor. If you get stuck at any point, some great support articles can be found at Arduino’s project hub.
There are two options to power the Uno: through the USB port or with an external power supply, but only after it’s been programmed.
Specifications:
- Chipset: ATMEGA328P
- Frequency: 16 MHz
- Digital I/O pins: 14 (6 PWM)
- Analog I/O pins: 6
- Power supply voltage: 5-12 V
- USB connector: Type-B
Coding Basics
If you have no previous experience with coding, trying to learn it can be like learning a foreign language. It’s best to start with the fundamental ideas and then build upon them.
Like we said above, Arduinos are coded with the C programming language. This is great because there are endless tutorials and lessons available online that can teach you everything there is to know about coding in C.
Coding for Arduino is slightly different than programming normal computer software. Therefore, it’s a good idea to find tutorials that specifically focus on coding for Arduino. The official Arduino tutorial page is a great place to start.
Since there’s so much high-quality content about coding for Arduino, we’ll just cover the basics. The blink program, or sketch (as programs are called in the Arduino universe), is a great place to start.
The Blink Sketch
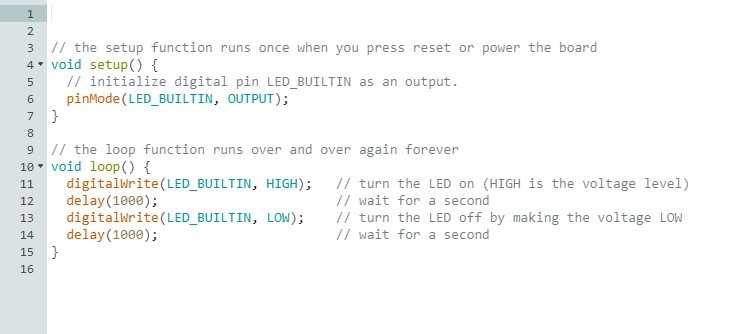
The blink sketch basically blinks the built-in LED, which is tied to the pin 13 on the board and marked with an ‘L’. The first thing to understand is that the code runs from top to bottom, one line at a time. Anything on a line that comes after a double slash is considered a comment, meaning the Arduino ignores it.
Comments are very important in coding. As it can be very difficult to decipher without context what lines of code are doing, it’s a good idea to use comments to explain what your code does.
The following are the most important functions in the code of the blink sketch:
void setup(){ ... }: This is a special Arduino function that runs everything inside the brackets once. This is commonly used for telling the Arduino which pins are outputs and which pins are inputs.void loop(){ ... }: This is another Arduino function that runs over and over again as long as the Arduino is powered. This is usually where most of your code will go: You put all the instructions inside the brackets, and the program reads the lines of code from top to bottom over and over again.digitalWrite( ... ): This function assigns either a high or low voltage level to a specified pin.delay( ... ): This commonly-used function tells the Arduino to wait the number of milliseconds specified in the parentheses before moving to the next line of code.
In the image above, the sketch uses the void setup function to tell the Arduino that the built-in LED is going to be an output. In the void loop lines of code, the digitalWrite function turns the LED light on, and then the delay function waits for 1,000 milliseconds. The second digitalWrite function turns the LED light off, whereupon the second delay function waits for another 1,000 milliseconds. After that, the loop restarts.
The blink sketch is definitely the first sketch you should try to upload to your Arduino; it’s one of the simplest things you can do. Follow the instructions in the code based on the guidance in the previous section above. If the LED is blinking, congratulations! You’ve just successfully uploaded a program to your Arduino.
Given the simplicity of the code, this is a great place to start tinkering. You can edit the code and see what happens. For example, you can change the timing of the blinks by altering the number in the delay function or even add multiple delays. You could also plug in a wire to pin 13, connect it to your own LED, and modify the code so as to blink your own light.
After you’ve tinkered to your heart’s content, the Arduino Web Editor has many other example sketches that are great for beginners. Each example includes comments that explain what each line of code does.
This can be a great place to start learning how to code!
Awesome Applications

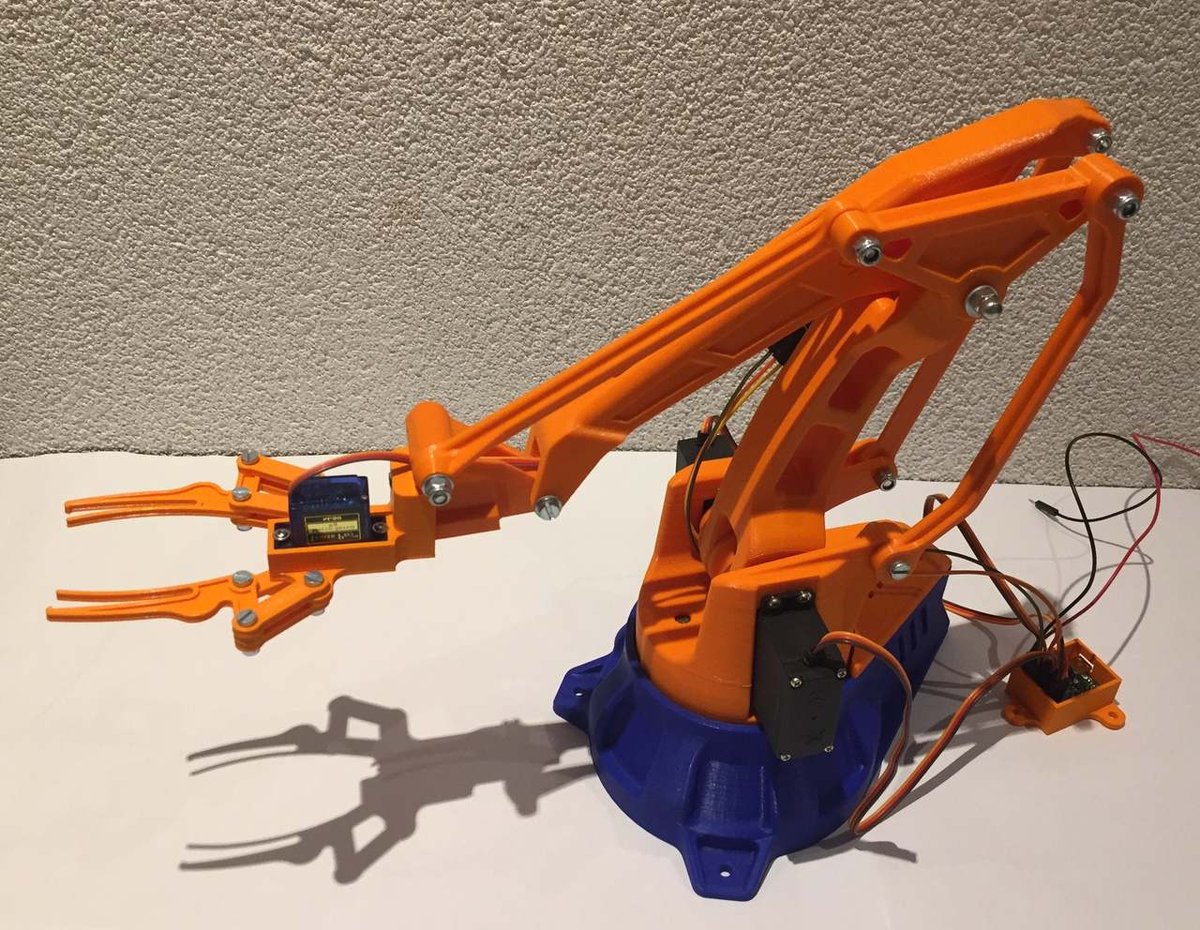
Now that you hopefully understand the basic concepts of Arduino, you’re free to use your Arduino in any number of ways. From 3D printers to walking bots to robot arms, you can control just about any type of electronics project with an Arduino. There are few limitations in the world of Arduino.
If you are a beginner, the best thing to learn is how to read inputs and generate outputs. An Arduino input is any electrical signal that you can control. Potentiometers allow you to generate an analog input (0-100), and they are commonly used to control outputs like motor speeds or servo angles. Buttons allow you to generate a digital input (0 or 1), and they are commonly used to select program options or simply to turn things on and off.
Once you can utilize the basic inputs, then you can start using more advanced inputs and outputs like sensors and displays. A popular example is the 8 x 8 x 8 LED Cube. This advanced project, built with an Arduino and some extra electronics, showcases the potential of Arduino’s outputs and utilizes them to the max. 512 LEDs are controlled to produce beautiful patterns or display information.

If you’re into gardening, Arduino can automate that, too. With enough know-how and motivation, you can completely automate watering and log data about your garden. Arduino can control water pumps through the use of relays, read sensor data, and upload the data to an SD card.
The possibilities are limited only by your imagination!
License: The text of "Arduino for Beginners: How to Get Started" by All3DP is licensed under a Creative Commons Attribution 4.0 International License.