3D Printing Brim: When Should You Use It

It prevents warping, helps with adhesion, and reduces waste – what's not to love about a 3D printing brim? Read on to learn more!
Bad first-layer adhesion can make 3D printing straight up impossible. Models with complicated geometries can detach from the bed as the print advances, and warping – which becomes a problem throughout the printing process and isn’t apparent from the start – can ruin prints and waste time. All these issues can be solved partially or completely by using a brim.
A brim is an optional addition to your print that can be activated in your slicer software. It’s not a part of your model but rather a slicer setting that aids with the quality of your print’s first layer. Whether you need one depends on the nature of the part being printed and the quality of your printer.
There are three different options for additions: skirt, raft, and brim. In this article, we’ll focus on brims, discussing when you should use them, when you should avoid them, and how to use a brim properly to get to most out of it.
Let’s dive in!

When to Use a Brim
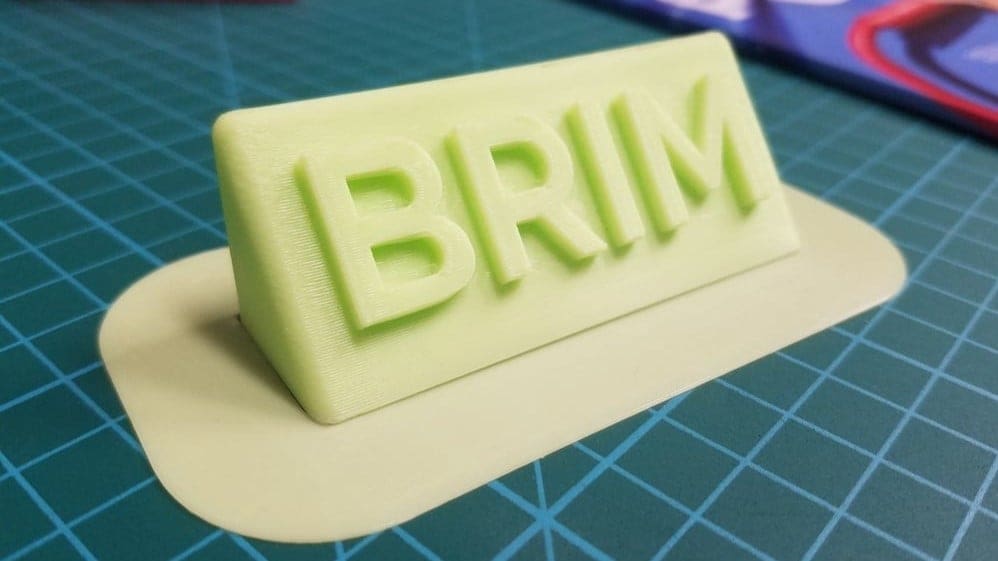
A brim is basically like a skirt with a 0-mm separation from the model. You could also say that it’s like a raft that’s only one layer on the outskirts of the model, but one that uses less material, takes up less time to print, and is easier to remove.
A great thing about brims is that they don’t alter the surface finish of the first layer. When you use a raft, the first layer isn’t as smooth as one that attaches to the print bed directly because a spacing must be left between the raft and the model to make it easier to detach. With a brim, this isn’t an issue because it only goes around the model.
A brim may not be necessary for every model you print. The key is knowing when to use it and when you can do without it. Even in cases when you use a brim, the settings are important to consider and may affect the overall outcome of the print. There isn’t a cure-all when it comes to brims, and you have to consider every individual situation.
So, let’s check out some situations when a brim is a good solution.
Warping
Warping is a 3D printing issue that causes the first layers of the print to shrink due to the pull of layers further up. This is something that happens as the print advances. When warping becomes apparent, you may have already invested a lot of time and material on the print.
Warping can happen with many filament materials, although some are more prone to it than others. ABS, for example, is notorious. Low-quality filaments are also more likely to warp. In addition to materials, the actual design of the model can lead to this issue. Large flat-bottomed models, for instance, might warp during printing.
Using a brim helps prevent warping because it acts like a net that forces the bottom of the print to stay attached to the bed. Similar to the way the upper parts of the print may try to pull the base up, the brim will pull it down, keeping it in place.
When you want to use a brim to prevent warping, the line count defining the brim’s width will depend on the surface area of your base layer. The bigger it is, the more lines the brim should have so it has enough strength to pull on the part.
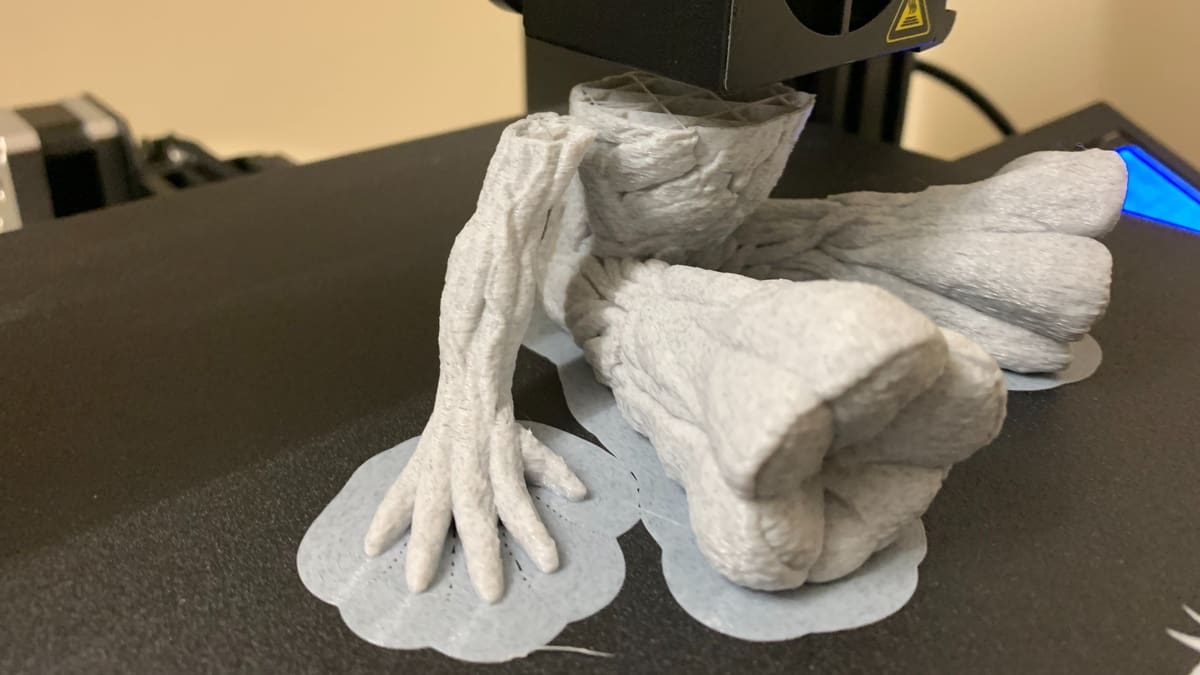
Risky Geometries
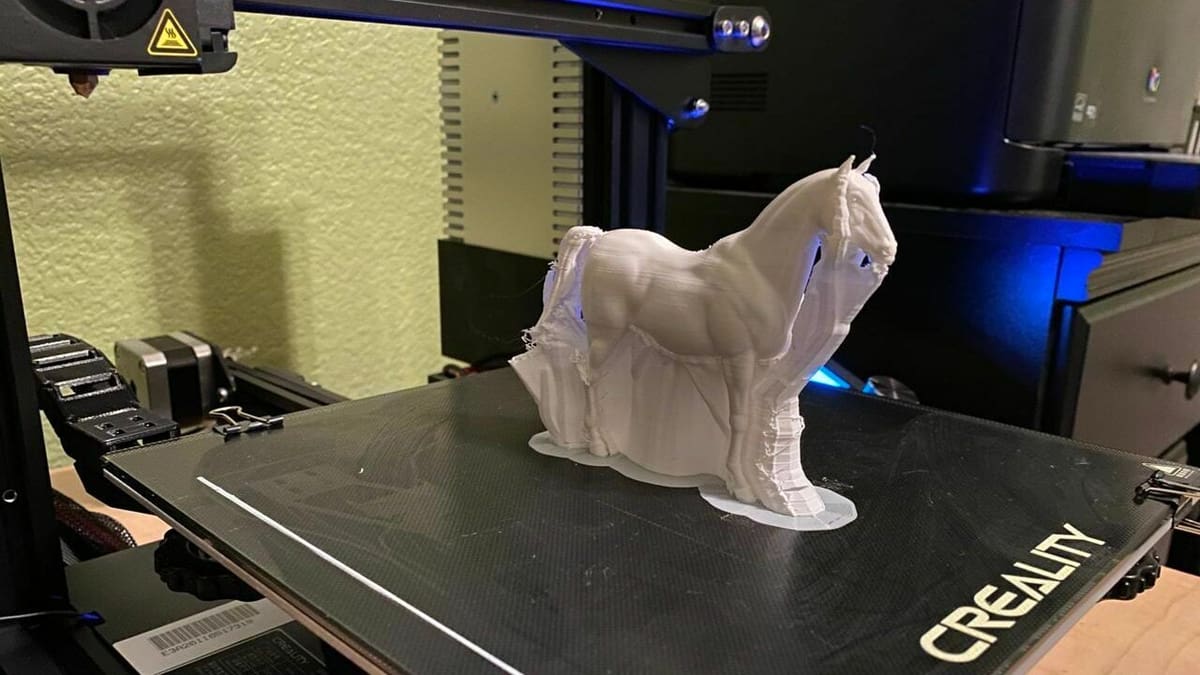
Imagine printing a standing horse. Each hoof and leg prints separately, then attaches to the body as the print progresses. These small individual parts can come loose due to the slight pull of the filament with each layer added. It’s not uncommon for the print to start without problem, and a few layers up, one of the hooves detaches from the bed. The print is then ruined.
Similarly, parts with prominent curves in the first layer or even sharp corners can have trouble adhering to the table. This can be solved with brims, which help contain the geometry in place. If you’re going to print a sphere or similar geometries where there’s a very small surface touching the build plate, a brim can prevent detaching from the build plate.
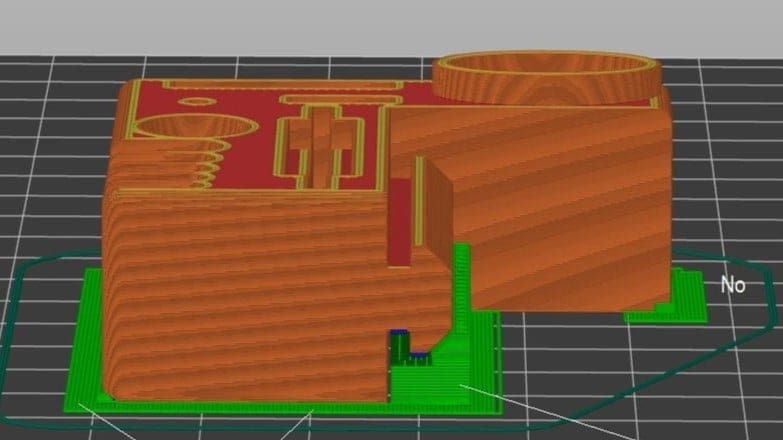
Small Support Structures
If a print needs supports but doesn’t have enough space to place them because, for example, the detail they’re supporting is too small, the printer can have trouble placing such a small geometry, and the supports may not adhere correctly. Therefore, brims can help contain the geometry of the support the same way as they would with the main print. This is because plastic attaches better to itself than to any other materials, which is the reason why everything usually goes smoothly after the first layer.
A brim basically takes the brunt of the first layer adhesion effort. That way, the actual part being printed can simply attach to the brim itself.
When Not to Use a Brim
While brims are typically considered the best choice for bed adhesion assistance, sometimes it’s not a good idea to use one for your print. Whether part accuracy is very important or you just want to ensure your print bed is level, a brim may not be necessary.
You’ll also want to keep in mind that, depending on how close together the lines in your first layer are, sanding or cutting may be necessary. It’s also possible to break delicate geometries when removing the brim, so a careful hand when doing so is recommended.
Here are a couple of situations when you’re better off without a brim.
Checking Print Settings
If you’re considering a brim to check that the print bed is leveled correctly, that the filament is extruding, or other print settings, but don’t need actual first-layer adhesion aid, you’d be better off using a skirt. It uses less material and doesn’t touch the model.
Brims produce a small amount of waste material, so it’s best to avoid them if you’re just testing your printer or its settings.
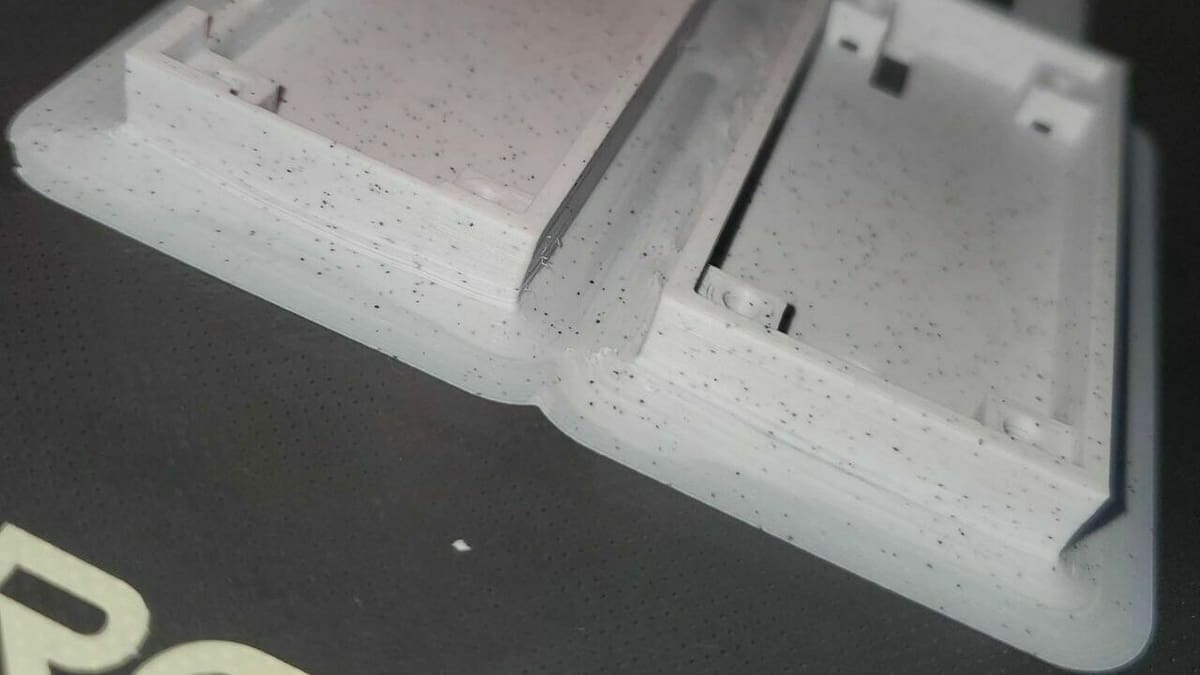
Dimensional Accuracy
Using brims is a good way to check the calibration and first-layer adhesion before starting the actual print. However, a brim can mess with the dimensional accuracy of parts, as it may be attached too firmly, requiring cutting and possibly sanding.
Designs that have a snap-fit functionality or functional models that need to be assembled into other parts require high dimensional accuracy, but brims can actually change their final geometry. You may not need to avoid it completely, but it’s important to consider the optimal bed orientation to preserve the print’s functionality.
In contrast, if you’re going to print a figurine, where dimensional accuracy isn’t as important, you can use a brim to help the first layer without it affecting the final result at all.
Slicer Settings
Depending on the slicer software you use, setting up a brim can change a little bit. You’ll notice differences between different slicers’ approaches to them. In Cura, for example, brim settings are among the Build Plate Adhesion settings. In Simplify3D, a brim is considered an Addition, while in PrusaSlicer, it’s lumped in with skirts and given its own category of settings, Skirt and Brim.
Cura and PrusaSlicer allow you to have a brim either only on the outside or on both the outside and inside of the print. In Simplify3D, a brim can only be on the outside. In all three options, you can add an offset to the brim. If you input values around 0.1 mm or 0.2 mm, you can solve the issue of having to sand your print afterward.
Regardless of the differences, it’s easy to get the gist of it in any new software with some experience. In the following sections, we’ll explain in more detail how to set up a brim in Cura, Simplify3D, and PrusaSlicer.

Cura
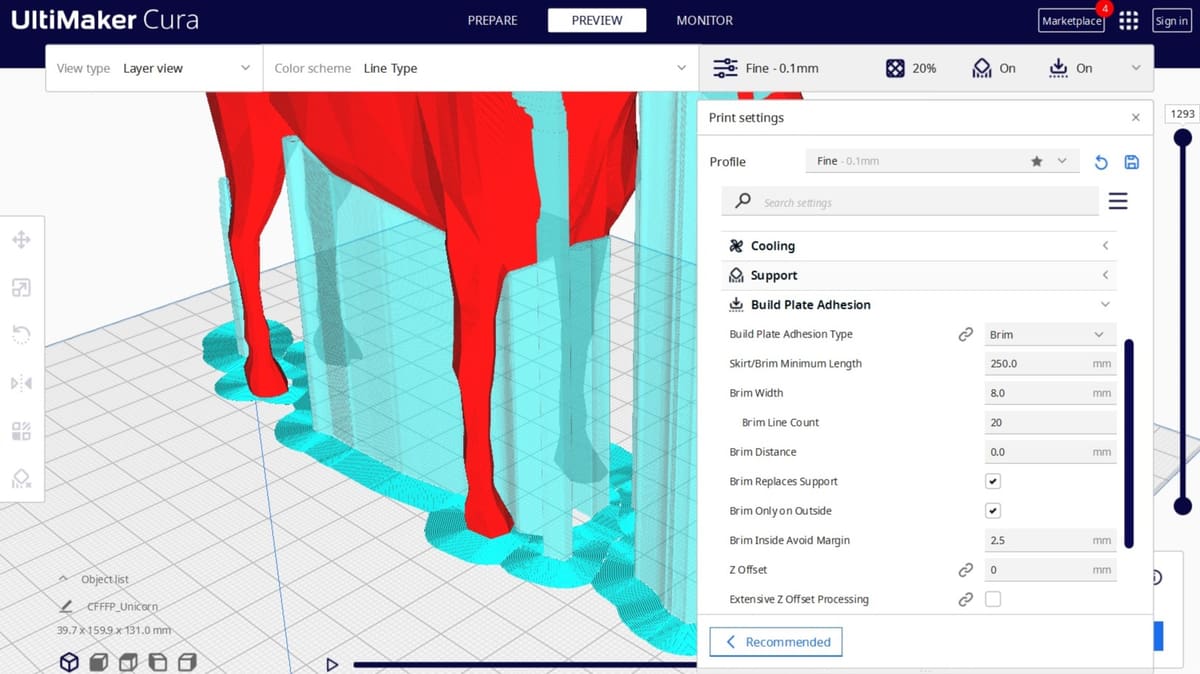
- Open the “Print settings” panel, then click open the “Build Plate Adhesion” section.
- Select “Brim” in the “Build Plate Adhesion Type” drop-down menu.
- In the “Brim Line Count” field, you can define the width of your brim by line count.
These are the only two settings under the “Basic” settings configuration, but if you check “All” in the drop-down menu next to the “Search Settings” field, there are a few more settings for you to play with.
A couple of the settings include “Brim Distance”, which is an offset to the brim, and “Brim Replaces Support”, which replaces supports for a brim in low sections that need support. When “Brim Only on Outside” isn’t activated, if the model is a standing cylinder, for example, it will also create a brim on the inside.
Simplify3D
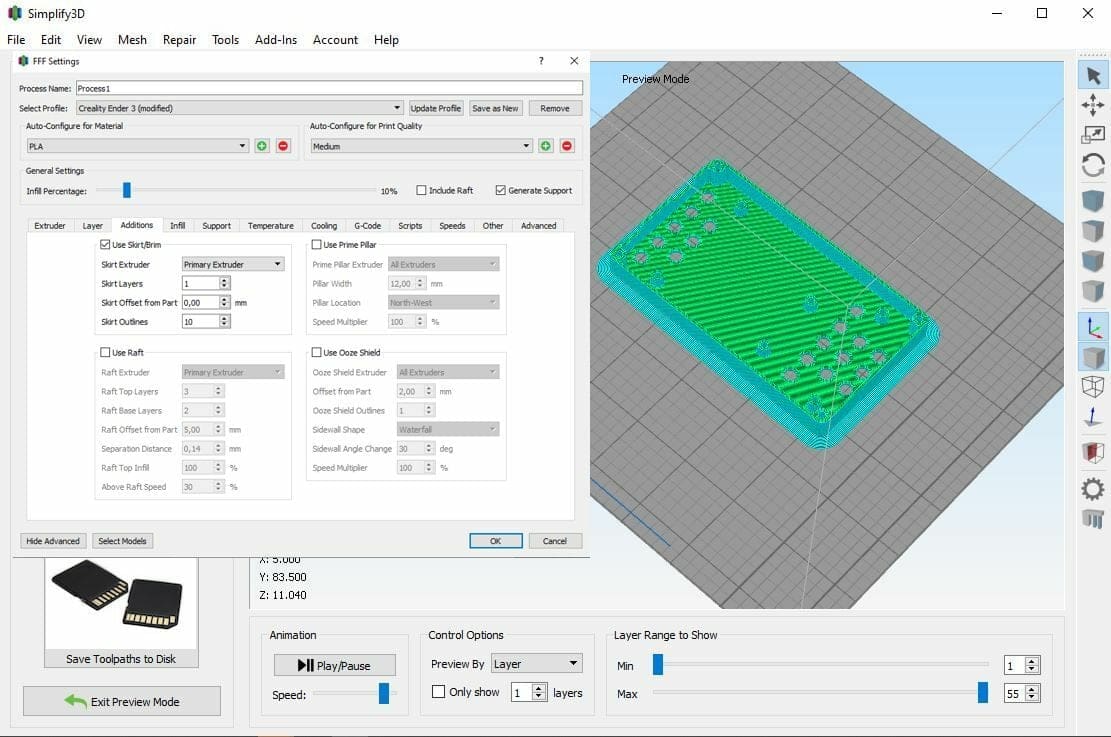
- Click “Edit Process Setting” on the bottom left of the interface, and the “FFF Settings” window will open.
- Click the “Show Advanced” button on the bottom left.
- Click the “Additions” tab, then check the “Use Skirt/Brim” box.
- Set the “Skirt Offset from Part” to 0,00 so that it acts as a brim. If the offset were 2 mm, for example, it would be a skirt.
In Simplify3D, you don’t have a separate option for the addition of a skirt or brim; only a raft is considered a different element. The fact that it’s set up this way has an additional advantage. If you print with a brim and notice that it’s too firmly attached to the model, which would necessitate cutting or sanding, you can set the offset to 0.1 mm or 0.2 mm instead of 0. This would solve all those accuracy and post-processing cons mentioned earlier.
The purpose of this tiny offset isn’t to print the brim detached from your part, in which case it wouldn’t count as a brim. The purpose is rather to take into account your printer’s dimensional accuracy to ensure the brim isn’t over-attached.
PrusaSlicer
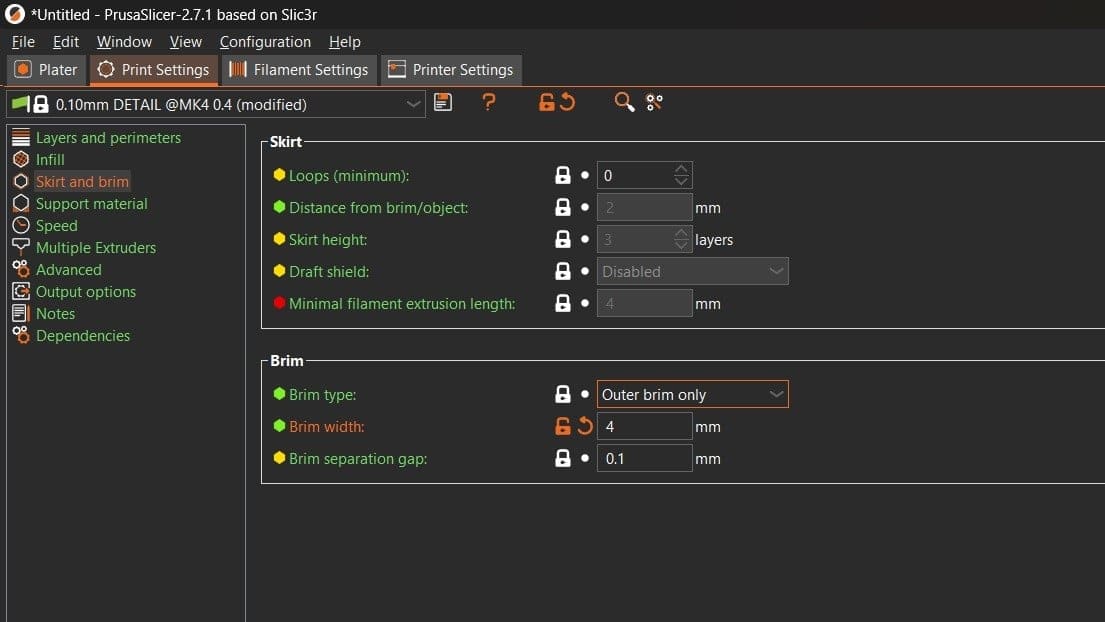
- Make sure to select “Expert” mode on the top right of the interface.
- Under the “Print Settings” tab, select “Skirt and brim”.
- Configure the settings according to your preferences.
In PrusaSlicer, you have three setting options. “Brim type” allows you to choose between outside only, inner only, both, or none. Additionally, you’ll also find “Brim separation gap” and “Brim width”, which are similar to those explained in previous sections.
Brim Tips
As with everything in 3D printing, there isn’t a foolproof way to do everything. You need experience and a bit of analysis to understand what is needed in each case. To help you along, we have a few tips to get you started.
Purpose
- Think of the purpose of the brim. What you wish to achieve with it matters.
- If you want to print a model containing tricky geometry, you don’t need many brim lines.
- If you need to prevent warping, you need more lines so the brim has the necessary strength to pull at the bottom layer of the print.
Size
- The necessary line count is relative to the size of the bottom surface area of the print. There isn’t a perfect fixed brim size.
- If a model is 10 x 10 x 10 mm, a 5-line brim is big enough for any purpose. However, if the model is 230 x 230 x 230 mm and you need brims to prevent warping, a 5-line brim may be inconsequential because it will be too small relative to the overall model.
Removing the Brim
- Cutting the brim can result in ugly finishes and sharp edges.
- Try to break the brim off without cutting it. You can bend it a few times, which will weaken and separate the material.
- Be sure your print isn’t delicate enough that the brim might pull or break it.
Using Different Materials
If you have a dual printer, you could also try to print the brims with PVA, which is a soluble filament. The brim will be easily removed. That said, since it’s soluble in water, you may want to consider the environmental effects first.
License: The text of "3D Printing Brim: When Should You Use It" by All3DP is licensed under a Creative Commons Attribution 4.0 International License.